An injection moulding machine for kids - what could possibly go wrong?
I'm having to stop myself looking on eBay, this looks terrific fun...
An injection moulding machine for kids - what could possibly go wrong?
I'm having to stop myself looking on eBay, this looks terrific fun...

This is a change to my earlier plan, which was to take Melbridge Dock for an outing. After a weekend operating it at my Dad's celebration day, I was offered space, and after a deep breath, said yes.
Sadly, once we got into the details, this didn't work. There's no Friday night setup, and the earliest we can get in the hall is 8am. That gives me two hours to unload, although help was offered, and I had to erect the layout on my own. Worse, I'd be loading it into the car at 6:30 in the morning. That's a very long day.
I seem to recall there's not a huge amount of space in the hall, and I tend to spread out a bit while putting the layout up. With everyone else doing the same thing, I can see the potential for accidental damage being quite high.
Doing this as a team activity is a lot easier. My Dad couldn't remember the setup process as well as I could, but he was handy for those jobs when a second pair of hands made life easier, such as the fascia and information boards. He'd also keep an eye on things to reduce accidents.
On the plus side, my proposed display fits in much better with the theme of the show, and dramatically reduces my stress levels for the day. And I'm sure people will still enjoy it, and I might be able to get a cup of tea and cake!
For more details, visit the Heart of England Modellers website.

It's been an interesting and enjoyable build. Part fit is mostly excellent, although the roof isn't perfectly flat where it joins the ceiling. Not really obvious; the only solution would have been to attack both with some abrasive sheet, which is messy, and unless you are very good, it sands one surface a touch wonky.
Instead, I'll leave things alone for a while. All that Citadel shading wash has proved to be ideal for the weathering. I wanted worn, not decrepit, and I think I've achieved this.

I fancy selling it in a little scene. Nothing large. Not much more than a concrete base with some grass, and a 2CV parked beside it. Maybe a little signage. Perhaps a peeling poster on one of the walls. I'm not sure, although I have a few ideas brewing in my head.
Watch this space.

This month, we take an in-depth look at
the spectacular Indian Hill Railway, one of the country's best-known
16mm exhibition layouts, and a star attraction at the National
Festival of Railway Modelling at the NEC 21-22 November.
Then
we get into the festive spirit, with a visit to the Butterley Garden
Railway Association's Christmas celebrations and find inspiration at
the Beacon Hill Railway.
In our practical section:
Choose the right fuel for your live steam locomotives
Build an impressive church complete with lighting and sound effects
Maintenance tips to keep your railway running smoothly through winter
A tunnel for your line
Re-body a Bachmann gas mechanical, and make it run smoothly
Part two of our Gauge 1 loco build
Build a short-wheelbase open wagon
Plus, all the latest news for
modellers in larger scales.
Garden Rail is available from all good newsagents, or our online store.

"This will be great for the Marble Express at your shows", he said.
I can't disagree, but first, I needed to put it back together.
A quick look and it became apparent that someone had taken it apart to deal with the battery box, the contacts of which are as furry as my cat. I had a little poke, but it was beyond saving. Plan B was to fit a new battery box, and I reckoned that a AAA box would fit in the space the original four AAs did.

All this would be a waste of time if the motor didn't work. It's a double-ended unit with a fan and gear on each end. Fortunately, all was well, so I just needed to figure out where the power should be fed into the switch.
This took a couple of goes, but with only a modest amount of bad language, I managed to solder the wires in place. And then realised these wires were too short if I wanted to slide the box out to change the batteries. Good thing the iron was still warm.
Of course, on the first go, the motor was running in reverse - not ideal if we want to blow air out, not suck it in. I had left the iron plugged in.

A bit of butchery of the original battery box allows the AAA version to slide inside it. It sticks out of the end of the cover slightly, but when fitted in the wagon, this is obvious.
The drive band that moves the bubble wands is a touch loose, but generally works. I've no idea where I'd get a replacement from, so if it becomes too much of an issue, I'll investigate a drive band kit. For the moment though, we have bubbles!

This is nice, but a bit of a faff, especially if you need a second batch of a particular colour and then have to match the colour you used before. So, I went my own way, aiming for 80% of the result, for 20% of the effort.
I was lucky that the one colour you don't have to mix is for the woodwork - Humbrol Matt Leather (62). There is a pot in my stash, picked up cheaply in a bag of five tinlets from Anoraks Anonymous. A single coat of this produces, to my eye, a nicely worn paint finish. I've never planned this is a perfect building.
The stucco walls are simply Cream (103) stippled with Light Stone (121) using a sponge. It looks just like the photo on the box, and if I need to touch an area up, the paint is in the pot.

While waiting, I was taken by a long, flexible LED, and it was too cheap to say no to. Once I've fired it up, I'll post on here.
Talking of cheap, one trader had brass section at 2012 prices, so I stocked up. How this stuff was still on the stand after four days is a mystery. It just shows, there are bargains out there, you just have to look out for them.

This year's model engineering show was a little special for me. Our boat club always puts on a display, and I'd entered my Dad's Victorian Steam launch. This isn't a competition, although there is a Best Boat On The Stand vote; it's just a chance to show off his workmanship.
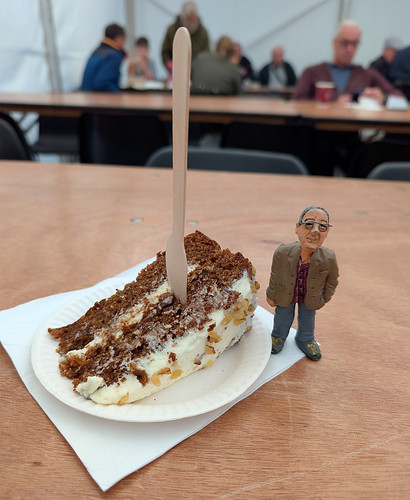
Dad was always proud of this model. OK, it's electrically powered rather than steam, but he put a lot of effort into the wooden deck, and it shows. The lines of the model are pleasing, so it doesn't look out of place at the show. Happily, the "Little Brian" figure is about the right scale too, so he got to attend a show we had been visiting for many years.
Elsewhere, the number of models in competitions seemed to be up. I know there was a dip after everyone finished projects while locked away during Covid. Maybe enough time has elapsed for them to complete something else?
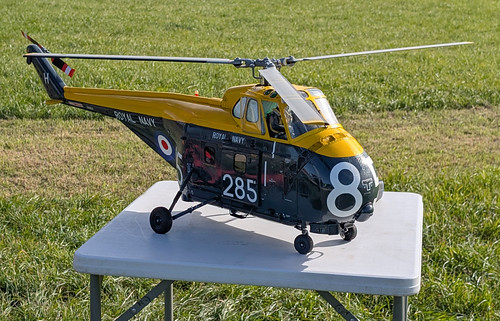
Engineering shows are always home to a wide variety of disciplines, and it was fun to watch some radio-controlled helicopters operating at the side of the car park. The team putting this display on explained some of the challenges they face. These aren't drones, there is no autopilot. You have to fly the things. Lucky for me, the conditions were just suitable for the show. 24 hours earlier, it was too windy.

I like talking to people at shows, it's amazing who you meet. The builder of this studio-scale model of Skydiver, from the Anderson show UFO, had worked on the Large Hadron Collider in the past, but now, aside from a little teaching work, spends his time building military models. Well, that and a rather nice large-scale Routemaster bus.
Since I attended on the final day of the event, cake options were limited, but the carrot cake was a winner.
Anyway, let's let the photos do the talking, with an album over on Flickr.
Another one of those videos which makes you realise how dull the modern railway is compared to the blue diesel days almost 40 years ago. Has anyone got a time machine?

That name on the front is printed, not a sticker, indicating that the chain of shops was going to distribute enough catalogues to make a special print run viable. Did Scalextric put it on for a valued retailer, or did Beatties have to pay for the print run as an advert?

Wandering around GETS with my boss in tow, we reached the Elaine's Train stand and Elaine said, "I've got something for you.", presenting me with a couple of long bags marked Hornby. These are designed to carry yard lengths of flexitrack. Peco make something similar in paper nowadays.
Of course, I am very excited about this. My boss rolls her eyes. This isn't the first time she's seen plastic bags come my way. At least this one didn't arrive at the office, to be posted on!
You'll want to see a photo of course, so I had to find someone to hold the things.

It's the December issue, even though it appears at the start of November, I feel there should be some festive content, which is why my first practical in this issue is a 7mm scale Christmas tree.

I head outdoors for the main piece, and build a greenhouse with its surrounding garden.

My camera has been out. First, we have 7mm scale Offerston Quay.

Moving down the scales, in 4mm, we have Guinea Street.

Finally, we go down a scale again, this time N gauge OWDLADD.

BRM is available from all good newsagents, supermarkets and our online store.

I spent a lot of time on the dry-fit stage of the French WC kit. There wasn't a rush, and I wanted to enjoy the build. More importantly, if significant work was required, the kit would need to go back in the box. Resin isn't lovely stuff to sand, the dust isn't good for you. Bad enough when it's just me, but we don't need to be exposing the public to anything.
Luckily, there wasn't an issue. All the parts were moulded square and true. A bit of brushable superglue was all that I needed to hold the main walls together.


Dealing with these was a mix of bits of Microstrip, and the filler I bought earlier in the day. The results aren't perfect, but they will do the job as you can't see much from outside.

And here we have the model plonked together. Obviously, the roof and modesty screens aren't attached at this stage, these will go on after painting. It's a really lovely little model, though. And yes, everyone did think I was weird for building it - but then that's part of the fun!

Picking projects to work on during a demo is a challenge. It must be something that doesn't need deep and prolonged concentration. A minimal toolkit too. Wagon kits are good, and I did have one in the box, but looking through the stash, I found this Artitec kit for a French toilet. Bought at Ally Pally earlier this year, I have it because I fancied a go at a kit from this manufacturer. The subject just amused me.
Looking at the parts, I reasoned that all I needed was an abrasive stick, and some superglue. I could fiddle with part fit if required, and take my time assembling things, allowing for interruptions while chatting.
My rule is that I'm there to talk, not to find some modelling time. A demo where nothing gets built is a good demo. Even at a busy show, there will be some dead time at the end of the afternoon, and having something to tinker with avoids sitting there, grinning like a loon, hoping someone would drop by and talk to me.
You know the rules, when visiting a show, at least one item must be purchased. Even when your time wandering around is very limited.
So, I had no choice.
First up, a very sensible buy, considering the event is run by the man who publishes the Hornby Collectors Club magazine.

Next, a practical buy.

Now the fun stuff.

Finally.

But the price was less than the coaches would be worth, so I felt it worth a punt. Again, we'll have a look at this on here in due course.

Welcome to my stand at the GBMRS. As usual, it's a selection of projects that I've built for magazines and on this blog. It's not a BRM event, so the tables are full of the contents of my head!
Since losing my Dad, it's a show I have to do on my own. Fortunately, the stewarding is carried out by members of the L&WMRS, so there's no problem with a short comfort breaks, tea delivery, or the chance to collect my lunch. As an added bonus, on Saturday, my boss Debbie, and colleague Steven turned up to do a bit of layout scouting. Both were roped in to pretend they were me for a few minutes.
None of this is a problem. I spent pretty much the entire weekend chatting to people - which is my favourite part of the hobby, and certainly makes the day pass quickly. As well as a couple of battery-powered working layouts, I had my G1 loco available on a rolling road. Kids were invited to drive it, and also switch the "smoke" on and off. They loved doing this, and I encouraged parents to come around the back to capture the moment on their phones.

All this meant even less wandering time than normal. A shame, since the quality of layouts was very high. You can expect to see a few on the pages of BRM (I carried out a shoot on the Friday evening, and there will be others) as well as at Warners shows.
Trade was fine, and as I'll show tomorrow, liberated a little cash from me.
Numbers looked good, and everyone seemed to be enjoying themselves. We saw more families than normal, possibly because the show takes place in the motor museum, so people can enjoy both cars and trains.
Everyone was pretty well behaved to. I always stick "Do not touch" signs on the display, and only had to ask a couple of adults to comply. One got in a huff, especially when I refused to sell him my latest magazine project. The other said "Oh, I'm always doing that" as though this is an excuse. I'm happy to talk anyone through anything on the stand, and if we do that, I'll normally hand it over for a good look, highlighting any potential breakable parts. Is it so unreasonable to ask people to look with their eyes, and not with their fingers? And why is is older adults who struggle with this?
I even managed some CatBus chat, of course it was on the stand, with the owner of the layout that inspired me to head to London and then buy a kit, plus a family whose child was called Howl, after the studio Ghibli film Howl's Moving Castle!
All in all, a very good weekend, where I managed very little modelling, as it should be. There is a French toilet block (more of that next week) and the brake van that goes along each year gained some partitions and sandboxes. If you dropped by for a chat, thanks very much, I hope you enjoyed it as much as I did. And I hope you enjoy this blog too.
There are some photos from the show on my Flickr album.
