A daily updated blog typed by someone with painty hands, oil under his fingernails and the smell of solder in his nostrils who likes making all sort of models and miniatures. And fixing things.
Monday, March 02, 2015
Fixing a dry joint
Amazingly, despite the layout's long storage, I plugged it in and every point motor tested worked straight away. Maybe the one into the front siding is a bit lazy but then it always had been - a shot of WD40 usually cures this if it becomes a problem.
This just shows how good Peco point motors - even ones over 30 years old (not all were new when we built the layout) can be. I can't have done too badly with my soldering either. The technique of making a joint, letting it cool and then giving the wire a tug presumably showed up anything dodgy at the time.
Better still, the text loco happily trundled around the track showing this works. Only one problem showed up - a dry joint in one rail on the front siding.
Spotting this was easy - the loco stopped as it made its way along the siding but when a screwdriver blade was jammed into the joint, it started up again.
Our track is home made using SMP code 75 nickel silver rail soldered to copper clad sleepers. No fishplates are used and I've always been too lazy to bond rail ends with little wire jumpers. That always seems to be too much work for a very limited improvement in reliability. Perhaps this is only fine for small layouts, but I've yet to be convinced otherwise.
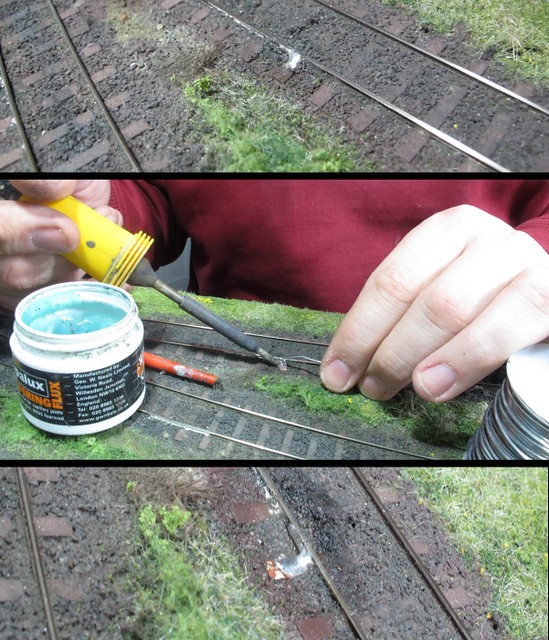
Anyway, the joint had obviously failed in the past at a show and I'd just heated up some solder to a big blob to the bridge the rail gap. The resulting silver lump on the sleeper end wasn't pretty so it was time to do something about it.
First up, the solder was heated and removed with a sprung solder sucker.
Then the rail side was cleaned with a small screwdriver and then a round file. I wanted shiny metal to solder too.
A small length of brass wire was tinned, cut to length and then held in place to bridge the joint with tweezers.
Using lashings of flux and a tiny amount of solder, the wire was fixed in place. Result - a nice neat joint with good electrical conductivity. A touch of Railmatch underframe dirt was applied after the join had been cleaned with turps to remove left over flux.
Hopefully, I won't be doing an unscheduled soldering demonstration at the show this weekend!
Note: If you think I sound smug because there were so few electical problems, you are correct. My smugness glow can be seen from space.

No comments:
Post a Comment