Showing posts with label 1/4 scale VW Engine. Show all posts

Tuesday, February 14, 2023

1/4 scale VW engine - the video

Here we go, the 1/4 scale VW engine in all it's full working glory. 

Press the button on the base, and the model turns over for 40 second, while making some very unconvincing noises. 

Trill as you can just about see the pistons moving! Be awed by the light-up spark plugs! 

Actually, I love this. It's been a great fun project with not much I would change for the future. Maybe some screws that look more "enginey" like hex-heads. Perhaps a bit more painting. But basically, this has been great fun, went together well and I am pleased with the result.

Monday, February 13, 2023

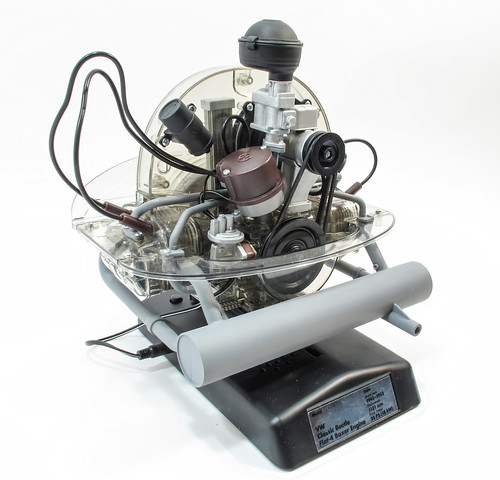
Finished flat four engine

1/4 scale VW engine

And with that. the VW engine is complete. Mounted on its base containing the batteries, the model can be made to work at the touch of a button. It looks great, I'm glad that I painted a few of the parts, it lifts the result a lot compared to the pure plastic version on the box, and makes it very much my model.

This has been a really enjoyable kit to build, and has helped give me a bit of my modelling mojo back. With a bit of luck, this will hang around for a while. I've already started on the next project...

I'll post a video of the model working tomorrow with a bit of luck.

Tuesday, February 07, 2023

Nearly finished, and I'm exhausted


We're nearly at the end of the VW engine build, and it's time for some of the larger bits in the box to be fitted - the exhaust system. 

It's interesting that the pipes emerging from the cylinder heads into the silencer, are very thin. Under the rocker covers on later VW engines are a set of heat exchangers. The pipe is finned and an outer jacket contains the air that will be blown into the cabin. Obviously, those fins take ages to warm up, and then warm the air supposedly providing heat. Worse, if the finner pipes develop a leak, you'll be blowing exhaust fumes into the cabin.

It's a clever system when it all works perfectly, but I haven't owned a VW where it was any more than useless. There wasn't much warming air in the cavernous space of my Type 2, and I don't recall the Beetle being much better. Mind you, it helps if everything is buttoned up properly and using original VW heat exchangers, any air gaps let the precious heat escape. The fins on the pattern version tend to be a bit rubbish too, reducing the effectiveness of the whole system. 

The main pipes are two-part items screwed together. I've sprayed it all with primer as that's the colour these things are normally supplied in, even if the paint quickly burns off and is replaced with rust. 

One good thing about building a kit is the speed of assembly. I've replaced several VW exhausts, and without fail, each one takes 6 hours work. Mostly trying to get pattern pipes to line up, a trick that required brute force and bad language!

Monday, February 06, 2023

Getting dizzy


My first thought when looking at the distributor, was that it doesn't look like any VW dizzy I've ever seen.Had the kitmakers designed it for ease of manufacture, rather than prototype fidelity? 

Nope. Doing a little digging online, I found photos of early VW engines with a Bosch unit that looks very like the one in the kit. It appears the change to the more common version with the HT leads emerging from the jell-mold shaped top took place sometime in the late 50s, the same time the fuel pump moved to the centre of the engine. This stuff is complicated, and strictly for the VW nerds!

On the model, the unit does it's proper job. Driven by a gear, it distributes electricity to each of the spark plugs (which definitly don't look like the real things) so they flash at the appropriate time as the engine turns over. Power comes, not from the coil, but from a lead plugged into the base. It would be nice if this was routed through the plastic coil, but hey-ho. 

I have, so far, resisted the temptation to unscrew the top from the dizzy to find out what's going on in there. I'd guess the inards won't be that different from the real thing, but since it's supplied ready to use, the designers don't want us poking around in there. That probably won't stop me eventually, but let's get it working first.

Thursday, February 02, 2023

Pumping fuel


VW fuel pump
Now this is a bit different. Because this is an early engine, the fuel pump is mounted on the side. Later versions, such as the one in my '73 Beetle, are on the top of the case, on the right of the distributor as you look through the back hatch. 

I know this, because many years ago, I planned to tour Kent in my bug. Heading down a quiet, and sunny M40, suddenly I had no power. Coasting to the hard shoulder, I pulled up, walked to an emergency phone (no mobiles in theose days) and than waited for the RAC to arrive. I still see the tree at that spot when I head south to this day. 

Once the van arrived, the diagnosis was lack of fuel, and looking at the pump, the pivot in the base was sticking out. Inside, there is a rocker operated by a rod coming out of the engine to bear on one end. The other is connected to the diaphram inside the pump, and that's the bit that moved fuel around. 

Back home, I quickly pushed the pivot into place and all was well. But I decided againast continuing the trip. 

This was wise, as the same thing happend on the way back from work a few weeks later. Better prepeared, I nipped around the back of the car, shoved the pivot back in and all was well. Which is what I told the very attractive blonde woman who pulled up in a red Beetle to see if all was well. What a time to do a quick fix - she was gone again in a flash, when  long chat as I diagnosed the problem would have been very pleasent...

Eventually, I worked out that there should be a circlip on each end of the pivot. Once replaced, the problem never occured again. 

The model version is a two-part plastic moulding that snaps together and then pushes into the crank case. I painted it silver (it looks better in real life) and the Bakealite spacer, a rust colour which looks about right.

Wednesday, February 01, 2023

Blowing hot air


If there's one technical thing people know about the VW Beetle, it's that the engine is air cooled. In practice, this means that air is blown through an oil cooler hidden in the fan shroud, and over the fins on th side of the cylinders. 

Th fan is attached to the dynamo, or alternator, depending on the year of the engine, and driven by the fan belt. That makes the belt a very vital bit of kit, and if the charging light comes on on the dash, the clever driver knows to pull over and check all is well. Failure to do so will see the engine temperature rise rapidly, and a valve on the number 3 cyclinder, which gets a little less air than the rest, exit via the side of the crank case. 

On the model, the fan and dynamo (This is an early engine) look just like the real things. You even have a voltage regulator sat on top, held in place by tight fitting plastic, not screws. 


All this sits on top of a stand with a oil filler on the side. All this has been painted as there's nothing to see and I think the contrast between black and silver bits looks rather nice. For some reason, the silver, a Humbrol metalcote colour, seems to dry incredibly fast. Over a coat of primer, I was easily able to put the required couple of coats on the parts in an evening.

Tuesday, January 31, 2023

Painting plastic bits


I've mentioned in the past my aversion to self-coloured plastic parts in kits. Mould them any colour you like, but I still prefer paint on the completed model. It's just looks better to me. 

The VW engine is supposed to be screwed together, the only tools required being some clippers to remove parts from the sprue, and a cross head screwdriver. No paint. 

Anyway, I want my model to look a bit more realistic, and so the manifold and exhaust parts have been given a spray of grey primer, which looks the part to me. The carb and end of the oil cooler are a random silver, possibly aluminium, from the paint drawer, and the body of the coller silver from the Liquid Metal range. This should be finned, but hopefully simply painting it will look OK through the clear fanhousing. 

It's difficult to decide how much to paint, but I'm working on the basis that if it's coloured plastic, then I'll look at a better colour. I do wonder if someone is going to produce a more detailed carb though. Possibly a job for 3D printing.

Tuesday, January 24, 2023

Off my rockers?


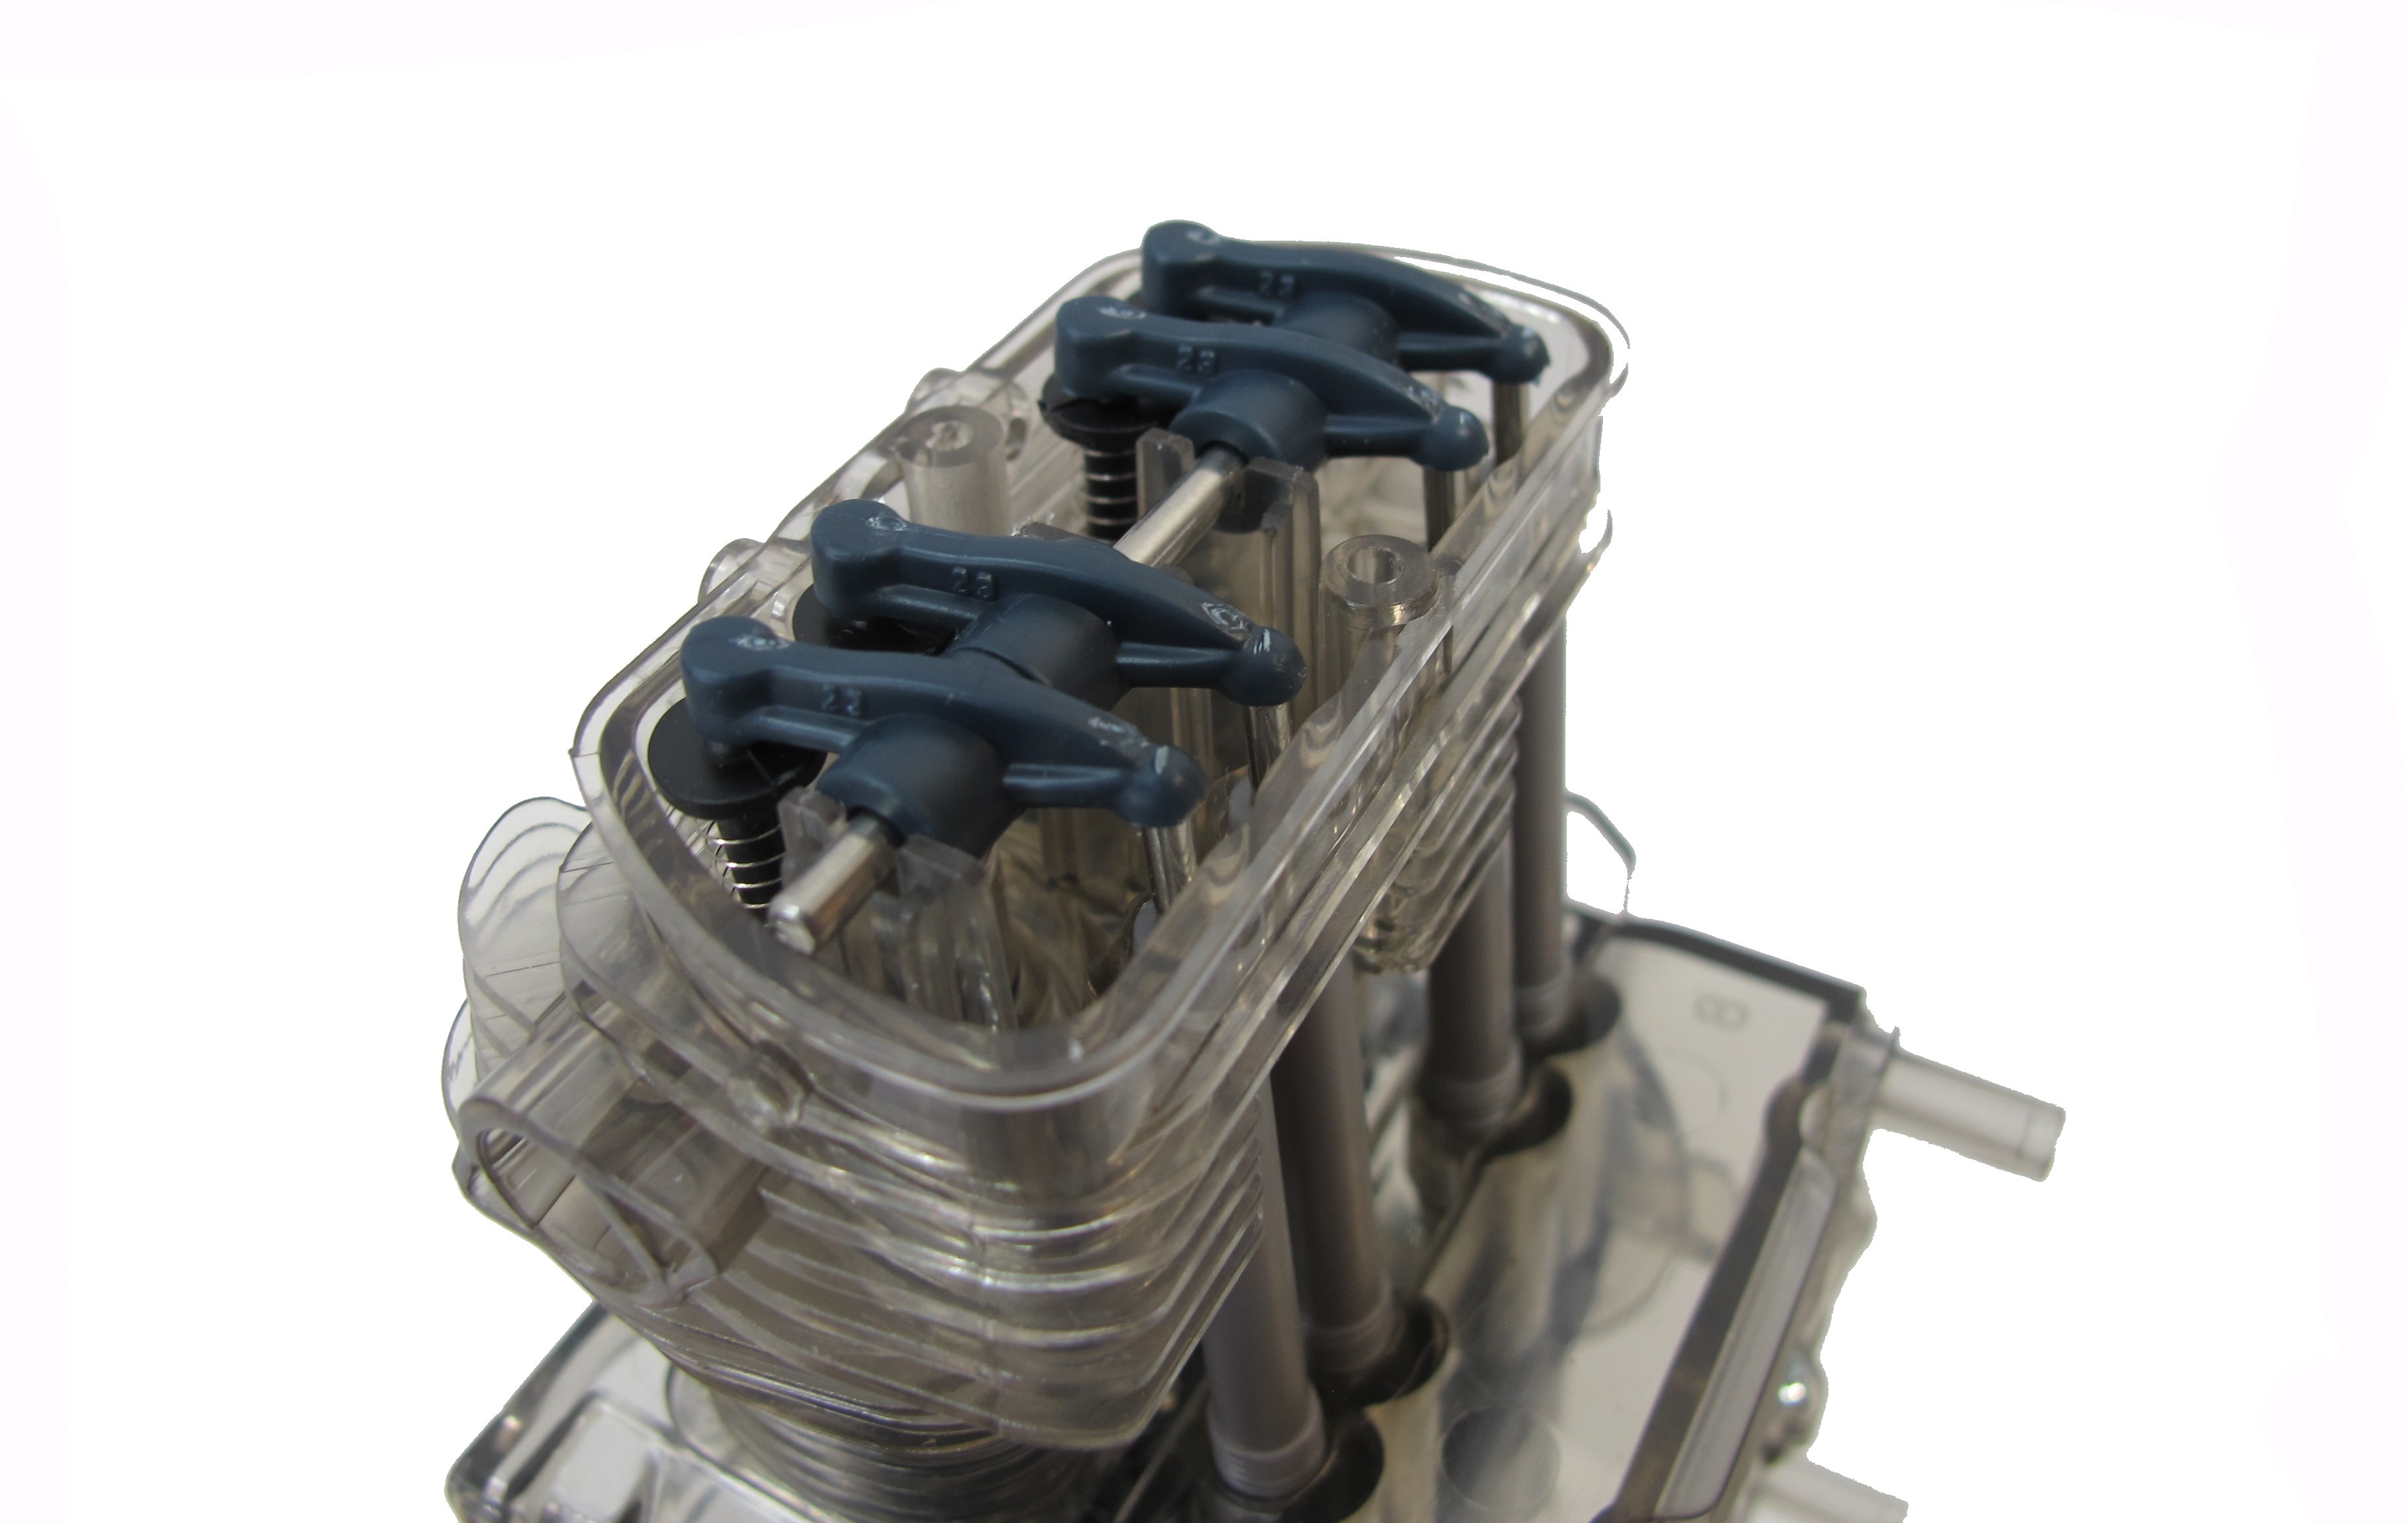
The push rods are connected to the vlaves by a series of rockers that effectivly reverse the direction of the thrust. On the real VW, it's important that the gap between rocker and valve is correct, and setting it is a bit of a baptism of fire that looks complicated, but I don't think should be that bad once you get the hang of it. 

If you look at the left hand side (in the photos) of each rocker, there is a bolt in the end that can be screwed in and out. A lock nut stops it moving. The principle, as I recall, involves rotating the engine so the valve is open, undoing the locknut, adjusting the bolt with the aid of a screwdriver and feeler gauge, and then doing the locknut up again. The engine must be absolutely cold when this is carried out. 

All this is theory, and I never had the bottle to give it a go. It's a job I'd want someone talking me through in person for the first time I think. The principles are simple enough, but you must have the engine correctly rotated for it to work. Later engines had hydraulic lifters, so you were spared all this. 

On the model it's a bit of a fiddle to slide all the rockers on the metal shaft, get them in position and then put th shaft into the supports. Still nicer than crawling around on the floor adjusting oily bits though.

Monday, January 23, 2023

Heads up!


The moving parts of the VW engine get every more exciting. We're on to the cylinder heads, with their valves. 

These are driven from the shaft in the centre, via pushrods (on the right in the photo) which operate through pushrod tubes (on the left). These move in and out, operating the rockers (tomorrow's blog) which move the valves. 

Anyway, the valves are made up of three parts, including a metal spring, which push together through the head. Those springs are ingeneously supplied threaded on a cable tie, so they don't get lost in transit. 

The heads are attached to the crank case with screws, and some carboard gaskets, not far off the thickness of the real thing, fit between the two. Getting these to sit flat might not matter for the engines operation, but they do for looks, so it's shiny white side against the crank case as the depression from the die cutting alots them slip in easily. 

Those push rod tubes are solid on the real engine, although collapsable versions are sold so you can replace one without removing the head. Removal can be a brutal operation, and it's essential to ensure the seal at each end seats, as they are full of oil which will otherwise "mark the spot" where the vehcile stands!


Thursday, January 19, 2023

Turning the engine over


With everything installed in the crankcase, I removed the timing lock things and gave the engine a quick twiddle. All works well, there's loads of space in the cyclinders, I could almost get away with painting the pistons as the wear on them would be very localised. 

Anyway, all good so far, next it will be time to look at the heads with plenty more fiddly bits to fit.

Tuesday, January 17, 2023

Timing


We have gears - both the timing gears for the bottom of the distrubutor and connecting the camshaft and crankshaft. There's even some pieces to hold these in the right places respectivly so the eventual timing is correct. It's all looking a bit clever to me. 

The gear on the bottom of the dizzy is interesting - it's one of those engine components that I have known about, but never seen. Plastic kit modelling can be educational!

Juggling this all into the crank case is a bit of a fiddle, but once you work out which holes the various pistons go it, th whole lot drops together nicely. All the gear mesh too, I wish this was always the case with models I build...

Wednesday, January 11, 2023

Cylinders and camshaft


So we can watch the mechanics of the engine work, most of the main parts are moulded in clear plastic. 

Just like a real VW engine, the cylinders bolt (OK, screw) on to the side of the crank case. They are also handed, the cooling fins sticking out the sides more on one side then the other. You can't actually fit them the wrong way around, so not to worry. 

All those cooling fins are essential on the real engine, but will, I fear, obscure the view into the model. However, so far this is nicely taking it's design cues from the real thing. 

The camshaft is a metal rod with four lobes slide over it. The rod is D-shaped so you can't go too far wrong, as long as you pay attention to the drawings in the instructions. I spent a while trying to figure out where I'd gone wrong before reaslising one lobe was fitted back to front. That would really ruin the timing!

Tuesday, January 10, 2023

Pistons and crankshaft


Pistons and crankshaft
First out of the kit box are the parts for the all-important pistons and crankshaft. Time to find out how well this thing is designed!

The instructions mention a knife, clippers and a screwdriver being the only tools required for the build, and the last one is supplied. No glue or any other modelling equipment. Sensible, when your audience isn't hard-core plastic kit builders. 

The parts are nicely moulded, and clip off the sprues easily enough. Using a sharp knife, I trim the residue away and start assembly. 

Each piston head is made from two parts and these push together over a plastic wrist pin that retains the connecting rod. All seems pretty solid and unlikely to disassemble itself while working. Since I can't paint these parts, it would rub off when the model is working, I sand and polish the pistons, but I'm not sure it's worth the effort - they looks a bit better maybe, but you can still see the sprue marks. 

The rods fit on to the shaft and screws hold the rod cap. There's plenty of play in the who setup, possibly as much as in a real engine, but I'm sure this is to ensure everything will work. 

All the bits fit together perfectly, and the screws bite into the plastic easily enough. You are warned not to do them up too tight, but you'd have to go mad to do much damage I feel.

Monday, January 09, 2023

1/4 scale VW engine


VW Engine
I first spotted the Franzis range of working plastic kit engines at the London Toy fair in 2020. Sadly, I didn't take any photos at the time, but really liked the look of them. To me, they hark back to the Revell "Visible V8" I drooled over in the 1980s Model Maker magazines. That kit is still available, but over time, my tastes moved towards the VW Flat-four found in the back of my Beetle and Campervan. The V8, with all it's working part, still looks great fun, but this is fun, and useful. 

It's no surprise that the VW engine joined the range a few years ago. Let's face it, there are millions of these things out there, and they are now owner by people who aren't scared of a bit of tinkering, so will like a hands-on project for when it's too cold to get out in the garage. 

Anyway, a few weeks ago, this was my big Christmas present. I know I don't need any more kits, but I also don't need socks or other stuff people give as gifts, so I might as well go for something fun. 

The big shock is that I've started building - my first project of 2023!

Inside the very high-quality box, is a mass of individually bagged sprues, some metal rods, springs fitted to a cable tie to keep them under control, wires and even a small screwdriver that doesn't appear to be rubbish quality. 

Also not rubbish, is the A4 softback instruction book. 2/3rds of this is a pretty reasonable history of the VW Beetle, and the engine that powers it. Yes there is Hitler, but also a lot of stuff from the 70s and right up to the end of production in 2003 (I still wonder if I should have blown my savings to buy a last edition new car. I'll never have the chance to own a new Beetle again.). It's a booklet worth keeping in the future - how often do you say that about the instructions in a kit? 

By the end of the build, I should have an electricly powered model flat-four with all the main parts moving, and lights to show the spark. A proper desk accesory that will be fun, and educational, for the future. That's the idea anyway.