A daily updated blog typed by someone with painty hands, oil under his fingernails and the smell of solder in his nostrils who likes making all sort of models and miniatures. And fixing things.
Showing posts with label Adams Radial. Show all posts
Monday, February 02, 2015
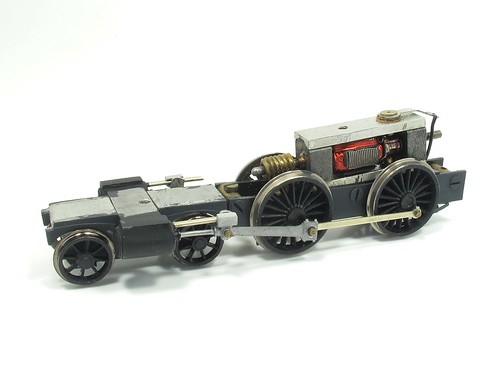
K's large MK 1 motor
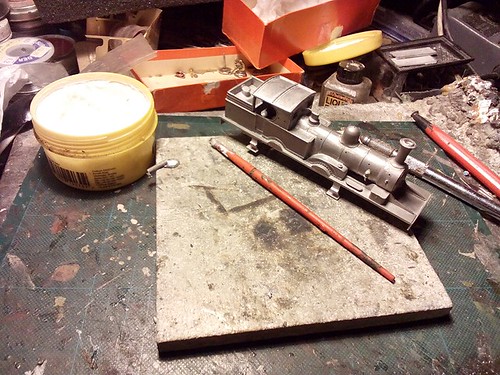
I love it when this blog helps someone out. Over the weekend, a member of the excellent Double O Gauge Association forum asked if anyone had the instructions for a K's model of an Adams Radial as he'd bought a second had kit which didn't include them. While I don't have the paperwork, at least I could point him at my photos to help out a bit.
This prompted another question about the motor in the kit. All I knew was that it's a whopper and possibly came from a Lancaster bomber, Lanc bomb control panels were a popular army surplus item for railway modellers (anyone got an unused one stashed away I could have?) so maybe the power units were also sold off...
Anyway, back in the real world, Colin Snowdon quickly identified the electric lump as a K's Mark 1. The Mark 2 apparently enjoyed only one magnet and after this they moved to the infamous plastic motor - most of which weren't going to trouble the skin of a rice pudding before expiring.
This motor seems quite smooth in a vintage sort of way. Were I to want to run the loco seriously on a finescale layout then something from Mashima attached to a proper gearbox would be dropped in but as this is a vintage model, I prefer to keep it original.
Wednesday, December 10, 2014
Radial
There we have it. Some transfers, a bit of red paint (Humbrol acrylic as I had a pot handy for another job) and a spray of Satincote varnish. Finish up with a matt black smokebox and some screw couplings that are probably contemporary to the kit.
OK, it's not the most hi-fi of models but the prototype's elegant design shines through and I think the ancient K's kit captures it very nicely. This is such a pretty loco that for the moment I can't bear to weather the model so it sits in the cabinet looking pretty.
Tuesday, December 09, 2014
Rattlecan paint job
The loco is going to be black. Do I break out the airbrush for a fine finish to the paintwork?
Nope. Halfords satin black aerosol. Warm it up in some water, give it a good shake and spray.
Result - pretty good. No clean up either. Can't think why I'd do anything else.
The brass strip by thee way is Mr Hobby metallic paint.
I'm not the only one who thinks like this - Muz duz too.
Monday, December 08, 2014
Soldering beats glue...
I don't understand why, but one of the K's Adams Radial splashers is too small. Quite a bit too small. Small enough to leave a great big gap around it's top edge when fitted in to the side that has a gap for it. My suspicion is that the wrong part was in the kit and the previous builder just fitted it and bodged with filler.
That doesn't work as the riveted strip looks odd, it should be along a nice clean right angle.
Never mind. First I pushed low melt solder into the gap from inside the loco. You can use this stuff as both joiner and filler.
Then a bit of microstrip over the top of the splasher bulked it up enough. Files back to provide a flat face and all is now good.
Friday, November 28, 2014
What makes a good Radial?
Subtitle: Why I can't be bothered to fit lamp irons to this loco.
With the Radial now in it's first coat of primer, I've been pondering how I will finish off the model.
A couple of months ago, I ruminated on exactly how good a model needs to be if you are planning to use it on a layout. My feeling was that once you look something as part of a complete scene, it's more important that everything is to a similar standard rather then be perfect to the tiniest detail.
One detail I have always had a bit of a blind spot over is lamp irons. Yes, I know they should be on the ends of the model but if they aren't, I don't miss them. Sacrilege I know, but that's me.
The Radial should be festooned with the things including a pair of entertainingly shaped ones sticking out the sides of the smokebox. I looked at these and decided I couldn't be bothered. Maybe the straight ones could be made out of staple but those "wings", that's a job for brass strip and doing things properly. Mess up and it would be better to leave them off. An added benefit is that the pretty front end of the model is, to my eye, enhanced by the lack of sticky up bits.
This isn't madness. You can report me to the finescale police all you want, but I think it's the right decision.
Too much detail would be inconsistent within the model. Look closely and you'll notice a lack of brake gear. Well, the frames are made from armour plate cut out of a decommissioned battleship. Drilling through this for hanger wires would technically be possible but hard work. I'd have to take the wheels off and I'm not sure they would go back on the axles properly. Some brake gear would also need scratchbuilding and I don't have a plan to hand.
Even if I did this, the cab is full of mahosive open frame motor. One of those bombproof jobbies from the 1960s that runs sweetly but at a cost of being the size of a small car. Really I ought to replace it with a more modern smaller unit and then build a cab interior.
But then the fit of the body around the splashers isn't perfect. There's some work to do shown in the photo along the footplate - I said this was the first shot of primer.
No, basically this kit is what it is. Attractive but on the basic side. If I want a hi-fi model I need to build an etched kit, or just wait for a RTR model to appear. I've seen the first shots from Hornby and they are better than my version if you want to look closely.
So, I'll build the kit and enjoy it. Maybe my model won't win any prizes but I think it's going to capture the character of the prototype and look very nice indeed. At the end of the day that's what matters.
With the Radial now in it's first coat of primer, I've been pondering how I will finish off the model.
A couple of months ago, I ruminated on exactly how good a model needs to be if you are planning to use it on a layout. My feeling was that once you look something as part of a complete scene, it's more important that everything is to a similar standard rather then be perfect to the tiniest detail.
One detail I have always had a bit of a blind spot over is lamp irons. Yes, I know they should be on the ends of the model but if they aren't, I don't miss them. Sacrilege I know, but that's me.
The Radial should be festooned with the things including a pair of entertainingly shaped ones sticking out the sides of the smokebox. I looked at these and decided I couldn't be bothered. Maybe the straight ones could be made out of staple but those "wings", that's a job for brass strip and doing things properly. Mess up and it would be better to leave them off. An added benefit is that the pretty front end of the model is, to my eye, enhanced by the lack of sticky up bits.
This isn't madness. You can report me to the finescale police all you want, but I think it's the right decision.
Too much detail would be inconsistent within the model. Look closely and you'll notice a lack of brake gear. Well, the frames are made from armour plate cut out of a decommissioned battleship. Drilling through this for hanger wires would technically be possible but hard work. I'd have to take the wheels off and I'm not sure they would go back on the axles properly. Some brake gear would also need scratchbuilding and I don't have a plan to hand.
Even if I did this, the cab is full of mahosive open frame motor. One of those bombproof jobbies from the 1960s that runs sweetly but at a cost of being the size of a small car. Really I ought to replace it with a more modern smaller unit and then build a cab interior.
But then the fit of the body around the splashers isn't perfect. There's some work to do shown in the photo along the footplate - I said this was the first shot of primer.
No, basically this kit is what it is. Attractive but on the basic side. If I want a hi-fi model I need to build an etched kit, or just wait for a RTR model to appear. I've seen the first shots from Hornby and they are better than my version if you want to look closely.
So, I'll build the kit and enjoy it. Maybe my model won't win any prizes but I think it's going to capture the character of the prototype and look very nice indeed. At the end of the day that's what matters.
Thursday, November 27, 2014
Brass buffers bad
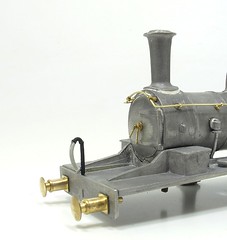
One surprise inside the box'o'bits that contained my Adams Radial kit was this set of natty brass buffers. Ready made and nicely sprung, they are just what we keep being told that modellers want to find at the ends of all their rolling stock.
I've no idea how old they are but I have a feeling they might be contemporary with the kit so over 40 years.
Sadly, there is a bit of a problem here. They are ALL brass.
While brass housings are fine and perfectly normal, brass heads and shanks aren't. What they are is the wrong colour because they are the wrong metal. What we need here is steel.
Sadly, this means the whole lot is going to have to be painted and then fixed solid so the paint doesn't rub off when the buffers are compressed. Pity, as they are quite nice.
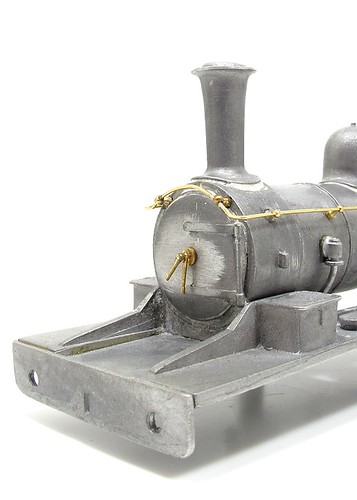
The sharp eyed will have spotted the vacuum pipe has been fitted and that instead of running up the face of the buffer beam, it emerges from behind it. Just as it does in the photos I found of the real loco. Not sure how common this is but I'm pleased to have modelled it and will now boast every time someone looks at the model.
Tuesday, November 25, 2014
Replacing a moulded smokebox dart
Right you lot, pay attention. If there is a simple improvement anyone can make to a model steam locomotive, it's replacing a moulded smokebox dart. Yes, I know that a lot of modern ready to play locos now come fitted with a nice seperate item but most of the older ones didn't and nor do those from Hornby's very economic Railroad range.
I've talked to "modellers" about doing this in the past and get very frustraited when I'm told "It's too difficult" to make this change. After all, there in an Interweb to whine on and one day the manufacturer will listen...
Well, tough. This is a model making blog and so I'm going to show you just how easy this job it. You'll need a small drill bit, sharp knife, superglue and some emery paper.
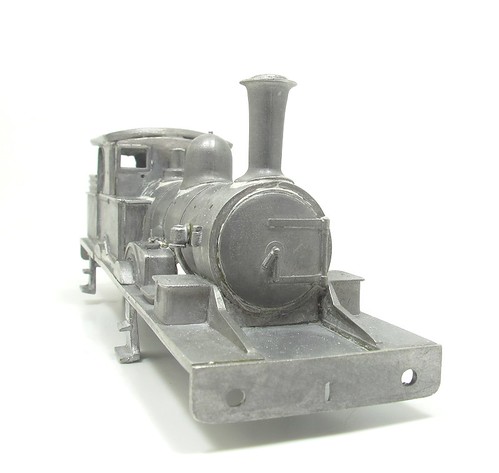
Exhibit A. A moulded smokebox dart (Yes, I know that's a modellers term but we'll stick with it) on the face of my Adams Radial. Back in the 1960s, people used to put up with this sort of thing, but then they used to accept all sorts of things back then.
The moulded dart is cut away with a sharp knife and the remains sanded away with emery paper. Before the last vestiges are removed, drill the centre with a 1mm drill bit. A polish with a fibreglass pencil is an excllent finishing touch.
The replacement part comes from Eileens Emproium as 3 tiny and nicely turned brass parts - a base and two arms. Some of you are probably thinking that £2.50 is a lot of money for very little metal but it's quite a lot of lathe work to get this far. Alternatives are available but if they are whitemetal castings, cleaning them up can be fiddly so I stick with what I know. Anyway, the improvement is worth it.
You pop the base in the hole drilled earlier then thread the arms on the spike. Positions them to match a photo of the real loco. Fix everything in place with tiny amounts of superglue. Place this on some plastic and trasfer to the model with the end of a pin - you don't need much. Finally, trim the spike and arms to length (look at the photo again) with some wire cutters or a file.
All of this is even easier on the plastic loco body. Best of all, touching the paint up is really simple as smokeboxes are matt black and Humbrol's version of this colour (No 33) is an excellent brushable paint so you don't even need to spray and it will stick to the new brass bits adequatly.
So, a nice simple upgrade for an older loco. Every time you look at your model you'll know it looks better than it did and more importantly, you'll be able to say, "I did that."
I've talked to "modellers" about doing this in the past and get very frustraited when I'm told "It's too difficult" to make this change. After all, there in an Interweb to whine on and one day the manufacturer will listen...
Well, tough. This is a model making blog and so I'm going to show you just how easy this job it. You'll need a small drill bit, sharp knife, superglue and some emery paper.
Exhibit A. A moulded smokebox dart (Yes, I know that's a modellers term but we'll stick with it) on the face of my Adams Radial. Back in the 1960s, people used to put up with this sort of thing, but then they used to accept all sorts of things back then.
The moulded dart is cut away with a sharp knife and the remains sanded away with emery paper. Before the last vestiges are removed, drill the centre with a 1mm drill bit. A polish with a fibreglass pencil is an excllent finishing touch.
The replacement part comes from Eileens Emproium as 3 tiny and nicely turned brass parts - a base and two arms. Some of you are probably thinking that £2.50 is a lot of money for very little metal but it's quite a lot of lathe work to get this far. Alternatives are available but if they are whitemetal castings, cleaning them up can be fiddly so I stick with what I know. Anyway, the improvement is worth it.
You pop the base in the hole drilled earlier then thread the arms on the spike. Positions them to match a photo of the real loco. Fix everything in place with tiny amounts of superglue. Place this on some plastic and trasfer to the model with the end of a pin - you don't need much. Finally, trim the spike and arms to length (look at the photo again) with some wire cutters or a file.
All of this is even easier on the plastic loco body. Best of all, touching the paint up is really simple as smokeboxes are matt black and Humbrol's version of this colour (No 33) is an excellent brushable paint so you don't even need to spray and it will stick to the new brass bits adequatly.
So, a nice simple upgrade for an older loco. Every time you look at your model you'll know it looks better than it did and more importantly, you'll be able to say, "I did that."
Labels:
Adams Radial,
hints'n'tips,
kitbuilding,
model railway
Monday, November 24, 2014
Radial handrails
There's not a whole lot of detail to add to the Radial but you can't avoid the handrails. I wish I could, they are always a fiddly job.
Anyway, first I counted the knobs. I needed 8 to fill the holes in the boiler sides and 10 if I wanted to include the two that should be in the smokebox front but K's had "forgotten".
In the box, there were 7. That's the perils of buying half-completed kits for you.
No matter, digging through my pot of leftovers, I found enough to replace the lot. They all look the same even though the leftovers come from a variety of sources.
One problem with using knobs (stop sniggering at the back) is that you need a variety of lengths (I said STOP sniggering) as the smokebox is wider than the boiler. Pragmatic modellers like Tony Wright use split pins to get around this figuring that the straight handrail trumps a wobbly one even if the later is hung from the best brass turnings Mr Gibson doth supply. I've tried pins but just can't get on with them which is a nuisance.
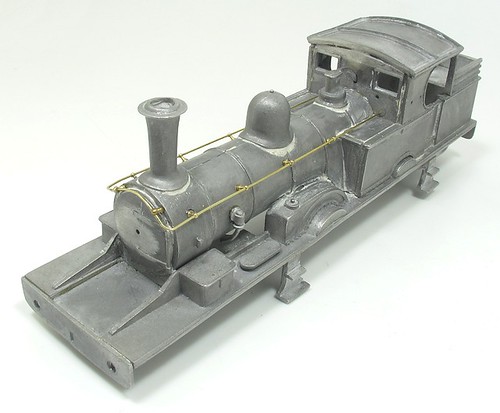
Anyway, the handrail was first bent over a pen of a smaller diameter then the boiler and then the corners put in using small pliers. The knobs were threaded on the wire and pushed in their holes. I opened out the ones in the smokebox to allow the knob to seat all the way in. Some filling superglue will hide this subterfuge. Then there was lots of tweaking and a little bad language before the job was done.
Wednesday, November 19, 2014
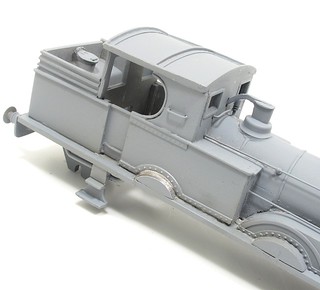
Body fiddling
Why did the previous owner of this kit stop work, put it in a box and flog the thing on a second hand stall for no money?
Quite a mystery since they had done such a good job of assembling the parts. All is neat and tidy. The filler work is far better then I usually manage and as far as I can tell, the loco isn't more than a few hours off completion.
Although the kit is glued together, I set to with some low-melt solder and attached a couple of steps. So far so good.
Then I looked at the roof. It should just drop on but most of the locating lumps had been filed away. Trying it in place I realised why. Somehow it didn't line up. The front was fine, but the back was distinctly off-centre.
I ran square over the model and all appeared OK. Then some close examination revealed that the cab back wasn't symmetrical - about 2mm thin on one side which definitely made a difference but that wasn't all of it.
After tack fitting the roof, I fiddle and faffed for about an hour. Happy, I fixed it in position properly, cleaned the model up and took the picture above.
Then I decided that it still wasn't right, fought the solder to get it off, and tried again. I think I'm happy this time.
Tuesday, November 18, 2014
Better wheels
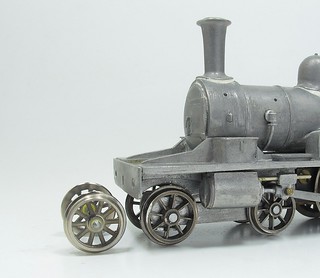
The Keyser kit dates from the 1960s and shows its age. While I can live with most of this, it's going to be a layout loco after all, one or two upgrades are required. The driving wheels look OK to me but not so the bogie and trailing wheels. These are (I think) Jacksons from the land that time forgot.
Spokes stamped from a sheet of metal and incorporated at the back of the wheel don't look right to my eye. There is an awful lot of depth from front to back which might have been OK back in the day, but not now. Well, not if they aren't hidden under a wagon anyway. The photo does them a favour...
Replacements come from the Hornby range. People will doubtless be horrified that I haven't picked anything more accurate, or at least with the right number of spokes (1 too few), but I had some to hand and if they really bother me, I'll change them later.
For the moment, I've filed the pinpoints off the ends and popped them in place. At least they keep the model in the air.
Monday, November 17, 2014
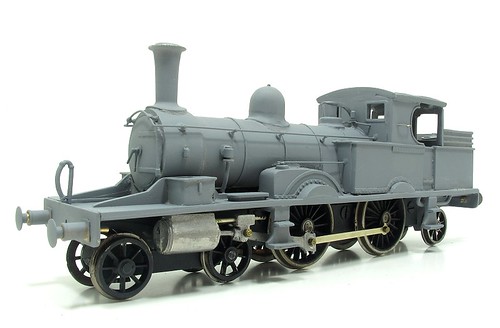
Adams Radial
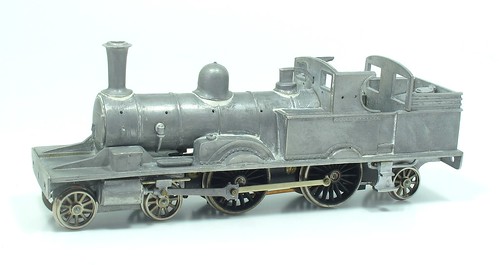
It seems that the most popular prototype locomotive in the UK is currently the Adams Radial. One manufacturer (Oxford Rail) has already announced a ready to run version, and there are rumours that another will do the same in a few days.
Some Aussies have been looking at the prototype for years and a fourth company started the research and then bailed out once it became clear the market was crowded. Bachmann also had a shuftie but felt the large number of variations was more trouble than it was worth.
Anyway, I thought I should get in on the action and have hauled an ancient Keyser kit out of the stash to have a look at.
Bought for 20 quid on a second hand stall a couple of years ago, this isn't a bad little project. Regular readers will remember it was in the running for the kit I'd build to cover my holiday but didn't make the cut. Mind you, the railcar that did hasn't progressed that much either...
No matter. The model, as you can see, is mostly assembled. The chassis is built and works pretty well. All I have to do is stick a few bits on it and paint. Another helpful step was to search on the web, where I found a photo of a model in a rather handsome early BR livery.
Of course, as a finescale modeller (stop laughing), I am concerned that I am being properly accurate. To this end, I did what everyone else does and e-mail the guru of all things railway south of the Thames, Graham Muspratt to find out what I'd got in my box of kit. He kindly responded:
Well the Radial is an interesting minefield...
The model you have so far has an Adams style boiler and safety vales with a Drummond chimney, luckily for you number 30584 with such an Adams boiler and chimney ran in unlined black with cream gills sans ‘British Railways’ lettering between April 1948 and May 1951.
So it looks like my plan has legs and I'm not going to be fighting transfers to apply mixed traffic lining. Mind you, it's my model and so if I want to paint it black... If you're not happy, get your own. It's not going to be difficult!
Subscribe to:
Posts (Atom)