Showing posts with label Lanz Bulldog. Show all posts

Tuesday, August 04, 2015

Express Bulldog

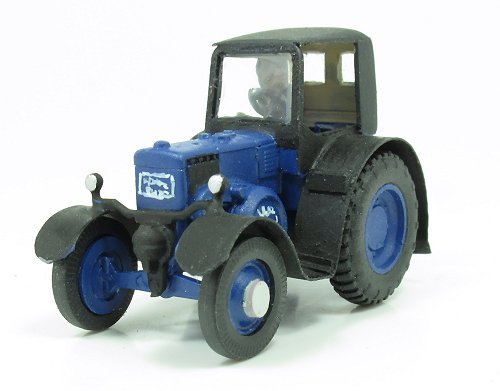
Lanz Bulldog front

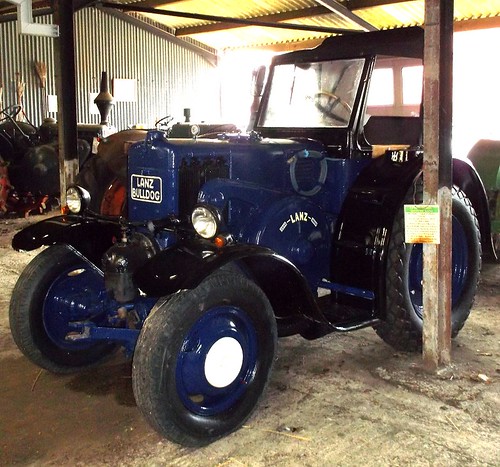
Blue paint found, the Lanz Express Bulldog tractor is ready for the farm layout. Some Humbrol Oxford blue paint is a pretty good match for the colour of the prototype. Matt black mudguards contrast with a Railmatch weathered black hood - in real like the tractor is shinny but I don't do gloss paint so the different blacks highlight the metal vs material differences.

Lettering, horribly crude in the photo but will be fine in the context of a larger model, is white ink drawn on with  a mapping pen. I picked the technique up from Geoff Kent's book and it works fine, were I a better calligrapher, the rests would be better still. The kit does come with a rub-down transfer sheet which has the Bulldog plate on it but it's the wrong colour and very thick.
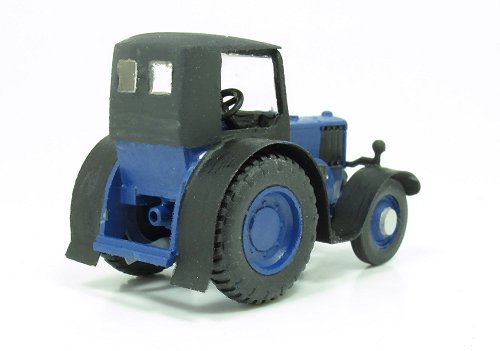
Bulldog back
 
In the novel, I've fitted a front lifting device. Not sure if this would have appeared on the prototype, at least one with mudguards, but we'll worry about that when Hollywood comes a'calling to make the film. Something for the special effects guys to worry about.

Monday, August 03, 2015

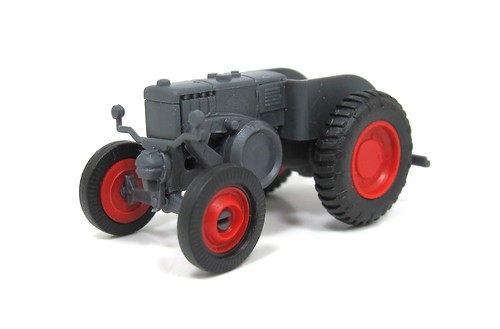
Little grey Bulldog

 
Before priming, the last job was to add some cab footsteps, a bit fiddly - I ended up making an angle out of microstrip as a single tread wouldn't stick out at the right angle when glued in place.
 
After this, it was down to the spray booth, out with the Halfords primer and the model was given a quick shot. Not perfect but good enough for what I'm doing. Now, where's my blue paint? 

Friday, July 31, 2015

Bulldog exhaust and a handy tool

 
Under the Bulldog, there is an exhaust pipe. Unusual feature since most tractors chuck out their gas from a vertical pipe on the side of the engine bonnet. Other Bulldogs have this, there is even a part in the kit, but not the one I'm building.
 
Anyway, there is a big, fat, silencer on the pipe that tapers at the end. Proper modellers would set up a lathe and turn this.
 
I stuffed a bit of plastic tube in a pencil sharpener. This sort of worked but when I glued a bit of rod in the tube to make a solid end, it shaped perfectly. Then I drilled from the back of the tube, put new rod in to represent the pipe and the rest was spot on.
 
This is the second time I used a pencil sharpener to make pointed bits for modelling recently. Last time was for 7mm scale plant pots. It's a handy tool.

Thursday, July 30, 2015

Bulldog roof

 
I'm not sure why the prototype Bulldog has a canvas roof not unlike a convertable sports car, but it does and therefore so my model must have one too. It's quite handy as in The Book, I wrote a cab in to the story.
 
Anyway, I don't think the roof is removable, at least not easily. When I started, I didn't know how I was going to make it. Since you can see both inside and out, the material had to be thin. Proper modellers would build a prototypical structure and drape gossamer thick cloth over it. More practical people would make a master and vacuum form plastic over this.
 
I'm not clever enough for the first and don't have the tools or equipment for the second.
 
Instead, I made the basic shape out of 0.75mm thick plastic sheet. In the top there is a single microstrip rib, sanded to shape. The rest of the roof is three coats of Deluxe Materials filler sanded to shape. While the sanding stick was out, I rounded off every corner and thinned down the edges slightly.
 
The result is OK. Yes, it's far thicker than it should be but then I doubt the real material is much more than 3mm thick. The only place it's really obvious is in the roof and you can't see under that can you?

Tuesday, July 28, 2015

Bulldog controls


More scratchbuilding. My Bulldog has a cab back and folding roof. The kit has neither so I've had to add the bodywork.

Firstly, the back was cut and fixed. It leans backward slightly, a job I've done by eye. Next, the sides were cut too large, placed in and the top of the mudguard drawn on them. A quick trim and they went in next. Lashings of plastic solvent and everything is held in place.

Finally, the kit controls were fitted. They're pretty good too although there should be an extra pod sticking out of the dashboard with two switches on it, I assume for the lights.

The tractor is looking less like farm machinery and more like a vintage car all the time.

Monday, July 27, 2015

Windscreen on

Windscreen added

According to my measurements, the Lanz Bulldog windscreen is fractionally under 2 feet tall. I bent the frame from some tiny square section brass. Whatever the photo appears to show, it IS square and not tapering.

Around the base, construction is a mix of microstrip and Deluxe Perfect Plastic filler. During sanding I managed to bend the mudguards in a bit but I'll fix those. The angled supports need re-fitting in this side too.

Handy hint: Don't take photos of your models, they are too cruel.

Thursday, July 23, 2015

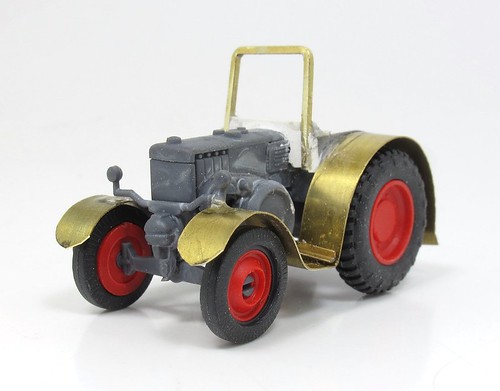
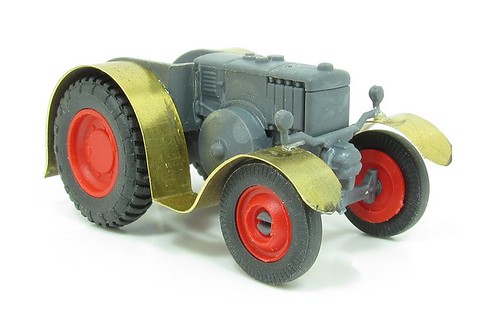
Mudguards on my Bulldog

Bulldog with mudguards

One job I really wasn't looking forward to on this build was forming the mudguards. On the prototype there are a lot of curves and I wasn't sure if I could form these neatly, nor if they would fit the model as it's not exactly the same as the real thing.

Anyway, I dug out some very thin brass (leftover etch) and cut some 5mm wide strips using an Olfa cutter. The width is guessed from the photo as the mudguards only just reach the edge of the rear wheels, but when I checked the real thing, they are 17 inches wide, so I'm not far out.

After this, bending started with the big wheels forming the metal around various pens until it looked about right. Then the sharp bend followed by more trial and error for the front. In reality, the mudguards are in two parts with the break where the sharp bend is. However the gap is tiny and it means when I add in the tiny angle fitted to support the front section, it can be purely cosmetic.

After which I just had to do it all again for the other side. Supeglue holds the metal to the plastic - the blobs under the lights aren't so obvious in real life and will vanish under paint later.

I know the cross-section incorporates some raised areas for strength but I reckoned I should stop bending while I was winning. Perhaps if I was soldering, I could have added thin wire for the effect but better go this far and be happy.


Now, I just need to go and measure the windscreen.

Wednesday, July 22, 2015

Lanz begins

Inside the expensive kit, there aren't that many parts. What there are rattle around in the big box!

Looking through, there are obviously several versions. In fact there is one with a sort of cab in the range. Mine has a powered saw arrangement on the back which I won't be using but handily, the power takeoff cover on the side of the engine IS in my kit. A bit of scratchbuilding saved - it's not perfect but near enough for me.

A few minutes work sees all the parts I'll need from the kit in use. Wheels are only pushed on, hence the lack of hubcaps. I need these to work out the size of the mudguards but they'll need to come off for painting later.

Bulldog beginnings

Tuesday, July 21, 2015

Lanz Bulldog

Lanz Bulldog

Years ago, I was writing about a man who restored vintage tractors for my novel. The character was based up someone I remembered from an old site visit in a previous employment. In the fictional world, his pride a joy was a prototype I'd never heard of until I joined the local model boat club.

The farmer who owned the land our pond is on collected tractors. The one that stuck in my mind was a Lanz Bulldog and when I needed a suitable steed for the chase that forms the exciting conclusion to the story, that was the name that stuck. Tractor fans will know that it's probably not the vehicle you chose for high-speed pursuit, but the novel is chick-lit so I'm gambling that no one will notice, and if they do, they will see the joke.

Anyway, in the book I've given the tractor a cab but the one on the farm didn't have one. Then, a couple of weeks ago, another Bulldog appears. Freshly restored and looking superb, it's exactly what I had in mind and when the film is made of my book, Hollywood will have to hire it.

This inspired me to dig out a plastic kit I bought some time ago to recreate the farm vehicle in my head. At 3.5mm to the foot, it's not very big. Even at half-price, it's scary expensive and the sort of thing you buy at the NEC when you haven't spent much cash over the weekend. It doesn't even look much like Bulldog I described, but hopefully it will make a good starting point.