Showing posts with label GWR diesel railcar. Show all posts

Friday, April 22, 2016

Flying banana?


Artist Andy  Evans follows this blog and sent me the image above as a potential solution to my railcar chassis problems. All I need is a propeller and a blimp and we are good to go. 

I admit, the idea appeals. The railcar becomes very Battlespace Turbo Car and that's never a bad thing.

Find this picture, and LMS alternative, and lots of other good stuff over on Andy's Wild Goose Website. 

Thursday, April 21, 2016

Diesel railcar review time

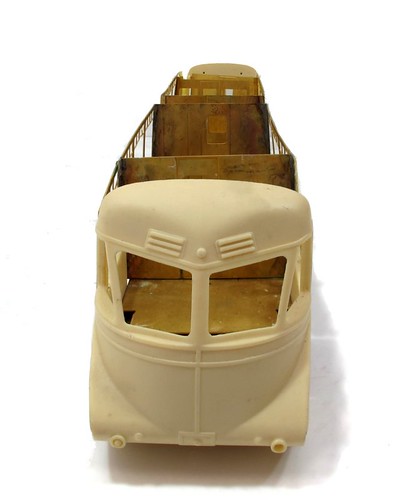
Railcar front

Time for a little railcar review. I'm having trouble with the kit, but is it just me? 

Apparently now. As far back as the second post in the project, someone helpfully pointed me at: GWR Diesel Railcar Saga where the builder assembled the kit but had to find a new bogie mechanism because the kit supplied version wouldn't work. I pretended not to notice...

Then some more digging around on-line threw up this thread on RMweb. It contains the classic phrase "Gateneal and finished don't often appear in the same sentence; well done!". The builder himself says "this has been the worst kit I have built yet" and mentions doubling the weight with body filler. Hmmmm.

To top it all, at the weekend, I am sitting with fellow club members in a pub and find myself next to someone building the same kit! He has also replaced the bogies and is struggling with the body. The super-fine window bars are currently causing problems, something I have to look forward to as those on my kit need attention.

I am not encouraged.

However, I'm certain the model can be built. All I need to do is work at it. I also need to stop beating myself up about a lack of progress. Perhaps a break on one of my other unfinished projects will give me thinking time. On the other hand, there is another idea. More tomorrow.


Tuesday, April 12, 2016

It doesn't touch the sides


Now, I'd expect the bulkheads around the luggage area to touch the sides, but it appears not. 

My sneaking suspicion is that I need to add the doors and these then fit in somewhere. Trouble is, working out where everything goes - there's no positive locations. 

The instructions seem to suggest holding the sides in position with the resin nose and then soldering things. Heat and resin aren't happy bedfellows so I'll not be trying that. Instead I'll be scratching my head for a bit...

Monday, April 11, 2016

Test fitting the nose

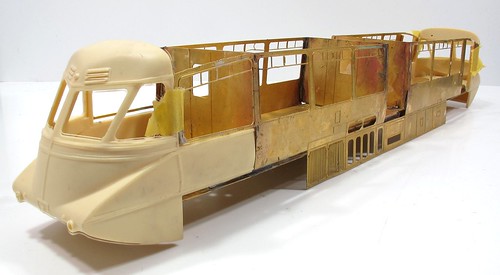
GWR Railcar nose test fit

With both etched sides fitted, it's time to see if the noses will go on. There's a little work to carry out removing excess resin but pretty quickly, the first end plugs in place.

The windows fit perfectly, the tumblehome is going to take a bit more work. Although the sides are well wrapped around the bulkheads, there join isn't prefect.


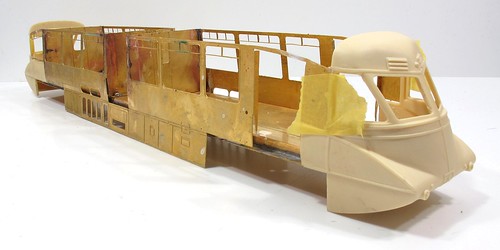
GWR Railcar nose test fit 2

At the luggage end, things are a bit more vague. With no bulkhead to hold the sides in place, the nose fits but I can't honestly say I'm certain it lines up. I don't understand the lack of bolt-in bulkheads, it's like the designer started at the other end and got bored after the centre doors.

It's pretty obvious there isn't any chance of me finishing this before the weekend but I'll plough on, albeit with a little less pressure, as this is a good looking model. Or it will be. Hopefully.

Saturday, April 09, 2016

First end fitting


Well the bulkheads were all fitted back to front, but then there's not indication which way round they go until you try the side in place. Not a problem, just a few minutes spent fiddling with nuts and bolts. 

The sides fitted OK on the bulkheads but there is a gab above the spaces were the bogies will go. On early railcars this was all covered with fairings but in BR days these were left off to improves access. Trouble is you can see the bottom of the floor. 

Is this right? Well all the photos in books and on-lie are murky in this area. The chassis would be seen but on the prototype the spine is a lot narrower than on the model. It doesn't step back like the model does either. I suppose I can paint it black and hope no-one notices but I'm not convinced. I have a feeling that the kitmakers assumed everyone would fit the valances and didn't think beyond this. 

Hmmm.

Friday, April 08, 2016

Make your sides look like a fat man


"Form a slight tumblehome" say the instructions. I wasn't looking forward to this bit. 

Tumblehome forming is something I've managed to avoid so far in my modelling career. By studiously not building any coaches, I've not faced trying to put a gentle but accurate bend in brass sides. A job that if you get it badly wrong, can ruin your kit. 

Looking at the profile of the partitions, the shape required is that of a fat bloke wearing a tight t-shirt in profile. At the top, the side is straight but further down there is a bulge. 

With no real idea if this would work, I stuffed each side in the GW Models rolling bars and introduced a gentle curve into the main panel. Fortunately, there is sufficient space in the centre doors that I can do this in two halves - the whole side is longer then the bars. Well no-one told me I'd be building O gauge coaches when I bought them did they? 

Anyway, a gentle curve looks about right and they sort of match the partitions. Hopefully a bit of pressure will bring everything into line once soldering starts. 

Thursday, April 07, 2016

Does my plan have a floor in it?

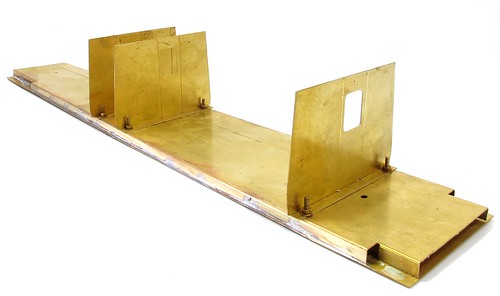
Railcar floor

Before I make any further progress with the bogies, it would help if I got my head around the "big picture" of this build.

Some kits provide you with an exploded diagram which helps the modeller understand how all the parts relate to each other. Not so here. We have a single, double-sided, sheet of A4 with lots of text. In three different typefaces.

I thought I ought to try to understand how the body goes together so I can work out the correct height for the bogies. The work starts by soldering two great big slabs of brass together using the gas torch and lashing of Powerflow flux. Work isn't helped because the bits to be bent down have the lines etched on the wrong side so end up fractionally larger than required to drop into the half-etch line on the lower floor.

Next, the bulkheads are bent and bolted to the floor. I've guessed which way around the go although I know where the toilet door is - it's etched on the upper floor. These stay connected with bolts so the sides and roof can be released from the finished model. Nifty.

Tuesday, April 05, 2016

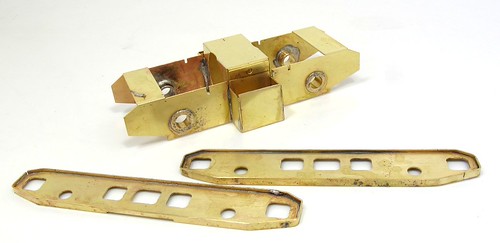
Railcar bogies part 1

Railcar Bogie Bits

According to the box,this kit complies with the Gauge O Guild Code of Practise CP1 for the content and quality of model railway equipment kits. 

Interesting. The code presumably doesn't cover holes for wheelbearings then. These are 2mm oversize.

Undersize I can deal with. Oversize is more tricky involving lots of soldering, poking, soldering and checking to make sure the thing will sit flat.

This is after I find the minimal instructions mention that the original design has the buffers sit 4mm too high in an effort to get the model around 6 foot curves. An alternative construction method is suggested to sort this out but I couldn't make much sense of it.

Finally, the sideframes - soldering these in place is fine if you don't mind trapping the wheels.

So, I'll work out my own pivot arrangements and have provided a large area for the sideframes to be glued in place after the wheels go in and painting.

The second bogie should be much quicker to build...

Monday, April 04, 2016

Crazy railcar project?

Railcar Kit

In 13 days time,we have a club trip to see Pete Waterman's model of Leamington Spa. I've been a couple of times before and it will be interesting to see how the model is progressing. That and it's always fun to see a model of somewhere you know so well.

One of the comments made is that no-one seems to take any stock with them to run on the layout. This is true, I don't recall anyone taking a loco with them in the past.

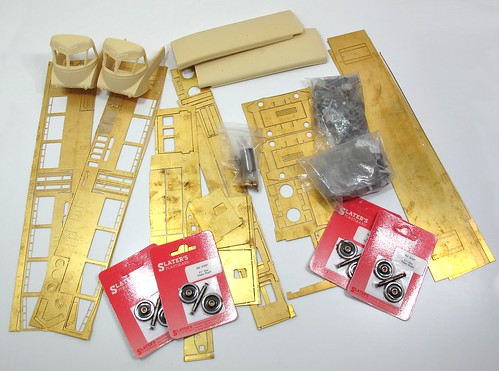
However, in my stash, I do have a kit for something that I've always wanted to pose in the bay platform of Leamington station. A GWR railcar.

This Mega Kit was bought second hand several years ago for a reasonably bargain price. I entertained ideas of building the model and then selling it for a mahoosive profit. However, as realistically, this won't happen, it's lain in store for years.

The feature that attracted me to the kit, apart from it being a prototype I really like the look of, was the fantastic 1-piece resin ends. This should take much of the hard work out of building the model. Apart from this, there are some big bits of brass and a load of castings.

Can I build it in time for the trip to Pete's? Dunno, but it will be fun to find out.

Railcar Nose