A daily updated blog typed by someone with painty hands, oil under his fingernails and the smell of solder in his nostrils who likes making all sort of models and miniatures. And fixing things.
Showing posts with label Layout in a box. Show all posts
Wednesday, July 01, 2015
Slumbering P Class
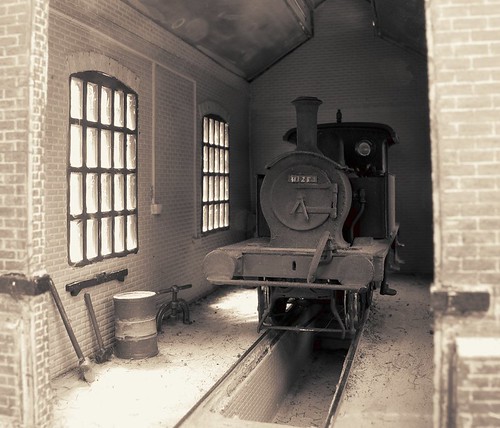
Poke your head inside the engine shed at Melbridge Parva and you might find a P Class locomotive awaiting its next duties. Perhaps it will feel fire in its belly today, or maybe it has been left to be discovered one day in the future by the preservation movement.
Thursday, July 14, 2011
Point lever mistake
When I built Melbridge Parva, I thought that as an industrial yard, the points would be operated with levers rather than from a signal box or even ground frame. This wasn't a problem I thought, just make up a little plastic base with the lever stuck to it. Fit this to the side of the points and all will be fine.
And it was, right up until I tried running a locomotive.
The loco stalled on the tiebar. Another attempt with the controller wound up higher saw the model leap off the rails. Closer inspection showed that the connecting rods were clipping the point levers as it passed. Bending the lever to the side cured the problem - sort of.
At the show I thought I'd get away with this, right up until I ran a loco with side skirts. These not only clipped the bent lever but actually managed to break it away from the base and deport the top end a few inches up the line.
The solution as any fule know, is to do the job properly. The sleepers either side of the tiebar should be extended and the lever fitted to this. In real life that's what happened, presumably railway companies worked out that the rod/lever collision wasn't healthy for either.
Saturday, June 25, 2011
Electric spaghetti
There seems an awful lot of wire under this tiny layout !
In an effort to keep things simple, I've done my best to colour code everything. Red and black wires are for track power. Blue and white change the points and yellow is the common return that completes the point control circuit. These last colours have been the standard scheme on my model railways for a few years - partly because it makes things easier to remember but mostly thanks to three drums of cable in those colours I was given many years ago...
At first glance, this looks complicated but it's really just repeats of the same circuit. Each point has three wires - a common and one for each directions. Track feeds are duplicated so the power goes in at the toe end of each point. There also a bit of wire on the point motors to switch the frog polarity - something you don't need for RTR points.
The electronic dubrey at the bottom of the board with two "tubes" is a capacitor discharge unit. It's job is to take 16V AC and store it up. When the button is pressed to throw the point, the CDU supplies a big jolt of electricity which makes the solenoid action more positive.
Finally the wires are stuck to the board bottom with glued strips of paper. I know you can get proper clips but the board surface is too thin for nails and screws. Self-adhesive clips always fall off the wood after a few months. Gluey paper has lasted for 25 years on one layout so I think I'll stick with it.
Friday, June 24, 2011
The plan for the panel
Before I start, perhaps I should quickly explain my plan for the panel on Melbridge Parva. If I were a management consultant, you'd have to pay thousands for this bit but since I am a nice person (sometimes) instead, here it is for free.
All of the layouts I've build since I was about 14 have been designed to be operated from the back. The reason is simple - when I exhibit a model railway, the audience is at the front looking at the display and I am at the back, making it all happen. I know there is a fashion at the moment for operating the layout from the front but I don't hold with this for a couple of reasons:
- The operator has to sit at the end of the display so he's trying to spot the uncoupling magnets at an oblique angle which is at the very least frustrating and possibly layout smashingly annoying.
- They can't help but get in the way of the viewers at some point.
- Since space has to be allowed along the front of the model for operator access, and since I'm a chubby chap, this puts the audience further away from the stuff I've built and makes it harder to see.
- Occasionally we get people in front of the layout who consider are a stranger to soap and I want to be as far away from them as possible. We don't get extra expenses for olfactory damage !
I wouldn't bother with all of this for a larger model, or one intended for use as a "proper" layout rather than an adjunct to a demonstration stand. Then I much prefer to build the unit into the baseboard. It's more reliable and involves less plugs and sockets.
Of course there is still one issue with this plan. Where will I put my mug of tea ?
Thursday, June 23, 2011
Wednesday wiring
Wiring.
You see, I had a deadline for publication. I was also about to start a new job which was going to munch up my time like I consume chips after a night in the pub. Something had to give and that something was the bits that would make the trains work. The photos were to be static after all so I didn't actually need to make anything move. If I didn't mention it, easy enough when you've been asked to write about constructing the above board stuff, then who would notice ?
But now I face an appearance at Hornby Live in a few weeks and think that part of the display should be the layout in the annual. So I better make it work.
Things aren't so bad. I made the control panel and even the leads that will run to it. I must have been having a good day as these wires are super-flexible silicon covered things, not cheapo stuff. A SCART plug and socket is in the "to do" box of bits along with a DIN plug for the transformer feed (that is where I plug the power in, not sustenance for robots in disguise). The point motors are fitted and the frog polarity switching is in place. I just need to join all this lot up and make it work.
How long can this take ?
Wednesday, December 08, 2010
Details, details
Tidying up the other day I found some detail parts I didn't get around to fitting to Melbridge Parva.
For the end of the warehouse platform there is a set of steps. This solved the problem of miniature people having to jump down to the ground and then being unable to get back up. In real life these would probably be made of brick but I'll assume that the builders didn't bother and improvised with some wood. Not that I forgot. At least Plastistruct made fixing the problem easy.
Under these is a wheelbarrow. I haven't glued this down as I don't think it fits in - there's no track where people have walked and you'd need to bump it over the rails. A wheelbarrow is a fine thing but I can't see why one would be here. I made up the detail from a CooperCraft workmans set of tools kit and this does provide quick and easy detail but on a micro layout you have to be selective and in this case I'm selecting not to use it.
Saturday, November 27, 2010
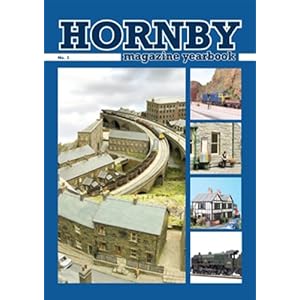
Hornby Magazine Yearbook No.3
Last Saturday I picked up (and paid for you will note) a copy of this years Hornby Magzine Yearbook. As usual it is an excellent mix of quality articles, two of which are by me.
The first is a couple of pages on wagon tarpaulins. These aren't difficult to do so they will hopefully lead to a few people starting modifying their models. Open wagons spent a lot of time covered up in the real world, but on models they travel around carting empty space up and down the country. No wonder the railway companies went bust.
Article two is much bigger. Melbridge Parva hits the pages in glorious technicolour. It looks fantastic and because I was able to photograph the construction process, gets full coverage. In fact I suspect that the page area devoted to it is greater than the area occupied by the model itself. The photos have definitely been printed bigger than life size !
Elsewhere there are layouts and "How to" features. The quality of the images is particularly strong with some that made me stop and stare as I looked through. Good Christmas reading for modellers again.
Buy the book from Amazon.
Hornby Magazine Website
The first is a couple of pages on wagon tarpaulins. These aren't difficult to do so they will hopefully lead to a few people starting modifying their models. Open wagons spent a lot of time covered up in the real world, but on models they travel around carting empty space up and down the country. No wonder the railway companies went bust.
Article two is much bigger. Melbridge Parva hits the pages in glorious technicolour. It looks fantastic and because I was able to photograph the construction process, gets full coverage. In fact I suspect that the page area devoted to it is greater than the area occupied by the model itself. The photos have definitely been printed bigger than life size !
Elsewhere there are layouts and "How to" features. The quality of the images is particularly strong with some that made me stop and stare as I looked through. Good Christmas reading for modellers again.
Buy the book from Amazon.
Hornby Magazine Website
Sunday, November 21, 2010
Warley Saturday
Who knew cardboard buildings were so interesting ?
I'm more than a bit tired after spending the day explaining how wonderful SuperQuick kits followed by an excustion into scratchbuilding. Many people have now handled the lump of Daler Board we brought along and marvelled that its smooth, cheap and easy to use. Hopefully some will have even been inspired to go out and have a go at their own projects.
Lots of blog leaflets disappeared, so if you are visiting for the first time, it was nice to see you at the show. On the right hand side (scroll down) under Labels, you will find the categorised posts. Click on a category and you'll get to read the story of that model. Admittedly this will be backwards (last posts first) but you'll get the idea.
As a start, here are the posts for the little layout, Melbridge Parva, which was on the stand.
More photos from Warley.
I'm more than a bit tired after spending the day explaining how wonderful SuperQuick kits followed by an excustion into scratchbuilding. Many people have now handled the lump of Daler Board we brought along and marvelled that its smooth, cheap and easy to use. Hopefully some will have even been inspired to go out and have a go at their own projects.
Lots of blog leaflets disappeared, so if you are visiting for the first time, it was nice to see you at the show. On the right hand side (scroll down) under Labels, you will find the categorised posts. Click on a category and you'll get to read the story of that model. Admittedly this will be backwards (last posts first) but you'll get the idea.
As a start, here are the posts for the little layout, Melbridge Parva, which was on the stand.
More photos from Warley.
Sunday, August 08, 2010
What's in a name ?
Naming anything is difficult. Parents can spend hours on the subject yet there are still plenty unable to do better than call them after characters in soap operas. I'm writing a book with a friend at the moment (it's fiction so nothing to appear here, however if you are a publisher or agent who fancies something a bit Tom Sharpe-ish though, then please get in touch...) and we haven't got down to the thorny topic of a title. Over 40,000 words down and we're both ignoring the half a dozen on the very first page. Because it's going to be difficult and we hope that something witty and obvious will occur to us.
Anyway, naming layouts is also difficult. If you built a model of a prototype then the decision is made. You just have to hope you got everything right or some twonk will recognise the name, know everything about the real thing having spent all the time they should have been engaging with soap researching the subject. Once they spot you the floodgates will open and spewing forth over the model will come a tidal wave of information and halitosis. Woe betide you if you made any minor mistakes.
This is why I've shied away from modelling the real thing. Even my closed call, The Hellingly Hosptial Railway, is described repeatedly, by me, as a cameo not an accurate recreation. Ask nicely and I'll happily tell you where the mistakes are. Try to engage me with a diatribe about how the area should be tarmaced as you clearly remember it and you'll be firmly put in your place. For a start the model is set in 1900 and you don't remember that date. Secondly the roads nearby didn't get a hard top until the 1950's, I have photos to prove this, so it's unlikely that they did a yard in the hospital 50 years earlier. But I digress.
So far, my layouts have been set in fictional places. Flockburgh is completely made up. Melbridge comes from the film "Random Harvest" and is the town where much of the action happens. Nicking a town name from a film was a lot easier than making a convincing one up. It also means some people think they know the place when of course there is no way they could.
Anyway, this brings me to the point in hand. The model railway that has been known as "The layout in a box" needs a name. I wanted to include "Melbridge" in it and since "The Melbridge Box Company" already exists, more imagination was required.
True to form, this failed me so a message was posted on the DOGA e-mail forum and resulted in a number of suggestions within a day:
Anyway, naming layouts is also difficult. If you built a model of a prototype then the decision is made. You just have to hope you got everything right or some twonk will recognise the name, know everything about the real thing having spent all the time they should have been engaging with soap researching the subject. Once they spot you the floodgates will open and spewing forth over the model will come a tidal wave of information and halitosis. Woe betide you if you made any minor mistakes.
This is why I've shied away from modelling the real thing. Even my closed call, The Hellingly Hosptial Railway, is described repeatedly, by me, as a cameo not an accurate recreation. Ask nicely and I'll happily tell you where the mistakes are. Try to engage me with a diatribe about how the area should be tarmaced as you clearly remember it and you'll be firmly put in your place. For a start the model is set in 1900 and you don't remember that date. Secondly the roads nearby didn't get a hard top until the 1950's, I have photos to prove this, so it's unlikely that they did a yard in the hospital 50 years earlier. But I digress.
So far, my layouts have been set in fictional places. Flockburgh is completely made up. Melbridge comes from the film "Random Harvest" and is the town where much of the action happens. Nicking a town name from a film was a lot easier than making a convincing one up. It also means some people think they know the place when of course there is no way they could.
Anyway, this brings me to the point in hand. The model railway that has been known as "The layout in a box" needs a name. I wanted to include "Melbridge" in it and since "The Melbridge Box Company" already exists, more imagination was required.
True to form, this failed me so a message was posted on the DOGA e-mail forum and resulted in a number of suggestions within a day:
- Melbridge Sidings
- Melbridge Wharf Shed, since railways & canals kind of lived together
- Melbridge 38E, or whatever shed code you fancy
- Melbridge Depot
- Melbridge Loco
- Melbridge Croft, meaning waste ground in some local usages
- Melbridge East
- Melbridge engineering
- Melbridge brewing co.
- Melbridge End
- Little Melbridge
- Lower Melbridge
- Melbridge Goods
Melbridge Parva
Labels:
Layout in a box,
model railway,
Random thoughts
Saturday, August 07, 2010
Lumpy undergrowth
One packet contains a sort of netting that you use to support leaves on tree armatures. I'm not sure what it is made of but the consistency is like non-sticky candyfloss, just not as tasty. In use it's teased out and stuck in place with some PVA. Then some puffer grass is fired it at. To finish the job it gets a coat of hairspray and a sprinkle of various flocks.
I'm not actually sure what I'm modelling here - probably a sort of low lying bush thing. What I am sure is that I've tried to walk through these in the past so they do exist. Botanists can fill in the details via the comments page please.
Friday, August 06, 2010
The beige, green grass of home
Nowadays we can be a little more sophisticated. Static grass is all the fashion - little nylon fibres charged with electricity standing up properly. I built myself a device to do this some time ago and it works very well. What it doesn't do is shoot fibres into corners. For that the trusty Heiki puffer bottle is required.
In theory, the polythene bottle imparts a charge to the fibres as they are blown through the holes in the cap making them stand up as required. I'm not convinced as the power of puff tends to overcome the static, although if you do some careful vacuuming afterwards you can sort this out apparently. What you do get is grass in every crevice (on the layout, stop sniggering at the back) which looks OK to me.
Wanting some dense undergrowth I then shot cheap hair lacquer over this and drifted on some flock. which gives a real unkempt look to my waste ground. I've even sprinkled a few little flowers in to pretty things up a bit.
Thursday, August 05, 2010
Groundworks
First up, ballasting. Not wanting anything coarse or resembling the mainline, I've used sawdust with a little bit of granite mixed in it. The result is lovely and fine but with just a hint of texture. The mix was applied dry and stuck down using the traditional PVA/water mix with a drop of washing up liquid to break the surface tension. Some brown powder paint would have been a good idea too. Since I didn't think of this when I was actually anywhere near somewhere that sold said paint, it will remain a good idea.
Between the track a few lumps and bumps are courtesy of a tube of Wilkinson ready mixed decorating filler. What they would call Pollyfilla but can't for trademark reasons. Applying this is like icing a cake, albeit with something a good deal crunchier. Based on these results, I'm not going to be competing with Jane Asher in a hurry. Not to worry, a bit of smearing around with a palette knife and the basic lumps are OK.
For colour I used Greenscene textured paint. It's a hell of a lot cheaper than Tamya's version and just as brown and gritty. Once dry some matchpot emulsion in various shades of brown (they don't actually call it brown bit it is) got splodged on and mixed.
Finally the track was sprayed with Precision underframe dirt. I started doing this with a paintbrush before realising that even allowing for set up and cleaning, it was a lot quicker to use an airbrush. Better still would have been an aerosol, but I forgot to buy one of those too.
Wednesday, August 04, 2010
Herding cats
Has anyone actually tried to get a cat to pose ?
No, well don't bother. My cunning plan involved putting a few treats in the bottom of said box, waiting for them to sit up from chomping and taking a picture. What could go wrong ?
Well, how about they hop in from the side nearest me and instead of aligning themselves along the length of the container, the little horrors dived into the goodies giving me a fine view of their back ends. As Barrie Cryer would say "That reminds me, I need to sharpen a pencil." The number of publications requiring photos of cats bums is very small and mainly consists of specialist websites.
Fortunately they are greedy little beggars and eventually I persuaded Splodge to sit up, although as you can see he managed to get his own back by licking his nose as the shutter clicked !
Tuesday, August 03, 2010
Felt roof
I'm sure I've seen this done before in model form but for the life of me I can't remember it. Some of the Wills kits have it I think but that doesn't help me much.
Now I'm acquainted with the felt roof having recovered a few sheds in my time. I know from painfully hanging on for dear life that it's a stoney finish but one with little in the way of texture except when you are very close. Certainly in 4mm:1ft scale I wasn't likely to need much.
My plan was simple - masking tape. It has a very fine grain which I hoped would look like distant felt. Best of all, being self-adhesive, application would be a doddle. It just has to be stuck down with something like a 2mm overlap.
What I did forget is that felt isn't grey. It's a sort of greeny colour and my black dry-brushed with dark grey isn't really correct. I might get the dry-brush out again or perhaps some weathering powders would be a better bet.
Monday, August 02, 2010
Shed interior
Since the shed has plenty of ventilation I've resisted the urge to paint the inside black. Locos wouldn't be in anything other than light steam when going in and out of the building so if there was anything coming out of the chimney it wouldn't have very much soot in it. For the same reason there isn't an enormous blast pattern over the door top - you only get these when the engine is working.
Using my pencil crayon method of colouring the brickwork went well. The faces aren't as pronounced as those on the Slaters version but they still picked up the colour OK. Special efforts had to be made on the angled ares above the stepped out bits at the bottom (can someone enlighten me to the correct technical phrase ?) but a sharpened pencil seemed to do the trick.
Saturday, July 31, 2010
Short shed door
The shed doors are desperately short. Not a little short but the sort of half mast normally only seen on old men who feel the need to reveal their socks by having a great big gap between shoe top and trouser hem.
The other door has a person sized door in it and I wonder quite who would be able to leap three feet and make use of it. Presumably someone who can't simply roll under the closed shed doors.
Anyway, faced with the opportunity to make some new doors, not a particularly difficult job I suppose, I have decided to leave them off entirely. In BR days maintenance, especially on an out of the way shed, wasn't brilliant so I expect that once the hinges packed up the doors would have been dumped behind the shed to get them out of the way. That's before being burned in a brazier to keep shed staff warm in the winter !
Friday, July 30, 2010
Loco inspection pit
I toddled down to Hither Green depot and sweet talked the guy in charge. I measured the pit to be 3' 6" deep.bottom to rail head.
So there we have it, in 4mm scale 14mm.
My pit has to be inserted from the bottom of the board so I cut some brick plastic to the right size and then made shorter Daler board walls and floor to cover the bits not in the woodwork.
Steps at the end were scratchbuilt from plasticard. They are a bit rough but hidden in the shed no one will notice. Step making is fiddly but easier here. I cut the sides and stuck them to the pit sides then joined them with strips of thin (0.5mm I think) plasticard and lots of solvent to weld the whole lot together.
And I did remember to check the construction fitted in the hole. It did with only a little extra filing...
Thursday, July 29, 2010
Engine shed part 4 - Roof and detailing
I appreciate that I've deviated from the kit instructions quite a lot by cladding the interior with brickwork and sometimes this has got in the way of the location aids provided, but I hadn't expected to have to reduce the height of the sloping parts of the back wall by a couple of mm to get the roof sitting flat. In hindsight I think the idea was that the tiles overlap the front and are flush with the edge at the back, but that would just look stupid to me so I hacked away at the wall to fix it. The results look pretty nice to my eye.
To get a nice fit I worked from the top down. The ridge is a nice strong moulding and once it's glued in place, fitting the vents is easy. On their own they aren't awfully strong but once attached to the top, this braces them up nicely. Finally the main tile panels go in and the roof is done.
Lower down, the windows have gained some chad toppings, why this wasn't part of the original moulding I don't know, and a cill appears at the bottom. Around the door the working hinges have been replaced and faux metal straps fitted over the holes. With my a little more thought, I might have decided to leave them alone as a little thinning might have been enough. On the real thing this is pretty chunky metalwork as it needs to be to support those heavy doors.
Finally, the huge moulding marks on the doors have been skimmed with filler and then give an good sanding.
Wednesday, July 28, 2010
Engine shed part 3 - Windows
Airfix supply some reasonable mouldings which are intended to fit from the inside. There is a flange around the edge to stop them falling out. If you look inside it's horrid but then when this kit was designed, that was the realm of super detail so no one bothered. I am fitting an interior so this at least had to be removed.
Test fitting showed I was going to have to thin the moulding down by nearly 2mm before it fitted in the hole flush with the inside and slightly inset from the outside. A 6 inch course file did most of the work with finishing off on a sanding block fitted with fine paper. This process makes a surprising amount of mess, but it's worth the effort I think.
Tuesday, July 27, 2010
Engine shed part 2
For those who don't understand brickwork, the way the things are laid is called the "bond" - you can read more about it on Wikipedia here. Most railway buildings use what is called "Flemish Bond" where you see a mix of stretchers and headers (the sides and ends of the brick). The Airfix shed uses stretcher bond, a form more commonly seen on modern cavity wall buildings and never as far as know seen on engine sheds.
Worse the bricks are too big. They are probably suitable for S scale but not 4mm. Still, I can't change them now even if I could be bothered. Just goes to show though that not everything was better in the old days.
Anyway, I pondered this problem and decided to ignore it. Inside the shed will be 4mm scale Slaters Flemish bond bricks. &mm ones were considered but are just too big to match the outside. OK so they won't match the outside but I can't be bothered to worry about this and doubt that many people will notice anyway. Except you lot and that's only because I told you.
Subscribe to:
Posts (Atom)