Showing posts with label Caledonia. Show all posts

Friday, July 01, 2011

Powered Caledonia chassis

Chassis with motor

The chassis works, the gearbox works. Time to bring them together.

First, any bearing inside the chassis frames has to be filed away so the 'box will slip in to place. Then there was a bit of fiddling around to get all the holes (2 frames, 2 gearbox bearings and the final drive gear) lined up so the axle would go through.

A quick test and the wheels rotated nice and smoothly. I always carry this out using an H&M controller as the lack of sophistication shows up tight spots with a feedback controller might overcome.

Then the rods go back on. You can see the horrors in the crank pin areas - those holes should be round not oblong - but it still worked. Pedants will also spot the rods are back to front. They work better this way despite the original jig being set up with them the correct way around (I checked, I really did. Several times). It doesn't matter, the thing runs acceptably well.

Finally I've fitted pickups to the rear 4 wheels. This is a live chassis model, that's why one of the motor terminal is covered with insulating tape, so only one set is required and these are 28swg phosphor bronze wire attached to veroboard bolted to a frame spacer. I'd like to say that I only did 4 as this will highlight electrical "issues" better than if all 6 wheels were grabbing electricity, but the truth was I couldn't be bothered to do the front pair. I'll sort this out later. For the moment the chassis is good enough for track testing.

And testing it did. Back and forth over the longer point crossover without any problems. No lumps or bumps or stalling. I wish the Isle of Man had bought more of these things rather than the more complex to build 2-4-0's !

Thursday, June 30, 2011

Branchlines Romford Slimline Gearbox

Branchlines GearboxI've always had a love-hate relationship with gearboxes in model locomotives. On one hand I can't mesh gears for toffee, on the other, making the gearbox work can be a real pain in the backside if the etcher hasn't done their job properly.

Branchlines boxes are usually better than most and it's rare the motor mounting holes have to opened out to increase the separation between the gears unlike some I've built !

This one is designed to take (supplied) Romford 40:1 gears and an open frame Mashima motor. Construction is simply a case of bending up the sides and fitting the super-slim axle bearings. As you can see I popped a jig-axle through these to keep them square. A touch from the reamer was needed to accept these

Once the metal was cleaned and dry, the motor was screwed into place, work gear fitted and finally the axles and final gear inserted. With a bit of power, the whole lot revolved beautifully first time. Very satisfying.

Tuesday, June 28, 2011

Jigging the Caledonia chassis

Chassis on jigI'd hoped that the chassis construction for Caledonia would be quick and simple. It's got 6 wheels and I wasn't planning on any of that fiddly compensation stuff, so how hard could it be ? Better still, if I stuck the thing on the Hobby Holidays jig, assembly ought to be a matter of a few minutes work ?

Wrong.

First up I laminated the rods. These are very thing in places as per the prototype. No complaints there although I suppose the tags holding them to the etch could have been a bit thinner.

Then I used these to set the axle positions on the jig. The holes were too small for the ends of the jig axles but I reckoned I'd got them set properly anyhow. Despite this I had to move one axle bearing over 1mm inboard by filing the ole out a bit. At least the jig kept things flat I hoped.

Then with the wheels fitted, I tried the rods. They bound. OK, so try one pair of wheels at a time. After lots of hole opening I managed to get these to rotate. Then the third axle. More hole opening. At the ends of the rods, the holes are oval slots rather than round.

The chassis now runs when pushed along the bench but I have a nasty feeling that a new set of rods will be required to get it moving under power. What I can't work out is where the problems come from. Did I set the jig up wrong ? Is there a problem with the kit ? Was I just having a bad day ?

Monday, June 27, 2011

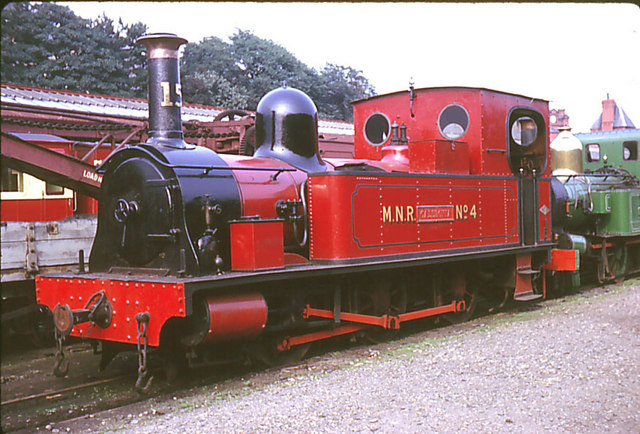
Caledonia

Caledonia Kit

One benefit of building a model railway based on the Isle of Man is you know what your locomotives are going to be. There will be two types - 2-4-0 Peacocks and one 0-6-0, Caledonia. I have a Peacock chassis so it seems sensible to build the other one as well. That way we know our track-work will be suitable for all the chuff chuffs.

Branchlines produce a kit for Caledonia. It's mixed media - nickel-silver for the chassis, whitemetal for the body and cast brass for a lot of the detail parts. Mechanical bits are a Tenshodo motor, Branchlines gearbox and Romford wheels.

Frame spacersThe chassis is designed to offer loads of options. Obviously you can work to the correct 12mm gauge but if you fancy an outside frames 009 model, this is catered for as well. Too well in my mind actually as the frame spacers have to be modified by snapping excess off the sides. Fine, except you then have to file the leftover half-etched metal away too which, if carried out too enthusiastically, will alter their width and therefore the width of the frames.