Showing posts with label O gauge. Show all posts

Friday, November 20, 2020

A quick fireman


With a BRM TV filming session lined up, I had an idea for one piece that would need a painted figure. 

7mm scale people work better on camera and a quick dig in my stash found a S&D Models Fireman wearing a cap (OF24). He needs his arm and shovel attaching with superglue and is then ready for paint. 

A quick shot of primer to check the attachments looked OK was followed with an evening of hurried painting - yes, I'd left it to the last minute. 

Skin tones are Humbrol flesh dry-brushed with Revell's version. Various greys on the clothes also got the dry-brush treatment. Working fast blends the colours which is great, but that wasn't the reason I was doing this. 

The whole job took an hour, I'd have been faster with acrylics but didn't have the shades to hand, so there was a bit of dangling the figure over the radiator to get the paint to harden a bit. I know it says to wait 8 hours before overpainting, but sometimes I don't have that long. 

Looking at Facebook, I believe I'm supposed to say "It's not great but..." but I'm not. This little man is OK and absolutely fine for the job I needed him for. One day he'll find his way to a loco footplate, but building that model is a long way away!

Tuesday, June 04, 2019

Done for now.

Couplings and buffers on, I'm going to stop work on the wooden ballast wagon at this point. I could give it a coat of paint, but that would hide the lovely wooden body and you'd not be able to tell it from a plastic kit model.

One day, when I have a layout for the model to run on, I'll finish the job, but for now, I like it how it is. Am I the only one who likes looking at a well-built brass model without paint?

It might seem silly to have splurged cash on saving a £1 refuge from a second-hand stall, but I've terrific satisfaction from doing it, which is the point of the hobby I suppose.

Now, what do do with the leftover van body. One for another day...

Tuesday, May 28, 2019

Wooden wagon rescue

Show me a box on a second-hand stall containing a 7mm scale wagon priced at a pound, and it's probably coming home with me.

That's especially true when the wagon is a beautifully scratch-built model made of wood. Someone has expendended a terrific amount of time and skill on this model. Presumably, they have then died and when the stash of models was cleared, this one ended up in a little cardboard box among a load of other stuff. People were so interested, it was still there on Sunday at a busy show.

I'm a sucker for this sort of thing and feel I have to rescue the model. I can't see all that effort thrown away.

What you see though, is what I got for my quid. I needed more parts to finish the project. 

Walking around the show, I managed to buy some wheels and buffers, but axleboxes eluded me. Not to worry, the second-hand stall also featured some tatty stock and for 4 quid, I bagged a banana van with one set of wheels and a dented roof.

Total cost - £30. To save a £1 model. You probably think I'm mad. 

Saturday, April 12, 2014

Finished Fowler

Finished Folwer Front

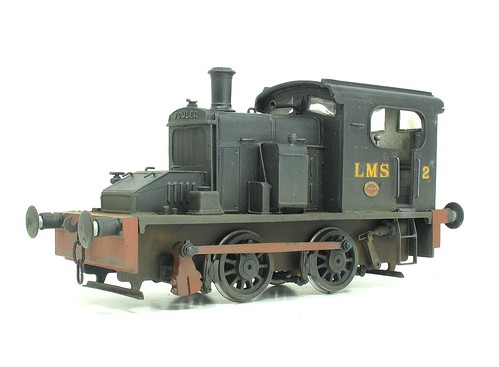
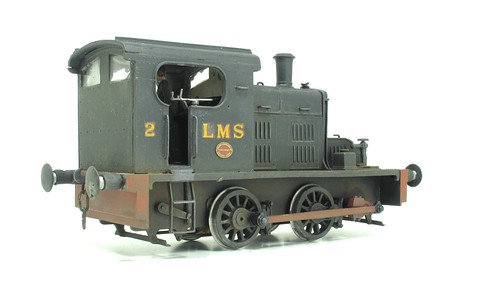
Finally, after over 15 years ownership, my Fowler diesel shunter is finished. The black bodywork has been washed with brown to give those lovely mucky nooks and crannies, then dry-brushed with dark grey to simulate highlights. After this a gentle airbrushing with some earth, dark grey and track colour blended everything together. A light dust of powders just finished the job.

Glazing is Krystal Klear. Plastic would probably have been better but you have to cut it to fit the rebates before glueing the roof in place. This looks OK though even if it was a pain to do.

A driver leans on the controls. I've positioned him so he looks out of the side as though planning to look forward or backward at any moment, well it is a shunter and I think this is better than reversing while looking out of the front. Anyway, he settled like that and the glue dried and I decided he looked pretty good.

All in all, the Eric Underhill kit is very nice indeed. At 615 grammes, it won't need any extra weight to keep the model in the track. It could probably out-drag one of those Ixion upstarts too. Mind you, I didn't anticipate their existence when I bought this!

Finished Folwer Rear

Monday, March 10, 2014

Farewell, Clayhanger Yard

Clayhanger Yard - Last trainBack in late February, I mentioned that my 7mm scale layout, Clayhanger Yard was for sale. At Kettering show, I was made an offer and accepted it. The buyer was keen enough to borrow a packing end board first to make sure it would fit in his car.

The plan was for the new owner to collect the layout after its final show with me, Leamington Spa last weekend. This happened and now the model has a new home.

It's very possible that Clayhanger will return to the exhibition circuit in the future, probably 2 feet longer than it was when I owned it.

Before handing the model over, I took the time to run a last train.

From the stock box, I selected the big, green, Barclay diesel. While not in period for the model, it was the first locomotive to run on the layout.

Behind this we have a wooden wagon with "Parker" painted on the side. Bringing up the rear is my GWR van with a apparently torn roof canvas.

This train ran around the layout, collected a couple of 1 plank wagons, and left for the fiddle yard leaving the layout empty of stock. After this, the lights were switched off, layout packed up and loaded into a new car.

Farewell, Clayhanger Yard. I hope to see you again one day.

Thursday, March 06, 2014

Cab steps

Fowler StepsWithout the instructions, figuring our the cap steps is a challenge. The prototype photos show them clearly but I could only find the sides and one tread on the etch.

Worse, the tread appeared too wide for the folded up steps.

Never mind, a strip of brass was cut using the Olfa cutter and then trimmed to length with scissors.

Using chip forks and wooden stirrers to hold the bits in place, a few dots of solder fixed everything together.

I like the large glueing area at the top - this makes it far easier to stick them in place. Hopefully that will make fitment reasonably robust, if not, well, hopefully the superglue join will break before the steps bend.

Wednesday, March 05, 2014

Grab rails and handles

Fowler Body TopChassis assembled, it's back to the body.

Not much to do here for finishing touches. Most of the work was drilling 0.7mm holes to fit grab handles on the bonnet and cab side with superglue. At the front there are 4 handles which I made out of the same wire.

Pedants will probably tell me they should be different thicknesses from each other - I'd reply that the difference in size on the model would be tiny, Anyway, finishing the thing for Clayhanger Yards final show is more important.

The cab front is fitted with a honking great horn as the LMS were different from the Great Western in their realisation that modern motive power shouldn't sound the same as steam engines. I like the look of the trumpet anyway and might have fitted it regardless of the adornment of the prototype.

Tuesday, March 04, 2014

Fowler Brakes

Fowler BrakesIf the Pug blogged yesterday was a case of, "fix it to last the last few days of owning an O gauge layout", then the Fowler shunter is, "Finish building it before you don't own somewhere for it to run."

Needless to say, I have loads of work on so time is precious. Still, the deadline is tight and so I better get a move on.

First problem - All the parts are in the box, except for the instructions.

A few days spend digging around doesn't solve this so I dig through my books and peer at photos to try and work out where the remaining parts fit. The brake gear is well hidden but with the combination of guesswork and the CAD pictures of Ixion's version, I think I figured it out.

The vacuum cylinder mounts at a crazy angle, but prototype photos who this to be correct. I couldn't work out how the handbrake connects to the pull-rods but this is hidden between the frames anyway so I don't care. What you can't see doesn't matter I'm afraid.

The biggest problem was that I put the hangers and rods on back to front at the first attempt. Wagging the superglue joints broke some and a bit of judicious use of wire fixed the others and now it all fits together. Not that you can see much anyway. Never mind.

Monday, March 03, 2014

The worm that turned away

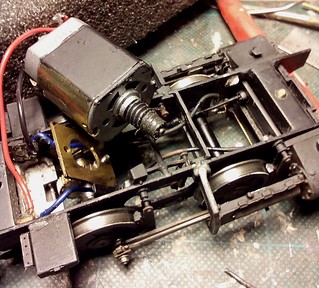
Horrid worm gearPreparing Clayhanger Yard for Kettering, I gave all the locos their usual pre-show wheel clean. Reaching the Pug, I remembered that it needed a little more attention than a polish with the fibreglass pencil.

With power applied to the wheels, the motor whirred away but nothing else moved. Splitting the body from the chassis, the cause was obvious - the worm gear was completely worn away.

Luckily, one end was intact so with a little levering and then the attentions of a gear puller, it was taken off the shaft, turned around and shoved back on. With everything screwed back together, the wheels on the train go round and round again.

With a bit of luck, the gear will survive the final 3 days of exhibition and then the loco can go back to being a display case queen again. Once day, I'll need to find something metal to replace the nylon(?) item, but hopefully this has staved that day off for a while.

Thursday, February 27, 2014

For Sale: Clayhanger Yard

The time has come, with 2 exhibitions this month, to part with Clayhanger Yard. I need the storage space for more projects and don't want to leave it to deteriorate when someone else can enjoy the model.

For those who don't remember, the layout was built as a minimum space O gauge shunting plank. At 10 feet long (7ft scenic, 3ft fiddle yard) and 2 1/2 feet wide, it should fit into most peoples homes. You can also get it in the back of a reasonably modest car if the new owners fancy taking it on the road.

Built for and serialised in Hornby Magazine(who are happy for me to sell it)  in 2013 , there are plenty of people who know the model and no secrets about its construction. Plywood baseboards are topped with Peco trackwork and buildings from several sources.

Point operation is manual via rods and can be operated from front or back.

Price £350

The buyer gets the layout, fiddle yard and cassettes, fascia panel and legs.

They don't get a controller (Gaugemaster plug-in will do), rolling stock stock or the fascia supports and lights (I use these on another layout), any details not glued down (the little car and lorry although I'm happy to chuck the later in), or the curtain.

The model can be seen and operated at the Kettering and Leamington shows. If you want, I'm happy to load it into your car at the end of Leamington. If we need to deliver, I'll discuss this at the time.

Basically, this is a nice layout that needs a home. The price covers the track and some of the woodwork. You couldn't build the layout for less.

Personally, I'd love to see it back on the exhibition circuit. As a magazine based layout, it wouldn't be difficult to get booked in to shows, I have one who'd like it already. Were I to do this myself, I'll be honest ans say I'd replace the point operating rods with Peco motors because I prefer these. At the same time I'd ditch 3-link couplings in favour of something automatic. Both are my preferences though rather than essentials - after all, we've exhibited it as it is several times.

On the other hand, if you want a home layout for shuffling wagons around, it would be ideal for this too.

Update: The layout has now been sold.

Thursday, October 17, 2013

Excuse me, Mr Hornby, is that your van?

Finished van

I am a bad modeller. All the photos I found of an Austin C van showed them painted in a single colour. Despite this, mine is two-tone.

Why? Because it looks nice that way. I'm sure someone felt the same about the prototype. If they didn't, they should have.

Painting the model by hand worked fine, masking the back was a bit fiddly and I haven't got it perfectly straight but no-one has mentioned it yet. Vac-formed glazing is included but I prefer Krystal Klear for this sort of job and didn't even try to fit it.

Final jobs include writing the numberplates which I will do at some point. The format would be very different from modern ones as well as colours, so I need a bit of research.

Stood on the layout, the model looks lovely. Those wire wheels impart a delicate air to it and make the price worthwhile. I could see myself doing another vehicle of this age, well if I didn't have a million other things to do.

The figures are whitemetal and that really is Frank Hornby on the right. You can read more about him and his miniature on the MRL website. Maybe I'll find a suitable set of Hornby transfers for the van one day, or perhaps he just likes to travel incognito.

Thursday, October 10, 2013

Suncole PO coal wagon now with added weathering

Suncole Wagon

Having fiddled with the Skytrex wagon over the last few days, it came time to slap on some paint.

As I've mentioned before, all the black bits on the model are self-coloured plastic. While the body looked OK, and repainting it would defeat the object of buying a RTR model, the chassis was horrid and shiny. Nothing that a coat of matt black paint wouldn't cure though. Thanks Mr Humbrol.

Since I couldn't be bothered to fire up the airbrush, weathering is pretty old-skool. A dry-brush with rust, then tank grey, gunmetal and track colour. These were left to dry overnight so the next stage, a wash of thinned matt black, wouldn't wash them away.

Finally, a good dose of black weathering powder imparts some texture to the dirt.

Inside, the coal load has had its legs cut down and a layer of the real thing glued over the top.

At the end of all this, it's a nice looking wagon. Pedants will notice that I haven't sorted out the safety loops yet. Sadly, I was busy with other jobs so these will have to wait for another day and me to be sufficently bothered to find some strip metal for the job. In this respect, 4mm models are lot easier as you can use old staples.

Wednesday, October 09, 2013

Titivating a wagon

Suncole Moded

A couple of hours work and this is where I am:

1 - Body corners have been stuck together with superglue and then filled. Pedants will spot that this probably means the sides lean in very slightly. They probably do and I don't care as it's such a tiny amount. I have spent time smoothing these corners as they should look like bent metal.

2 - Some plastic strip was trimmed and superglued in to place to fill the solebar hole. Gap filling glue is handy as it hides the worst of the fitting. The brake lever and bolt detail make filing difficult here.

3 - Drilling through the sides of the conjoined V-hanger and then carving away the excess plastic makes this fitting a lot neater. Replacement with etched parts would be better but I don't have any, can't be bothered to make any, and this will look OK on the layout. The safety loops still need attention but I had forgotten this when I took the picture.

4 - Slightly sticky wheels were traced to a little excess plastic on the face of the moulding around the axle. Trimming this back sorted it. Adding some lead weight underneath will help too.

Tuesday, October 08, 2013

Skytrex PO wagon

Suncole PO Wagon

My collection of O gauge wagons doesn't include many Private Owner ones. Increasing the fleet can be expensive, those wagon side sized transfers aren't cheap and you still need a vehicle to stick them on. Slaters do a nice set of kits but I've gone ready-to-run this time.

Skytrex produce a range of RTR wagons and some of these emerge from the factory in a less than perfect condition. Those find themselves sold off as seconds for a bargain price, normally £15. At the recent Daventry show, this had dropped to £12.50. I've always wondered what they are like so paid up and brought a new toy home.

Suncole inside

I should start by saying I have no idea how well this model conforms to the RCH rulebook. Others far better versed in the subject can talk about this. To my eye it looks like a wagon but I wonder if it's a bit short. Not enough to worry me, just the proportions look a touch odd. I'm probably wrong about this though.

Anyway, inside you see some economies immediately. Under a rubbery, but quite nice, coal load, the floor and wagon interiors is nicely planked. The sides are missing the metal strapping and at the bottom, incorporate angles to allow them to be screwed to the floor. Boo.

Probably because my wagon is a second, the corners aren't touching each other either. I could take them apart, remove the angles and then glue the bits together but for the moment, it will run loaded and no-one will be any the wiser.

Incidentally, the load hold extension rails in place when the mode is carrying coke (lighter than coal so it can be piled higher whilst no overloading the wagon). Taking this out sees them drop away, and I've managed to lose one of them doing this.


Suncole underside

Underneath there is more economy. The plastic wheels are fitted on metal axles. One set runs free, the other turns but not as well. The wheel profile looks a bit sharper than metal wheels tend toward.

Brake gear is very simplified. The inner and outer V-hangers are a single moulding with no space between the two and this looks clumsy. Solid safety loops that look a lot like those found in OO kits are fitted and the brake shoes are nowhere near the wheel treads.

Presumably so the chassis can be used for several prototypes, there is a rectangular cut-out in the solebar which I suspect locates a shorter brake lever. The chassis is a shiny self-coloured plastic (so is the body but it isn't as shiny) that needs toning down.

On the plus side, buffers are sprung and so is the coupling.

So, there is work to do. Mind you, what does anyone anyone expect when they pay OO wagon money for an O gauge vehicle? Like the eponymous Hachette MK1 coach, this is going to be great raw material for a quick makeover.

Tuesday, September 24, 2013

Missing links - O gauge coupling chain

LinksStuff that should be easy to find at a model railway show No.2 - Coupling chain for use on O gauge wagons.

You'd have thought so anyway. As it was, I searched high and low at Guildex a couple of weeks ago and found none on sale, at least none available as a spare part. You could buy coupling sets with it in but as the wagons I run already have hooks on the end, I didn't really want to pay a premium price to purchase something I wouldn't use just to get some chain.

Just when I was contemplating winding my own, someone pointed me in the direction of Parkside Dundas. On previous passes by the stand, I'd not seen any hung up on the racks and the guy running things was being spoken at by one of the crustier punters so I'd not asked.

Rectifying this a couple of hours later, I was able to order the chain. No, they didn't have it in stock on the stand, but for a few quid, I was promised some in the post. I did this and a couple of weeks later, 50 links arrived in the post.

Great stuff. Now I can replace the links that have fallen off 3 of my wagons.

I still don't understand why none of the 120(ish) stands at the show had something so basic in stock. Perhaps they all think someone else carries it and there is no demand?

Saturday, September 14, 2013

Guildex 2013 - Please bring food

I don't know why I didn't book the Friday night.

I mean, I always book accommodation for the Friday night of a show. Except this time. Maybe I though I was being clever. Maybe I reckoned that the M6 on Friday afternoon would be worse than a 6:30am start on Saturday morning. Whatever, it was this that we did and to be fair, the M6 was pretty quiet.

Arriving at the hall, there was a quick circuit of the 1-way system to get us to the correct entrance but by 8am, we were in and the car parked up for the weekend.

Perspective Modelling

Operational by 8:45, we had time for a quick look around the show before heading back to be ready for the early entrants at 9:30. There were some superb dioramas on the LNWR stand including a breathtaking piece of perspective modelling. You don't often see this but this was worth the look. Being there early and showing an interest, I got to see the top view - the model is very shallow but you can't tell this from the front. Quite how you go about starting a model where nothing is square, I don't really know.

Photographing the Heljan WesternI also managed to borrow the new Heljan Wester diesel and railcar. The later could have happily stayed as it was a gem, although £400 seems a bit steep. Big locos aren't really my thing so the Western went back before any more bits dropped off the pre-production model!

Anyway, we awaited the first punters for quite a while. This is a show with 120+ trade stands so obviously the early birds were there to catch the 7mm scale worms. Eventually though, they found us and started to watch.

And chat. Buy, did we chat to people. The Clayhanger Yard build has been serialised in Hornby Magazine and an awful lot of people seem to have been following this. One gentleman had even come up from London especially to see the model - fortunately he was pleased with what he found!

By lunchtime, the early start and constant talking was catching up with us. The problem was that the show was so busy, attempts to get lunch we doomed to failure - the queue was out the door. We survived on Kit Kats and biscuits until mid afternoon when I managed to bag some chicken wrap and a portion of chips from the very depleted cafe. Luckily, we acquired a couple of guest operators who kept the layout moving while we talked.

By the end of the day, we sloped off to the hotel which is next to the hall. A look in at the social event didn't last long as the single member of bar staff was struggling to serve the 50 or so people who had turned up at the same time.

Not fancying the restaurant much we headed off to a Beefeater only to find it closed.

Telford is a "new town" which means a lot of roads and very little town centre as far as I can tell. This is all great if you know where you are going but we didn't. Had we not been quite so knackered, perhaps a trip to Kidderminster or Bridgenorth would have been on the cards but neither of us felt like being adventurous.

Dinner ended up being a Twix and shortcake biscuit from the vending machine. Even that wasn't easy as the one on our floor was broken and I had to search out a working one. To be fair, the room was very comfortable but to be honest, I think we'd have slept on the floor at this point.

The "Full English" breakfast in the morning turned out to be under-cooked bacon in a bap. To accompany this there was cereal, and toast from a machine capable of making stale bread or charcoal and nothing in between.

Locos on shedGetting back to the hall, we had a quick clean up and then took a load of photos of the layout. While I have plenty of building shots, finished ones are a bit rarer. After this, we got our only other look around the show. There were some superb layouts and amazing trade. I even liked the big GWR model which was well made and featured stock of a quality I'll never match.

Anyway, the doors opened and we started work. Almost immediately, we discovered that the mechanism under one of the points had failed.

On Clayhanger, this is a problem. Because it's aimed at beginner, the model sits on a paste table so there is no access to the underside of the baseboard. Fortunately, the failed point was at the fiddle yard end so by sliding the table along while holding on to the baseboard, I could see what the problem was.

Point operation uses piano wire on to which are fitted the brass bits from inside electrical chocolate block. Wires soldered to these head up through the points to operate them and it was one of these that had dropped off. Fixing it requires the wire to be dropped off the board and a new wire soldered in place. Easy to do with the layout on its side. Nearly impossible with it set up.

In the end, discretion won out and we fixed the point in position so most of the model could be used. Being the first point on the board this dramatically reduced operation.

As it happens, by shear hard work we got away with it mostly. Every punter was talked to. Problems were explained and most seemed far more interested in finding out how we made things rather than worrying about seeing models move much.

The other blessing was that the show was a lot quieter. I reckon that the attendance was about 30% of day 1. We even got in to eat at lunchtime to get some very nice food. Of course, just as I got back, the Fowler loco arrived but my burger stayed warm in its box while I took photos...

Knocking down con-incided with the roar of heavy rain on the metal roof. Getting the car near the door was tough too. I should have moved it to the nearer parking in the morning as despite being a proper exhibition hall, access for vans involves a huge queue at the back and I got stuck in it for a while.

An hour after the show closed, we were just setting off. Another hour and half and the layout was back in store.

So, one of the tougher shows. We talked ourselves hoarse but that's what we were there to do. If I were invited again I'd go on Friday night and make sure I brought in some food like the team whose layout backed on to our did. Checking out the local eateries for Saturday night in advance would have been a good idea too. None of this is the fault of anyone but me - hopefully this will help someone in the future.

The show itself looked very good. Neither of use saw much but then that's what happens when you build a layout like ours which is about the chat rather than hiding away behind the scenes.

Anyway, what photos I took are on Flickr.

Thursday, September 12, 2013

A pair of Fowlers

Pair of Fowlers

It's a common complaint that as soon as you start building a locomotive, along comes an easier option to produce the same thing.

Scratchbuilders see kits appear. Kitbuilders see Ready-to-Run models appear. Clumsy RTR buyers find models in easier to open boxs pop up on the shelves.

So it was with the Fowler shunter. There I was, happily browsing the trade stands at Kettering show, and there was an announcement from Ixion that they would be producing the loco as a RTR model in O gauge. My first thoughts were to a half-built kit lurking in a cupboard. My second involved burning down the factory to stop this happening.

Anyway, fast forward a bit and I get my hands on the first pre-production, painted version of the RTR model (Thanks to EDM Models) to plonk on Clayhanger Yard. In the stock box is my still half-built kit, so it seems natural to compare the two.

I should point out a few things. The painted loco is due for revision before it goes on sale so the dodgy font will be fixed. My model represents the LMS version, hence the different donkey engine size and position. I'd love to do the GWR version but my painting and lining skills aren't up to it.

The kit is a lot heavier than the plastic version. The cab sides of the later are finer but overall, I don't think there is a huge amount to chose between them. You can decide for yourself whether this is good or bad. I think that it means a well-assembled kit next to a bought in model will look fine. No need to bin hours of construction work, nor feel that there is a better option than buying the Ixion model.

Will I hand of the cash for a RTR version? Nope. I don't need a fleet of these things, one is plenty, but if anyone wants to send one to me, then I wouldn't turn it down.

Thursday, September 05, 2013

3-link coupling hooks - Part 2

Coupling hooksAfter struggling a bit with the 3-link couplings on our 7mm scale layout Clayhanger Yard, I came away from Midland Railex with a whole lot of helpful suggestions to make the hook we were using better.

The main improvement would be to lengthen the wire. Working between vans proved very difficult as the torch often hit the roof before the hook reached the coupling.

Thinner wire was suggested but I've stuck with 0.7mm brass as I don't fancy anything finer making it through the weekend without needing replacement.

Less for a curve on the hook is the second change. About 3/4 of a hook seemed to be the consensus.

My plan had been to test a number of hooks but and still stymied by the lack of small torches available locally. I'll keep looking as I'd like a selection to play with. I suppose the lighting up bit isn't essential, we didn't use it at Railex but then that was quite a bright show. Under the NEC sodium lights, I think a bit more illumination might be required.

Monday, August 19, 2013

Thornycroft Lorry

Thornycroft Lorry

The Thornycroft lorry is now finished and ready for the layout. Considering the fun I had with the kit, the model isn't bad looking at all.

OK, maybe it's not mega-detailed, but as a layout filler it will do very nicely. It's certainly different, which in my head means better, than all those diecast models that haven't even been weathered. A coat of reddish-brown Revell enamel and some weathering powder gives me something that is working but not in the first flush of youth .

On the back are more of the excellent Skytrex sacks. I'm trying to suggest that loading is taking place, hence they are dotted around. There driver is also the labourer and he's chucked sacks on from the goods shed. In a minute he'll finish his fag and tidy up the load.

Thornycroft Lorry back view

Tuesday, July 09, 2013

Loading platform

There's a lot of Clayhanger Yard this week as it's off up to Hartlepool this weekend.

Loading Bay top

Job number 1 is to ballast the left hand baseboard. Before I can do that though, I need the loading platform for the corner.

Constructions is simple cardboard modelling with a scribed top (using the back of the scalpel) and base designed to keep the top 33mm above the woodwork. Testing with a Dapol wagon shows this to be about right.

Loading Bay bottom
 
I've described this sort of work loads of times in print so I'm not going to do it again but as you can see, it's pretty simple if you can cut a straight line. I do like Deluxe Materials card glue for this work as it grabs instantly which is handy when fixing a strip of card that has to follow a curve.
 
Behind, ballasting has started. A swizzle stick from the pub is ideal for mixing the watered down PVA glue mix once I've finished with it in a cooling pink or orange and lemonade. Trouble is, it's dirty now so perhaps I should go and get another one!