Sunday, January 31, 2016

#savethehovercraft

Hovercraft - Car Door

Is it national "Scrap our heritage transport" month?

First the Manx Horse Trams and now the BBC reports that the last two cross-channel hovercraft are to be destroyed so a property developer can make a few quid.

Well done.

I travelled on both hovercraft in their penultimate weekend. I won't say it was salubrious, both needed a refurbishment. Neither was it quiet. What it was was fascinating.

Obviously I am disappointed by this but I suppose we live in a country where knowing how something works is a reason for derision on TV panel shows whereas lobbing up a few houses in the space a unique and irreplaceable machine is sitting is perfectly sensible.

Saturday, January 30, 2016

My favourite landrover

SWB Landrover

Sadly, yesterday saw the last Landrover Defender roll off the production line. You can see that they just used up all the leftover panels they had kicking around...

Seriously though, I love this landrover spotted as near the local Quickfit. Since the vehicles are pretty much a Meccano set, parts can be replaced with the aid of some spanners. Great if you use your 4X4 for proper off-roading as bits get damaged by nature.

The owner above has obviously carried out a few repairs but not bothered with any of that poncy paint stuff. The only time I saw anything that might be better was a landrover with a wing bought from an autojumble - how did I know? Well, the price was written on the side in permanent pen, upside down!

Now, where is that diecast model...

Friday, January 29, 2016

Toy Fair edibles

I know what you're thinking, "We're not interested in the kits and fancy pants models at the Toy Fair - we want cake!"

Corgi Cupcake

Well, the only cakes I saw (apart from plastic ones) were commemorative cupcakes celebrating Corgi's 60th anniversary. For journalistic reasons, I tested one and it was delicious.

Hornby Rock

There was also Hornby and Corgi rock. No idea what this tastes like as I don't particularly like rock and more to point, this is a valuable collectible and will be worth a fortune in years to come.

Oh, and lunch was a bottle of water and bag of posh crisps. By lunchtime, the cafe we found had run out of sandwiches. Amazing.

Thursday, January 28, 2016

London Toy Fair

On Monday I headed over to the London Toy Fair. Obviously my trip was mostly about model railways and I've covered the goodies from this over on MREmag. However, I couldn't resist looking at other stuff so here's a few goodies from the plastic kit world.

Revell


Plenty to see on the Revell stand. They are introducing a fantastic range of easy built kits aimed at 6 years and up. Clipped and screwed together using plastic fixings, once built the cars all have great play value. The range then moves to clip together and then clip and paint kits before becoming "proper" like the models shown above and below.


MPC


Plenty of TV tie-ins here. A deluxe Space 1999 Eagle with booster pack, Battlestar Galactica Vipers in normal and cartoon (looks like an egg-plane) forms, Back to the Future DeLoreans, Knight Rider and the General Lee.

Interesting Star Trek Enterprise packaging with what appears to be a father & son. Does this suggest they are trying to sell kits as something families can build together and bond over? Not a bad idea although I wonder if they should have gone for grandfather & grandson.

I'll admit I fancy the cartoon Viper and the Eagle from this selection. Hopefully a Toy Fair appearance means availability will be good.

Airfix


I was too busy to take a lot of notice here, but the range has been announced well in advance anyway. There was a 3D print of the VW camper in the Quickbuild range I'd heard about late last year. I'm not so convinced by the shape as I am with the Beetle but have a feeling one will find its way to me anyway.

Bolt Action


Finally, how about some Dad's Army figures from wargaming company Bolt Action?

Sadly too large for OO and too small for O gauge models, I still fancy a set, although at 40 quid, it might have to wait a while!


Wednesday, January 27, 2016

Warehouse Wednesday: Laxey Flour Mill

Laxey Flour Mill

I'd not planned a third Manx warehouse on the trot but while researching last week's building, I was reminded about the rather excellent Laxey Flour Mill, so thought "Why not?"

The first reason is that I don't have any photos of the building. I'm sure I've taken them but by the look of it, a long while ago and on film. Thus, I'm relying on other pictures found on Flickr. Even these aren't exactly numerous.

Anyway, the site is interesting because we have a stone building over a century and half old, set in a bucolic tree filled gorge. And out the front are four ugly, steel silos.

Presumably this only made it through planning as they are essential for the business and if you stop flour storage, the place shuts down. I know around here they local residents would be up in arms. Mind you, they are up in arms if anyone dares not to have a beige shop front so that's no guide.

This is quite a useful prototype for modellers. The view above has been taken from a road bridge and behind this is the Manx Electric Railway viaduct. Take a look at the site on Google maps to get a better idea just how confined this site is.

Originally, all the milling was powered by water, hence the location. Now, the firm has grown up to fill the spot with buildings behind the pretty warehouse that appear to owe more to wiggly asbestos sheet than crafted stone. If you need to cram industry into a small area, this is useful inspiration.

The good news is, the firm still operates and you can have a look around on the website.


Tuesday, January 26, 2016

View from the Hospital engine shed

Hospital Scene

Taking a few photos on The Hellingly Hospital Railway and spotted this view when looking through the engine shed doors. Virtually no railway in view, but quite a lot of construction equipment.

I'll admit that I've added the scenery on the left of the tree as normally that's where you see the happy faces of exhibition visitors but apart from that, it's all real.

Everything in the picture is kit or scratch built. although apart from the traction engine (W&T models) and foreground roller (scratchbuilt from plastic bits) I can't remember the sources I'm afraid. It's over a decade since I built this lot!

Monday, January 25, 2016

Kitmaster motorised van

Kitmaster motorised van

I'm very busy working on the latest Ramsay's British Model Trains catalogue at the moment so there's not a lot of modelling getting done.

Part of the job involves photographing some ancient models including this one in my collection - the Kitmaster RTR motorised van.

The idea is that you could power your unmotorised Kitmaster plastic locomotives with this. Quite a neat idea. Basically a power bogie with a plastic lid and sideframes. Ramsay's needed a picture of the model and box, but I have a feeling readers of this blog will be more interested in the insides.

Kitmaster van in bits

Saturday, January 23, 2016

Manx horse trams - RIP

View from a horse tram

The good people who run Douglas Council on the Isle of Man have decided to scrap the horse tram service along the front.

IOM Today - Historic horse tram service to be axed

From my initial reading, the problem seems to be that, "The decision follows a proposal by the council to amalgamate the Tramway Terrace stables site with the tramway hub at the Strathallan site, a scheme estimated, as of December 2015, to cost in the region of £2.9million."

Basically, they had a scheme. It was going to cost a lot of money. The money can't be found so the whole tramway is to be scrapped rather than just leaving it as it was.

Now, I realise that the tramway lost money in crude financial terms. Sadly, you can't put a price on the number of tourists it helped to bring in and that's what accountants do. They will happily destroy every attraction and then wonder why all the tourist based businesses have closed.

This is a more general problem for the IOM. While the Manx people are lovely and friendly, they appoint representatives who hate any tourism not based around the TT races, something I've heard expressed by more than one hotel owner.

The TT is great but it only provides 2-3 weeks of business. After that, you're left with an expensive to reach island which ought to provide a great heritage location. Trouble is, when you scrap the interesting heritage, it's a pretty place but Ireland is cheaper and more varied.

One problem with the horse trams, and possibly part of the reason they have to go, is that they run down one of the busiest streets in Douglas holding up the traffic. There was a plan to re-locate them to the promenade as part of a renovation scheme - this made perfect sense but I believe there are "issues" with this scheme too with all sorts of arguments about it in parliament.

So, the horse tram service will not run in 2016, or ever after. The horses will be retired and the rolling stock sold to museums or scrapped. The valuable buildings on the front will be sold off. The people of Douglas will be able to drive very slightly faster along the seafront, although on such a small island, I doubt that will really make much difference.

There is a petition to save the horse trams here. 


Friday, January 22, 2016

Home made chisel

Home made chisel

I amongst John Webb's tools, I found this unprepossessing tool - a home made chisel.

I've no idea what John made it from, suggestions are welcomed, but it's brilliant for removing excess solder from the surface of brass kits. I'm guessing that's what he made it for anyway.

While I have a 3-sided scraper which is good, but I still find it hard not to gouge the surface of the brass with a hard steel blade. This seems softer (it's still steel) and easier to slide along the metal.

Maybe if I owned a grinding wheel, I'd make more of these sorts of things myself, old books always mention grinding old files to make chisels and I've certainly read scratchbuilders who have manufactured their own tools.

Thursday, January 21, 2016

Hot handrails

Handrails fitted

Planning is important. The correct time to attach the handrails to the Barclay tanks was when I could solder the knobs from inside. Instead, I left them thinking I could use a bit more heat and work from outside.

I could, but it needed a lot more heat. In the end I tinned anything that went through the brass body then smothered the lot with solder paint and Powerflow flux. With each handrail held in place with a screwdriver and the gas torch fired up to provide some quick heat.

The results are OK, if a little messy. Before cleaning the model up, it looked a real state with burnt and blackened flux over everything. A scrub with Shiny Sinks and then a bit of burnishing brought everything up to a shine again but it takes confidence, and experience, to know that's how things will turn out.

Wednesday, January 20, 2016

Warehouse Wednesday: Laxey Mill

Laxey Mill

Stroll up the road from last week's warehouse and you find Laxey Mills. Not a dark satanic mill, well not nowadays anyway, but a modest stone building beside the Laxey river running out to sea.

Once end of the building is home to a weaver producing traditional Manx tartan stuff. I have a video of him at work on YouTube. If you are a tourist, it's great news as you'll be able to wear something proper Manx and more importantly, warm and cosy. It's not always as nice a day as my photos show!

The other end used to house a small workshop which was where I first saw laser cutting. Again, mostly tourist stuff with coasters and other wooden bits engraved with suitable designs. I came away with the 3D plaque showing the Laxey Wheel featuring some amazingly thinly cut wood.

A couple of features on the building interest me. For a start it's been extended if we judge by the roof lines. That's not a surprise as the building has been through several owners. Originally a corn mill, it was was converted in 1881 to a water-powered cotton mill. The water power has long gone as have the powered looms, everything is now hand-woven.

I can only assume the original owners were rather kind to their workers as those windows are massive. OK, the daylight would have saved money on lighting, and I suppose on cold days it would have been freezing in there, but it still seems generous.

Anyway, if you need a modest size mill for a railway layout this would be worth a look, or at least a prototype to inspire your own architecture.

LaxeyMill2

Tuesday, January 19, 2016

Perspective modelling

Level Crossing

Another photo from Geoff William's model of Aylesbury, it's only shot on my compact but illustrates a rare feature - perspective modelling.

The street leading away from the crossing looks longer than it is. The houses change scale as they get further away. It's a technique used in many place on the model to make it look bigger than it really is. Nowadays, perspective modelling is very rare. For a start, you have a much more complicated scratchbuild and in a world of ready to plonk buildings, that doesn't fit in with the way people work.

Once consequence of the approach is that the layout has to be displayed quite high up, I'd estimate about 4 1/2 feet off the ground. Viewers must look into the scene rather than hover over the top like a helicopter. I know the layout appeared in the press at the time it was built, I wonder how they managed to photograph it in those days when "helicopter shots" were very much the thing?

Never mind, Andy York has taken some proper quality photos for the appearance in BRM so you can get a good view around May.

Monday, January 18, 2016

Hand lettered wagons

Hand Lettered wagons

On Saturday, I was privileged to head over to the Princess Risborough club to see a layout in their care.

Back in the 1970s, Geoff Williams built a model of Aylesbury station.

That sounds simple enough but when he built it, he built everything. The period is 1910 and so even if there had been any RTR available for the era, it would have been a bit rubbish.

One of my favourite features are the hand-lettered wagons. Sign writing is a real skill - I've struggled to do a descent job in the past - but these look superb.

Now, if you plonked a modern RTR model beside them then many modellers would pooh-pooh the older versions as not been very sharp, but for me they work as part of a scene. Consistent standards over the entire model work so much better than a few stand-out items and the rest modelled to a lesser quality.

It has always amused me that we have people demanding higher and higher standards from the RTR makers. Their own modelling will always pale in comparison from the perfect from China so the layout will never look as good overall.

Anyway, if you wan to see more of Aylesbury, it will be in print and on DVD in a future issue of BRM and making it's one and only appearance at Railex 2016.

Sunday, January 17, 2016

Unexpected oiling in the smokebox area

 
My Hornby Q1has been stored in a cupboard for a few years. It's nice and warm and dry in there. The model is wrapped as it came from the factory.
 
Taking it out for some photographs, I noticed that the sides of the smokebox were oily. Blobs of the stuff. Checking the piece of thin plastic wrapped around this area, there was oil on there too.
 
My best guess is that the lubricant from the chassis has slowly run into the plastic and then on the body of the loco. I can't remember is the loco was upside down in it's box but I suspect so.
 
Lengthy storage allowed this to happen. Fortunately, a gentle rub with some absorbent kitchen towel cleaned things up.
 
The moral of the story is run your locomotives - don't leave them in the cupboard!

Saturday, January 16, 2016

Green Sentinel

RT Models Sentinel

Taking some photos on Ruston Quays the other day, I found my green Sentinel and realised I'd forgotten how good it looks, so few seconds in front of the camera seemed appropriate.

The kit if from RT Models and as I recall, if you ignore the finner bits of etched nickel silver, builds easily into a really nice model. I must stick some coupling bars on it for the trip out with the Dock to Doncaster next month.

Friday, January 15, 2016

Prototype for everything: Giant Wills arch kits


If you look behind the arches on Ruston Quays, you can see that what we have is some fairly thin plastic parts hiding a wooden substructure. It's how we tend to build model railways, a facade hiding the ugly truth.
 
Not very realistic?
 
Well have a look at this picture of work taking place around London Bridge station shared on Twitter by Tim Dunn. Those are basically full-sized Wills plastic kits they are putting up aren't they?


Thursday, January 14, 2016

A proper Thursday boat

Bantam Sails

If you are reading this over your mid-morning coffee, there is a very good chance that I'll be out in the fresh air sailing the Bantam Tug.

I'm pleased to say that it has turned out to be an excellent "Thursday Boat".

Thursday boats are those that can be taken to the pond with the minimum of fuss. If the weather looks nice, the battery will get a quick charge, I'll make sure everything works and then it's in the car and off. At the lake, the boat is switched on, launched and then I get to play.

Some boats need to be treated like fine china. Some are too large to pick up and load on a whim. Thursday boats are small and reliable. They are also the hardest to build as everything has to be simple and well assembled. Not too much detail but enough to please me on the water. A good strong colour scheme helps too - you can certainly see the Bantam from a distance.

On the water, the boat is incredibly maneuverable, able to turn in it's own length. I've put so much weight in that it rises out waves cause by other craft perfectly. It seems to stay dry inside too despite the lack of coming around the hole. Water lands on the deck but (so far) hasn't found its way inside.

Back from a sail, I just leave the boat with the top off to dry out of its box. Ready for the next week.

Bantam Sails away

Wednesday, January 13, 2016

Warehouse Wednesday: Laxey quayside

Laxey Warehouse

Cross the sea to the beautiful Isle of Man and then head to the harbour at Laxey. It's a bit of a stroll from the tram stops but well worth it. To my mind, Laxey has the best beach on the island when the sun shines. It's quiet and sheltered but there used to be an excellent ice cream kiosk.

Anyway, this isn't a blog about sunbathing, it's about modelmaking and many of you know I dream of building a miniature bit of Manxland. One prototype work looking at is the line on to Laxey quayside. Thanks to a quirk of ownership, it was the only harbour owned by a railway company and as such, there were lines running down there but many years before the steam railway happened.

At one point, there was a plan to run the steam railway to Laxey. There are plans showing the route in the record office and so we wondered if the old horse-drawn line could have been modernised. If it could, this would make an excellent model .

If we built it, the warehouse above would be a must. Stone course experts will be able to tell me this stuff isn't really random but it certainly doesn't seem to be as well cut as normal stonework. Technical term required please.

This contrasts with the very neat window surrounds which look almost as though they have been glued on the wall surface.

An attractive building but not the only one. Next week, we'll continue the walk into town.


Laxey Warehouse windows

Tuesday, January 12, 2016

More hot RSU action

RSU in use

Since I've been using the RSU on a project recently, here's a not at all posed shot of the unit in typical use.

One of the great benefits of the device is that joins are normally very tidy. Attaching the strip of brass shown above with a conventional iron would require the piece to be tinned on the back and then the hot bit dragged along the sides to encourage heat into the join.

The results would be fine but a bit messy. Nothing that a fibreglass burnisher couldn't take care of but another chore.

The RSU only heats up solder between the positive connection above and the earth - the rest of the kit. Therefore it will only heat the solder on the back of the metal strip.

There are problems of course. Because the heat is very localised, it's possible to burn your way through a piece of metal if the RSU setting is too high or the metal very thin.

I'm never quite so convinced of the joint strength either, but then I used to say that about liquid plastic glue and years of practise have show there isn't a problem there.

Monday, January 11, 2016

What is an RSU?

RSU

I was asked recently what an "RSU" is. I think I'd mentioned it on the blog somewhere and blithely thrown the term in without thinking about it.

Well, to answer the question, it's the box in the photo. Is that enough?

No.

OK. RSU stands for Resistance Soldering Unit. It's a clever way of soldering two bits of metal together, or at least heating up the solder between two bits of metal so it melts and joins them together.

The box above has a black earth lead and a red positive. The red lead can be plugged into different sockets to vary the voltage coming through it. The unit is switched on with a foot switch.

The main use of the RSU, for me at least, is laminating brass bits on a kit. The part is tinned on the back with solder and then sploshed with some flux.

The earth lead is clipped to the kit. Then the item to be fixed is held in place with the probe. I press the foot switch and power flows and as it passes through the solder, the resistance is higher and causes the solder to heat up and melt. Take the foot off the switch, the power goes off and and the joint cools.

Nowadays this isn't a cheap bit of kit. Even when I bought mine it was over a hundred quid. Now the only UK supplier I know of, London Road Models, charges £190. Still, it's a one-time buy.

Sunday, January 10, 2016

It's a shame about the 07

News that Heljan are to produce a RTR Class 07 shunter has delighted the Interweb but makes me a little sad. I've enjoyed quite a long history with this attractive prototype and this announcement changes everything.

As mentioned in the past on this blog, my first etched brass kit was a cheap Blackpool toastrack tram. Encouraged by this, I was on the look out for a locomotive to have a go at. I had a DJH whitemetal kit 02 under my belt and so Dave Elbourne at the model railway club sold me a part completed Craftsman 07 kit.

It was a bargain as he'd done the hard work making an operating chassis. Even the lubricator linkage worked. All I had to do was build the body.

Craftsman kits are good basic products and this was no different. Front and rear bonnets were pre-formed and after some careful work, I ended up with a model I was very proud of. It ran for many miles on Melbridge Dock and Dave's Scotland Street Yard. Then it was stolen from the back of a van along with all the other rolling stock in the late 90s.

07 shunter

It's replacement is powered by a Porterscap motor - real Rolls-Royce power and stupidly expensive. Since I was spending the insurance money, I was determined that if I was going to have to build the model again, it was going to be an upgrade.

More recently, for my Modelling British Rail Diesels bookazine, I took the opportunity to build the excellent Silver Fox resin kit. Basically a body to fit a Bachmann 03 chassis, with a little detailing, the results are very impressive. It's a simple enough job and I always felt that the kit should have sold in huge numbers. After all, people were always saying they wanted one.

07 007

Now of course, no-one will want either kit. Worse, the 07 joins the ranks of locos I don't run because you can have the same thing RTR. I have a trip out with the Dock next month and I bet every time my 07 appears, someone will witter on about the Heljan version and some of them will be feeling superior because I was stupid enough to build a kit and they were smart enough to sit and wait for someone to do the work for them.

On the other hand, if I was that clever, I'd have missed a lot of fun over the years building things.

Saturday, January 09, 2016

Birmingham Library - RIP

Demolishing Birmingham Library

As you read this, Birmingham Central Library is being demolished.

Not the new(ish) one you understand. The one that looks horrible from the outside but truly magnificent once you go through the doors.

No, I refer to the old library that looks like an upturned concrete pyramid.

If you are a fan of big machinery they it's worth taking time to go and have a look. The nibbling device they are using to eat through the structure is amazing. For a start it's huge. That arm has to reach to the top of a tall building and it's all controlled by one man in the cab that can be tilted to improve his view.

Around the site are devices blowing water to reduce the dust given off. The is a site right in the middle of a city, presumably the reason explosives aren't being used.

Personally, while I can see the new library is easier to operate, I prefer the exterior design of the old one. Sadly, it is being demolished to make way for a series of uninspiring modern shops and offices.

Still, we can look back to the days when it was being built thanks to this excellent time lapse film:


Birmingham timelapse from 7inch cinema on Vimeo.

Friday, January 08, 2016

Loco plonked together

Plonked together

I can't resist plonking together the main parts of any model I build every so often. I could claim this is so I can see how things are coming together but really it's that I'm a big kid.

The Barclay is progressing well. With the smokebox fitted, but not yet soldered, in the front of the boiler, I can see how the body looks. The stubby chimney is just rested in place so it looks like a steam engine. At least the motor fits into the firebox without any real fettling.

It's an odd (in a good way) looking beast this one. A driver will tower over the loco and show just how tiny it is. There's a very purposeful look to the model however and it would look fantastic running in a factory setting on stupidly tight curves.

Thursday, January 07, 2016

Lights, display case, wagon!

The four week schedule means that it's BRM time again folks. The February issue sees the gradual redesign of the magazine spread to the practical article and very nice they look too. Less shouty and more classy. Bit like me really. Except for the classy. And perhaps the less shouty.

Anyway, first up, we have something a little offbeat, making a display case.

Display Case

This projects has been in my mind for a couple of years. What I've done is a take a cheaply available picture from from Hobbycraft and turn it into a case that can be filled with models and hung on the wall to enhance any room. All this with a complete lack of skill on the woodworking front.

Another new feature is "A wagon kit in every scale". I'm starting small with a 2mm scale starter kit.

2mm scale wagon

There's a lot of modelling in this kit, and it's very, very, small, but thanks to some excellent design, the model goes together very well indeed. The guys from the 2mm Scale Society have been very helpful too.

Finally, the work on the BRM card kit continues on both the page and DVD. Building a model isn't enough, we've added some lights. Needless to say, I didn't just restrict myself to lighting buildings, I've looked at a few other illuminating possibilities too.

VW with lights

There are a few niggles along the way but adding lights isn't too hard and certainly adds a new element to your layout. Best of all, you only light the bits you want to show, the rest can hide in the gloom!

Wednesday, January 06, 2016

Warehouse Wednesday: EC Williams

EC Williams

Warehouse Wednesday has been a bit of an unexpected hit on this blog so while I can still find pictures, I'll carry on posting them.

EC Williams Ltd isn't a warehouse, it's a factory, but I think it's an interesting building for modellers. We tend to look at 60s and earlier structures and ignore anything later as though this will make it go away.

This one seems as 1980s as the TV show Capital City. I seem to recall a campaign around this period encouraging firms to use brick for buildings are it looks nicer than slabs of concrete, although a quick search reveals nothing so this might just be my imagination!

The clean lines would be easy to model and on the right layout it would really help to set the period. I suspect the windows are replacements but bet if they are, the originals didn't look much different. A nice touch is the raised ECW in black bricks at the far end, some plasticard bits would do this or you could just cheat and paint a few individual bricks on the sheet.

Explore on Google Streetview

Tuesday, January 05, 2016

Barclay crossheads

Crosshead

Bit of bodgery with the Barclay cross heads. A nickel silver connecting rod is supplied but so is a brass one with an extra tongue and you're supposed to use this one. Lovely, but it's a the wrong colour and a different colour from the connecting rods.

I hacked off the end of the brass piece and soldered this to the back of the NS version. Then the cast head is fitted using lots of permanent pen to stop the solder spreading where it shouldn't. There's a brass washer on the back which is soldered to a cast pin and the first head went fine. The second took two goes but after a bit of fettling, they swivel nicely.

Slide bars

The slide bars are more modifications to the original chassis design (for the Eagle according to the instructions) leaving a single sidebar. It fits into the rear support and on the end of the cylinder etch. There's quite a lot of space behind the slidy bits, one of the benefits of O16.5 I suppose.

Monday, January 04, 2016

Access hole

Access Hole

I've been HERE before. Trying to do up the grub screw at the base of a worm gear and wishing I had a tiny screwdriver bent at a right angle.

For a change, the solution was simple - drill a hole big enough for a tiny jewelers screwdriver to poke through the end of the chassis. This bit will be hidden behind a honking great bufferbeam so no one will see it.

Setting up the gears is a bit of a rigmarole. The order seems to be:
  • Fit motor but leave it loose
  • Slide brass gear along to the centre of the axle
  • Fit worm gear
  • Slide motor so the gears mesh
  • Do up the back screw to hold the motor in place
  • Side the brass gear out of the way
  • Tighten second motor screw
  • Return brass gear to the centre and tighten the grub screw up
What fun!

Sunday, January 03, 2016

Austrains NR26

Austrains NR26

Just over a year ago, I went on a trip to Australia. Starting in Adelade, I decided when booking that a train ride to Sydney would be a good idea. In my mind it was a few hours, hopefully on an XPT.

The travel agent knew better. "You'll want the Indian Pacific then" he said. I'd never heard of it but he seemed to know what he was doing so I nodded.

Rather than 4 hours, the journey actually took and fantastic 26. We passed through proper outback, saw kangaroos and emus running wild and wondered who would live in the remote communities we passed through. I took a bit of video that can be seen on YouTube.

Indian Pacific locos
 
Anyway, being a train fan, of course I wanted a model of one of the locos that had hauled me. The prototype is easy enough, it's the NR Class, built in the late 1990s.
 
A model was more of a challenge. Looking in one of the Aussie model mags I'd bought, a company called Austrains were commissioning a HO scale replica but it wasn't available at the time.
 
What a surprise on Christmas day to find an orange box under the tree with the model at the top of this post inside it. My parents had been communicating with Orient Express models to buy one. Just like in the UK, there had been production delays so what had been planned as a birthday present arrived at Christmas.
 
I'm well chuffed. It's a lovely model and will make a great addition to my little Australian model display. Best that I don't think about building a layout - the train would be over 6 metres long and if I fancy building the whole trip, the baseboard will be 64803 feet long - a bit large for most exhibitions!

Saturday, January 02, 2016

A new year project for someone?

 
Spotted on eBay (Hat tip to Dave and Ed at boat club) is this 1936 Megows wooden kit for the RMS Queen Mary. Yours (currently) for £89.99.
 
This is PROPER model making. None of your plastic bits stuff. What you get is a plan and some lumps of wood. All you have to do is whittle your model from the materials provided. It's about as a far as you can get from those "modellers" today who whine about plugging parts into pre-drilled holes on a model locomotive!
 

Friday, January 01, 2016

A decade of bloggery

10 
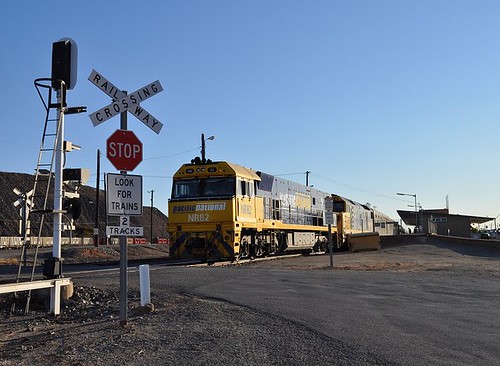
A few weeks ago, I was in London for a few drinks with anoraky friends and before we met up, was on the lookout for some transport related number 9s for this post. Only when I got back home with a nice enamel 9 on the camera card did I realise that I actually needed a 10.

10. That's a decade of blogging.

When I first started this at the end of December 2005 things looked a bit different. At the time I worked for the County Council and did a little commission model building on the side. The blog was just a bit of fun and somewhere to test a few ideas.

Since then I've left the local authority, had a few more jobs and worked for two of the biggest model railway mags in the UK as well as appearing in all the rest. I also took over MREmag.com, the biggest on-line model railway magazine. And I stopped comission building as being more trouble than it was worth.

There have been three one-shot or bookazine publications, all of which I'm proud of. A novel too, although there's not any modelling in that.

Posting, once occasional, is now daily. Many, many words, some of them correctly spelt, have appeared on-line. I've no idea how many - how close is the first million I wonder?

Anyway, it's review of the year time again.

Statistics are:
  • 365 posts in 2015 - one a day still. It's been close a few times but I've managed to knock something together and am still stupidly proud of the fact.
  • 168,000 visitors - Around 460 a day with 145 returning each day. Presumably a lot of people are bored at work...
  • 250,000 pages viewed over the year.

More importantly, there have been many projects I'm proud of.

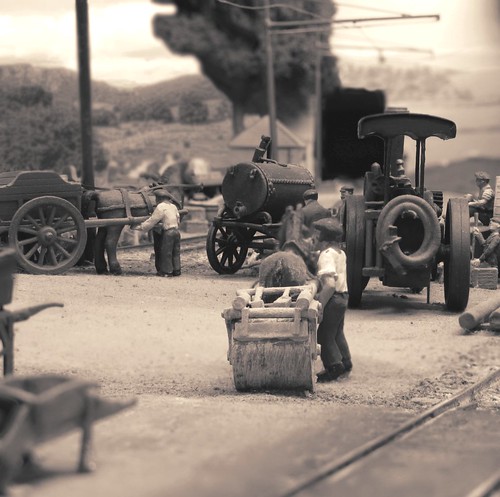
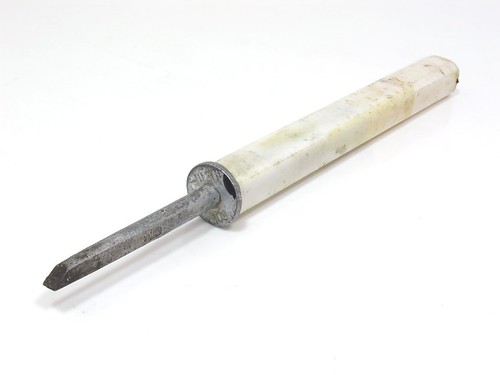
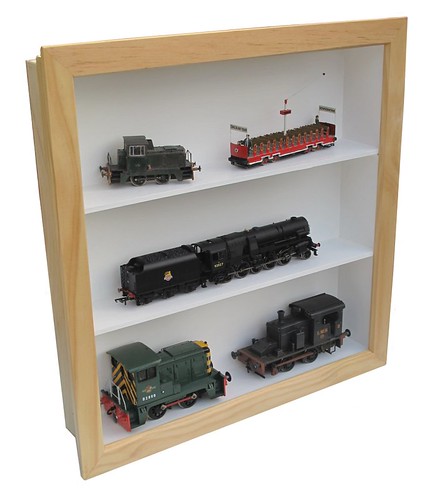
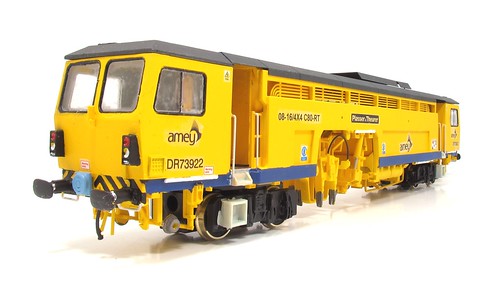
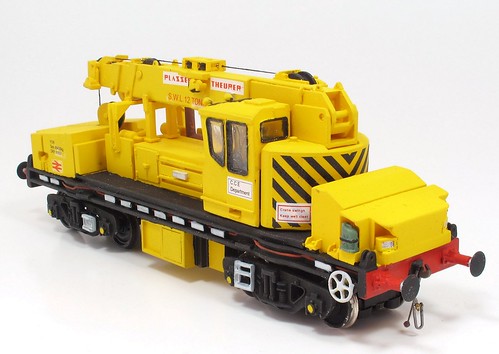
In the "not every kit maker has died we're not all doomed" category are a couple of cracking models of on-track plant:

Ballast Tamper

Clockwork Industries laser-cut ballast tamper.

Rail Crane

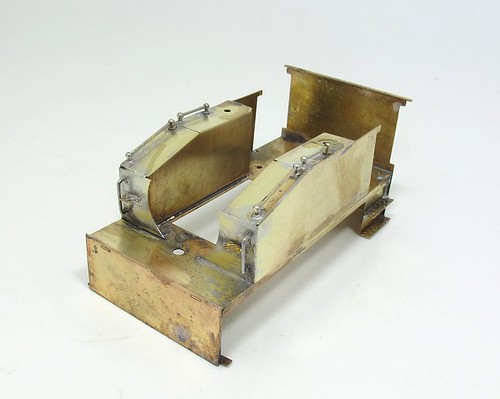
Make your Mark models rail crane.

Both are fantastic kits that look good and aren't too difficult to build. Kitbuilding isn't all about fighting lumps of badly cast whitemetal.

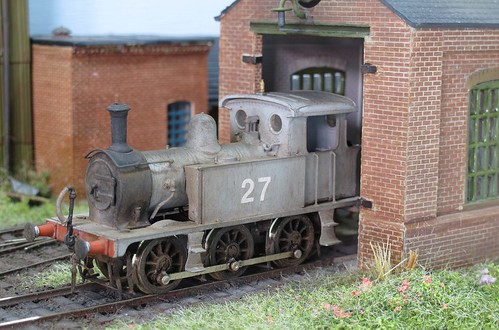
That's not to say I didn't have a few fights with lead alloy.

Wartime P Class

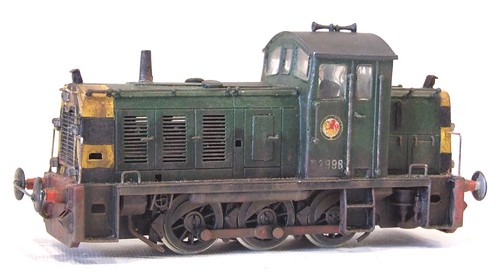
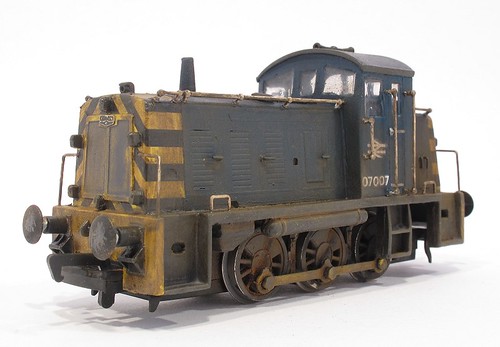
A South Eastern Finecast P Class. There was a 7mm scale 02 diesel too.

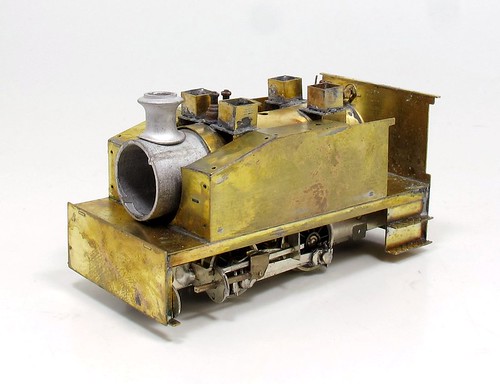
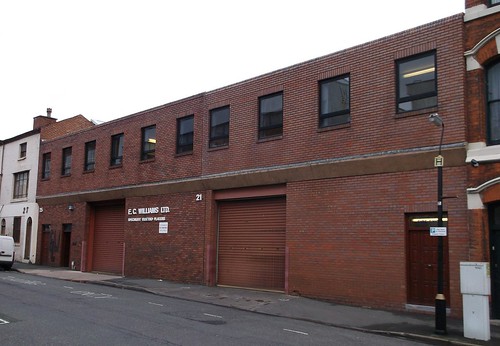
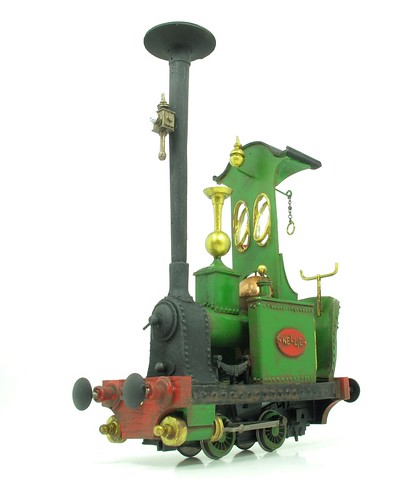
If your tastes tend toward to odd-ball, after visiting an Emmett exhibition in Birmingham, I came away with a Smallbrook Studio kit for Nellie:

Nellie painted and weathered

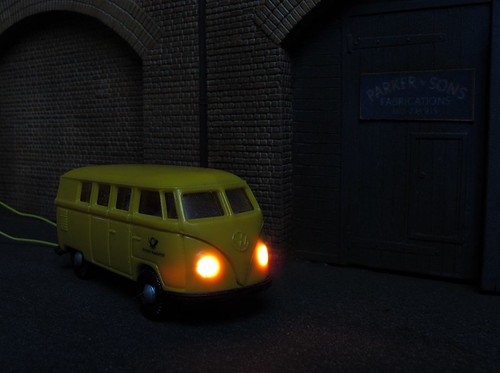
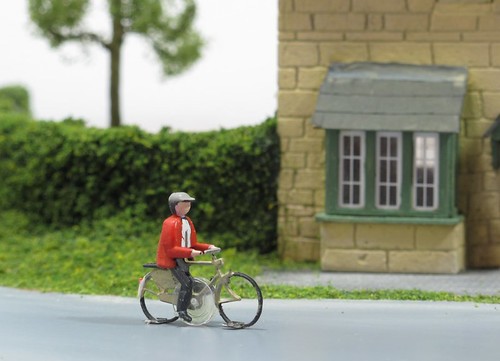
It's not just locos either, there was the amazing Magna Rail cyclist, seen here passing a Petite Properties cottage.

Cyclist diorama

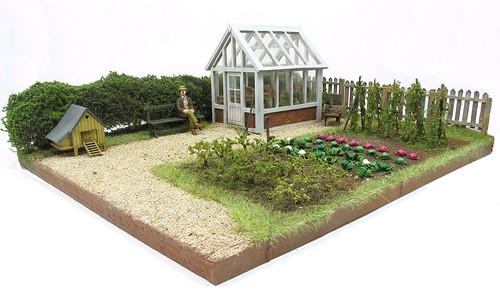
A bit larger, in 7mm scale, I headed out to the garden for this greenhouse diorama.

Greenhouse Diorama

I've even managed to knock a project off the list from last year!

Bantam Front

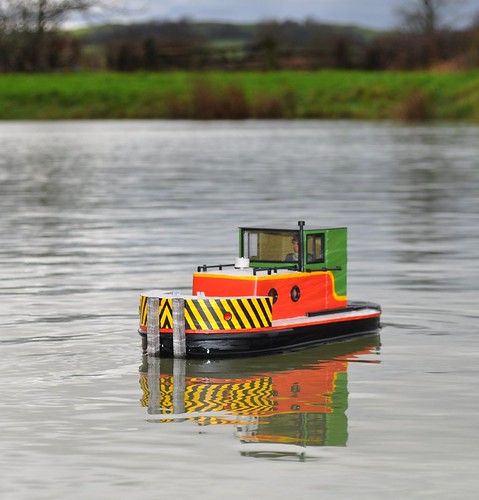
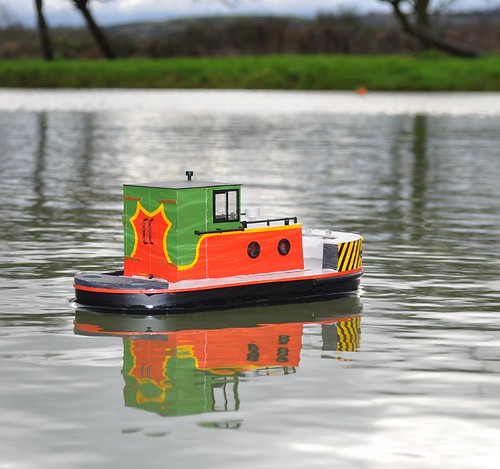
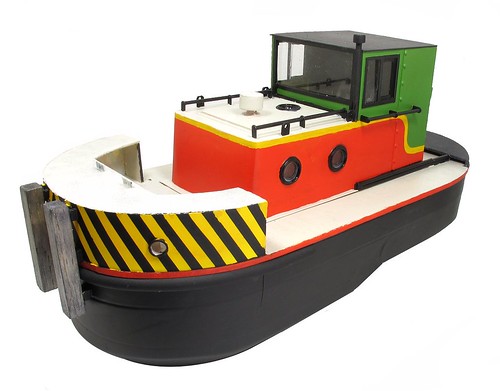
The Bantam Tug has been on the water and looking good. One day I'll weather it but that can wait a while.

We'll just have to ignore the 3mm scale Class 25 now making 4 years unfinished and the industrial Garratts still not out of their boxes either.

2016 holds yet more projects.

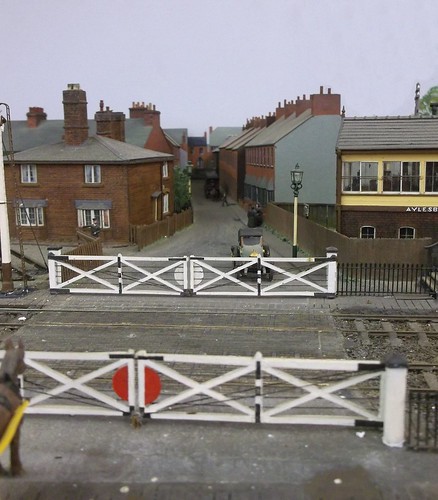
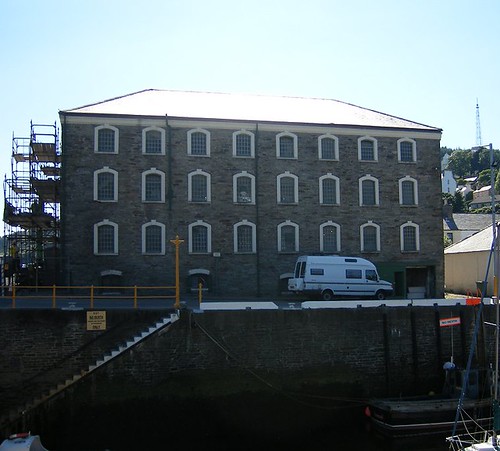
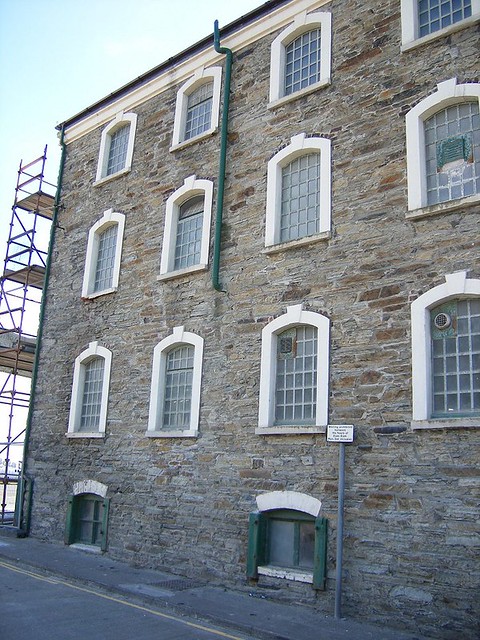
Quite a few of these will be for Ruston Quays, the new BRM project layout I've been working on. This is scheduled for a couple more trips in the spring, and on one of these it will be accompanied by Melbridge Dock, our venerable old layout which also managed a couple of shows in 2015.

Anyway, thanks, as always for reading my waffle and sometimes even commenting. To be honest, even if no-one dropped by, I'd probably still write stuff, but it makes it a lot more fun if I know it's being read. Happy 2016 everyone!

Railcar