Showing posts with label Lewin. Show all posts

Friday, September 23, 2022

Lewin

Lewin

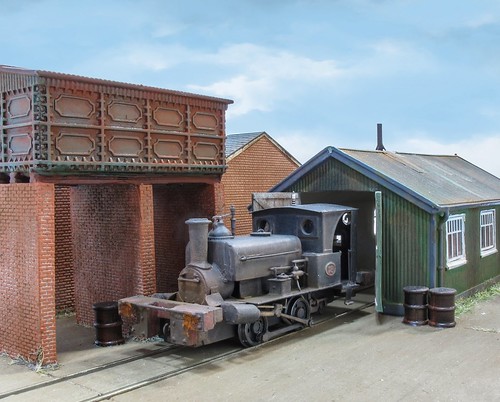
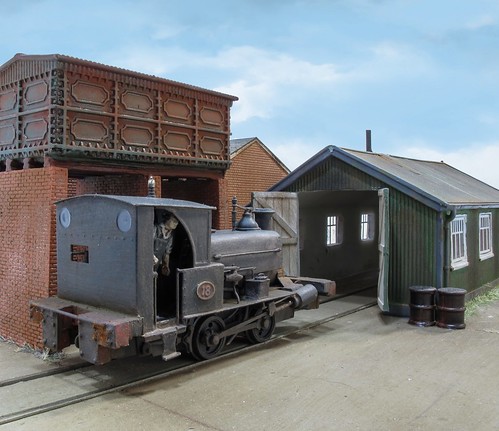
All done. A little tickle from the weathering powders, especially on the outer edges of the buffer beam where photos show rusty patches. 

The drive was a fiddle to fit, eventually he found a happy position himself, so I'll live with that. 

I'm a little disapointed that photos don't show coal piled up in front of the cab - it would be a nice detail but I assume the harbour was small enough that running back to the shed for fuel wasn't a problem. 

OK, I'm not responsible for most of the work on this model, but I'm pleased to take it from a box of bits to a nicely running locomotive which can now join the fleet in my display case. One project ticked off!

I hope the original builder would approve of what I've done anyway.

Lewin

Thursday, September 22, 2022

Getting grubby


It's a long while since I broke out and airbrush and made a locomotive dirty!

So long, that my Iwata has long since gone and been replaced by a Sparmax. And more importantly, the cat food boxes I used to pearch models on have changed, and are now too large (OK, we might just be buying bigger quantities of cat grub) for the job, forcing me to to use an old jam jar to raise the model up a bit so I can shoot paint under the footplate. 

The recipie is the same though. First, a dry-brush with dark grey, then out to the garage for s blow over with rust, then some earth colour on the lower reaches, followed by a light clean with a turps filed cotton bud. Then a little more earth followed by a dose of Track Colour everywhere and finishing up with some Revell Anthracite along the top to represent the soot. 

OK, it's not Martyn Welch, but I think gives me 80% of the look for about 20% of the effort. This is a mucky loco, and the dirt has certainly reduced the impact of those buffer beams. Maybe I was working fast because Jacob-Rees Mog was staring out at me from an old copy of the Daily Express too.

Now to let the paint harden, tickle with weathering powders and a bit of glazing.

Tuesday, September 20, 2022

Crew


Bit of a crisis with the Lewin build - I went to my box of good figures for a crew, and the cupboard was bare! I don't know when I used the last set, but obviously didn't think to re-order. 

Loco crew figures will always come in handy, so I spent some time replenishing the stash from the Dart Castings website. I know 3D printed people are more fashionable, but I've always liked the Monty's Models range. At the time they first appeared, they were a revolution compared to some of the badly proportioned horrors of the time. These are a lot cheaper too, always a bonus. 

Anyway, a few days later a Jiffy bag arrived with my order, and I set to to decide which person would fit in the cab. Answer, very few of them. In the end, I think that MSV71 Industrial or Narrow gauge loco driver will just about squeeze in. The cab is very low and the others are just too tall. IT's a job for some HO scale people really. 

A bit of paint flipped over him, followed by a wash of Nulin Oil, and he will look the part. The photo close-up is cruel, he looks much more refined in real life!


Tuesday, September 13, 2022

Does red paint make it better?


Trying to reduce the impact of the buffers, I've tweaked the livery slightly over the prototype images I can find. Fully red beams with black faces look mahoosive, but painting the back beam black seems to help a bit. 

I'll admit they are still big lumps on a diminutive loco, but there's no point in having something that won't couple to my existing rolling stock. 

With a bit of luck, some weathering will take the edge off them too. Which means I need to connect up the airbrush, currenlty in use powering a steam loco chassis for a Garden Rail project...


Monday, September 12, 2022

Chunky buffer beams required


Working on a model that's already built, rather than a kit, isn't always easy. I've come to fit the buffers to the Lewin, and on the prototype, these are chunky lumps of iron-faced wood. 

I always used Sprat & Winkle couplings, which require a bar between the buffers, and space behind this for a hook. 

If I were starting with a kit, the beam itself could be a lot thinner, allowing hook space with less bulky buffers. But I'm not. The best I could do is removed a millimetre of whitemetal by sawing the ends and carving the rest away with a sharp knife. The 3-link coupling hook prevents serious filing to achieve the same result. 

The faces are built up using plastic sheet, with rivets (bolts?) added from cubes of Microstrip and lashings of solvent. 

The end result is bulkier than I'd like, but at least it works. Industrial locos were known for chunky buffers anyway, and I'm not going to pretend this is a perfect model of the Seaham Harbour machine - not least because I can't face doing the lined green livery!

Sorry the model is so dusty. It's a trick of the camera, highlighting dust you can't see normally. For work, I'll spend time dusting, both physically and electronically, but on the blog, I keep it real (as da kidz say).


Thursday, September 01, 2022

Getting on track


Amazingly, after a tiny twist, the wheel quartering seemd pretty much spot on. Rods were slid over bearings and the retaining nuts done up hard, then touched with superglue to ensure they don't undo themselves - as one did when testing under power. For a hour or so's work, things were looking good. 

Finding space for pickups was tricky. The PCB shelf was well fitted, but I like to bear on the backs of the wheels as far away from the centres as I can so there is some spring in the phosphor-bronze wire. A bit of dodging around chassis parts was required, but on the first go, three of the four were doing their job. Considering how long it is since I did this, that's a pretty good hit rate. 

After that, a blast on the test track with unsophisticated H&M Clipper power, and it seems I have a working loco!


All I need is to tidy up the edges of the wheels and rods and it's time for some body titivation. The real thing might be green, but I'll stick with black as intended by the original builder. A bit of weathering will help bring it alive though.

Wednesday, August 31, 2022

Wheels off


I love Romford wheels. Self-quartering, and thanks to the metal centres, pretty much indesructable. These are not Romfords. 

It's been a long while since I did any serious kit bulding, but the soft plastic centre suggest Sharman wheels, or possibly Gibsons. Whatever, my experience in the past is that you can't take these on and off an axle repeatedly as they lose their grip. So I wanted to do the job once, and carefully. 

That's why I'm using a wheel puller to remove them with as little strain on the soft bits as possible. They slide off easily enough, which I hope is down to me using the right tool, and not that the centres are made of blancmange. 

The front axle drops out, and I shorten it with a piercing saw. Breaking three blades doing so. No idea how, I'm usually pretty good with these things, but one blade only lasted two strokes. 

Anyway, eventually it was chopped, the end tidied up and the wheels put back on using my vice as a press to ensure they went on sqaure. Something else Romfords are good at...

At the back, the gear is firmly fixed, I i had to cut both ends. Measuring was simply putting a wheel against the frame and marking the required axle length with a fine pen. Not perfect, but good enough for this job. 

Back in place, every thing turns smoothly and they seem not to wobble when spun. The back-to-back gauge just goes in between them, so I'm not taking anything apart again to thin down bearings in the chassis. I even spotted the front axle is compensated - this seems a very well-made model, which makes me wonder how it ended up in the state I got it.
Tuesday, August 30, 2022

Lewin loco


When my friend Earl dropped a load of collectables (Triang Giraffe car, 3-rail loco) he also brought along a part-built kit for which he extracted a small amount of cash. 

At the time, he said it was one of the early MRJ scratchbuilt models. This appealed to me as I think I bought the last set of brass castings for this project, as it's long been on my to-do list. I remember the series, even haunting WH Smith to get a mag with the latest installent of the Wantage No.5 build. 

Now, I knew this wasn't Wantage No.5, but the article included a few variations, and I assumed this was one of these. 

Yes, I can be a bit dim. 

What I actually have is an Impetus kit of Stephen Lewin's Seaham Harbour locomotive. The clue in on the home-made box, although in my defence, the label wasn't stuck to it at the time. 

Anyway, in the box is a nicely made body, and a chassis that appear to be a bit "got at". 

It's built with OO frames, but the wheels are set to EM thanks to a load of washers. The cyliner rods are attached, but not the connecting rods for the wheels. Given some power, the motor works sweetly enough. 

So, all I need to do is regauge it back to OO, and re-attach all the bits, which I've checked, are in the box.