Friday, July 31, 2015

Bulldog exhaust and a handy tool

 
Under the Bulldog, there is an exhaust pipe. Unusual feature since most tractors chuck out their gas from a vertical pipe on the side of the engine bonnet. Other Bulldogs have this, there is even a part in the kit, but not the one I'm building.
 
Anyway, there is a big, fat, silencer on the pipe that tapers at the end. Proper modellers would set up a lathe and turn this.
 
I stuffed a bit of plastic tube in a pencil sharpener. This sort of worked but when I glued a bit of rod in the tube to make a solid end, it shaped perfectly. Then I drilled from the back of the tube, put new rod in to represent the pipe and the rest was spot on.
 
This is the second time I used a pencil sharpener to make pointed bits for modelling recently. Last time was for 7mm scale plant pots. It's a handy tool.

Thursday, July 30, 2015

Bulldog roof

 
I'm not sure why the prototype Bulldog has a canvas roof not unlike a convertable sports car, but it does and therefore so my model must have one too. It's quite handy as in The Book, I wrote a cab in to the story.
 
Anyway, I don't think the roof is removable, at least not easily. When I started, I didn't know how I was going to make it. Since you can see both inside and out, the material had to be thin. Proper modellers would build a prototypical structure and drape gossamer thick cloth over it. More practical people would make a master and vacuum form plastic over this.
 
I'm not clever enough for the first and don't have the tools or equipment for the second.
 
Instead, I made the basic shape out of 0.75mm thick plastic sheet. In the top there is a single microstrip rib, sanded to shape. The rest of the roof is three coats of Deluxe Materials filler sanded to shape. While the sanding stick was out, I rounded off every corner and thinned down the edges slightly.
 
The result is OK. Yes, it's far thicker than it should be but then I doubt the real material is much more than 3mm thick. The only place it's really obvious is in the roof and you can't see under that can you?

Wednesday, July 29, 2015

Book Review: Industrial Railways of Southern England in Colour by Jeffery Grayer


Giving blood can be expensive. The Birmingham centre I use is a 30 seconds walk from the Ian Allan bookshop so after dishing out the squidgy stuff and enjoying a delicious Club Biscuit, it seems only sensible to continue my recovery by perusing their shelves.

Normally, this doesn't add much to the weight of my rucksack. Sometime there is even amusement to be had when the assistants have to deploy the air freshener after visits from certain customers who are obviously well known to them.

Anyway, wandering in there last time, I spot this book. It claims to have pictures of industrial railways and since this interests me, I flick though. What I expect is some nice photos but nothing exciting.

I was wrong. One of the first photos shows proper steam trains running in the streets of Farnborough.

The killer images though, are on pages 67 and 68 - Colour photos of the Hellingly Hospital Railway!!!

Of course this meant that I have to buy a copy. The £18.50 price made me gulp slightly but if I'm honest, the rest of the book is well worth the money. It's not full of coal mines for a start. Instead there is a real variety of industries including several that cry out for modelling.

Even if you aren't interested in Hellingly, it's worth a look. I certainly want to know more about the lines in Farnborough and those at APCM Southfleet. Even the watercress lines at Bere Regis, which I've seen pictures of but never taken a lot of notice of in the past, look amazing.

Industrial Railways of Southern England in Colour at Amazon

Tuesday, July 28, 2015

Bulldog controls


More scratchbuilding. My Bulldog has a cab back and folding roof. The kit has neither so I've had to add the bodywork.

Firstly, the back was cut and fixed. It leans backward slightly, a job I've done by eye. Next, the sides were cut too large, placed in and the top of the mudguard drawn on them. A quick trim and they went in next. Lashings of plastic solvent and everything is held in place.

Finally, the kit controls were fitted. They're pretty good too although there should be an extra pod sticking out of the dashboard with two switches on it, I assume for the lights.

The tractor is looking less like farm machinery and more like a vintage car all the time.

Monday, July 27, 2015

Windscreen on

Windscreen added

According to my measurements, the Lanz Bulldog windscreen is fractionally under 2 feet tall. I bent the frame from some tiny square section brass. Whatever the photo appears to show, it IS square and not tapering.

Around the base, construction is a mix of microstrip and Deluxe Perfect Plastic filler. During sanding I managed to bend the mudguards in a bit but I'll fix those. The angled supports need re-fitting in this side too.

Handy hint: Don't take photos of your models, they are too cruel.

Sunday, July 26, 2015

Large Model Flyers, Cosford 2015

Wheeling a Lancaster

The rain as we drove up the M6 didn't bode well for the day, but then the M6 is always grim anyway. By the time we made it to Cosford and walked over from the car parking area - a bit of hike this year thanks to a change in the event's layout - the sun was breaking through and apart from a warm breeze, the day was perfect.

Almost immediately, there were 2 and then 3 Lancaster bombers in the air. Each has a 17 foot wingspan and according to one of the pilots we chatted to later, took 3 years to build. A year to get the basics made, another year for detailing and a final year for CAA approval.

Fueling up

A couple of aerobatic displays were very impressive. Quite how you make an aeroplane fly this was is a mystery. One move, called "the harrier", involved the plane descending vertically but with the plane horizontal. Another seemed to have the plane flying forward so slowly you could hardly see it move. My understanding of physics is that at this point the plane should have all the flying properties of a brick, but it seems not.

Lightning

Blustery conditions gave the problems problems. A large model of a Lightning was within a couple of feet of touchdown after an impressive display when it was suddenly flying perpendicular to the runway for a second - real heart in mouth stuff that thankfully turned out well due to the skill of the pilot. Fortunately, wind doesn't affect these large models as much as smaller ones. For the most part, everything seemed to go very well.

One of the nice things about this show is I can wander around the trade without feeling the urge to splash out on a kit. Fascinating as this stuff is, I'm happy just to watch other people flying. Mind you, I did come away with 20 quids worth of superglue (it's cheaper here than train shows), some big sheets of Depron and a slab of blue foam. No idea what I'll do with these but they were so cheap, and the car wasn't that far away...

Photos of big model aircraft on Flickr.

Saturday, July 25, 2015

Puffer pictures

Auld Reekie

You know how it is. Working in out clubrooms with BRM's Andy York taking some photos and you happen to have a 1/32nd scale Clyde Puffer handy. And well, we had a large photo booth set up. It seemed a shame not to get him to take a few photos.

Strangely, he seems all at sea for one of them...

Puffer at sea

Friday, July 24, 2015

Friday Facts about the Triang Giraffe Car

Triang Giraffe Car

The Interweb is full of FACTS so here are a few about the R.348 Triang Giraffe Car:

1) The model was in the catalogue from 1963 to 1971 with the exception of 1970 when it was mysteriously absent.

2) Like many Triang operating accessories, the inspiration was a Lionel O gauge model.

3) According to the 1969 catalogue, the Giraffe's name is Georgina. Previously it had been referred to as Georgie.

4) Due to the box inner not including a hole for the left ear, this tends to be knocked off in transit. 2-eared giraffe's are rare and you can normally point out the missing Auris. I've bagged a few discounts this way.

5) It is the best model railway wagon ever made. Why it has never been re-introduced is a mystery.

Thursday, July 23, 2015

Mudguards on my Bulldog

Bulldog with mudguards

One job I really wasn't looking forward to on this build was forming the mudguards. On the prototype there are a lot of curves and I wasn't sure if I could form these neatly, nor if they would fit the model as it's not exactly the same as the real thing.

Anyway, I dug out some very thin brass (leftover etch) and cut some 5mm wide strips using an Olfa cutter. The width is guessed from the photo as the mudguards only just reach the edge of the rear wheels, but when I checked the real thing, they are 17 inches wide, so I'm not far out.

After this, bending started with the big wheels forming the metal around various pens until it looked about right. Then the sharp bend followed by more trial and error for the front. In reality, the mudguards are in two parts with the break where the sharp bend is. However the gap is tiny and it means when I add in the tiny angle fitted to support the front section, it can be purely cosmetic.

After which I just had to do it all again for the other side. Supeglue holds the metal to the plastic - the blobs under the lights aren't so obvious in real life and will vanish under paint later.

I know the cross-section incorporates some raised areas for strength but I reckoned I should stop bending while I was winning. Perhaps if I was soldering, I could have added thin wire for the effect but better go this far and be happy.


Now, I just need to go and measure the windscreen.

Wednesday, July 22, 2015

Lanz begins

Inside the expensive kit, there aren't that many parts. What there are rattle around in the big box!

Looking through, there are obviously several versions. In fact there is one with a sort of cab in the range. Mine has a powered saw arrangement on the back which I won't be using but handily, the power takeoff cover on the side of the engine IS in my kit. A bit of scratchbuilding saved - it's not perfect but near enough for me.

A few minutes work sees all the parts I'll need from the kit in use. Wheels are only pushed on, hence the lack of hubcaps. I need these to work out the size of the mudguards but they'll need to come off for painting later.

Bulldog beginnings

Tuesday, July 21, 2015

Lanz Bulldog

Lanz Bulldog

Years ago, I was writing about a man who restored vintage tractors for my novel. The character was based up someone I remembered from an old site visit in a previous employment. In the fictional world, his pride a joy was a prototype I'd never heard of until I joined the local model boat club.

The farmer who owned the land our pond is on collected tractors. The one that stuck in my mind was a Lanz Bulldog and when I needed a suitable steed for the chase that forms the exciting conclusion to the story, that was the name that stuck. Tractor fans will know that it's probably not the vehicle you chose for high-speed pursuit, but the novel is chick-lit so I'm gambling that no one will notice, and if they do, they will see the joke.

Anyway, in the book I've given the tractor a cab but the one on the farm didn't have one. Then, a couple of weeks ago, another Bulldog appears. Freshly restored and looking superb, it's exactly what I had in mind and when the film is made of my book, Hollywood will have to hire it.

This inspired me to dig out a plastic kit I bought some time ago to recreate the farm vehicle in my head. At 3.5mm to the foot, it's not very big. Even at half-price, it's scary expensive and the sort of thing you buy at the NEC when you haven't spent much cash over the weekend. It doesn't even look much like Bulldog I described, but hopefully it will make a good starting point.

Monday, July 20, 2015

Why models are better than CGI

They provide better entertainment for plastic kit anoraks.

TerraHawks ship

Look at this Terrahawks space ship, you might need to click on the photo to see it larger. Once you've enjoyed the show, there's hours of fun identifying the various bits of kits that went into the construction.

You don't get any of that with CGI and computer generated stuff never looks as good.

For more on this mode, visit the David Sisson Models website.

Sunday, July 19, 2015

Novel Glue

In his novel "Us", David Nicholls has the main character permanently assembling some of his sons Lego models because the little brat just smashes them up and then sticks the bricks together in an annoyingly random form.

One night, motivated entirely by a desire to give my son something lasting and permanent to ply with, I waiting until he and Connie were in be, poured myself a large Scotch, mixed together some Araldite adhesive in a jam-jar lid, laid the instructions before me and carefully glued together a pirate ship, a troll castle and an ambulance.

I wonder is Araldite is really the best glue for this. The character is a scientist so presumably able to tell the difference between different adhesives.

2-part epoxy glue strikes me as problematic, you'd be forever making new mixes in the jam-jar lid for a start. Building 3 models will take tame, and about half a bottle of Scotch, by which time you'll be high as a kite on the fumes.

Would a plastic cement be better? Presumably it would need to be an ABS one - Plastic Weld for example. Even then, you're going to have a hell of a come down from the effects if not working in a well-ventilated area.

Saturday, July 18, 2015

Smallspace 2015

xl5
 
Time for a break from all those model railway shows with a trip to Buckinghamshire for the Smallspace Exhibition of all things sci-fi.
 
 
The star of the show this year was the Whomobile - a futuristic looking car commissioned by Jon Pertwee and owned by him. Now restored, it appeared on a trailer and every hour, there was a raffle for the chance to sit in it.

The most fascinating thing about this years displays was the number of original TV or film props and just how crude these were. The large Space 1999 Eagles are impressive but even here you can see the woodscrews used to retain the equipment pods as well as the plumbing to direct freon gass out of the rocket engine nozzles.

An alien spacecraft from UFO looked tatty but was apparently used in the distance for some shots to creature forced perspective. One lit and whirling around, I suppose no-one could see the detail. Along side it was a Luton-van model based on a MK1 transit and lettered for HS studios, the fictional cover for SHADOW in the series. I wonder how difficult it will be to make one of these one Oxford diecast produce their normal version?

HMA Leviathan

Outside but under canvas were a fine selection of steampunk models. The imagination and skill that goes into creating these amazes me every time I see them. At some point I really want to have a go at this sort of modelling myself. For the minute, take a trip to Herr Doktor's blog and have a look. I particularly like the idea that after defeating the Martians in "War of the Worlds" we reverse engineered the ships and are heading to the Red Planet to teach Johnny Alien a lesson...
 
The only problem with this event is it's outgrowing the village hall that hosts it. The trade to exhibit balance changed in the direction of trade this year but not detrimentally. I managed not to buy any kits, although the Bandi R2-D2 and R5-D4 1/12th scale kit tempted me as did a Thunderbird 4 kit. And a Robbie the robot. In the end I just bought some tools and material from Little Cars. Well, I don't really need any more kits for the cupboard...
 
Photos from Smallspace on Flickr

Friday, July 17, 2015

Mounting toggle switches in 9mm plywood

switchmounting

The problem: Fitting a toggle switch in a 9mm plywood baseboard. You can't just drill a hole as the threaded area on the switch is also 9mm tall so the retaining nut won't grip.

Solution: Drill half way through the wood with a 12mm spade bit. The go all the way through with a 6.5mm normal bit - the spade will leave a guide hole in the centre.

Clean up with sandpaper, knife and the spade bit twiddled in the fingers.

Result: Nicely recessed toggle switch held in place perfectly.

Sounds simple but thinking this up took me a couple of days!

Thursday, July 16, 2015

Hornby renovated

Finished Hornby Building

After a few finishing touched - large doors and painting the drainpipes - the Hornby building is fully renovated.

Despite it's lowly origins as a 50p buy from a second hand stall, I'm quite pleased with the results. Some early (1980s - early!) plastic kits are pretty good and repay careful building.

In fact, I'd say there is an awful lot of the Hornby accessories range from this era that are unjustifiably ignored by modellers. They are kicking around eBay and second hand stalls - grab them before people realise what they are missing out on!

You might notice that the building is empty. Well, that's part of the tribute to Margate works, which is also empty now Hornby have moved out...

Wednesday, July 15, 2015

Making signs

Signs

Now we live in the future, certain things have become a lot easier. One of these is producing bespoke signage. Given a computer and printer, anyone can rattle off signs that would have required the efforts of a skilled man with a brush years ago.

So it is in miniature. Running off replacement signs for the Hornby building to replace the ones pulled off the kit when I was stripping paint was the matter of a few minutes work with a desktop publishing package (Serif PagePlus 7). The Hornby logo is lifted from their website and despite being web quality, is more than good enough for this purpose. I like to run off lots of different sizes as despite measuring, it's nice to have options to see what looks right on the model.

The only problem was that the signs came out brown instead of red when printed on the photo quality paper. Telling the printer to clean it's heads solved this.

The final job is to cut them out, run a suitably coloured pen around the white edges and glue in place with UHU.

Tuesday, July 14, 2015

Windows

Window

While stripping down the building, I tried to remove the plastic windows carefully, decided they were too well stuck in place and just bust them out with a poking finger.

Replacements were cut from 1mm thick plastic sheet. I tried to mark the bars by scribing them and filling the lines with white ink. This didn't work as the ink pulled out of the scratch as soon as I rubbed the excess away.

The second attempt was made with enamel (Humbrol 147) put on with a bow pen. Although I'm showing the best window, the others are OK, at least for this project. To be honest, I wish I'd gone for the bow pen straight away - a lesson to be learnt for next time. It's certainly the best way to represent steel industrial window frames.

Monday, July 13, 2015

VW Campervan for sale


If you've seen my local paper then you might have spotted this advert in the motoring classifieds. Yes, it is time to sell Ashley, my VW campervan.

Truth is, I've not driven him on the public roads for 5 years (he had to be dry stored once I got the 206 for commuting) and if I'm honest, before that trips out were often prompted by a realisation that he'd not moved for a week. I'm not really a camper, rarely get anything resembling a holiday and am no-way cool enough to make the most of VeeDub festivals. Basically, I'm not using him, he needs someone who will.

The good news is that the tiny bit of welding required has been done. Engine seriously serviced and a quick freshen-up became a full respray. He looks fantastic and the re-con engine with around 7000 miles on it runs very sweetly indeed.

Unlike most vans, there shouldn't be any horrors to discover - I went through that process over a decade ago and very painful it was too. You could jump in and go on holiday next weekend.

If you are interested, ring the number in the advert (Malc has carried out all the work except the respray) and is handling the sale. Either that or drop me an e-mail. Good home required please.

Sunday, July 12, 2015

Beaconsfield 2015

Melbridge DockMid-summer exhibitions are rare. It's generally considered that most punters will be outside doing summery things and won't be easily enticed into a warm hall to look at train sets. However, more and more clubs are risking the move to sunny times especially if they are currently trying to organise a show in the busy autumn/winter period.

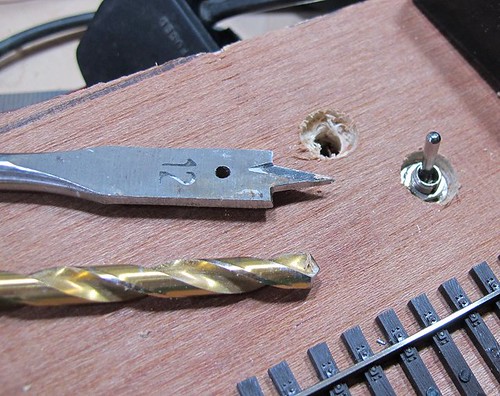
To make things as difficult as possible, the weather on the day was glorious. Our trip down the M40 was uneventful and once inside, we set up, fixed a dry joint and then went for a stroll.

The second hand stall was fantastic and I could have spent a lot more than I did. I still regret not picking up the Matchbox Jaguar kit for a couple of quid, even though I don't really need a 1/32nd car kit. It just looked fun to build. Still, 
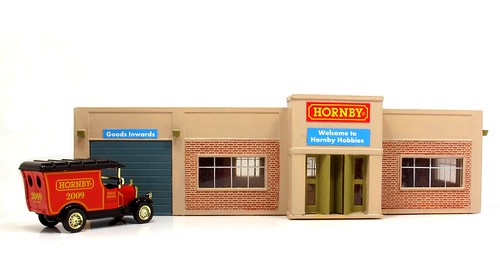
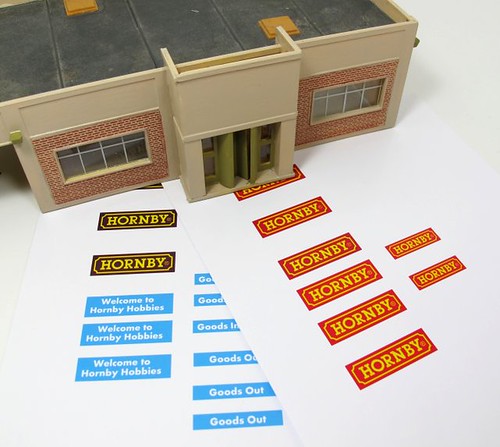
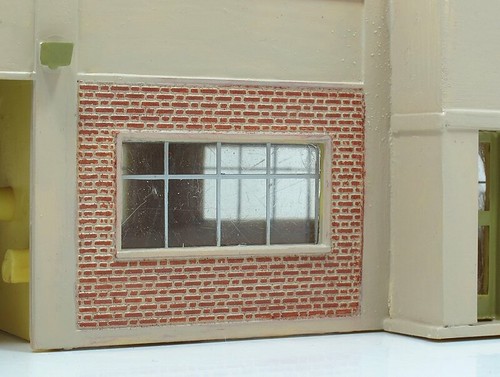
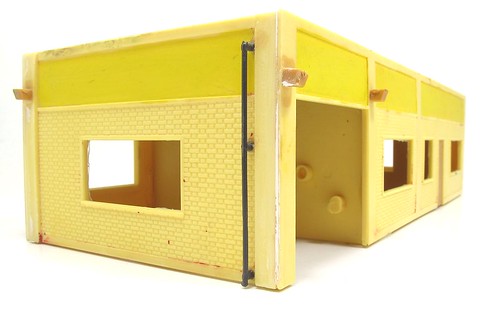
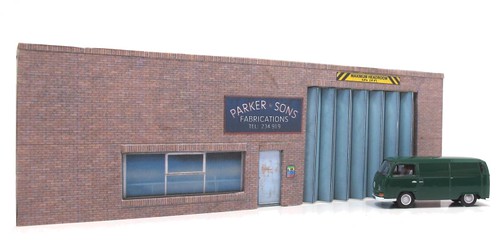
the Hornby building is entertaining enough.

The warm weather might have been caused by the heat coming off the teas. Walking around the show, I spilt a little on my hand, 5 minutes after it was served resulting in a mild scald and trip to the toilets to run cold water on my wrist. After this, I stuck to cold drinks!

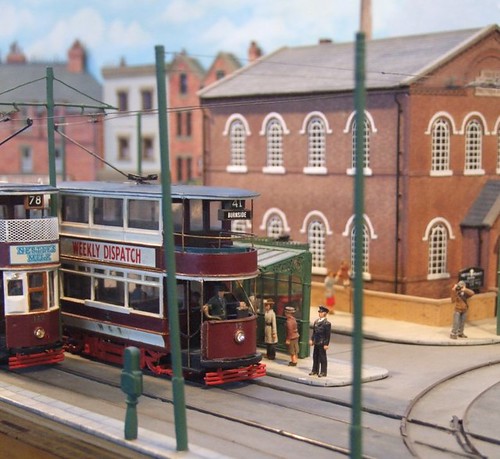
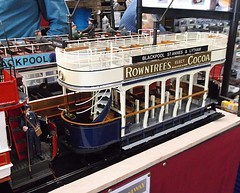
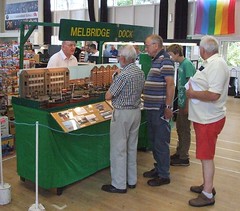
Layouts were better than you might expect for a local show. I'd recon that there were half-a-dozen that I really liked including some N gauge which is unusual for me. I'd not really like to pick a favourite although the tramway is a bit special even though it's been around for many years.

Tram to Burnside

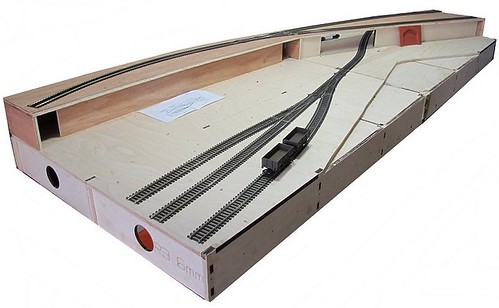
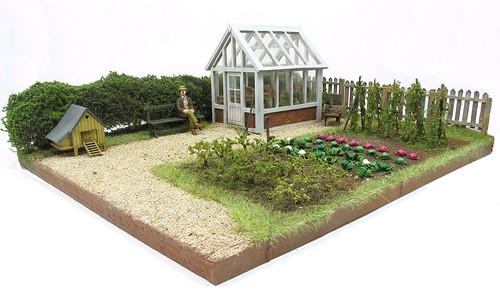
Trade was less exciting. Several RTR sellers were fighting for custom. Elsewhere Severn Models tempted me with their new O gauge garden sheds which I could happily have added some figure from Freestone Model Accessories to in a little scene, had I not just built a garden diorama for BRM.

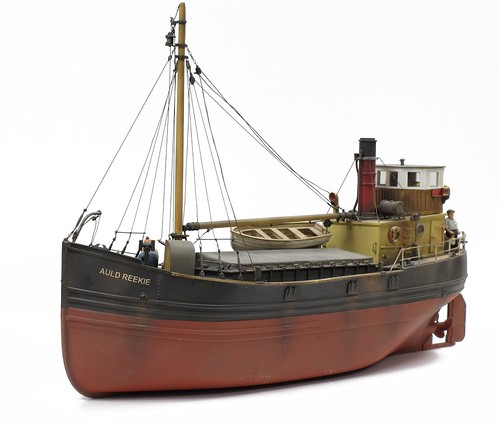
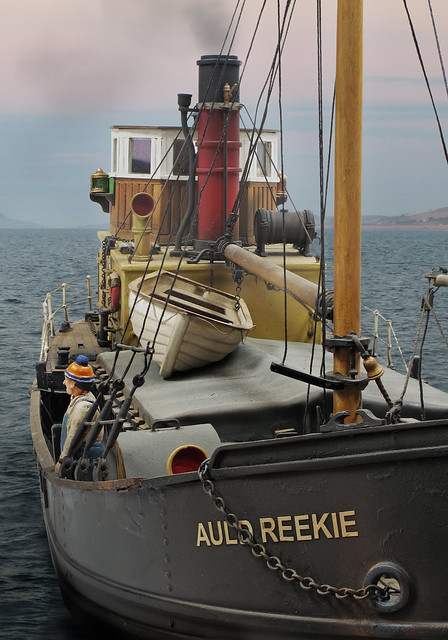
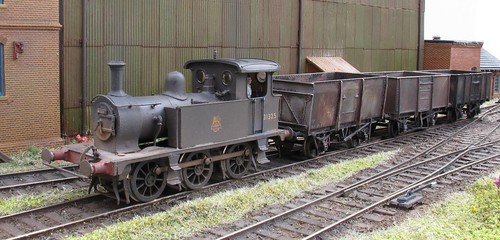
Apart from our initial dry joint, the layout ran well and we received much appreciative comment. Despite being withing spitting distance of the M25, the puffers proved the most popular feature. We met people who had sailed on them, restored them and even been a cabin boy on one!

ChoccieCakeWhilst never heavingly busy, there were plenty of people around and the day passed quickly in a blur of chatting. One of the joys of a one-day show is that it doesn't need to be desperately serious, just a pleasant day out playing trains.

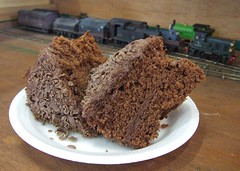
Which leaves the cake question. As hoped, the cake was excellent. Chocolate in the morning and carrot in the afternoon. Lunch looked good but neither of us fancied a big, hot meal and swapped our tickets for a cheese sandwich and sausage roll. I think I might have missed out on some good desert though...

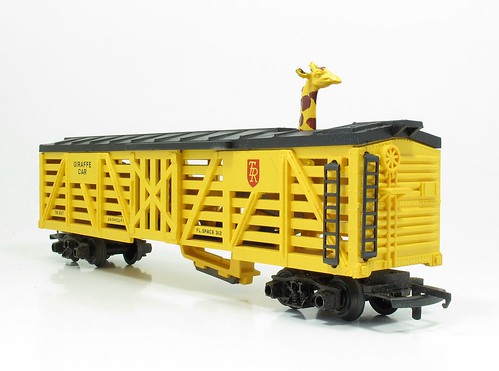
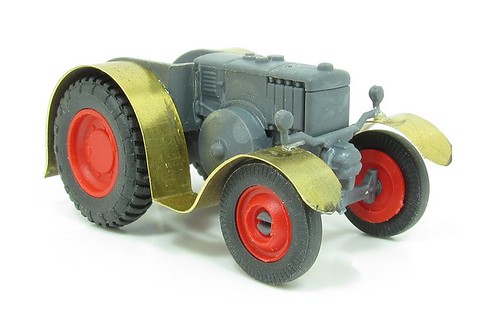
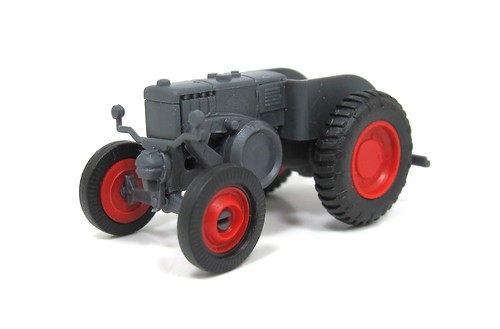
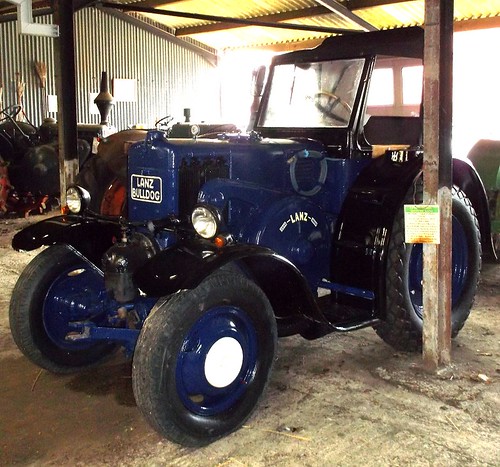
Photos from the show on Flickr.

Saturday, July 11, 2015

Stripping paint

Stripped Building

Back at the 50p Hornby building, I've spent half an hour at the sink with some Precision Paints Superstrip in an effort to remove the old paint. As you can see, I had reasonable success with the red brickwork but made no impression on the yellow stuff in the top panels.

Even getting this far took longer than expected. I worked the stripper in to the bricks with an old paintbrush and for about 15 minutes, only the faces cleaned up. Suddenly the chemicals got into the mortar and another quarter of an hour saw most of these cleared. Finally, I picked out the remaining paint with a sharp knife - it was loose but not ready to fall out.

After this, all the corners were re-glued and I filled in the worst of the gaps with Deluxe Materials plastic filler.

All this effort - I wish I'd just bought an unbuilt kit, but then I suppose that wouldn't have been so much fun!

Friday, July 10, 2015

Codename Edgeworth 2

Ruston Quays

If you've watched the DVD that arrived with your copy of BRM this month, then you'll have seen me introduce our new project layouts - Ruston Quays.

After building Edgeworth last year, we've been keen to do another layout build but something the complete opposite of a rural branch line. A few plans have been bashed around - you'll get a longer run down of this in next months magazine - but this is what we've settled on. Two levels of track, urban location, canal basin. Grime. Dirt. A bit of decay. Lovely, just my sort of train set!

The name came quite late in the process. For months it's been appearing on plans as "Edgeworth 2" and in the same way it takes months to stop writing the previous years date on cheques, I'm only just automatically calling it by the right name.

Look out for updates in British Railway Modelling and even on the blog over the next few months. I'm booked in to the National Festival of Railway modelling later this year, so I better get a move on!

Thursday, July 09, 2015

Scenic BRM

It's the annual British Railway Modelling scenery special issue and so I've been getting all green fingered.

Greenhouse Diorama

I've built a 7mm scale diorama based around a Petite Properties greenhouse kit. Despite being a small model, there's loads of detail in here with plants insides and outside the greenhouse. None of it is particularly difficult however and this sort of scene makes a great space filler on a model. It's the sort of detail that appeals to non-modellers too, the people who are bored by all that purving over locomotives.


Wednesday, July 08, 2015

Hornby factory


I've become a little obsessed with the Hornby "Town and Country" range of plastic kit buildings. There are several in my collection and I wouldn't mind picking up the rest. While they were badged Hornby, as Simon Kohler reveals in his blog, manufacture was by the European firm, Pola.
 
A little digging on the web finds that my 50 pence building is from their R281 Industrial Buildings kit. In the box you'd find the "Hornby" building and a modern northlight style structure. While long out of production, unused kits can still be found 2nd hand.

It's an odd beast really. Too small at 21cm by 9cm for an actual building but ideal for many model railways. Possibly the best bet would be to use it as the posh entrance to a much larger warehouse building. Basically, stick it on the front of one of the great big tin sheds that populate the out-of-town industrial parks of the nation.

My model is going to be a tribute to the real Hornby factory in Margate, which they moved out of earlier this year. OK, so the plastic version looks nothing like the real thing, I still think it can be made into a presentable model with some properly applied paint and perhaps better windows. It's better than being thrown away anyway, the normal fate of a model building if no-one will pay 50p for it.


Tuesday, July 07, 2015

Bluebell Model Railway event

 
Just over a week ago, I headed down to the Bluebell Railway for their model railway event. While it was a nice day out, the real aim was to go and photograph the pre-production Oxford Rail Adams Radial for MREmag. First impressions are good and if I didn't have a kit-built version, I could be very tempted indeed. More details on MREmag.
 
Reaching the Bluebell by train from Leamington was surprisingly easy - Ciltern to Marylebone, 2 tubes to Victoria and then a Southern train to East Grinstead. £45 although this was a late booking so it might have been possible to reduce this. Just under three and a half hours too so about the right amount of reading time.
 
After that I was in a beautifully restored birdcage coach and on my way behind a chuffer to Sheffield Park station. £17 for an all-day ticket.
 
The show was, if I'm honest, not nearly as good as the GCR event a couple of weeks before. While the floor didn't bounce, the layouts weren't nearly as good, nor the trade as impressive - although the GCR had set a very high bar that many shows wouldn't reach. This was a preserved railway doing model railways, not a high quality model rail show with a preserved railway attached.
 
That said, there were interesting models to be seen. The Bluebell is value for money and I certainly enjoyed myself. The full-sized stations looks fantastic and being Southern, very different from what I'm used to in the Midlands. Hostead Keynes with its underpass between platforms is especially interesting.
 
Tram 23
Perhaps in keeping with the preserved railway ethos, there was more model engineering on show. A large live steam Gauge 1 layout shared space in an engine shed with a 3/4 inch to the foot tram system. I love both of these so wasn't disappointed.

Regular readers will of course want to know about the cake situation. I can report that the cream tea served aboard the Pullman coach at Sheffield Park is excellent and at under a fiver, good value. Lots of tea, delicious fruit (one of the 5-a-day) scones, jam and cream. All served in luxurious surroundings.
 
A good day out - photos over on Flickr.

Monday, July 06, 2015

I bought Hornby - for 50p

50pHornby

An irresistible bargain from the weekend - Hornby for 50p!

An ideal blog project I'm thinking. What am I planning? You'll have to watch this space...

Sunday, July 05, 2015

Parker & Son Fabrications

Parker & Son Fabrications

Over on the British Railway Modelling blog, I've written up a quickie project I built to try out some free downloadable building elements supplied on the August 2015 DVD.

The 4mm scale model is based on the sort of industrial units I get to look at while dropping my 206 in for its service or awaiting the bill from same...

Head over to the BRM Blog for full details.

Saturday, July 04, 2015

Airfix QuickBuild Beetle

Back in January, on the Hornby/Airfix/Scalectrix stand at the London Toy Fair, I spotted something very exciting indeed - a Beetle!

Draw a venn diagram of things I like and both Lego and Veedubs will be on there. This kit lives at the intersection between those circles as well as the big one marked "Making things". You can imagine how excited I was when I finally found a newly released kit in a Brummy shop.

Beelte Bits

Inside, the components owe a lot to Lego losing a patent case a few years ago. OK, they aren't exactly Lego but I bet, as they say on other copycat versions, the parts are "Compatible with leading brands". When I was a kid, I wondered if Lego would eventually evolve to produce realistic plastic kits. It seems I was right, even if it didn't happen quite the way I thought. Mind you, the boys from Denmark are a bit hot on special one-kit pieces apparently so I wasn't that far off.

Beelte Bits for cutting

Although no glue is required, some parts have to be removed from sprues. They twist off OK but removing the leftover nib is a job for an adult with a craft knife or and emery board.

Beelte Build

Assembly is simple enough. The instruction designers have obviously looked at Lego but can't resist a bit of Airfix too. Highlighted studs are brought together in an unnecessary level of detail. The tyre to wheel assembly confused me as it's not obvious which way around the rubber bits go on the wheels, but once you try, they only fit one way around.

QuickBuild Beetle front

The most pleasing thing about the model is it really looks like a Beetle. Those curved lines aren't easy to capture and yet I think the Airfix boys have done a superb job. I reckon this could for the basis for a scale model with a bit of work. I fancy changing the colour myself so this might not be the last appearance of this model on the blog.

Friday, July 03, 2015

Off to Beaconsfield tomorrow


Tomorrow, all being well, we'll be exhibiting at Beaconsfield Model Railway show with Melbridge Dock.

I hope the cake is good and that if you drop in, you say hello.

Thursday, July 02, 2015

Mineral wagons

P and trucks3

Once upon a time, I thought all 16T mineral wagons were the same. I'm old enough to have seen trains of them hauled by blue diesels through my local station. At the time I didn't think anything of it - it's just how things were. If only I'd known that the future would see the end of interesting trains like this and a freight network consisting of containers with the occasional train of bogie wagons, not even MGRs, I might have paid more attention.

I also remember how excited I was to borrow An Illustrated History of BR Wagons Volume One from my local library. All those plans! All the different wagons! I could have a go at building some of them!

It didn't quite happen like that of course. I photocopied loads of plans but before construction could commence, Parkside Dundas came along with their reasonably priced, easy to assemble and pretty accurate kits.

I still tried to build a variety though. I didn't know before the book about slope sided or French type wagons. It just goes to show how much variety you can have in a rake of grey coal tubs.

When I was ignoring the trains of four-wheelers, I also didn't realise that one day I'd be able to buy most types RTR. Even if the sides do look a bit thick to me.

Wednesday, July 01, 2015

Slumbering P Class

Slumbering P Class

Poke your head inside the engine shed at Melbridge Parva and you might find a P Class locomotive awaiting its next duties. Perhaps it will feel fire in its belly today, or maybe it has been left to be discovered one day in the future by the preservation movement.