Tuesday, September 30, 2014

Scrubs up nicely

I'm doing a bit more filming for a BRM DVD. This time I'll be needing my soldering iron for the feature. It was looking a bit worse for wear - basically absolutely filthy.

Now, I don't mind my tools looking like they earn their keep in photos and films but this thing was absolutely caked in muck and gunge. When you can't see the markings around the temperature control then perhaps it's time to have a clean.

This worried me. I think this is an excellent tool and I really don't want to break it. But, a couple of days ago, I gave our toaster a good, through, clean.

Plugging it back in I'd obvioulsy knocked the lever enough to switch it on. The element warmed up, there was some steam from inside, then a load pop and all the power went off in the house.

I unplugged the errant appliance, reset the RCD in the distributor box in the cupboard and then had a sniff. The smell was unmistakably borken electric thing. A very clean bread heater awaits a trip to the small electicals recycling bin which a replacement occupies it's old position.

I didn't want this to happn to my soldering iron so extreem care was taken when brushing Cillit Bang around the base and handgrip. A paper towel wiped up any excess moisture and the thick grime after a few seconds.

I also didn't plug back in for a couple of hours to let things dry. When I did though, I am happy to report that the iron works as well as ever. I wonder if Barry Scott would like to feature it in an advert?

Monday, September 29, 2014

A most useful photography tool

 
RIP my GorillaPod. After well over a year of sterling service, it has finally bitten the dust. The three legs are turned skyward as it will no longer hold up my camera.
 
I didn't believe this could happen but quite simply, I've worn the thing out. Once the legs were stiff enough to hold in any position but now the balls move in the sockets at the merest hint of a touch. Screw a camera to the top and it descends to the desktop with a thump.
 
Trouble is, this is an incredibly useful too. Whereas for a DSLR or bridge camera, a beanbag is the ideal support, for my Cannon G12 - the workhorse for "how to" articles - the Pod is a more flexible support allowing for all sorts of angles. If greater height is required then it sits atop some books or boxes, whatever comes to hand really.
 
I did try some of the Internet fixes with smears of Superglue or roughing up the balls. Nothing worked sadly. If anyone has a suggestion, I'm all ears.
 
So useful a tool is the GorillaPod that it's already been replaced with one sporting grey rings instead of red ones. The difference in stiffness between the two is amazing.

Sunday, September 28, 2014

Tidying up the baseboard edge


I'm known to bang on about layout presentation. It doesn't matter how good your modelling is, if the beautiful scene is surrounded by what looks like the badly assembled contents of a skip, the overall effect is ruined.

On the other hand, a tidy setup can improve the model no end. One of our club layouts has just completed a very neat fascia panel and it really sets to the model off perfectly.

While I believe all this, I'm not always that good as following my own advice. Several hours of my time have been spend electronically tidying up the edges of dioramas that will appear in print to remove paint or glue runs. Time I could have spent with the paintbrush doing the job in real life. In fact, it would almost certainly have been quicker!

So, look at the big picture. If there are runs on the front of baseboard, a quick sand and some paint will be as effective in improving a model as any amount of etch brass fiddly bits.

Saturday, September 27, 2014

Accurail Monon wood side twin hopper

Momon Hopper

Job done. Result - a nice looking US bogie hopper wagon. It runs well on straight track (no points for testing at the moment) and would fit in with a RTR based consist.

Construction is really simple, certainly a lot easier than most British wagon kits. If I were in a hurry, going from box to built would be around 20 minutes. If you paint the black plastic bits black then add in another 10. For batch building, I'd probably spray the sprues and bogies with an aerosol can and leave them to dry overnight bringing the time per wagon to about 25 minutes.

One possible drawback with the kit is that they all have the same running number, but for $4.00 for half a dozen numbers printed on the body colour, Accurail can supply a decal sheet to fix this. Neat.

In the UK, we'd almost call this a CKD (Completely Knocked Down) kit. There is a little glue work required for the brake gubbins but the bogies screw into place as do the couplings. Detail isn't bad although there is potential for lots of separate parts. The ladders up the side look a bit thin to me and there aren't any handrails.

Could we have this in the UK? Not sure. I'd like to think so but have a feeling that UK modellers are now firmly entrenched in RTR or kitbuilding camps and I'm not sure they could be easily persuaded to jump from one to the other even with an easy to build model. Looking at the number of on-line complaints about the detailing packs supplied with models now, usually along the lines of "I don't know what to do it's too difficult why can't they do it for me" I'm not sure those people would appreciate having to attach their own bogies.

It's also quite an investment to produce a kit like this and UK sales aren't likely to be high enough to justify the investment. US modellers are greater in number and many will happily by a fleet of wagons bringing the unit cost down to the under £10 level this is.

A pity really, as I enjoyed making this kit up.

Friday, September 26, 2014

Off to Barrow Hill


This weekend, I'll be taking Edgeworth to Barrow Hill Live exhibition. It's a new venue for me but the mix of real and model trains looks interesting so if I can escape from behind the stand for a while, I hope to have a good poke around.

If you have the chance, please drop in and say hello.

More details of Barrow Hill Live

Thursday, September 25, 2014

Two types of buckeye

Couplings

Another new one on me, or at least I don't remember finding this before on a kit.

The buckeye coupling is supplied in two parts made from a different, more flexible, plastic from the rest of the kit. These both go inside the draft box, one on top of the other. Result is a sprung, working buckeye with an opening jaw.  Hanging underneath is a steel pole on the end of which is crimped a half moon to fit in the similarly shaped hole under the coupler head.

What I don't understand is the non-working coupling also provided. Who needs this? It's not any more realistic than the working version and you'll not be able to make up a train without lifting each vehicle up and hooking it on manually. Even then the train will struggle with curves as it wouldn't swing from side to side much. I suspect that most of these end up as scenic additions dumped in the corner of a yard.


Wednesday, September 24, 2014

Disappointing bogies

Bogies

In general, I'm quite impressed with Accurail's kit, apart from one thing. The wheels.

I don't know how they think in the land of the free, but over here in Blighty, we like our wheels made out of metal. We do not like shiny plastic with wobbly, and near impossible to remove, flash around the flanges thank you very much.

To be fair, the bogies roll well although I had to try one of the axles in a couple of places to get it to work. Not sure how that is as putting a different axle in the position it had just come from showed no problem.

If I'm being picky, the brake shoes don't line up with the treads either but since I think this kit was originally designed in the 1990s, that isn't so much of a surprise. On a layout you probably wouldn't notice and if you did, the vast gap between shoe and wheel tread will probably offend you more.

Still, other than clipping the axles in, there was no construction to this step making it pretty idiot proof.

Tuesday, September 23, 2014

Brake bits and undeframe

Brake bits

Nice drawing in the hopper instructions. In theory it shows were all the brake gubbins goes on the underframe spine. It's a pity the illustration is of the underside and they all go on top.

To be fair, we are only talking about 3 parts and if you bothered to look at a prototype picture (I didn't) it's probably obvious. For the rest of us guesswork will do aided bu locating pins in the shape of half-moons that fit in similar shape holes. You can't really go wrong unless you really work at forcing the wrong part in the wrong hole the wrong way around.

Hopper Bottom
 
The underframe fits beneath the hopper. It's a very tight squeeze, the central beam takes quite a hard shove to go between the chutes. This means sliding it back and forth for final positioning is pretty much out for the question. The body isn't quite symmetrical either so you have to make sure the brake gubbins is at the right end. Fortunately I hadn't glued it in place at that point...
 
In the photo you can see one of the big steel weights that slots in under each bin. These are really neat and invisible from normal viewing angles. The instructions do suggest painting them black if you want to - I can't imaging anyone not wanting to if I'm honest. Really keep types will fill around the edges but it's not essential IMHO as the framing and dark colour hide any tiny gaps.
 
While the paint was out, all the black plastic parts needed a coat. I suppose if you aren't fussy then self-coloured plastic is OK, but I am and it isn't. Not when my good friend Humbrol 33 is to hand anyway.

Monday, September 22, 2014

Hopper wagon

Kit and box

Now for something completely different. My friend Chris Mead has been collecting American rolling stock during business trips. He's fallen for the Monon Railroad and has amassed a modest collection for a layout many years in the future.

Some of the wagons are kits and on seeing them, I offered to put one together out of curiosity. After all, I've been told many times that American kits are superior to ours...

In the box is a pre-painted hopper wagon body and some black plastic fittings on a sprue. The bogies are one piece mouldings and wheels are included.

Cost: $15.98 - £9.78 in proper money. That's got to be some sort of bargain. For about the price of a UK 4-wheel wagon kit you have a pre-painted and lettered bogie wagon. Of course this is all down to economies of scale. I'd bet that Accurail can knock out 20 times the number of these than Parkside can sell mineral wagons. Chances are the same wagon can be shipped in a variety of liveries too, making the unit cost lower still. The box it arrives in is rather good too.

Sunday, September 21, 2014

RMWeb Live 2014

Diorama DisplayMonths ago, when we were first talking about RMWeb Live, I'm not sure any of us really knew exactly what the show would look like on the day. Obviously we had a pretty good idea but when doing something new, you don't really know until you see it in the hall.

Back then, the plan had been to do something different from the standard exhibition. Since the forum after which the show is named is all about information exchange, it seemed a good plan to try and set the show up in a similar manner. Therefore the plan involved skills zones covering different topics. In these you would find demonstrators who could show and explain how to do things, layouts using those techniques and appropriate traders.

Not only was this a new type of show, it was in a new to us hall - the Ricoh Stadium in Coventry. When first mooted, this was to be football free, but three weeks before the opening, Coventry City FC settled their arguments with the owners and were allowed back, and of course one of the matches was to be on the same day as the show.

Anyway, I turned up in my little hire van, a rather excellent VW Caddy, and found my table handily marked with a stand up poster. The tables for demos are new. Higher than normal, they allowed the demonstrators to talk to people who were standing up. They were also 6ft long and very solid. Perfect for the job.

Saturday dawns and the first thing I find is that I've set up in the wrong place. It seems there was a slight change to the plan between the programme being printed and the opening. Fortunately with a bit of help we lugged Edgeworth to the next aisle and managed to swap my stand with one of the other demos without causing chaos (thanks for being understanding Tim).

First visitor was none other than Radio 6 Musics Steve Lamacq who was hosting the theatre over the weekend. Before getting down to work he'd been keen to see the projects written up in the magazine, of which I had a small selection.

It has to be admitted that visitor numbers were well down on expectations but despite this, I spent the entire day talking to people, not emerging from behind Edgeworth until closing. I hope people enjoyed themselves, certainly plenty took time to poke around behind the layout - which is the point of bringing it along.

Reely Grate

Sunday was more of the same after we watched RMWeb's very own Andy York and BRM's Steve Cole being doused with icey water for charity. The previous evening at the meal, Andy said he'd do it if we collected more than £100. The final total was over twice that so his cold wash was well worth it.

Sunday morning allowed me a quick run around the show with a camera. There were more then the usual number of small layouts. In that respect I wish I'd been a visitor as regular readers will know these are just my sort of thing.

Another day chatting and then a surprisingly swift packing up and exit. An excellent weekend, although my legs felt it for two days afterward. That hall floor is hard and I forgot to take some carpet to stand on!

Overall, the Skill Zone concept worked. Large banners overhead guided visitors and made the show look good. Hopefully future events will be able to secure a few more demos and traders to enlarge the areas. At least those who came enjoyed them. We must have done something right as to quote Simon Kohler from the Hornby stand, "I asked numerous visitors to the show if they had learnt something new during their visit and to a man (and woman) they all said that they had". Success indeed.

My photos on Flickr.

Saturday, September 20, 2014

Building the ring road of death


I don't like driving in Coventry. Given the option I'll take the bus and let someone else navigate.
 
The reason for my nervousness is the ring road surrounding the city centre. The ring road of death was built 40 years ago, in an age when it seemed only sensible to place thick concrete barriers either side of the tarmac with short gaps to allow traffic on and off at the same time.
 

Friday, September 19, 2014

A long drinking session


Last weekend, I took my beer festival diorama to RM Web live. Having purchased a suitable PP3 battery from Layouts4U, the animated drinkers were powered up and proved to be a great success.

Considering we were in a huge exhibition hall with loads of things for people to look at, nearly everyone who passed by spotted the little men banging their glasses on the table. The little bit of movement catches the eye, presumably some sort of ancient defence mechanism dating from when we were grubbing around water holes and trying not to be eaten by saber-tooth tigers.

Early in the evening, I was sitting waiting for the bar to open and realised I hadn't switched the drinkers off. The doors to the hall were locked so they spent the whole night working away. The next morning they were still at it and this continued for a couple of hours after the show opened.

26 hours on a cheap 9V battery. Not bad going at all!

Thursday, September 18, 2014

Dazzle camouflage

Dazzle

See that ship? Not very clearly.

Spotted in London a couple of weeks ago, this is the first time I've seen dazzle camouflage applied to a full-sized vessel.

The theory is that the disruptive pattern makes it harder to see the ship as your eye can't clearly make out the general shape. If you are aiming a gun or torpedo at it, you might be able to see something but it's harder to work out what and how big it is.

Paint schemes seem to have been applied sporadically during both world wars. Oddly, one campaign where the navy preferred grey boats was in the Pacific where they faced Kamikaze pilots. That's one area where confusing the vision of your attacker would have offered quite a benefit I would have thought.

I'm particularly interested in this as near where I live is the proving ground for Jaguar, Aston Martin and Landrover. Cars are often seen in a version of dazzle camouflage driving around some of the country lanes. The paint, sometimes only applied to part of the vehicle, is intended to make it harder for photographers to get a decent shot to leak the details of new models. I've never managed to photograph one myself but here's the same sort of thing on an Audi.

Spy Photo: 2015 Audi RS Q3 facelift

Now, who fancies trying to paint a model, car or ship, in these colours?

Wednesday, September 17, 2014

Book Review: Top Gear Ambitious But Rubbish

They say that inside every fat person, there is a thin person trying to get out.

In a similar vein, inside the behemoth that is the BBCs popular Top Gear TV programme, there is an excellent book or TV series desperate to emerge.

This isn't that book. But it's close.

Ambitious But Rubbish covers the Top Gear challenges where the presenters invent something, be it an amphibious car to a Reliant Robbins space shuttle. In truth the work is contracted out to people who know what they are doing and the presenter just gurns for the camera.

What I've never understood is why there isn't a backup documentary telling the behind-the-scenes story of each one. It's something useful for BBC3 for a start. Perhaps the Beeb think that it would spoil matters if we saw the TV trickery going on.

Never mind. This tiny book purports to give a little peak behind the magic curtain. It does this as well as it can which is to say, not very much but enough to make me want more. There are some nice little details provided but since each projects gets less than an A4 page of coverage including photos, this is all frustratingly brief. OK, I don't really need to know about the various cheap car challengers much but the Damper van project made me want to build a model. I would love more information on that.

For the bargain price of £2.99 (down from £9.99) it's well worth a read but I'll say now, I'd spend a lot more on a more detailed story.

Tuesday, September 16, 2014

Inspirational buildings

Runined Barn

After a weekend sat next to David Wright and his superbly atmospheric model buildings, I feel the urge to have a go at scribing DAS. For the moment I don't have the time but at least I managed to borrow a couple of structures to grab photos.


Hut

You can see more at David's Dovedale Models Website.

I want to make models like this...

Monday, September 15, 2014

Yacht varnish advice


Here's a handy hint. The photo shows two tins of yacht varnish - my standard gloop for producing large areas of model water.

On the left, a small tin of varnish. An ideal size for a modelling project you would thing. At 99p, it's well priced too.

There are a couple of snags. Firstly, the stuff doesn't go off. Archaeologists will dig up woodwork painted with it in a thousand years time and it will still be sticky.

Worse though is the smell. This stuff really stinks. Imagine the English, Welsh and Scottish rugby teams relieving themselves on your living room carpet after many pints of cheap lager on a hot day. It's smells a bit worst than that.

Ronseal yacht varnish costs 15 quid for a big can. It sets and the smell dissipates after half an hour.

Sometimes it seems, you get what you pay for.

Sunday, September 14, 2014

3D Printing show 2014

SoldierLast week, I wangled a press pass to the 3D printing show in London. I'm interested in the subject and the event was well worth a visit.

On display were cutting edge print machines churning out both little and big models. From printers you could buy to bureau services, there was a heck of a lot on show. If you don't fancy learning CAD then there were even scanners for things from tabletop ornaments to full sized people.

The big surprise for me was that colour printing is happening. The material has a stone texture finish but in many cases this doesn't matter and the repro is superb.

My take on the technology?

Well, it's good. For prototypes and VERY short production runs, it's brilliant.

BUT. It isn't as good as many people would have you believe, at least for our sort of small scale model making. Look at the surfaces and the texture is sandpaper. Curves display facets from the layers of plastic used to build them up. With these normally being 0.15 to 0.2mm thick, they are visible. And this is the cutting edge technology.

Another aspect often ignored is the time taken for a print. Something the size of a OO loco is going to take 5 hours or more to produce. Better hope the computer doesn't go to sleep in that time too as the results look like a plastic spaghetti explosion. Most printers can accept USB keyfobs and SD cards with the design on to get around this.

Market Hall

Price is an issue too. A very nice 4mm scale market hall would come in at a bit under £400. I'd probably build you one for that money. The firm concerned are working on clever design to bring this down. By printing it as a kit rather than a finished building they can reduce print time and therefore (apparently) cost.

Printing in actionHaving said this, I'm still fascinated by the technology. I am sure that it has a place in the modellers toolkit and that place is going to grow as print layers become thinner or different technology is used, resin printing looks very interesting for example.

When someone tells me there is no need to learn any modelling skills as they can do it all on a computer and print the results, I still think they are wrong. Even where they are right, you've got to climb the steep learning curve with a CAD package and gain experience in making 3D print items as it's not as easy as it looks.

More to the point, I like making things with my hands. If you can print everything, and there was one printer that would tackle a micro-layout sized job, then it's going to be time to find another hobby. But not for a good few years yet I think.

My photos from the 3D print show on Flickr

Saturday, September 13, 2014

Laxey Wheel in model form


One of the many wonderful things about visiting the Isle of Man is that there are interesting people to talk to, especially during the enthusiasts weekend.

Early this year, when we were over there, on one of the first trains we rode on, in the corner was a gentleman from New Zealand by the name of Lloyd Dickens. We got chatting and it turned out that he was researching the railway for his garden railway. I asked if on his return, he'd send me some pictures and this is what you see above.

Now a garden line based on the IOM isn't that surprising. We have a fair bit of stock ourselves. However, Lloyd has what may be the only model of the Lady Isabella, the Laxey Wheel. This is quite an achievement as the thing is both huge and complicated.

Not only do we have the wheel, the push rod that runs along a viaduct to operate the pump hauling water out of the mine is included, albeit in a shortened form. There is also the counterweight on the other end.

Smashing model.

Friday, September 12, 2014

RM Web Live this weekend


This weekend sees the first RM Web live exhibition. When we first looked at putting a show to tie in with the forum, it was important to do something markedly different to a traditional model railway show. After all, there are hundreds of these every year and the world probably doesn't need another one.

Since RM Web is all about information exchange, and we have the benefit of a professional exhibition organising team who can work "outside the box" rather easier than most model railway clubs can, the event has been planned around a series of skill zones.

There will still be layouts and traders but these will be supplemented by loads of demonstrators - people helping the visitor with their modelling.

Central to the event will be the theatre which has a rolling programme hosted by Radio 6 music's Steve Lamacq, who happens to be a railway modeller as well as music nerd and top broadcaster.

I'll be on the BRM stand with Edgeworth and a pile of the most recent projects I've built in the magazine so please drop in for a chat.

Thursday, September 11, 2014

Laser cut buildings in BRM

October's issue of BRM is an RM Web special with lots of article by member of the countries largest model railway forum. We even handed over some of the editorial duties to a couple of guest editors - you can read their experiences on the BRM Blog.

My input this month, both on paper and on the bumper pack DVD, centres on laser cut buildings. I've Tried and Tested an engine shed kit from LCut Creative engine shed kit.

It's an interesting model. Sharply cut from a superb material - a compressed card that cuts perfectly with a sharp knife. I'd like some plain sheets for scratchbuilding. The kit's not perfect, as I say on the page, but if you need a single road shed for a tank loco, it's well worth a look. Being able to buy components or modules from the range is an excellent idea too. Those windows are superb.

On camera, I'm building a bridge kit which involved a bit of Blue Peter style "He's one I built earlier" malarkey. With only one kit to work with, I found myself sat outside the studio quickly sticking the model together while Howard was in front of the cameras. The place stank of superglue kicker afterwards...

Wednesday, September 10, 2014

Not all toys are childs play


"Why are we looking at a Playmobil - 4469 - Nautical Expedition Ship?", I hear you cry.

I'm impressed with your knowledge of the Playmobil catalogue, especially the ability to recall the serial number of a particular toy, I would reply.

Truth is, this toy has been knocking around the Parker pending pile for a couple of year. At around 15 inches long, it looks like it will make a nice radio controlled model. There's space inside for the mechanical and electrical gubbins. There is lots of detail, but not enough to worry about. Being a toy, it's nice and robust.

It's also a fun idea and should look fab on the water. Quite a few modellers have spotted the range and done the same work on them. Just for fun you understand.

Anyway, Parker senior fancies putting the mechanical. First job - make the model up. According to the box, this will take someone over 3 years old about half an hour.

Our combined age - 116. Time taken to build the boat. 45 minutes.

Hmmmm.

Tuesday, September 09, 2014

Wise words from car restorers

I've written in the past about my preference for the type of classic car magazine which shows people getting dirty and wrestling with rusty parts. Apparently I'm not normal in this, those mags full of shiny and unattainable vehicles sell better, but who cares. Rusty relics returned to life are more interesting to read about than concours car p**n.

Anyway, I open the latest issue of Practical Classics and reading a couple of the articles, I'm struck that there are some lessons to be learned from car botherers.

The first piece is about "Shed Hero", Rocky Rockliffe. Here we have a man who has apparently never stopped learning. Even though he's now retired to a croft on Skye, his home-built engineering workshop is a sight to behold.

"Life is for learning" he tells us and that is borne out in his approach. No-one is born with the ability to make new cogs for a gearbox and then harden them so the results will work. Nor do you build a turbocharger lightly but it doesn't seem to put him off trying.

His approach seems to be to keep trying and over the years he's built up skills and equipment to match.

Following this we have Callum Beveridge and his restored Citroen Dyane 6. Working in IT, he wanted a screen-free hobby and so bought a rusty 1980 car and brought it back to life using scrap parts and ingenuity.

Costing £75, his approach was that it was a great way to learn how to weld. He says, "I figured if I ruined it, I could always chop the body up and take it down the tip."

That's the spirit. Understanding that your hobby isn't life or death. Have a go and if it doesn't work, does it matter?

Someone recently said that many modellers are beaten before they start. It's true. I speak to lots of people who are terrified of having a go. They should read this mag and see what happens when you do.

Monday, September 08, 2014

Mystery bell

BellI'm writing this sat at the kitchen table in my sisters house while dog sitting.

The house is one half of a pair of cottages and mooching around, I notice a rusty bell on an outside wall.

It's obviously not worked for many years but I'm wondering what it was for originally. My guess is a repeater for the telephone bell - in the days before mobiles and wireless phones, you couldn't take one with you in your pocket so if you didn't want to miss a call, this bell would ring and you'd rush indoors to answer it.

It seems a bit of a grand feature for a cottage though. Presumably this was something you had to pay for probably quite handsomely, so you'd need to be answering some pretty vital calls if you wanted one. Perhaps there was an element of showing off too. Every time the bell rang it told the neighbours, "I'm important enough to have a telephone.", much like some people think a Bluetooth headset does today.

Are there any telephone engineers out there who can expand on this? I'm thinking it's a pretty neat detail to add to a model building but I'd like to get it right.

Sunday, September 07, 2014

Good enough?


“I can't built as well as the the RTR manufacturers, so I won't bother trying.”

It's a common enough thing to hear modellers saying, especially when it's suggested that they might like to build an item of rolling stock, but does it matter?

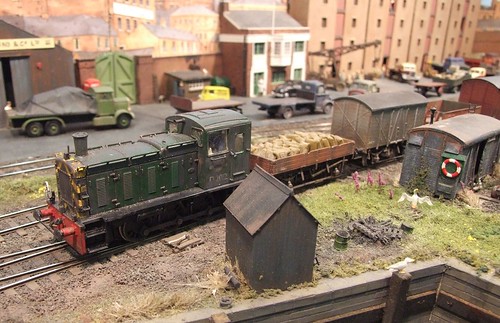
I'm going to suggest it doesn't – with one caveat. It doesn't if you are building a model railway layout. That is, you will place your loco/carriage/wagon in a larger scene.

03

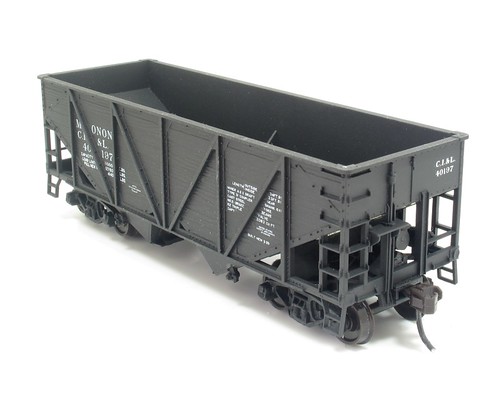
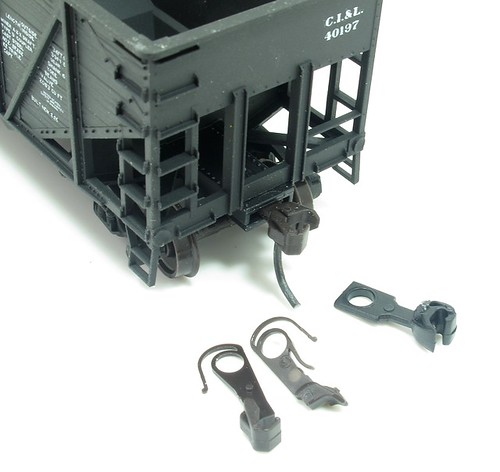
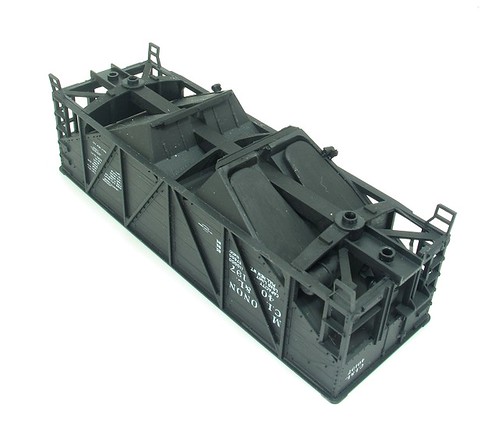
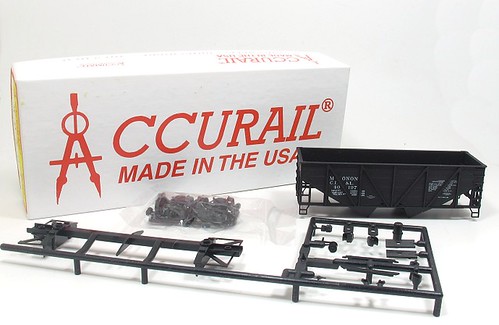
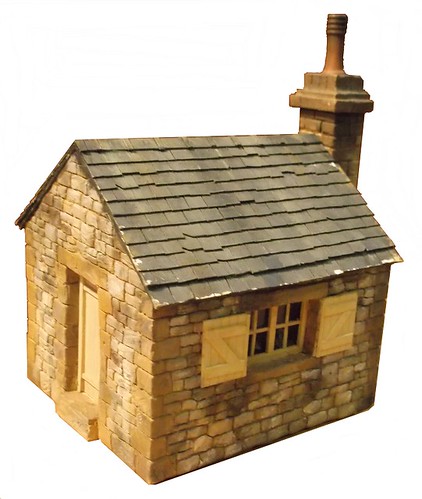
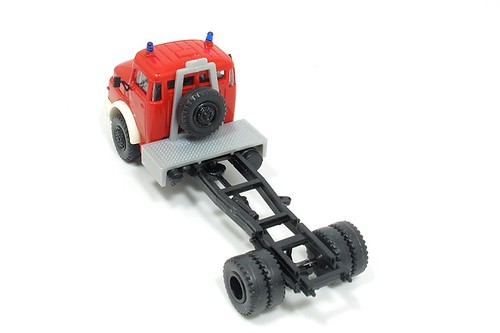
For many years I've not bothered to number my wagons properly considering that blobs of paint roughly the same size as numbers will suffice. I've also built many locos that are missing lamp irons and other fiddly little details. I even know a prominent 3mm scale modeller who doesn't bother fitting brake gear to his locos.

Has this been a problem?

No. You see when a viewer sees a layout, they see an entire scene and most simply can't take in all the visual information in one go. They see locomotive shaped lumps, not every rivet and handrail. Rolling stock will normally receive even less attention – a rake of coach shaped objects behind the loco will be fine.

So why are people worried?

Well first, I'd suggest it's an excuse. If you have decided that you will never be able to work to the standard you desire, there's no need to actually do anything. No need to climb the learning curve from raw beginner to seasoned bodger. No need to waste time that could be more valuably employed on the Internet or watching TV by sitting at a modelling bench and trying things. No need to put any effort in at all actually.

Second, lots of “modellers” don't own a layout. For them a loco, if it comes out of the box at all, is a showcase queen. Here it will be studied in detail and yes, you will notice the lack of lamp irons or wonky transfers. Here the highest standards will be required and I'd agree that the RTR manufacturers have the edge here unless you are, or are employing, the most skilled model makers in the land.

Third, we buy model railway magazines. In these pages you'll see models built by possibly the top 20% of modellers. They will be cruelly photographed and enlarged on the page. The camera doesn't lie and it's certainly the best way to spot errors.

An excellent example is baseboard joints. Nowadays these tend to be electronically removed from images, not because there is anything wrong with them but simply because they scream at you on the page. Yet, when you see the same model in real life, your eye simply ignores them.

So away people go, convinced that they “could never do that”, a phrase I hear at exhibitions time and time again. The truth is that they could, but the first stage is to understand what they are trying to do. Does it matter if your station doors don't have the right shaped door knobs, or even door knobs at all? For some this is life and death but I bet most people don't notice.

Look at it another way – can you cook as well as a top chef?

Probably not, but it doesn't mean you've starved to death have you. All that happens is you acquire enough skill to produce edible food. Very few people eat out for every single meal so why should you “model out” for every single model?

My feeling is that the eye is very forgiving. Find some realistic goals and stop beating yourself up. At the end of the day it's your hobby. Every time you blame mythical rivet counters for not having a go then you're depriving yourself of enjoyment. Even if one of these people does appear, all you have to do is ask them how they did whatever they are being snarky about and they will vanish in a puff of body odour.

In the meantime, join us bodgers in making things. It's fun when you get started!

Saturday, September 06, 2014

Mystery Motor

motor1

Here's a puzzle for you. Can anyone tell me anything about this motor?

Bought for £1 out of curiosity, it runs very smoothly on 12V DC but would (according to the markings on the end) be happy on 24V. It's very well made with screws over the brushes to allow for adjustment and replacement. I think you can adjust the end float by turning the lump with two holes in at at the back of the shaft. This is painted with a clear glaze, presumably to fix it.

The biggest oddity is that there are pairs of wires to each polarity - red/blue and yellow/black. These are twisted together so I assume they do the same things but why would you want to feed the motor from two places?

Motor2

Dimensions:
Length over shaft - 75mm
Width over the flat sides - 40mm
Height - 46mm
Shaft diameter - 3mm (it appears hollow too)

A plate on the end says Type CM3. The motor is No. 051207

The seller suggested this might have RAF origins but knew no more.

Friday, September 05, 2014

Preiser 1180 Fire Engine

Fire Engine 7


Fire Engine 8Phew, what a whopper!

After around 3 hours work, I am now the proud owner of a Mercedes Benz fire engine in 1:87 scale.

Finishing touches include a few spots of orange and silver paint and some transfers.

While there are plenty of transfers provided, with several town names and other options, since I don't sprechen ze Deutsche, I had to guess which ones made sense. If they don't then I'm (a little bit) sorry. The box wasn't much help either as again it didn't tie up perfectly with the contents.

Anyway, this is a lovely model. The arm extends to around a foot in height and when you move the joints, all sorts of hydraulic rams and pivots move. It all looks very impressive.

To be fair, this isn't a toy. Pulling the legs around will probably break them pretty quickly. Everything needs to be handled with care so it's more appropriate for posing than playing.

All I need now is a tall building and some cotton wool and then it's Fire! Fire!

Thursday, September 04, 2014

Hydraulic arm

Fire Engine 6Now for the impressive part. The hydraulic arm that supports the cradle is made up of loads of pieces, quite a lot of which clip in to each other and must on no account come in to contact with any glue!

Talking of glue, the instructions say these parts must be assembled with ABS solvent, not the normal plastic stuff.

I couldn't tell the difference between the two materials by touch, although the ABS seemed a bit softer perhaps. The pipe up the nozzle broke twice while I tried to drill out the hole in the top but I sploshed the solvent on and pushed the parts together and it seems OK.

One problem is that with lots of parts sliding inside each other, it would have been better to mould some in silver rather than white. Painting the while bits would be easy and the result would look more realistic. Keen types would replace the silver parts with metal rods of course but that's several steps too far for me.

The arm is simply pushed in to the back of the lorry body so it can be pulled off if required. I'm a little surprised that there wasn't a retaining collar inside. Mind you, it doesn't appear to want to fall off so I suppose it's all right.

Wednesday, September 03, 2014

Hydraulic legs

Fire Engine 4

With a tall raised platform, the fire engine needs some legs to stop it tipping over the first time the feuerwehrmann attempts to rescue a katze from a tree. (I assume German cats get stuck up trees. Perhaps they are too sensible).

The legs are box sections that slide inside each other. Care is required to ensure that the tiny tab on the inner box is running in the grove inside the other. Cleverly this stops it coming out too far and provides enough friction to keep the leg stretched out when in use.

Inside the body are a couple of metal nuts to give the plastic model much needed weight. These fit over moulded stub tubes - it's all quite ingenious really.

At this point it's a good idea if you've worked out the "do not glue" symbols. Also, since the outer box sections have holes in the side, be careful with the liquid glue, you don't want Mr Capillary action inviting it inside after all.

Fire Engine 5


Tuesday, September 02, 2014

Fire engine chassis

Fire Engine 2

Starting with the chassis, there's nothing particularly exciting to report. The main part is a single piece with the exhaust, fuel tank, springs and drive shafts (also a single moulding - neat) stuck on with liquid plastic glue.

Tyres are rubber slid over the plastic hubs. After you've done one, it makes sense to put the tyres on with the moulding pips inside. Fortunately, while they are a tight fit, a little persuasion removes them so they can go back on properly...

Axles are metal and according to the instructions, fitted with a hammer!

Gentle taps do force the metal in to the plastic. Then it's threaded through the springs and the other wheel pushed on. I used a vice as a press to help with this as you don't want to be whacking the outside hubs with the hammer.

Another nice touch is that there is vertical slop where the axle passes through the springs so all the wheels can sit on the ground even if it's not perfectly flat.

Fire Engine 3

The cab interior is a single part that fits on to the chassis front but is very tight. You must push this all the way home or the red cab body won't sit down properly on the front wheel arches.

Lights and wing mirrors fit with plastic glue and bot are excellent fits. Finally, the spare wheel mounts on the section behind the cab. This is a different colour to the model on the box cover, something that I spotted happens for several parts. Presumably the cover shots are of a prototype model.

Oh, in case you wonder, the wheels do revolve so the finished model can be "brooooomed" along the carpet.

Monday, September 01, 2014

Feuerwehrwagen

Fire Engine 1Most people come back from holiday with sensible souvenirs. A straw donkey perhaps or maybe something pottery or perhaps a notifiable disease. Me, I brought this back from the Isle of Man.

A plastic kit for a German Mercedes Benz fire engine.

My excuse is that it was cheap - a fiver from the pet shop in Port Erin. Also, I enjoy building Preiser road vehicles. Besides, I'd already bought everything railway and tram related on the island.

Quite why the pet shop had a stock of foreign road vehicle kits isn't clear. There were about half a dozen stacked up in the window. All looked pretty faded and it was only after 3 or 4 trips by the shop I finally succumbed and bought one. The lady in the shop said something about the owner buying jobs lots of stuff but wasn't sure. I think she'd have liked me to take the lot away but I didn't have the cash, or space in the suitcase.

Obviously I bought the model with greatest play value because I'm a big kit. Looking at the box, the legs extend and jib rises up. Since the current price is nearly 30 quid, I reckon it was worth it.

Inside the mouldings are self coloured, which is good because you can't paint parts that slide inside each other without gumming things up or rubbing the paint off. The instructions are mostly pictures supplemented with 4 other languages. To be honest, with brain in gear and with the experience of many kits behind me, I don't expect too many problems.