Saturday, May 31, 2014

Real (and model) buses at Wythall

A sunny bank holiday - what better way to spend it than riding around on vintage buses?

Wythall Transport Museum was calling so at 10:30am, a friend and I climbed the stairs on a vintage double-decker in the centre of Birmingham. The event was the annual Model Bus Federation show.

Bus line-up

To free up space for models and traders, some of the old buses had been evicted from the halls and were readily available for photography. Great news and we'd both gone along with cameras, far more interested in the prototypes than miniatures.

The event included several tours and we were pretty quickly travelling around the prettier parts of Birmingham (Yes, really. There are some lovely areas on the outskirts) on the "mystery tour" in a classic coach that could have been carrying Miss Marple. Had there been a vicar, suspicious foreigner and mysterious lady on board, we'd have been looking out for bodies. It was an incredibly comfortable ride although the driver had to work the gearbox on some of the hills.

Lunch took a little longer than expected thanks to a customer at the front of the queue who was a little "odd" but we were soon back out with cameras and then another trip out on one of a pair of buses. Exactly where we went is a bit of a mystery as there were an awful lot of country lanes and small villages but none that stuck in the mind. The 20 minute run was very pretty, especially when the bus in front had warmed up enough that it stopped leaving a smoke screen!

On a tour

All this was terrific value at a tenner for entry and all the rides including the one to and from central Brum. The museum is home to a large collection of vehicles including loads of electric delivery floats. The sort of thing we modellers love on a layout but you never see in real life nowadays.

Lots of photos on Flickr.

Friday, May 30, 2014

Weathering notes for Cross Country Voyagers

Mucky Voyager

Couldn't resist this - standing on the station last week, I spotted a Cross Country Voyager set opposite me. It seems that the automatic carriage washers don;t reach all the way down the bodysides so there is a very neat mucky band at the bottom of the tumblehome.

On a model you'd need to mask this line as it's so neat and straight. The colour is a greeny sludge with streaks. Not one from the Humbrol range but I bet Games Workshop do a "Grungy Green". You might want to sprinkle some talc in the paint to as the build up is quite significant.

Thursday, May 29, 2014

Tiny 206

Tiny 206

Sticking with yesterdays diecast theme, at the same time I bought the G&G bus, there was another model I have been looking for a - a Peugeot 206.

It's a nice shape, about 7mm scale, and very similar to the one I own. The manufacturer is the famous 80's pop group Carmaramama.

In fact there are only a couple of differences - the blue light on the roof and the colour. Oh, and the left hand drive thing.

I've been looking for a model 206 ever since I bought the real one. Owning miniature versions of my vehicles is a bit of a thing for me but whereas the VW's were reasonably easy, more mundane cars are far harder. Until finding this, the closest I had managed was a rally version with extra spoilers. You might get lucky with Oxford Diecast picking your motor for a model, but I have a feeling that this is some years away while they work through the contents of Practical Classics magazine.

Anyway, all I have to do now is lose the light, change the colour and decide if I can live with the steering wheel in the wrong side. Disassembly is easy - two screws in the base. What I wonder is, how do I deal with Peugeot logos on the front and back? One trip in to the Nitromoors and they will be history.

I suppose I could repaint my car to match the model but that would be a shame as I have a can of green touch up spray to hand. It does look good in white and orange though...

Wednesday, May 28, 2014

My old school bus

GGBus

Not literally of course. I was hard and walked to school every morning and back again at the end of the day. Not like kids nowadays being carted everywhere like screaming sacks of spuds in the family people carrier because, "it's too dangerous for Jocasta to walk with all the cars on the road" even though they are only making the problem worse...

Anyway, I did get to travel on school buses. When it came our turn to have swimming lessons in PE, or the annual prize giving at the local civic centre (the one I worked in for a few years recently), we were loaded in to blue buses courtesy of local Leamington firm G&G.

I've no idea what the G&G stood for but I know why they got the contact - cost.

Inside the seats were best described as "worn". Years of abuse from local schoolkids produced something that people using a proper bus service wouldn't have been keen to pay to use. They weren't dirty or seriously vandalised, just tired and tatty.

Anyway, while I'm not a diecast collector, I couldn't resist a miniature version of a bus I may well have ridden on. A destination blind featuring the town I live in made it even more desirable.

The model is produced by Britbus and more details can be found here. Cost on a trade stand was a tenner and I think you can buy the same model from Hattons for the same amount. Except (gasp) it's NOT the same model. Theirs is route 70, not 69. And the numberplate is KJD 225P and I have 224P. In fact, it looks very like this one:

G&G Metropolitans await scrapping.

Does this mean I need to double the size of my fleet?

Tuesday, May 27, 2014

File cleaning - Part 2

Yesterdays efforts at cleaning my files didn't entirely please me so I thought while I was at, I'd have a go with a product I bought many years ago.

"File Sharp" claims to sharpen blunt files. I assume it means that it cleans the gunk out of the teeth rather than having some magical property that alters the shape of metal. File do wear out and if you've worn away the teeth, whatever liquid it is in here won't do anything to fix this.

Anyway, the idea is you dunk the file in the bottle, leave it for a bit, and it is restored to rude health (especially if it is a bastard cut - engineers joke).

I've tried it and there is a noticeable difference, in colour at least. The teeth do look a bit cleaner although whitemetal gunk is untouched. Presumably the liquid is some sort of mild acid. It had certainly turned the child proof top brittle enough to shatter.

Results are OK but still not as good as a file card. Used in conjunction with one though, I could see this working.

The biggest problem is sourcing the stuff. I bought mine in the Jewelery Quarter of Birmingham at least 10 years ago. On the back of the bottle is an address:

Kingfisher Jewellery
59-61 Hatton Gardens
London

but Google can't find this although there is a similar named shop nearby. No website though so I can't see if they sell tools.

Monday, May 26, 2014

File cleaning - Part 1

Clogged files are a perennial problem on my workbench. It's mostly my own fault as I don't really treat them with the respect they deserve.

I'll happily file all whitemetal which clogs the teeth. The files live next to the soldering iron stand and so occasionally get a wash when I pour water on the sponge. I've even managed to spill lemonade on them and there is no faster way to promote rust than this it appears.

Despite this, they do me well. My oldest must be 20 years old now and still sees plenty of use on harder metals. I am a good buy, treating them to regular brushes from a file card to remove the lead alloy and other muck.

Spotting a abrasive cleaning disk on the S&M Tools stand (careful how you search for this) at a recent event, it claimed to "Extend the life of abrasives and files, needle files, sanding blocks etc." and that's worth £3.50 of my money.

The block is made of a sort of rubbery resin. As far as I can tell, the file is rubbed on it and cleaned in the same way that a pencil eraser removes graphite from a page. The rubber bonds to the muck and flakes away.

I'd have to give the results (for me) a 6 out of 10. General muck is removed but it can't touch the whitemetal. I think this varies depending on the file. A file tooth quarter inch file saw little improvement but a coarse needle file looks a lot better.

Sunday, May 25, 2014

Wooden BiPlane Automata


My Dad is a big fan of Timberkits wooden automata kits and has built most of the range, or at least has received them as presents and will get around to building them one day.

His latest, and my favourite, is this wooden biplane. Wind the handle and the aircraft swings around the skies with it's propeller turning and the pilot giving everyone a thumbs up from the cockpit.

The ingenuity of the mechanism is astonishing. Not only have the designers made something that works (OK, the belts driving the prop have stretched a bit and slip) but can be assembled by normal human beings and not engineers. There's a lot more work behind the scenes than I suspect we think. All this has to be cut, packed and stuck in a box for under £27. Not bad for the entertainment they provide.

Saturday, May 24, 2014

Lutterworth 2014

AllotmentsAn nice day, a local(ish) show and a couple of house to kill in the afternoon saw us at Lutterworth exhibition. After a trip along the M6 (the satnav was navigating and has an obsession with this motorway) we drove through the town thinking that it looked rather nice and oddly familiar. Only when we arrived in the car park did we remember that we'd exhibited here a couple of years ago.

Held in a sports hall, it's not a big show but still worth a look. Trade was mixed with lots of second hand and RTR. Nothing wrong with that. I managed to spend plenty of money on a couple of stands and I hadn't really expected to. I'd suggest that if you are serious about trading, you really need to find a way to take plastic cards. People don't walk around with 3-figure sums in their pocket nowadays and being on the outskirts, there wasn't a cash machine anywhere to be found.

Cassette fiddle yard

Of the layouts, one really inspired me with a clever cassette fiddle yard based on upside down Hornby platform sections glued together. The model itself was minimum space and highly detailed - just my sort of thing. I'm embarrassed to say that I can't remember the name and there wasn't a programme I could refer to either.

Platform Slewed

On another layout we had a slewing platform based on a prototype. Not something I've ever seen before, details were attached to the front of the model.

Platform unSlewed

Cake news is less impressive. Catering was provided by the sports centre and the Costa Coffee therein. We wandered out at 3pm and it was just shutting up for the day so no tea and cake for me!

Anyway, a nice show, worth a wander.

Photos on Flickr.

Friday, May 23, 2014

Electric glue

Can you make electrical joints without soldering?

According to the Internet, you can. All you need is some "Wire Glue".

I spotted this stuff on eBay a few weeks ago. It's all over the place in the webs number one tat bazaar - every day my search for items labeled "Yacht" brings back at least 10 rests a day for the stuff, rather negating the benefit of the search.

Anyway, curious, I spent the cash and bought some. Opening the pot, the contents are a grey paste that requires lots of stirring to reach an even colour.

My test was a pair of wires held in contact with some Blu-tack. The exposed wire ends were dipped in the glue and then the pair were held together to dry. An extra dollop was smeared on with a screwdriver just for good measure.

Drying takes several hours according to the instructions (1-nil to solder) so I left it overnight.

In the morning, success. The joint conducts electricity so it certainly works. The mechanical strength isn't as good as solder - you can pull the wires apart - but it's not too bad.

In conclusion, I'll not be ditching the soldering iron. This stuff takes too long and I'm suspicious of the joint strength. The drying time could be a problem as you'll need to support the joint for several hours. I can see this as a useful addition to the toolbox though as if you don't want to heat a joint then here is a workaround.

Find Wire Glue on eBay

Thursday, May 22, 2014

First time on real water

First time on the water

Thursday morning is boat sailing time. Well, when my work allows and the sun is shining.

I charged the Bantam battery up for several hours, fitted it and taped the top down to the deck. I know from the tests in the batch the model would float, but test tanks and lakes with other boats and fish are different things.

Happily, the model sailed very well. It sits very low in the water and lower on one side than the other, but I can sort this out. The real tugs deck was close enough to the wet stuff to be washed occasionally so I'm not very far off.

Speed is excellent. With the throttle stick half way forward, the model proceeds at a respectable rate. Full power sees the front dip and the water cover the front third of the deck. I didn't do much of this. Fiddling with the weight and fitting the great big bow bumper will cure any problems.

Steering is fantastic - you can throw the boat in to a turn with a hard left or right and it spins on it's axis. Presumably this is due to a combination of a rudder with too much movement and a funny shaped hull designed to be agile. This model is going to be great for steering competitions.

Run time is at least 25 minutes. I'm confident of over half an hour once finished. That's long enough for me. I'll get bored of sailing by then and want to go off and have a cup of tea or a chat.

Best of all, despite washing the decks, the inside was water-free. Success!

Wednesday, May 21, 2014

Who were Model Railway Enterprises?

MRERailsRooting through a box of "stuff" at an exhibition last weekend, I picked up this interesting packet.

The contents are a pair of ready made switchblades for home made pointwork. Each piece is 12cm long, made from phosphor bronze code 75 rail and very neatly tapered at the end.

Price to me - £1

I've never heard of Model Railway Enterprises. Based at 25 Brookhill, Woodstock, Oxford, I assume they have long since passed in to history.

Google Streetview shows the address to be a suburban house but the chances are this was a mail-order only operation. Two telephone numbers (both landlines and with a 4 digit STD code) suggest these are pretty old. I did try and work out when the STD code moved from 4 to 5 digits but got very confused.

The printing was obviously based on a typewritten original which might suggest these are over 30 years old, but then many modellers resisted change and weren't early adopters of desk top publishing so that's no guide.

So, another for the collection of random model railway bits. I'd love to know more, can anyone help?

Tuesday, May 20, 2014

Maritime adventures with plasticard

Superstructure building part1

I thought this would be easy. The top of the Bantam tugboat looked oh so square and simple. Industrial design where all corners are cut to produce the least complex design for ease of building.

Then I took a proper look at the photos.

At the front, the superstructure slopes backward ever so slightly - enough to be noticeable so I can't ignore it. The front corners are curved too.

After a bit of head scratching, I made a top and bottom for the box out of thick plasticard. The top and bottom are slightly different sized to provide the front slope. This lot sits in a base 2mm wider all round to give me the visible flange at the deck line. Under here we have a piece the same size as the hole in the deck.

Some thin (you'll notice I don't know what the thickness is - I'm pulling random bits out of the plasticard bag) sheet was cut and wrapped around the front to give the slope. Had I not fitted this to a base, I wouldn't have had to indulge in fiddly fitting of sloped sides. I could have allowed an overlap top and bottom and then trimmed back.

At least the work area smelled nice after this. Using Limonene to laminate the sheets results in a pleasant citrus smell. There's not many modelling tasks this achieve this.

Monday, May 19, 2014

K8 Telephone Kiosk shock

K8 Box

Writing yesterdays post about the National Vintage Communications Fair, I linked off to the Wikipedia entry for the K8 telephone box. According to the ever reliable site, there only 12 of these little structures left in the wild.

How did this happen?

When I was a kid in the 1970s, they were everywhere. Classic K6 boxes (the ones you think of when someone says "Telephone Box") were uprooted for these more modern versions. No shopping precinct was complete without a couple of them. Years ago, the design said modern...

According to Gavin Stamp, the K8 was designed by Bruce Martin, an architect who had on pre-fabricated school building methods. Originally to be cast in aluminium alloy, the Post Office decided that this was insufficiently robust and replaced with cast iron, a material they were far happier with. They also painted it red rather than the unpainted metal originally specified.

The first order was placed with the Lion Foundry in January 1968 for 1000 kiosks at a price of £100 or £68 per kiosk less than the older K6 design. The first example appeared in Old Palace Yard, Westminster 7 months later. 11,000 followed.

If there really are only 12 left, I think that is sad.

Modellers note: The model is Shire Scenes etched kit sat on a Games Workshop plastic base. The figure comes from the Merit telephone box, the dog and road sign from Langley.

There is a Flickr group for photos of K8 kiosks here.

Peter's lunch hour...

Sunday, May 18, 2014

National Vintage Communications Fair 2014

Heading over to Rugby for the Slim Gauge Circle event, I passed the Warwickshire Exhibition Centre and noticed adverts for the National Vintage Communications Fair. The car park looked busy and I've always been interested in old radios and telephone boxes - I've always wanted a K6 and the much rarer K8 - so after lunch I dropped in.

Radios and Record players

The hall was busy. Really busy. The first stall I see is selling components. Proper, electrical components for repairing old electrical items made in the days when people like my mate Dave fixed them. In the distance, a large illuminated sign that read "Valves".

I trawled up and down the lines. Near the door were old telephones and telephone equipment. If you remember 'phones with dials you'll recall that in the middle of the dial was a circle of paper. This usually contained your number and details of the emergency services. These are not collectible. There are albums designed to hold them.

At the side of the hall, the Telecommunications Heritage Group had set up a couple of small exchanges and a few old 'phones for people to try. If you'd never worked a dial 'phone before, now was your chance. I did but then I remember - as did most of the people in the hall judging by the apparent ages. Of course, nostalgia is all very well, but I do remember how slow the process of dialling used to be...

Anyway, moving on, I was in vintage radio and TV land. As far as the flickering tube is concerned, 625 lines was years in the future, as was colour. Great cabinets to micro sets from the 1980s took stand space. The early ones are especially collectible judging by the prices. Mind you, back in the day, they were seriously expensive so not many purchased them. Those that did would have relegated the set to the loft once a newer model arrived to replace it so survivors aren't going to be that common.

I largely ignored the record players and I never owned one when vinyl was king, but moved on to the radios. So many designs!

Little radiosMore Bakelite and wood - exactly what you'd think of when imagining a collectible wireless. Unlike the TVs, you can still used these for the job they were built for. OK, you can't get DAB but then around here the signal is patchy anyway so nothing changes.

It was at this point, I had to think about leaving. You see, the more tempted I was to buy a little collectible. Perhaps a novelty radio collection wouldn't take up too much space or cost a fortune.

No.No. NO! - I don't need any more hobbies.

As it was, I came away with a Sinclair DM2 multimeter because of my old home computer allegiances. Were money no object a tiny, beautiful scale model of a lathe for £360 would have come home for no other reason then it was amazing.

Talking of home computers, there was a mint, boxed ZX81 for £50 and a few BBC Micros including one with a, now useless, Teletext adaptor. I think I spotted a One Per Desk (OPD) micro too that I identified by the microdrive slots on the front.

I am such a nerd.

I was even tempted by a stupidly cheap standalone Teletext adaptor for a TV. That's stupidly cheap for a box for an excellent service that no longer exists anyway.

Anyway, an absolutely fascinating event. Have a look at my photos on Flickr.

Saturday, May 17, 2014

Slim Gauge Circle 2014

Diesel 45The SGC meeting at Rugby is a funny event. You never quite know what you are going to see, but the chances are it will be interesting.

Walking in, there was a modular layout being set up and another more traditional display already lit and working. This provided the first surprise of the show - it was operated using an iPod. I've heard of using smartphones/iPods/tablets to work model railway layouts but not been so close to one being worked this way.

I can certainly see the logic. Instead of the usual DCC controller button-fest, the display just showed the controls you needed at that point. For the technically challenged this ought to make things easier, although I can see a lack of tactile feedback might be an issue.

Moving in to the sales area where seemingly random people grab a table in the bar and flog leftover models or extras from their collection of exquisite Korean brass, Neil Briggs had a selection of 3D printed conversion parts for N gauge models. He supplies new cabs, tenders and boiler furniture that the modeller fits to RTR locos.

HOn30 Loco

You can see Neil's Myner Models products at his Shapeway Shop.

These looked really good and pretty simple to use. If I was looking for some US projects, I would have been handing over money. Maybe in the future...

The Phoenix Group had the usual selection of exceptional large scale modelling on display. Most of the items were part finished and displayed in raw plasticard allowing us to see just how good the workmanship is. The part finished Japanese logging train shown on a piece of wood with a rather large worm appealed.

Logging Line

While looking at this, I discovered the book "Military Traction Engines and Lorries 1858-1918" and am now on the lookout for a copy for a future project. If you have one, please get in touch.

I'll admit that this was one of those shows where I could have lightened my wallet considerably. Of course EDM Models would have taken a chunk but I'd have brought home some of the contents of the interesting tables too. It's that sort of event.

More photos on Flickr.


Friday, May 16, 2014

First sail

First float

Traditionally, model boats first hit the water in what magazine writers like to call, "the domestic test tank", and the rest of us call the bath. You don't really want to do this sort of thing at the side of a lake. Far too many people around and anyway, the bathwater is at a much easier height to work.

Most of the wiring is properly installed now, the only croc clips are between the battery and speed control.

The most important thing at this stage is to get some weight into the hull to bring it down the the waterline. Despite being only a foot long, the tug still required bringing up to 1426g to do this. Most of the weight is at the front but some lead has been added in the middle. All this is held in with epoxy - don't use PVA as it reacts with the metal and swells up.

Sailing tests look very promising. The boat can just about turn around in the bath - 3-point turns are pretty easy. As befits it's role, this should be one maneuverable model. I wonder if we hare having a steering competition at this years open day?

Thursday, May 15, 2014

Croc-clip wiring

Croc clip wiring

With the motor, propshaft, rudder and steering servo fitted, it's time to wire the Bantam Tug up. I like to start with a rough connecting up session to make sure everything works before I do the job properly.

Wires with crocodile clips on the end join up all the electrical parts. The yellow and green ones here link the speed control (small black box towards the top with a label and lots of wires) to the motor hidden down in the hull.

The receiver (white box, loads of pins) is plugged in to the speed control and also the servo you can't see in the hull.

At the bottom, you see the 6v Gell Cell battery connected in to the speed control.

Despite being horribly untidy, the whole lot worked OK so the next job was to fit it properly.

Wednesday, May 14, 2014

Model boat rudder

RudderI appreciate that my blog is mostly read by railway modellers and therefore the intricacies of model boat building might be a bit of a mystery. To be honest, even the idea of steering is a bit of an unknown, what with trains not needing anything in this direction.

So, here is a diagram of a typical model boat rudder.

The business end is the flat paddle at the bottom. This needs to stick out of the hull behind the propeller. The paddle diverts the thrust move the boat from side to side.

It is attached to a brass rod that runs up through the threaded part that goes through the hull.

At the top there is the swivelly bit that clamps to the rod. I'll attach a wire from this to a servo arm that will be moved in response to the controls on a radio transmitter.

Fitting involves making a hole in the hull for the threaded part. This is far too long and needs to be shortened, as does the brass rod in the middle. The swivelly bit is unclamped and moved down the rod as required. To stop things leaking, I like to smear epoxy resin around the parts under the hull. While an O-ring is included, I prefer a belt'n'braces approach to keeping the wet stuff outside.

The hull is made of plastic just over 1mm thick so has to be built up around the rudder post - partly because the threaded bit isn't all the way down but mostly to support the parts staying vertical and not moving as they flex the hull plastic. You can see what I mean from this shot inside the boat.

Rudder fitted

Tuesday, May 13, 2014

C15 in the RM

Model C15 locomotive

Quite some time ago, I built a Connoisseur Kit for a C15 4-4-2 locomotive.

As a freelancers, I wasn't going to pass up the opportunity to see the build in print so a piece was submitted to the Railway Modeller and after a bit of a wait, you can now read it in the June issue that has just appeared.

Sadly the gentleman I built the loco for, John, passed away a few months ago and so never saw his locomotive on the page, but he did have time to enjoy running it on his layout, which is far more important.

You might be surprised to see me in RM, but the first rule of writing is to write for your audience. The Modeller probably covers a more esoteric range of subjects than other mags and when I wrote it, this article seemed a better fit here than elsewhere. That's not a criticism - far from it. The strength of the model railway press is that all the publications have different characters so you can pick the one, or ones, that suit you as a reader.

In this case, the editor has prefaced my piece with a prototype article which produces an excellent combination and results in  satisfying package, even if, like most people, you aren't about to order up a kit and fire up the soldering iron.


Monday, May 12, 2014

Bantam Man - Painted

Bantam Man

The little Bantam man is now fully painted and looks fine. There's nothing special about the job - some Lifecolor acrylic skin tones and then the clothes picked out in various shades of Humbrol.

I have experimented with Games Workshop coloured ink washed everywhere to emphasise the folds in the clothes - the jury is out on the results at the moment. I think I need something larger to work on. Next time I have a 7mm scale figure to hand I'll see how I get on.

Talking of small, this little chap is 20mm tall - exactly 5ft in his boots which makes him a bit of a shorta**e but then not everyone can attain a sensible height. Well, they could if they pay attention to the job while growing up but they don't and then they come running as fast as their little legs can carry them to moan that items on high shelves are beyond their reach. I have no sympathy.

The photo illustrates one of the great truths about model railway photography. Stupid electrostatic grass gets everywhere. It shouldn't be stuck to the windows but it is. For print I'd have to take the shot again after brushing it away but you've not paid to be here so I won't bother.

Sunday, May 11, 2014

A sunny day on the garden railway


Last weekend, it was nice and sunny so we ran a few trains out in the garden. While doing this, I pointed my compact camera, which still hasn't been right since I dropped it on the cobbles at Scarborough, at them to record the event.

Well, running through the flowers looks pretty. I know it's not hard-core finescale modelling, but it is fun.

Saturday, May 10, 2014

Bantam Man

Bantam Man BitsNo, not a captain for my Bantam Tugboat, this is a figure from a new range retailed by Ken Clarke.

Unlike most 4mm scale figures, these crew arrive as a selection of components allowing the builder to tailor the figure to fit a location, such as a locomotive cab.

The Bantam bits refers to the figure size - they are actually sculpted to HO (3.5mm:1foot) scale and so a bit on the small size but as people come in all shapes, some short ones are fine on a layout.

Many loco cabs seem to offer limited headroom anyway so these will fit in much more easily without foot amputation, something I have been forced to resort to in the past.

Img_2456Each figure consists of a body, 2 arms and a head. Putting these bits together is incredibly fiddly. The neck needs to be drilled out to accept the stalk under the head (not quite a neck but near enough) and the arm sockets also benefit from a little enlargement.

I initially tried Zap superglue but found it too runny to grab the bits. A tube of gel superglue worked OK though. In cruel enlargement, my little ma doesn't look great but in real life he'll be OK. I expect my assembly technique will improve. These are tiny parts and difficult to hold while not fixing yourself to them with the adhesive.

A coat of Humbrol acrylic primer would probably have been better applied by spray too. Next time.

Friday, May 09, 2014

Nightime bufferstop

Daybuffer

OK, so the buffer stop is now finished and installed. For the moment I've not PVA'd the gravel around it but that will happen the next time we get some sunny weather.

Inside, I've tried to waterproof the electronics as far as possible. The original casing from the solar light has been rebuilt around the circuit board and all the holes I can see are filled with Pound Shop epoxy resin. Soldered connections outside the casing are protected with heat shrink tubing.

With no moving parts inside, this ought to keep the light working for a long while. The weak link is the separate AA battery in the unit which relies on contact with its sprung connectors to work. I considered soldering it in (I think it's removable to conform with WEE regs for disposal) but have found in the past that you need flux on the contacts to get solder to stick and so that will just go green and cause the joints to fail anyway.

So, my hope is that if I keep as much moisture out as possible, I'll get a couple of years service from the unit. I think replacement will be possible, if not a 10 minute job.

One area I did initially get wrong was wiring the solar cell. With the polarities reversed, the circuit still charged and the light came on but it didn't switch off again in daylight. Obviously my error meant the transistor that handled this stuff wasn't working. A quick swap of the wires and in daylight the light is off, put your hand on the solar cell and it comes on. That's worth remembering for the future.

Night Buffer3


Thursday, May 08, 2014

Sprat & Winkle couplings in BRM

A quiet month for me in the latest issue of BRM which should be hitting your doorsteps this morning.

I'm taking the opportunity to explain how I fit Sprat & Winkle couplings to rolling stock.

"What are those couplings?" is a popular question at exhibitions, indeed at some shows it seems to be the only question anyone wants to ask. Back in the good old days, modellers could recognise an aftermarket coupling a mile off but now we live in the era of the Internet, pop tarts and tension lock couplings fitted to RTR stock that will actually couple with each other, the demand for replacements has dropped off a bit.

Despite this, it's worth presenting people with options and explaining how they work. As it was I had to do some research because Wizard Models have expanded the range with some funky new under-buffer beam fitting plates so you don't have to hack a slot between the buffers any more.

 
Apart from this and a bit in the Q&A section, you're going to be a bit light on my contributions this month. That's not a move to sideline me, quite the opposite. It's just that to date, projects have been completed pretty much on the deadline date and when you are making things, that's not a great situation to be in. If something goes wrong then you are stuffed.
 
As it is, there is sufficient material sitting in the pile to let me take a breather for a month and work on the following months content. Here I can promise some of the most interesting kits I've ever built. But that's for next month...
 

Wednesday, May 07, 2014

Solar power stop lamp

Solar Bits in 1According to the instructions Pendle Valley Workshop supply with the buffer stop kit, "To bring the stop lamp to life, just add the optional inside mounting switched battery box.".

That's all very good but then I need to remember to change the batteries. A far better idea in my opinion, if to power the thing with captured sunlight.

A cheap outdoor solar lamp was picked up for a quid from Maplin (that's only 5p more than the battery box). Wanting only the top bit, the shop were happy to throw away the pole and clear plastic bit for me which saved space in my bag during the day.

Taking the lamp to bits isn't easy. The wires to the solar cell are covered with hot glue. Peeling this away with pliers removed one wire but I needed a soldering iron for the other. Pulling the cell from the casing, I fitted new wires and then glued it to the artificial ballast/coal lump. Setting the panel in flush would have been nicer but I should have done this before assembling the bits. Never mind, it won't be that obvious.

Solar Bits in 2A quick test with the my multimeter showed that the panel was pulling over 1v out of the sunlight to charge the internal battery.

Anyway, the lamp LED was de-soldered and replaced with the kit red LED attached to a couple of long wires. If you try this yourself, test the setup as LEDs must be connected the correct way around. Fortunately there doesn't seem to be enough current to blow it if you get it wrong. Guess how I know.

With everything lashed together, all seems OK. As I write, dusk has arrived and we still seem to have a glow from the LED and that's with minimal charging today. Hopefully once the light gets at the solar cell, the battery will be full and we'll have a proper glow in the early evening.

Tuesday, May 06, 2014

A buffer stop for the garden railway

Unpainted buffer stop

Our garden railway has a siding and as we all know, at the end of every siding, you should have a buffer stop of some description. Well, I think that's how it works anyway, especially on a garden railway when you don't want wagons ending up in the flowerbed!

I'm pretty certain we've bought at least 3 buffer stops for the line including the well-known LGB version, but the winner is Pendle Vally Workshop's version. A resin kit made up of 6 parts, it includes a lamp and red LED.

Assembly was carried out with Pound Shop Epoxy glue to hold the main parts together. Then, on a nice sunny day, the model was tested on the track and cutouts made with a junior hacksaw to fit it over the track. The resin is soft enough that once the vertical cuts are made, the chunk can be twisted out with small pliers.

After this, the buffer beam is fitted, checking its height against a handy LGB van.

With everything dry, I took the model back indoors for a quick coat of spray primer and then some acrylic paint. After this, I'll make the light work but not in the way the makers imagine.

Painted buffer stop

Monday, May 05, 2014

Gambling with my models


 Thanks to Andy York for this image. As you can see, I never miss the opportunity to indulge in a bit of modelling...

What happened was that we were in the Ricoh Arena for a meeting about RMWeb live. These always include a tour and the tour always includes a trip around the Casino - something they are very proud of.

Anyway, Andy and I came up with the idea that we ought to be able to lift the centre out of a roulette wheel and put a layout in there. He took a few photos, and the next day through the magic of Photoshop, I'm making models in the casino. Before I know it, the photo is on RMweb in a blogpost that includes a rather more embarasing picture. 

Sunday, May 04, 2014

Spamtastic!

spamRunning a blog with comments is great fun. Often the messages left by readers are useful to others and informative. Even if they are telling me I've made a mistake I'm happy to see them there.

However, I do approve all comments as the blog also attracts less useful content. In a word; Spam.

I don't like Spam. It doesn't taste very nice (I prefer corned beef) and on the web it's often ridiculous. Take this latest effort:

Wonderful blog! I found it while surfing around on Yahoo News.

Do you have any suggestions on how to get listedd in Yahoo News?
I've been trying for a while but I never seem to get there!

Appreciate it

my website divorce advice for men in nebraska

Seriously? You think that people will be browsing a post telling them how I set up the drive train for a Bantam Tug and then thing, "You know, I'm in Nebraska and a bit fed up with my wife, what a handy link!"

Of course not and to be honest, this isn't what the spamming scum think either. They just want to get a link on my blog so it fools Google that their pathetic site is worthy of some consideration.

Sadly for them, I just read them and laugh. Then I hit "mark as spam" and away they go.

Saturday, May 03, 2014

Sutton Coldfield 2014

Those who know me will recall I have always experienced problems attending Sutton Coldfield exhibition. Every time we've been booked to attend, the vehicle has been poorly either on the way there or on the way back. It seems the posh end of Brum is bad for my cars. Thus, when I decided to pay a visit to the show as a punter, I travelled by train.

The event is close to a railway line but sadly, not the one with a station so a 20 minute stroll is required past some very nice 1930s villas. Being a posh area, they hadn't been vandalised with UPVC windows either. In fact, if you were looking for a location to research old houses that could have come from an Edward Beal book, Station Road would be a good start.

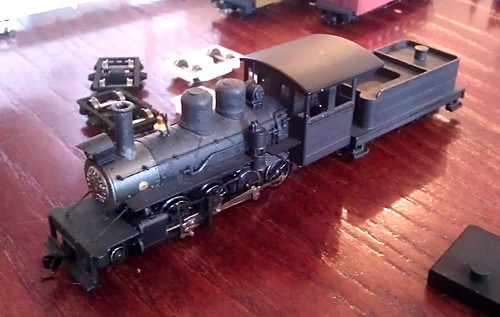
Anyway, I arrived at the show at 11 to find a small queue caused by a congested entrance corridor. One of the first sights to great visitors is a 5 inch gauge LMS 10000. Nice model too and safe enough near the door because even if you do covet it (and I did) it's too heavy to make a sharp exit with.

Cake and sausage roll
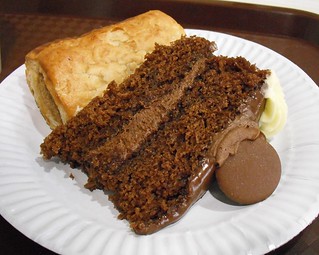
After my excursions, a cup of tea and cake was called for. I'm pleased to report that the excellent slice of chocolate cake was as delicious as it looked.

With lunchtime approaching, a sausage roll was added to the plate since I didn't fancy trying to get in during the rush of famished modeller an hour later.

Anyway, the show takes place in a school with the main hall and a large side room housing the layouts and trade.

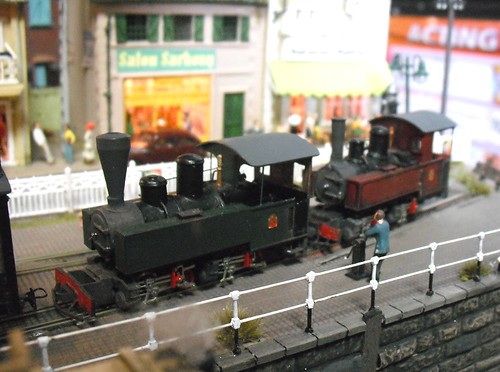
The main purpose of my visit was not to eat cake, but to provide moral support to members of the L&WMRS taking their layout "Duxbury" out to its first exhibition not hosted by our club. Being a modest distance away from the home base, they managed to raise a large team to make everything happen. So large that a bigger operating well could have been required at some times.

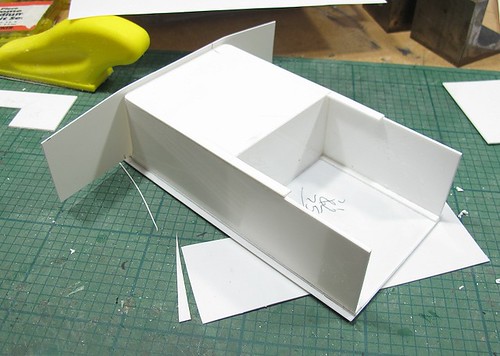
Any layout on its first outing will develop niggles. Loading it in the back of a van and carting the thing around gives it a good shake which will uncover any problems. Despite this, things were working although the difference between working an operating sequence in the club rooms and at a show with the public staring at you had become apparent. The very sensible decision to abandon this and just get something running was soon taken and a re-write will take place. Chatting after the event, the snagging list isn't huge and most items can easily be fixed in time for the next appearance at the Great Electric Train Show later this year.

Much Murkle

Next to Duxbury was the star of the show for me. 
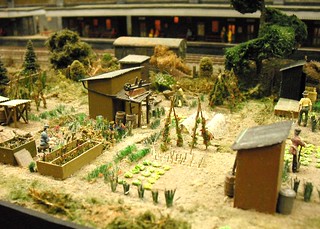
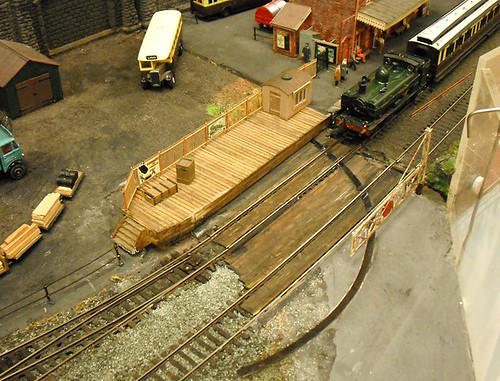
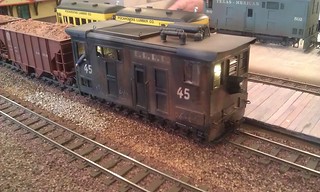
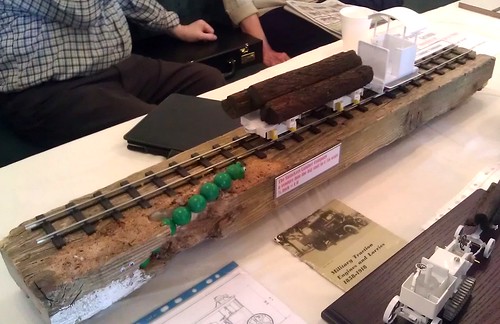
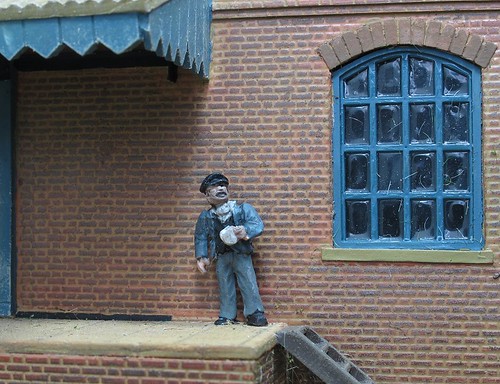
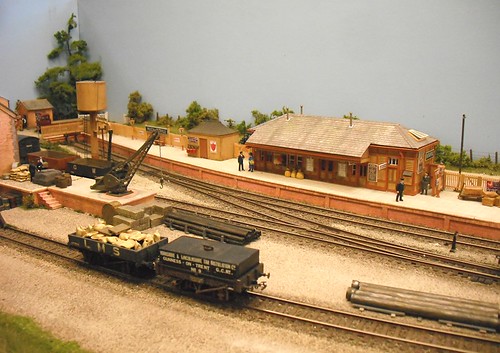
Much Murkle is a GWR end-of-branch line station. Peco code 100 track is the only concession on this stunning model. The plan looks good, all the structures are lovely and the rolling stock, while based on RTR items, has been detailed and weathered. It's a layout that a keen beginner could aspire to - a bit like Edgeworth Part 2.

French Mallets

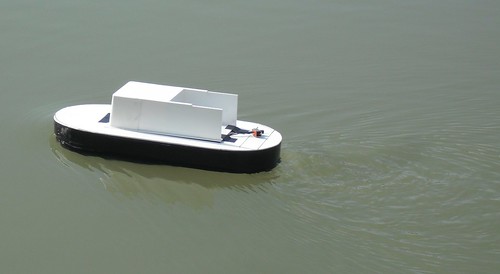
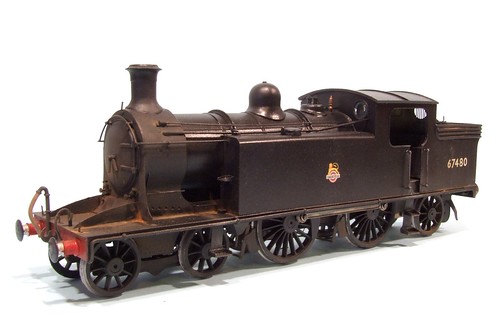
Despite being a modest local show, this wasn't the only nice layout to be seen. Charles Insley's St Etienne-En-Caux has loads of character, a bit like its builder, and some cracking articulated locos model boats that look right.

08 761
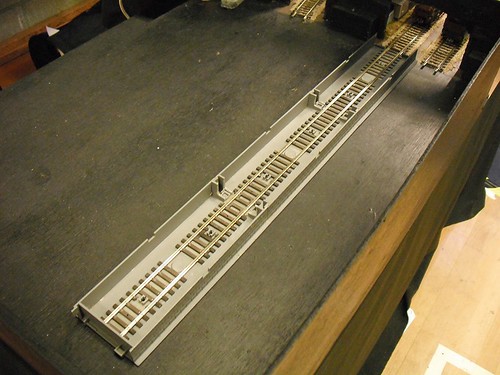
Unlike many shows, the trade could have taken plenty of money off me had any of them taken plastic cards. As it was, my one cheque was spent on a Hornby lifting bridge kit from the 1970s. I think that a bit more planning is required here by sellers at exhibitions. There are plenty of mobile phone based card solutions now so you don't need to spend a fortune.

On the other hand, if I can pay by card then when at a show miles from a cashpoint , I can keep giving you money. Who heads out with the sort of money it costs to buy a RTR loco in their pocket nowadays?

Anyway, a really enjoyable show. I spent 5 hours there and most of that was chatting. Thanks to everyone I spoke to, it was great fun.

Photos on Flickr

Friday, May 02, 2014

Bantam drivetrain

Bantam DrivetrainI've commented before that it seems odd one of the first tasks to be carried out when building a model boat is to make holes in the hull. In other words take the very part you rely on to keep water out, and sabotage its ability to do this.

Still, no holes, no drive or steering so I measured up the Bantam hull for drilling.

There's not instructions in the kit and even if there were, I'd probably have ignored them. All I did was measure the centre line of the motor, as a couple of mm and then mark this on the vertical flat bit where the drive shaft exits the hull.

Into this is stuffed a propshaft, supported by a rectangle of plasticard (not visible in the photo as it's under the brass shaft) to top it flapping around.

The motor is connected with a short coupling of a type I've never used before. Other have so I don't have any worries on this score.

A 380 type motor mount is sat on a great big dollop of silicone sealant and tweaked so everything is in reasonable alignment. This won't be a fast boat but a bit of care now will save power and vibration later. The sealant will isolate the motor wobbles from the hull and also saves me trying to work out how to screw the mount down into plastic about 1mm thick.

At the business end there is a brass propeller. So far, this is the most expensive part of the model coming in at around 13 quid. I reckon it's worth it though. As well as working better than a plastic version, it looks lovely under there.

Brass Prop

Thursday, May 01, 2014

Fitting the deck

Lots of clipsSince I wasn't going to be using the deck supplied in the kit, I needed to fit a new version.

This isn't scary as on a Bantam as it is on other vessels since it's just a flat sheet. There needs to be a hole in the top to permit access to the gubbins inside but that's as bad as it gets.

I started by trimming the hull carefully to keep the top surface flat. The top edge is only 1mm thick which isn't really enough meat for a decent glue joint.

No matter - a strip of 1mm plasticard deep enough to sit along the top of a moulded ridge within the hull glued in place using lashings of Humbrol tube polystyrene cement. (Safety Note: Do this in a well ventilated area or you will find your modelling unusually pleasurable)

Further beefing up came from some cheapo sawn section plastic bought at a show. This was bent roughly to shape before putting in place. Again, loads of cement and this time, quite a lot of clips and the top edge was plenty wide enough for a sheet of 2mm plasticard to be stuck on top.