Monday, June 30, 2014

Carriages with guns

Carriages with guns

The RH&DR armoured train packs a punch!

People who know about these things tell me the fat gun nearest the camera is a Lewis gun with the other one being a Bren. Not sure what the different or significance is but I'm sure you'd want to be at the trigger end rather then the other.

The Lewis is fitted to a pole so it can be swung around. The Bren is on a circular rail which I assume rotates. There is a fitting for a second weapon here, apparently a Boyes anti-tank rifle for when the Bosh are coming up the beach.

Fitting the guns is a superglue job. The Bren is moulded in to the soldier figure whereas the Lewis is a separate item. I've tested it with the figure and recon that the white metal support will bend to accommodate him.

(Information on guns picked up from the GnATTERbox forum)

Sunday, June 29, 2014

Rumination on APT-E

I suppose I ought to start this post by reminding readers that this blog is home to my personal thoughts and doesn't represent those of any magazine I write for or edit.

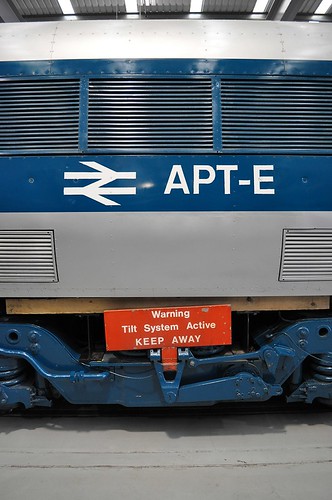
Last week started with a couple of days in the north for the Rapido trains launch of their first model for the UK market - the iconic APT-E train currently residing at the NRM Shildon outpost.

I cadged a lift with RMweb's Andy York and after a stop at the York museum for a stroll around, we pitched up at Shildon. There was no sign of the Rapido guys so we made ourselves comfortable in the prototype APT-E. At least I got to sit in the drivers seat, marvel at the tiny windscreen and be amazed at how many of the buttons were flashing on an off before were were politely ushered back out by the team who look after the train so they could carry on working on it.

Moving to the middle of the set, we tried out the seats in the executive lounge. These are from the Blue Pullman but fitted with APT antimacassars. Chatting to another volunteer, we gained and idea of how much work had gone in to bringing the train up to the standard it was from the moss-covered condition I remember from its York days.


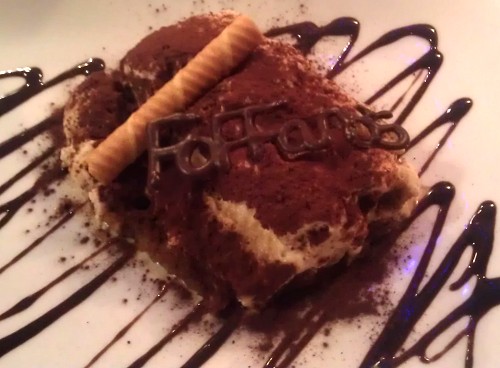
Once Rapido's Jason and Bill arrived and we had explained to the staff that we weren't punters and therefore allowed to stay in after the museum closed, setting up started. At this point the identity of the prototype to be scanned was a mystery to most people. The big reveal was set up and we headed off to our hotels and then for dinner in a nice Italian restaurant.

If you've seen any of the videos featuring Rapido Jason, you might think he and his company are very different from the other model railway manufacturers. You would be right. I can't imaging the Hornby management own a "I'd rather be on British Rail" T-shirt. Nor are they quite so nerdy (in a good way) and enthusiastic about the models they produce. It's clear that this isn't just a business but a passion. Of course being a very small firm helps - if you are a publicly quoted Plc the city want suits not shorts.

Tiramisu

You might expect conversation to revolve around trains but no - we chatted sci-fi too although I'm not sure that makes us seem any more normal. Jason is a big Dr Who fan and was as pleased to see the Special Weapons Dalek as I was in a recent episode. Better still, one of the team looking after the APT-E is none other than Kit Spackman, Mr Tilt, who designed the system that provides the characteristic lean that gets enthusiasts excited and give model manufacturers headaches. He's a bit of a fan of Matt Irvine and his TV models from the 70s and 80s too.

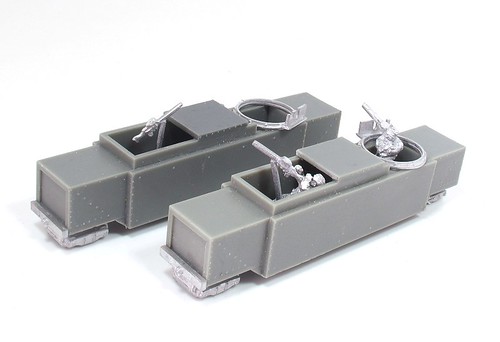
Anyway, the next day we arrived to watch the announcement to the world followed by some 3D scanning. All very nice. I caught up with Anthony Coulls, the man in charge of wheeled vehicles, who I first met as a 14 year old at the Leamington model railway club. Nice to meet old friends and they even gave us couple of sandwiches for lunch.

Sales opened at 10amd and by the time I placed my order at 10:30, I was bagged number 3 of the DC version. The model is available in several flavours - you can read all the details on this PDF. Price is, to my mind, very reasonable. I'd heard £250 so £225 was a pleasant surprise. Mind you, the full-fat DCC versions with bells, whistles and photo torpedoes at £325 is selling best.

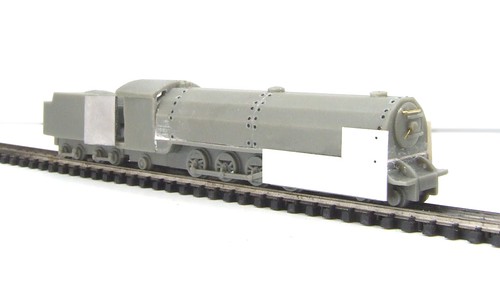
I'm really looking froward to this model. To quote Jason, the train looked like a space ship on wheels. Although too young to have seen it run, it's a prototype that means a lot to me. When you saw a picture of the thing it was the future.

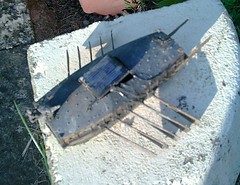
Since then, I have developed a bit of an APT fixation with plenty of memorabilia and models in my collection. As such, I've occasionally pondered on ways of producing the APT-E but the smooth shape and complicated nose have always defeated my imagination. Now, I can just lay down some cash and in 18 months time, I'll have a nice, shiny model to go with the Hornby APT-Ps.

So far, as I understand it, sales of the model are looking good. Rapido specialise in very high quality models and aren't afraid to take on unusual subjects. Their Turbo Train is a gem and the book to accompany the model will probably make an appearance on my shelf one day because it looks like a fascinating read. This is model manufacturer by people with passion rather than accountants. That's not to say it won't make money - for both Locomotion and Rapido. It will and that's a good thing. The profits go to help the NRM which is a good thing to my mind.

To order an APT-E, head over to Locomotion. Unlike most models, you have to lay down £50 as a deposit to secure a set. If the project doesn't go ahead (very, very unlikely) then I believe you will get the money back. Otherwise towards the end of 2015 you'll pay the rest and receive a model.

Only models ordered will be produced so if you want one, you have to order. This is controversial in some quarters as we haven't seen the finished product. It's a business model that is common in the US and at least we have seen the manufacturers previous efforts which are streets ahead of many UK models in detail. With a financial head on, I can understand why you can't produce to meet the demand for anyone who just says, "I fancy one of those" as when it comes to collecting the cash, suddenly quite a lot of them won't and you could be left with a lot of unsold stock.

At least we can see the early shots before deciding. The first of these will be at Warley later this year and orders can wait until the end of April so you have time to save the pennies.

APT-E
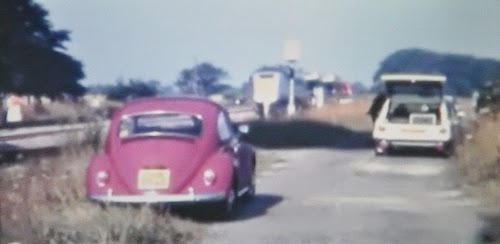
Is this a vision of the future?

Well, the APT nearly was. Three APT-P sets were produced and they did enter service. Sadly once the project stopped being the province of engineers and management and marketing got involved, someone thought it would be a good idea to launch the service in the winter when trains are at their least reliable. Add to this the genius decision to pack an early service with journalists who have been making good use of a free bar and it's hardly surprising that the coverage was appalling. After some panicking, the project was killed off.

We do have tilting trains of course and the Pendolinos make use of many developments from APT research. Still, it's not like Great Britian was known as a serious engineering powerhouse ever was it?

Maybe the model is the future though. Short runs that must be pre-ordered are likely to become ever more popular for the finescale end of the market. If you have the manufacturing contacts, literally anything can be made. All you have to do is find a way to fund it. Perhaps Kickstarter projects where groups of enthusiasts come together to create a specific prototype might be the way ahead.

Anyway, roll on the end of 2015!


Saturday, June 28, 2014

Turtleback

Recovered boatHere's a surprise. Look back to December 2011 and you can read how a model I built of a Korean Turtle Boat sank during its first tests on the lake.

At the time I spent an hour or so poking around in the water with a big net but didn't find any trace of it. Sad, but this is the risk you take putting a model boat on the water. It wasn't something I'd spent many months building so I decided to chalk it up to experience - the lesson being that when you try to retrieve a boat, use a net and not a pole with a hook on the end of it.

Anyway, I was sitting in a rather nice Italian restaurant on Monday and recieved a text with the picture shown here in it.

My boat had been found by the grand daughter of the lady who owns the farm has been paddling in the lake with some friends and found some boats on the bottom - 3 of them including mine! As you can see, it's a bit muddy but as far as I can tell intact.

Back home, the model have been well washed and looks pretty good for a model that has been under water for nearly 3 years. The electrics don't seem to work but then that's hardly surprising. Something is rattling around in the hull too.

Not to worry, when I get a minute I'll try and take it to pieces and see what the story is inside. If I could make it work again, that really would be a story...

Cleaned recovered boat

Friday, June 27, 2014

Detailing the loco

Loco Detailed

The armoured loco looks nice but I felt, lacks the detail present on the carriages. Not to worry, I could do something about this.

Starting at the front, the central smokebox handle is a nice moulding with descent undercut (RTR manufactures take note, it can be done) but lacked the second handle - easily added with 0.3mm brass wire. Above this is a moulded handrail that went in the bin to replaced with a brass item. I think the "face" of a loco matter so don't mind a bit of effort.

A drill bit stuffed down the chimney opened this out - it wasn't blind but hole only extended a couple of mm. Now it goes a lot deeper as the resin is lovely and easy to drill.

The cylinder & valve gear covers were a separate plate on the prototype and while the moulded version was OK, thin plasticard is even better.

Finally, the casing is covered with prominent bolt heads. You need to be careful here as the original loco sported much chunkier lumps than the recent full-size replica. This gave me the opportunity to try out some Archer resin transfers bought a while ago.

These are 3D lumps applied on transfer paper. To use, cut them out of the sheet, soak them from the back and apply. A wash of MicroSol helps them stick to the body. A more thorough de-greasing would have probably helped further as I still managed to lose half-a dozen.

If you really want to go to town, cladding the resin boiler with think plastic or metal would be even better. The sheets on the prototype showed clear gaps around the dome and safety valves. I thought about his and decided against. Not sure if that was the right move. I did score the vertical line half way along the casing though so I'll let myself off.

Thursday, June 26, 2014

Building the loco

Trimming MouldingsThe armoured locomotive is made up of large resin castings. A dry-build (posh term for putting the bits together without glue so you can take them apart again) revealed that the boiler unit sat on the footplate with a gap under it at each end.

Checking the base with a ruler confirmed that the boiler was the problem. Ideally I wanted to take out about 1/4 of a mm from the centre and leave the ends alone.

What I didn't want to do was make the problem worse by filing the bottom flat but not parallel to the top. Dragging it back and forth along a file sat on the workbench seemed to do the job. I kept turning the part over to see where the scratches were and make sure they weren't at the ends where I wanted to keep the material.

Another problem was that to my eye, the unit was very, very slightly too long. It's a snug fit up against the front of the cab so it's another spot where filing away and producing a wonky part is going to show, or at least take some filer work to hide the bodge.

Fortunately, I have just the tool. A pricey True Sander from North West Shortline, bought from EDM Models in a fit of enthusiasm. Basically, a masonite base with an aluminium block that runs back and forth with some abrasive paper wrapped around it. The important point is that the set-up keeps the sandpaper at 90 degrees to whatever is being sanded.

End sanding

I took that picture by clamping my cheap compact camera between chin and throat. Not sure the proper photographers work like that but it went surprisingly well. And yes, my modelling bench is a mess. That's how I roll.

After this, the parts went together well with superglue and the loco looks nice. Sadly the shadow means you can't see the well detailed backhead, but the pipes and controls are all in there.

Loco started

Wednesday, June 25, 2014

Carriages on "wheels"

Carriage mouldingsStarting with, what we shall call, the carriages, there are some large mould runners on the underside of all the resin parts.

I trimmed these off with some flush-cut wire cutters. The resin is soft and they chew through it perfectly. Any leftovers were sliced away with a sharp knife and then sanded with an abrasive stick.

To be honest, it's all underneath so perfection isn't required.

The bogies are solid whitemetal castings. When looking to build a working model, I did find some Graham Farish wagons with the right sort of size bogies but these were on pricey modern PW hoppers (I think, it was while ago) although the container wagons could also have donated sets.

Assembly simply requires some superglue on the bogie and the wagon placed on top of this. The lumps sticking out from the centre well on the wagon are (I think) supposed to locate in to depressions in the end of each bogie but I felt they pushed them too close to the ends so lopped these off too.

Not owning an N gauge straight track, I Blu-tacked some flexi down between a couple of rulers and then set the carriage up on this to ensure the wheels were all in a line. I suppose a couple of screws or bolts could have worked as pivots but it didn't seem worth the effort for solid bogies.

Carriage assembly

Tuesday, June 24, 2014

A look in the box

Kit Bits

The Sgt's Mess kit seems a bit of a bargain to me. The main parts of the train are cleanly cast in resin. Detail items are whitemetal, again, cleanly cast with no flash. A set of 7 nicely sculpted crew figures is also included.

Obviously the first job is to put the model together without glue. Just to test the part fit you understand and not 'cos I'm a big kid who likes to see what it will look like far too early in the process.

Some casting runners need to be removed (photo tomorrow) but this is the work of a few minutes. After this, all the major bits seem to sit together very nicely.

Raw Bits


Monday, June 23, 2014

RH&DR Armoured train

 photo 7b194d2c_zpsf112bc28.jpg

With all the war time specials to be found in model railway magazines, it seems only appropriate that I do something on the blog. The problem is that I don't really do tanks and guns and stuff, not being a big fan of armed conflicts. While lots of people love all that stuff, I can't help thinking, "There but for the grace of god go I" on the basis that if born 70 years earlier, I'd have been spending time in a muddy trench rather than building model railways.

However, I can't escape entirely. While the idea of modelling the front lines does nothing for me, you can't really escape being fascinated by some of the equipment developed. Hobart's funnies for example, fascinating. Or in this case an armoured train - one that could very well have been right in the front line as it ran on the Romney Hythe and Dymchurch railway.

Manned by the Home Guard and armed with Lewis and Bren guns along with anti-tank rifles, the train fortunately didn't see action. This doesn't make it any less interesting. The idea of building a model has been one of many kicking around in my mind for years but things came together last year when I spotted a kit on the Sgt's Mess stand at the IPMS.

Train on stand

Initial thoughts centred around building a working model from the static kit. After an awful lot of digging through N gauge locos (the model is designed to sit on N gauge track, rather too wide for the 15 inch RH&DR but we'll ignore that) it proved impossible to find a 4-8-2 chassis with 6mm driving wheels.

Thus, the kit has sat around untouched for a few months. This seems a shame so I've decided to build it. If anyone comes up with a solution to the chassis problem, well a second kit won't break the bank, I'll have another go.

Sunday, June 22, 2014

New magazines on the shelves


A trip to Smifs this week saw my pocket lightened by the cost of two new magazines. Both interesting and both Issue No.1 so valuable investments for the future. After all, they are bound to rise in value aren't they?

VW Vibe (£3.99) is a mag for those in the VeeDub "scene". There are cars but no tech articles for people who know one end of a spanner from the other. This is a mag for people for whom it's not just a car, it's a lifestyle. While there is a pleasant lack of "I gave the car to X and paid them to do all the work", I'm pretty sure that this will come. Some of the builders are professionals and I wonder how many articles will be showcases for their work. Don't get me wrong, there are some fascinating vehicles in there, I just wonder how many will still be around in 3 years time once they have been sold to people who don't understand the difference between a modern Toyota and and 40 year old bug.

What it does is confirm some of the reasons my campervan is up for sale. I'm no where near cool enough to be part of the "scene" and nowadays that seems to be the main reason for owning an old Volkswagen.

Blocks Magazine (£5.99) is a different beast. For a start, it's so low budget that there isn't even a website. You wouldn't know this from the inside though. Reproduction, print and photography are all top notch. It feels like a quality publication.

I don't really understand the adult Lego market. This is probably jealousy as even I can't see myself playing with a toy that I loved not that many years ago. Yes, I'd relish an opportunity to sit down with a kit and put it together - and if you are reading this so would you - but I can't quite get away from the "grown-ups playing with toys" thing. Looking at some of the sets reviewed though, Lego have spotted the adult market. You don't pay £250 for a Star Wars sand crawler from your pocket money.

This isn't a pure picture-fest. A history of Lego takes up several pages and there is a nod to collecting with a look at the Blacktron sets from the 1980s. There's even some practical stuff with step-by-step articles on building a Minifigure display cabinet and making some Lego valve-caps for your car or bicycle.

I quite like the idea of the 60 minute challenge. Random tubs of bits is handed to two competitors and they have to build a model from these in the time, the results being judged at the end. This isnt' far off the way most people work with Lego, having a pile of bits and using pure imagination to work out what to make.

Towards the back there is a book review and then some glossary terms for newbies to the brick world. I wonder if this is the publishers hedging their bets against a second issue. If it doesn't sell well then the thing works as a standalone publication. That would be a pity as there is obviously a market full of creative people who desperately want others to understand and appreciate their work.

All they need now is for WH Smith to stop putting it in the children's section. Mind you, if I were 7 years old, I would have read it from cover to cover.

Saturday, June 21, 2014

Patrick Rylands, designer


Patrick Rylands designs toys. Children of the 70s like me will remember PlayPlax squares - interlocking plastic pieces in different colours that you made abstract creations with. Simple and elegant.

Anyway, there is a rather interesting interview with him on Toy News.

I post this not because I've been too busy for much blogable modelmaking (I have but that will be fixed next week) but because he has some interesting views on the future of toys and how they will be impacted by electronic devices.

"Over the years, I’ve been an obsessive collector of all kinds of things and it occurred to me quite early on that a lot of the information we get from anything came in through the fingers, not just the eyes. There are more senses than just the eyes and I do worry its just look based not do based."

Basically, there is more to life than staring at a screen. Something I think most modelmakers will agree with. You might even see some parallels with the current state of the model train world too. I did.

Friday, June 20, 2014

Mystery buffer bar

Sprat & Winkles

Mike asks: Please can you explain the use of the bar connecting the 2 front buffer pads on your Ruston shunting loco (Fri, Aug 19, 2011 blog post photo). I have Googled extensively but can't find anything to explain or show similar. Was this a real practice?

Good question. It's something I'm asked at exhibitions too and the photo you've seen doesn't give any useful clues either.

The bar is part of the Sprat & Winkle coupling system. As you can see from the pic above, wagons have both the bar and a pivoted hook on the ends. The hook grabs the bar on the loco. Basically, it's the same as a traditional tension-lock coupling you find on the ends of ready to run models except that this version is mounted upside down and operated by magnets under the track.

There's is no prototype equivalent. In real life coupling is achieved using chains attached to hooks on the buffer beam. You can do this on a model but it's very fiddly, especially in any scale under 7mm.

I've used S&Ws for many years on all my models and really like them. There are other ways of fitting the coupling rod but gluing it to the buffers is easiest and if painted with a off-black, not too obtrusive in real life.

The couplings are available from Wizard Models.

I wrote up fitting these couplings in the June 2104 issue of British Railway Modelling.

Thursday, June 19, 2014

Melbridge Box Company video

Melbridge Box Company on Modelrailway tv

Four years ago, I made a couple of films for Modelrailway.tv It appears that one of these, The Melbridge Box Company, is still on-line and available for free viewing.
 
Update: Sorry. I didn't watch it all the way through when I wrote the post. Apparently you get the first half and then an offer to pay to see the rest - I'd assumed it was all free. Apologies to all the people who have been highly offended by this. All links have now been removed.


Wednesday, June 18, 2014

Hornby Visitor Centre

I wasn't really sure what there was to be found in the Hornby visitor centre when presented with a schedule that included half an hour in there, I was looking forward to it. It helps that I'm not a proper finescale snob. If it's trains, there will probably be something of interest.

As you'd expect, one of the first exhibits is a large model railway that visitors can operate. It's one of three (I think, possibly more) and makes use of Hornby products on a scale that most people can only dream of. I'm sure the kids will like them, especially the Thomas set which incorporates a couple of vistadomes in the middle so you can get right in to the scene.

 
This is a bit of a gimmick but if you have a large layout, how about arranging for people to be able to stick their head inside a building so they look out through the windows? We all tend to get down to eye level while viewing a model railway, and this isn't a bad way of doing it while keeping little hands away from the models.
 
Anyway, the centre isn't just devoted to Hornby. There's a lot of stuff from the rest of the group. You can play with a couple of Scalextric sets for example. Who knew they made cars that would drift? I didn't. Good fun though.

In cabinets fitted into the walls are all sort of fascinating displays. I've never seen the Airfix Fergie kit - the one that brought the company in to producing plastic kits - before, but here we go:

Airfix Fergie#

How about the recent Live Steam loco range with their tops off?

Live Steam Locos

Or some of the prototypes for the Corgi vehicles range?

Prototype Corgis

I liked the selection of tinplate Volkswagens:

Tinplate VWs

There is space for model makers contributions such as these conversions of the Wallace & Gromit range of vehicles on loan from one of the IPMS Special Interest Groups:

WG Conversions

Appropriately, there is a huge D-Day model. Relying on standard Airfix kits means it's not perfectly accurate (the landing craft are too small for tanks) the panels around the model explain which products have been used. I doubt many people will have the space (20ft square I think although I didn't have a tape measure handy) to reproduce the scene, it might inspire a few modellers to try a diorama. There are prototype vehicles around the edge for military nerds to have a good look at too.

D-Day Scene

These pictures are only a tiny selection of the exhibits on offer.

Would I pay to go in?

Yes I would. I reckon there is a happy half day poking around, watching films and generally wallowing in model making goodness to be had, especially if you are interested in how the models are made or remember the older ones that you haven't seen for a long while. I'd suggest avoiding school holidays - Thursday morning was nice and quiet and we managed to have a play with everything without needing to shove small children out of the way.

Hornby visitor centre website.

Tuesday, June 17, 2014

Hornby shop, Margate

Here be HornbyI can't talk about model shops without mentioning the one attached to Hornby's premises in Margate.

To find it, you have to go around the side of the building - to the right as you look at the front door. Don't worry, there are signs pointing you to the visitors centre (I'll post about this tomorrow).

Inside, as you might expect, there is as full a range of Hornby products as can expect to find anywhere. After all, if they can't get it who can?

Locos, and rolling stock are on the shelves and possibly the only display devoted to the under-rated SkaleScenics products I've ever seen.

 
Look, lots of toy trains!


This probably sounds like a terrible factory shop set-up, a bit like the one attached to the Cadbury museum. Unlike this one, a trip around the visitors centre hadn't put me off the products. In fact, had I not been working, I would have happily browsed the shelves for an hour or so.
 
What you get from a trip here is an idea of the range of items produced by the Hornby GROUP. Airfix, Corgi, Scalextric and Humbrol stuff fills the shelves. If I lived nearby I'd never have to worry about running out of paint for a start.
 
For bargain hunters, there were some shelves of discounted items - mostly Airfix products as I recall from a quick look, but I assume this changes over time so it would be worth dropping in occasionally.

Hornby Visitor Centre website


Monday, June 16, 2014

RAF Manston History Museum

Manston MuseumOn the edge of Manston Airport in Kent, there are a pair of museums dedicated to old aircraft. One of these is the RAF Manston Museum.

Housed in an old building, it's a little bit home-spun but in the best way possible. Greeted by volunteer staff, you are pointed in the direction of the exhibits having been relieved for a measly £1.50 entrance fee.

Both inside and out, there are sections of real aircraft and support vehicles. Most of the flying machines have been chopped off behind the cockpit apart from a Jaguar, couple of helicopters and a Canadian jet fighter.

It's possible to poke your head in to the Victor to get a feel for the conditions enjoyed by the crew. I was taken by the idea that special inflatable cushions were built to get those not supplied with ejector seats into a standing position so they could jump out.

Inside Manston

One of the rarer exhibits is the remnants of a bouncing bomb, presumably the test version. It's very different from the object dropped in the 1955 film when the details were still top secret.

Bouncing Bomb

Anyway, we don't normally do aircraft museums on this blog, no matter how good they are. This one gets a place as a model shop. As well as a fine range of books and souvenirs, they stock lots of plastic kits. Mostly aircraft obviously, but one of two others from the Airfix range. In addition, there are racks of Humbrol enamel and acrylic paints plus glues, filler and brushes.

Not too difficult a place to fin - you'll know you are there when you spot the V1 bomb on a stick outside the door. If you need even more aeroplanes, on the other side of the car park is the Spitfire & Hurricane museum - free to go in and also fascinating.

RAF Manston History Museum Website


Sunday, June 15, 2014

Knightcote Model Boat Club open day 2014

Club 500

A sunny day. The chance to spend time sailing model boats with friends. Such a pity I had to work so could only spend a couple of hours there.

Never mind, there was plenty to see. Even in the morning, at one point there were 17 sailors around the poolside. A wide variety of models to be seen too from landing craft to wooden river cruisers to yachts and high-speed racing boats.

As befits an open day, there were at least 3 clubs other than KMBC represented. Steve from Model Boat Bits had brought a useful selection of products to relieve us of a few quid. I came away with long lengths of plastic mouldings for a railway project and some brass wire - because I'm sure it will come in handy and you don't see it in yard lengths normally.

Anyway, go and have a look at my photos on Flickr.

KMBC Open Day 2014

Saturday, June 14, 2014

Elham Valley Railway Museum

Funicular

So I'm tootling through the Kent countryside with RMweb's Andy York and we spot a sign for a railway museum. There's no name but none of us can think of a museum in the area. A little navigational jiggery-pokery later we head up a country lane and spot this.

A funicular car in what appears to be a garden. Either that, or the track is going to be anchored on the moon one day. Perhaps this is an early attempt at a space elevator?

As it turns out, the carriage is part of the Elham Valley Railway museum. Sadly, it was closed mid-week so all we could do was look over the hedge at the Channel Tunnel works trains also on the site. If you are in the area at a weekend or bank holiday, it looks worth a visit though.

Personally, I think this is a cracking garden ornament. A very different type of garden railway...

Friday, June 13, 2014

A good jigsaw

Airfix Through The Years Jigsaw

I love a good jigsaw. There is something about bringing order to a random pile of little pieces and watching the picture come together that is very satisfying.

It can be horribly addictive too. Jigsaws tend to be left out for anyone to pick at around here. Gradually the pieces will be sorted out, usually the edges first and then little areas inside until these can be pulled together and the remaining holes filled. As a relaxing pastime, it's hard to beat - you can't really think of anything else while you work so it clears the mind. The problem is, you think you'll do ten minutes and an hour layer you are searching for just one more piece.

For this to work, obviously you need lots of bits - at least 1000. The picture has to have plenty of detail and be well reproduced too. A recent jigsaw became an exercise in trying every piece in every gap at one point as the painting of sea and rocks wasn't distinctive enough to spot which parts should go together.

The picture at the top shows "Airfix - Through the years", a selection of Airfix products from the first little grey Fergie kit at the front to more modern offerings such as the ship in the bottom left corner. Classic artwork on box tops from Roy Cross (anything with guns and explosions) to the tamer modern images. There's some old catalogues in the centre, at least one of which I remember having from the 1970s.

I'm not sure how or why, but there is even a little bit for Beatties anoraks like me - the HMS Warspite box has a price label on it! I wonder if this was left in deliberately? It would seem odd as none of the other boxes is priced.

Am I the only jigsaw fan out in the world of modelmakers?

Surely not. After all, we all enjoy bringing a bit of order to chaos.

Anyway, jigsaw making isn't that much different from building a model from a kit, especially with some of the instructions I've found in kits.

Thursday, June 12, 2014

Cow-a-vanba, it's BRM!

It's time for the paper copy of British Railway Modelling again - electronic copies have been knocking  around for several days already but on this blog we don't consider publication has taken place until we see some dead tree.

Well, in magazine terms anyway.

Obviously the blog is published when the electrons are born. Moving on...

This time you can feast on a cow-van special from my workbench.

Parlimentary Cow Van

First up we have a laser-cut and laser-etched kit for a LNWR 19th Century cattle wagon from Parliamentary Trains. It's an odd-ball prototype from a time that most people wouldn't consider modelling. Even on O gauge, this isn't a huge vehicle but as you can see, it makes up very nicely.

IOM Cow Van
 
O gauge not big enough for you? Well try this Isle of Man cattle van from IP Engineering in G scale. More laser cutting but in plywood this time, the finished model is a substantial 25 1/2 CM over the ends. Lots of wood and metal for your money here.
 
I've also carried on looking at couplings, this time it's a drop-in replacement for the standard tension-lock hook from PH Designs.
 
And finally, if all this weren't enough, the magazine comes with a free scenery guide. In here, you'll find out how I built one of my favourite projects for a long while - a little diorama based around a Nissen Hut. It's 7mm again, although the parts are available in 4mm too, and (to my eye) has come up really well showing that even in a small space, you can have some enjoyable modelling.
 
Nissen Hut
 
 
Loads of good stuff for only £3.75 - Find out more at the BRM Website.


Wednesday, June 11, 2014

Book Review: The Modelmaker's Handbook by Jackson & Day

I haven't reviewed a book on here for a while but as I leafed through The Modelmaker's Handbook looking for something, it occurred to me that most people will probably look at this volume on a second hand shelf and dismiss it.

Firstly, it was published in 1981, so it's going to be out of date isn't it?

Second, the writers are trying to cover all model making hobbies in 351 pages - surely an impossibility.

Wrong on both counts I'm afraid.

Let's start with the date thing. It is true that if you want cutting edge information on DCC wiring for model railways, or the latest details of radio control, then you won't find them in here.

On the other hand, there is plenty of information on wiring analogue railways, which is all you need really unless you insist on selling your soul to the devil for noises and lights and gizmos.

Servos etc. on the RC side haven't changed much. The main difference is the receiver you plug them in to doesn't have Xtals in it any more now you've started with that 2.4mHz stuff.

There's also no mention of laser cutting or 3D printing but then they are specialist subjects that many modellers will have limited practical contact with.

No, inside, you find an excellent reference designed for people with a wide range of interests. Take a look at the contents page:

 
There is an awful lot between the covers. Normally this would mean that the information is desperately basic, but not this time. I was looking for information on painting figures and there it was. Enough to get me going. If I wanted to modify the little people, details and diagrams are available quite obviously written by military modellers who do a lot of this sort of thing. There's some very nice information on painting horses complete with colour pictures.
 
In fact, the whole books is well illustrated with photos and diagrams. Someone spent a lot on artists to produce all these - not something you get very often now as photos are a lot cheaper, if not clearer.
 
Of course, for a proper British railway modeller, this sort of book is an anathema. It's got stuff on other hobbies in it! The horror!
 
That's fine but if it's the way you think, you are missing out. How do you straighten thin wire out? You look it up in the chapter on detailing and modifying plastic kits because the pictures are in there. Making plants or moulding rocks? This is under military dioramas. Making a horse and wonder how the tack works? Saddlery is pages 151 & 152. Stucco walls - well that one is in the railway building section after brickpaper and plasticard and before wooden walls.
 
The range is probably best illustrated when I say that the Index runs to 7 pages. You also have a glossary of terms for those new to a particular hobby.
 
As far as I know, The Modelmaker's Handbook is out of print, but I picked up my copy second hand reasonably cheaply to replace an original never returned by one of my sisters ex-husbands. If you can deal with cross-disciplinary ideas then grab a copy next time you see one.


Tuesday, June 10, 2014

3Doodler 3D pen

3D DoodleThis 3D print stuff fascinates me. I'm impressed with the technology, if not as blind to the current level of development as many of a people on forums who see it as way of never having to do any of that fiddly model making.

One of the never ideas out there is the 3Doodler pen. It's not really the same as 3D printing, even though it's lumped in with the serious kit. That doesn't mean it's of no interest though. I'm always happy to tinker with a gadget with the idea it might have some model making uses.

Hanging around a quiet Maplin on a wet day, I decided to ask if I could have a play. Even though my total purchases were limited to some LEDs and a 9V battery snap, the assistant was happy for me to fire it up and hand it over.

The device is a fat, pen shaped object with two buttons and a fan. Basically, it's a hot glue gun that extrudes a plastic. Plug it in and the fan comes on. After a few seconds, the device is up to temperature and you can press a button to get started. Despite appearing to be forward and reverse, the buttons are just two speeds of extrusion.

On the advice of the assistant, I started my test by making a mound on the paper to glue my "model" to the surface. Then I drew a wiggly line in the air.

My line is 7.5cm tall and free standing. Working slowly, the plastic hardens fast enough to support itself withing a couple of seconds. The 1mm thick line is surprisingly strong too. My little doodle is springy and not at all brittle. I was impressed.

So, what use is this?

Not sure. Attempt two was a less than successful tree armature. Sticking branches to each other neatly would take practise and I had been using the tool for around 2 minutes. If it can be done, the finished tree will be flexible enough to take knocks but I'm sure strong enough to support fine gauze covered in flock powder. Thickening up the trunk could be carried out by drawing extra lines up it.

3D Doodle2

It's certainly an interesting tool. I didn't stump up the £99 to buy one, although if anyone wants to send one to me for proper testing, I'd be happy to devote more time to it.

With work, I wonder if a finner nozzle could be made to produce telegraph wires. Or rope for bunting. Or rope on boats generally. The plastic isn't elastic so won't stretch but I reckon there is way around this.

Interesting. Great fun to play with too.

Maplin 3Doodler

Monday, June 09, 2014

Rowland Emett Exhibition

For most railway enthusiasts, mentioned the name Rowland Emett causes them to think of the Far Tottering and Oyster Creek Branch Railway that ran at the Festival of Britain as well as his numerous cartoons featuring transport over the years.

Others will know him as the designer of the star of the film Chitty Chitty Bang Bang as well as many other fantastic gadgets that appeared on screen.

Birmingham Museum & Art Gallery have assembled the largest collection of his working creations in a show entitled Marvellous Machines: The Wonderful World of Rowland Emett.

Arriving in the hall, the display starts with a film of Emett and some background history on his life and work. All around you are original framed cartoons broken down in to subjects that appealed to him such as class and of course, transport.

Despite a background as a technical artist, he moved in to working 3D creations - literally cartoons brought to life and half of the hall is given over to these. Starting with some from Chitty, we then have the Little Dragon Carpet Sweeper, a bicycle designed for lunar exploration, a flying machine and finally, his last display, "A Quiet Afternoon in Cuckoo Valley".

This final piece is made up of several machines from a bathing machine that is home to a corpulent diver to a man on a bicycle to the centrepiece - an almost full sized Emett train.

All the machines are working. The train rolls back and forth on its track. The loco seems to go in a different direction to the coaches. In one of these, a lady is casting around with a butterfly net.

Wonderful, wonderful stuff. Well worth a visit.