Wednesday, October 31, 2018

Warehouse Wednesday: Peel Castle via LNWR

Peel Castle

Not a warehouse, and in truth, not something you are likely to need to build unless a very large model of Peel station on the Isle of Man is on your agenda. 

The photo does have a railway connection though - it's part of a triptych from a London & North Western Railway Company carriage print. Sadly, only this photo survives. The image on the right is a view of Peel but only a fragment remains. 

The castle hasn't changed much, no-one has bothered to restore it, but this photo speaks of days when Mona's Isle would be at it's height as a tourist destination. You would take the train to the steamer and disembark in Douglas. Then another train to Peel. All journeys I'd love to be able to take...

Tuesday, October 30, 2018

De ja vue hull fun


Oh dear. Things aren't starting well. Comparing the bulwarks of the boat with it's hull, there's quite a difference. The top and bottom you see in the photo should match, and the top part is quite a bit short.

At this point all I can think of is the Brede Lifeboat kit I bought a few years ago and ended up throwing in the bin as the parts were beyond saving. I appreciate that kit development isn't free, but you would think that the bits could be better than this. Fortunately, the makers of this one have long since retired, so I can say what I like...


Matters don't improve when I cut out the deck using the plan either. It's quite a bit bigger than the hull! Not consistently either, so this isn't some weird photocopying error.

In the end, I cut the access holes in the deck and stick the hull to it with lashings of Precision ABS glue. A least a deck too large can be rimmed back.

I'm going to build this thing no matter how it fights me!

Monday, October 29, 2018

New project: Mohan


Time for a new project, and I'm in the mood to build a model boat. I've even set myself a punishing deadline - it's entered in to the International Model Boat show on the 9th November. Even though I'm posting a week or so after each stage is built, that's still tight. I have taken the precaution of describing it as "A work in progress" on the form...

The kit is a Waverley Models "mini tug" kit. Bought at least 10 years ago, I kept finding the model in the store and since the 16mm Hunslet has reminded me how much I like noodling with plastic sheet, a "kit" that will require a lot of that is just what I need right now.

In the box are some vac-formed hull bits 35cm long a plan and a few resin bits that don't look like much on the drawing. After this, I'm on my own. I think there was some plastic sheet in there to make the superstructure out of but I can't find that. Not to worry, I've got loads.

In another exciting change, I plan to take the photos on a grey background where possible. I want to see how this looks, and save myself time sorting out a nice white background to contrast against the white materials I'm building the model in.

Sunday, October 28, 2018

Midlands Model Engineering Exhibition 2018

Midland Spinner

One question: How did this gorgeous 5 inch gauge Midland Spinner come second in its class? 

I never did find the winner, but it must have been some amazing model to beat this. 

My favourite model?

3D printed steam engine

A 3D printed steam engine on the Steam Apprentices stand. Working valve gear and steam control (OK, the last one is just a controller for the electric motor), it was beautiful and educational. 


Saturday, October 27, 2018

Saturday Film Club: Driving through the night


Nice film from the "Look at Life" series following Wally on a run between London and Birmingham and back overnight. 

I like the film of parcels loading, something of interest to railway modellers. Lots of blokes in dustcoat wheeling packages around. 

There's an nice early (no "eyebrow") split screen VW at the end too.

Friday, October 26, 2018

Tri-ang 11" motor cruiser

Triang Boat and box

A nice crossover purchase for me - a model boat, made by a manufacturer better know for model railways. 

"Burnham" was produced between 1960 and 1968 by Lines Brothers for Triang. Powered by a clockwork motor, the key is notable for featuring both companies names. 


Winding is a fiddly process as the propeller has to be held still. Once released, it whizzes away for some time - exactly how long I'll find out when I get this model on the water. 

Once running, a mast with navigation light fits into the keyhole. 

Steering is achieved by setting the brass rudder and hoping it stays put to turn the boat so it come back to the bank. This example seems a bit floppy so might need a bit of a crimp before launching. 

Bought at the recent toyfair, my model is really smart, comes with it's key, forward mast but not the rear flagpole (if there ever was one) and seems pretty mint. All for £30 after a little haggling. 

Had it been a lot cheaper and in much worse condition, I'd consider a motor and radio control transplant, but the model is too nice to mess with, and I do have a couple of other candidates for this sort of work in the future. 

As it is, this fits with the giraffe cars and other Triang products in my collection. Railway modellers will consider this "impure" but I the "off-piste" products produced by both Triang and Hornby groups fascinate me.

Thursday, October 25, 2018

Dirty tanker

Class B tank wagon

Last week, I spent a day at the Severn Valley Railway and standing in Highley station was this fantastically weathered Class B Tank wagon.

Peeling paint, rust, dirt and an awful lot of green, it looks amazing and represents quite a challenge to anyone who enjoys a bit of wagon weathering.

Wednesday, October 24, 2018

Warehouse Wednesday: Thames boat yard

Thames Boatyard

Taken from the slightly terrifying Emirates Airline thing (Boris's cable car) over the Thames, this is one of those views not easy to get on the ground. There are gates and dogs and stuff to stop the casual photographer from poking around, even if they are interested in industry and boats. 

Click the image for a better look (it will take you to Flickr) as there's a lot of interesting detail to be seen. Boats under repair, tugs, barges, enough junk to film and episode of The Professionals. If I liked heights more, I'd have happily hung about for a longer look...

Tuesday, October 23, 2018

The (nearly) cheapest loco kit in the world, finished.

Finished loco


Finally finished, the Phil Sharples loco is looking pretty good. Most importantly, I enjoyed mucking around with this kit quite a lot.

Nothing earth-shattering took place, but I tried a few new things and I've some ideas for future project.

The most important thing is the model is done. I speak to a lot of people who start a project, get stuck, or simply decide that it's not going quite as they hoped, and stop. Even if a model isn't the perfection you hope for, pushing on and getting the thing done is still a good exercise. An average or even poor finished model is better than another project dumped in the back of a cupboard.

And yes, this model did languish for a loooong while as work took over. The first pictures were taken a year ago and dribs and drabs of work were carried out with a final sprint towards the end when I decided I was going to get this done!

Monday, October 22, 2018

Wiring a battery electric loco

Plan A for the Hunslet involved fitting a cheapo infra-red control system that I picked up at a show. That didn't work, so I've decided to wire it up with a switch for the moment. The bits are in the box with the rest of the kit anyway, so I might as well use them.

Wiring this stuff isn't rocket science. Essentially the batteries are wired to the motor and these make it go.

For stop and reverse, add a double-pole-double-throw switch. Batteries to the middle terminals. Motor attached to the end pair. Then the top left terminal is wired to the bottom right and bottom left to top right. The wires should cross on the middle (make them a bit longer to loop out of the way of the connections to the middle pair.

Hopefully, my crude diagram will help. If not, ignore it.

One fault with the set-up is that the switch provided doesn't have a centre off. Had I spotted this before wiring, I'd have replaced it with one that does. As it is, the slider needs to be carefully positioned in the middle to switch the motor off.

Long term, I want a cheap remote controller - suggestions in the comments please - I am NOT spending Deltang money on this model! As the body is not fixed down, retro fitting shouldn't be a problem.

Sunday, October 21, 2018

Yorkshire Garden Rail 2018

Blue Hunslet

To Bradford!

The show that used to be Elsecar has moved north to a new venue. From a heritage centre full of character to a 1970s concrete leisure centre that has a certain amount of different character if you like brutalist buildings. The move was forced on the organisers and they made the best of it. Next year, the venue will change a little again, as the old centre is being replaced with a brand new one.

Inside, the hall was a bit dark, my DSLR couldn't cope, but my new 'phone managed well so we have photos.

Ivor

The show itself was good. Plenty of layouts and lots of movement. Lots of trade too with plenty to tempt the pocket and empty the wallet. Best of all, the ladies running the cafe were as chirpy as you could hope for. It will be a shame if they don't transfer to the new venue.I'm planning to go along to find out!


Saturday, October 20, 2018

Saturday Film Club: Triang Battlespace mega layout


As mentioned yesterday, I love a bit of Triang. Top of the pops has to be the Battle Space range of operating accessories and I've never seen a better display than this seen at a show in Perth. 

You can keep all your finescale rubbish - give me a couple of Turbo cars circulating on high level tracks!

Friday, October 19, 2018

Get your voting fingers ready!

Vote

It's voting time for a couple of important contests. 

The BRM Cakebox Challenge
49 entrants can be seen here. Please take a look at each one, pick three and jot down their numbers. Then head over to the voting page to make your choices.

All the entries are impressive and inspirational with really clever ideas that we can all take back to our own modelling efforts. I'm pleased that the competition has turned several lapsed modellers into active modellers again.

The Wishlist Poll

The Poll Team put a terrific amount of work in each year to create a poll of prototypes that modellers would like to see appear as RTR products. While no manufacturer will use this as their only guide when planning ranges for the future, it certainly plays a part and it's interesting to see how many new models appear that have been placed high on this list.

Vote in The Wishlist Poll


Thursday, October 18, 2018

Garden Rail November


Present me with some Isle of Man Railways for a Garden Rail article and you can be sure I'll bite. Our main feature this month is a beautiful selection of IOM models on their owners layout.

Carrying on the theme, I've finally turned my sketch notes for the Manx station huts into something approaching a drawing. As a potential model, they have loads of applications for anyone not looking for a grand station. Very scratchbuildable too.

I'm also pleased to be able to publish an article on building the Garden Railway Specialists Garratt kit. Sadly, it's not me who built it, but maybe I'll get to do it one day...

All this and much more in Garden Rail November 2018.

Wednesday, October 17, 2018

Warehouse Wednesday: North Woolwich Station

North Woolwich Station

Looking rather ramshackle now, North Woolwich station is a pretty standard example of Great Eastern Railway architecture. You'll see derivatives of this building dotted around their territory. Railway companies like to find a style and stick to it, or at least some of them did.

North Woolwich Station

The building used to be home to the Great Eastern Railway Museum, but this closed in 2008. The exhibits have been dispersed to other establishments, but it's a shame the museum closed. To be honest, there's precious little else to head to this side of the Thames for.

North Woolwich Station

Hopefully, the building will find a sympathetic new owner. Probably some sort of apartment block, but maybe the conversion will be carried out by someone with the same sort of imagination as did Wolverhampton Low Level station.

Tuesday, October 16, 2018

Weathering an MDF loco is harder than it looks

Adding a bit of dirt to the Hunslet, pretty much essential as the faded yellow was still VERY bright, was supposed to be simple. Blow earth colour around the bottom, blackish over the top and track colour pretty much everywhere.Just like I do for everything else I build for the railway world.

The end result looked a bit flat. Maybe I should have given the yellow a coat of satin varnish to make it pop a bit more, maybe I didn't clean out the paint cup properly and the earth colour took the edge of the others, but I wasn't really happy.

Wanting a bit of dirty hanging around the detail, I tried a wash of Agrax Earthshade shading ink. On the sideframes it looked good so I went for it over the rest of the body. Normally, it's paint on, wipe off. Here, it soaked into the surface a bit so I had to wipe quickly. Another reason I should have varnished the yellow.

After that, a bit of dry-brushing and I'm reasonably happy.

The figure by the way is a Kara's character. I do like his stance, leaning out of the cab. A bit more lively than most.

Monday, October 15, 2018

Getting the paint on

Prime some MDF and the amount it soaks in varies more than I'd expected. This isn't a problem for what will be a heavily weathered loco, but if I'd been aiming at shiny, there would have been some sanding between coats. Maybe even some sanding sealer first.

Anyway, I'm quite pleased with look of the model in grey. It's a little cartoony, but in an appropriately garden railway way. The scratchbuilt exhaust, made from several bits of plastic tube, looks fine, even if I have had to cheat on the way it exists the bonnet doors.

I fancies painting this loco yellow and found a pot of Precision faded signal yellow to do the job through my airbrush.

The radiator was harder. First attempts at masking were scuppered by the bonnet handles so I decided to hand paint. Fine until it comes to the mesh where you can't get paint far enough back. In desperation, I cut a square hole in some card, slightly smaller than the central core. This acted as enough of a mask to let me spray with an aerosol, the overspray being limited to the other black bits around the edge which I handled with a brush.

After that, a quick-dry brush with some gunmetal and it's looking good. On to proper dirt!

Sunday, October 14, 2018

11 Swapmeet lessons


With a stash of diecast trams and stuff to dispose of, my Dad and I headed to a toyfair at the NEC. We'd not been to one for many years, eBay having eaten all the little local events, and wondered how they had changed. 

We learned some things:
  • The NEC event is big. 
  • Walking past stalls looking sideways makes your neck hurt after a while. 
  • There is a lot of stuff, and some of it is very tempting. 
  • A surprising amount of traders haven't bought a little machine to take card payments. There must be some big wodges of cash walking around the hall, or a lot of expensive models going back in the vans they came in. 
  • You are going to come back with stuff. This was not the point of going. 
  • Toys you remember as a kid will be on sale and this makes me feel old. 
  • Some of the stuff is just junk. 
  • Some children got Matchbox cars and never took them out of their boxes. I feel sorry for them.
  • I still want to buy a stupidly expensive  toy car and "Broooooom" it along the concrete floor. 
  • A disappointing number of punters do not wash their hands after going to the toilet. 
  • Realising this, and knowing that they will have been handling the goods for sale makes me feel icky. 

We still fancy the fun of having a stall one day. Maybe not at the NEC (£55 a table) but at a smaller event. Of course, being there all day means more temptation...

Saturday, October 13, 2018

Saturday Film Club: Magnarail and Faller boats


Thanks to Mike Bowman for pointing me at this series of videos by klatchco56 who is working on many different ways to use the Magnarail system I used in the July 2015 issue of BRM

I've picked a video that makes use of the ingenious Dutch system to operate a model boat - alongside a model powered by a Faller car system mechanism. Both are very neat and have given me ideas for future models. But then I always have ideas for future models...

Friday, October 12, 2018

La France fire engine - a childhood dream realised

Corgi La France fire engine

When I was 5 or 6, I remember going over to Johnathan Simmonds house to play. I probably took some cars and because of this, we spent time perusing the Corgi car catalogue. The model that stuck in my mind was the magnificent La France fire engine.

I don't really know why.I've never been particularly into them. I never played firemen as far as I remember. Something to do with being afraid of heights maybe. 

We had a friend who was a fireman, it's pertly his fault that I'm into model railways. Since he is American, I could have wondered if it was the sort of thing Earl drove. Mostly though, I think it just looked magnificent and bit exotic. Being the biggest toy in the book helped a bit too. 

The trouble was, La France was too expensive for me. Maybe if I'd really wanted it as a major Christmas present I'd have been granted my wish, but there was Lego and I liked that a lot more. 

I've not given much through to the model since. Maybe I looked at them second hand (£80 for a boxed version) and wondered it I should scratch that childhood itch. Corgi even re-issued the model a few years go, which spoilt things slightly, I'd want a 1970s one. They were proper.

Corgi La France fire engine rear view 
Anyway, there I was at a toy fair the other day and on the last stall I visited, there was a "play worn" model. For £4.50. I hesitated and the decided that for little more than the price of a pint, I might as well. 

I'm glad I did. The model needs a new windscreen, but it has all its tyres and most importantly, figures. The neat mechanism that winds the ladder skyward still works. The raising one isn't quite so healthy, but I can live with this. 

The moral of the story is, wait long enough and whatever it is you are looking for will appear at the price you want to pay. Mind you, 42 years is a long wait!

So, today's question: What was the childhood toy you coveted but never owned? And would you be tempted to buy it today? 

Thursday, October 11, 2018

Flowers, occupational crossings and lots of cottages in BRM


Model railway builders love level crossings, but the prototype hates them and will put a lot of effort in to avoiding bringing roads and rails together on the level.

By far the majority of crossing now are "occupational crossings". Intended for farmers moving animals and machinery. The rules are less exacting, but then they aren't on public roads.

I've built just such a crossing using the Ratio kit as the basis. One of the problems with this is that the kit has to try and cover a lot of options so you can't just blindly stick bits together and plonk in place. It helps to know what you are doing, or at least read the words of someone who spent a bit of time trying to work things out.

How different can you make three versions of a simple card kit?

Pretty different as it turns out. Starting with a standard build, I gradually add to the work to produce 3 variations on a theme. None of the jobs I do is difficult, but several make huge differences to the finished model. I suggest that most modellers can adopt a pick'n'mix approach to the tasks for their versions, so I'm sure that many more options are possible, but this will give everyone a starting point.


On the DVD, I'm trying different methods of making flower for the layout. Adding a bit of colour to otherwise drab scenes is one of my favourite tasks and there are lots of opportunities to do this. I'll admit that demonstrating them on video wasn't the easiest job I've had, but you'll get the idea.


Andy York and I took a trip to Tracks The The Trenches and a short version of the film we made is on the DVD. There's a lot of looking as oddball little locos and some interesting layouts too. Digital readers get the full 45 minute version of this film with some extra interviews and trundling train footage. 

Talking of digi, there are a bucket load of extras on there. This month was particularly good for content we'd got in store, AND you receive free back issues of Garden Rail and Engineering in Miniature magazines. 


Wednesday, October 10, 2018

Warehouse Wednesday: Sand and gravel loading on the Thames

Sand and gravel loader

Who knew that there were so many sand and gravel plants alongside the river Thames?

Not me for a start. A recent trip to see the last runs of the current Woolwich ferries saw me stroll back to the Greenwich through some of the less salubrious bits of the capital. Bits that were fascinating to me and I took a lot of photos.

Most of the facilities are too large for me to photograph properly, but this little quay would be very modelable. That crawler crane looks a lot like and Oxford diecast one, albeit with a higher cab. How they got it out there is a mystery. The supports surely aren't strong enough to take the weight if it's driven, but then how else was this done? 

The crane loads into a bucket connected to a long conveyor belt to take the material into the yard, where is is loaded into lorries. Once upon a time, this would have been shifted by train if the remains of embedded track are any guide.


Sand and gravel loader

Tuesday, October 09, 2018

Plastic noodling a radiator

At the front of the Hunslet, I need a radiator, and prototype pictures show that this sticks out of the sides and top, so I needed to concoct something from bits of plastic.

Wrapping a couple of layers of 0.5mm thick sheet around the edges and then sanding the corners away was a quick enough job. The raised flanges are made from 2mm square strip. I don't buy much of specific sizes preferring to keep big stocks of random sizes, but these seemed about right for the job and I can't remember what I bought them for originally.

The mesh is from an Albion Alloys sheet. Easy to cut with scissors and held in place by a few dots of superglue. The cross in front is more microstrip superglued in place.

Over the top is the word "Hunslet" from Slater's letters. It should be "Hudson Hunslet" but I couldn't fit that on, nor be bothered fiddling around with plastic letters. If this were a proper scale model I would, but it isn't.

It still looks nice though. 

Monday, October 08, 2018

Review: GVS Elipse spray mask


A face mask is an absolute essential when spray painting or airbrushing. You might think that you're only working on a model so it won't matter, but your lungs don't care where the paint came from.

I have a spray booth, but always wear a mask, and my old version was letting me smell paint the last couple of times I used it. Since Halfords don't seem to sell the cartridge filters any more (or any other type of spray mask - the assistant pointed me at a dust mask!) it was time to find a replacement.

Screwfix seems the obvious place to go to find something. They cater from the more demanding professional market, so if they are OK with the kit, my short bursts of spraying shouldn't tax it too much.

My choice is the GVS Eclipse Half Mask Respirator. It's rated for P3, that is paint and solvents so good for the stuff I use. I'm not using 2-pack paint, so we don't need forced air or anything fancy.

In the box, the mask seemed very small, but once on, the very flexible rubber sealed around my mouth and nose very well. The top of the nose doesn't interfere with the bridge of my glasses. Both filters are also flexible and peel out of the blue rubbery bit, changing them is a little fiddly, but a matter of a few minutes.

My entirely unscientific test showed no smells coming through when I weathered a 7mm scale wagon with thinned enamel paint. I could still breath perfectly normally too.

I am impressed with this. It's a lot more comfortable than my old mask. I can slip it on and off without removing my glasses, in fact, it's easy to slide down my face leaving the mask around my neck while out of the garage enjoying a cup of tea.

The straps around the back of my head are elastic and I didn't need to adjust them, although this is easy enough. Maybe I have a big bonce so they just pull tight.

So far, so good. For the price (mask and spare filters were less than the last one cost), this seems to be exactly what I need for model making spraying.

Eclipse mask at Screwfix.

Sunday, October 07, 2018

Visiting Rodney Peppe

I've mentioned my love of automata on here before, and so when nearby Compton Verney art gallery announced a "Marvelous Mechanical Museum" exhibition of them, I rushed there in the last week before the 6-month show finished. Well, I'd been busy...

Anyway, the show was good. OK, a bit "high art" in places, but there were plenty of interesting machines on display. I had the advantage of seeing the Emmett train a few years ago so the big reveal at the end of the show was a bit lost on me, but I don't think it's his best work anyway.

The real surprise was an exhibition of work by Rodney Peppe - author, illustrator and model maker. I'd never heard of him, but was slightly familiar with some of his work.

Peppe it seems, like to build models to help him draw the illustrations for his books, and exceptionally fine and imaginative models they are. Some even work, hence the inclusion in a gallery with an automata show.

The models really interested me, but to my great frustration, photography in the gallery was banned.

Not a problem I thought, I'll buy the book. Except when I got to the shop, the book turned out to be a bit rubbish. Put together by someone really interested in the subject's graphic design and illustration work, the models didn't really get a look in.

The terrific boat from the Huxley Pig series appears, badly photographed, in the appendixes at the end along with a couple of other models. Tiny images, chucked in as an afterthought. This is annoying, as the tugboat looked to me to be a very pretty potential modelling project.

To see what I mean, scroll down through the photos in this blog. Not a great picture, but still better than the one in the book!

I'll have to keep an eye out for another exhibition - it seems this is a touring show. I'd like another look as I'm a big fan of oddball models and anyone who builds houses in old boots is doing something interesting.

All is not lost though as there are several books by Peppe, none of which were available from the museum shop, so I'll be trying to track them down for sensible prices in the future. 


Saturday, October 06, 2018

Saturday Film Club: How to model a muddy road with Kathy Millatt


By the time you are reading this, the interweb will be awash with comment on Channel 5's new series, The Great Model Railway Challenge. As I write this, there have already been some murmerings from people who don't feel the need to wait to see the show before declaring it The Wurst Thing In The World rather than just a TV show.

However, one of the stars can easily out-model nearly all the critics, Kathy Millatt has been producing how-to videos for some time and so it seems sensible to link to one of my favourites today.

Watch it and then I suggest you subscribe. There's a lot of good content here. 


Friday, October 05, 2018

I bought a bit of Sea Lion!


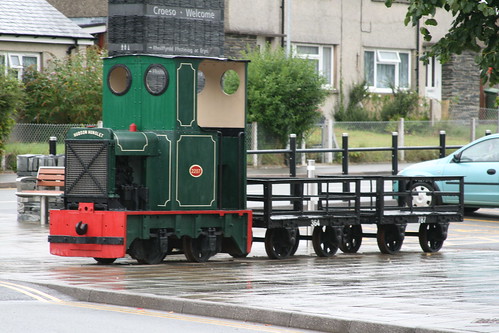
Regular readers will know that I'm a big fan of the Groudle Glen Railway. My favourite steam locomotive in the world is Sea Lion, the lines first loco, still going strong over 100 years later.

Well, we say still going strong, but at the time of writing, she's undergoing a serious restoration after some boiler problems. While being worked on, it was found that her tanks, put on in 1986 during the first major restoration by BNFL apprentices, were too far gone. A new set has been fabricated, along with a new cab back and loads of other bits.

What to do with the old parts? Rather than keep them kicking around the shed, the Groudle decided to put them on eBay.

Where I saw them.

Now, this provoked a terrible dilemma. Thanks to a tax refund that I still don't understand but HMRC assure me is correct, I could comfortably afford to buy them. You couldn't flog me bits from Flying Scotsman, but Sea Lion, oh boy, I wanted these.

But what on earth would I do with them? I've got enough stuff in store. There was also the issue of picking them up. The auction specified collection and the GGR isn't easy to get to by road. I could have spent more money hiring a van (they are too large for a car apparently) and ferry fares than buying the metalwork! Just so I could own something, it didn't seem right.

The solution came via the very helpful Mike Buttell and the Isle of Man Heritage Volunteers - Steam Railway group. I met and interviewed Mike when over a couple of months ago so dropped him a line to see if there would be a chance of adding them to the displays in Port Erin steam museum.

It turns out there was. Not only that, the railway were happy to collect. All I had to do was win the auction - which I had taken the precaution of checking was genuine. A bit of late night nervous bidding and I won!


A couple of weeks ago, the cab back and tank (I'm assuming by the way that the other tank is staying on the GGR) were loaded onto a wagon and trundled to the road access point halfway along the line. From there, they were taken to the museum to be seen for the first time at the last "Night at the Museum" event.

In due course, they will form a proper display in time for next years season. Technically, they are on loan - if the museum decides they don't want them, I'll hire that van and take them away. Placing an exhibit on long-term loan to a museum has always been an ambition anyway, so that's another ticked off.

Thanks to Mike and museum guys for doing all the hard work. I'm looking forward to heading to Manx land next year to see what I bought and am so pleased to have been able to do my little bit to make this happen.

Thursday, October 04, 2018

Detail manufacture with a leather punch

An understandable niggle with many laser-cut kits is that bolt heads and rivets are represented with etched circles rather than anything raised. I'm sure round bits could be supplied but this would be fiddly and add to the cost. Surely modellers can do these themselves if they are bothered?

I am and I can.

The solution is simplicity itself. A leather punch with varying sizes of hole makers.

Leatherworkers want to make holes, but I'm more interested in the circles themselves. Punching some 0.5mm plastic quickly fills the punch and with a small screwdriver, I can poke them into the reservoir under the orange plastic cover.

A bit of superglue and there I have it, simple bolt and rivets for the kit.

Note: I know you can buy really nice bolt heads from both Tamya and Cambrian. I have both sets but felt they would be overkill for this kit. It's not that accurate a model, so these will do. 

Wednesday, October 03, 2018

Warehouse Wednesday - Sutton Coldfield Telephone Exchange

Suton Coldfield telephone exchange

Close to the station in Sutton Coldfield, is the telephone exchange. Built in the 1930s, it replaced an earlier building opened in 1901 that by 1903 had 38 subscribers. Presumably the residents had taken to the new-fangled communications device, hence the new building. In 1976, it became home to Britain's first commercially produced electronic telephone exchange, the TXE4.

It's a nice looking structure with a simple stone doorway that looks like one from the Wills building accessories pack. Windows might be a fiddle, but the decorative bricks along the top are just like those found on the bottom of a Superquick brickpaper sheet. 

Tuesday, October 02, 2018

Body mods for the 16mm Hunslet

A dry run with the loco parts produces a not-unattractive little model. It's very much a relative of the low-cost Saltford Models that I loved years ago. Simple and slightly cartoony, the only difference is that the modeller doesn't have to cut the parts out.

In truth, you could stick this model together in about half an hour. There's some soldering to do for wiring, but nothing too challenging.

One feature I understand, but don't like, is the bonnet to radiator proportions. I know radiators are larger than bonnets on these things, but not this much.


Hudson Hunslet 2207 @ Blaneau Ffestiniog

You can see what I mean from this photo, along with the open-sided engine bay.  Well, we can fix one, but not the other. After all, that bay is home to the motor and batteries. 

Building up the bonnet sides with thick plastic and then wrapping it in a couple of layers of thin stuff at least gives me a set of flat sides to work with. 


 Doing the wrap in two layers means you can use 0.5mm tick material which bends easily and if limonene solvent is used (buy it from Wizard Models at shows) it sticks well. The less vicious solvent takes a bit longer to dry but won't warp the plastic as normal MEK can in this sort of application.

Monday, October 01, 2018

The world's cheapest model locomotive kit


Railway modelling is expensive, cripplingly so according to people on popular forums. Basically, if you want toy trains, you and your family will have to go without food for a year.

Of course, this is rubbish. If you must buy every new locomotive when it comes out then yes, it's a pricey hobby. If your ambitions are a bit more modest though, there are bargains to be had.

Easily the cheapest loco kit I am aware of is a laser cut 16mm scale model from Phil Sharples (search vwmonkeyblue on eBay, and there is a useful set of photos here). For £35, you get all the bits required to build a loco including motor, wheels, battery box and switch.

The basic laser-cut MDF parts slot together easily enough and the chassis even has plastic bearings which will be more than adequate for the light work it's designed for.

Needless to say, I won't be building the model exactly as intended. That would be no fun. You see the other way to make railway modelling cheap is to do some, erm, railway modelling...