Showing posts with label On30. Show all posts

Monday, June 12, 2023

I'm not sure what I bought. Was it a bargain?


Traders taking cards is bad. Then you can buy junk on a whim. 

£20 for this possibly On30 loco. 

Regular readers will know that an American On30 layout is (hopefully) in my future. I already have some stock, and a few building kits. 

What I don't have a tender loco, and so at first glance, this tired example was worth a punt. 

I was told it didn't work, but looking at the multi-pin connection, I guessed that all those wires not fitted to the tender plug might have something to do with this. 

Getting the top off taxed me for a while, until I decided that there must be a screw under one of the boiler mounted sandboxes. There is, but I had to break both off (superglued on) and was surprised to find they are whitemetal castings. 

Removing the wires from the PCB, I managed to connect the motor directly to the pickups - and to my satisfaction, it runs very sweetly on a 9V battery. 

So, there is potentially, a working loco. Plenty of bodywork will be required. The cab has been badly extended with Plastikard, and it needs a smoke stack. None of this should be too hard, especially if the aim is an American looking loco, rather then a hi-fidelity model. 

Whipping the top off the tender, I get a surprise. 

A sound unit! Not a DCC chip sadly, that would be worth several times the price of the loco, but still, there is potential for noise if I can wire it up properly. That is, unless someone wants to make me an offer for the tender contents...

Anyway, for the moment, it goes in the On30 box, waiting for the time I get to build my dream layout. Well, one of them...


Friday, April 10, 2020

The railcar that almost got away

I don't have many regrets as far as buying RTR models are concerned, but one that did bug me was the Ixion "Coffee Pot" railcar.

The prototype was found on the Pichi Richi railway in Australia. I've travelled on this, although not in a railcar, but that wasn't the main motivation behind me acquiring this model. I just liked the look of it. One day I aspire to an On30 model, and while it's likely to be a bit American, this would fit right in.

Why didn't I buy one when they were available?

Because the coach looks horribly plasticy. Compare it to the prototype photo here and you can see what I mean.

But, I still liked the model. It's lovely to look at, and maybe I can fix the coach with some paint. By the time I worked this out though, the model had long since vanished from our shelved. Made in a limited run, it took a long time watching eBay to find one at a price I liked. In the end, I liked paying 30 quid or so less than the new price, so perhaps things do come to those who wait.

OK, the self-colour plastic coach body is pretty horrible, but the rest of the model is a joy. The waggly bits waggle as the model moved smoothly. If I wield the paintbrushes (I recall there is a Tim Shackleton article on it somewhere) apply a little dirt and add a crew, I reckon I'm glad I filled this gap in my collection.

So, does anyone fancy admitting to a model they wish they had bought when it was available?

Tuesday, August 22, 2017

Down in the spraybooth, something stirred


In between all my gallivanting around, getting locked in car parks and eating cake, I managed to find a few minutes to take the railbus to the spraybooth for a blow over with some colour.

To make accessing the lower portions easier, the model sits on a handy box of cat food. The moggies don't seem to mind me using it and the recycling men don't seem bothered what paint it gets in the outside. It makes a nice solid support and yet can be spun around on the turntable. 

Colours used were Humbrol 250 (pale brown) below the footplate, 70 (rust) everywhere but especially the front, 173 (track colour) all over and a finish using Railmatch weathered black around the exhaust. 

The effect I'm looking for is a gentle tinting rather than any standout colours. Each paint is heavily thinned and sprayed from about a foot away so it's nearly dry when it hits the model - dirt is matt as far as I am concerned. To avoid clean "shadows" behind the rods, a 9V battery turns the wheels a bit between colours.

Friday, August 11, 2017

Detail and prime


Just a few little details to add now, mainly door hinges made from lengths of micro-rod fitted with superglue. The gap-filling properties of this bed them into the body to remove the "just stuck on" look.

After this, the motor, wheel and rods are masked with a mix of tape and kitchen foil. The latter is easy to poke around the lump inside the model. I'm not sure it matters if the PCB gets painty but I certainly want to keep it off the moving parts including the motor and I can't take the model to bits anymore.


Primer is Halford U-Pol etching. Readily available and cheap enough if you don't need gallons of the stuff. My can has done well over 20 models and there's still plenty left.

Thursday, August 10, 2017

Footstep restoration

"It appears you've lost one of the footstep mounts." said Anonymous when I started this project, and he/she was right.

Sorting this out was easier than expected. All the support brackets are plastic mouldings that plug into the diecast footplate without any glue fixing.

I simply pulled them all out and replaced them with bent bits of nickel silver strip from the spares box. This time, glue was involved. It also holds the real wood plank to the front and the plastic detailing parts on this. I've even used it to fix the bolt heads cut from microstrip to the metal.

All pretty painless and a useful method if you have a Gas Mechanical to repair. 

Monday, July 24, 2017

Grab rails and door handles

More railbus progress - grab handrails to help miniature people climb up the front steps and door handles so they can get inside. The sharp eyed will notice that the wire handles have been filed flat before fitting. I'm such a detail freak!

Both are attached too long and then cut once soldered. the extra wire makes handling them easier and I find snipping the excess off simpler when they are secure too. To be honest, I just cut the door handles off to match the vertical lines on the door. At least that way they all end up the same length.

Tuesday, July 18, 2017

Getting exhausted


As supplied, the railbus exhaust is just a bit of tube. To my mind this didn't seem right. Surely the rain would get down it?

What we needed was one of those funky tops that bob up and down in the fumeflow, shutting completely when the engine is off. Like those things you see on trucks.

A little bit of noodling around with some brass sorted it. I wrapped the top of the tube in a thin bit. A length of tube filed down would have been quicker but some bodgery with files and solder looked OK.

The cap was cut with a leather hole punch - it takes a bit of waggling the metal around to cut it but the result is circular and slightly domed. A bit of wire holds it up and slightly open.

At the bottom, a bit of tube and another punched circle beefs up the base of the pipe.

Probably an hours work while watching TV, and a very pleasant way to spent some time.

Monday, July 17, 2017

Adding the "nose"


Most of the bodywork for the railbus arrived ready assembled but it still needed a bit of cleaning up to sit down on the Bachmann chassis properly. I'm wondering exactly why this kit ended up for sale as filing away the excess solder in the corners for a good fit would have been one of the next jobs surely. Was the kit abandoned suddenly? Those red marks on the box, I assumed they were paint...

Anyway, with this looking good, I felt it was time to add the "nose" which gives the model so much character. Part fit was excellent and a few minutes with some 100 degree solder saw both this, the radiator and tool box in position. I'll polish the excess solder away later but despite being out of practise, they seemed to go on rather nicely.

Friday, July 14, 2017

On30 chassis investigation and repair

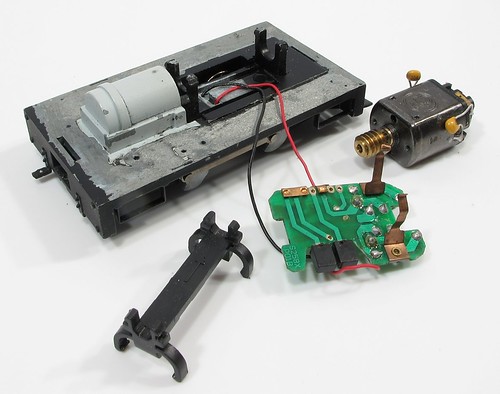
Bachmann Gas Mechanical chassis bits

First job with the Inspection railcar kit was obvioulsy to plonk the Bachmann chassis on the track and and see if it works. 

It didn't. 

I wasn't surprised. There was a spare motor and set of wheels and rods in the box. That didn't bode well. Still, a little diagnosis seemed a good idea. 

The surprise, for me anyway, was that the motor is clipped in place for ease of assembly. To remove it, the PCB is unclipped from the top and then the central plastic clip is taken out then the motor can be wiggled free.

Putting a bit of power into the contact, it spun over. Held back in, it drove the geartrain and wheels happily enough too. Putting the whole lot back together though, nothing. 

After a few minutes applying power in different places, I diagnosed a couple of problems. 

First, the wires from the pickups push into the circuit board. The red wire was lose so I stripped and tinned both of them for a better fit. I'd have soldered them to the board if required, but left that for later. 

Second, the connections to the motor from the board are those phosphor bronze arms you see reaching upward in the picture. On wasn't quite making contact with the sides unless it was gently prodded. Re-bending it slightly with pliers sorted this out. 

After less than 20 minutes work, my chassis was running back and forth sweetly on the test track. The kit is looking like a bargain now.

Thursday, July 13, 2017

Is it a bargain?


OK, so there I was rushing along the platform at Loughborough during the GCR model railway event. There wasn't a lot of time as I needed to have a look at the garden railway exhibits and my train to the main tent would leave in 25 minutes.

This box shouted out to me from among a pile of second-hand stuff. I couldn't resist a quick peek.

Inside there is a Backwoods Miniatures Inspection Car kit, partly built AND the requisite Bachmann Gas Mechanical chassis. The kit is £43 and the chassis, if you can find one, around £70. £113 worth of stuff for £20? Got to be a bargain, hasn't it?

The downside is I didn't have time to inspect the contents properly. The kit is part built, but at a glance, this looks OK. Being metal, I reckon I can take it apart if required. Missing bits might be an issue but the big parts all looked to be present.

That chassis is also an unknown quantity. Will it work?

Buying part built kits isn't something I recommend. You can easily spend more time undoing the previous owner's bodges than you would starting with a new model. Let's face it, there is a reason the kit is up for sale!

But, at £20, how could I resist? 

Monday, October 29, 2012

Slim Gauge Circle, Rugby

Devenport DieselSunday saw a quick trip over to Rugby for the half-yearly Slim Gauge Circle meeting. At the very least I know that NG Trains would be present so what I spent on diesel, I'd save on postage when I ordered a 3-can pack of Testors Dullcote.

(Note: Dullcote is a matt varnish, not unexciting outdoor wear.)

It's always worth the short trip as there is some inspirational modelling from the Pheonix Group. People who think that when you erect a model building, you should cast all the brick first. An Albion war lorry was the highlight of the stand this time and shows what you can do if you have patience and skill. A couple of 1/35th industrial locos under construction caught my eye too. Once finished, they look the business I expect.

Mind you, none of this stuff comes cheap. Seeing one modellers supply of Grandt Line nuts and bolts shows that scratch building isn't always the cheapest way to produce a model, at least it isn't if you work at this level.

Hoppers

The groups modular layout took up the centre of the hall. One side featured some most impressive stonework around a lagoon. Chatting to the creator of these, he explained that all(!) he did was stipple very dry Polyfiller in place and then work over it with brushed on water. Apparently this re-activates the mix and causes rivulets in the surface. This sounds simple but I'm keen to have a go and see how much practise is required as the results were very impressive.

A few photos from the Slim Guage Circle event.

Saturday, May 21, 2011

Project X

Project XSometimes I see a model someone has made and it blows me away. A couple of weeks ago I went over to Bilton near Rugby for the Slim Gauge Society meeting and on the Phoenix Narrow Gauge modellers demo table, among some of the best railway modelling I've ever seen, was Project X.

As you can see, Project X is a box. With a hole in the front.

The viewer sits on a chair and peers into the hole. Inside he or she finds themselves inside an American locomotive shed. In one corner there is a steam engine but most of the scene is taken up with the accouterments of locomotive maintenance. The level of detail is awesome. The staging is even better though. You can't see all the model when you look through the hole at first. You have to look around and there are things blocking your view - just as there would be in real life.

Of course I now want to build something similar. That's a pain as I have so many other projects on the go. Maybe one day.

The model is an extreme version of the theatrical staging that Iain Rice bangs on about in some of this books. You take control of the viewpoint just like a stage. Hiding things behind walls and other blockers gives the model an air of mystery. I wouldn't want to see an entire layout like this, although the idea of putting a small camera in a building to show the view out of a window has crossed my mind, but it's a great way to display a diorama.

Shed interior

Note: I'd left my camera in the car and so these photos were taken on my 'phone, a HTC Desire Z. The top one is a bit wobbly as I just snapped it, but the close-up is suprisingly good isn't it ?

Friday, May 20, 2011

Warning: Deady flexitrack

On30 TrackA few days ago I purchased some very nice On30 flexi-track from EDM Models. It look great with code 70 rail (you can have code 83 or 100 as well) and nice fine sleepers. 18ft of it, probably enough plain track for the entire layout, costs just over 30 quid which isn't unreasonable for a specialist product.

I know the same thing can be made from nickel silver rail and copper-clad sleepers but it's deadly dull to make and probably not that much cheaper. Interestingly (well I found it thus, which probably says something about me) is that the rail itself comes from Sheffield. This is then shipped to the USA, sleepers are attached and then sent back to blighty.

In fact it appears that pretty much all model railway rail comes from Sheffield where it is made by one man. I'd assume that Marcway (based in Sheffield) us him. Kalgarin do for their new range as well. Worryingly, he's approaching retirement age so maybe I should stockpile the stuff ?

Anyway, once the track has come back from the new world, it has a sticker on it. Apparently if you use this stuff in California, the track can cause infertility and birth defects. Presumably you could be born a Great Western modeller. Which would be pretty bad.


Mind you, simply being a railway modeller is likely to harm your chances of reproduction - no matter what you do with the trackwork...

Monday, February 07, 2011

Going around the (sharp) bend

On30 test trainAfter seeing some tight curves on an On30 layout at Southampton, a little test track was in order for my Father and I's own model railway layout in that scale.

He found a bit of Peco flexi-track and bent it to a 17 inch diameter curve, held in place with drawing pins to a softboard sheet. The width of curve was forced on us by the width of the wood, not some desire to get locos around corners.

The test wagon ran OK so we powered it up with some croc clips and an old H&M controller. Amazingly, the locos all seemed to run fine. Even the Porter pictured which I worried about thanks to it's long wheelbase if you include the pony truck.

The only thing we have that doesn't like this curve is a Bachmann Shay and even this should be placated by an extra inch or so (as the actress said to the bishop).

OK, so the couplings won't join up on the curves but that won't be a problem. Better still, looking at the plan, we won't need curves this tight after all. Still, it's nice to know.

Thursday, February 03, 2011

Apple eating youth

Boy eating appleFor the On30 project model railway I need some American figures. At the weekend I had another look at the range from Falcon Figures becuase he has introduced some suitable.

The picture shows the teenage eating an apple. Thanks to a lack of cash machine and the fact the things cost 4 quid each I had to chose between this and a child bawling his eyes out. I went for this one because for some reason I can't explain, he just looks American. Or at least how I imagine an American child would look like before they all started wearing baseball caps and box-fresh trainers. Maybe it's too many cowboy films...

Anyway, the figure comes as an unpaited pewter model. This is a lot harder than whitmetal as I discovered when trying to remove the mould line on his hat. I don't normally prime figures but wonder if I should have done so this time. Paint coverage is OK so I'll live with it for the time being but might change my mind for future models.

Tuesday, November 09, 2010

Slim Gauge meeting

Trestle bridgeRegular readers will know that one day I fancy building a layout in On30. So far there is a bit of rolling stock and some locomotives. That and a pile of kits. Plus a mule, prospector and a load of wildlife I picked up at Wycrail...

Anyway, all that is lacking is inspiration and time. The later looks to be getting easier in a couple of weeks and while there is a still a pile of projects in the queue ahead of the layout I thought I'd do something about the inspiration part of the problem.

EDM Models send out a newsletter and in the last one I spotted there was a meeting of the Slim Gauge association, a group interested in modelling narrow gauge American railways, about half an hours drive away. "Got to worth a look" I thought.

Having tracked down Bilton Social Club, I found the entrance around the back of the building and wandered in. Behind the desk it signatures of members and guests were being collected. Members were also presented with a sticker showing their name - an excellent idea for any group where they will only meet virtually. I could have gone in for free as a guest but decided to leap in with a fivers worth of membership money.

In the club it was mostly sales stalls. This took a little while to get my head around. Reading the newsletter it seems that people can come along as sell things which leads to what has been described as a marketplace. Not knowing anyone though, this helped as I could poke around and chat at the same time. Of the larger traders, EDM models was present with a huge range of products.

30 by 14 inchesThere were a couple of layouts too. One appeared to be Sn3 and far too clean for my tastes. The other though was just what I was looking for. 30 inches by 14 of roundy roundy. In the middle of the circuit is a mine loader, again, just what I am planning. The biggest difference is that this layout is 5.5mm scale and I'm going for 7mm. The track gauge is the same though. And I have at least twice the length and a bit more width available for my model.

Brick workshopsElsewhere a modeller of European prototypes was showing some very nice little industrial buildings. The brickwork is fantastic due to the fact it is real. He casts his own bricks in plaster and lays them in the same way as a real brickie. This must take hours but the slightly uneven courses give the walls loads of character.

Finally I spotted a G scale wooden hopper wagon. I want one. And I want it in 7mm scale. And the nice man who built it let me take photos and told me how he stained the wood - a mix of black, brown and emulsion which you dip the basswood into and let it dry. Great stuff.

Thursday, November 26, 2009

Mine tubs in Continental Modeller

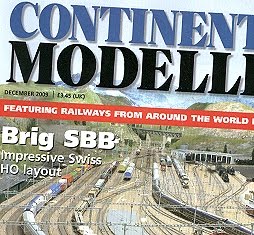
December's Continental Modeller has a new look which is pretty exciting for anything from the PECO stable. More thrilling it has a couple of pages from me covering my build of On30 mine tubs.

Everything looks OK, although the photos predate the change of my photo backgrounds to pale which means the edges are lost on the white page. I notice but probably no one else will.

Elsewhere, being sucker for micro layouts, I love the market garden model. The prototype feature on the Pyrenean overhead electric railway makes me want to pack some bags to go and see for myself. It's very like the Sneafell Mountain Railway but with locos and coaches. And a rack system. And intermediate stations. Well the photo of the trains ascending the hill on page 776 looks a lot like the Laxey Valley anyway.

Completed train

Friday, September 18, 2009

Critter in Continental Modeller

I get in from work and find a fat envelope from Peco. Inside is the October 2009 issue of Continental Modeller magazine. The reason they have sent it to me (the only publisher who do hint hint) is that the piece I penned on building a "Critter" from a Unit Models kit is to be found on pages 622 and 623.

It's interesting writing about American prototypes especially when there is likely to be a reasonable number of people from that country reading it. The editor has added a short teaser at the top of the page "Phil Parker fell for the charm of a convincing craftsman kit". In the UK I'd initially think "Craftsman Kit" means an etched brass loco model from the firm of the same name. In the US I think it means a kit that has to be assembled and many need some modification or fitting to get it together. Likewise "critter" is an Americanism meaning a small locomotive, often of dubious parentage that has been on the end of several in service modifications.
Modellers of the US prototype will hopefully be versed in the lingo - if not they need to go and buy some magazines from across the pond (easy enough there are several good ones available from UK suppliers - try this, it's fabulous) where no concession is made to British sensibilities. You think they'd remember exactly who invented the language...

Friday, September 04, 2009

Stake wagon

On30 stake wagonWell, I've been noodling around painting the stake wagon this week. Various dry brushings of creams, pale browns, greys and a touch of gunmetal eventually gave me a result I was happy with. On to this went a wash of dark brown. Once dry I felt this needed lighting up a bit and the dry-brushing started again. Not so much but just a bit of lightening here and there.

The result is nicely uneven I think but if I had to do it again, I couldn't !

Anyway, the last job was to fit a paint of Kadee number 5 couplings. The start of holes are moulded in the base of the wagon but these have to be drilled out and then (ideally) tapped with an 8BA thread. The couplings are assembled and the top lip taken off the box (called a pilot box I think) so everything sits flush. A pair of spare steel bolts were shortened and screwed in place. This wagon now connects with the coal tub and that couples with the loco so I think I'm doing OK.

All that is required is a load. It's been too wet to go hunting in the garden for some suitable plant clippings but when I do these will be roped in place with perhaps a little weight hidden underneath to improve running.

Thursday, August 27, 2009

Underframe alternative ?

bogie & wagon
As you may have guessed from my description of the build, I didn't find the Select-a-car kits to be that easy to assemble. Once I had put them together, although they run well enough, I'm still suspicious of the steel pinpoint axle running in resin bearing. It just doesn't sound like a recipe for the long term use of the wagon on any model railway.

However, someone told me that there was a Bachmann bogie available as a spare that looked very similar to the Backwoods one. After a little bit of digging I tracked these down to the NG Trains website for £8.50 a pair plus postage.

Looking at the photo you can see that superficially the two underframes are very similar - the axleboxes are pretty much identical. The Bachmann one is die-cast and heavier on its own than the complete wagon. It's wheels are 13mm diameter as opposed to 14mm.

The wagon though, has a much lighter look. The tie bar is massive on the bogie and has some decent springing apparent too. Since it's metal, removing all of this to make it less massive will be a challenge. Of course you could just ignore it - I probably will for the moment - but if not it's out with the piercing saw. At the same time the pivot needs to come off as do the pickups for lighting the coach that should be sitting on top.

Mind you, for the money, the bogies are a pretty good thing. As the basis for an otherwise scratchbuilt wagon they allow the modeller to guarantee that whatever the result, it will work.