Friday, November 30, 2018

Grinding Machime


A few months ago, I bunged a "U Star Grinding Machime" (sic) into a larger order from Hobbyking. It only cost £3.77 at the time so I was curious to see how good such a cheap tool could be.

Well, after exhaustive testing, I've come to the conclusion that it's rubbish.

Pros: Cheap. Powered by easily available batteries. Fits nicely in the hand.

Cons: Grinders need grunt. This one is utterly devoid of this.

I guess the push in tools should give this away. There's nothing to stop them from rotating in the hidden chuck. For the sake of it, I tried to grind away a bit of plastic. The tool stalled. I tried with hardly any pressure. The tool stalled.

Basically, this would be fine powering a fan, but for work, buy a Dremel or something proper.

I suppose the tools were nearly worth the price of the whole lot. Another lesson learned. 

Thursday, November 29, 2018

Make me a battery and go for a sail


Mohan needs a battery. Plan A involved using a 6 C-cell lump like the one shown on the plan that came with the kit.

It didn't fit. Maybe if I hadn't put a propshaft in then it would, but looking at the plan, I'm pretty sure this hadn't occurred to the original designer.

Plan B. A much smaller set of 8 cells bought second hand somewhere. It had the wrong plug on and too much voltage, but both these are fixable with a soldering iron.

The plastic covering was peeled away.  The connecting strips were levered off the top of the end cells. You should be able to desolder these - I tried and it wasn't happening so brute force did the job instead.

Then I re-connected the end pair to give me a 6-cell set. Some soldering using a non-corrosive flux was required. Hot iron, in and out fast, don't worry how horrible the result looks.

While I was at it, a new Tamiya socket went on the end. Then I realised my mistake and fitted a plug instead.

The pack now sits in a tray over the spot where the prop exits the bottom of the hull adding valuable weight. 


With all the gubbins fitted, it was time for a first sail on the pool. My impressions are it sits too high in the water, but that's easily fixable. Speed and steering aren't bad although the turning circle is larger than I might like.

But - IT FLOATS!

Wednesday, November 28, 2018

Warehouse Wednesday: The building vanishes


This isn't the first time, this building has appeared on the blog. Back in 2016, I showed an old tin shed that was on my route to school every day. It was a fixture in my life for decades.

Now, it's gone.

All that is left is the concrete base.


I'm sorry to see the building has gone, but the slab leftover is a very modelable feature that I don't think I've ever seen on a model railway layout.

In 4mm scale, some card painted mottled concrete colours (try the Pheonix range) and a bit of talc for texture would do the job. In larger scales, you probably want to consider the lines where long lengths of wood have been used to pat the wet mix dry. On that basis, casting the slab in plaster would be a better bet.

It's strange, but this prototype really appeals to me and I'm wondering where I can give it a go.

Tuesday, November 27, 2018

Fitting the motor and servo


Happy with the superstructure, I'm fitting the working parts in the tugboat hull. There didn't seem to be much point in doing this any earlier as I wasn't convinced the kit was going to sail anywhere other than the bin!

I want a large propeller and this combined with the shape of the hull, forces the shaft to be fitted at a steeper angle than I'd normally aim for. This means the motor is going to be high up and after considering a big block of something to support it, I realised it could just hang upside down from the deck.

A little messing around with bits of plastic, a metal motor mount and some epoxy glue sorted this all out. The prop spins around happily enough and I've pored plenty of epoxy into the holes around the shaft to keep the water out.


Sticking with the deck-hanging theme, the servo also naturally found itself fixed well above the hull. A small mounting plate was made from plastic, the servo screwed in and then the whole lot glued in place with plenty of solvent. There are some blocks of more plastic behind the plate to make the whole lot nice and solid.

Everything seems to work OK, leaving me to work out where all the other parts are going to go in there. 

Monday, November 26, 2018

LGB tanker clean-up


I'm a big fan of the LGB Toy-Train range. Reasonably priced, rugged and colour ful rolling stock that looks nice in the garden and will take the odd spill when you are testing the railway after a long lay-up. It's also cheaper than the main range, especially if you manage to bag some second-hand.

That's how I acquired the wagon above. We don't have a tanker, and this one has my Dad's initials on the side too, so for £25 I picked it up from Exeter. The only downside is, it's a bit grubby, but that is fixable.


German engineering, even for "Toy Trains" means the whole thing can be taken apart with a scredriver. The wheels are sprung out from the swivelling (LGB stuff is designed to go around stupidly tight curves) axleboxes and then these are turned to give acess to the screws.

A few minutes work and the wagon is reduced to its component parts. These than head to a nice sink full of soapy water for a good scrub with an old toothbrush followed by a long rinse in cold water.

The wheels show evidence of plenty of use but I'm not worried about this. Water has obvioulsy got into the axleboxes and corroded the axle ends. Nothing a light sanding with mild abarasive paper can't take care of though.

After this, rebuilding is the reverse of dismantling and the wagon is nearly as good as new.


Sunday, November 25, 2018

Exeter Garden Railway show 2018

Lined Garratt

Off to the cattle market for Exeter show. The new development this year is that the massive "Bring and Buy" stand just inside the door doesn't open until half an hour after the show starts, A good move as it allows us all to get inside out of the cold without having to fight through crowds fighting for bargainz.

It's interesting travelling around the country for garden shows to see how the trade changes at each one. You see a few people in the south who wouldn't find it viable to travel north and vice versa. Obviously, my job is to chat to as many as possible, and also to talk to visitors to try to encourage them to write for Garden Rail.

It's always fun to do this, and if you do see me at a show, come over for a chat. One gent recently said he'd seen me at an event and didn't know whether he should come over - the answer is always yes. I do my best, but starting dozens of conversations every day doesn't come naturally to me, so it's nice to be talked to.

Scratchbuilt electric loco Sid

Anyway, I have bagged some more words for the mag. The first arrived in the post 2 days later!

The show is good, but the catering is superb but provided the only missed opportunity of the day. Sitting down at an empty table with a delicious lasgne, I was joined by someone with venison casserole. I was at a show where they serve venison casserole! Beats a greasy burger any day.


Saturday, November 24, 2018

Japanese track machine


OK, I don't know much about this, other than it is an ingeneous track machine. According to the YouTube comments, the device it tows is a rail lubricator, but that's not the exciting bit. The truck (is it a Kei car?) pulling the rail trolley along and then powering it is really clever.

Now, how about a 1/32nd scale model?

Friday, November 23, 2018

Off to Warley

It's Warley time at the NEC and if you are reading this after lunch, that's where I'll be.

For me, this is a 3-day event. The Friday set-up day is an excellent chance to do a bit of "networking" and photograph some of the new products we'll be seeing. It's polite to do this when the trade doesn't mind you nicking stuff from the stand for a while, or you aren't elbowing punters out of the way.

This year, the space on the BRM stand is limited as we've a lot of goodie bags to filled with some terrific offers. This isn't a problem though as Mr York and I will be roving the hall with video cameras, trying to capture the event for those who can't make it.

If you see us, please come over for a chat. We love talking model railways to anyone!

Handy hint: If you are preparing to moan about the show, please read my handy guide which probably answers many of your points

See you at the show!

Thursday, November 22, 2018

Glazed cabin


Modern boat designs tend to need large areas of glazing. Providing the operator with the best field of vision properly is essential so no more peering out of tiny windows!

 My material of choice is some thick clear plastic from Bayer, which I now can't find to provide proper details. It comes with peel-off pale blue plastic coating if that helps you identify it.

Cutting is no problem. It's a bit more brittle than plastic sheet, but both Olfa cutters and knives will do the job. It snaps a bit like plastic too.

Glue is the challenge. Even Superweld wouldn't stick it. The only stuff I had handy that did anything was Revell Contacta plastic cement. The joints are OK, and it is easy to control, but I'd like something more solid. Please note: Superglue is not an option, I don't want foggy windows as the fumes find fingerprint grease!

Framing from black plastic finishes the job. I'll paint it but don't want to do the fiddly edges, hence the colour. 

Wednesday, November 21, 2018

Warehouse Wednesday: Classic tin garage


Spotted in a local garden, this is a pretty classic corrugated iron garage that probably dates from the 1970s or even earlier. It wouldn't look out of place in the 1950s setting. Today, it's a rare anomaly.

The lines are pretty simple, you could make it out of solid pieces of Wills sheet, simply scribing the doors on the front. Colour would have been black pitch, which isn't actually pitch black. The blue doors are an exciting addition I suspect now coloured paint for metal doesn't flake off in a week.

Tuesday, November 20, 2018

Plastic noodling


With a mockup I'm happy with, the next job on the tug was to reproduce this in plastic. It's the bit of the job I really enjoy, messing around with bits of plastic sheet. The work is pretty simple - cut, stick, cut, stick - and the model grows quickly in front of your eyes.

I like to do this while half-watching something on TV. I'm not very good at properly watching telly, my finger itch to do something, but it's demanding enough to entertain me but not so much I can ideally cast my eye to the screen occasionally. Like listening to music while working, the trick is to watch something you know well, or at least don't care that much about.


To achieve nice smooth joints, I'm trying out Liquid Green Stuff from Games Workshop. It's an interesting product, a bit thinner than toothpaste, that you are supposed to brush on to wargaming figures. I didn't know this and scraped it on any joins that looked like they needed help using an old scalpel blade.

I suspected the filler would shrink when it dried so I put a bit more on to allow for this. Once dry - I left it overnight - it sanded back very nicely. I'll get a better idea when the model is painted, but first impressions are good. Not sure it will replace Perfect Plastic Putty as my favourite filler, but I can see it being something I reach for again. Not least, because it's easier to get out of the Games Workshop pot than anything in a tube!


Monday, November 19, 2018

Bricking it

Pile of bricks

I had a little preparation to do before some filming last week, and part of this was a build a small diorama for one of those "Here's one I did earlier" shots. 

My materials all came from ScaleModelScenery.com including these rather nifty laser-cut bricks. Obviously, I painted each 4mm scale brick by hand individually - OK, I sloshed some slightly thinned enamel over then while they were still on the sheet and then cut them out once dry. It seemed to work OK. 

Fixing had me stumped for a while until I decided to treat them like any other granular material and just dump some watered down PV glue over the lot. They survived 150 miles in the car, so I guess they must be fixed OK...

Sunday, November 18, 2018

Commemorating Splodge


Last week, one of our cats, Splodge, died. At 17 years old, he'd enjoyed a reasonable innings and certainly lived a comfortable and loved life. Found curled up in a corner one morning, he'd died in his sleep.

Losing a pet is always sad, but later in the day, I found myself looking at a model I'd made of him years earlier.


A nighttime sail caused me to dig out the only boat I have with working lights, and in the wheelhouse is a slightly overscale representation of our cat. I'm pretty certain he wouldn't have been impressed with becoming a ship's cat in real life, but the model is 1:12 scale so cats from a dolls house supplier are easy to obtain and once I had him, it was obvious the colours he should be painted.

Like many pet owners, the desire to celebrate their animals is strong. Many of my boats enjoy the same names as past pets. You won't be surprised to know that there is a boat named after Splodge.

splodger sails

Splodger is my footie fishing boat built from the George Turner kit built many years ago. I haven't sailed it for years, but now feel the urge to get the model back on the water as a tribute to my puss cat.

Saturday, November 17, 2018

Saturday Film Club: Classic car scrapage


Nooooo. Those are classic cars being scrapped!

Scrapyard action from the days when anti-rust protection was pretty much non-existant. You could even find tin-worm on a brand new car!

Still, it's good to see people are still blaming the Council for not clearing up mess, and not the person who made it. Also, it seems our model roadsides should be littered with dead automobiles.

Friday, November 16, 2018

York Show 1985 - The Trade


So what could you buy in 1985, and from whom?

The first advert is from Ratio and features their Provender Store (then £5.45 inc. VAT, now £18.95) and Water tower (£2.50 to £9.30) both still with us today. There's a Peco advert too, from the days when these two were separate businesses.

RailMail of Watford offered "Consistently good value" and £240 instant credit to anyone with a credit card or clearing bank cheque card.

Wakefield Model Centre might have been "Your one-stop hobby shop" but sadly stopped trading in 2013.

Precision Paints are still with us, as are Slater's Plastikard and the Monk Bar Model Shop in the city centre.

JidencoModels are "for quality" although anyone who has tackled one of the kits might disagree, there were a few "issues" although skilled modellers could assemble them. George Norton kits are now part of the London Road Models world.

The big news though, is from Wild Swan Publications - An entirely new specialist publication for the more serious modeller" - Model Railway Journal was born!

The full list of those attending the show:

Ratio Models
Wakefield Model Centre
The Transport Scene
DJH Models
Ebor Group secondhand sales
ECM Electronics
Railway Modeller Magazine (Peco Publications)
Jidenco Scale Models
Derek Mundy - Sprat and Winkle Components
Precision Paints Ltd
SLaters (Plastikard) Ltd
Geo Norton & Co.
Railmail of Watford and Glasgow
BTA Hobbies
PhotoRail Porcessing - R, Elliff & Co. Ltd
Rail Riders Club

Thursday, November 15, 2018

Garden Rail December 2018


It's funny how themes develop when putting a magazine together. Purely by chance, I found myself with a couple of articles where the writers talk about garden railways for youngsters. One of these is a layout that is possibly the simplest we've ever featured, but has an interesting story to tell - and one that a lot of people (I suspect) will relate to.

We've also got a WW1 theme with a piece on modelling interesting rolling stock as well as a review of Accucrafts Hunslet.

And of course, it's Christmas and I've always wanted to do a gift guide. A few e-mails to regular contributors and I had a list Santa will be delighted to receive. To illustrate this, of course, I needed a suitable image. Which is why, despite being off cakes at the moment, I bought 2 boxes of mince pies.


Two, because my first attempt didn't look right when the magazine came back from the designer. Boxes, because it seems you can't just buy a single mince pie. The bigger problem is, I don't like them very much!

More details on RMweb. 

Wednesday, November 14, 2018

Warehouse Wednesday: Stone warehouse, Port St Mary

Port St Mary warehouse

"Hooray, a real warehouse on a Wednesday", I hear you cry. 

 It's true, this stone building is the first for a while, but finding genuine warehouses isn't easy. I really need to get out and bag a few before they all disappear. 

Anyway, this one is from Port St Mary on the Isle of Man and taken about 3 years ago. Apart from that, I know nothing about it. 

The stone is pretty common Manx stuff, and the rendered extension does nothing for the aesthetics of the structure. It would be pretty easy to model though and at least the colours blend nicely together. 

Tuesday, November 13, 2018

Now THAT'S what I call a superstructure


In search of ideas for Mohan, I spent an hour or so trawling the web looking at small, modern, tugboats. Eventually, I found the BRatt design by Robert Allan Ltd. I like the look of it and the hull I have isn't so far away from the prototype I can't live with the discrepancy, so I let it influence my efforts.


I made a few changes as I only had photos to work from at the time - and of course, my hull is a different shape. The result looks OK. Once in place I felt it needed to move forward slightly, but that's easy enough with cereal packet card and masking tape.

Next, it was time for plastic:


I'm keeping things simple with 1mm sheet cut out as neatly as I can manage and glued with MEK pack. This is the stage I really enjoy, noodling around with plastic watching the model come together. Not following a plan helps now as I get to say if it looks tight, it is right.

Monday, November 12, 2018

Superstructure design. Hmmm.


The "kit" is supplied with a plan for everything apart from the hull, leaving the modeller to cut up some plastic sheet and build the thing themselves. Maybe the plastic was included, but if it was, I've lost it. No worries, there's plenty more in stock.

Before committing myself to good materials though, I mocked the parts up in cornflake packet card.

I'm glad I did. The drawings didn't look promising, but rendered in 3D, I'd say this was from the 5-year-old with crayons school of design. It looks awful to my eyes, and not just mine either. Trawling through old photos from model boat shows, I found a couple of these kits made up.


There are some similarities, but not many. Even 14-year-old Olly decided he could do a better job, and did.

So, back to the drawing board for this one.

Sunday, November 11, 2018

Thoughts on the Great Model Railway Challenge TV show

With the first series of Channel 5's Great Model Railway Challenge over and done with, I thought it worth a blog post to lay down some of my thoughts. Feel free to disagree in the comments section.

It's not about model railways

People who say this really mean “It's not MY version of model railways” and usually “And that means it shouldn't be allowed!”

I disagree. Railway modelling is a wide-ranging hobby with far too many facets to list. Everyone does it their own particular way and to their own standard. To me, this is a strength of the hobby.

There is a tendency, for lots of reasons, for people to feel threatened by anyone doing something slightly different from them. This isn't just a model railway thing, religion and politics both have the same problems, the difference is, we don't generally resort to violence against those who don't follow “the true path”.

Railway modelling isn't a competitive sport for me, but others do enjoy entering competitions, even if only those at their local show.

All the layouts are rubbish

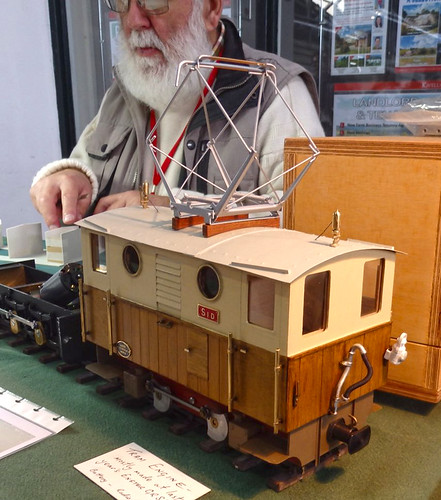
No, they aren't. I see a lot of models built by so-called “average modellers” on-line. It's important for me to understand where most people are when writing articles. For a huge number of modellers, a GMRC quality layout is something they will aspire to, but there's nothing wrong with that.

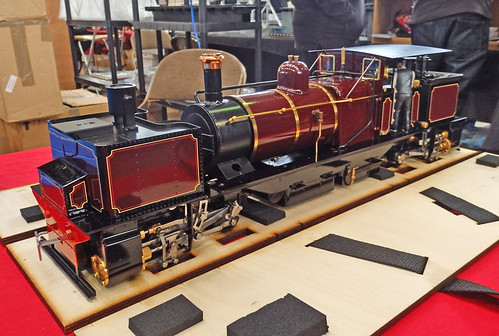
24 hours, the time allotted for building, isn't long. Even allowing for a bit of pre-building and there being 6 people in a team, some of the progress made is astonishing. The format demands a broad-brush effect rather than fiddling with all the tiny details, but whatever they produce has to look good on camera. You can't see rivets, you can see landscapes.

I hate all the gimmicks and stupid animations

Animated features have been part of railway modelling for decades. The doyen of them has to be Dave Rowe, most of his layouts were barely model railways but full functioning scenes. People watched them in amazement as vehicles moved along roads, fishermen cast their flies, boats moved in basins and canals and many other delights.

OK, some of the GMRC stuff has been a bit gimmicky, but I bet there are plenty of kids (including big ones) who love this stuff. I'll always be happy to say I love Tri-ang Battlespace models with their operating features. It's just another aspect of the hobby.

The point, of course, is to make entertaining TV. Trains running round in circles might keep us happy, but more movement equals a happy general audience. Modellers can look at the way these things work and ponder if the same techniques could be employed to more realistic effect.

They are making modellers look stupid

No, they aren't. This is a classic case of seeing what you want to see. The production company have creditably not played on any stereotypes. Those taking part in the show have generally been very happy with the way they appear on the screen. 

TV is not real and the guy in the edit suite controls the show. On that basis, don't say anything you'll regret, especially straight to camera and don't annoy the production team. If you do, then they will have their revenge – not that this happened in this case. I always know to keep on the right side of the BRM filming guys just to be safe though!

The people taking part are fat/ugly/weirdos

I've spotted a bit of this on the web. A female judge and team members always brings the misogynists out of the woodwork – well they can go straight back in. If anything, the teams were more mixed and varied than the average group of white, middle-aged, middle-class men that make up the bulk (in all senses of the word) hobby.

The “Scratchbuild challenge” is rubbish

When I saw this on the rulebook, I thought the same. It's interesting that they included a team captain saying this too in the first episode shown too.

However, what the challenge showed was how imaginative modellers can be. Sawn up shoe dust for coal? Genius. Sink plunger into an igloo – I liked that too.

On balance, I can see how it works and why it was included. Will it make it into the second series? Very probably, and the teams will be better prepared.

OK, the themes are stupid. Why can't we have something about historical accuracy?

Because it would be deadly dull to the average viewer. The slightly random themes forced the teams to use their imagination, and generally, this worked a treat. OK, the results were generally not the traditional model railway, but that partly obscured the broad brush approach the limited timescales imposed.

The unusual models also made for visually impressive telly.

It's doing nothing to promote the hobby

And why should it? Railway modelling is not a religion and people not involved in it aren't duty bound to go an preach the word. The GMRC producers had one job – make entertaining TV.

Having said that, it has helped the hobby. I can do no better than quote Graham Muspratt, “I spoke at yesterday’s Wycrail exhibition to a number of families, new to the hobby that had been enthralled by The Great Model Railway Challenge on Channel 5 & came to the show for the first time”

Exhibitors at Spalding and Cardiff shows reported the same thing. Basically, people who would never have considered visiting one of our exhibitions are coming through the door. Maybe it will be their one and only visit, but at least the club putting on the event has gained a few quid from admission prices.

If you want numbers, the Missenden website saw a tenfold rise in visits and at least one booking.

After all that, it's down to people in the hobby to promote the hobby.

*

From this, you'll guess that I quite liked the series. The obvious comparisons have been with The Great British Bake Off, and you can see the connections. One factor most moaners seem to miss is that Bakeoff was a very different show in the first series to the version we see now. It evolved over time and GMRC will too. The production company have learned a lot and the teams who enter in the future will also know what they are letting themselves in for.

All this came about because someone made an entertaining TV programme. Over a million people watched each episode, giving it a far greater reach than any modelling magazine or even Interweb site. Maybe it's a step to improving the image of railway modelling. Who knows.

An unexpected pleasure was taking part in the RMweb thread. We set out to keep it reasonably upbeat knowing that there was a good chance that the general public would find their way to it and if they discovered a pool of modellers competing to be more offended than each other, that wasn't going to impress anyone. As it happened, very little was needed - in 2000 posts, less than 20 were moderated and mostly for people swearing, hurling abuse at one of the teams in capitals several times and threatening the admins.

Instead, we had team members filling us in on the behind the scenes action and even one of the judges explaining a few points. No-one posted the winners names so everyone could enjoy finding out the results when the show aired.

By the end, a lot of talented railway modellers took a punt on being involved and came up trumps. Good for them, and good for Knickerbocker Glory Productions for doing a superb job.

Saturday, November 10, 2018

Saturday Film Club: Scammell recovery tractor


This week's film comes courtesy of Garden Rail corespondant, Ralph Pitcher. As a past owner and restorer of a 6-wheel Scammell Pioneer, he has pointed me at several interesting films. 

Watching this, I commented that at the end, the lorry seems to have gained chains on the rear wheels. Ralph explained: 

The tracks were stored in the bin under the drivers side cab floor.
You drove over them and joined the ends together with a track puller,
I have a bren gun carrier one, that would easily manage to pull the track ends together.
The tracks rode over the tyres and stayed on what ever the suspension did because the distance between the hub centres remained the same.
The rear axle had bogie beams that could travel through 45 degrees, (12 inches up  and 12 inches down ) up and down at either end, or 90 degrees in total.

Fascinating. There is one of these at a local garage - you can see it on Streetview

Friday, November 09, 2018

York Show 1985 - The layouts


Let's head back to 1985 - 33 years ago! I happen to have found a programme for York Model Railway show and it was a very different world.

In those days, the show was held in both the Theatre Royal and Assembly rooms in the centre of town. You could walk between the two in less than 5 minutes, unless you diverted to grab some food of course, or just enjoy the buskers that fill the streets at Easter .

I always enjoyed the show in town as a punter. I like York and I liked being able to see a bit of the city and the show. Admittedly, at 15 years old, I can't be sure I visited that year, but I'm sure my first York was around this time.

Anyway, highlight of the layouts for young Phil would probably have been Dave and Shirley Rowe's Leighton Buzzard. I've always been a sucker for animations other than trains so the working sand plant, canal and road vehicles cleverly moving on grey typewriter ribbon would have caught my eye. Had I known how these worked, I'd have enjoyed them even more - I had to wait for the Wild Swan book to find this out.

Another star was Barry Norman's Petherick, a scenic masterpiece which spawned it's own Wild Swan publication, the classic Landscape Modelling. As I recall, the really notable feature was that the 4 by 2 baseboards were used narrow side to the crowd to give an expanse of scenery we'd never really seen before. The modelling was all to a consistent standard and the colours really well balanced.

Ian Futers Glen Falloch made an appearance, something rare as I recall that his attempt at a continuous run with more than the signature 3 points suffered from lack of building time. Friends at the L&WMRS went to help him and found the model set up in the hall of his school. There was, as I recall, rather less track than there should have been and some serious teamwork was required to get the model into a state to be shown. It never really took off, to the extent that we produced some "I saw Glen Fallooch" badges to wind him up. They wouldn't have been big sellers...

Finally, Keith Foster's Huntingfield Great Eastern model was in the middle of its successful exhibition programme. I came to know this layout very well - it was where I cut my public operating teeth and the first layout I went out to a show with. In fact I learnt it so well I was able to stand in on my own at one show my Dad and I happened to visit. At lunchtime, one team hadn't returned form the pub and the others wanted to get off for lunch, so young Phil sat in the operating chair with the instructions "just keep something moving" in his ears. I had the advantage that a computer was used to show people what was happening - and old Texas Instruments one - so I could press a button and see be reminded, all I had to do was remember what the prompt was telling me to do!

I think Huntingfield still exists, but the others are no more as far as I know.

The full list:

Y Tren Bach - Malcolm Clarke
Fraalsdorf - Frank Wilkinson
Leighton Buzzard - Dave & Shirley Rowe
Caerleon - North Gwent Rly Modellers
Evercreech Junction - Shipley MRS
Highworth-Hannington - Dave Peacey
Gilling Railway - Paul Cope (ARC)
Glenmore - Peter Fletcher (ARC)
Huntingfield - Keith Foster
Roseladden Wharf - Steve Howe
Dowlais Cae Harris - Cardiff 4mm Group
Glen Falloch - Ian Futers
Petherick - Barry Norman
Beverleys - Dave & Bev Lowery
Ubley - Butcombe Junct. Group
Kyle of Tongue - Steve Flint (I wonder what happened to him?)

I'm sure people are saying, "How can you not mention xxxx", but I don't remember them and I do remember these. It was a pretty classic show that year and I'd certainly like to hop in a time machine and have a look.

Next week, the trade stands.

Thursday, November 08, 2018

Phil's been out with his camera in this months BRM

It's the BRM layouts special issue this month with no less than 10 model railways for your inspiration and entertainment.

All those layouts leave little space for practical projects, but I've not been idle. Instead, I've done a couple of layouts shoots. The first is Chris O'Donoghue's Compass Point in 009.


As well as being a cracking layout, it's also the setting for a series of detective mysteries Chris has written - more on his blog.

The second is the 3mm scale, Uppingham by Martin Olley.


While we had Uppingham in the studio, I had a chat with Martin who explained why he chose this prototype and the unusual scale.


Finally, I make some suggestions as to what you can do with an old layout. Let's be honest, these aren't pretty...

December 2018 BRM.

Wednesday, November 07, 2018

Warehouse Wednesday: Modern(ish) station footbridge

Four Oaks Station footbridge

A rather interesting footbridge at Four Oaks station. The concrete pillar is a bit brutalist but topped with a metal set of steps and bridge span. All would be easy to scratch build to suit your site. My suspicion is that this dates from the late 1970s when the cross-city line was inaugurated requiring an upgrade of facilities. 

Looking over the tracks, the station itself is a well-reserved wooden building that has presumably been the recipient of quite a bit of loving care. The design is pure London and North Western railway, the station opened in 1884

Four Oaks station

Tuesday, November 06, 2018

ABS glue of choice

Andy from the excellent Workshop Shed blog asks:

I was just reading about your boat building and realised you'd be a great person to quiz.

I've got a couple of ABS parts I've printed and wanted to fix them together.

What adhesive would you recommend?


Good question. ABS is a harder plastic than styrene so a more volatile solvent is required. I've tried several and find that Pheonix Precision Paints Superweld works best for me.

Applied with an old paintbrush, it seems to grab really quickly and harden fast. Other ABS glues are available, but this is cheap and very effective so it's the one I return to. Even the bottle shape is good, as the wide neck and fat base seem to prevent accidental knocking over, although having said that I'll probably do it next time I use the stuff...

Monday, November 05, 2018

Still fighting the boat kit and bringing out the big guns


This kit is fighting all the way. A sensible, or at least pragmatic, person would chuck it in the bin. If I hadn't booked it into a show, I might well have done this, but since I have, I'm not going to let it beat me. 

With the hull/deck/bulwark sandwich completed, there is an ugly join line around the middle to hide. I could use filler, but as this is a tugboat, a nice, fat rubbing strip seemed a better bet. I've also a stock of plastic strip bought because it looked useful a few years ago. The odd length has found a purpose, but here is a chance for it to star in a build. 

As you can see, the strip isn't very flexible and the line isn't that straight so there was lots of clamping required. Little clamps are good, but they don't have the reach so it's time for the full-size woodworking clamps. Also lashings of glue. 


Glue hardened, it's a long way from perfect. Look head on and the rubbing strip isn't level all the way around. From most normal angles, this doesn't show, so I've decided to live with it. Yes, this makes me a bad person, but if I don't, the hull goes in the bin. 

Looking along the deck, it's obviously twisted slightly so a horrible bodge to pull it down around 3mm in the front left corner of the hole which the superstructure will cover is required. A strip is glued to the hull with solvent and epoxy. Once dry, the deck is bent, clamped and glued. It's still not perfectly level, but very close. 

Phil: 1 Kit: 0

Sunday, November 04, 2018

Large scale model aircraft 2018

Pusher

It takes a special kind of person to start building an 18ft wingspan Lancaster bomber - and an even more special one to finish it. At the show, only half a wing was on display, but the workmanship was superb. The same could be said for the 12ft long wing for a Catalina, complete with some interesting and clever linkages.

Super Sabre

While the number and quality of exhibits at the LMA show was as good as ever, the number of traders has fallen dramatically over the years. Most were in a single room when they would spill over into two. OK, I'm only looking for wood and a few radio bits, but it's a bit of a surprise. Are there many other shows, other then Cosford, to sell at? We aren't talking about toy trains with a plethora of events every weekend after all.

One surprise was on the Nexus stand. In pure value of money terms, how can model railways compete with this RTF aeroplane?  54 inch wingspan and more clever technology than you can shake a control stick at for less than the price of a big OO gauge loco? Only storage considerations stopped me being seriously tempted!


Saturday, November 03, 2018

Saturday Film Club: Mouville


Thanks to a YouTube recommendation, this week we look at Mouville by Henk Wust and Jan van Mourik. A tiny, 80cm square scene, it's full of atmosphere.

OK, it would be nice to see more than two items of stock run, and video cameras can't do depth of field like a still camera can, but it's 4 minutes worth of interesting modelling. I love the higgledy-piggledy arrangement of buildings, something very hard to do properly but when it is, it just looks right. Nice scenic details too. Crack open some vin and enjoy. 

Friday, November 02, 2018

It's only a bargain when it works!

With the Planet range of radio control sets disappearing off the market, at Christmas, I decided it was time to buy my Dad a new outfit. We'd pick something that we could buy plenty of receivers for, and stock up.

Based on advice from a forum, I plumped for the Turnigy TGY-i6. Designed for aircraft, it's over-specified for model boats, but you can't get anything much simpler. The recommendation was to buy this through the Hobby King website. I've bought from there before and didn't anticipate a problem. I even bought a second receiver.

Well, it's taken 10 months, but finally we are ready to use it in a boat, so I open the box, plug the receiver in and start to follow the instructions for binding the transmitter/receiver (this is the process where they learn to talk to each other and no other transmitters). I try it in an existing boat whose electrical system I know works too, to be on the safe side.

First worry, the LED blinked, but not as fast as expected. I press on. The transmitter says binding, but nothing else happens. OK, I try again, double checking what I've done. Then I try the other receiver. Still no good. Basically, at the end of the process, the LED on the receiver should stay lit.

Hmmm. OK, so I do a bit of searching on the Internet. There are a few YouTube videos showing the process and they are all doing what I did, except the initial LED flash is faster then I had seen, but exactly what I had expected. 

Next, to a forum or two. There I find out the problem. The receivers are knackered. Both of them.

What to do?

With the seller China-based, having taken 10 months to get this far and not having a receipt, the answer is obvious. Chuck it all in the bin.

The embarrassing thing is, I've done what I always recommend people not to do, and been bitten by it.

I'm a big fan of local model shops. If there is a problem, you can take things back. It's a long way back to China!

So, the next RC set will be bought from Howes of Kidlington. I can drive there in an hour. Should there be a problem, I can take things back.

And I'll still buy from Hobby King, just not anything electrical, or spend money I can't afford to throw away.

Lesson learned. 

Thursday, November 01, 2018

If it's plastic, I can make it work


Right, the bulwarks. They are too short for the hull, so either I make new ones or find a way to use the kit bits.

For a while I considered the scratchbuild option, but in the end decided that if I cut them in half, I could fill the join later. It's mostly flat with a curved top and being plastic, loads of solvent will melt everything together into a single piece. No-one will ever know what I've been up to.

So, cut the part in two and glue the front end so it matches the deck. I've already got a plan to cover the horrible join around the middle.