Looking at the stats on visitors to this blog, most people arrive from my main web page or from one of the descriptions of the layouts I have built. As such you are probably hoping to read about some model railway work I’m carrying out.
Well I have to disappoint you. Currently I’m still working on the fuel tank from my VW Camper van. So far I’ve taken it out of the vehicle and have been pouring treatments into it in an effort to remove all the muck in the bottom.
The first stage of the process involves “Marine Clean”, a high powered degreaser. It’s so powerful that the bottle in the picture has to be diluted 5:1 with water. The results on the tank contents appear impressive. On the first washing (half a bottle) a load of rust coloured muck poured out. The second gave more but not as much. A screwdriver scraped along the inside of the tank brings back no lumps of crud.
Now a regular task when kit-building is to clean the grease off a model before painting. I wonder if this stuff would be any good ? There is a little left in the bottle for me to find out, so where is that mineral engine kit ?
Tuesday, October 31, 2006

Sunday, October 29, 2006
Trial and error
This afternoon I spent some time learning to weld. My method was to try and close up the holes in some tinware from the van and grind the welds flat. Then discover that I had made the holes bigger in some places and try to close them up again. Repeat until madness arrives.
To be fair I learned a lot. Having been on a proper course it is really time to put the lessons into practice. At the college the machine is pretty much set up for you. The material you play with is thick and you are only doing fairly simple joints.
I have to set my machine up and work on thin metal. Of course I’m not joining to bits, I want to try and build up my weld pool to fill a rust hole. This is like trying to ice a cake with molten metal. Not being able to see anything properly doesn’t help. I need a strong light so I can see the work piece through the welding mask – or I’ll continue to miss the bit I want to fill and blow a hole in something else.
After two and a half hours of messing around and frustration I thought I had it. My weld pools were getting better. I learned to use the green gloves not the red ones as they gave me better control over the trigger on the welder. I learned that the contact the earth makes with the metal is vital and can be disrupted by a bit of rust or dirt. I tried different settings and made holes when I shouldn’t have. I fiddled with the wire tension and speed. I heard the sound of a good weld crackle and the spit of a duff weld as well.
I had to give up through lack of light. Not inside on the bench but outside where I was grinding the welds flat. Through sheer laziness I hadn’t installed a light outside so when the daylight disappeared I was grinding in the dark. A lead lamp helped but only to make me over confident. So over confident I ground right though the metal I was welding back in.
I learned about grinding today.
Saturday, October 28, 2006
Petrol tank out
This is what a Volkswagen Type 2 petrol tank looks like after it has been hauled out of a 1971 camper van.
It’s not as big as I thought it would be. Not sure why, but I expected something at least twice this size. Stupid really as there isn’t the space for anything larger.
Anyway, apart from having to stop work to buy a deep 13mm socket to remove the retaining straps, everything went pretty well. The bolts and screws undid OK with only a little effort. Of course the tank has been out in the last eighteen months for a new fuel gauge sender to be fitted so this isn’t that much of a surprise – except to anyone who has ever worked on an old car and knows from painful (!) experience how fast a bolt can decide it wants to stick in a hole.
In the bottom of the tank is a nice thick layer of sludge made up of muck and rust. The top of the inside looks clean though. I’ve got some POR Marine clean soaking the sludge away at present. Two treatments each lasting 24 hours are proscribed on the side of the bottle so that’s what it gets. I only plan to do this job once so I will break the habit of a lifetime and do what I’m told by the labels.
I have found more rust to deal with in the tank compartment. Looks like I need to get aquainted with the welding kit to sort this out. The whole job is suffering mission creep as I add to the “to do” list all the time. I know this is what happens with old vehicles and I know that if I do a proper job I’ll be much happier. Doesn’t mean I wouldn’t love to have just one job go quicker and easier than expected.
Oh yes. My plans to re-paint the outside of the tank have stumbled as well. It’s dark grey (“Tank grey” to Humbrol paint fans…) not gloss black. Still, I’m sure I’ll find another use for the paint I bought !
Friday, October 27, 2006
Petrol tank treatment stage 1 - Engine out
Time to pull my finger out and treat the rust in the fuel tank in my VW Camper. The usual plan is to use a product from POR in the USA to treat and then seal the inside of the tank which will stop it rusting and let me travel without stopping to change the fuel filter every thirty miles.
Stage one is to get the engine out of the way. I’ve never done this myself so have had to pay to get the work done. Because I’m on good terms with the guy who does mechanicals (& welding) for me, I’ve had the engine dropped on the drive. This allows me to work on the petrol tank at my own pace.
Engine removal isn’t too painful. If I had a suitable trolley jack I’d be able to do it myself I’m sure but as I don’t, I can’t. I do get to help which is always interesting and educational.
For now I have a mid-engined van. Admittedly this isn’t going to give the performance and handling you normally expect from this sort of vehicle, what with it siting where the cooker is supposed to be and not actually attached to anything.
Tuesday, October 24, 2006
Armstrong Whitworth Diesel Shunter
What a handsome beast eh ?
This is the first finished model Armstrong Whitworth locomotive from the Mercian Models kit. Apparently she was called “Alice”.
Built and painted this is an impressive model. If I worked in 016.5 I would be sorely tempted. I know that there was (apparently) only one built but it looks like a very typical diesel shunter. At the head of a train of hoppers of other metal wagons the locomotives strong, purposeful shape would fit in fine.
Preserved railways often have something like this for shunting, works trains and when they can’t be bothered to steam a chuff chuff.
This isn’t a difficult kits to assemble. It’s etched in nickel silver – always a plus because it solders so much better than brass. There is a bit of forming to carry out on the bonnet but this isn’t too bad and can’t really be avoided on this sort of loco. Apart from the issue with the buffer holes (this is going to be fixed) then there isn’t anything wrong. There is plenty of space for a motor & gearbox. I would recommend a two stage unit as the model demands a very low top speed. Event with a flywheel fitted as well there would be loads of space for lead in that bonnet.
Best of all I’ve knocked off another of those projects from my list.
Monday, October 23, 2006
Fiddly Bits
Grand Prix races are good for something. Being dull most of the time you can get things done while watching them. The Brazilian race gave me the chance to fit the fiddly bits in the cab of my mineral locomotive.
This was a challenge but a good one. Each lost wax cast brass part has to be removed from its sprue, doing my cutters no good at all, and then drilled for the bits of wire to be attached to it. The instructions give different wire sizes but as they vary by less than .3mm I just used the .5mm wire for them all. Well except for the .3 stuff, which I ignore entirely.
One drilled, tinned brass wire is inserted into the indentation (I can’t call it a hole as the brass is too hard to drill very far) and lightly soldered. Suprisingly this works very well as long as plenty of flux is used. I cleaned the joins up a bit with a file but not much. Far harder was getting the wire in at the correct angle – I had to remake several joins as the pipe exited the fitting at an odd angle.
The results are everything a Victorian railway locomotive should be. Overly ornate with too much pipework on display. Lovely.
Sunday, October 22, 2006
Grot
Some models need to be dirty. The diesel I’m finishing is definitely a case in point. After airbrushing with satin green the locomotive looked flat and uninteresting. Dry brushing with a lighter green helped but with a light dusting of dirt it comes alive.
Weathering is easy with an airbrush. Mix a weak rust/dark brown paint up and spray it lightly all over the body. Go over the lower areas a bit more to deapen the effect. Dry with a hair dryer and take a look to see if a bit more muck is in order. One happy, repeat with a dark grey/brown mix.
I experimented with holding the spray further away from the model than recommended. This allows the paint droplets to dry slightly before impact and imparts a fine texture – just like real dirt has – to the paint.
A little dry-brushing in selected areas and the body will be finished. Now I just need to do the same with the chassis.
Saturday, October 21, 2006
Little peg into a larger hole

This is why kits have to be test built by idiots like me. As you can see the hole that the buffer is supposed to fit into is quite a bit larger than the shank. Actually it’s nearly larger than the buffer base (the square bit) that is supposed to sit on the buffer beam of this model locomotive.
Now as I’ve had a bit of practise at model making I managed, with only a little swearing, to fit the part with low-melt solder. The solder acts as both adhesive and filler in this instance and the result is not too bad.
Now I have to tell Trevor he needs to alter the etch. Still better to do this now than on the production batch.
Update: I think I know how this happened. If you look at the front and rear views on the plan there are circles for the buffer heads. I suspect that the designer managed to etch these instead of the correct size versions. Easy done and easy fixed.
Thursday, October 19, 2006
Old Instructions
Although this blog might suggest otherwise, I’m not the most prodigious of modellers. Some of the models I build take years to come to fruition. Most railway locomotives go back in their box two or three times during the build as I lose interest or just fancy doing something else for a while. It is a hobby after all – so if you want to change tack, do it.
The current project has scared me. It is a High Level Models mineral locomotive. I bought the kit on the strength of the article on Hellingly Hospital appearing in British Railway Modelling. Most of the cheque was used to fund the kit, something I think is only fair. Since the layout earned the money I should spend it in the layout.
High Level kits are superb. The parts fit together nicely and the instructions are second to none. For such small models they are very complicated to assemble but the process has been thought through and as long as you do what you are told, all will be well.
To keep my place I have been jotting down dates and ticking off stages so I know where I am. This is at least the third time this model has been on the bench. I wasn’t prepared for the date found on the paper which indicated the last time I’d done any work – it’s over a year ago !
Well, progress has been made. The rear buffer beam and cab sheet have been attached. Perhaps I might get a working model before the box beckons again. My incentive is a show in a few weeks with the Hospital where I could run the loco. Maybe I can squeeze a bit of time out of this weekend…
Tuesday, October 17, 2006
Another one bites the dust
I forgot to mention another model railway project kicking around the workbench when I listed them a couple of days ago.
For months there has been a pair of On3 (I think; what we call O16.5) wagons built from kits awaiting couplings starring at me. I kept planning to get around to them but instead something got in the way. The wagons have had to be dusted a few times so they really would be better finished and in a box.
Last night I finally got on with it. The couplings fitted are Kadees which I was given by someone who fancied using them on his wartime layout and then decided they would be too much work. All I had to do was superglue them in the right spot under the buffer beam.
Kadees are notorious for being fiddly to fit. I think you are supposed to use gauges and stuff to get them right. I don’t have a gauge so I just checked they would couple with the loco (a Bachmann 0-4-2) and each other. Not sure if this will be good enough for curved track, but as they don’t have a layout nor any prospect of one in the near future, this isn’t going to worry me.
I was amazed at the engineering in such small and relatively cheap items. They are proper fully working knuckle couplings as fitted to American railways. Far more sophisticated than the traditional UK tension lock beast.
Monday, October 16, 2006
Fame at last !
I am the new Jeremy Clarkson. No, I’m not getting a perm and bucket load of right wing opinions. I have started writing about cars.
In the November 2006 issue of Volkswagen Camper & Commercial magazine, page 37 features my replacement of the thermostat in Ashley. Top quality pictures, well written prose. I can’t praise it highly enough.
Buy your copy today !

In the November 2006 issue of Volkswagen Camper & Commercial magazine, page 37 features my replacement of the thermostat in Ashley. Top quality pictures, well written prose. I can’t praise it highly enough.
Buy your copy today !
Sunday, October 15, 2006
An audience with greatness
Let me start by saying that this isn’t my model.
It is a beautiful example of the model engineers art. A part built Foden steam lorry on show at the Midlands Model Engineering Exhibition today. The chassis is superb. The woodwork for the body is absolutely amazing. It is cabinet making of the highest quality.
When I was a kid I always wondered why the model engineering section of the local festival was full of part built models that looked the same from one year to the next. There are only so many steam boilers you can look at before wanting to go back to the toy trains where things actually move. Why didn’t these guys get on with it and finish the models. It was explained to me that they took many years, often more years than I had been alive to complete, but it never sank in.
As a grown-up I can now appreciate the workmanship. To be honest the sight of a boiler without a machine around it still does nothing for me, but other objects are works of art. I have learned to appreciate workmanship for it’s own sake. Makes something properly and I can look in wonder.
The wood framing of the steam lorry amazes me. I don’t think I would ever be able to match the quality in my lifetime. But then I might also argue that as the frame will be covered when the model is complete, perhaps that fine finish isn’t really necessary ?
Of course the builder has gained enormous pleasure from the work and that alone justifies it. He probably looks at the doweled joints and smooth finish with that inner glow of satisfaction that you get from a job exceptionally well done. Doubtless the rest of the modelling will be carried out to the same high standard. I just hope I get to see the finished item. Sometimes bodgers like me need to come into contact with perfection to be inspired. Maybe next time I make something I’ll manage to raise my standards just a little.
Saturday, October 14, 2006
Wanted: Model boat captain
Today’s job is to try and move some projects on a bit. Ideally I want to finish one of them. With nothing special on, this doesn’t seem to be a hopeless cause.
The obvious choice was “Little Miss Minty”, my model launch. She was nearly complete with even the castings painted. A quick session with the superglue and all apart from the captain were fixed in place.
I then turned to the mechanical gubbins. This was a quick re-assembly of the parts I had taken out before spraying. I even fixed things down properly – OK, the receiver was velcroed into position !
With all this done the battery was charged and a trip to the lake arranged. It’s difficult not to be like a big kid in this situation and want to play with the new toy. The weather was nice and at this time of year that means an opportunity is to be grabbed.
On the water the boat worked fine. Engine noise was a problem, sometimes it was quiet, others there was a rattle. This was quickly traced to a wire from the speed controller touching the drive shaft, not everything is quite as fixed down as it needs to be.
The biggest problem was signal reception. Most of the time everything was fine but about three-quarters of the way through a u-turn everything went odd. The motor would stop and refuse to restart for a few seconds. Distance wasn’t an issue so it must be position. I moved the aerial wire from around the back edge of the hull but this didn’t help. Then I wrapped it around the centre bar leaving the end pointing up. This did the job so I know that I need to make this a bit more permanent than the current twisted wire and second hand masking tape arrangement.
Apart from this I’m happy. Just the captain to paint and fix in position to finish this one. I’ve even thrown away the leftover parts already !
Drowning in projects
 Sorry for the lack of posts this week. Too much work. The last thing I want to do sometimes is stare at a screen in the evening. Besides, I haven’t really done any model making either.
This is a pity because I am knee deep in projects crying out for my attentions. Getting half built model railway locomotives ready for a demonstration hasn’t helped this !
On the bench at present there is:
“Little Miss Minty” model boat.
Y7, one of the half finished locos.
An O gauge Midland 0-4-4 also half finished. More on this in later posts.
0-16.5 Armstrong Whitworth – This now has castings and can be finished, or at least it will be when all the casting are in my hand.
A 4mm scale mineral tank engine for the Hospital layout. This is going to show next month so I’d like the tank to be ready at least for testing. I’ve said that before though.
Pigeon Pie is nearly finished, just a few castings and a bit of detail to add.
And then there is a GWR tender loco in EM in the queue which I’d really like to get stuck into.
I wonder if I could retire 30 years early to do all this stuff ?

Thursday, October 12, 2006
Wrong
Ignore part of that last post. If you stick the clear plastic into the window with plastic glue, once it dries it falls out again. User superglue like any sensible person trying to afix plastic to painted plastic and resin.
On a positive note, the clear plastic from the collars on Burton's shirts is wonderful glazing material and so much more ecological than throwing it away !
On a positive note, the clear plastic from the collars on Burton's shirts is wonderful glazing material and so much more ecological than throwing it away !
Tuesday, October 10, 2006
Glazing
 Model boats mean water and that means it’s not a clever idea to sail without some glazing in the windows. With windows the size of the ones in my new launch it’s a job I have to do. Now it’s painted I can’t put the job off.
When the windows went in I cut the holes big enough to allow me to stick the clear plastic to the back of the resin frames. It’s not that accurate but good enough for my dodgy workmanship. To get the size the material was placed over the whole and marked with new favourite tool, the CD marker pen.
A quick trim with a pair of scissors and I could stick it in place. Superglue seemed the best bet applied on the end of a small screwdriver but plastic glue worked as well.
Sunday, October 08, 2006
Workbench on tour
The workbench spent today at an exhibition. Literally this time, as I was demonstrating and had a to a work area with me !
The show was the Heathcote Modeller exhibition just off the M1 (the oppose way to Loughborough) at Shepshed. This is a really an O gauge model railway event, but others are catered for. On the Saturday there is a lot of trade. On Sunday some of these don’t come in and are replaced by demonstrators. I’d been invited to attend by Mercian Models and ended up next to Trevor’s stand.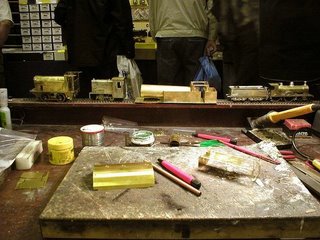
As it turns out this was very convenient. The first couple of jobs I did were building saddle tanks for locomotives in the range. A bit fiddly for me but quite worrying to the novice builder, hence they took the chance to get me to do the hard work. The first, a Peckett went pretty well and was assembled quickly. I managed to crease the metal in an ill advised attempt to put one of the bends in sharper than it needed but I was able to smooth this out enough not to show under paint. The owner was happy anyway.
The second tank was for a Barclay. These are a pig of a job as there are several fairly sharp bends and a tuck under at the bottom. The former that the tank top bends around has a fault as well – it’s about 1mm too long. I moved this and then gingerly tacked the metal in place. All looked OK except for the bottom. At the front and back it bulged. Normally I am confident I can bodge this away and cover the result with paint. It’s not quite so much fun doing this with people watching and knowing that you will hand it over in the brass. However there was no choice so I proceeded to fill with solder and file away while pretending that this is normal kitbuilding activity. I suppose it is really but don’t tell anyone.
The result was good and another happy punter. A bit nerve wracking as I didn’t really want to wreck someone else’s kit !
The show was the Heathcote Modeller exhibition just off the M1 (the oppose way to Loughborough) at Shepshed. This is a really an O gauge model railway event, but others are catered for. On the Saturday there is a lot of trade. On Sunday some of these don’t come in and are replaced by demonstrators. I’d been invited to attend by Mercian Models and ended up next to Trevor’s stand.

As it turns out this was very convenient. The first couple of jobs I did were building saddle tanks for locomotives in the range. A bit fiddly for me but quite worrying to the novice builder, hence they took the chance to get me to do the hard work. The first, a Peckett went pretty well and was assembled quickly. I managed to crease the metal in an ill advised attempt to put one of the bends in sharper than it needed but I was able to smooth this out enough not to show under paint. The owner was happy anyway.
The second tank was for a Barclay. These are a pig of a job as there are several fairly sharp bends and a tuck under at the bottom. The former that the tank top bends around has a fault as well – it’s about 1mm too long. I moved this and then gingerly tacked the metal in place. All looked OK except for the bottom. At the front and back it bulged. Normally I am confident I can bodge this away and cover the result with paint. It’s not quite so much fun doing this with people watching and knowing that you will hand it over in the brass. However there was no choice so I proceeded to fill with solder and file away while pretending that this is normal kitbuilding activity. I suppose it is really but don’t tell anyone.
The result was good and another happy punter. A bit nerve wracking as I didn’t really want to wreck someone else’s kit !
Thursday, October 05, 2006
Body beautiful
More soldering and I have a locomotive body. Thanks to tab and slot construction assembly is quick and reasonably easy. Even the boiler was a cinch as it’s pre-rolled. With the side tanks in place it sits on fold out ledges. All the parts are the right size and shape – not a given with many kits.
Purists will note that the front buffer beam is in the wrong place. It should overlap the footplate by the height of the valve covers. I fixed this after the picture was taken. Perhaps a little less haste would have been a good idea.
No singed fingers so far though.

Purists will note that the front buffer beam is in the wrong place. It should overlap the footplate by the height of the valve covers. I fixed this after the picture was taken. Perhaps a little less haste would have been a good idea.
No singed fingers so far though.
Wednesday, October 04, 2006
Fast work
I need a half built model railway locomotive in a hurry.
The reason ? I’m demonstrating somewhere on Sunday and it helps the demo if you have a few part built kits on the modelling board. Of course I don’t actually have anything suitable kicking around, especially in 7mm scale so half a day last weekend was devoted to sticking some bits together.
Out of the maturing cupboard came an etched brass kit for an LNER Y7 from Conneseiur (Sorry, can’t spell it and the box is upstairs) Models. A nice simple locomotive that I bought years ago when I fancied building an O gauge layout. I’ve built 3 & 4mm scale versions, so why not get the set ?
The chassis is a simple fold up affair, which took very little time to reach the stage I photographed. The 50W soldering iron was a help here as there is a pretty large mass of metal to soak the heat away from the joins. Powerflow Flux was useful too. It’s nasty stuff that takes a lot of scrubbing to remove but it makes that solder flow. I even managed to get it around the axle bearings properly, not my usual blobby effect.
All soldering was carried out with the chassis upside down on a sheet of glass to keep things flat. It sort of worked but I still had to twist it a little with my fingers. That’s not a trick that you see in proper modelling instructions but it works. Just a gentle twist though, or you end up with a brass corkscrew.
Monday, October 02, 2006
Name that boat
Every boat needs a name. I’ve used vinyl letters before but on this launch I fancied something with a scripty font. Even if I could get this in pre-cut letters, I wouldn’t fancy applying them to a hull as getting nice level text would be a nightmare. It’s one of those jobs that even if it’s slightly wrong, will stand out like a sore thumb.
Since I have used a system that allows production of waterslide transfers from a computer printer for adverts on model building walls, I thought this would be worth a whirl here.
Printing the sheet took a bit of work. The first go went all blotchy but my second attempt was good even if I did print the wrong side of the sheet first. Not sure how this happened as I’m sure I put it in the right way up. The text was laid out in a DTP package (PagePlus) and took only a few minutes.
The hull needed to be painted with gloss so the transfers would sit properly. There was going to be a lot of transfer film showing and this was my best bet of hiding it. Unfortunately even this didn’t really help as you can still see the edges. I think the ink ran a little as well and highlighted the edges.
The effect is pleasing with nothing untoward visible from normal viewing distances. If you can see any problem you have got wet feet !
A few coats of gloss varnish will hopefully keep everything in place. I don’t want them washing off the first time I sail !
Sunday, October 01, 2006
Fixing Richard's bracket
The guy who sits next to me at work said, “You’ve got a welder haven’t you ? Could you fix a bracket on my bicycle lights ?”. I said I had (can’t hide it, I’d talked about the welding classes I took ages ago to the people in the office) and would be happy to look at the bit of bike to see what I could do. I pointed out that there were no promises, as I’d not actually used the machine yet.
What I got was a bent bracket with two cracks in the metal on the corner nearest you in the photograph. It looks like someone has tried to grab the light and twisted and split the metal. I fancied my chances so took the job on.
This morning I unearthed the welder from the depths of the garage and had a go.
My first mistake was setting the temperature too low. This resulted is hissing and spitting with lumpy weld left behind. It would probably do though so I cleaned the job up with a grinder. I wasn’t really happy with the result so I had another go. This was better but my lack of finesse with that most delicate of tools, the angle grinder had removed some good metal.
This time I upped the amperage a bit to the lowest medium setting and managed a much better result. Quite a good weld pool formed and the resulting lump was pretty smooth. I ground it down and then finished with hand tools to get the final result. Not perfect but definitely stronger than it was.
What I re-discovered was the joy of welding. I’d forgotten how much fun I had when I did my course. I also reminded myself how annoying welding masks are. Mine gradually lowers itself while you are getting ready to work and of course the window is so dark you can’t see where the torch is until you are welding. Them’s the breaks though – and if they are breaks in steel I can probably fix them !
Reflections
How glossy is my boat desk ?
Several coats of varnish sprayed on the wooden deck really brings it alive. Someone has obviously been swabbing this properly !

Several coats of varnish sprayed on the wooden deck really brings it alive. Someone has obviously been swabbing this properly !
Subscribe to:
Posts (Atom)