Monday, December 31, 2012

My 2013 Exhibition Calandar

At the end of the year, it's time to look the the future and sort out my public appearances for 2013.

The results can be seen on my exhibition calender. Very scary they are too.

Nine shows, yes 9 of them! Nine opportunities to pack up the car, drive a long distance and talk to people.

To be fair, only 5 shows involve stopping away and 2 of them are within 15 minutes drive of where I live. This is a good thing. It's not that I don't like being at exhibitions, it's just that once you've done a few, the novelty wears off and turning out can sometimes seem like a bit of a chore.

That's probably shocked you. Surely everyone who exhibits loves every moment of the experience?

No we don't. Once you are set up and working then it's fine. Give me a friendly group of visitors, pleasant venue, decent hotel and a good breakfast and I'm a very happy man. I still stress about travelling and whether the model will perform properly. I'm always relieved once the layout, exhibition essentials and rolling stock are packed away after a weekend.

This is why we try to limit shows to 4 a year. Possibly 5, something miserably failed this year.

Never mind. Take a look and see if there is anything that tickles your fancy. I always enjoy meeting readers of this blog. It's nice to put names to web stats and with a bit of luck I'm guaranteed a friendly audience!

Sunday, December 30, 2012

Instant Orange Tree

Orange Tree

Down at the toe of my Christmas stocking there was a tangerine. This is good because while I like an orange, I'm rubbish at peeling the standard model but when the skin falls of easily even with my bitten finger-nails, then I'm in.

Pulling the bottom away, this came out from between the centre of the segments. I thought it looked a like like a tiny tree.

Maybe it's just me but I think you'll find that modellers through the years have employed natural materials as the basis for miniature tress. Stuff pulled from hedges, seafoam, hydrangeas - all have been covered with flock and spongy things to give the finished item a bit of shape.

This is great and proves an important mathematical principle - fractals. The idea that a line splitting into two with each of these splitting into two and so on, results in something that looks like a tree is well known. Delve deeper into nature and the same effect occurs at ever more microscopic levels.

Hence, my tangerine centre, looks like a tree !

Saturday, December 29, 2012

Triang Fours

FoursBoxI'm not a real collector of old model railways, although a 9 wagon train of Giraffe cars puled by a "Davy Crockett" has a special place in my heart, but I'm fascinated by the products that appear when our favorite companies go "off piste" .

At the moment, I covet a Hornby 3DS game system. This is a bizarre monorail along which a space ship hurtles. The player then uses a second space ship to shoot at the target. Points are scored and it makes noises. I'd love to show one off at a model railway event just to annoy the purists.

However, while browsing in a charity shop a few days ago, this goodies was in a corner. A Triang Fours game. Yes, Triang the model railway maker.

FoursBoardA 3D game of noughts and crosses, just like that 3D chess game Spock and Kirk are always playing in Star Trek, but with much simpler rules.

The "board" is four layers of plastic with holes in, one above the other.

Players take it in turns to place plastic counters into the holes, the objective being to make a line of 4 counters. The single sheet of instructions covers this in several languages.

I've never seen another of these sets, so I assume it's worth many millions of pounds. Mine is complete, has a tatty box missing its top and there is a crack in one of the plastic plates, but nothing to stop it being played.

I paid £1.50, which has got to be a bargain hasn't it?

Friday, December 28, 2012

THIS is a Boxing Day sail

Boxing Day Sail

Who wants to force poorly-paid shop staff to turn up at work at the crack of dawn on Boxing Day so we can get clothes for a few quid less than they were a couple of days earlier? Not me.

My idea of a Boxing Day sale involves standing beside a lake on a sunny day in the countryside.

Not for me, fighting through a shopping centre to max out my credit card. Far better to be somewhere peaceful with a couple of boats on the water.

The little orange one is a free- sailing RNLI battery powered toy that I suspect is intended for use in the bath. It pootles around quite happily powered by a tiny jet drive unit. OK, it's not very fast and the rudder is designed by the same man who produced the chocolate teapot. Maybe it does something but mine certainly didn't head straight across the water, more wandered aimlessly around until it hit the bank.

The other is a Vintage Model Boat Company "Mr Tom" kit built as a present for my mother. At some point, I'll detail the build here but for the moment, let me just tell you that it looked fab here but about 10 minutes later, the motor ca fire and so I have the opportunity to re-build the drive-train.

Still more fun than spending the morning in Next though.

Thursday, December 27, 2012

RIP Gerry Anderson

Eagle Transporter nose

At the age of 83, Gerry Anderson has died.

The world of entertainment has lost the most consistently innovating and imaginative thinker that we have ever had on British TV. Quite frankly, the UK telly industry has lost about 75% of it's creativity now.

Thunderbird 3I don't remember the original runs of Thunderbirds, Captain Scarlet or UFO. I did watch Space 1999 avidly and still consider the Eagle Transporter the greatest spaceship ever created. Not glamorous or even exciting, but a real workhorse that is exactly the sort of thing a real moonbase would need.

Tributes to Anderson now fill the web so I'm not going to try and fill in all the details here. From my personal point of view, I am a heretic in one respect - I don't think he could do plots. While the visuals on every single show are stunning, some of the stores are rubbish. Space 1999 suffered more than most in this respect with Stingraydistinctly weird fantasy pseudo religious mumbo-jumbo stuff on a regular basis. To be fair, he can't be blamed for series 2, which was muddled to appease an American market who seemed to think that replacing realistic settings with a character who could change shape was a good idea...

No, the plots, even for Thunderbirds, might often have been a bit thin, maybe the model shots went on a bit long sometimes, but as shows they were brilliant. The imagination behind them was simply stunning. Why Anderson wasn't given the contract to design the whole 21st Century, I don't know. What we got was a bit rubbish in contrast.

Lady Penelope and ParkerMy personal favourites, aside from Space 1999, were the his feature films - Thunderbirds Are Go and the live-action Doppelganger. Both flopped at the box office but visually they were great and had enjoyable plots. OK, so neither were exactly complicated but who cared, they trundled along well enough, who can ask for more?

Wednesday, December 26, 2012

Fairground trains

Santa Express

Has anyone ever seriously modelled a fairground train ?

The example above is from Winter Wonderland in London's Hyde Park earlier this year. It's basically a great big LGB set running around a patch of whirling, brightly lit, fairground rides and stalls. The sort of model that would cost an arm and leg to build using Faller Fairground models but would be an exhibition favourite, at least with the visiting public. Model Railway Journal readers might be able to like to too in public if you do a decent job and a famous "serious" modeller says it's permissible.

Santa Express trackBefore you scoff, remember these are real railways. The gauge of this one appears to be around 2 feet, which is the same as many "proper" narrow gauge railways.

OK, these lines don't have points generally and they only go around in circles carrying happy holidaymakers so maybe the operation wouldn't be that exciting.

From a modelling perspective though, they could be interesting. Real track for a start, probably best modelled using PCB with rail soldered to it. You don't need real rail of course, strip metal is what the prototype used and so would the model.

Under the fibreglass body, there is a tiny wheeled power unit for the engine. Coaches look like they run on some sort of bogie though.

The thing is, there used to be loads of these lines hosting engines hurling themselves around tight circuits, but now there are very few. I miss the one found in St Nicholas Park, Warwick, it used to be simple steam engine shaped carriages running which were then replaced by this:

 
certainly a colourful model! Sadly, I don't have a photo of the older version of the line. I wonder what happened to the rolling stock?
 
My feeling is that done properly, you ought to be thinking bigger than OO to fit mechanisms in the locos. On the other had, Langley make a 4mm scale crazy golf set. In fact, I think I've got one somewhere...


Tuesday, December 25, 2012

Merry Christmas!


Merry Christmas everybody.

Now stop messing around with the computer. Go play with your presents and eat some turkey!

Monday, December 24, 2012

16mm scale Groudle Glen Coach

Completed coach

Job done! A very enjoyable build of this 16mm scale, laser-cut wood kit.

It's not perfect of course, what kit is? Picky Phil would point out the the underframe truss detail should be set back from the steps. The bogies needed detail on the side. The non-door side of the body is missing a vertical spar at the guards end. The GGR half-lasered lettering is nice but unprototypical. And stupid people can fit the seats upside down.

That said, it is fun to do, easy to assemble, well designed and most importantly looks good. And I will definitely be ordering another (and a Sea Lion to pull them), which probably tells you all you need to know. A rake of these wending it's way through the garden would look fantastic.

Sunday, December 23, 2012

Writing for model mags in Writers Forum

Have you ever wondered how to break in to the rock'n'roll world of the model magazine ?

Well, get yourself down to WH Smith and pick up a copy of the latest issue of Writers Forum magazine where one of the greatest exponents of the art (me) will explain it to you.

Seriously though, with some ambitions to fiction writing, I bought a subscription some time ago to try and better understand the craft and then decided that pitching a piece of writing for anoraks was worth a go.

The editor grabbed it. Either they are desperate for content, or my point that model magazine writing is easy to get into (as long as you don't mind writing for society journals and not getting paid, but it's good experience and expose as well as helping the society out) and a useful adjunct to a hobby. Even if you aren't a modeller, you can always write up projects for other people.

Anyway, this make me a proper writer doesn't it?

Writers-Forum website

Saturday, December 22, 2012

Magna Couplings

Magna CouplingsWe all love a gadget at Christmas so how about these ?

Called Magna Couplings, they are rare-earth magnets on laser-cut swivels. Plenty strong enough to connect coaches, even 16mm scale ones, yet the connection can be broken by pulling the vehicles away from each other by hand.

I think this is really clever. Obviously if the plan is to shunt stock then it's less so but then how many people shunt on a garden railway?

I suspect this could be adapted for 4mm scale carriage use. The smallest of these magnets are about 2mm in diameter so the grab would be strong enough but not too strong. Under working corridor connections though, they would be a lot easier to deal with then hooks and loops.

Friday, December 21, 2012

Roof covering

Covering the Roof

Bigger scales demand more effort in the surface finishes. I could have just painted the Groudle coach roof but it would still look like painted wood, or at best paint on a smooth surface.

The real things are covered with something (not sure what to be honest) that has a bit of texture. I fancied that the best material to replicate this would be tissue paper - proper stuff not toilet. Partly 'cos this should work but mostly due to a roll being to hand for Christmas prezzie wrapping.

Recent experience trying to cover a model barge hatch cover lead me to eshew the traditional PVA in preference for a can of Photomount spray glue. If not spread very thinly and perfectly, PVA can make the tissue crinkle badly. To be honest, Pritt Stick glue would be better if there is no spray glue available.

A waft of sticky on the roof quickly followed by application of the tissue and lots of smoothing and it looked good. The paper was oversize but easily cut down to fit. Far simpler than trying to fit a perfectly cut bit of paper and it's not going to like being slid around to fit.

Final job, a coat of Humbrol 66 which you see during painting, hence the sheen. I promise you, it's dried nice and matt.

Thursday, December 20, 2012

Cast bogie sides

BogieSidesThe best laid plans etc. etc.

So, there I am with 4 cast bogies side for the Groudle coach. The look OK - not perfect but good enough for the job. The spring worked pretty well so I'll use that trick in the future.

What I hadn't checked was the clearance for the bogie swing behind the steps. There is 50% of S*d all. I could fit the overlays but it would be at the expense of building a coach only capable to travelling in a straight line.

Half an hour later, I had a coarse file full of resin, a workbench covered in the stuff and a pair of very, very thinly backed sideframes. These were better but I still ended up filing the face of the axleboxes as well, which pained me to do but it was the only option.

On the side which doesn't have steps, I just flattened the back of the castings and stuck them in place.

A quick coat of black paint, some leather coloured axlebox faces (No, I don't know why but that's the colour they look in the photo) and the job was done.

Oh, and to top it all, before I started I lost one of the castings just long enough to conclude that I better make another, mix and pour the resin then find the thing before the casting had set.

Wednesday, December 19, 2012

Groudle bogies

Sea Lion at Sealion Rocks

While I really like the wooden Groudle Glen coach kit, there is an obvious deficiency, the bogie sideframes are, well, basic.

If you are running the model in the garden, you might not care much about this. Paint them black and it's likely that no-one will notice the absence of detail or those Triang style open axleboxes. Me, I want a bit more down there.

Not to worry, all I have to do is find a photo, make a simple master and then cast a set in resin.

Except that I struggled to find a clear picture. The one above is the best I could do. It's so old the original is a 35mm film shot. When you have to pay for each photo, the temptation to snap away under rolling stock isn't strong enough obviously. Nowadays, I'm sure I'd have dozens to chose from. Mind you, a post on the Isle of Man forum didn't get me anywhere so maybe there is a gap in the market for a book of close-up pictures of bogies.

Maybe I could work under the pen-name "Fungus the Bogieman"

Anyway, I did the best I could with the limited information. This isn't a finescale model, I just wanted something better than I had. Result, a simple mock-up in plastic. The real spring is squashed in to the middle box and then pushed into place with a soldering iron to get it level with the face of the unit. Around it I poured superglue to avoid any undercuts.

GGR Bogie Mould

Tuesday, December 18, 2012

Hornby 2013 programme


Hornby have announced their programme for 2013 - It's all over the web so I won't go into detail here.
 
I think one loco deserves a mention, the new Sentinel 4wDM industrial shunter. First impressions are that it looks good. Apparently there is a slow-running mechanism underneath too so it ought to run well. Many will wonder what Hornby are doing producing a non-mainline engine. I think it's a clever move.
 
For a start, the drive system will presumably be related to DMU and EMU systems so the tooling costs will be lower than a bespoke item.  The body will still require significant investment but not as much as a steam engine.
 
The clever part is that the model can easily be produced in a variety of liveries thus increasing potential sales. It's a scale model that can also be eye-catching. I bet there will collectors for them all. I know I want one.


Monday, December 17, 2012

Servicing a Bob Moore lining pen

Cleaning the Bob Moore pen

The recent build of a corpse van required me to perform quite a lot of lining. Since I'm rubbish with a bow-pen, it was applied with my Bob Moore Lining pen. A nice device but you do have to look after it.

I'm a bad boy and hadn't. All but one of the heads were bunged up with dried paint. I managed with the available nozzle but I could have done with a finer one. Anyway, I thought I'd better do something about this. Bob Moore pens are expensive and even though I acquired mine second-hand, they are too valuable to be treated like this.

First step was to leave the heads in some cellulose thinners for a few days. Not a lot, you can see the little jam jar, acquired from one of the last days of the Wrexham and Shropshire Railway, with less then a centimetre in the bottom. Enough to cover them.

Once I felt the paint would have softened sufficiently, each head was removed and the nozzle poked with a cleaning wire. After a bit of prodding, this worked its way through each one. After that I squirted more thinners through using the glass syringe. This is a messy job as if the nozzle isn't clear, the stuff can backfire on you. Don't wear good clothes is my advice!

Finally, the try and keep the incredibly fine paint nozzles clear, I shot some WD40 through them. Well, I did for the first two and then I realised airbrush cleaner would be even better so I repeated the exercise with this.

With a bit of luck, next time I do some lining, I won't have to struggle with the tools.

Sunday, December 16, 2012

Blogs of Note

The observant amongst you will have noticed in the right hand sidebar that there are lots of good things. You can ask me a question, find out how I'm getting on with the novel, visit my other website, buy the excellent Parker's Guide bookazine or even my self-published Fillets book, give me money for free by clicking on adverts (thank you) or look up topics in their entirety.

There is also a rolling display called "Blogs of note". These are the blogs I follow and if I follow them, I guess that you might like to as well. Some put up lots of posts, other very few. It doesn't matter, they are all worth a look. Just don't defect to them from me.

In case anyone is interested, the list is:

Albion Yard
Beer and Buckjumpers
Bron Hebog
Fairlight Works
Frank's Jotting
George Dent Model Maker
Go-Go Trains!
Iain Robinson - Modelmaking
Its Just Playing Trains
Michael's Model Railways
National Railway Museum blog
Nevardmedia
Railway Misadventures
Rushby's Railways
Scale Model News
Sentinal Steam Loco 7109
Shawplan
Toolmonger
Wood End and Beyond
Workshop Shed

If you know of any blog that should be added, let me know.


Saturday, December 15, 2012

Rubbery handles with Plasti Dip

Hacksaw handle

I'm buying some tools for my sister this Christmas (don't worry, she asked for them) but there is a slight snag. While she's happy to have a go at a little light DIY, her skin reacts badly to contact with metal. Pure gold is OK - it would be wouldn't it - but steel and other stuff makes her go green.

So, if she's going to use the presents, either I need to gold plate them, or find another solution. As it happens, I don't need to head to the precious metal merchants, the motor industry has a fix.

DippingPlasti Dip

I've seen this stuff in classic car tools catalogues. They are full of fascinating goodies, a sort of porn for those who like to do their fiddling in the garage, and if I'm honest, I'd love a garage/workshop full of the products.However, I don't have space or a need for most of them but the Plasti Dip always intrigued me.

The idea is that you open the top of the can to find a thick paint-like substance. After a quick stir, the item to be coated is dipped into the goop, slowly pulled out and the excess allowed to run back into the can. After a few minutes it's touch dry and several hours later, fuly hardened.

So far, the results are excellent. I've coated a junior hacksaw and adjustable spanner. I had worried about getting a lumpy finish but it dries nice and tidy. The writing on the spanner handle is clear ans the hanging up hole at the end perfectly round.

The coating feels rubbery. How well it will stand up to use is another mater but at least it will stop my sister going rotten. I'm now looking through my toolkit for more things to dip - it's great fun!

Plasti Dip at Frosts

Friday, December 14, 2012

Something big in Hornby Magazine

Always keen to push the boundaries of models suitable for publication in Hornby Magazine, this month I've built a pre-grouping corpse van. Yes - a bit of rolling stock designed for carrying dead people.

Not only that, but it's and etched kit so about as far from the mags normal RTR BR steam/diesel era focus as possible.

Am I mad?

No. I don't think so anyway and presumably as it's in print, neither did editor Mike. What we have is a nice introduction to etched kit building. All the soldered joins happen inside the body, so it doesn't matter if you aren't perfect with them. The kit is in easy to solder nickel-silver. A short vehicle, there's no problem forming the tumble home in the sides.

And it certainly is a bit different!

Elsewhere I introduce a major project I'm carrying out, building a 7mm scale layout called "Clayhanger Yard".

Working on the basis that the Dapol 08 and Ixion Hudswell Clarke will cause the birth of a slew of shunting plank type layouts in O gauge, we're getting in first. I've always wanted to build one of these too.

Unlike most of my magazine projects, I'll be mentioning this on the blog from time to time, so keep dropping by to get an idea of progress. Full details will be in future issues of Hornby Magazine, next time I'm building baseboard, and you can be sure that not everything will be going to plan. Don't worry, this won't be hidden from you either as fixing problems is as much a part of model making as getting things right in the first place.

Corpse Van

Thursday, December 13, 2012

That's an 07 isn't it?


I took a couple of trips to London last week. Each time the train passed by the Chiltern Railways Wembly depot, I looked out of the window and thought, "Blimey, that's an 07 isn't it?"

The engine in question certainly looked like an ex-BR Class 07. Admittedly it is painted bright blue but then it's only paint.

A little digging on the web and it looks like I'm the only person who thinks this. At least Rail-news.com and the writers on Flickr just list is as a Ruston-Hornsby loco so maybe I'm wrong. Perhaps it's a bit longer at the back. The photo above would appear to show a jackshaft drive.

If I were to try and model it, I recon a Silver Fox kit would do the job if you didn't fancy the full-fat Craftsman etched brass version anyway. Stick it on a standard 03/04 chassis and you'll be about right.


Wednesday, December 12, 2012

Book Review: Flying Scotsman by Andrew Roden

I've never really got Flying Scotsman. Yes it's a nice looking steam locomotive and if you like main line express engines, then it's as good as any other. Why then do people go gaga over it? What causes mild-mannered middle aged gentlemen to pour vitriol over those at the NRM currently restoring the machine with the same fervour's that religious lunatics dish out to those who read a different holy book?

Andrew Roden didn't "get it" either, or at least, so he claims at the start of the book.

In 236 pages, he tells the story of this most famous engine from birth to purchase by the National Railway Museum in 2005. It's quite a story too. What could have been just another green engine came to prominence at the 1923 Empire Exhibition when displayed in an age when a steam engine was the cutting edge of technology.

At the show, a young Alan Pegler was entranced by what he saw and after a career in the RAF followed by the family business, he saved the engine from scrapping by British Rail.

The story isn't just about a single steam engine, it's set against the background of changes to the UK railway scene with the run-down of steam and focuses a lot of the characters involved and the adventures along the way. There is jeopardy when Scotsman is nearly trapped over in America, controversy at some of the business practises of those who have owned her. It's a roller-coaster ride!

As with Roden's later books, this can be read and enjoyed by non-enthusiasts and railway nutters alike. There's some technical stuff but it never gets in the way of the story which rattles along at a decent pace.

What would be nice is to read an updated version in two years time. At the moment, Scotsman's latest restoration is bogged down. Once she emerges, I can see a lot of people would like to follow the latest part of the tale.

So, do I now "get" Flying Scotsman? Sort of. I don't suppose I'll ever be a big engine man, and I think the lunatic fringe of the fans are, well, lunatics really, but it certainly has a story worth telling.

Flying Scotsman - The Extraordinary Story of the the World's Most Famous Train at Amazon

Tuesday, December 11, 2012

Weathering the van

WeatheredVan

Railway models, in my opinion (and it's MY blog so that's what counts around here) must be weathered if they are to look realistic. The prototype was clean for about 20 minutes and even then didn't look as toylike as a freshly painted miniature.

I didn't wan to break out the air bush for this model as I had a set of brand new Humbrol Weathering powders to hand and wanted to give them a go.

The process began with a light dry-brushing of the underframe with dark grey and rust coloured enamel. This highlights the high-points of the detailing and edges of the mouldings.

Next, some Railmatch underframe dirt was thinned and tricked around the door edges and metalwork.

Finally I worked over the whole model with the weathering powders. Two shades of rust bushed on to the bodyside metalwork and a little on the black underframe (it shows up more on the later so I use less) then some dark earth in the same areas as the underframe dirt as well as a gentle dusting over the entire body.

Finally, smoke colour over the roof and higher parts. This is a really nice colour - not black but a good match for sooty muck.

The powders stuck very well, better than some I've used in the past. Despite this I've sealed then in with a distant blast of Testors matt varnish. That didn't remove them so I guess it will be OK.

Now my wagon has character. You can see and appreciate the detail. It's taken more effort than a 4mm van would but then the larger scale demands more time on each model. When you are paying over 20 quid for a kit though, you want to spend plenty of time working on it to get some value for money.

Monday, December 10, 2012

Waterslide and Presfix are NOT the same

WobblyWordsIf I'd bothered to read the instructions Parkside kindly provided in their kit and not just looking at the pictures, I might have realised that the excellent transfers were Presfix and not Waterslide.

This makes a difference because if you cut the transfer out of the sheet, drop it in some water and then try to transfer the lettering to the wagon body, the letters go all higgledy-piggledy as you can see. Worse, poking the letters with a wet paintbrush or dragging them around with tweezers doesn't work. How they became so stuck the side I don't know but I can honestly say the bond is one of the strongest I've come across in my model making career.

The correct way to deal with these things is to cut through the transfers and peel the backing sheet and letters away. Turn them over so you can see the words the correct way around and then press the whole lot onto the body. Assuming they look to be in the right place, swash water over the backing sheet and it will lift way leaving beautiful, film-free lettering.

Simple when you know how.

Freshpaintedvan

Mind you, a cleanly painted model does look boring doesn't it?

Sunday, December 09, 2012

Lego VW Campervan

Camper1

I have to thank Matt Dawson for the contents of this post. He is clearing out his collection a bit and e-mailed me to see if I'd like to take some of it off his hands. The item in question was a Lego model of a VW Splitscreen campervan.

Of course I aid yeas and on Monday, we met up in central Brum where this marvellous vehicle became mine.

The kit was produced by Lego earlier in the year. It's a serious model made up of 1334 pieces and requires 2 A4 sized instruction books to show the potential owner how to build the the model. Matt had been through this, saving me several hours. Admittedly, by the time I got the model home, I had to re-read some of the diagrams to repair the damage boxing and carrying the van had caused. I'll be honest and admit that one day, I'm going to have to take the model to pieces completely and build it myself. That can wait until I have a spare weekend. In the meantime, I'll just enjoy Mr Dawson's handiwork

Camper3


Designing this model must have been a heck of a challenge. A VW isn't a simple, Lego-friendly box. There are lots of curves to contented with. The designer obviously wanted to go to town too so we get a pop-top roof and all the doors open. There's even a little engine in the back!

Inside, a rock'n'roll bed can be made from one of the seats. The wardrobe opens to reveal a t-short bearing the legend "Make Lego models , not war". Details including hairbrushes, lava lamp and wine glasses are included to make your campers feel at home.

Camper2

Now, I've often through that being a professional Lego builder must be a dream job. Spending all day assembling fantastic structure from little plastic bricks just sounds fun. I bet though, that like any job, much of it is dull and repetitive. Yes, there is the joy at seeing a giant advent calendar on display at Covent Garden in London, but I bet most of the work involves planning out the project, estimating the bricks required and costing how long it's going to take to build.

Lego Advent Calendar


Saturday, December 08, 2012

Bad Boy Bauxite

BauxiteProper modellers will chose paint based on either the colour description on the side of the tin, or compare the lid to a reliable photographic source.

I'm not a proper modeller.

As far as I am concerned, bauxite is a sort of rusty colour. Looking at photographs, the stuff never seems to be the same shade between different wagons. When I brush paint, I used Humbrol 70, Brick Red. For this wagon, because it is larger and I wanted to get on, a can of Halfords red oxide primer has been sprayed on.

The results are, to my eye, pretty good. The paint finish is smooth an even. Those corners have come up nicely so the filler works well. It will be finding a more permanent spot on the bench.

Anyway, the colour looks fine to me. Eventually it will become filthy and no-one will notice. Well, except those who spend all their time worrying about such things and don't do any modelling...

Friday, December 07, 2012

Tidy corners

TidyCronersDespite both mine and Parksides best efforts, the LMS van corners didn't look like rolled metal. The two parts met but there was a definite line down each one.

On my workbench, there is a new tube of Deluxe Materials "Perfect Plastic Putty". I don't get on with fillers generally but thought I might as well give this a go.

The results are pretty good. The mixture itself is runnier than I had expected. Despite looking a bit toothpaste, it's smooth and flows well. Squirt out too much as you can even suck it back into the tube. I splodged some onto a bit of the modelling mat and worked it into the crease with a knife blade.

The filler dried quickly - not that surprising as I was using minuscule amounts - and seemed to stay stuck. It doesn't appear to dissolve in plastic glue so there isn't any benefit to brushing Mek-Pak over it. Reading the tube, it suggests water clean up so maybe a wet finger would work.

In my case, a quick rub with a sanding stick looks promising. We'll find out tomorrow when the paint arrives.

Thursday, December 06, 2012

Body Building

Body BuildingBuilding a van isn't difficult in either 3,4 or 7mm to be honest. Stick the sides around a base and that's it.

Parkside generously include both instructions and an exploded diagram in with this kit. I like pictures so guess which one I went for?

One odd-ball is that if you do things properly, the body is built before the chassis. However, the ends of this fit into the recess in the bufferbeam backs. I suppose you could bend the solebars to do this, although I wouldn't fancy your chances. I had to trim them a bit even with my reversed build!

Wednesday, December 05, 2012

Parkside chassis - making the axleboxes move

Wheel Waggling

The biggest surprise I felt when I built my first Parkside Dundas O gauge wagon kit many years ago, was that the axleboxes are designed to move in the W-irons. To be honest, I've never been sure why they bothered with this - the larger scale wagons are a lot heavier than their 4mm brethren and thanks to a thick plastic floor, pretty difficult to make up wonky.

This isn't proper compensation - if it were, there would be a fixed axle and the other would rock around a centre pivot - however I'm sure it improves trackholding. You could convert it to normal compensation easily enough should you want to but here, I can't be bothered. That experiment can wait until I glue up the moving parts solid one day. Than I'll claim it to be science.

Anyway, each axlebox is made up of three parts; two plastic and a brass bearing.

Construction starts by making sure the rear part slides in the W-iron. If it doesn't file and scrape away plastic until friction-free movement is acived.

Then pop the bearing in. Add a dot of superglue to the top and cap this with the outer axlebox. The unit should still slide up and down, if it doesn't take it to bits immediately. Leave the parts to dry fully and have another go.

Three of mine work OK, the fourth is a little stiff but moves enough to work with the weight of the wagon on top.

Tuesday, December 04, 2012

What I made at Warley

Van Chassis

A wise man once told me the sign of a good demonstration at any model railway show is that you get next to no modelling done. Anyone who says, "It must be great to have a couple of days modelling time." doesn't understand why you are there.

A good demonstrator spends all the show talking to people and answering questions. If this is true, then I was a good demonstrator last weekend.

Digging through the cupboard and wondering what to take along, I found a Parkside Dundas O gauge kit for an LMS Ventilated van. Just the job - I knew it would go together well and be suitable for picking up and putting down at a moments notice when a visitor arrived.

Saturday saw the floor taken out of the box. I cleaned up the feed gates from the side.

Sunday started a lot more slowly. Being on the far side of the hall from the entrance and more importantly, the Bachmann stand, I have half an hour to kill. Even then the chairs opposite me were sometimes empty. I managed to assemble the chassis and add it to the floor.

I could stick the bits back in the box and take then next year but as I will be needing some O gauge stock, I think this one will get finished during the week. I'll post some progress reports.

Monday, December 03, 2012

Leamington & Warwick MRS on TV

If you are quick, and stand the adverts you are forced to watch, then there is some nice footage of my local model railway club to be found on the ITV player here:

Leamington and Warwick Model Railway Society on TV (Look for the 1st December 2012 episode)

The action starts just over 30 minutes in but you can shove the on-screen slider along to skip the first bits if you want.

Please ignore the commentary, it's mostly wrong (club night is Thursday, not Friday) but enjoy the pictures which are well filmed for a one-man crew.

The film is part of a holiday programme that covers the farm that the club calls home. Getting in on this was handy and provided what I think is the highlight of an otherwise run-of-the-mill show. Naughtical fans might enjoy the boat club a few minutes earlier and the tractor collection (with me playing "Machine mad man with camera" because there weren't any holiday makers to do it) before this.

What I found interesting was just how much footage the cameraman took. For our 3 minutes of fame, he had the best part of 2 hours in the can. With all these little production companies able to do this on the cheap, it makes you wonder why daytime TV isn't full of shows covering peoples hobbie's?

Sunday, December 02, 2012

Warley Part 2 - Sunday

Sunday morning started cold but with clear skies. Today was a car journey as I didn't fancy trying to bring all the stuff back on the train. Heading through Kenilworth there was a bit of a flood on one road but it was only to kerb height so we drove down the middle of the road without incident. The news might have been full of floods but these weren't anywhere near the Midlands, or so I thought.

Having passed through Balasll Common, I did spot that the dual carriage way in the opposite direction was under water but our side was fine. Except for the final few feet before the Stonebridge roundabout. Before me was another bit puddle. On one side an AA van was recovering a car facing in the other direction.

The car in front of me slowly made his way through and from this I judged the water just about shallow enough to cross. To be honest, I didn't see what my other options were, you can't turn around and the only side road lead who knew where?

Revs kept up and speed down, we made it through fine. Approaching the NEC though, I noticed that the engine note was deeper than normal. Parking up, I looked under the back of the car and realised wading through the flood had pulled the back box off the end of my exhaust. All the bits were there but not connected.

Suffice to say, I was not happy. Being stuck with a stand 20 miles from home did not bode well for the day. However, it is the sort of thing I hand the RAC money every month to sort out. Back in the hall, a quick call put the fix in motion. I made it clear that I wasn't any sort of priority, after all, we were in a car park and not planning to move until 5pm anyway.

Breakfast today was double sausage, I didn't fancy risking eggy shirt again considering my luck earlier. Very nice though.

Perpective ModellingA little more wandering before opening time allowed me to see a fascinating Dutch moving diorama which employed perspective modelling. The owner explained, with the aid of diagrams, how he managed this. Aside from the clever use of dept, the modelling was superb. I was also very tempted by a working 4mm scale cyclist kit but mindful of an immanent bill for car repair, my wallet stayed tucked away.

Show opening saw a slow start for us. I actually built much of the wagon chassis before settling down to chatting. Chatting that was interrupted by calls from the RAC alerting me to the progress of my repairman. I'm sorry if you caught me during one of these - I couldn't do much about it.

Anyway, about 11, a man in van was on the way. He called from the car park (I'd alerted the parking guys that he was on the way) and by the time I got to him, the back of the car was up in the air with a new clamp being fitted to re-join the exhaust parts. Despite my crusty middle pipe, he patched it up and I was back in the hall in time to head to lunch at 12.15. Excellent service from the RAC there.

Spud dessertLunch seemed better organised and I scoffed a jacket spud. We were all mystified buy the mention of a one potato dessert on the menu, especially as the puddings were yoghurt's and muffins. The former tasted of strawberry so I can only guess at the muffin ingredients...

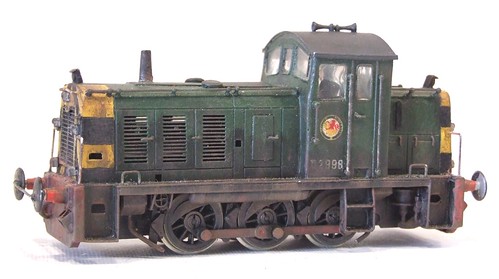
The afternoon was as Saturday morning. Lots of chat and a few more signings. Today's topic was the Class 13 diesel conversion


I kept trying to explain how simple a job this is, especially with the aid of a copy of Parker's Guide (still available for sale) and the bits from RT Models, who were at the show.

There was even a bit more wandering. I kept my hands in my pockets as there wasn't anything I really wanted. Well, apart from one stand which had some Triang building kits I'd never seen. And 2 Giraffe cars and a Slaters Hudswell Clarke kit in O gauge. And a boxed Hornby steam rocket coach.

OK, I could have spent loads. As it was my total purchases apart from food were a set of smokebox clock hands from RT Models for 30p.

So, it appears the way to save money at Warley is to be a demonstrator. You don't get out much and the entrance is free. Mind you, it's hard work. We were both tired when we got home, that's what sitting around and gassbagging all day does for you.

Thanks to everyone who came up for a chat, especially those who took the time to say nice things about this blog, my magazine wittering and MREmag. To me this is what shows are all about, a chance to put names to e-mail addresses or Tweets. I hope you all had as good a time as I did (apart from the exhaust thing) and look forward to seeing you in the future.

My photos on Flickr.

Saturday, December 01, 2012

Warley Part 1 - Saturday

Modelling board

Advance ticket holders being let into the show at 9.15 meant a very early start for the Parker's Guide team. 7.12 from Leamington station saw us 7.45 at Birmingham International. At this point, normal railway modellers would head straight to Hall 5 to wallow in toy train goodness. We took the Air Rail service to the airport.

We mooched around and watched planes come and go a bit but eventually headed back, arriving in the hall about an hour before the first punters were due in. Even then there was a decent crowd and I had to resist the temptation to say loudly to my Dad, "It's a shame Bachmann dropped out of the show this year." The shock would probably have killed half of them...

Instead we nipped out the front of the building to take a look at the mock-up of Spaceship 2. It's an impressive full sized model but the grass around it is covered in dog mess. Not just the odd bit but several tons of the stuff turning a bit of (space) plane spotting into a crazy dance dodging the smelly stuff.

Egg and Sausage bapBack at our stand, we were still too early so wandered over to the restaurant where there were queues of modellers including at least one we recognised. Breakfast was served - those being put up by the show were being fed in the hall as the start was too early for the hotels. The rest of us bought rolls anyway, I had a delicious fried egg and sausage which I managed to scoff without covering my lovely Hornby Magazine polo shirt with yolk.

You'll be pleased to know we did get started and actually open up our demo but to be honest there isn't much to say about this. I spent most of the day sat talking to people. My Dad acted as back-up and chatted to visitors as well, after all, I can't yak to more than one punter at a time.

Popular subject of the day was the Skytrex based factory building. It was picked up an examined many times and hopefully a few people then headed to the other side of the show to look at the manufacturer and buy some bits. Late in the day, a friend connected with one of the main model railway manufacturers looked at it and said that a ready to plan resin model would cost around £100, so at half that, plus some enjoyable work, my model was a bargain.

Skytrex Factory

To be honest, I can't say I got out much during the day. An unsuccessful (thank you NEC caterers) attempt to get some lunch allowed me to walk a loop around the hall but crowds were such I didn't really see anything.

There was one special moment - I signed a copy of "Parker's Guide". This makes me a proper author. So proper in fact, that I signed 3 more during the rest of the day. It sounds a bit smug but this was really special. (OK, I'll shut up about it now).

At the end of the day, we walked back to the station, glad to avoid a dark and wet drive home, to find the train we should have caught if I'd looked at the timetable, had left 3 minutes earlier. The next one was an hour, and another trip to the airport for a drink, away. Delayed 20 minutes and full of merry football fans, one of whom didn't comprehend that when everyone is crammed into a vestibule, wearing rucksack should be a capital crime.

And the sum total of the modelling? I had cleaned the moulding pips off the side of a floor for a 7mm scale van. My assistant had removed a part from the fret of a cardboard building. That sounds like a succesful demo!

Warley photos on Flickr