Showing posts with label Chairmans Challenge. Show all posts

Saturday, June 18, 2016

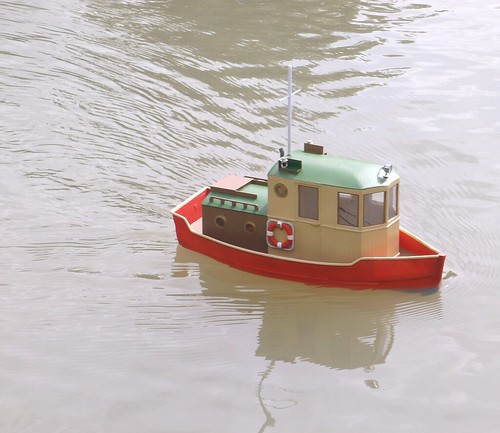
Cassiopeia sails!

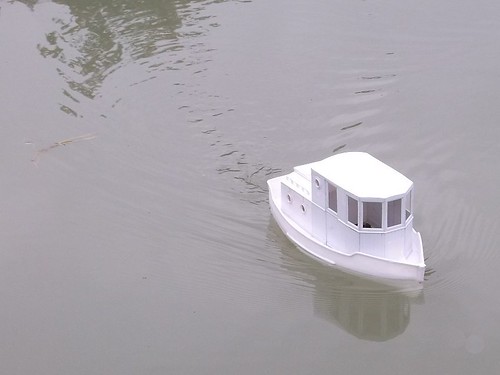
Cassiopeia sails for the first time.

A rare sunny moment on Thursday saw me finally sail my latest model boat - and I'm pleased to say that it has turned out very well.

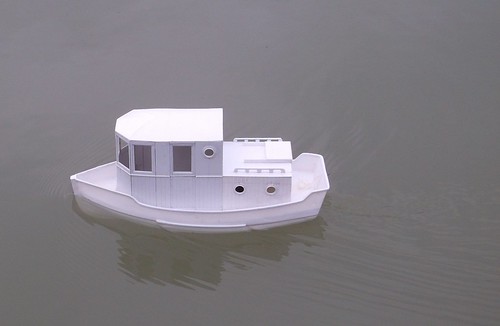
Almost silent on the water, it tootles around with an nice range of speeds, from scale a couple of notches up on the transmitter to get out of trouble at the top. Tweaks to the weight distribution mean that at full tilt, the bow rises slightly rather than digging in and eating part of the lake!
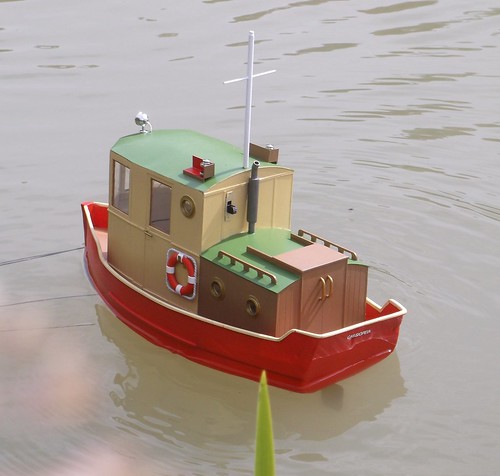
Cassiopeia sails for the first time

A squirt of grease up the propshaft seems to have cured the very minor water ingress too. Radio reception is fine everywhere on our admittedly small lake.

All in all, a good Thursday morning boat. I might not have won any prizes, but I have made something very usable and that's a success in my book.

Talking of the competition, the torrential rain rather messed this up apparently but the winner, and a boat I wouldn't hope to beat for ingenuity or attractiveness, was built by Ken (no relation) Parker:
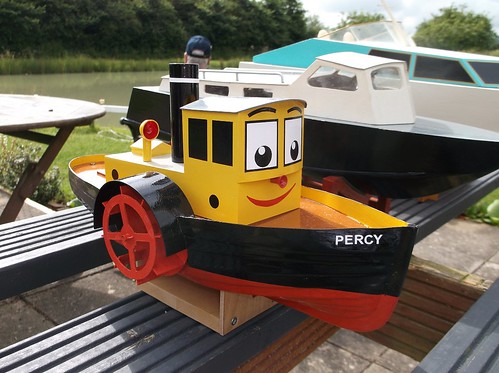
Percy the paddle steamer

Saturday, June 11, 2016

A boat project meets the deadline

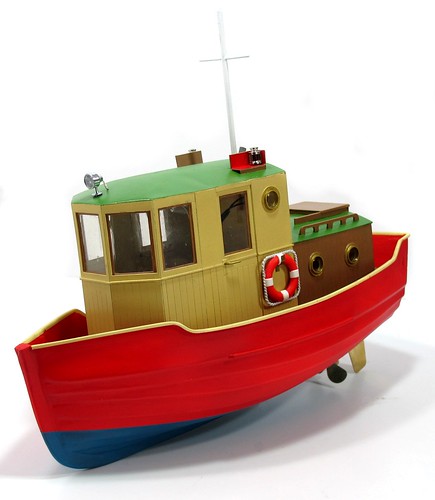
Red boat front

I'm pleased to say that my "Chairman's Challenge" boat is ready for this weekend's KMBC open day.

As you can see, the colours chosen will stand out on the water, I'll be able to see the model from the other side of the lake. My choices are based on a prototype photo showing a red hull and blue anti-fouling paint. The cream wheelhouse and brown rear cabin are my idea and the green roof - well I'd originally thought grey but once the colours were laid on, the model really needed a "prettier" colour.


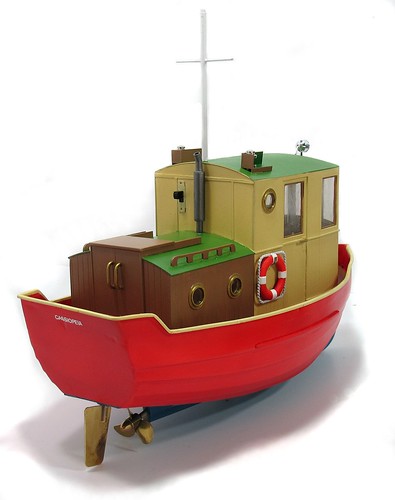
Red boat rear

At the back there is a stainless steel exhaust. This is painted with Mr Hobby colour and the portholes are Darkstar "Molten metal" brass. A final spray with Humbrol satin varnish brought all the colours together and also made them "zing" a bit. 

Navigation lights and a spotlight came from the spares box and can be made to operate. At some point I fancy trying a radio controlled switch so I can operate them from the handset. These 2.4ghz sets all have at least 5 channels and I'm only using 2 at the moment.


There is only one slight snag. Thanks to a double booking, I can't make the open day myself and thanks to my father feeling under the weather, he's not going either, so the model can't be entered in the competition I built it for! 

Never mind, I enjoyed the build and hopefully have a very useful "Thursday morning" boat that can be sailed at a moments notice if the weather looks nice.

Friday, June 10, 2016

Ruminating on Humbrol paint


Sage advice for model painters is to buy fresh tinlets when performing important work. This is what I did, but the results weren't what I expected. 

I'm a "man of the people" style modeller. No fancy pants paints for me if I can help it. Humbrol is readily available in many high streets and I like to think that my model-making brothers and sisters will feel confident when looking at my projects if they can buy the same materials easily. 

That and I rarely remember to buy the fancy stuff but there is a Humbrol rack in my local shopping arcade and I raided this for new tins fo all the main colours I planned to use.

The first colour to be sprayed was 103 Cream. Taking the top off, it was a tar-like consistency. With loads of thinning (white spirit) I managed to get it through the Iwatta airbrush but I'll admit it was a shock. I like my paints on the thick side, one reason I've never been keen on Revell as it is thinner, but pale bunker oil? No thanks. 

The 118 Brown was fine, although I wouldn't want it any thicker. Blue and red were perfect, as was the green, which I'd bought years earlier and half used. 

A spray can of satin varnish lasted 3 squirts before gumming up. What I got out did seem very thick. 

Come on Humbrol, I want to love your paint, but you do make it hard sometimes!

Thursday, June 09, 2016

I name this vessel...


Cassiopeia. 

Thanks to Anonymous who suggested that the boat ought to have a name plucked from the original series of Battlestar Galactica as I watched the box set during the early stages of the build.  

It's certainly better than my first thought - "Mini McBoatface". 


Cassiopeia (Biog on Wikipedia) was played in the series by the amusingly surnamed Laurette Spang. There was also a vain Queen in Greek mythology and a constellation in the northern sky. 

Naming is as usual, vinyl letters 3mm high aligned over a printed name. I'd have preferred something about twice this size, but these were to hand and I wanted to get on with painting. More on this tomorrow. 


Tuesday, June 07, 2016

First sail


First Sail

On a quiet, but dry, evening last week, my dad and I snuck down to the model boat club to test our challenge boats. No-one was around so we switched on the transmitters and launched. 

While I'm not telling you about his, my model went very well. It sat nice and level for a start. It didn't sink (always good this one). 

Starting up, the model moved off pretty sharpish. The big propeller gives it a fair turn of speed. In fact I didn't dare take it all the way as the bow wave threatened to swamp the deck. Give it a couple of notches on the controller and it's perfectly happy. 

I'm thinking I'll be taking a bit of weight out of the bow just to tip it backward slightly. Although it's not digging in, I'd like a bit more hull above that bow wave. I'll certainly not be making holes in the front for a anchor chain!

First sail 2

Monday, June 06, 2016

Time to put on weight


Time to get the Chairman's Challenge boat on the water, and that means this pudgy little hull needs some weight to get it down to a sensible level. 

Fortunately, the kitchen sink is plenty big enough, both in length and depth (bathroom sink is too shallow) as well as being handy for worktops allowing all the lead mangling equipment can be close at hand.

To lower the hull took a heck of a lot of weight. 834g according to my scale, including a jelly cell battery. At least it should ride the waves well on the pond. 

Talking of which, take me to the water!

Friday, June 03, 2016

Make it again Phil


Yesterday's post showed the back end of my model boat. You might have noticed the handrails. 

These are supposed to be (as far as I can tell) made from a single piece of wood in real life, and on the model they are made from a single bit of 60 thou plastic sheet. 

Attempt 1 wasn't quite right. The methods was fine, make the pieces with the legs facing each other on the sheet so speed up marking out. I'd even worked out that the curved inner corners could be produced by drilling holes. What I didn't do was drill enough. Trying to make them along the join line left me with handholds too shallow and a top rail far too deep. 

One of the best bits of advice I've ever read came from an old issue of Railway Modeller. Someone said that when making things, if you aren't happy, do it again. You might think you can live with the error, but over time it will niggle at you. Far better to bin the part and do it again. 

Which is what I did. The dimensions are the same, I just drilled twice as many holes, further apart. And now I'm much happier. 

Thursday, June 02, 2016

Back entrance


At the back of my boat, there is an entrance to the rear cabin. It's not very tall so a normal door wouldn't do the job. 

Instead, there is a door and above this, a sliding hatch. The go inside you slide the hatch forward and then open the doors and walk down the stairs. I assume once under cover, the hatch has a handle inside so you can slide it back again. 

In model from, this is all created from plastic sheet. The key is to understand how this stuff works so the runners are long enough for the hatch to move all the way. Either that, or look at the plan properly, but since I'm adapting a plan to fit an existing hull, that's not so easy. 

Besides, I like knowing how things work. I'm curious like that.

Tuesday, May 31, 2016

Front end filler work

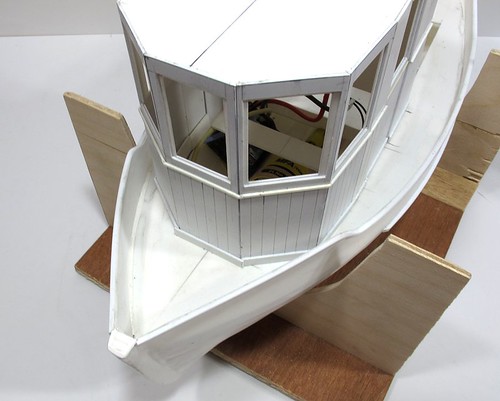
It's all very well having a curved roof, but at the front of the wheelhouse, it needs to slope down.

I cut ribs from plastic to join the front to a central point. Next, 2 layers of 20 thou plastic sheet were curved and fitted to the ribs. I'd hoped that the thin sheet might bend in enough directions to fit in one go, but no.

In the end, I choped away a triangle at the front. This was filled with some lightweight model filler with all the constancy of loose marshmallow. It's sold to aircraft modellers, but I'm told you can buy it by the bucket from Wickes. Probably for a lot less money.

Not happy that this was hard enough, I then skimmed it with Deluxe Materials plastic putty. This was sanded, recoated, sanded, recoated and then sanded and recoated again. I think I'm not happy with the results. At least until I paint them anyway.

Monday, May 30, 2016

How to draw a gentle curve

A large boat roof is a challenge. I wanted a gently curved profile but struggled to draw this on a sheet of plastic.

It's too large for compases and I needed something larger than a dustbin lid (remember them, before wheelie bins) and nothing suitable was to hand.

Mt dad suggested I try the roof from a G gauge tram loco kit. He was right, it's pretty much spot on. Close enough for my freelance model anyway.

This made me think - if I took a piece of brass trip and feed it through my rolling bars, templates for any curviture would be easy to make.

I'll remember that next time.

Tuesday, May 24, 2016

Successful scratchbuilding just takes good bodging

Wheelhouse Trim


Making models from scratch is a concept that terrifies people, but it shouldn't

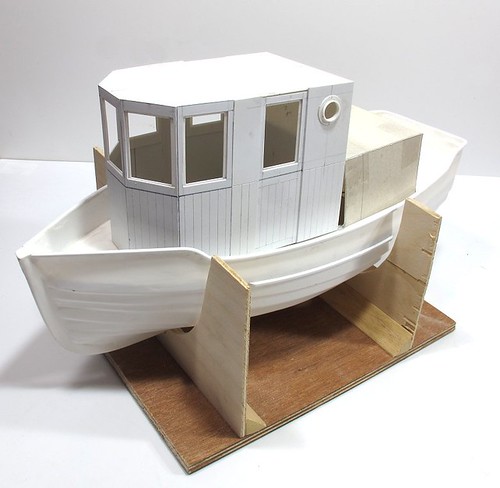
The photo illustrates some bodgery that has helped my boat look good. When I fitted the wheelhouse, I knew that the front edge would need to be cut away to compensate for the rising deck at the front of the boat. I should have allowed for this as I assembled the panels, but I didn't bother.

Cutting away the bottom of each was a bit trial and error as the rise isn't consistent thanks to the less than perfect hull. No matter, I just kept trimming until the wheelhouse sat upright.

Along the bottom, the cuts were less than perfect but some strips of plastic added a little decorate trim and made it look perfect. Each was cut over-long and cut or filed back, the front piece awaits this. Of course if you look inside you can see the errors but since no-one can, it doesn't matter.


Monday, May 23, 2016

Burning the midnight oil

Wheelhouse

When I get into a project, I really get into it. This photo shows the state my boat was in after midnight a few days ago. 4 hours work while a succession of Battlestar Galactica episodes (the original one when it was space ships and bad acting rather than alluding to stuff and CGI) played at the end of the bench.

It's great when a project really grabs you. Working away with the plastic sheet and watching something appear on the modelling board as the parts come together is just brilliant. You can't get that sort of feeling from just buying a model, you have to craft it yourself.

Along the way, I took advantage of plastic's ease of use. There were mistakes such as putting the portholes too low on the ends and forgetting to make the short panel in front of each door, but these were quickly rectified. By the time I made myself go to bed, I was really pleased with my efforts.

Friday, May 20, 2016

No panic, just let me at the plastic

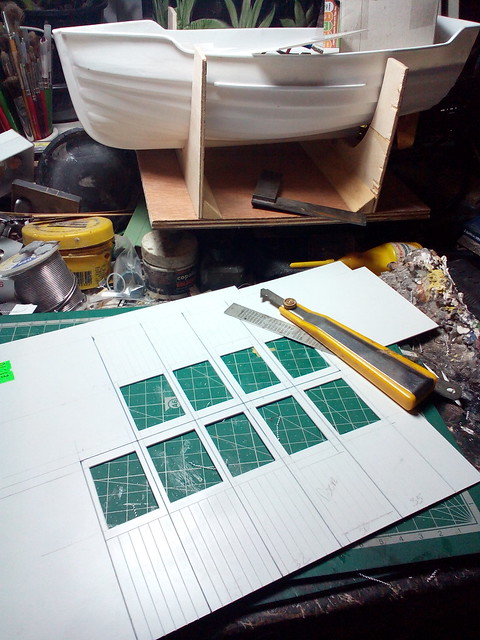
Plasticard noodling a wheelhouse.

"You realise it's just over 3 weeks to the boat club open day don't you?"

My dad has been looking at the calendar. He's right. 3 weeks until my chairman's challenge boat needs to be ready and it's only a hull with a deck and some cornflake packet superstructure. 

Which is why I spent a late night scoring and cutting the wheelhouse sides, aided by a box-set of the original Battlestar Galactica. Maybe if I'd paid a bit more attention I'd have spotted that two of the panels should have portholes and not windows in them...

Mind you, I found a lovely picture to provide me with some paint colours.


Can you believe you can buy the plans for this REAL boat for $15? That's cheaper than model plans!

Friday, May 06, 2016

Bulwarks!


I'm quite pleased with this. Now the deck is fitted and level, I can work out the bulwarks - that is the sides of the boat above the deck that either keep water out, or in depending on how high the waves are.

As I'm not using the hull as the manufacturer intended, I need a new top line with a bit of shape.

The length is a bit longer than a single cereal packet but by sticking two together, I was able to make a template for the cut. Using it on both sides should result in symmetry. Incidentally, the card from Weetabix "Crunchy Bran" is much better quality than Sainsbury's own brand versions.

A few lengths of 2mm square styrene strip finish off the top edge and look better than trimmed plastic which is too thin. It adds a bit of strength too.

Thursday, May 05, 2016

Wonky deck


Trust nothing. I foolishly used the plank lines on the vac-formed boat hull as a guide when fitting the deck. As you can see from the photo above, it's wonky. Quite a bit wonky.

Removing the deck (Hint: Soak the joint in Plastic Weld and peel apart gently) and then using a big pair of dividers (thanks Grandad) to measure the distance from top of the hull to top of plank line and the problem becomes obvious.


I don't know how, or why, but the plank lines are wrong in the rear corner. They climb back up to the same level as the other side half way along the hull which is even weirder. Someone at the club had commented the hulls weren't symmetrical but I'd assume this was a just the typical vac-form hull errors (see past abandoned projects) and only occurred between the two sides, not along the length!

Putting in some new plastic support along the true line solves the problem and gives me a nice flat deck, but it's a problem I hadn't expected. 

Tuesday, May 03, 2016

Cabin V2

Cabin Number 2

Finger pulled out, progress on my Chairman's Challenge boat starts again. 

The first job is to build a new mock up for the superstructure as the first version wasn't a complete success

I liked the front windows so these have stayed but the new design has all the panels the same width, including the door which had been far too narrow before. Since this is supposed to be a sliding panel, the section behind had better be wide enough to accommodate it too. 

The proportions are a lot better. I'll need to make the back cabins about 15mm longer to balance the look but just by placing the cardboard creations on the deck, i can see this is much batter balanced and closer to the prototype I'm sort of basing it on

Sunday, March 20, 2016

Chairman's Challenge boat sails

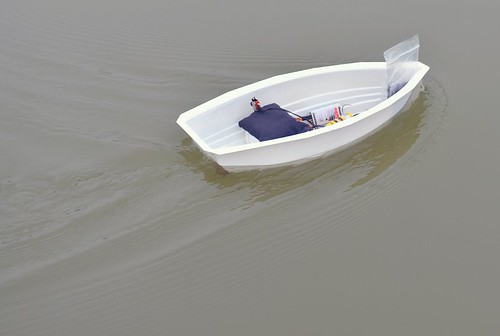
Chairman's Challenge hull on the water

Better weather means more time sailing boats and one on the list to see afloat is the hull I'm working on for the Chairman's Challenge this year.

With the mechanical gubbins installed, I tested the hull in the sink and as suspected, it's very buoyant. A couple of bags of lead shot were needed to bring it down to waterline.

On the water, the model sails really well. The hull is lovely and with all that weight, pretty stable even in tight turns. I could have used a smaller propeller as it needs no more than the first couple of notches on the transmitter for a sensible speed.

All good anyway, now to get back to the superstructure.

Friday, February 26, 2016

Elastic motor mount

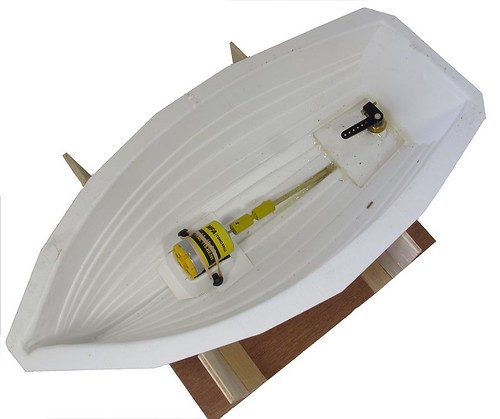
Boat mechanism

Some new (to me) kit being tested here.

From SHG Models we have a vac-formed plastic motor mount suitable for 380 sized units. It arrives with a pair of black plastic bungs that are to be fitted in holes drilled in the sides.

The motor sits on a bed of sticky-backed foam strips and is held in place with a fat elastic band wrapped around the bungs.

I'm not sure about this. Will the motor try to rotate in it's mounting? Would a blob of silicone sealant be a good idea to "glue" it into place?

This isn't a speedboat for for the moment, I'll assemble the mount as expected. I can't always come back with glue later.

Another new piece is the universal joint. This is made in three parts that aren't actually fixed together. The shafts on the motor and prop are only 2mm diameter so I wonder if this might have applications in the model railway world for O gauge and above models?

Thursday, February 25, 2016

Now cut a big hole in the hull

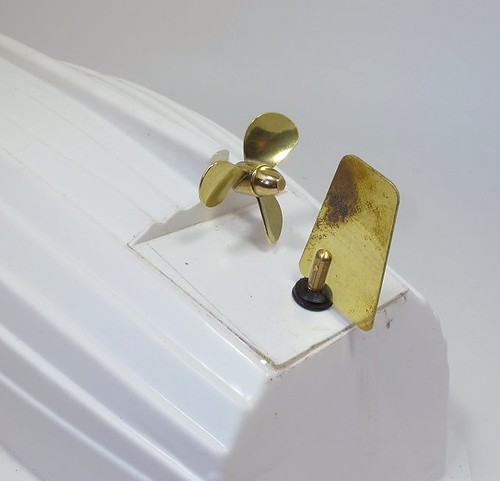
Prop and rudder

Normally, model boat building starts with holes being made in the hull for the propshaft and rudder. With that challenge model, the biggest problem is that there isn't anywhere to put these holes.

The hull appears to be a clinker built dinghy so no provision is made for powered drive.

To fit this in, I had to hack a great big chunk out of the back of the hull and fill the holes in with plastic sheet. My plan involves a 40mm diameter propeller and some rough measurements showed this could fit with relatively little effort if the prop tube emerged from the keel.

There was also the rudder to allow for - this could have hung on the back but fitting to the bottom is easier.

The photo makes the angle of the prop look steeper than it is in real life. Ideally you want all the thrust to go backward but some downward is normal so the tube can be angled up into the hull to find a motor.

A brass propeller looks nice by the way but is ruinously expensive for a "fun" project at 13 quid or so. Sadly, Graupner who make plastic props went into receivership in 2012 so supplies of the cheap version are disrupted.

Tuesday, February 23, 2016

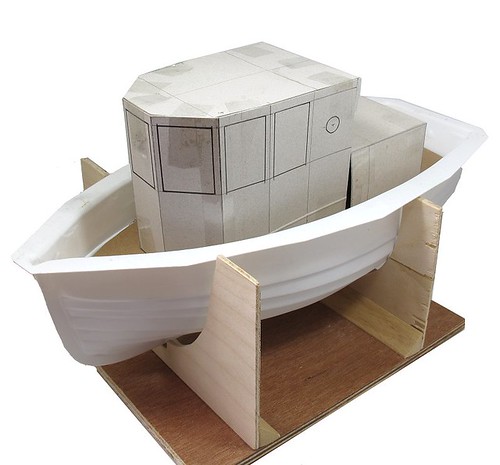
Cereal card mockup

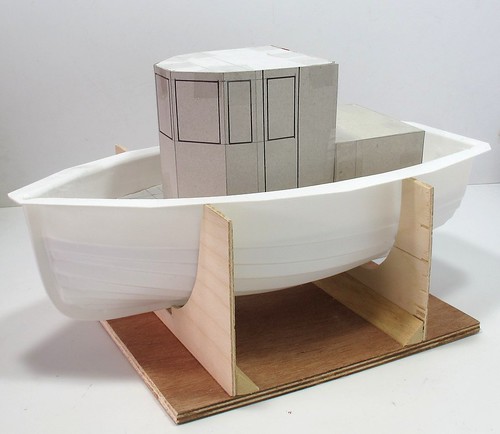
Mocked up superstructure

Out with the cereal packet card and sellotape.

An hours messing around produced my first mockup for the superstructure.

Having looked at the model for a while, my feeling is that while the bridge is the right size, it's too central in the hull. If I move it forward a bit I think it will look a lot nicer. More sticky tape I think...