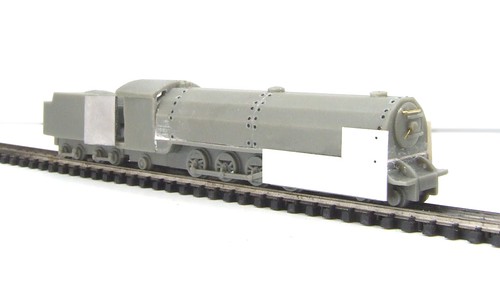
The armoured loco looks nice but I felt, lacks the detail present on the carriages. Not to worry, I could do something about this.
Starting at the front, the central smokebox handle is a nice moulding with descent undercut (RTR manufactures take note, it can be done) but lacked the second handle - easily added with 0.3mm brass wire. Above this is a moulded handrail that went in the bin to replaced with a brass item. I think the "face" of a loco matter so don't mind a bit of effort.
A drill bit stuffed down the chimney opened this out - it wasn't blind but hole only extended a couple of mm. Now it goes a lot deeper as the resin is lovely and easy to drill.
The cylinder & valve gear covers were a separate plate on the prototype and while the moulded version was OK, thin plasticard is even better.
Finally, the casing is covered with prominent bolt heads. You need to be careful here as the original loco sported much chunkier lumps than the recent full-size replica. This gave me the opportunity to try out some Archer resin transfers bought a while ago.
These are 3D lumps applied on transfer paper. To use, cut them out of the sheet, soak them from the back and apply. A wash of MicroSol helps them stick to the body. A more thorough de-greasing would have probably helped further as I still managed to lose half-a dozen.
If you really want to go to town, cladding the resin boiler with think plastic or metal would be even better. The sheets on the prototype showed clear gaps around the dome and safety valves. I thought about his and decided against. Not sure if that was the right move. I did score the vertical line half way along the casing though so I'll let myself off.
No comments:
Post a Comment