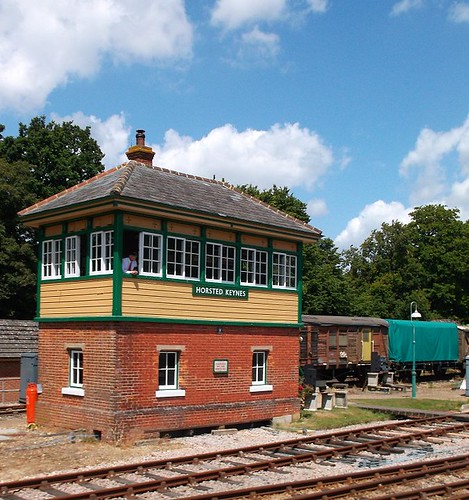
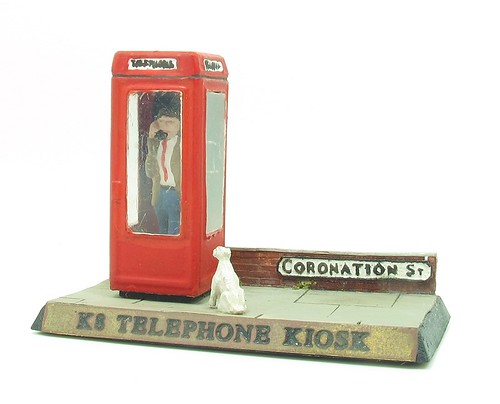
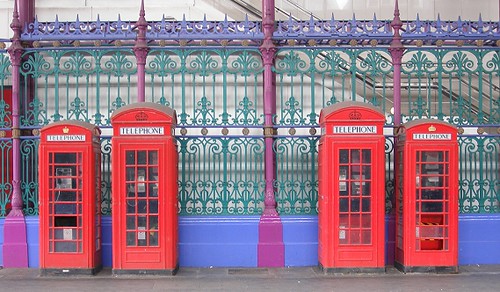
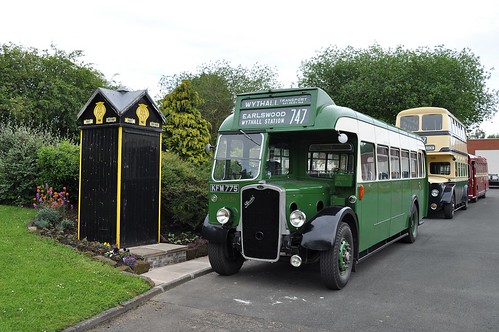
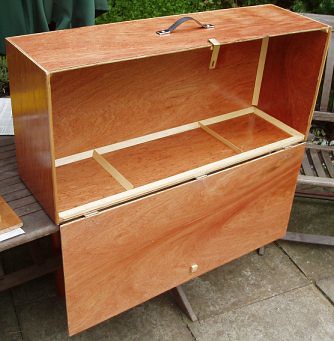
It's Boxing Day in the UK. To celebrate this, I searched on the word "Box" in my Flickr photos.
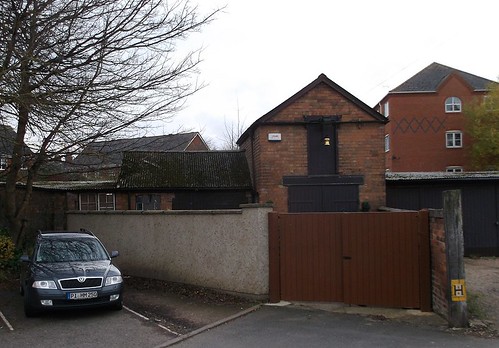
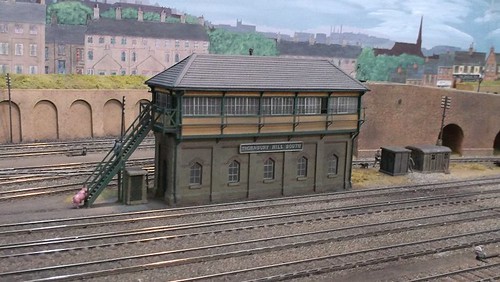
Of course the results include signal boxes:
And some telephone boxes:
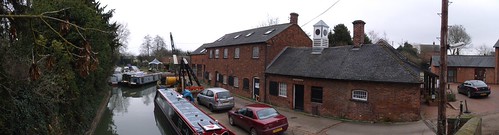
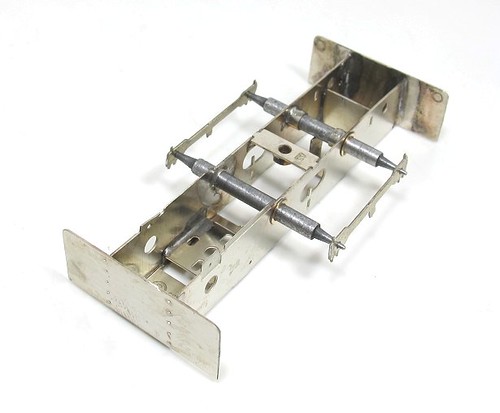
Model boat boxes:
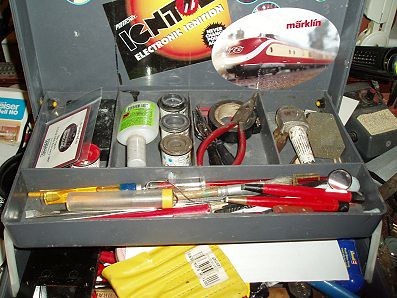
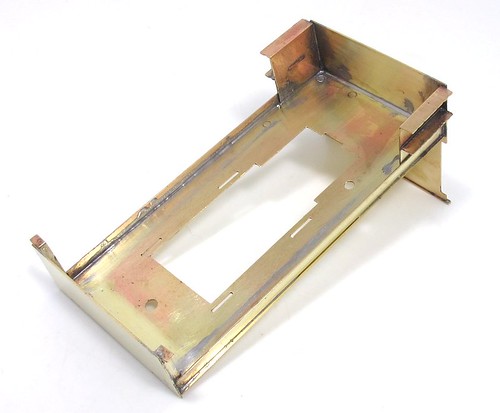
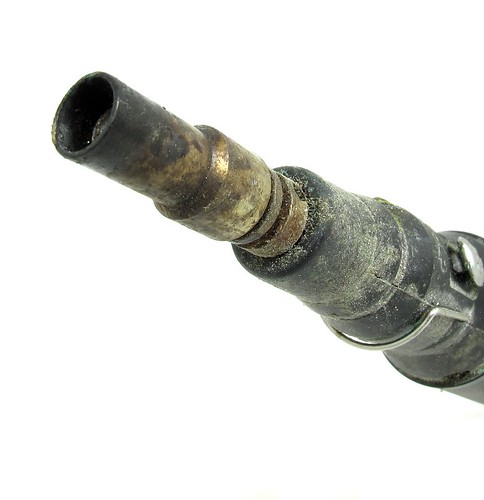
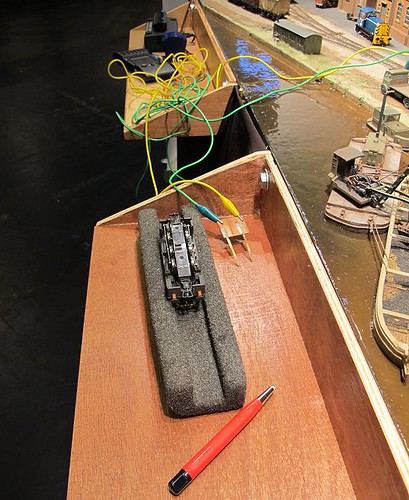
Tool box:
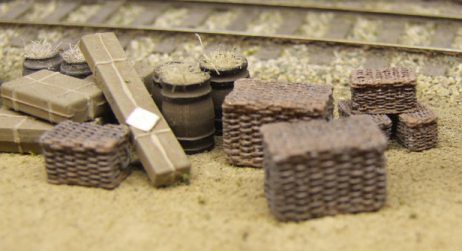
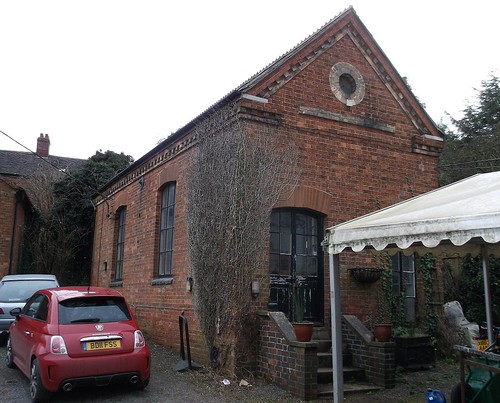
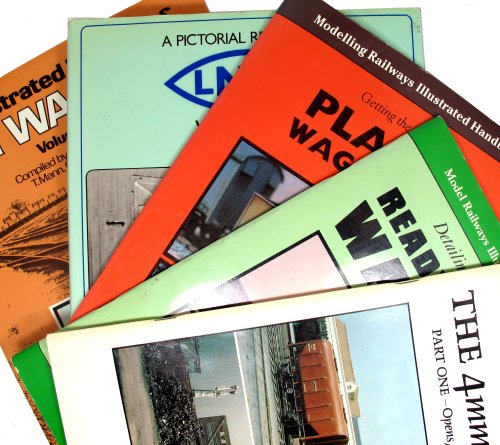
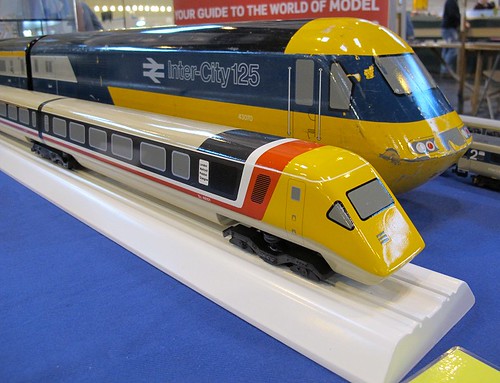
Some model boxes:
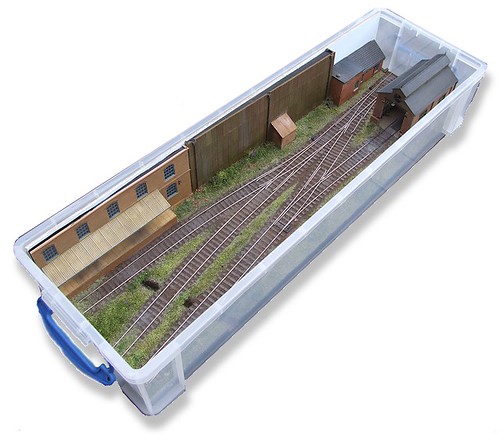
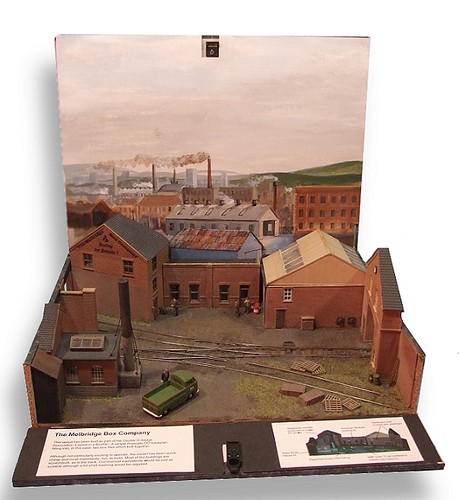
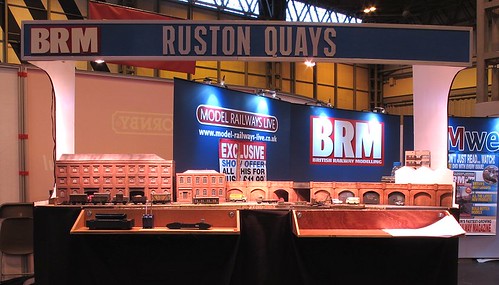
and of course, layouts in boxes:
Happy Boxing Day!
A daily updated blog typed by someone with painty hands, oil under his fingernails and the smell of solder in his nostrils who likes making all sort of models and miniatures. And fixing things.
Saturday, December 26, 2015
Friday, December 25, 2015
Merry Christmas!
Merry Christmas and Happy New Year to all readers of Phil's Workbench.
I hope you've all been presented with some lovely model making goodies and maybe a little chocolate to enjoy whilst making them.
Thursday, December 24, 2015
Barclay footplate
A couple of hours with the soldering tools followed by some cleaning and burnishing, and the Barclay footplate is built.
Work starts (for me at least) with valances located in half-etched lines along each side of the footplate. Then the honking great big buffer beams are fitted using tabs and slots.
Only the steps have to be positioned by eye although if they are hard up against the valance, that's not too hard. There is something about leaving part of the front ones off if you are fitting drain cocks, but we'll cross that bridge when we come to it...
Wednesday, December 23, 2015
Warehouse Wednesday: Canals again and a dry dock
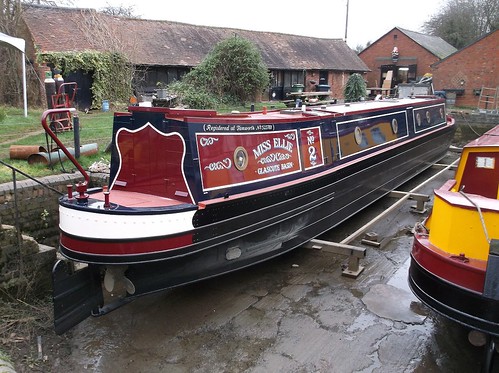
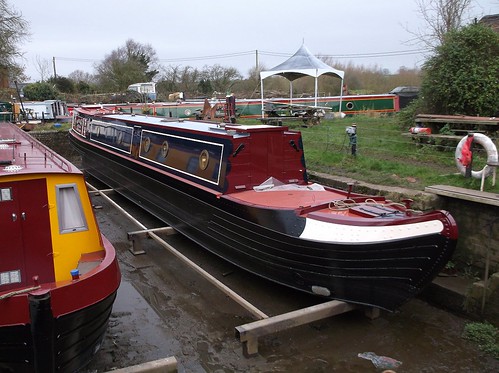
When I visited Barby Model Rail last week, I couldn't resist taking a few photos of the canal side buildings. Click on the pictures for a larger image over on Flickr.
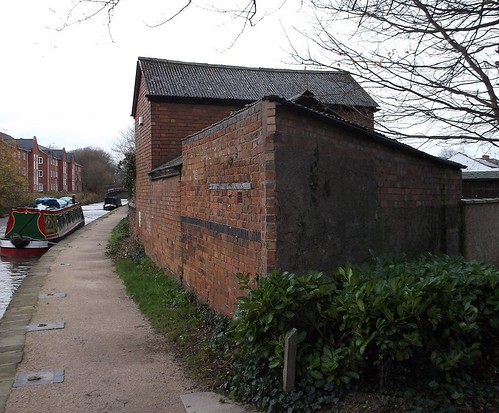
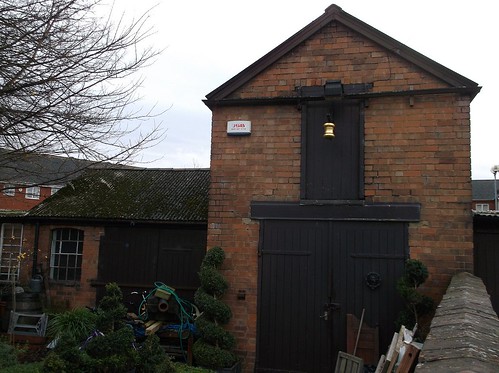
I'm not convinced that these buildings were warehouses, the one nearest the camera claims to be the Blacksmith's shop, as the place has been gentrified a bit. Is that derrick in the right place for example?
Whatever, they are certainly worth a look. The building above could fit in to many different scenes and would make a cracking ready-to-plant model.
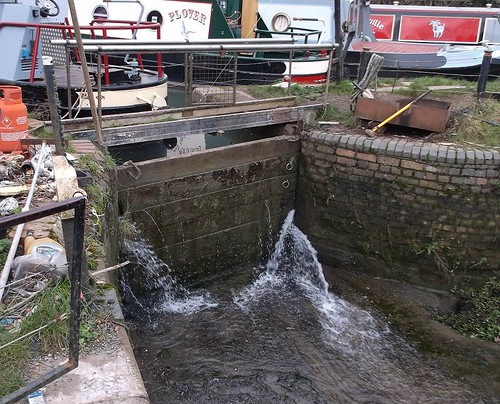
The dry dock particularly interested me as I don't recall seeing one on a canal before. Boats seem to be hauled out of the water for work rather than taking the water away, but then I suppose cranes are cheaper than dry docks.
These should help anyone wondering what narrow boats look like below the waterline.
Talking of water, the dam used to keep the dock dry was worth a look too.
An aerial view is available on Google.
Tuesday, December 22, 2015
Does this chassis belong to something else?
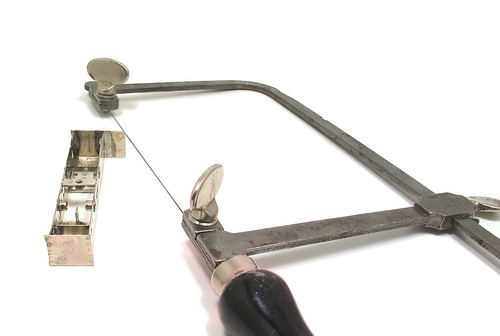
Reading the instructions for a change, I was a little surprised to be told to hack the "wings" from the Barclay chassis with a saw.
I'd assumed that these were the buffer beams - I'd even punched the etched rivet dimples - but apparently not. They are surplus to requirements.
I wonder if the chassis kit was designed for something else and then pressed into service for this loco?
Monday, December 21, 2015
Flame out
Working on the Barclay kit, I've found my soldering iron a bit lacking in oomph. I think it's letting me that a new bit is required as the metal parts aren't that large, for a 45W iron anyway.
No worries, I have a small gas torch on the bench. This handy tool is great for heating up localised areas and blowing solder along joins.
The gas reservoir was empty but I quick fill with some Swan lighter gas sorted this, or so I though. Trying to light the flame on a cheapo cigarette lighter, there was noise but no ignition.
The torch being empty had filled with air. After around 4 minutes, I'd blown this through and started firing on proper, flammable, gas. Longer than I had expected certainly and worth bearing in mind if you find yourself in the same situation.
Sunday, December 20, 2015
Buy books!
On a forum recently, someone was bemoaning the pages given over in a magazine to prototype photos. Apparently, these are a waste of space because he can get all the pictures he needs on the Internet.
This is of course, rubbish.
Yes there are a lot of photos on the web but you can't beat having access to a library full of real books. I've been building a wagon kit and needed some end detail. Was there a photo on the web?
No. But I found the information in a book that I paid 6 quid for years ago. There were some really nice shots of the brake gear too.
Books 1:Interweb Nil
Saturday, December 19, 2015
Barby Model Rail - Rugby
It's a little off the beaten track, but once you get there, for canal enthusiasts there is a lot worth seeing. The shop entrance is low-key but once inside, it opens up into a veritable model railway Aladdin's cave.
On the left, a wall of Wills kits and bits'n'pieces. Owner Tony French wasn't convinced by these when he took the business on but the sales have justified their retention. Under the test track on the left there are many packs of the same companies building materials as well as Slater's Plasticard.
Behind the repairs bench is a huge selection of new and second hand RTR models, both locos and rolling stock. Hornby, Bachmann, Dapol and Oxford Rail are in stock. By the door, a display case shows some of the new models but there's more on the shelves.
Stock is mainly OO but with a few bits of N and O. Others scales can be ordered in - one of the assistants is a 7mm modeller and while I was there picked up some Parkside kits to go with his recently purchased Dapol Terrier.
Although Tony only took over the business a few months ago, the shop has been open for longer and so there are a few gems to be found if you dig. I was also pleased to see the best range of Merit models, often overlooked but very useful for anyone building a layout.
As befits model shop that isn't just shifting boxes, services such as DCC decoder fitting are offered and buyers can see models work on the test track.
Considering the location, the shop was busy too. In a couple of hours mid-week there were half a dozen buyers as what should be a really quiet time of year. In the summer, when the cafe is open and you can leave the family in the sunshine by the waterway, it would make an ideal location to "accidentally" visit, the rest of the time, it's a good, solid useful model shop.
Friday, December 18, 2015
Chassis jigged
No idea how long it took to get me this far but no more than a couple of hours.
The chassis sides fold up and thanks to some nice tab and slots design, everything locates reasonably accurately in place. The slots are perhaps a little larger than perfect so some care is required to make sure everything lines up.
Aluminium axle jigs aid the positioning of the bearings. Two lengths of these are supplied with the short ones for the gearbox end and the long ones in the other holes. I'm intrigued by this as there is a support for the centre of the axle which would normally indicate it rocks to compensate for uneven track. The long bearings would seem to make this less likely though. We'll have to wait and see.
Thursday, December 17, 2015
Barclay 0-4-0T
I've an etched loco kit project lined up for the very near future and since the last one I built was quite a while ago, I thought I'd better get a bit of practise in with the soldering iron.
And I'd had this kit kicking around for many, many years and just fancied getting it built.
Branchlines 0-4-0T "Peacock" for O16.5 isn't a real loco. The prototype it's based on was from the Beckton Gasworks system, which as you'll probably know, was standard gauge. There is a nice photo of the loco nearest this design here.
The designer of this model took inspiration from Chris Peacock's layout "Calstock Quay" which features some scratchbuilt versions. They have used the standard gauge loco as a guide and scaled the proportions down to suit a narrow gauge model.
In the box, bought from Motor City Books in Oxford when it existed, contains lots of etched bits, some whitemetal and lost-wax cast brass. Romford wheels and a Tenshodo motor finish the package. I paid a long forgotten bargain price for this but think the kit is still available from Branchlines.
First impressions are good - the etched bits are cleanly done. We get brass and nickel silver. The cast brass parts are sharp, as are the whitemetal. Several pages of instructions are in the modest (too small for the finisehed model) box and include exploded diargams for those who can't be bothered to read.
Wednesday, December 16, 2015
Warehouse Wednesday: Leamington canalside workshop
A few weeks ago, I took a walk around the north end of Leamington Spa looking at old workshops that might make useful models filling in odd corners of a layout. Now, I've been in the south of the town to find this little scene trapped between a Co-op car park and the canal.
The site is triangular, crammed into the space available. Next door is another angular site, this time full of garages.
I'm assuming from all the doors that this really was a warehouse of some sort. It's a tiny building though and could probably be modelled to scale. It reminds me quite a lot of one of Iain Robinson's drawings from Railway Modeller years ago - that sort of atmosphere with "stuff" that has grown up over time.
You can see the site on Google Streetview.
Tuesday, December 15, 2015
Birmingham water taxi
It might seem odd for someone who has recently built a Bantam Tugboat, but I've never felt that canal boats are good subjects for large, radio control models. They are at home in narrow waterways but look wrong to me when on a lake.
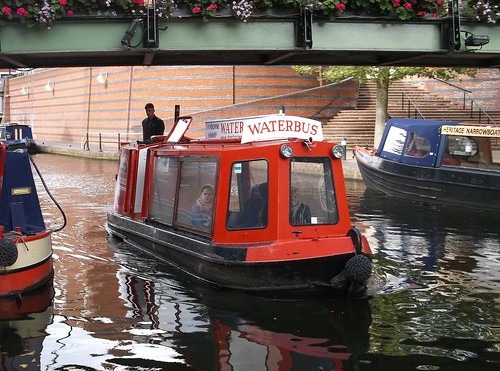
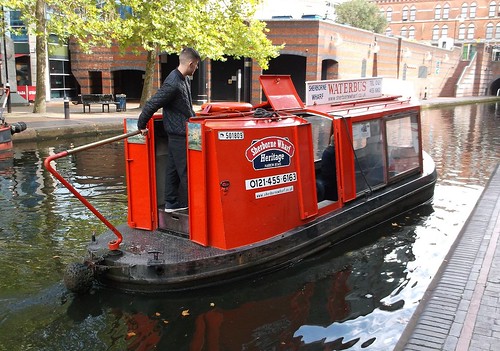
This might be the exception to the rule however, the Waterbus that plies its trade in central Birmingham,
A really short prototype, not much longer than the Bantam. It is a little boat on the canal so wouldn't have that "fish out of water" feel when on a lake.
I'd suggest that any model needs to be at least 1/12th scale to fit the mechanical bits. Going even bigger might be nice, perhaps Action Man size?
If you want to sail, details here.
Monday, December 14, 2015
Fixing footwear
I don't like things I can't repair. One pet hate is those stupid plastics that don't react to any known glue so once broken, can only head towards land-fill.
Another issue is shoes. Occasionally, the sole starts to come unstuck from the top and needs a little glue to fix the join. It was glued originally so repair ought to be easy.
Trouble is, the join has to flex. You can't use epoxy as it's too stiff and after a few feet of walking, starts to break down. Evo Stick, being a rubber glue, ought to be better but never seems strong enough to me. I'll confess that I've even had failures when having repairs professionally carried out. New soles pulling away from perfectly good uppers for example.
A while ago, I bought a tube of Unibond EXTREME glue. It claims strength and flexibility so I gave it a go.
I can report that on one pear of shoes, the join, at the toe, was effective and allowed me to cover many more miles before I wore the soles out. More recently, it's been used to re-fix a boot sole which shows no evidence of glue being involved in the manufacture and this seems OK.
Two tricks: Open the gap with a screwdriver so you can squirt the glue well into the join. Second, a paper towel dampened with white spirit wipes away splurges of glue from the sides, leaving a perfect join.
Sunday, December 13, 2015
Paper aeroplanes
Mind = blown. Singapore Airlines
Posted by Architecture & Engineering on Wednesday, 9 December 2015
Spotted on Facebook, this is captivating. As far as I can tell, the guy really is making these models out of card - although it must be a very high quality one as it doesn't seem to bend much. The parts have been pre-printed but even so, cutting the things out (can't see any laser burns so this must have been done by hand) will have taken many, many hours.
Saturday, December 12, 2015
Tool p*rn
For various MREmag related reasons, I find myself in possession of a Micro-Mark tool catalogue from the US of A.
I've perused the website a few times but there is something about seeing a the amazing selection on tools in a paper catalogue that is special. And horribly tempting to a tool freak like me.
On every page there is something that I would find useful, or at least interesting. Looking closely, many of the items are available in the UK and quite a lot of them are in my possession already, but there are some funky clamps in page 41 for a start.
Trouble is that while the prices are good, postage from the USA costs a million billion pounds. That and some of the chemicals can't be shipped out of the country anyway.
I've often thought that if I ever win the lottery, I'm going to pick up a catalogue, ring the number and order one of everything. It might well be this one.
I've perused the website a few times but there is something about seeing a the amazing selection on tools in a paper catalogue that is special. And horribly tempting to a tool freak like me.
On every page there is something that I would find useful, or at least interesting. Looking closely, many of the items are available in the UK and quite a lot of them are in my possession already, but there are some funky clamps in page 41 for a start.
Trouble is that while the prices are good, postage from the USA costs a million billion pounds. That and some of the chemicals can't be shipped out of the country anyway.
I've often thought that if I ever win the lottery, I'm going to pick up a catalogue, ring the number and order one of everything. It might well be this one.
Friday, December 11, 2015
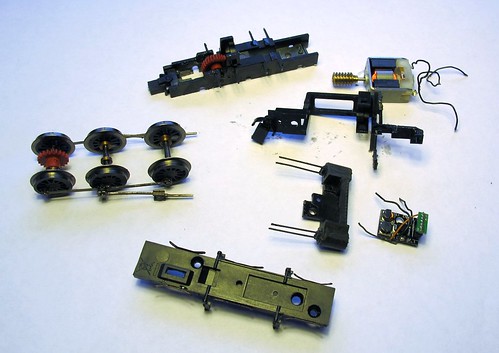
The guts of an Electrotren
If you are as stupid as me, you don't always pay attention when dismantling a model locomotive.
If the loco concerned is an Electrotren and you try to pull the baseplate off, you'll stretch the wires that pass up through the cast chassis. This allows the insulation to pull back and the positive and negative electric juice to escape, meeting each other in a sparky way that DCC controllers just don't like.
If you saw the model at Doncaster you'll know it wasn't running. For Warley I decided to fix it, partly prompted by the promise that the manufacturer of the resin body would be visiting.
Anyway, I carefully unscrewed and unclipped everything with the results you see above. Apart from some fiddling popping the waggly bits back into the slide bars, it's not too bad a job. I rewired with the thinnest wire I had to hand and double insulated the exposed wire at the top of the pickups with blobs of superglue - just to be on the safe side.
Once reassembled, the model runs sweeter than such a cheap chassis has any right to, especially one with such a cheap 3-pole motor. I've kit built chassis that don't work that well and they have "proper" motors in them. Grrrr.
Thursday, December 10, 2015
Industrial loco, card building and lighting up the underground
If you were loitering around the BRM stand at Warley, you'll have seen this issue already. Hard work by the production team and a printing press a short stroll from the office allowed the January issue to be available extra early. For everyone else it arrives this week.
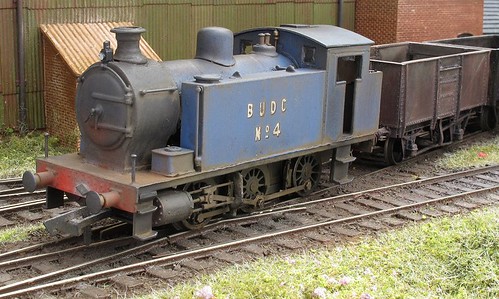
I'm doing quite a lot inside. For a start I've fitted Cobalt point motors to Ruston Quays. This isn't exciting to look at on the blog so we'll move straight on to one of my favourite projects for a while - an ARC models RS&H loco kit
Construction couldn't be simpler. The resin body needs a little assembly, mainly fitting the handrails and a few other bits, and then it sits on an Electrotren RTR chassis. Result: a very sweet running model that really looks the part. For me, the biggest problem was finding something to fill the pages as the construction is so simple! For a change I've been able to go to town on painting and weathering.
Modellers are always saying how much they want an industrial chuffer in wish lists. Well, here is a kit that anyone could assemble. It deserves to sell like hot cakes, as does the follow up Barclay on the same chassis. You don't get an easier way to watch a model loco run and feel the pride that only comes with having built it yourself.
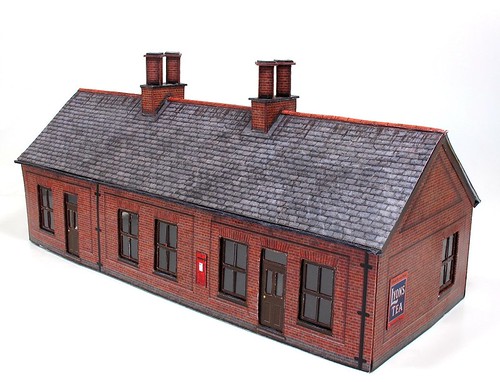
Another beginner-friendly feature is the free card kit designed by modelrailwayscenery.com. Modellers will find it on the DVD. I built a pre-production version and ended up requesting a few changes to the design but these should make the build even easier. The complete model appears over 4 months and the last one will be particularly useful even if you don't build the rest as it's some excellent posters and building details suitable for all sorts of models.
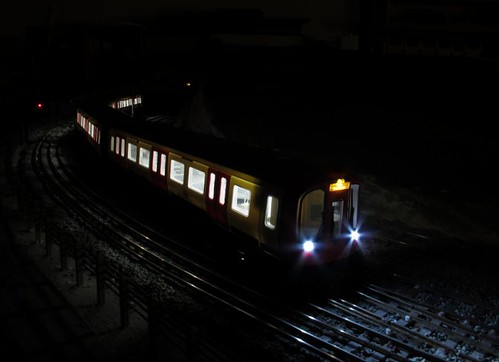
Finally, I've added some Train-Tech lights and sounds to the new Bachmann/LT museum S Stock. The hardest part of the job is taking the model apart, although the suggestion that the lighting bars be held in with Blu-Tack has quietly been ignored for better, bust just as easy, methods.
Taking the final picture was fun. The lights and sounds are powered by internal batteries that detect motion to switch on. Built in lights on the front are powered from the track. Getting everything illuminated took best part of an hour. Eventually the driving bogies were set off the rails and then power applied. With wheels thrashing around uselessly, I managed to bag the required long exposure shots to complete the photo. Thanks to the L&WMRS Duxford team for letting me borrow the layout with all that lovely 4th rail for the background.
On the DVD I'm doing a bit more card modelling, demonstrating some basic techniques to support the kit. If you want to see me look stupid, you'll enjoy the piece on layout animations. For the record, I was NOT bouncing along to the music, it's that stupid chair that doesn't stay pumped up and our evil video guys...
I'm doing quite a lot inside. For a start I've fitted Cobalt point motors to Ruston Quays. This isn't exciting to look at on the blog so we'll move straight on to one of my favourite projects for a while - an ARC models RS&H loco kit
Construction couldn't be simpler. The resin body needs a little assembly, mainly fitting the handrails and a few other bits, and then it sits on an Electrotren RTR chassis. Result: a very sweet running model that really looks the part. For me, the biggest problem was finding something to fill the pages as the construction is so simple! For a change I've been able to go to town on painting and weathering.
Modellers are always saying how much they want an industrial chuffer in wish lists. Well, here is a kit that anyone could assemble. It deserves to sell like hot cakes, as does the follow up Barclay on the same chassis. You don't get an easier way to watch a model loco run and feel the pride that only comes with having built it yourself.
Another beginner-friendly feature is the free card kit designed by modelrailwayscenery.com. Modellers will find it on the DVD. I built a pre-production version and ended up requesting a few changes to the design but these should make the build even easier. The complete model appears over 4 months and the last one will be particularly useful even if you don't build the rest as it's some excellent posters and building details suitable for all sorts of models.
Finally, I've added some Train-Tech lights and sounds to the new Bachmann/LT museum S Stock. The hardest part of the job is taking the model apart, although the suggestion that the lighting bars be held in with Blu-Tack has quietly been ignored for better, bust just as easy, methods.
Taking the final picture was fun. The lights and sounds are powered by internal batteries that detect motion to switch on. Built in lights on the front are powered from the track. Getting everything illuminated took best part of an hour. Eventually the driving bogies were set off the rails and then power applied. With wheels thrashing around uselessly, I managed to bag the required long exposure shots to complete the photo. Thanks to the L&WMRS Duxford team for letting me borrow the layout with all that lovely 4th rail for the background.
On the DVD I'm doing a bit more card modelling, demonstrating some basic techniques to support the kit. If you want to see me look stupid, you'll enjoy the piece on layout animations. For the record, I was NOT bouncing along to the music, it's that stupid chair that doesn't stay pumped up and our evil video guys...
Wednesday, December 09, 2015
Warehouse Wednesday: Birmingham tie plates
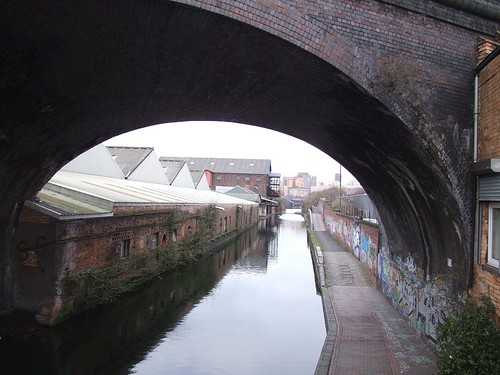
Today we are back in Birmingham, exploring the canals. For a change there are some actual warehouses in the photo, but I'm more interested in the building nearest the camera on the left.
It appears to have been re-roofed with modern(ish) metal but the walls are a mass of tie plates.
Not only do we have the relatively traditional S shaped plates, these are joined with lengths of what looks a bit like rail. The whole thing has presumably sagged quite badly over the years and someone decided that wrapping it in metal was cheaper than letting the thing fall down and rebuild.
The condition must be pretty bad judging by the amount of plant life clinging to the walls. The roots digging in to the mortar won't be doing the structural integrity any good either. Maybe this is the Brummie equivalent of the hanging gardens of Babylon?
Tuesday, December 08, 2015
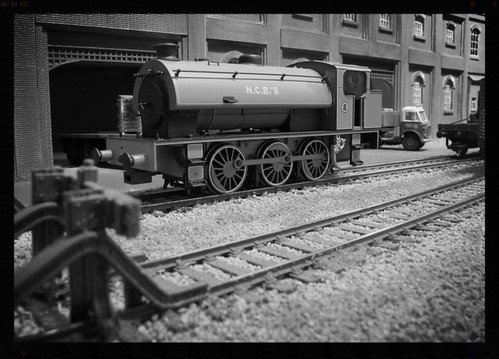
New NCB loco
August 1957: Local railway enthusiast Archebald Robotham sneaks his new Kodak Brownie Starlet into his snap bag and while partaking of lunch, take a photo of newly built a NCB Hunslet loco parked up in a siding at Ruston Quays. He wonders if one day someone will invent a colour film suitable for amateur use as he'd like to have captured the lovely apple green colour. The clean engine stands out amongst the dirt and grime of the dockyard he works in a a flange wrangler.
This is a DJ Models loco lent to us for photos during Warley exhibition. It is a pretty colour.
Monday, December 07, 2015
Why DCC is rubbish #375 - Wheel cleaning
Wheel cleaning under DC
- Place loco upside down in Peco cradle
- Attach flyleads to the back of a controller
- Hold leads against wheels
- Hold fibre pen on each wheel in turn
- Wait for a few moments and shiny metal is revealed
- Take loco away and repeat
Wheel cleaning under DCC
- Place loco upside down in Peco cradle
- Realise you can't attach flyleads to the back of the controller
- Try to find a spot where you can clip them to the track and not destroy some detail
- Work out which number loco you are cleaning
- Dial up the number on the keypad
- Turn up controller
- Realise you've dialed up the wrong number
- Dial up the correct number
- Hold leads against wheels
- Hold fibre pen on each wheel in turn
- Wait for a few moments and shiny metal is revealed
- Take loco away
- Place next loco in cradle
- Realise you can't remember the number
- Decide that the wheels aren't that dirty anyway
Sunday, December 06, 2015
Has anyone seen my lorry?
One of the problems with exhibiting at that NEC is that when the show closes, everyone wants to get out at the same time. Setting up takes the best part of a day, knockdown, a few hours.
The hall is big enough for vehicles to drive inside to pick up stands but as everyone wants to do this, there is a heck of a traffic jam formed pretty much as soon as the doors close.
Despite parking in a "normal" car park (E1 I think), when I timed my walk to the stand, I reckoned it took something between 5 and 10 minutes. This meant a 20 minute round trip including unloading things in to the car. On that basis, I decided that I'd be quicker trolleying the layout to the car than trying to get the vehicle in the hall. I'd also avoid the frustrating time spent in traffic jams or touring the NEC road system that I'd experienced in previous years.
A quick check by Ben at the end of the day told me the weather was windy but not wet. Worth the risk I thought.
First trip took out the sideboards and legs with the trolley collected for the second trip. This saw me move the layout. After this there were the crates of stuff and finally the fascia panel and seat. One more trip than I bargained on but there were still a few people queueing in cars when I left so I might have saved myself some frustration.
The best part was that if you leave at 18:50, the car park guys don't bother charging you for the parking so that's 12 quid saved.
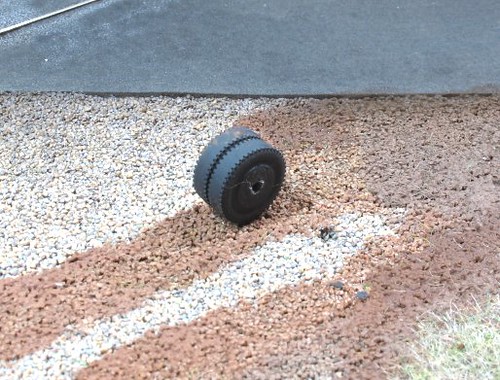
Setting up the layout on Monday to carry on working, I was pleased to see that everything was still attached. Except for the lorry. Sadly, only one wheel had survived the bumping along the roads and pavements. Presumably the rest of it ended it's days in an NEC car park.
Regular readers will know this model as I showed it on here. Now I'll have to build another one.
Saturday, December 05, 2015
Warley NEC 2015
The Warley model railway exhibition at the NEC is the largest model railway exhibition in the UK. I spent the whole of last weekend there.
And I saw almost none of it.
My time was pretty much entirely spent behind, beside or generally around Ruston Quays talking to people. So many people.
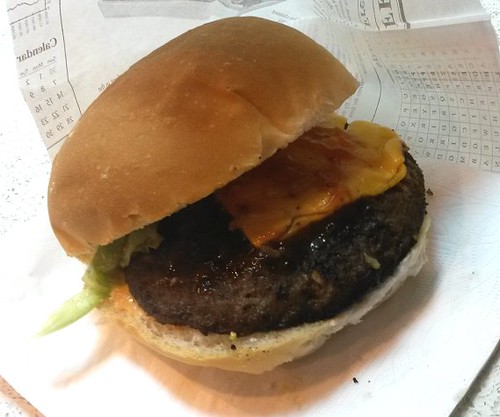
So, if you are expecting a full show report you will be disappointed. Truth is I could really do with a visit to a big model railway show to do some shopping but apart from a couple of very good burgers, a rather more awkward crepe (almost impossible to eat as the filling sunk into a pocket at the bottom of the folded pancake and was lava hot) and a Dapol canopy kit, my wallet was unbothered.
Having said this, it was an excellent weekend. Lots and lots of people, including some readers of this blog, dropped by for a chat. Almost without exception, the chats were very nice too. People like what we are doing with BRM, the stuff I write and especially the DVD where my cunning plan not to share disk space with people really good at telly means my shortcomings are easily overlooked.
Not everything is perfect of course. I do wonder about people sometimes when I'm asked, "Will this layout appear in the magazine?" and have to resist the urge to shout, "Yes. It's been in for the last 6 months and on the telly disk twice!"
Best bits though are undoubtedly those where people tell me about projects they are doing because I wrote something in a magazine. There's an O gauge version of Ruston Quays underway at the moment in addition to a couple of N gauge ones I knew about. This makes the job worthwhile, although if anyone from Warners is reading this, that doesn't mean you can stop paying me!
Apart from this, there is little to say. Some van action saw the Bachmann display cases nearly filled with a full scale transit and Montana from Hornby resist the urge to run them over with another van while packing away. I can only assume they had all behaved themselves.
New products, there were loads, but I took photos and put them up on MREmag for all to enjoy. Quite frankly, everything paled in comparison to the Oxford Diecast Manx Peacock for me but I might not be quite normal in that respect.
My Saturday night plan to head to the airport rather than the station paid off. I had some yummy spag-bog and then strolled back for the trip back home whereas a friend who left at the same time managed to catch the same train having been unable to get on to the previous two as there was no space.
Sunday night was more fun, but I'll talk about that tomorrow. In the meantime, can I just thank everyone who chatted for dropping by.
Friday, December 04, 2015
Accucraft Sea Lion
I recently read on Facebook, someone complaining that their feed was full of people on model railway groups posting the latest thing they had bought and it was getting boring. Well, today I'm doing just that.
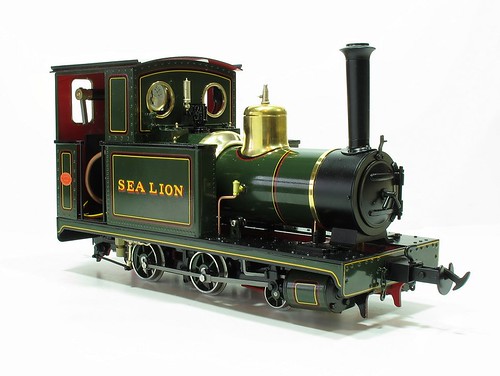
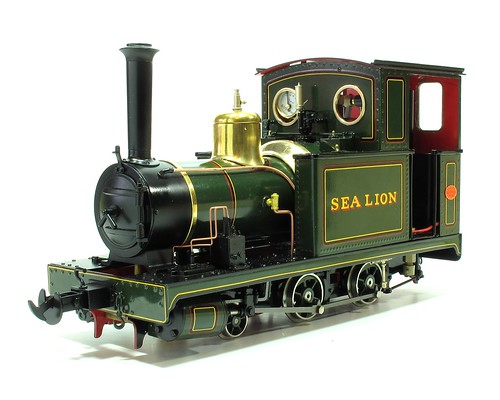
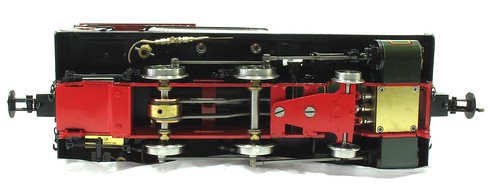
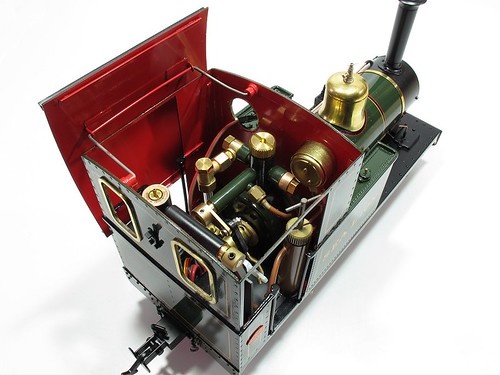
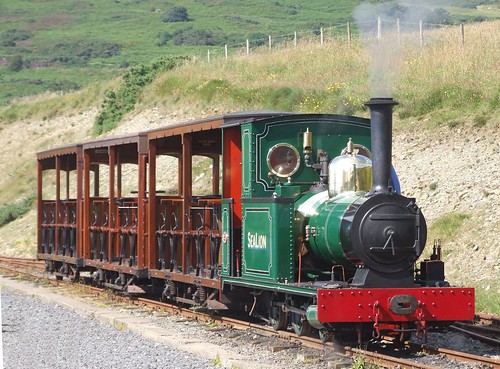
This is my latest purchase - a 7/8th scale live steam model of the Groudle Glen locomotive Sea Lion.
I don't care if it's boring. This is far from the usual parade of Hornbachpol models you'll see elsewhere.
Saving for this model has taken my father and I the best part of 4 years. As soon as it was announced, I ordered one and so we had a goal to work to. Excess stuff has been sold on eBay and other odd bits of cash have gone into the account to raise the sum equivalent to nearly two Mulberry handbags (can you tell I write chick-lit?).
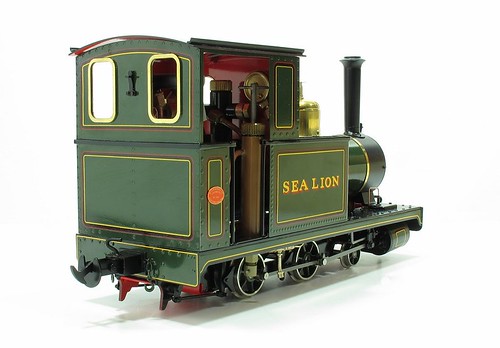
In the cab you can see all the controls. A chunk of the purchase price is taken up with the factory fitted radio control system. Manual control is an option but if you care buying something special, you might as well tick all the options. Besides, it's more fun than crawling around trying to furckle in the cab one a ground level line.
The model is lovely. Yes, it's not finescale perfect but compromises have been made because it has one advantage over your plastic chuffer - real metal and a belly full of real steam!
This model is available from Track-Shack.
Labels:
garden railway,
ggr,
isle of man,
model railway
Thursday, December 03, 2015
On sale today!
Some of you may know that for the last few years, I've been working with my friend Candice writing a novel. Well, today is the big day that it goes on sale!
Kate vs The Dirtboffins started out as a few random ideas thrown around by people stuck in the first quango to be closed down by the last government. We had to go in each day to be paid, but there was literally nothing to do.
Chatting (as you do) someone suggested we should set up a "change management" company to help close down all the other bits of government that were due for the chop. From there we came up with our characters and took it from there.
The process has taken over 5 years - mostly because real life kept getting in the way.
Somehow, despite me having never read any, the book became a little bit chick-lit as well as a lot Tom Sharpe with great big dollops of humour. With our commercial head on, these are the two most popular genres so lets hope for a few sales. Don't let the girlie cover put you off, it's readable by both sexes.
Along the way, I've read a lot, visited literary festivals and met proper writers and enjoyed the process a lot. If anyone thinks they have a book in them, go for it. Writing is (mostly) fun. Writing as a team is even more so with the added benefit of cake during those important meetings to discuss the plot.
Anyway, head over to our writing blog for more details and to buy your copy!
In other news: This is the 3500th post on this blog!
Kate vs The Dirtboffins started out as a few random ideas thrown around by people stuck in the first quango to be closed down by the last government. We had to go in each day to be paid, but there was literally nothing to do.
Chatting (as you do) someone suggested we should set up a "change management" company to help close down all the other bits of government that were due for the chop. From there we came up with our characters and took it from there.
The process has taken over 5 years - mostly because real life kept getting in the way.
Somehow, despite me having never read any, the book became a little bit chick-lit as well as a lot Tom Sharpe with great big dollops of humour. With our commercial head on, these are the two most popular genres so lets hope for a few sales. Don't let the girlie cover put you off, it's readable by both sexes.
Along the way, I've read a lot, visited literary festivals and met proper writers and enjoyed the process a lot. If anyone thinks they have a book in them, go for it. Writing is (mostly) fun. Writing as a team is even more so with the added benefit of cake during those important meetings to discuss the plot.
Anyway, head over to our writing blog for more details and to buy your copy!
In other news: This is the 3500th post on this blog!
Wednesday, December 02, 2015
Warehouse Wednesday: Demolishing Ford Foundry
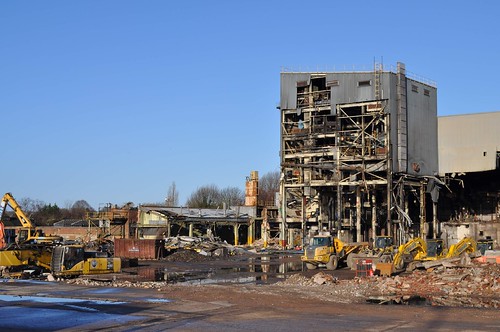
Another Not a Warehouse this week but digging around my collection, I thought this deserved an airing.
Heading north from Leamington station, the view from the window was either enhanced or ruined, depending on your opinion, by Ford Foundry. This ugly industrial plant seemed oddly out of place so close to the town centre. The feeling got worse as the area around it filled with posh housing estates.
Eventually the plant was declared uneconomic and closed down, the workforce largely being moved to other sites within the company. This meant the demolisher's could move in and tear the place down. It's not a Morrisons store and brownfield site no-one seems to want to buy.
It's worth clicking on the image above as I've put it on Flickr full size (click through to the site and then click on the image again to magnify it. That way you can appreciate the complexity of the building innards. As a modelling prospect, forget it. Far too fiddly. But it would look great if done properly...
Tuesday, December 01, 2015
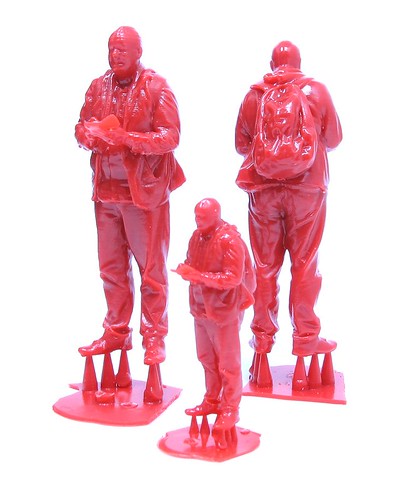
Mini Phils
Well, that's Christmas sorted then. Thanks to the efforts of Modelu, I have tiny 3D versions of me.
The scanning took place back in October at the Great Electric Train show. I was dressed in hoodie and backpack, just like a proper train spotter.
Now, I have been printed. At the time I ordered a 4 & 7mm version. When Alan delivered the prints at the weekend, he included a reject version of the 7mm version. I can't remember what it wrong but I'm happy to have an extra figure.
Now, i know of a 4ft wide 3D printer. If we used the data file on this, the result would be 2.4 metres high - slightly larger than real life. If I get them working now, I reckon everyone I know can have a statue of me in their front garden by boxing day!
Subscribe to:
Posts (Atom)