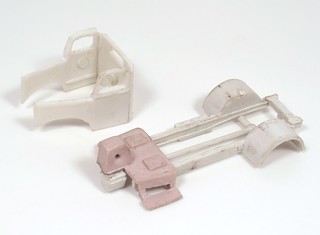
 Some of this work is more like sculpture than modelmaking. Take a randomly shaped plastic part and try to work out what you have to carve away to reveal the component within.
 Having said that, the first stages of the build have progressed better than expected.
Once you've whittled out the cab floor and footsteps, there are some lines underneath that the main chassis members locate in. This sets the width and is followed by more cross-pieces along the back. Quite where they fit is a mystery to me - not on top of the frames and presumably not underneath. In the middle? Not sure they fit there either. Anyway, I fitted the back one and left the others off for the moment.
The sides of the cab needed tidying up. Inspecting the back part, it becomes clear that the rear edges behind the doors shouldn't be tapered but flat, at right angles to the side. Sort this out and they fit nicely in place.
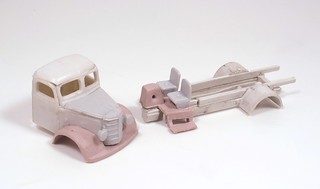 The bonnet sets the angle at the front thanks to more guides moulded in the bottom. Cleaning up the radiator proves easier than expected as long as your knife is sharp. Even turning the lights in to near hemispheres at the back can be done and one complete, looks very nice.
 Making the cab sit level on the mudguard moulding is more fun, Some scraping at the curved edge of the bonnet sides was required but worth it for a neat fit.
I am wondering about that pink plastic though.
No comments:
Post a Comment