Friday, September 18, 2009

Critter in Continental Modeller

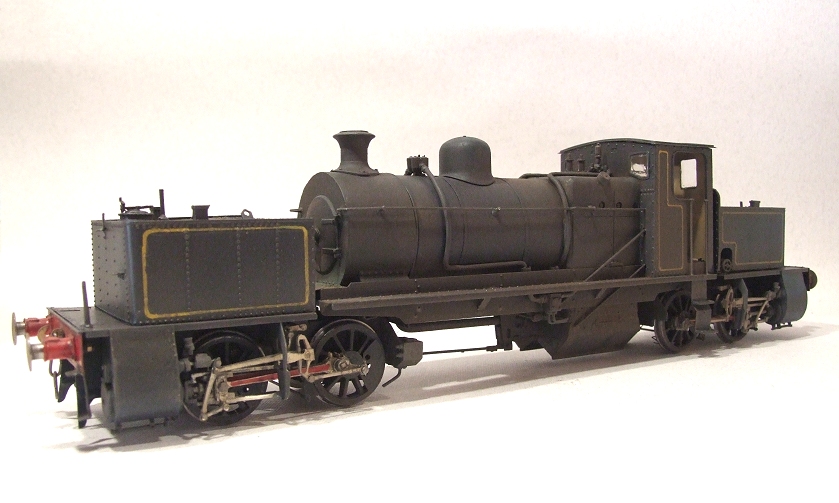
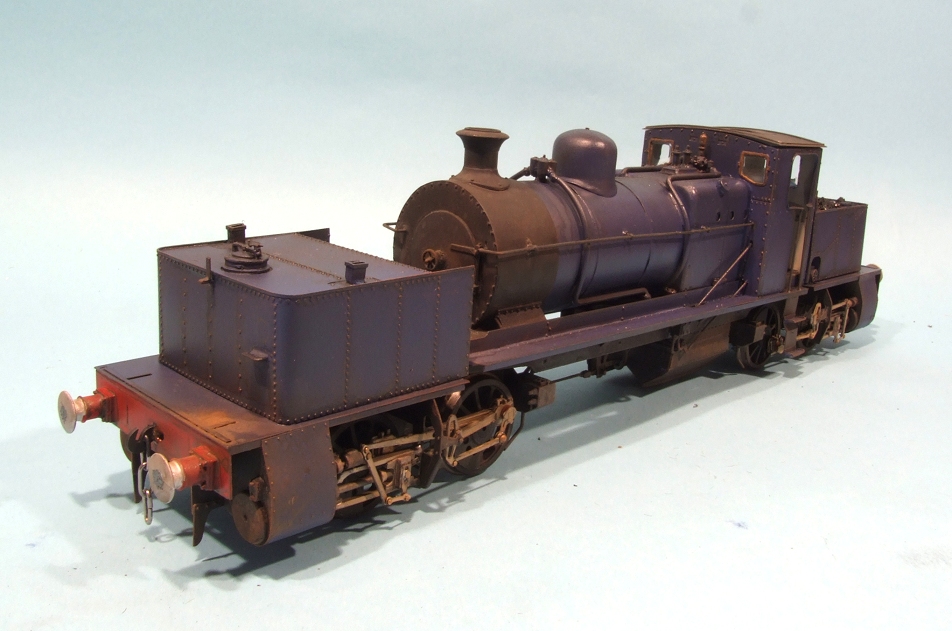
I get in from work and find a fat envelope from Peco. Inside is the October 2009 issue of Continental Modeller magazine. The reason they have sent it to me (the only publisher who do hint hint) is that the piece I penned on building a "Critter" from a Unit Models kit is to be found on pages 622 and 623.

It's interesting writing about American prototypes especially when there is likely to be a reasonable number of people from that country reading it. The editor has added a short teaser at the top of the page "Phil Parker fell for the charm of a convincing craftsman kit". In the UK I'd initially think "Craftsman Kit" means an etched brass loco model from the firm of the same name. In the US I think it means a kit that has to be assembled and many need some modification or fitting to get it together. Likewise "critter" is an Americanism meaning a small locomotive, often of dubious parentage that has been on the end of several in service modifications.
Modellers of the US prototype will hopefully be versed in the lingo - if not they need to go and buy some magazines from across the pond (easy enough there are several good ones available from UK suppliers - try this, it's fabulous) where no concession is made to British sensibilities. You think they'd remember exactly who invented the language...

Thursday, September 17, 2009

Get a hobby

Quote from the helpfultechnology blog: "Last night, as I was flicking through tweets and Google Reader items, I found myself realising a strange co-incidence. I wasn't just reading social media news or the usual (excellent) fare from government digerati blogging in their spare time."

Which translated means (I think) - "I spend my working life working on electronic government projects. After work I spend my time reading and writing about the same subject. As do lots of other people."

So you live in a bubble. Your work is your life. Your whole life.

I say - get a hobby. Get an interest that is different from your job. You Sad Man.

How can you get perspective from within your bubble ? When do you step back and look properly at things ?

I couldn't live without a hobby. It allows me downtime and a chance to take a break from work to recover. Sitting at the workbench thinking about whatever I'm working on there have been occasions when flashes of inspiration occur. It's like my brain is working away on a problem or idea without me being aware of it.

More importantly, it gets me away from work so that when I go back to it I'm refreshed and can work objectively. This is, to my mind, healthy. It also means you work better. The guys in the bubble only talk (sorry, Twitter) to others in the same bubble. They believe that everyone thinks like them and therefore make plans and decisions, which we as taxpayers are going to have to fund, based on this information. The pace of change in the bubble will accelerate while outside, it will remain slow. Those within the bubble will wonder why the rest of us don't keep up.

I hate to suggest that everyone should be legally required to have a hobby but you do wonder sometimes if it wouldn't be a good idea. Even if you don't have a huge amount of time to devote to an interest, simply having one gives your mind a place to wander to.

It's great if you have a job that you enjoy and want to give yourself over too. When you hate tough but again, having a hobby gives you something else to live for. And for the man who lives in the bubble, wheat happens when it pops and you lose the job. You really have lost everything. Presumably this is why so many people dread retirement. It's not the drop in income, its a terror of having to fill the yawning chasm in your life.

So, I say, don't feel guilty about your hobby, it makes you a better person.

Wednesday, September 16, 2009

Up on its wheels

Bulldog chassis on wheelsThe chassis jig performed it's magic again and once cleaned up I was able to fit the Romford wheels. All 6 touch the surface of a flat thing, in my case I like to use the disk part of an old computer hard disk which is excellent. Solid 0-6-0 chassis are notoriously difficult to get spot on, often locos see-saw on the centre set of wheels. You can tell if this is happening once the model is running, the middle wheels will be dirtier than the outer ones. Many builders actually set this set slightly higher to avoid this.

The rods are laminated up from two parts. To help those who have compensated the locomotive, they are in two halves pivoting on the centre crank pin. This takes a little more effort and care than making them up as whole lengths but nothing beyond even my meagre skills.

While I'm testing, the rods are held in place using insulation stripped from bits of wire. It's slightly smaller than the crank pin and can be slid on and off as required. Eventually I'll replace these bits with the Romford washers and some solder but before then I suppose I ought to put the motor and gears in ! As it is, this assembly rolls and up down a track with the slightest push and no binding. And it looks nice and shiny too.

Tuesday, September 15, 2009

6 wheel chassis

Bulldog chassis on jigYou'll get a pretty good idea how well any kits is likely to go together from assembling the chassis. On that bassis this model locomotive won't be sophisticated but it will work.

Jigging the model up, the frame spacers fitted very nicely with none of the fiddling to enlarge the slots that I've found elsewhere. The bearing holes needed just a touch of reaming out. In fact the worst job involved the bearing themselves which had to be opened to accept the axles. Holding these was a pain - I resorted to the chuck on an electric screwdriver as the metal spun around when held any other was and reamed.

The locating pins on the jig (A Hobby Holidays model) were set using a digital vernier as the end pins are too fat for the holes in the con rods. Chatting to the makers last weekend, it seems that my tool has the pins for Gibson or Sharman cranks pins whereas I use Romford versions which are thinner.

Monday, September 14, 2009

3F Bulldog

Bulldog kitAfter a couple of weeks messing around on various little jobs and article work, I now get to start a new proper project. One that isn't a Garratt too.

The new kit is a 4mm scale 3F locomotive nicknamed Bulldogs to be built from the London Road Models etched brass kit. It's a lovely engine with a simple outline - pretty much your classic UK 6 wheel good engine. Of course the simple outline means I have to get things very right. No chance of hiding wonkiness under detail !

Opening the box the builder is confronted with a mass of tissue paper. The packing is as comprehensive as you could hope. Digging down once the instructions are cast aside, a small packet of casting in both white metal and brass appears. As befits such a plain engine, this isn't exactly extensive being mostly smokebox front, backhead and tender axle boxes. Further down are wrapped parcels with the etches and very nice they are too. The detail is sharp and nicely presented. Once I start assembly we'll find out if this impressive appearance is justified in the planning behind the kit.

Sunday, September 13, 2009

The Cawood, Wistow & Selby Light Railway

Wistow

This Sunday's model isn't missing in the conventional sense, I know exactly where it is. In fact it would be fairer to say it's simply resting.

The station you see is Wistow, and formed part of my Father and I's first exhibition layout - The Cawood, Wistow & Selby Light Railway. Inspiration came from an Oakwood Press book found in a York second hand book shop. We liked the look of the buildings, of which there were 2mm:1ft plans, and the area. At the time it also seemed similar to a fiends models of the East Suffolk Light Railway which were very popular on the circuit.

As it was our first model we did a whole load of things we wouldn't do now:
The baseboard is chipboard braced with 2X1 wood. Heavy.
Originally the scenery made extensive use of cheap flock powder which faded from luminous to beige in the daylight.
The model was too long to set up at home.
Despite being only 12 and later 15 feet long (Cawood station was extended after a while) we had two stations.
I was still learning kit building so the stock had to be largely inappropriate RTR such as a GWR railcar. This didn't bother us much as neither really appreciated the niceties and thought this could be improved.
The layout stood on trestles.
Landscape contours initially didn't exist - the area is very flat. However it was pointed out that even flat areas aren't so when the scenery was re-done, plasterwork sorted out the lumps.
It didn't fit properly in the car, at least with 3 of us in there - at that point I couldn't drive and my Dad never passed his test so Mum had to ferry us around.

On the other hand, it worked.
The points used Peco motors.
All the track was hand built SMP including the single slip on this board.
The board bolted together to form boxes.
We had lights.
Spratt & Winkle couplings were fitted to everything.
There was quite a lot of detail.

All stuff we have repeated ever since.

In fact we were, and still are, quite proud of this model. The buildings were brick-papered cardboard and pretty scale. The station layouts (we had Cawood and Wistow) weren't too far off even if they were compressed - Wistow is over 1/4 mile long in real life. Cawood gave us a particular highlight, at it's first show one a long term friend looked at it and said, "Blimey. Cawood station". It turns out he had lived in Yorkshire years ago and used to drive by the remains every day and recognised it from this - so we much have done something right !

Over the years we made many improvements. The scenery was completely re-worked. That cornfield took 12 hours work with plumber's hemp ! Woodlands Scenics replaced dodgy cheap flock. Details were added. The stock improved a bit. Controls were re-wired at least once. This station was even shown on it's own as a static model at a hobby show held at my school.

As an exhibition model I think it only ever attended 4 shows. After that we built Melbridge Dock having learned many useful lessons. As for our first effort, well Wistow & a single Scenic board are in the shed. Cawood station survives in a box. Many of the details were rescued and appear on subsequent models so the spirit lives on. In fact the buildings were done again in 3mm scale to appear on Flockburgh. Who knows, perhaps we might be tempted to have another go at this prototype some day.

Saturday, September 12, 2009

Portable workbench


Workbench
Originally uploaded by Phil_Parker
My sister makes jewellery and to help here I built a modified version of my own workbench. When I made mine many years ago what I needed was space to build and leave stuff part built without clearing away after every sessions. If there's one thing that stymies progress for modelmakers, it getting everything out and putting it away at the end of the evening. It's just easier not to start, whereas if the project can be started immediately you have less of an excuse.

My bench is 4 feet long and was designed to be luggable between desk top and bed. Not a long distance but I needed the desk space for studying. While I was doing this, the bed was unoccupied , except by a cat occasionally, so a suitable resting place for the board.

My sisters version is smaller, about 3 feet long, and made of MDF rather than the plywood I used. The sides are an offcut strip found at the wood shop and chopped to suit. The shelf is another off cut. Everything is glued and pinned together. The nearest I got to cabinet making was the edging around the shelf which is quarter round strip cut neatly using a cheap mitre saw device.

A couple of coats of varnish later the board went off to its new owner who is very happy with it. I reckon anyone could make one of these. If you work on a table that needs to be cleared at a moments notice then it's an invaluable tool. It might even allow you to do some work in a more sociable area of the home rather than tucked away in the attic.

And yes you can buy these things in kit form but isn't it more fun to make it yourself ?

Friday, September 11, 2009

MOT shock result

That replacement pedal rubber obviously did the job. My campervan at a whopping 38 years old passed it's MOT first time. Not through a dodgy testing station either, Ashley actually went back to my favorite tester locally - a guy who is through, firm but fair.

Since he doesn't do repairs other than a little welding, he has no incentive to fail vehicles just to get a bit of work. That's a handy hint repeated by the money saving guy on the telly who suggests going to your local council MOT station for exactly the same reason.

Anyway, I didn't even get an official advisory note, just a jotted suggestion I should check the bolts on the offside CV joints. That's a nice easy job apart from the ones at the top of the wheel which are shielded by the driveshaft, but still far, far better than it could have been.
All of which is being celebrated with a strawberry fruit beer and then I shall work out what project can occupy the time I would have spent trying to get the van fixed. Time to get the Bulldog kit out I think...

Thursday, September 10, 2009

Hornby Mag - October double Phil

This month's copy of Hornby Magazine drops through the letterbox and I find that it is an especially good issue for me. Two articles - Parker's Guide on Whitemetal wagon building and a Beginner's guide to detailing up a Heljan class 37 and 47.

These last two models were what I built my little display track for a few weeks ago for. In fact the Class 37 in the article is the one posed on the display for the final blog photo. What you can't see in the mag is thanks to the power of computer fiddling I extended the grass electronically to the side for a better photo. It was either that or make the display about 3 feet wide !

I'm in good company too. The mag starts with a piece on James May's attempt to build a 10 mile long model railway. May is the good one from Top Gear, the one you could imagine going down the pub with to drink proper beer. I've enjoyed his TV stuff and his books. Even the Telepgraph column is worth a read although I'm far too much of a leftie to buy the paper but read it on-line.

Wednesday, September 09, 2009

Footbrake rubber

Did you know a worn brake pedal can be a reason to fail your MOT ?

Apparently this is the case and with my campervan's MOT looming this week, I need to give the inspector as few reasons to give me the big red sheet as I can. Not that I expect to get off this year, I'm sure there will be something, but I might as well try.

Replacement rubbers are readily available for a few quid and I'm sure I bought some over a year ago. I definitely picked some more up at Stanford Hall earlier this year and now I've got around to fitting them.

For pattern parts (i.e. not genuine VW ones but made by a third party supplier) they fitted very well pushing on with no adhesive required. The originals were well worn and simply pulled away to reside in the bin. Even the tread on the rubber was the same as the last ones. You really can tell when you use the brake too, the thicker rubber feels different.

Tuesday, September 08, 2009

Trams and bugs

Split van and Glasgow TramSorry, I'm too busy for a long post today - lots on the go but mostly stuff not for the blog.

All is not lost however, head over to my travelling blog where you'll find lots of pictures of tramcars and old Volkwagens.

Travelling Philbury - Beetle Drive

Monday, September 07, 2009

Telford O gauge 2009

7mm LeaderSaturday was Telford, the 7mm scale show to beat them all. Well, beat them all if you want to find anything manufactured in the scale anyway. Basically if it ain't at Telford, it probably doesn't exist.

Now I'm not a modeller in the scale BUT I do build locos for other people (OK, I admit there may be a loco or three lurking in my own collection. And some wagons. And some track. And a couple of baseboards for a prospective layout that probably won't get built but you know what I mean) so it's very useful to go along, pay the £12 non-members entry fee, and have a good poke around and chat to people.

As usual the show was packed, the trade seemed to be doing brisk business. I was surprised by the number of ready to go locos there were on sale, and (in my capacity as someone who tries to make a few quid building stuff for others) disappointed at the low prices they were fetching. No chance of me raising my rates for a while I think ! Mind you there is some very rough stuff out there so my prices still look like a pretty good deal, and of course you don't get to see the stuff running...

Anyway, there were a few amusing moments - One potential customer asked if the Garratt kit regular readers of this blog will be familiar with, could be made up as one of the locomotives running on the Welsh Highland Railway. Had I been on the stand I might have suggested that yes it could. All you have to do is take the kit out of the box, throw it away and go and buy the correct one from Backwoods Miniatures. I mean, the WH version has more wheels, very different shaped ends and is narrow gauge. Apart from that it's almost identical.

Railway Modeller magazine take a stand and behind it there is a portable studio, not unlike the version I use. It is there so new releases can be shot for the news section in the magazine. I trotted over there with the Garratt and half way across the hall was accosted by a gentleman who say "Oh, a Garratt. How unusual." to which I had to reply looking at the model under his arm, "Oh, a Leader. How unusual." If we are playing Top Trumps, I think he beats me as only one of those locos were ever finished. Nice model too and totally scratchbuilt.

And I did a stupid thing. Something I laugh at other people for doing. I left my wallet on Squires stand. Fortunately when I went back for it, Roger had rescued it and was about to 'phone the shop to get my home number. Now that is customer service for you.

Sunday, September 06, 2009

Dad's Ferrari


Dads racing car
Originally uploaded by Phil_Parker

This is my Dad's racing car. It has a Mongram kits body, K's motor, Supershell chassis and MRRC wheels and steering. The scale is 1/32nd. He used to race at the Luton airport social club back in the 1960's.

This is how slot racing was before the advent of all that ready to use Scalextric stuff appeared. Handcrafted models with steering that worked. Proper modelling.

This post was prompted by an entry in Iain Robinson's blog about Slot Car Racing 60's style. I looked at the picture and immediately recognised cousin Keith (he is pretty distinctive and hadn't changed when I last saw him a few years ago) second from right. It also fascinated me that they were all smartly dressed to go racing - I don't look that posh when I go to work !


What's really impressive about the whole thing is not that my Dad was an avid racer despite never learning to drive or being at all interested in cars, but that everything had to be made. The 6 lane track is scratchbuilt. Reading magazines from the era, the surface was usually hardboard and there was much debate about which way up it should go - rough side (better grip but less skill required in the corners) or smooth (faster racing once you got going but more skill needed at the start).

Nowadays these tracks were made from ready made bits I believe. Much of the racing is carried out with car shaped projectiles featuring laser cut chassis and moulded tops. A far cry from the days of buying an Airfix kit and fitting mechanical gubbins yourself. Personally I think things were better in the old days but then that's just me.

And yes, when I look at the car I do wonder if it would be fun to make and race one myself. Perhaps it's in the genes.

Hat tip: Iain Robertson - Modelmaker

Saturday, September 05, 2009

Clever track gauge

Track gaugeDigging into the old Model Railway Constructors again, I find this fascinating tool. Designed for making point work from component parts, it's quite simply a piece of wood of suitable width with slots in it so the wood can bend. Thus you have a handy track gauge for the curved bits.

Obviously getting a bit of wood the correct width is crucial. Someone who is handy with a plane ought to be able to help, or better still find a man with a thicknesing machine in his woodworking workshop and he will be able to do the job with great accuracy, albeit on a very thick lump that will then have to be cut into thin strips. Perhaps this is an opportunity for an enterprising trader to make these and sell them ? Not sure how long manufacture would take if you batch built but I bet not that long.

For making your own track using PCB or rivets in ply sleepers, this would be fantastic. It just shows, not all the good ideas are new ones.

Friday, September 04, 2009

Stake wagon

On30 stake wagonWell, I've been noodling around painting the stake wagon this week. Various dry brushings of creams, pale browns, greys and a touch of gunmetal eventually gave me a result I was happy with. On to this went a wash of dark brown. Once dry I felt this needed lighting up a bit and the dry-brushing started again. Not so much but just a bit of lightening here and there.

The result is nicely uneven I think but if I had to do it again, I couldn't !

Anyway, the last job was to fit a paint of Kadee number 5 couplings. The start of holes are moulded in the base of the wagon but these have to be drilled out and then (ideally) tapped with an 8BA thread. The couplings are assembled and the top lip taken off the box (called a pilot box I think) so everything sits flush. A pair of spare steel bolts were shortened and screwed in place. This wagon now connects with the coal tub and that couples with the loco so I think I'm doing OK.

All that is required is a load. It's been too wet to go hunting in the garden for some suitable plant clippings but when I do these will be roped in place with perhaps a little weight hidden underneath to improve running.

Thursday, September 03, 2009

Bobble hat not required


Via a friend in the biz called show:


**************************************************

DO YOU HAVE THE BEST HOBBY?

A new Sky One show is searching for hobby enthusiasts in SOUTH EAST ENGLAND to go head to head with one another for a cash prize.

ARE YOU INCREDIBLY PASSIONATE ABOUT YOUR HOBBY?
RECKON YOU COULD CONVINCE OTHERS THAT YOUR HOBBY IS BETTER THAN THEIRS?

ARE YOU WILLING TO TRY OUT NEW HOBBIES IN RETURN?

DO YOU THINK YOUR HOBBY COULD CLAIM THE WINNING PRIZE?

If you can show the nation that your hobby is worth it’s weight in gold and are prepared to try out a few more, get in touch
Drop us an email with your hobby in the subject line and then your name, contact number, age, address and a 50 -100 word outline of why your hobby is the best and what you would do to convince others that it is.

AT THE MOMENT WE ARE ONLY CONSIDERING PEOPLE FROM THE SOUTH EAST

if you are interested please contact hobbies@princesstv.com


**************************************************

Sorry about the capitals, they are from the original e-mail.
One thing. If you do apply, please do not, under any circumstances, wear a hat.
Not a bobble hat.
Not a greasetop hat.
Not a guards hat.
You are model maker, not some sort of village idiot. Our hobbies need all the help with PR that they can get and that means punching any TV producer in the face when they suggest waving flags or anything else that makes you look an idiot. Please.

Wednesday, September 02, 2009

Low energy bulb

light bulbThe BBC reports that the end is nigh for the incandescent light bulb. The usual selection of unbalanced idiots contributing to it's "Have your say" section decry this as fascist ZaNuLabour EU interference in their human rights. No surprise there.

But one commentator cannot be ignored. Apparently "It will be impossible to do any crafts" with the new bulbs fitted in you lights.

Well, my desk lamp, the one I do all my model making under, has been low energy for about 18 months. The light is pleasant, well balanced and comes on as soon as I want it. It's a slightly softer light than the old bulb but nicer to work under, especially for long periods.

If there is a downside, it's that the bulb produces no heat at all and so you can't dry paint under it or soften plasticard. Aside from that, it's perfect. The world will no more end due to the change in light bulbs than it did with the reduction in availability of lead based solder.

Tuesday, September 01, 2009

Outdoor ballast

Frog crossing
A sunny bank holiday has allowed us to finish ballasting the garden railway. I'm not really sure how you are supposed to do this, but we have done exactly the same thing as we'd do with indoor layouts - fine grit is brushed over the LGB track and once we're happy with the position, watered down PVA is poured over it from a little yellow watering can.

The logic behind this is simple - I hate ballasting so the stones need to be stuck down and stay down. Glued in ballast makes keeping the line tidy a lot easier too. Any leaves that fall can be blown away with a garden vacuum cleaner rather than laboriously being picked off. The vac can be used at a distance too which will save trampling around the flower bed. I think it was David Jenkinson who's technique we are pinching. He was of the same opinion, if you want the model to look presentable, loose ballast is a bad idea. He had much more line to worry about too !

I test ballasted a section of track a couple of months ago and it seems have withstood everything nature has thrown at it. I know PVA isn't waterproof, even the builders stuff we bought, but it hasn't washed away either. OK so there is winter to come but I'll find out then how well we fare. Handy hint: Check the price of the PVA when you buy it. 5 litres was only 5p more than 2.5 of the same stuff thanks to a special offer at the builders merchants. Bargain.

In the meantime, trains were run over the last section to get stones just to make sure everything worked OK. A couple of areas needed to be re-levelled by levering up the track a touch and re-gluing it but otherwise all seems fine. The frogs like it too !

Monday, August 31, 2009

Now you've made them, it's time to use them...

Tank top with rivetsHappy days. I've stuck rivet strips all over the tank end of the Garratt locomotive. I did my best to follow the photo and the results don't look half bad.

The whitemetal vent stands have, for the first time I've built one of these kits, been put in place. They were topped by more plastic and then the vents. Around the sides are strips of lumps and up the fronts of the stands. At the back - well I don't have a photo and there isn't a corresponding line of rivets on the outside of the tank, so I left them off.

The pipe is simply a bit of wire bent up and terminates in a washer. The straps holding it in place are strips of paper. I tried to use microstrip but the plastic isn't flexible enough to bend around the rod. With a good soaking of superglue I think they will look OK.

Finally, the lifting lugs are made from left over etch. Measurements are done by eye but 3mm for the raise part and the same for the flat bit looks pretty close to me.

Sunday, August 30, 2009

Channel Tunnel model railway

British Transport Commission Channel Tunnel model railwayLast Sundays' post about a missing model railway concerned a model of a proposed channel tunnel scheme. This prompted Graham W to take the time to send me a scan of an article that appeared in the Eastern Region Magazine (all the regions of the real railway network published in house magazine, a process that originated from thier earliest days as separate companies) that described the very layout I was interested in !

Thanks to Graham I've managed to wear my fingers out on the keyboard and can bring you the following:
***********************************************
Channel Tunnel Terminal – model built in less than four months
Described by A.W.Ashberry

Undoubtedly a magnificent model ! And it shows what the Model section of the BTC Publicity division can do. Three enthusiastic craftsmen from Stratford Loco works lent a hand.
Started at the end of June, it was required for demonstration at the Channel Tunnel Study Group's conference at BTC HQ in October. It was widely publicised on the radio, TV and in the national Press and will be shown at the Schoolboy's Exhibition at Olympia in London after Christmas.

The 30ft. X 8ft. Working mode is of the railway terminal at the English end of the proposed Channel Tunnel and illustrates the principles of design and operation. It shows the essential features of a tunnel terminal but is necessarily simplified and reduced to a reasonable size for exhibition purposes. In practise the terminal will be three miles long and six miles from the tunnel mouth.

Built to scale, one seventy-fifth of full size, construction was undertaken at the Model section's workshop at Stratford Works (ER) in East London. Rolling stock and the miniature cars come from commercial sources.

British Transport Commission Channel Tunnel model railway - track planConstruction of baseboard and track
The baseboard is built in ten sections each 6ft. X 4ft. which bolt together. It can easily be dismantled for transport and is supported on tubular steel legs adjustable for height. The material used is 5/8in. blockboard.

The rails are of nickel silver soldered to metal plates set in fibre sleepers, enabling two-rail electrification system for model railways to be used throughout. By this method locomotives pick up their current from one rail and the return circuit is completed through the other.
Ultimately the tunnel itself will be electrified on the 25kV AC overhead system, whereas the Southern Region is electrified on the 750 volt AC third rail system. Dual voltage power units would therefore be used on through services.

Both these systems are represented on the model but only in dummy form. The pantographs are, however raised automatically and lowered as they approach or leave the overhead system.
The layout is completely signalled with multiple-aspect colour signals which, although working models are not at present wired up. If this were ever undertaken the relay room would be nearly full-size !

Buildings and scenery
The main buildings are constructed entirely from 3/32in. perspex sheet which when scribed for windows and painted provides a quick method of construction in contemporary style. The locomotive maintenance sheds and signal boxes are built from plastic kits. The scenery is built up on wood formers covered with 1/2in. chicken-run wire netting. This netting is then covered with muslin soaked in plaster which, when dry is given another coat of plaster and covered with impact adhesive. A fine coat of sand is sprinkled over the glue while tacky and finally the contours are hand painted with tempera colours.

A most attractive corner of the layout depicts a section of the white cliffs of Dover. A mixture of Scotch glue and sawdust was plastered over plywood formers and then covered in plaster. The cliffs were hand painted and the sea is a sheet of rippled glass over a painted underlay.

Rolling stock
There are five fine models of the Bo-Bo electric locomotives now in use on the Manchester-Crewe overhead lines resplendent in “electric blue”. Also one French model of the BB 16,000 class which hauls French trains on the Northern and Eastern lines. One 350hp diesel shunter works in the small marshalling yard. Eventually there will be a 4-car set of BR electric stock to work along the Dover-London line represented on the model. One train of French silver steel coaches and two trains of BR standard maroon coaches complete the passenger stock.

The varied freight stock includes perfect models of the new Roadrailer vehicles and Continental and British wagons. The accent is, of course on the double-decked car-carrying wagons. Although shown as open wagons on the model, in actual practise they will be covered.

There is also a train of single-deck wagons on which model cars are run under their own power – through an electrical pick-up. They are stopped on their respective rial vehicles and the train proceeds on its tunnel journey. A train returning from the “French side” with a similar load can be brought into the unloading dock where the cars are run off, again under their own power. This is accepted in the model-making world as a unique feature.

Congratulations are due to the designer, Mr Ron Beddoes, and builders of this fascinating model which will undoubtedly be well received wherever it is shown. This glimpse of the pattern proposed for future cross-channel transport will conjure but one thought in all viewers' minds - “How soon ?”

***********************************************

This is fascinating stuff. The article contains many fascinating points:
The track was hand built using an early form of PCB style construction rather than buying off the shelf items. Fibre sleepers are notorious for being affected by changes to the atmosphere so you wonder why they did this.
At 30 by 8, this model would well within the reach of most model railway clubs. Anyone fancy a reproduction as a project ? I wouldn't recomend the blockboard baseboards though if you don't have a club full of weight lifters !
The unique car system looks very similar to what eventually became the Minic-car system. I wonder if one influenced the other ?

But the big question still left is, what happened to this model ?

(Thanks to Graham for sending me this article)

Saturday, August 29, 2009

Lines of rivets

making plastic rivetsHere's how you get nice straight lines of rivets - use all the bits of the press. That means the cross-slide which has only been out of the box a couple of times since I bought the thing. I mean I always planned to do some scratchbuilding but never quite got around to it. And I know this tool is a bit over engineered for punching out the half etched marks in kits, but then it is loverly to use for the job.

Anyway, the plastic was clamped in the slide, exposing the one failing of this machine - namely the clamping system only works with quite wide bits of material. If you want a thin strip you'll have to rivet it first and then cut it back. Either that or follow Pete Kazers example and make a clamp that fits in the clamp to hold your metal a lot closer to the press and anvil.

The slide advances 1mm for every turn of the graduated handle so that's the spacing I used. You couldn't get any closer really in plastic without the deformed areas overlapping. One you get the hang of it the jobs pretty quick too. I haven't counted how many rivets I made but there will be well over the hundred and every one in place to withing 0.05mm. I don't get any more accurate than that !

Of course you might be wondering why I'm bothering. Slaters do some riveted plasticard and I could just use that. Well, I do have some but (IMHO) it's not as good as my home brewed version. The embossing tool Slaters use is quite small so the result is lots of squares of bumps that don't line up. If I want I could make a strip as long as the bit of plastic.

My bumps look better than theirs anyway. So there.

Friday, August 28, 2009

Riveting plastic

plastic lumpsAdding the rivets tot he Garratt bunker seems, to me, to be a job easier carried out in plasticard than metal. I could cut little bits of brass shim , rivet them and fit in place but I think some of the blending around corners will be easier if I have a solvent to hand to smooth things out. Putting bumps in thin strips only results in mangled metal and bad language anyway.

So, all I need is to form rivets in the plastic. In theory this is possible using my rivet tool so I stick various thicknesses under and have a go. The 0.7mm stuff forms nice little domes with only a touch of adjustment to "bompiness" of the tool. Sadly it's far too thick for the thin sheet I need to represent.

0.4mm seems best but it's a lot more fragile. To be honest this sheet feels a bit brittle and has probably been kicking around for a few years. Tool adjustment is a lot more critical as it's very easy to punch through the thin material. Ideally I'd alter the punch to be less pointed but I don't have an spares, or the ability to make one with a perfectly centred point.

Anyway, now I think I have to find a way to make long thin strips of rivets to go around the bunker edge. If I manage this then the bunker detailing will be easy. Probably.

Thursday, August 27, 2009

Underframe alternative ?

bogie & wagon
As you may have guessed from my description of the build, I didn't find the Select-a-car kits to be that easy to assemble. Once I had put them together, although they run well enough, I'm still suspicious of the steel pinpoint axle running in resin bearing. It just doesn't sound like a recipe for the long term use of the wagon on any model railway.

However, someone told me that there was a Bachmann bogie available as a spare that looked very similar to the Backwoods one. After a little bit of digging I tracked these down to the NG Trains website for £8.50 a pair plus postage.

Looking at the photo you can see that superficially the two underframes are very similar - the axleboxes are pretty much identical. The Bachmann one is die-cast and heavier on its own than the complete wagon. It's wheels are 13mm diameter as opposed to 14mm.

The wagon though, has a much lighter look. The tie bar is massive on the bogie and has some decent springing apparent too. Since it's metal, removing all of this to make it less massive will be a challenge. Of course you could just ignore it - I probably will for the moment - but if not it's out with the piercing saw. At the same time the pivot needs to come off as do the pickups for lighting the coach that should be sitting on top.

Mind you, for the money, the bogies are a pretty good thing. As the basis for an otherwise scratchbuilt wagon they allow the modeller to guarantee that whatever the result, it will work.

Wednesday, August 26, 2009

Inside the bunker of a Garratt

Inside Garratt BunkerLoitering around after the show at MOSI a week ago and wearing an "Exhibitor" badge prominently, I spent a lot of time crawling all over the "William Francis" Garratt locomotive taking lots and lots of pictures. Not exactly holiday snaps but very useful for working out the details.

Thanks the helpful staff, I was even allowed to nip up on the footplate and see just how small the inside of the cab was. It seems ironic that Beyer-Peacock seemed to bless the locos with automatic stoking devices with ballrooms at the firey end, yet when the fireman would be shovelling, he was cooped up in a cubicle. I doubt I'd have shifted much coal before bruising my arms and legs as well as those of the driver through inept use of the shovel.

Anyway, from the cab I could see into the coal bunker. This has always been mystery to me as there aren't any pictures of this area and if there were, most of the detail would be covered up by coal. My modelling efforts have been best guesses with lots of black Welsh gold to hide the errors.

No more though. As you can see, the vents are supported on substantial boxes. There are actually parts for these in the kit but no-one has ever known what they are except the pattern maker and I don't even know who he was. Now I know, I can fit them and the vents in the proper place. Sadly this means I can also see I need to fit an awful lot of riveted material too. And an interesting looking pipe. And the lifting lugs hiding behind the box. Then try not to cover it all with coal.

Still, it's nice to have a challenge isn't it ?

Tuesday, August 25, 2009

White ?

What has happened to Halfords paint ? You used to get a spray can with a colour coded top that looked like it had been painted with the contents. Now the caps are clear with a paper label stuck on apparently indicating the colour within.

Kadet is white so I selected Peugeot Arctic White as a suitable colour. Painting something as big as a model boat with aerosol is a lot easier than trying to work with an airbrush, the later doesn't really throw out enough paint. In a perfect work I'd use a paint gun but that would need a bigger compressor and more cleaning up than I can, quite frankly, be bothered to do.

Anyway, you would have expected paint called Arctic White to be, well, white. Nice clean white white. The label indicated that was what it would be. At no point did I think pale beige. Not until using the stuff anyway. At that point of course it's too late, you have a pale beige model (I know, try the paint on a test piece etc. - the can said "Artic White" and I wasn't that fussy or so I thought) which doesn't look any better in day light no matter how much you squint at it.

The box lid didn't help either. That showed a gleaming model with no hint of rusty cream colour.

There was only one thing for it - more paint. Back to Halfords for a can of "Appliance White". Washing machines and 'fridges, that's the colour to emulate. The paint is white but also very runny and took a fair bit of fiddling with, heating and generally messing around with to get a nice finish. Good shine though. But if you scrape your dishwasher, go and buy a new one as this stuff would be all but impossible to use on a vertical surface.

And if the Artic is beige, I feel sort for the penquins.

Monday, August 24, 2009

van front grilleIt's not just modelling projects that kick around for ages, I manage to prevaricate with VW stuff too !

Just under the windscreen on a VW Type 2 campervan, there is a grille. It's not for the radiator, you don't get one of those on an air-cooled vehicle, it's to cover fresh air vents. Behind the grille bars that are normally painted body colour, is a plastic mesh. Ideally this is a different colour, in fact if it isn't, the van looks odd. A bit like when it was painted the spray gun operator couldn't be bothered to take it out or mask it off.

On my van the mesh had been removed for painting. There is body colour inside the vent area. Despite this, the mesh was an odd assortment of colours, mostly light blue but with a bit of white and dirt. It looked horrible. I suppose at least there wasn't any rust what with it being made of plastic.

Anyway, nearly 2 years ago I bought a replacement part to improve the look of the van. I suppose I could have cleaned up and repainted the old one but that's too much effort and for the money, wasn't worth the effort. The new mesh panel has been a feature of our dining room ever since.

But no more. On Saturday I removed the spare wheel, unscrewed the metal grille and threw aside the old mesh. In went the new part and as the manual says, re-assembly was the reverse of the above. Fortunately as I had been in there before all the screws were greased so nothing stuck. I was a good boy and checked the air in the spare (not enough) and cleaned and waxed the bodywork behind it.

van front sans grille

Now, I hope not to being fiddling with the vents again for a while but that might not be the case. Around the opening flaps you can see some while draught excluder which stops the worst of the wind whistling through and into my face in the cab. On the back of the old mesh there were strips of gaffer tape to seal things up further. The new mesh is sans this refinement so if the cold blast gets too much, I will have to do something. Perhaps a more permanent fix with black plasticard would be a good idea. If you don't live in the tropics, this primitive air conditioning is more trouble than it's worth in my opinion.

Still, the job went well and the van looks a little bit kewler for it. Not bad for an hours work.

Sunday, August 23, 2009

Missing models - Part 2

Another British Transport film, this time the appropriately (for this blog) named "Modelling for the Future". 8 minutes showing a model of the proposed channel tunnel rail terminal being built.

In 1961.

This means we have electric locomotives in bright blue and lots of stock that looks suspiciously Triang. Even a working "RoadRailer" system appears which Traing offered for a short period. When built, the commentary tells us the terminal will be fed from the A23, not a motorway as the first section of the M1 was only a couple of years old at this point. Everyone working on the model is wearing a tie and something tweedy - not a pair of jeans to be seen anywhere.

This is yet another fantastic model and yet I've never seen it. Presumably the work was carried out as part of the publicity process that lead to the work and cancellation of the project in the mid 70's. 15 years from model to short-sighted political cowardice is pretty good going.

What I want to know is, what happened to the model ? It was obviously quite large and probably not cheap to build. If intended for publicity purposes I assume the thing could be dismantled and moved around. Did it ever attend IMREX in London ? Is it still stuck in the back of a warehouse - or more likely, did it gradually fall apart until abandoned in a skip somewhere ?

More on the film here.

Saturday, August 22, 2009

Stake wagon


Stake wagon
Originally uploaded by Phil_Parker
Thanks to the joys of (temporary) full time employment doing proper webmastering stuff rather than assembling toy trains, my modelling time has been more limited over the last week than normal. However despite my commute and consequent earlier starts and later finishes, I have been determined not just to slump in front of the telly or computer. If I want to keep writing this blog, I need to keep making things.

Now if you are a bit tired and don't have a huge amount of time, in theory there is nothing better than sticking a simple kit together. Since the blog has been full of On30 wagon, and I had one kit left of the three I bought, this seemed the best candidate for this weeks project.

The stake wagon goes together in exactly the same way as the open. Build the chassis and stick the sides on. The resin mouldings for the chassis weren't as good as before and needed a bit more massaging to get them flat. More massaging than I bothered to give them anyway. Needless to say, once I'd assembled the sideframes and wheels, the thing didn't sit completely flat. A quick twist helped a little. A bigger twist resulted in a broken sideframe.

Undaunted, I just stick it back with superglue and since the thing seemed flat I left it there.

Initial painting with pale grey, browns and cream went ahead followed by a decent dusting of talcum powder. The results look pretty good to me and once the wash of dark brown goes on the wagon will look pretty wooden for a resin kit.

Sadly, thing needed a touch more tweaking to sit flat again and when I did this, the glue joint gave way and now half the solebar needs to be re-stuck. I'll do this and even brace the joint with epoxy. Then I can finish the painting, put a load on and fit the couplings when they arrive. You'll see another photo when I do.

Friday, August 21, 2009

On30 tub

On30 wagon
My particular kit was the gondola, or in English, open wagon. To make this, 4 cast resin sides are added to the basic flat wagon. These fit on with superglue easily enough and then it's off to the paint shop.

The instructions dismiss anything other than spray paint for the wagons. While the results produced this way are nice I simply can't be bothered for wagons so it was hand painting for me.

Body colour is Humbrol matt red dry brushed with some of the same paint with a drop of cream added. Inside is a light earth and pale grey mix. This is then dry brushed with gunmetal. Finally, when fully dry, a wash of dark brown completed the work. Simple, and to my eye, effective. Perhaps there will be some highlighting of bolt heads with rust, but I'll wait until I decided what load the wagon will transport. If it's coal then a lot of black will be needed instead.

Thursday, August 20, 2009

On30 chassis

On30 wagon chassis
The Select-a-car chassis looks pretty simple. Reading the instructions didn't show up any issues so I ploughed on in the same way I always do - attach one solebar, let it dry and do the other, trapping the wheels at the same time. One surprise was that the bearings for the pinpoint axles were cast integrally with the resin axleboxes rather than separate brass ones. I assumed the manufacturer knows what he is doing but I'm not convinced.

Anyway, I attach the first frame and leave it overnight then I do the second one. Which doesn't work. The axles are far too long. A quick measurement shows axle length 26mm. Between the backs of the boxes is 22.5mm. There is no way that there is 3.5mm depth in the bearings. I played around with a few ideas and then consigned the first chassis to the bin in disgust.

A few days, and a bit of discussion on an On30 message board later, I tried again. Others had made the kits although suspicion about those bearings abounded.

So, on attempt 2 I tired something different. Superglue was spread to hold both solebars and they were both fitted. Then before it dried (i.e. very quickly !) the wheels went in. A bit of fiddling to ensure they revolved well and the splay of the 'boxes was equal and all looked well. In the morning, things still appeared OK and the chassis ran up and down the track freely. Problem solved hopefully.

Wednesday, August 19, 2009

Select-a-car

Select-a-kit parts

In my quest for unusual wagons for the forthcoming On30 layout, I decided to try a Backwoods Miniatures Select-a-car kit. This was slightly influenced by being caught drooling over the range on the stand at Telford NG show. Being a bit bored towards the end of the day I couldn't help poking at them and decided I ought to do more than a bit of tyre kicking 'cos I hate people who spend their time hastling traders with no intention of actually buying anything. Pertinent questions are fine - but you are not the friend of the guy behind the counter just because you came in the door. He doesn't necessarily want to spend hour talking to you, especially when people who are interested in spending money can't get a word in edge ways.

Anyway, I left with three kits. Apparently you have to buy this many to make the economics make sense. I did get a run down of the costs involved but can't remember it exactly now but at the time it made sense. At least I saved postage costs and I had been meaning to buy some for a while.

In the bag are a set of resin castings, some bits of plastic and wheels. All the wagons are basically the same - a flat wagon - with additional body parts to make them different. Instructions are included and for such a simple kit are very fulsome. I suspect the paper weighs the same as the kit parts !

Tuesday, August 18, 2009

The only Beyer-Garratt built in Manchester this year

MOSI buildWell, the only Garratt built in the Manchester Museum of Science & Industry this year during the "Great Garratt Gathering" anyway.

For some people, three days demonstrating model building means three precious days modelling time. That is, IMHO, the wrong attitude. Far better to say that if you get anything made at all then you haven't been talking to the public enough.

Well, this weekend I think I managed to get the mix about right. On Friday the frames for the front engine unit went together. Plenty of time spent checking resulted in decent alignment of the parts as far as I can tell. You need to be careful as it's easy to find just over a millimetre of error thanks to a bit of slop in the parts that slot together.

Saturday there was lots of riveting - which seemed to interest people a lot. I could have done with a couple of GW Models riveting presses for sale I think as no one seemed to think the cost too horrific once I'd explained my reasoning behind the purchase. After making metal dimples, I assembled the front tank. Of course I then went out and looked at the prototype to discover the vents were 90 degrees out of correct. Once of these promptly fell off but it's safe in my "little bits" box.

Sunday was time for the rear tank. Three goes it took to get the wrapper exactly right. Partly this was my fault for trying a different method for attaching. Let's just say, starting in the middle means everything fits. Start and then and and the MOSI clean upresults aren't quite so good. Still, I did manage to demonstrate how to un-solder things...

Of course all this soldering means the parts have to be cleaned and here I can offer more advice. Scrubbing them with Shiny Sinks in the en-suite of a Premier Inn travelodge works fine BUT without some washing up liquid to clean them up afterwards, the surfaces tarnish. Bulling these up with a fibreglass burnishing pen works, but wastes a chunk of time at the start of the day. But then we want things to look good for the audience don't we ?

Monday, August 17, 2009

Great Garratt Gathering


Workbench
Originally uploaded by Phil_Parker
or: "Phil's Workbench on tour"

For the last few days I've been based at the end of the Mercian Model stand situated in the Manchester Museum of Science & Industry for the "Great Garratt Gathering". This event celebrated the production of the first Beyer-Garratt locomotive in 1909.

Part of the event involved bringing together as many Garratts as possible so we were in a room with lots of them - and since Trevor (Mercian) currently produces a kit for William Francis, and I have built a couple of these, we were invited along too. This was especially useful as William Francis had been hauled out of Bressingham Museum and brought to its birthplace in Manchester.

At the moment, I'm still feeling a bit boggled from the weekend - suffice to say is was very busy. The crowds we interested in what I was doing - so much so that on Saturday I looked at my watch and saw 11:15 and thought, "Must think about getting some lunch soon" and the next time I saw it was 2:35. Good job we'd had a big breakfast !

The crowds were my favorite sort, not full of model railway enthusiasts but made up mainly of normal people. Even better, normal people with well behaved and polite children. This meant questions rather than challenges about the placing of rivets. Fascination that anyone makes things any more and some ego boosting compliments about my work. If you are reading this and were one of the people who saw me soldering or riveting, thank you.

If you are reading this blog for the first time after picking up one of my cards, you might be interested in the following links:

My William Francis Garratt locomotive building.

Building the Gauge 1 Ruston.

Mercian Models.

Or if you want to see more pictures from the event, I have a gallery on Flickr.

Sunday, August 16, 2009

Missing models - Part 1

Watching a British Transport film the other day - "Railways For Ever!" - among all the nostalgia, one scene leapt out at me. It was in the section of the film covering the exciting future of rail travel and showed a model of what the narrator, John Betjeman, claimed in suitably awe inspired tones, to be the new Advanced Passenger Train.

The scene involved a model railway layout with prominent Airfix signal box. Whizzing by was an APT. Not the APT we know and love (well I love anyway, a fabulous train) but a model of an early design study. The one shown above in fact. The model obviously ran on OO gauge track and as it cornered the coaches tilted realistically. Between the vehicles weren't gangways but those clever articulating units found on the real train when it emerged.

RG Latham has an excellent site on the APT here with many photos. Check it out.

Now what, I wonder, happened to this model ? It was built by a model maker, probably from scratch since the Hornby model was many years in the future. If it hadn't been they could have saved a fortune on "design studies". How the tilting was achieved is a mystery. From memory, Hornby struggled for some time to work out what in the end was a very simple method. In fact the construction as a whole would take some explaining - the sides are apparently seamless and also made from clear plastic, possibly vacuum formed ?

I must admit a model of the APT-E has always been on my list and one of these could be fun too. Mind you, if I wait long enough, Heljan will probably bring one out RTR !

Saturday, August 15, 2009

2 Mags

Hornby Magazine & Railway ModellerTwo articles in two magazines for me this month. In Railway Modeller you can read about building a Gauge 1 Ruston loco. Alongside my text is a short article on the prototype with a nice plan. My words concern the Diesel-Mechanical version of the locomotive, not the Diesel-Electric version recently featured here.

I hope this encourages a few people to have a crack at Gauge 1 modelling. As I've said on numerous occasions, this loco would form the basis of a fine minimum space shunting layout. Something like "The Melbridge Box Company" but in something rather bigger than a boxfile !

In Hornby Magazine, Parker's Guide covers the BR 21-ton coal hopper. It's not that easy a kit, although like all modern Parkside, care and attention to the correct order of assembly results in a very nice wagon.

To take the article beyond simple "stick a to b" territory I have tried out a weathering technique picked up from military modellers. This uses salt (as in the stuff for chips) to give aid painting rust patches on the sides. I'm pleased with the results and plan to use it again quite a lot in the future. Buy the mag now though and you can be ahead of the game.

Friday, August 14, 2009

Crewmen

Garratt CrewThanks to speedy work by S&D Miniatures and some lightening fast painting by yours truly, the Garratt Locomotive has a crew.

I'm a little worried though. The driver looks very like Bluto from the Popeye cartoons. It's something to do with the beard, angry expression and figure, although the later isn't quite corpulent enough. I don't really understand how I managed this either - it wasn't intentional, in fact I didn't spot the likeness until I looked at the photograph.

Both figures are really mainline crewmen but they will suffice for industrial use. Watching British Transport Films while working recently, it seems that everyone in the 1950's wore a hat of some kind and engine drivers always had a proper peaked cap to denote their superior status over the flat cap wearing population. And they both have shiny footwear thanks to regular shining and in this case, satin black paint.

Thursday, August 13, 2009

Yet another Garratt


Initial Garratt Bits
Originally uploaded by Phil_Parker
Oh, look, some bits for a O gauge industrial Garratt.

Yes, one down, one to go. All thoughts of having the model in a state of near completion in time for the weekend events have long been forgotten. The best I can do is assemble some lumps of locomotive to talk about on the stand.

However, there is one important thing about this model - it's mine. I'm finally getting to build myself an O gauge Garratt. That I get to keep. Forever.

And that means the project has a different emphasis. Instead of simply assembling the etches (first model) or building the best looking loco I can within the time available (second model), I can fiddle with this all I like. If I want to alter or even replace parts, I will.

One of my influences will be pictures of the locos produced by The Model Company of New Zealand and advertised in Model Railway Journal back in 1995. These models were hand built, scratch built engines of the highest quality - and price, the magazine noted "Obviously handbuilt RTR models will cost a few thousand pounds". I drooled over these but even now wouldn't have a hope of affording such beautiful workmanship, but I can do my level best to reproduce it with the help of the kit !

Of course, not having a deadline helps. The plan will be a do a bit, put it away, leave it for a while and then do a bit more. I'll be basing the model on William Francis, not least because I should be able to take some photos of the prototype over the weekend to clear up some of the pipework mysteries. Whether I name the model thus (plates have been tracked down and ordered from Guilplates), I'm not sure yet. I fancy a red liver with black lining rather than anything the loco would have carried in real life. And it's my choo choo so I'll paint it any colour I want, which won't be the colour the prototype is at the moment !

Wednesday, August 12, 2009

Dirty Blue Garratt


Dirty Blue Garratt
Originally uploaded by Phil_Parker
One down, one to go. The first Garratt is finished. Well apart from a crew (on order) and some nameplates (struggling to track these down) but apart from this, it's done. The locomotive runs under it's own power along the test track, or at least it does now I've wired the motors up so they run in the same direction !

The new owners plan to display the model in a scenic setting eventually and so agreed to some light weathering. Let's be honest a clean industrial steam loco looks a bit odd - their condition varied from grubby to absolutely filthy according to the pictures I've seen. Having said that, crews often did take a bit of pride in their machines so some evidence of cleaning looks nice.

Weathering started on this loco with a wash of very weak weathered black around all the pipes and rivet lines. Then the rivets were dry-brushed with a bit of rust followed by the cylinder ends and ash pan. This mixes a touch with the black and takes the edge off the redness.

With the paint still not completely dry I then spray the model with three colours - an overall dark brown (Humbrol 170 if I can get it, why was it discontinued ?) followed by a dark earth for the underpinning. Finally some black is drifted onto the top to simulate soot.

Finishing touches include glazing (Krystal Klear) and grease on the buffer heads done using an ordinary HB pencil. A touch of weathering powder gives texture to the very rust bits.

The satin varnished paint shines through the muck when the light catches it giving an oily impression. The main body colour was a good choice too as it's bright enough to stay visible under the dirt, something the much darker blue used on the last Garratt I built didn't.

Tuesday, August 11, 2009

Motor hole


Motor hole
Originally uploaded by Phil_Parker

For some reason, this motor in the back of this Garratt locomotive, doesn't fit. I'm sure it fitted when I carried out the test build. Maybe the supplied power unit is longer than before ? Checking the photos of the build, I think the configuration is the same one I used last time.

Anyway, the motor has to poke into the coal space. Not a lot but enough to require a hole in the metal. This was easily cut by drilling the corners of the hole and then "joining the dots" with a piercing saw.

A simple black plasticard box will cover everything up and then a pile of coal with hide this. Anyone looking at the model will never know.

Update: Problem solved. The motors are longer than before. Problems with Tenshodo supply apparently.

Monday, August 10, 2009

Walschaerts

Walschaerts

Does any other word strike so much fear in the model locomotive builder ? Walschaerts valve gear is wonderful stuff on an engine, it adds complexity and detail under the footplate. All those rods form a natural focal point. Built properly, every modeller will ohh and ahh over it.

And joy of joys, the Garratt has four sets. To be fair, if you ignore the connecting rods then the complexity is formed of only 6 parts. OK, so all of these are double thickness lamination's but that's not too bad.

No, the worst bit is jointing the parts. Most of mine are done with brass pins or in one case, a brass rivet. All are soldered. Some days this works, some days it doesn't. The first day I tried to build up the valve gear, I made the first joint 5 times before it flexed. The next day everything went perfectly. To stop the solder running I used the tin-foil method and it worked a treat.

One issue I did find was that the unit where I had fudged things to get enough clearance between cross head and front crank pin didn't work. The joins were too small and kept breaking so I had to bit the bullet and dismantle it, rebuilding with the cylinder faces moved out to gain space. It just shows you need to do each step properly before moving on or it will come back to bite you.

Sunday, August 09, 2009

Kinder disapointment


Kinder Smart Car
Originally uploaded by Phil_Parker

On my way back from Birmingham a couple of days ago when I felt the need for something to eat. The handy mini-market opposite Smiths on the concourse was available and I purchased some chocolate and then , on a whim at the counter, a Kinder egg.

I may have had some beer inside me which influenced this.

According to the assistant, I'm not the only one who does this either.

Anyway, like everyone else who does this, I'm not really interested in the chocolate shell. It's OK but not really enough for a grown up, we never believed that a finger of fudge was just enough either years ago. No, what I wanted was the toy inside, the idea being that its assembly would provide a little entertainment for the train ride home. I like making things, even enjoying the challenge of flat-pack furniture, and fiddling with stupid little toys like this is fun. Especially when your faculties aren't in tip-top operation.

For a change a seat is selected with a table - hoping the lateness of the hour meant no-one would join me and disturb my building. After all, I wanted to be able to spread out the parts and instructions on the workbench.

I open up the egg. The chocolate is disposed of in the normal way. Then the yellow plastic container is split.

Disaster !

Inside is a car. A Smart car. A ready built Smart car.

What's going on here ? When did the Kinder corporation stop putting kits in the eggs and start putting ready made toys in ?

At some point in Kinder Towers, there has been a board meeting. In front of a PowerPoint slide someone has stood up and with Teutonic efficiency announced that children's ability has dropped below the point where they are able to take some brightly colour plastic parts and assemble them into a toy. Tests will have shown that your average child will now stick the bits up their nose or into other bodily orifices as they are too stupid to know how to do anything else.

This is obviously A Bad Thing. Where is our next Brunell or Barnes Wallace going to come from if this basic engineering practise is gone ? If you give them ready built cars then what you will produce is a nation of Jeremy Clarkesons. Fine if you thing pushing a Smart car around a train table shouting, "Powerrrrrr" and pretending that the tyres are smoking makes you a useful member of society, but the car will be German or Japanese 'cos we don't make anything any more.

Then it occurs to me, Kinder is a German company. By inserting ready built toys into the eggs, the crafty Hunn is destroying our engineering base. A clever plan but I have seen through it. There is only one way we can save Blightly - Children of Britain, I call on you to take up your Meccano !!

Saturday, August 08, 2009

Grab that Garratt


Workbench
Originally uploaded by Phil_Parker
How do you hold and work on a Garratt locomotive engine unit ? There aren't many flat areas it can sit on - and you don't want to bend those delicate waggly bits yet you still need to be able to get at the thing from lots of angles. With both hands.

Solution - stuff the motor down the central tube of the reel of solder. It's heavy enough to stay put and the motor/tube interface (as they say in management apparently) is good enough to ensure it remains stable while hot irons, pliers and bad language are brought to bear.

Friday, August 07, 2009

Fag paper clearances


Cylinder backs
Originally uploaded by Phil_Parker
You don't get a lot of space between the back of the cross heads and the front of the leading crank pin on this Garratt locomotive. In fact unless you do some serious fiddling, the clearance is nil or less than nil - the crank will wallop the bars as it tries, unsuccessfully, to rotate.

On one end a combination of things (error probably, but fortuitous ones) allowed me to cheap and fit the slide bars to the outside edge of the cylinder face. This bought me enough space - just.

On the other end this ploy wasn't going to work so off came the cylinder ends courtesy of the RSU. The holes were elongated towards the outside edges and the spigots thinned down on one side. This bought me about 1.5mm on each side, enough for the wheels to rotate freely. Wish I'd thought of this before I put the thing together first though !

Thursday, August 06, 2009

Blue is the colour


Blue Garratt
Originally uploaded by Phil_Parker
How do you decide on the colour a model locomotive should be painted ? Normally it's easy enough - look at the photos of the real thing and copy them. Sadly, the real thing is currently painted in a sort of mustardy brown, a shade it never wore during it's working life.

According to those who know, when the Garratt worked, it was blue. Probably dark blue. Or black. That's why I painted the last one I produced S&D blue. Personally I think it's too dark, it may be right but in model form doesn't suit the engine (IMHO). A bit of weathering helps but unless you chuck lots of light at it, the paint looks gloomy. Now on the stand there is a nice spotlight to brighten things up but the new model is destined for display in a church in a case, which means there will be less light.

So, the decision has been made to go for a lighter shade of blue. Humbrol No.25. To my eye, it's not a bad match for NCB blue and certainly sits well on the locomotive. Fresh from the airbrush the colour is a bit flat, it is a matt paint after all, but give it a coat of satin varnish and this give it life.

Mind you, there is a long way to go. Quite a lot of this model is black and that's a hand painting job.

Wednesday, August 05, 2009

Hard Brass


Cast Brass
Originally uploaded by Phil_Parker

Most of the Garratt Locomotive detail is, as is usual for model loco kits, cast in whitmetal. However this material is too soft for some of the working parts, especially surfaces which will see a lot of wear. Ironically on real engines, whitemetal bears were quite common but of course these were lubricated and replaced as required.

For the slide bars and cylinders you need something harder and in this case that means brass. The castings are made using a lost wax process and arrive on sprues like any other. Cutting them free requires big cutters or piercing saw. I then had to remove a chunk from the stub at the back of the cylinder face before drilling out the centre for the rod.

The front castings are for the valve guides and these are more of a problem. They too have to be drilled out but in this case there are two tubes that have to be tweaked to be in line and then put on the drill. Quite a bit of accuracy is required here and I'm struggling a little bit. I think the solution is to drill each part separately and then line them up rather than the other way around.

Update: That idea doesn't work. Instead I drilled through in one hit from the front using a 1.3mm bit which allows more than enough leaway for the valve spindle. Where the hole wasn't accurate enough in the cylinder wall, a broach could be slipped through fronm the buffer beam end to open the hole out a bit.

Tuesday, August 04, 2009

Garratt progress


Garratt progress
Originally uploaded by Phil_Parker
The good news is that I am rapidly running out of etched bits to attach to the Garratt locomotive. All the major lumps are in place as is much of the detailing. It's all looking pretty good. At this point the 80:20 rule is running things - 80% of the time is spent on 20% of the model. In other words, sticking a boiler together produces a sizable chunk of steam engine - but the character of the model is in the detail such as handrails and pipework and they take a whole lot longer to form and fit. I never was any good at plumbing !

But, and it's a big one, I still have to fit the valve gear. Hopefully the motors and gears will arrive in today's post so that task can commence in earnest. With a deadline for delivery of this Saturday looming, I'm hoping my skills with the waggly bits aren't too rusty.