Saturday, November 08, 2014

Brasso time

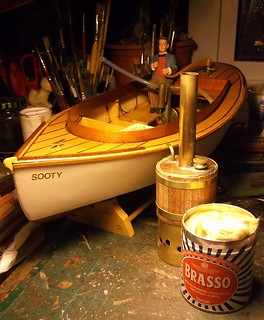
Boat polishingAs you read this, my fantail launch Sooty, should be on display as part of the Knightcote Model Boat club stand at the International Model Boat Show in Warwick.

Our theme this year is wooden boats and since I'm quite pleased with the woodwork on the deck, and I want to go in to the show for free, it's been entered in to the display.

The boat hasn't been out for over a year and I recall that in the past a mix of steam chemicals and oil resulted in the brasswork looking distinctly green and slimy. That's not what anyone wants to see on display so out came the Brasso wadding and everything has been given a good polish.

While I was at it, the woodwork has been waxed so the model is ship-shape for the public. If you are coming along to the show, I'll be there manning the stand on Sunday so please drop in and say hello. I'll take some photos and post them next week so you can enjoy the show even if you can't make it.

Friday, November 07, 2014

Sydney Opera House - in brass

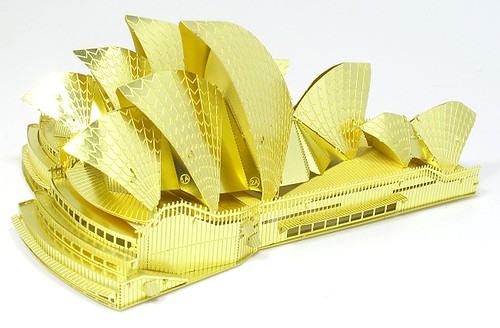
Opera House in brass

You'd think a kit designed for "normal" people would be easy to assemble. Instead, I've built locomotives that were easier to put together than this!

Part of the problem is that to make things "easy", the kit used tabs and slots to locate the parts. You push one through the other and then bend it over to lock the two bits together. There are many places where I'd love to have run a bead of solder but the metals coating would prevent this. Since the end result needed to be unpainted, stripping this off wasn't really an option. Besides, I was supposed to be building this for fun, not a serious project.


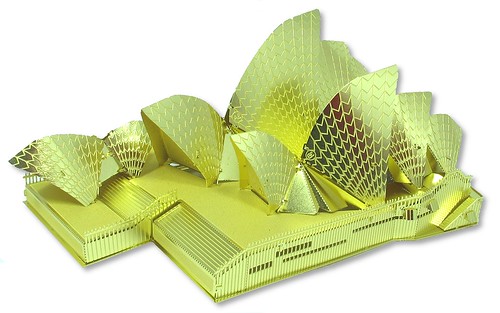
Opera House in brass - rear view
 
Even if you are a normal person, you'll need some small pliers with tiny noses to put this thing together. You'll also need a Stanley knife or similar to cut the bits free from the fret - something the instructions don't mention.
 
The design of the building doesn't help much. It's all curves and angles. If a wall isn't curved, it zig-zags in and out and this doesn't always come over in the instructions. All bend lines are etched as dotted lines rather than the kit convention of half etching, a pity as this would have provided an indication which way the bend was supposed to go. In my experience you get to change this three times before the metal snaps...
 
Anyway, after around 3 hours fiddly work, I have the start of an Australia corner in my display cabinet. At 13 x 8 cm, it's a nice size (no, I don't know what scale it is) and I have the satisfaction of having made it myself.

Opera House at dusk

Thursday, November 06, 2014

Sydney Opera House - in kit form

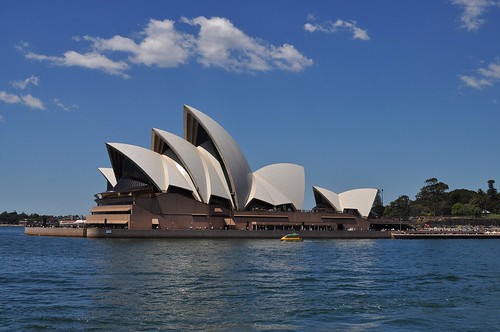
Opera house from the ferry

If you visit Sydney then it's pretty much the law that you will go and have a look at the opera house. We're all seen it on the telly and so the chance to have a look at the real thing isn't something to be passed up.

I took my look on the first full day in the city. As expected, the building looks amazing although not as big as you'd think it is. A tour of the inside is interesting. Those shells are undecorated concrete inside and covered with shiny, self-cleaning, tiles outside. A fascinating structure.

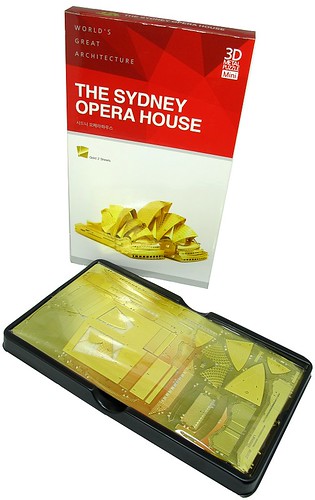
Opera House KitNow, if you have an iconic building then the other certainty is that every souvenir seller will be peddling miniature versions. From tiny resin keyring sized models to whoppers in the Lego range that would have required me to empty the suitcase to ship home, there is something for everyone.

Including me it seems.

Much as I'd enjoy the Lego versions, my hobby involves an awful lot of etched brass construction and so when I found a metal opera house kit in a model shop, I knew it had my name on it.

Not described as a "kit", this is marketed as a 3D puzzle. In the box are two nicely etched sheets of brass. The metal has a strange surface so presumably it's been lacquered to keep shiny. Two colours are available - silver or gold. The later seemed to be selling less well so that's what I plumped for.

Price is around £15, not too bad as a souvenir and certainly lightly enough and packed to survive a flight home. What the security people thought when they X-rayed it is not known...

Wednesday, November 05, 2014

Not so different after all

Aussie Steam Engine

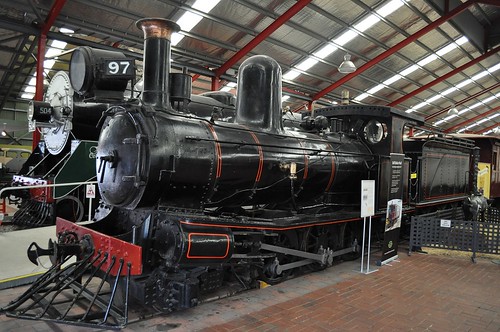
The traditional British view is that foreign railways should be ignored and only the home-grown scene is of interest. I'll admit to preferring UK prototypes myself, but as these photos show, it's not as simple as this.

Take a look at the top photo. An Australian 3ft gauge prototype built by Beyer Peacock. Now look at this one:

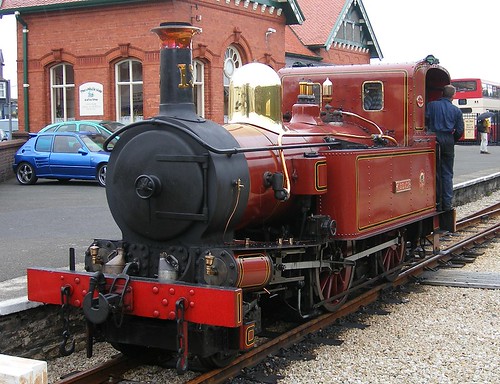
Kissak
 
A 3ft gauge prototype, also built by Beyer Peacock. The front ends both show the "house style" or that the makers had a design that worked and weren't about to change it just because there were going to be more wheels and a tender behind the cylinders.
 
I wonder what would have happened if the Isle of Man had needed some tender engines...

Tuesday, November 04, 2014

Detailed scenes

 
Not all Aussie layouts are giant scene nailed in place. Master modeller, Gavin Thrum, builds what we would consider "conventional" exhibition layouts. On to these he lavishes high levels of detail.

 
As a bit of a detail freak myself, I loved this work and could have snapped many more shots. As it is, I present four examples. Hopefully there will be more appearing in print in the not too distant future.

 
All this is impressive, especially when you consider that Gavin is one of the very few pure-bred Aussies I met while away. Not only that, he's never been to Britain so all this is from photographs!

Monday, November 03, 2014

Aussie layouts

One of the biggest differences between the Australian model railway scene and the UK one is the lack of exhibitions. With major population centres being hundred, if not thousands of miles apart, any exhibitions would be very localised with little chance of bringing layouts in from outside the immediate area.


Down under, they also enjoy much more space outside the city centres than we do. Bungalows on plots larger than most UK executive houses occupy are the most common suburban accommodation. These allow for proper sized train shed often twice the size of our double garages.


All this meant I saw many very large layouts that were permanent installations. Each featured several stations and the system was operated far more like the prototype than the theatre presentations we tend to do for exhibition display. Trains are passed between operators and dealt with in a prototypical manner.


Rather than bring the layout to the operators, the operator travel around the layouts. Each weekly meeting takes place at a different venue with the team enjoying a running session + stubbies. If there are 5 in the team, that allows everyones layout to be worked once a month, allowing plenty of time for subsequent repairs and tweaks before they descend again.
 
Some of the layouts are vast empires. Even the more modest ones would be considered large by UK standards. You don't see many UK models where a Garratt can earn its keep in the way the real thing did!

Sunday, November 02, 2014

Fixing my clock

 
This rather childish clock has hung on my wall for at least 15 years. Recently, it stopped working. At first I assumed a dead battery but replacing this saw the metal terminals in the battery box break off.
 
A sensible person would have taken this as a reason to replace the clock for something more grown-up. I am not a sensible person and nor can I be called properly grown-up, so I decided to fix it.

 
The plan was to replace the old mechanism with a new one bought from Maplin. Work started by carefully levering off the hands and then undoing the centre nut with some thin pliers.


Once I had old (left) and new (right) mechanisms, it became obvious that there was to be no quick-fix. The old shaft was larger than the new so I'd have to fill the hole in the face a bit. Also, the hands wouldn't fit on the new shaft and I didn't want to change them.


Plan B. Since the mechanics work OK, just replace the battery box with a new one epoxied to the back of the face. The wires are soldered to terminal visible on the edge of the circuit board. Happily, this works and I can hope for another few years timekeeping.


Saturday, November 01, 2014

Large Model Association 2014

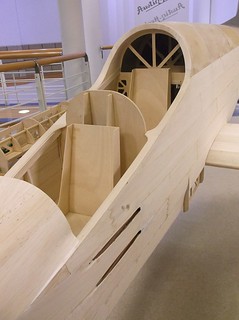
Off to Gaydon last weekend where the builders of huge model aircraft were showing the results of their labours.

While I still don't have any idea what makes someone get up in the morning and decide that their life won't be complete without building a half sized Gypsy Moth, I can still appreciate the workmanship. It's also ineteresting to see what the trade has on offer. Last year I funded the cost of my entry with a review of a laser-cut servo mount...

3D printed pilots

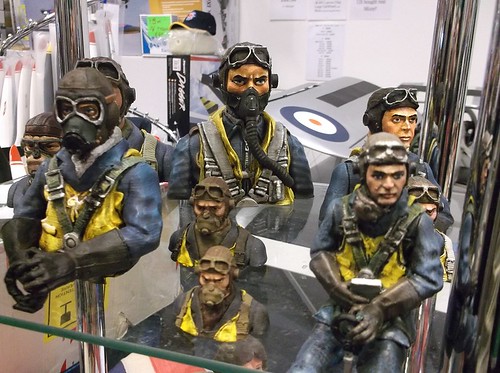
Anyway, one of the highlights was the selection of 3D printet pilots from RealModelPilots. These look amazing and can be sculpted (in CAD) so you can fly your own aeroplane. From a practical point of view, since they are printed in ABS, the models are tough but very light.

If you are willing to sacrifice strength for weight, rather than a honeycombe interiror, you can have your miniture hollow. I had a look and to be honest, the hollow versions is pretty strong so I can't see why you'd add extra internal structure. If you need that strngth to survive a crash landing, a damaged pilot is likely to be the least of your worries.

Under constructionElsewhere, I was chatting to a man building a 1/3 scale South America plane. He showed a material made by sandwiching balsa sheet either side of a hard, but light, solid foam sourced from the Formula 1 world.

Tests for the CAA (big models have to be certified) have proved it's strong enough for construction of flying items and I wondered if it would work for baseboards. Strength looks fine but I suspect the cost might rule it out.

All-in-all, very interesting as usual. I've come away with some interesting goodies, including a new (to me) material I'm very excitied about and will devote a blog post to in a few days.

In the meantime, go look at the gallery on Flickr.

Friday, October 31, 2014

More souvenirs

Oz KitsWell, I couldn't visit all those model shops in Oz without buying a few kits could I?

The range of Australian prototype kits is greater than I had expected. Maybe visiting modellers interested in UK railways influenced me, but I'd expected this to be the realm of scratchbuilders whittling things out of gum trees.

Not so. There is a modest amount of RTR and quite a supply of kits. Not anything like as much as on the UK scene, and diluted because of the countries 3 different track gauges, but still enough to make a reasonable start on a layout.

Limitations on the amount of baggage I could bring back on the 'plane restricted my buying but I have a few bits to dabble with.

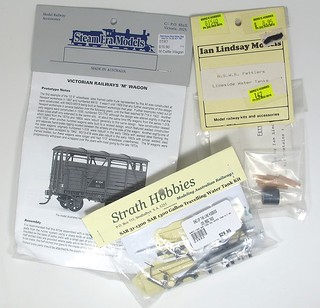
Top of the tree is the Steam Era Models kit for a Victorian Railways "M" wagon. Sharply injection moulded, the kit includes wheels and some etched details. Price $16.90Aus, or about 9 quid in her Britannic Majesties coinage. A real bargain in many ways and slightly cheaper than a comparable Parkside kit.

Next is a Strath Hobbies SAR 31-1300 Travelling Water Tank. Injection moulded solebars, metal wheels and a resin body and some plastic strip. Obviously more of a cottage industry kit than the one above but I've seen a finished model and it looks OK. Price $29.95Aus - not dissimilar to a UK kit from the same sort of firm.

Finally, as the holiday drew to a close and I really was worrying about the suitcase, a couple of NSWR lineside water tanks from Ian Lindsay Models for $8.95Aus. Resin corrugated tanks and bits of wood. Nicely moulded and they will look great on a diorama one day. The Aussies collect water obsessively so you can't model the country without these.

In addition, there were some rather nice building kits, Korean brass (lovely Garratt for $1700Aus), brass and whitemetal kit locos and loads of other stuff. While the Aussie modeller might have to build more than his or her UK counterpart (no bad thing some may say), there's certainly a lot on the market.

Thursday, October 30, 2014

A couple of souvenirs


"What did you bring back from your holiday Phil?", I hear you ask.

Well, there is an awful lot of stuff the tempt the tourist but assuming you don't need a "genuine" Aboriginal boomerang or didgeridoo and prefer something railway related then the list becomes a lot shorter.

In my suitcase, a GWR 0-4-2 was to be found. Purchased for $20AUS from the convention second hand stall, this is a K's whitemetal kit still running on its original wheels. While the paintwork could do with a little touching up and a new smokebox dart is called for, the loco runs quite a bit better than the poorly Airfix GWR version I bought from eBay to operate Edgeworth.

I quite like the idea that I've imported a British model built by an Aussie. It's perfect reminder of the convention.

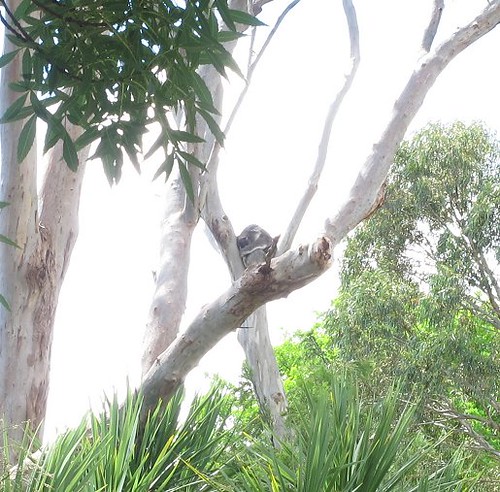
A plastic Koala might at first appear to have less of a model railway connection, but I spotted a wild one whilst photographing a model railway out in the wilds of Adelaide. Not something that happens in the UK!

Koala

Wednesday, October 29, 2014

Yard crane

Yard Crane

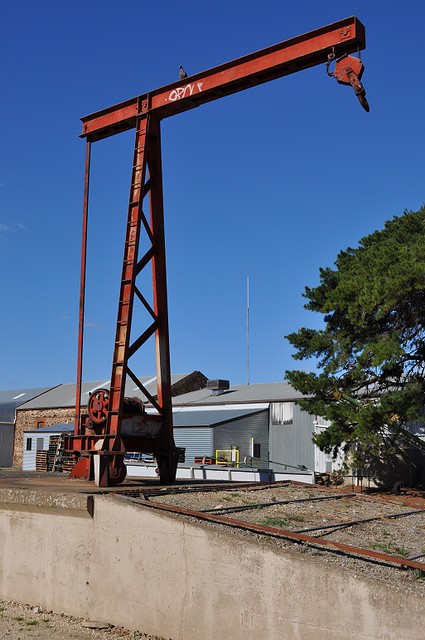
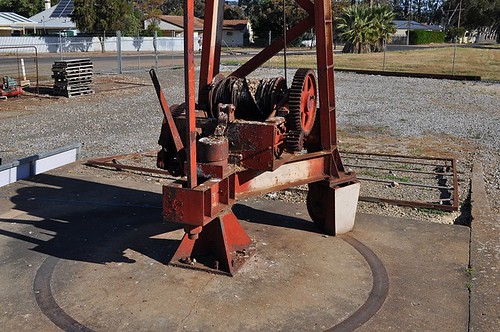
Yard cranes in Australia, at least those on branch lines, seem to have two designs.

The first we can describe as "looking a lot like the Wills kit" and because of this can be ignored.

The other, and far more common version, is this tall example. For some reason, even though none appear to have seen any lifting action for many, many years, there are loads around. I reckon I saw at least 20 in my short time. Examples have survived even when the tracks they would have served have long since gone.

Yard Crane base

The design is ingenious. A central pivot point anchors the crane and the base rotates around this. Sadly I didn't get any measurements - long tape measures and long haul luggage allowances do not make good bedfellows - but I'm sure someone has a plan somewhere. Possibly even a kit.

Monday, October 27, 2014

Stobie Poles


It's funny what you become interested in on holiday. Or maybe it's just funny what I become interested in.
 
On the other side of the world from my home, the object that fascinates me more than anything else in the country is the Stobie Pole. Yes, poles supporting power lines. Something never seen on a postcard.
 
It seems that South Australia is short of straight trees suitable for making poles. Gum trees are wooden knots so not suitable for the job. If that wasn't enough of a problem, termites love wood so even if you have a straight length, it will be dinner pretty quickly.
 
The solution James Cyril Stobie came up with was to make a pole from two lengths of H-section steel filled in with concrete. Apparently alternative designs are regularly looked at but in nearly a hundred years, nothing superior has been found.
 
I pondered how I'd make a miniature version and thoughts of brass section filled in with plaster had crossed my mind. BRMA member Gavin Thrum has a better solution (seen on the right) with the metal section filled with basswood. This provides a suitable texture and is pretty close to the right colour.
 
Why they don't appear on a postcard though, remains a mystery.


Back from a land down under


Right - I'm back from Australia. The trip was great, none of the flying involved crashes and I'm now faced with trying to get back to normal. 

 
Whilst I'm sure no-one wants to read me banging on about my trip, it's my blog so I'll be putting up a few bits and pieces. After all, with no model-making done for 3 weeks, I need to talk about something! Besides, I had hopped to drop a few Aussie posts in while I was away but with the pricey Interweb over there and so many things to see, this didn't happen.
 
The BRMA convention went very well. My workshops were well attended and all finished with modellers having a go at the brick colouring method I now use. It's quite fun to see a group of middle-aged modellers wielding pencil crayons on resin building parts and being pleasantly pleased with the result.
 
During the main sessions, my talks went down well too. It's a bit nerve-wracking heading to the other side of the planet to talk to a group. If you bore them then they might reasonably wonder why they asked you in the first place. Fortunately, there were many other talks so if I had fallen flat, then there was other entertainment.
 
After this we enjoyed visits to many different layouts. All that space allows the locals to build some magnificent empires. I'll post a few pics later once I've sorted out the 2611 photos I've returned home with!


Sunday, October 26, 2014

Broken, but not in the way you think

 
Controller turned on.
 
No red light.
 
No locomotive movement.
 
Faulty electrics?
 
Nope. The knob isn't gripping the shaft properly. It's turned around a little bit. As it happens, I didn't spot this originally but then realised what was happening. At least it was a simple fix!

Saturday, October 25, 2014

Q Car

 
Behold. The Holy Grail of Triang collectables.
 
R571 "Q" Car
 
Produced in 1968, it's an exploding wagon that when open reveals a pair of "Red Eye" missiles. The mechanism swivels these into firing position when the sides come off.
 
Only 2,700 were made.
 
Price £345
 
I'll admit to being in awe of this. I have been a fan of the Battlespace range for years but this is the first time I've ever seen inside one of these. WM Collectables kindly lent the model to me for a few minutes so I could take some pictures for another job in the future.
 
If I had the money, I'd not have handed it back. This is hard core collecting at its best. Never mind your endless lines of diecast cars, when you've tracked one of these down, you are an alpha male in the collecting world.
 
And if I owned it, of course I'd play with it. I'd blow all those super-dooper finescale models off the tracks. This is what I call fun!

Friday, October 24, 2014

Triang R298

 
How nice is this set?
 
A Triang R298 Home Maintenance set for your model railways. Complete and untouched.
 
Containing some tools: tweezers, and electrical test light and some screwdrivers. Spools of wire in four colours, track pins and a tube containing couplings, screws and other sundries.
 
Once upon a time we fixed our model railways.
 
Yours for £145 from WM Collectables. Yes, I know it is a lot of money but find me another one in this condition. Of course I'd like it. But not as much as I'd like tomorrows blog subject.

Thursday, October 23, 2014

4 wheels on my loco

 
The big worry with a whitemetal chassis is that the thing won't be flat. Castings have a tendency to subtly change shape as they cool and while that might not be an issue with the pretty bits, where accuracy matters, this is a bad thing.
 
You might wonder why if I'm so worried, I didn't replace the lump. Truth is, while there are only 4 wheels, I'd need to hang the cylinders and valve gear of it. More to the point, the body has to sit on top and pivot. Since the arrangement shown in the exploded drawing looks pretty promising (read, quite like the setup seen in old RTR) I don't fancy trying to re-engineer this.
 
Anyway, a quick check shows the chassis is flat so far. If it need a tweak, at least the metal is soft enough for this to be reasonably easy.
 
And in case you are wondering, the metal disk is from a computer hard drive. It's more robust than glass and flatter. I'm proper hard finescale like that.

Wednesday, October 22, 2014

Bushed chassis

 
I'm not sure what world Nu-Cast were operating in when they decided that the whitemetal loco chassis would provide adequate bearing surfaces, but in my world they were wrong.
 
With all those waggly bits hanging on the outside, I really don't want to have to strip the mechanicals down just because after a prolonged period of running, the axle holes are the shape of a Wheetabix rather than round.
 
So, after digging four brass bearings out of the pot you saw yesterday, I reamed out the holes in the alloy lump and glued the metal bits in place. Reaming took rather longer than I expected as the hole enlargement is greater than I expected but once done and with the holes countersunk, the bearings were pushed in to place and then pressed home in a vice. Only one needed a smear of runny superglue too.

Tuesday, October 21, 2014

Pot of bearings


When I pen a magazine article, one phrase I hope never to write is, "I got this from the spares box."

How frustrating is that for the reader? I might have a spares box able to provide the vital missing part but that's not much help to anyone trying to follow the project. Not unless I'm selling special spares boxes with all the rubbish you might need for modelling.

Actually, that's an idea. I bet they would sell. Especially if I got someone famous to brand them...

Anyway, on the blog it doesn't matter. So, here is my brass bearing jam jar. It's where I go when I need to stick some bearings in a chassis and the kitmaker hasn't thought to supply them. Once you've been modelling for a while, you build up this sort of bits stock and the building process becomes quicker and easier.

Mind you, I can't remember why I bought most of this stuff.

Monday, October 20, 2014

Hobbyco Store - Sydney


Apologies for the lack of posting from a land down under. It seems that WiFi here is limited and/or expensive so I've had to concentrate on working on MREmag.com or backing photos up to Flickr.

However, I felt I ought to share this model shop with you. Possibly the biggest I've found. HobbyCo describe this on their website as a “Flagship store”. Now, as far as I know, only fashion emporia have flagship stores – that being the big shop in the capital where all the trendy stuff goes.

Well, this isn't in the capital city and if the contents are trendy then I've suddenly become cool.

Sited in the top floor of the Queen Victoria shopping centre, the most impressive building in the centre of Sydney, it has everything you could wish for.

Obviously I headed straight for the model railway section, right as you walk in the door and behind the operating railway in the window if further guidance were needed. That railway, by the way, looks like a standard Hornby display item and was running Flying Scotsman double-headed with Thomas on one level and something German looking on another.

Train wiser there is a huge range of Hornby products, both rolling stock and Skaledale. You can have Bachmann too, and most surprisingly, Peco. Not just track but O gauge building components. If you need road vehicles then a pretty impressive selection of Oxford Diecast are stocked.

Foreign models aplenty include American and Australian locos and rolling stock. Ausie wagons are rarer but several box sets were on sale. A sale bin had some bogie hopper kits, a local production complete with transfers but not bogies. $25AUS a kit if you fancy them.


Outside trains, I found a huge range of plastic kits, slot cars, R/C cars and aircraft and piles of laser cut model boat kits, many from manufacturers I'd not heard of. Plenty of Manga stuff if you want it as well as all the normal ships, aircraft and cars.

Paint and glue is stocked along with a wide range of tools. As befits the location, Tamiya and Mr Hobby Japanese materials are available.

This is one heck of a model store. I can't comment on prices as I'm still halving everything to convert it in to pounds sterling so it all looks reasonable. I'd certainly love to have a shop ike this in a few UK cities!

Me, I left with an Assie diecast car, a cartoon Karman Ghia and an etched brass kit for the Sydney opera house. And even more worries about future excess baggage charges. Suggestions for methods of shipping a lot of magazines and books from Aus to the UK would be welcomed...