Sunday, December 20, 2020

Douglas model boating lake

A nice little find while Christmas shopping is a tourist guide to the Isle of Man from 1960. 


Mostly full of adverts for hotels, there is a colour section at the front of the book with shots from around the island. 

The one that really caught my eye is this one caption "The children's (and fathers') Boating Lake, Loch Promenade, Douglas. 

What a wonderful facility!

Unsurprisingly, the pond has long since been turned into a sunken garden. I suspect that water is harder to maintain and potentially dangerous for a start. More importantly, how many people enjoy the peaceful pleasure of sailing a little boat this those shown? Sadly, not many. 

If I ever get back to the IOM, I'll do my best to identify the location of this image. The shelter is still there, so it shouldn't be too hard. 

Of course, model boating lakes like this weren't uncommon in seaside towns years ago. I'm sure I've seen them in the past, although I can't remember where. Can anyone else help?

Saturday, December 19, 2020

Saturday Film Club: Leamington Spa in the late 1950s


It's always interesting seeing old film of the place you live - simply spotting the changes in street scenes appeals to me. 

These films are odd. The cameraman seems to have spent his time filming very random bit of traffic. Fascinating now, but I wonder why he was thinking this at the time. 

For me, the big surprise is just how much road traffic there is. Leamington has always resisted the lure of pedestrianisation, preferring to have a four-lane main road running through the town centre. It's obvious that this has always been a busy road too.

Friday, December 18, 2020

A new delivery van for Garden Rail


If you've read the latest issue of Garden Rail, you'll have spotted a review build of 3D Wayne's "Mostyn Seven" van. As well as the kit supplied for review, he also sent one over to me and I've turned it into a delivery van for Garden Rail. 

The kit is 3D printed so needs a little clean-up to remove print lines. A couple of coats of high-build Halfords primer did the job well enough for me. After that there was more rattle-can painting and a set of transfers made on my printer. 

I'm particularly pleased with the spoked wheels. The spokes are printed and all I did was draw them in with a bow-pen full of silver paint. 


This was a nice simple project and a bit of fun. I like the cartoony looks of the model. This fits in with the sort of people I populate my outdoor line with. Look out for this appearing on lines I visit - if we are ever allowed out to visit anywhere in the future!

Thursday, December 17, 2020

Garden Rail - January 2021


Our lead layout in Garden Rail this month is the stunningly realist Isle of Westland railway, built by Andy Coward. For an editor, it presented a big challenge - the photos are all stunning and I couldn't fit them all in, despite a page shuffle to give it a bit more space than recent months. 

We've also got some scratchbuilding advice for the larger scale modeller. If you fancy building a battery-electric loco, then read Dave's words. You don't need a well-equipped workshop, just hand tools and some stuff from a DIY store. 

Full contents listing over on RMweb. 

Wednesday, December 16, 2020

Invisible work

Scribing 

Why do we fiddle with details that no-one will see on a model? 

"Because I know it's there." seems to be the stock answer when I ask anyone this question, and I guess it's as good as any. 

Normally, we build models to please ourselves. In truth, unless someone is paying you to build it, there is absolutely no point otherwise. On that basis, you make things to a standard you are happy with. This might not be the highest in the world, but it's a level where you gain the maximum pleasure - this is a hobby after all. 

Commercial modellers will have a different approach, but I know I'll never ben properly in that field. There isn't a magazine project I've worked on where I haven't done some work that won't appear in the photos on the page. Maybe I might take the model to a show (remember those?) and the fact the back of a building has been modelled will be appreciated by a visitor. 

On the other hand, it just seems odd to me not to do this. While I might build on demand, I'm still proud of each and every project, and leaving bits off would seem to be selling myself short. An attitude that might satisfy my soul, even the approaching deadline makes me wonder!

What's the most time-consuming detail you've added to a model that only you know exists?

Tuesday, December 15, 2020

More wall


Every time I drive in to the office, there is a wall that annoys me. It's newly built from stone and on a slight hill. And the line of the stones follows the hill.

It works fine as a wall, but I can't help feeling that the mortar lines are supposed to be horizontal. OK, that's more work as the lower levels will be slightly set into the ground - but it wouldn't niggle me as I sit waiting at the traffic lights. 

When it comes to the Selly Oak walls, I spent time looking online and am convinced I'm right. Mortar is flat so the wall has to step down as it follows down the hill. I think the top can slope, but even that seems to vary. I guess non-sloping is easier.

I'm started by going for the slope. It's very slight, the angle in the photo exaggerates it, but changed my mind and levelled it off. Plastic sheet is very adaptable. To be honest, no-one will be looking at these walls anyway, there is a lot of visual clutter to go around them. That's the trouble with this bit of the model. It's a fiddle, but no-one will be looking at it anyway once the whole scene is in place.

Monday, December 14, 2020

Why do I chose the big knife?


This probably sounds s bit random, but I've noticed a change in my model-making technique recently. 

Once, my scalpel would be almost like a finger, it spent so long in my hands. I cut with it, scrape with it and even poke things to make holes. 

Over the last few weeks though, I notice that I'm using the big craft knife for more and more jobs. 

Cutting jobs I'd have used the scalpel for in the past. Scraping too. 

I don't really know why. Maybe I'm just getting more confident, but then it's hardly like I'm a beginner at this stuff. Perhaps it's related to my enthusiasm for the larger file over the modellers favourite needle files. 

For many jobs, the big knife is faster yet still pretty manoeuvrable. This one fits nicely in my hand and the snap-off blades ensure I'm always working with a keen edge. Thinking about it though, it just doesn't seem right - but also ties in with a "get it done" attitude that many professional modellers have.

What is everyone else cutting with?

Sunday, December 13, 2020

Model shop news

 From the UK Modelshops newsletter*: 

Sadly we have lost 24 model shops this past year, but the good news is that 22 new ones have opened up, fairly similar to 2019.

 So, countrywide, we have a defect of two model shops for 2020 - considering what a s**tshow of a year we've "enjoyed" then that's pretty good.

Optimistically, I'd say that this year will have seen those with little or no online presence struggle and those heading for retirement decide that this is the year is the year to call it quits. There will always be gains and losses, hopefully, those that are left will be in a stronger position than ever.

Trade with a working website have struggled to keep up with demand over the last few months. Even raw materials have been difficult, but not impossible, to come by. While frustrating, strong demand will hopefully drive stronger supply in the future.

What this definitely isn't is the "death of the hobby" as predicted by doom-fetishists online. I'll take that. 

*If you aren't signed up for this, get over there and do it now.

Saturday, December 12, 2020

Saturday Film Club: Toy bus restoration


Interesting and impressive restoration of a very rusty toy bus. I couldn't help wondering about the state of the original however - it's a rotbox but all the tags that hold it together can be bent over. Surely most of these small parts would have rusted and broken when being straightened and re-bent? 

It makes me wish I had space for a media blasting cabinet though.

Friday, December 11, 2020

Rockin' VeeDub


A random photo from the archive of shots still to be filed from my hard drive crash a few years ago. Thousands of images that live in a folder and await sorting out, I look in occasionally and have a go, but it's a long job. 

Anyway, I can't remember where I took this photo, but it is brilliant. A handbuilt, wooden VW rocking "horse". The workmanship is amazing and I wish I'd had one of these as a child!

Thursday, December 10, 2020

Cutting Woodland Scenics Deep Pour


Yesterday, I wondered if it would be possible to cut Woodland Scenics "Deep pour" water at a baseboard joint instead of trying to pour identical depths of resin either side of the gap. Since I had a lump of leftover resin in the bottom of the mixing cup, I decided to have a go. 

First point - this resin takes a couple of days to fully harden. If you touch the surface of the canal, it initially feels "soft" in the same way fresh paint feels soft. 48 hours later, it feels hard. The resin in the cup was the same, in fact when I peeled the plastic away, there was still unset material even after five days. 

After another 24 hours, it was time for science. Logically, if I'm going to cut "water" at a baseboard joint, I'll use an Xacto saw for it's fine and straight cut. I tried the fine-tooth blade because the coarser toothed version for wood seemed wrong. 

The resin cut very well. It's hard work but cuts cleanly enough - so it looks like this method is a goer for future layout work. 

Out of curiosity, I tried polishing the off-cut, first with a sanding stick and then with some Brasso wadding. The results are impressive, even if they don't show up well in the photo. With work, and I only had a quick test, I think you could produce a nice, clear surface. I managed a little section even with minimal work. 

Next time, I will make the canal in one piece, pour the water, then cut it on the joins when set. That will certainly be easier then trying to match the levels in the way I have done this time.


Wednesday, December 09, 2020

2nd pour for the canal


Some delicate work now - time to try to bring the canal on the right hand board up to the level of that on the left. Ideally without sticking it to the worktop again. 

My plan was to bring the water level up to the top of the meniscus, using this to hold the "water" back. This would see it close to level all the way along. 

I'm not sure how I could have done this better. Maybe it's possible to saw through the resin once it's set. Seal the entire canal, pour it in one go and cut through later. I don't know, but I'll have a play with the leftover resin and let you know how I get on. 

Anyway, once poured, the model is covered with a sheet of foamboard and I go and hide in the office to avoid risking raising any dust that will stick in the water.

Tuesday, December 08, 2020

Fixing the arches down

Not an exciting photo, but this is a big moment for the Selly Oak build - the arches can be fixed down permenantly!

With buildings this big, glue alone isn't a great idea but those 9mm thick bit of plywood supporting the track bed are fat enough to screw into. As long as I drill some pilot holes anyway. We don't want to be going on a fishing operation with the electric screwdriver trying to find them from under the baseboard.

I'm getting there now. With the board cleared, I can see the model and get a proper feel for it. There's a long was to go, but putting things together and stepping back for a look helps keep the enthusiasm up.


Monday, December 07, 2020

The Donald's new hobby?

This is an official photo of this years Whitehouse Christmas decorations. And it includes a train. According to Fox News, this is "The White House Express".

Melania doesn't look awfully impressed does she? 

Maybe The Donald is taking up a new hobby now he's going to have plenty of time on his (small) hands? 

I feel there should be a caption competition...

Sunday, December 06, 2020

A giant train-shaped cake!

I get some interesting press releases in my job. Many are irrelevant and go in the bin. This one doesn't fit a model railway magazine, but is perfect for this blog. To be honest, it's too wonderful not to share. 

2020 Hasn’t Derailed This Train of Christmas Cheer 

The Broadmoor Unveils Gigantic Cog Railway Gingerbread Creation

Creating a fanciful, over-the-top gingerbread house is a holiday tradition at the 102-year-old Broadmoor resort in picturesque Colorado Springs, and 2020 (despite its best efforts) is no exception. The gingerbread isn’t cancelled. 

We repeat: the gingerbread isn’t cancelled! 

Led by The Broadmoor’s Executive Pastry Chef Adam Thomas and his team of chocolatiers and bakers (plus a few carpenters), The Broadmoor gingerbread creation has been a holiday staple at the resort since 1964. 

This year’s installation was inspired by the resort’s own The Broadmoor Manitou & Pikes Peak Railway, one of the top tourist attractions in Colorado. Originally built in 1891, the cog railway is the highest railway in America reaching a height of 14,115 feet above sea level. Since March of 2019, it has been closed as it undergoes a massive $100 million renovation of its tracks, railcars, and depot to totally reimagine the experience to the summit of Pikes Peak where "America The Beautiful" was inspired. It’s on track for a May, 2021 reopening. 

Previous gingerbread displays have included the resort’s intricate Pauline Chapel, the original 1918 resort, and, in 2019, The Broadmoor Special, a 1918 Pierce Arrow Touring Car that was converted by Broadmoor Founder Spencer Penrose into an iconic race car. The first Broadmoor gingerbread was a fairytale gingerbread house with Hansel and Gretel, complete with a tiny oven where the old witch put the bad children. 

Since 2013, the gingerbread creations have been life-sized and played a vital role in the resort’s holiday celebrations – going up at Thanksgiving and remaining on display until the new year. They are beloved by families who visit the resort during the holiday season. 

 In the past, non-guests would flock to the resort to get a glimpse of the impressive creations, along with a host of other public holiday programming, but in 2020 as crowds must be kept to a minimum, only hotel guests may view the gingerbread and other lavish decorations. This year, the resort has made digital viewing available, as well as created a video with The Broadmoor’s talented pastry team/chocolatiers that gives families tips on making their own gingerbread creations at home: https://www.broadmoor.com/the-resort/holidays/2020/ 

For those who can travel to the property for holiday cheer (or indulge in a restful staycation), the resort is offering a Winter Spectacular getaway, with rates starting as low as $249/night, valid on select dates between now and March, 2021. For more information about The Broadmoor, visit broadmoor.com.


Saturday, December 05, 2020

Saturday Film Club: Crewe - August 1989


In the good old days,most trains had a proper engine on the front of them. Sadly, that's all gone, but we can relive the fun times for a couple of minutes thanks to this video from Nick Tozzer. I know the quality isn't amazing, but you can almost smell the fumes, and the anticipation of something worth spotting.

Friday, December 04, 2020

Toy Town, the shop of dreams

As a youngster, there was one shop in Leamington that I wanted to visit - Toy Town. 

Two wonderful floors of toys and games. My Lego came from there, so did my Playpeople. Every birthday, I would take a crisp five pound note, and chose a new big set from the display in the middle of the ground floor. 

I liked the upper floor more though. That was where the models were. 

Trains, boats, cars, plastic kits. Paint Glue, tools - you could buy them all. Helpful staff could advise you on the best way to spend your money. The range on offer simply doesn't exist in many retail outlets now. 

 
These photos, which I think date to 1986, were taken by Mark Dobson and posted in the "I Remember Toy Town" group on Facebook. He generously agreed to me re-posting here.  

I miss Toytown. It closed in 1995 thanks to massive rent increases. The Facebook group shows I'm not alone, although I remember working with someone who ranted how she hated the place due to all the staff "looking superior" and the prices being higher than ToysRUs. Well, they've gone too. 

Looking at these photos, I wish for a time machine so I can go back and just wander around the shelves with my pocket money burning a hole in my trousers. Looking at models I could only dream of owning, but dreaming that one day I would carry a big box out of the shop...

You can read more about Toy Town here.


Thursday, December 03, 2020

Garages and fencing in BRM

After the virtual show, I had thought I was doing well with my magazine work. That was until I realised that the date I'd writen on my To-Do list was when the mag would head to the printers, not when I needed to get my copy in!

There were a couple of long days, but the result of my rush is a car workshop based on a Auhagen plastic kit. 

As supplied, this is a pretty and efficient German establishment. Nothing like the sort of place I like to take a car. To represent that, I needed to do a lot of work. 

The result looks good and would be useful for many modellers who fancy an interesting and characterful space-filler. 


Over on BRM TV, I'm demonstrating how I made the fences  how I made the fences for Selly Oak using some ScaleModelScenery fence kits with a bit of modification. 

I'm also providing the voice-over for film of John Ahern's Madder Valley Railway. 

January 2021 BRM on RMweb.

Wednesday, December 02, 2020

Palette knife rescue

While painting the roads, I managed to knock over the tin of fresh tarmac paint. This is frustrating and smelly. Fortunately, I had my palette knife handy and was able to scoop much of the paint up and drop it back into the pot.

There's still a grey pool on the board, but I was pleasantly surprised how much I managed to save with a bit of quick work.

Tuesday, December 01, 2020

Road markings

Adding road markings is a nice simple job. Armed with a ScaleModelScenery stencil set, I splodged Humbrol 147 though using a sponge. 

For some of the stencils, it's worth placing masking tape over the adjacent holes to ensure paint only goes through the ones you want, but otherwise, the task is easy. Using paint looks better than self-adhesive tape as it becomes part of the road and simulating wear just means putting less 147 down. 

Exactly what the road markings should be is a little tougher to work out. Somewhere I have a 1973 RAC book which I'm sure would help if I could find it. However, even that assumes the markings were up-to date. 

Photos seem to show only a single line down the middle of the road despite there being four lanes. Mind you, a couple of decades earlier, London roundabouts enjoyed no markings on roundabouts, despite there being three of more lanes! Perhaps drivers in the past were considered capable of dodging each other. 

The photo above shows the roads without pavements - those are still to come so don't worry, it's not finished yet. I'm tempted to add some patch repairs, another job for the future.


Monday, November 30, 2020

Men at work - road painting

 
I have a pretty standard method for painting tarmac. It basically involves splodging Precision Paints tarmac and faded tarmac paint around with a sponge, then finishing up with some talcum powder applied with a sponge and finished with a big brush.  

This method has always worked well and given excellent results, so that is how I planned to handle the Selly Oak road. 

Of I splodged, but the effect wasn't working.At least on the main road. 

On the side road to the woodyard, it was as good as ever. This was weird. 

My only thought is that the side road is plaster, which is porus. The main road is MDF, which isn't. Thinking about this a bit more, I normally work on a card base, another porous material. 

Basically, the colours weren't blending properly. The result wasn't terrible, just not as good as normal. 


With a hint of desperation, I gave the road a very light coat of grey primer to tie everything together. The can was used well above the surface and very lightly. The result is a lot better. You can see the colour variations, but they are subtle, as they should be. 

It just goes to prove that we all learn all the time. Since doing this I've looked at a bit more information and see that many people are hitting the weathering powders for this job - something I've done myself in the past. I'll see how the road looks as the project progresses, but there is a pack of grey pastels on the shelf...

Sunday, November 29, 2020

Taking photos of trains

Chiltern Railways Silver train 

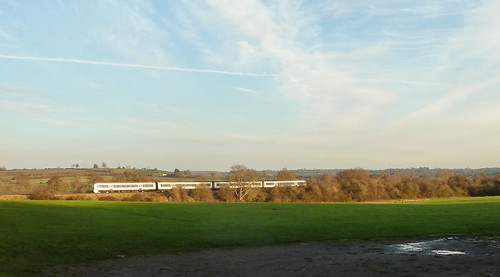
 For once I'm feeling that I'm getting on top of my projects. It might be an illusion, but I'll pretend and so headed out for a stroll on Friday afternoon. My plan was to head to the countryside, about a 15 minute walk, where I could watch trains go by.

 I've missed looking at a train and wishing I could be on it. I know we are supposed to be hiding under a table with a paper bag on our heads (where I live is in Tier 47 I think) but I'm getting tired of being led by people playing politics. And that's just the sceintists. Past experience tells me the politicians will be a waste of space. 

Anyway, I found some trains and took some pictures. 

66087 

 They aren't brillant, but I don't think I've captured anything exciting, just the railway doing it's usual thing. 

 XC Voyager 

One day, maybe, we will be allowed to get back on a train just for the fun of travel. I look forward to it. 

Chiltern train

Saturday, November 28, 2020

Saturday Film Club: Being a generalist


An interesting video where Adam Savage, best known from TV's Mythbusters talks about never having specialised in a particular making genre - preferring to be a Jack of All Trades rather than a master of any particular one. 

This interests me as I'm very much a generalist and always have been. For my current job, this is pretty much essential. I need to be willing and able to have a go at any type of model making. OK, I'm not the best at anything, but then that's the situation most railway modellers find themselves in. You need a wide variety of skills to build a layout. 

Being a specialist is fine, but limiting. The hours of honing your technique doesn't appeal to me much either. I have a butterfly mind and like to try lots of different things. And since the appeal of a hobby is that you enjoy it, I need to go with what works for me. 

How about everyone else? 


Friday, November 27, 2020

Coles Crane


Random picture time. This is a Coles Crane on my layout Melbridge Dock. 

Built in the old days when we actually made things rather than buying them, the crane part is from the Airfix Recovery Set with a cab made from Microstrip. 

It sits on a simple scratchbuilt base that uses whitemetal wheels bought from the Langley Models spares pots at an exhibition. 

I'm always been quite pleased with this model. It's not the first to be made from this combination of parts, and probably not the best, but I made it myself and that means a lot to me.

Thursday, November 26, 2020

Trimming the meniscus


Along the edge of the baseboard joint, there is a meniscus curve in the canal. I've been putting off dealing with it but eventually had to do something. 

The Woodland Scenics Deep Pour resin is pretty solid, so with no better ideas, I attacked it with a sharp knife, sliding the blade along, trying to cut slivers of "water" away. 

This sort of worked but eventually I resorted to scraping the blade sideways in the same way I remove mould lines on a plastic kit. This worked, but the slightly rough surface (above the blade in the photo) didn't look great. Not as bad as I feared though. 

A new blade and back to the slicing - the results aren't bad. Not perfect, but then I didn't expect that. The resin is a little rubbery, so not amenable to polishing with abrasive. The result doesn't stand out too much though. No worse than a baseboard joint anyway, and I still plan a pipe bridge to hide it further.

Wednesday, November 25, 2020

Weathering with emulsion paint


Back to the dirty arches.

I pondered how to weather them for quite a while. Airbrushing is the obvious method for such a large area, but I do that in the garage to keep the smell under control and didn't fancy lugging the arches down there and filling up the workbench. 

Instead, I had a go with sponges and emulsion paints. First on a test piece and then on the arches proper in an orgy of mucky-fingered painting. 

I'm using high-density foam, two shades of grey and some black. Dabbing the paint on seems to work, but a rolling motion works well for blending. I start with black and then move to grey. Each colour has its own sponge square. 

Working on a small area - about a foot long - at a time means the colours blend on the brickwork. I sometimes went back to black after putting on grey as it seems to soften any edges. 

The paint dries to a slightly different shade, something you only lean with practise. Even after the test pieces, I started on the back of my viaduct!

One advantage is that the colour dries perfectly matt. The downside of this method is it's not easy to get paint right into the corners, but that will be finished with weathering powders later on in the build. 

For the moment, I'm very please with the effect. It might be messy and not that fast, but it's certainly less smelly than spraying.

Tuesday, November 24, 2020

Look at those arches!


 Since starting Selly Oak, I've become a bit of a railway arches nerd. Watching an old episode of The Professionals the other day, I couldn't help looking at the background as they talked by a viaduct. 

The screen grab isn't great but these filled in arches look great. Better still, being genuine 1970s ones, they would be perfect for me. Not that I'm going to change anything now, but it shows that watching old telly sometimes counts as research. 

 
Via RMweb, SP Steve sent me this shot of arches in Wigan. While they might be all gentrified and clean, as a reference for brick colours, they are brilliant. There are a lot of colours in the blue bricks and three different shades of red too. 

I'm assuming the parapet has been rebuilt at some point, and wonder what that would look like on a model. Too different? Is it one of those things we accept in real life but not in miniature? 
 
I always remember someone explaining how they set up a passenger train with a mix of liveries to match a prototype photo, but it didn't look right. Maybe we need models to look how we expect them, not always how they should.


Monday, November 23, 2020

Mystery spool


In the random bag of tools I bought from the MRC, is this one. It appears to be a wooden handle with a chuck fitted in the end. The jaws look to be able to hold drill bits 2mm diameter and above. 

That's not a problem, I've pin-vices for the smaller ones and sometimes drilling with the larger ones is very useful. In the past I've used a chuck designer to fit in an electric screwdriver which isn't the comfiest thing to hold. This will be better. 

There is a mystery though. Housed in the handle is a spool of string. It can be removed by unclipping a metal cap on the end but would rotate is pulled while still fitted. 

Can anyone suggest what this is for? The best I can come up with is lining up bricks, but those are spikes, not drills.


Sunday, November 22, 2020

I took a trip to evil Tom's second hand stall of doom


New to the Virtual Show this time is the second hand stall run by the Model Railway Club. 

They always put on a monster at Ally Pally, but with this off for the time being, it has moved online so you can buy old trains at midnight. 

Anyway, to promote it Lawrence interviewed the custodian, Tom. I edited the videos, added some cheesy sound effects and they were good to go. Each one is a bit of a laugh with the definite hint of a TV shopping channel. 

Of course I spotted a kit I wanted. The Swiss chalet is just the sort of thing I'd pick up out of curiosity on a real second-hand stall. And I hadn't visited one of those for many months. There is an itch waiting to be scratched.

Being a fair-minded person, I waited until the event was over before heading to the shop. Unsurprisingly, I am the only person who wants this sort of thing, so it was still available. And while there, just like a real stall, I managed to pick up a few other goodies. 


A few days later, a parcel arrived with my goodies. Excellent service.

Some - the bus stop, billboards and bike shed - I have proper uses for. The tools looked interesting, and there was a boat kit. 


The Heller "Fauvette" kit looked interesting. Checking it out (after it arrived), the model has been in and out of the catalogue over quite a long period. Scale is 1:150, so no use for railways, but who cares? It's a small model so maybe I can build it and put it in a case one day. 

You'll notice a complete lack of actual trains. That's not because there aren't any, just nothing weird enough for me. I think this is an interesting new innovation, the sort of thing Covid has forced upon us. I know you can trawl eBay, but a percentage of the prices here stay in the hobby supporting the MRC, which is a good thing. Perhaps other clubs could think about doing the same?

However, the second-hand shop is online here, so we can all go an have another look. Tom is waiting to take your money!


Saturday, November 21, 2020

Saturday Film Club: A double-headed train on the Isle of Man


Finding a box of mini DVDs recorded on our old video camera, I rashly promised to produce a film for the recent Virtual Exhibition.

Trawling through the footage, this piece leapt out - an unusual train on the steam railway. I'm told double-heading is now in vogue on the island, but back in 2007, it was unusual so I'm glad I recorded it.

There are more disks in the box, so watch this space for more IOM!

Friday, November 20, 2020

A quick fireman


With a BRM TV filming session lined up, I had an idea for one piece that would need a painted figure. 

7mm scale people work better on camera and a quick dig in my stash found a S&D Models Fireman wearing a cap (OF24). He needs his arm and shovel attaching with superglue and is then ready for paint. 

A quick shot of primer to check the attachments looked OK was followed with an evening of hurried painting - yes, I'd left it to the last minute. 

Skin tones are Humbrol flesh dry-brushed with Revell's version. Various greys on the clothes also got the dry-brush treatment. Working fast blends the colours which is great, but that wasn't the reason I was doing this. 

The whole job took an hour, I'd have been faster with acrylics but didn't have the shades to hand, so there was a bit of dangling the figure over the radiator to get the paint to harden a bit. I know it says to wait 8 hours before overpainting, but sometimes I don't have that long. 

Looking at Facebook, I believe I'm supposed to say "It's not great but..." but I'm not. This little man is OK and absolutely fine for the job I needed him for. One day he'll find his way to a loco footplate, but building that model is a long way away!

Thursday, November 19, 2020

A quick wash of dog poo brown


Weathering the viaduct means I need some brown. Chris Nevard uses a lot of emulsion paint when he works and while I've dabbled with it in the past, I've not really used it in anger on anything significant. 

However, with a large area to cover, it's time to dig out the excellent Wilco "Nutmeg Spice" I use for groundworks (I'm on at least a pot a month I reckon, it would probably pay to buy the big tub) which should really be called "Dog poo brown" but isn't to avoid upsetting customers delicate sensibilities. 

Thinned with water, I've washed it over the plastic bricks. Adherence is a bit patchy, but that only adds to the effect. This is only the first stage anyway. Basically, I slop it around and mop up the stuff that runs to the bottom of the wall with a piece of kitchen towel so we don't get a brown tide mark. 

Proper modellers will use an airbrush and proper paint, but I didn't fancy taking the viaduct down to the garage for this, and anyway, on a project like this that isn't heading for a step-by-step piece in a magazine, I can experiment and have a bit of fun.

Wednesday, November 18, 2020

Paint your arches


Underneath the arches, we have some lock-ups and these also need paint. 

Boringly conventional, the woodwork starts with Revell Number 9 - Anthracite Grey - for both front and back. The the doors are painted grey or brown. I couldn't make my mind up about the later, so ended up painting it one colour and then a second shade before it dried. The effect looks OK though. 

What I'm aiming for here is colour that no-one notices. They need paint, but in sufficiently muted shades that they hide in the background, which I think I've managed. 

The canal will need a dust though.

Tuesday, November 17, 2020

Going grey


Lots of arches mean lots of paint. Since these are grey bricks, I'm starting with a spray of Humbrol 27 Sea Grey. Too much of that looks a bit monotonous so all the brick surfaces are dabbed with 67 Tank Grey using a sponge. 
 
Normally I'd dry-brush bricks if painting, but there's so large an area to paint here that I need something quick and capable of a 90% job - and high-density sponge will do the job. 
 
Sponges are underrated tools. One day, I'm sure a proper modeller will write them up in a proper finescale magazine and suddenly, the rest of the world will discover them. In the meantime, I'll keep dabbing on.


Monday, November 16, 2020

Brace yourself!


The Selly Oak viaduct is the biggest structure I've built in many years, and my normal methods need a bit of adaption. 
 
With the sides stuck to the plywood track bed using Deluxe Materials Speedbond, the structure still felt a bit wobbly. Cue several pieces of foamboard fixed in place for added strength. I only need this while the model is free of the baseboard, but they won't hurt. It's not like they add any weight! Fixing is with the special foam-safe UHU as it's quick to grab and holds really well. 
 
At the end, there some DIY wall filler also acting as glue and the same trick has been sued along the sides of the trackbed where there are small gaps 'cos I'm rubbish at woodwork. 
 
The viaduct can now be waved around in the air without issue - good news as it's now time for paint. 

Sunday, November 15, 2020

Virtual shows aren't so different from real ones


I spent last Sunday afternoon posting the features into the timeline of our latest Virtual Model Railway exhibition. 
 
The process of putting on a virtual show isn't that different to that of a real one. For a start, the week running up to the weekend was chaotic. There was an awful lot of last-minute work. Some of the trade interviews have to be carried out late in the day so they include announcements. 
 
There's also a fair bit of loose-end tying up. It's easy to put odd jobs off but eventually they come back to catch you out!

All the prep means that the weekend itself is reasonably calm. Mostly, while "on duty" you sit copying and pasting content into the site at the appropriate times. You have to be there, but it's not too tough. Real shows are a bit like this - once the doors open you have to get used to there being nothing more you can do. 

At the end of it, there's also the slight sense of deflation - after weeks of extremely busy build-up, it's all over. Back to work on Monday then. 

Oh, and just like a real show, I managed to splurge on the second-hand stall, buying stuff that I (mostly) don't really need...

Anyway, if you dropped in, I hope you enjoyed our efforts. Feedback is appreciated as we can bear it in mind for the next one.

Saturday, November 14, 2020

Saturday Film Club: A flying car


A flying car! A proper, working flying car! Finally, we get something 21st Century at last. 

OK, so it's probably not that practical, but the engineering of those wings when they fold away is just incredible. 

I'm still note sure I like it as much as I loved my Corgi Aerocar though. 

Friday, November 13, 2020

Rare!


Thanks to Hugh Freeman for this unexpected addition to my Beatties collection. An unopened packet of track pins, complete with price ticket!

I don't know how old these are, but the same item from Hornby is now £3.45 (RRP) so inflation has definitely taken hold. 

The thing is, these are properly rare. I bet there are more Hornby O gauge Duchesses then packed of Beatties track pins. Let's face it, you didn't buy the pins for fun, so most packets would be ripped open as soon as you got home and pushed firmly into the Sundeala.

Thursday, November 12, 2020

Fancy a portable, large-scale layout? This and more in December's Garden Rail


It's interesting the variety of layouts we get to feature in Garden Rail. This month I've chosen a portable model that despite it's small size - 10ft by 3ft 6 - still looks good and allows live steam to be run. It very much ticks the "Layout's Phil would like to build" box. 

Another dream project is the PDF Models Hunslet which looks fantastic. Surface finishing took a while according to the write-up, but the results are well worth it. 

I've also got to try out the LocoRemote system and am really impressed. Who needs DCC? 

(The sharp eyed might spot this isn't the final version of the cover. Yes, I know.)