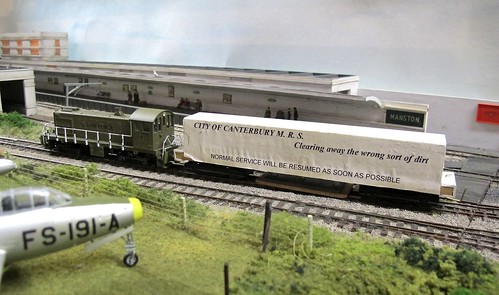
Saturday, February 20, 2016

Doncaster 2016

Quays and Dock

20 years ago last weekend, the very first Festival of British Railway Modelling took place at Doncaster Racecourse. We loaded up my campervan and headed up there with Melbridge Dock. As I recall, a good weekend was had apart from a quickly solved issue with the expenses where they wanted to pay by cheque in the post and we preferred cash in the hand (and soon in the traders tills).

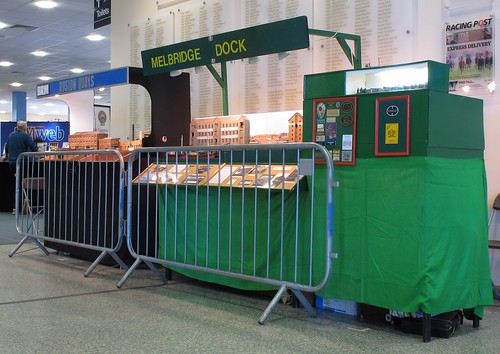
With the anniversary of the show upon us, I found myself loading up a hire van with two layouts, Melbridge Dock and Ruston Quays. I know I still have the camper but it's off the road and too small for 3 operators and 2 layout. In the middle seat was Chris Mead who had also been to the first show and was part of the group explaining how expenses are paid.
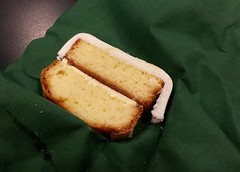
Birthday cakeBecause it was an anniversary, the first thing we found on arrival was cake. Quite a nice sponge washed down with a cup of tea. We set up in the foyer and then headed for the hotel. Doncaster always seems like the proper north to me but is only 2 and a bit hours from home. Even the traffic and collecting Chris only extended this to just over 3, so long enough to feel like a proper travelling show but close enough for a pain-free journey.

One slight snag was that I'd managed to leave the RQ control board at home. This isn't the end of the world as it only holds the point levers (still no practical DCC system - told you analogue was better) but still a little embarrassing. A couple of phone calls and we'd made arrangements for it to be brought up by a fellow club member visiting the next day. Thanks Steve. 

Saturday opened with excellent crowds in front of both layouts. It might quarter of a century old but the Dock seemed to have at least ten people in front of its 6ft scenic section. My dad and Chris were kept busy all day talking about Sprat & Winkle couplings and Clyde Puffers.

Over on Ruston Quays, I left the shuttle unit to run trains and talked. Continuously.

My session in the lecture theatre was attended by around 50 people and quite a few found their way back downstairs later to ask questions.

By the end of the day we were all tired and headed back to the hotel and adjacent pub for refreshment. Main course eaten, Chris and I had to try the monster deserts on offer. Quite why a gooey cake thing 8 inches tall needs to be accompanied by two piles of cream is a mystery - almost as much as how anyone could finish a portion!

Day two was much like Day 1 except with less voice for me. I was very croaky by the end of the day and glad there wasn't a third.
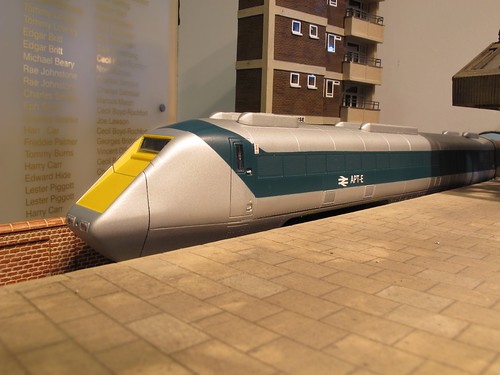
APT-E

Before the crowds arrived, I managed to borrow a non-working APT-E pre-production sample to pose in my station where it looks rather nice. Despite not being a production example, and lacking rivets and details, it felt well assembled and surprisingly heavy. 

Shortly after the opening, I found myself presented with a Hornby HST power car which its owner said was squeaking on curves. The back to backs looked a little narrow on the problem bogie but when I went to fix this, one of the tyres came away from the plastic hub. A little superglue sorted this out and hopefully the model is now back in service.

All this means there was very little looking around the show on my part. I did manage a couple of trips out and took some photos. The layout selection seemed varied. One visitor angrily complained that nothing was moving on any layout but I suspect he was unlucky as even at the times quiet enough for me to get out I saw plenty of movement.
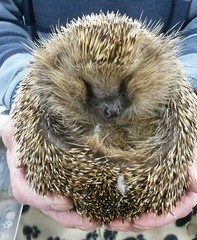
Andrew the blind hedgehogMy favourite stand wasn't railway related - it was a hedgehog rescue group. Andrew the hedgehog was amazingly cute. He was born blind and so can't be released back into the wild but is quite happy to sit on the stand in his bed occasionally be handled so we could stroke him.

Trade seemed good and I left having spent some money. One stand I didn't get to was the Really Useful Box Company one which had a few boxes that looked good for potential micro layouts. They seemed to good business without me though.

So, a busy weekend but a pleasant one. Loads of chat and an elegant sufficiency of cake. If you dropped by to say hello, thanks very much, I hope you enjoyed it as much as I did.

More photos on Flickr.


Friday, February 19, 2016

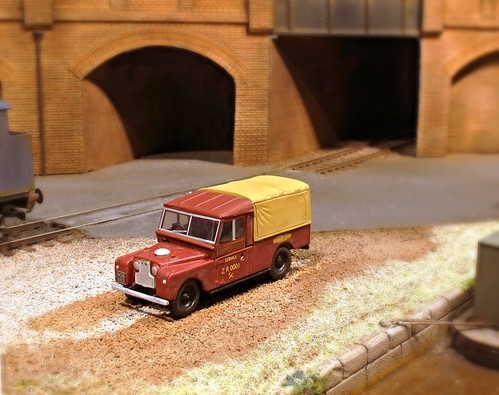
Quick and dirty landrover

BR Landrover

Trundling the layout back to the car from Warley, the one glued-down road vehicle decided to part company with the baseboard, leaving only a single wheelset. I've no idea what happened to it but wasn't inclined to go back to the NEC and find out. 

Obviously I'd like the replace the Coopercraft AEC with an identical model but can't find a kit for sale and  while I'm sure there is one in my stash, it's well buried and I didn't get around to digging it out. 

The space looked a bit empty so I needed a quick replacement in time for the Doncaster show. An Oxford Diecast Landrover was to hand so a quick coat of Testors Dullcote, applied by brush rather than spray to save masking, was followed by a wash of Lifecolor track dirt weathering paint. 

Total time required less than half an hour including drying time. 

On the layout, the model looks fine and actually attracted positive attention. One visitor was really impressed as he'd been stripping and repainting the models. Suddenly he realised that a simple coat of varnish might be all that was required.

Thursday, February 18, 2016

Cast Hut - Part 3

Huts

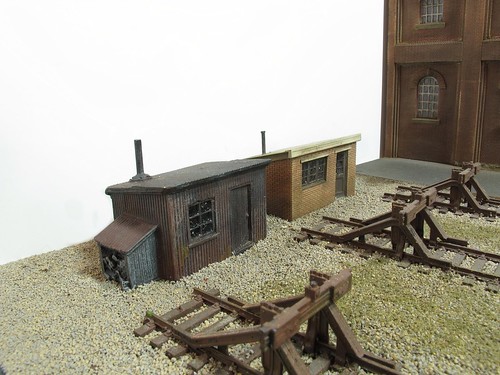
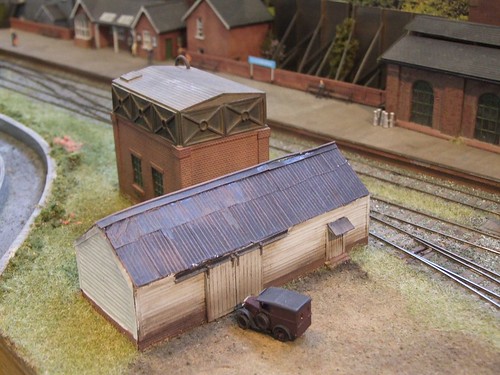
With the hut planted on Ruston Quays, it's possible to compare the etched building from Severn Models with the stonecast version.

Not too bad but you can tell the detail of the metal version is sharper. Once bedded in on the layout, I think I'll get away with them side by side. If you look hard you'll spot the difference but most people don't do this - they see the overall scene and as long as nothing jumps out as too good or too bad, then the eye ignores the tiny differences.

In the end you pays you money and takes your choice. The two models cost about the same as each other. The etched brass version needs reasonably simple assembly whereas the cast hut can be dropped straight on to the layout. You don't have to paint it like I did but in it's original incarnation I wouldn't have been happy to use it. At least mine is unique!

Wednesday, February 17, 2016

Warehouse Wednesday: Newton Stewart tile works


OK, not a warehouse, but such an interesting picture it deserves an airing. Anyway, it's brick and stored clay products...

Also known as Carty Tileworks, this was a typical small rural tileworks, making clay drainage tiles for local markets. When built it probably shipped some of its produce to market, as there were the remains of a wood-piled quay beside the works. The view shows the single kiln in the centre, with the chimney which provided the draught for it.

Behind it are the single-storey wooden sheds in which the tiles were moulded and dried before being fired in the kiln. This was one of the last ceramic drainage tile works to operate in Scotland, as flexible plastic pipes were already taking over in the 1970s.

There is more detail and further view available from the Canmore website where I picked up the text above.

For modellers, the chimney could be bought (in 4mm scale) from Skytrex. Needless to say I can't find it on the website but I have a couple and they definitely came from there.

More interesting for me is the pile of pipes. The arrangement seems to be designed to stop the tubes rolling around with angled pipes at ninety degrees to the main stack. It would be fun to model although I think you'd need to lay them individually. No chance of using pasta for pipes as I recall a Blue Peter annual recommended!

Thanks to Duncan Young for pointing me at this and obtaining permission to publish.

Tuesday, February 16, 2016

Cast Hut - Part 2

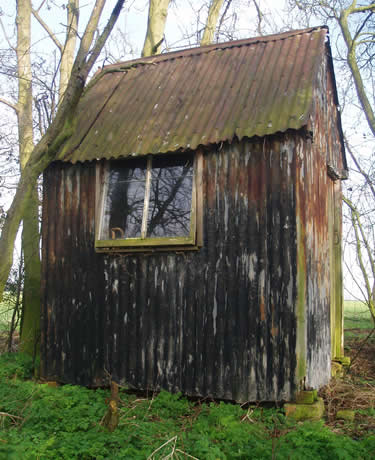
If it's metal, it rusts, as this rather atmospheric iron toilet shows:


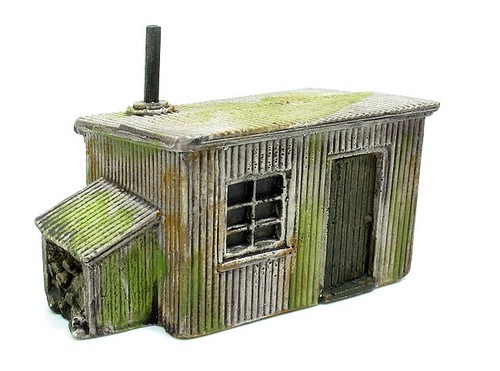
With some Lifecolor Rust Wizard paints to hand, I washed my hut's walls with various shades of rust. Starting with the Deep Rust, I ended up with the bright orange and yellow colours in patches. Using these surprised me as I'm not a fan of bright colours but they really work for fresh rust bursting from the metal.
 
 weathered hut

I'll set this on the layout and see how it looks.

Monday, February 15, 2016

Cast Hut - Part 1

Harburn Hut

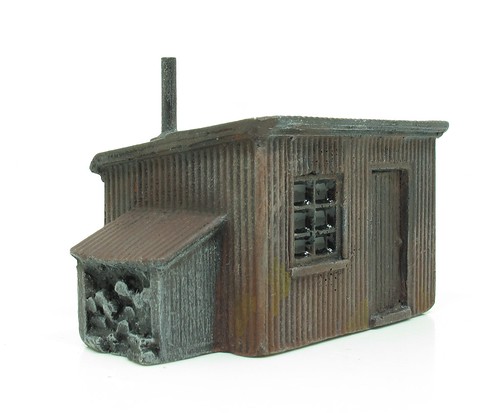
Looking around for a new hut to grace Ruston Quays, I found this model from the Harburn Hobbies range. Cast in stone, it's ready to plant on your layout but I really don't like the paint job and decided to have a go at improving it. I'm not a big fan of solid buildings so I fancied the challenge of making it look better to my eyes.

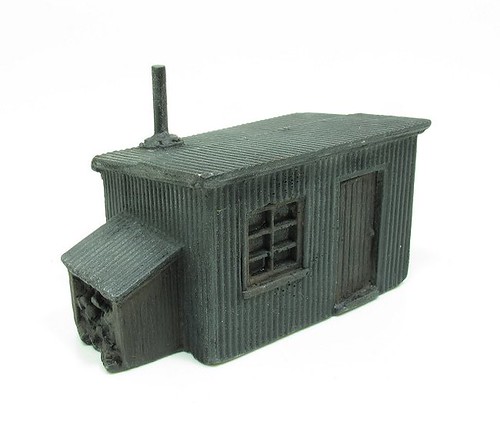
My first thought was that a corrugated building like this would be painted black, possibly with pitch, to waterproof it. A spray can of Halfords matt black quickly sorted this out.

painted hut
 
But looking at photos, the roof might be black but the walls are a black/grey mix. Since my pure black hut looked far too dark, I heavily dry-brushed it with grey. It looks brighter than the photo suggests but never mind. At the same time, I've washed the wooden bits with track colour to represent creosote or varnish.
 
Now for some rust.

Sunday, February 14, 2016

Model Tractor & Plant show 2016

Now for something completely different - a model tractor show!

Harvest

I've seen this show advertised before but always been otherwise occupied. Having a free day this time, took the chance to go along. Heavy rain had turned the car park into a bog but quite a lot of the vehicles were 4 wheel drive with the distinctly agricultural air.

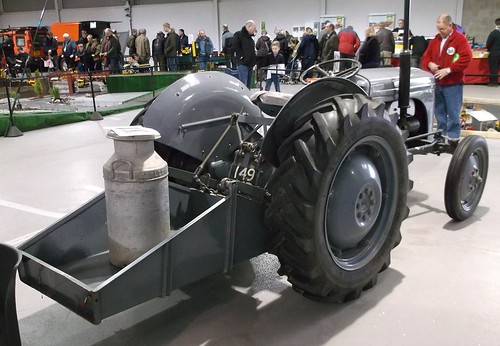
Inside, the first thing I saw was a display of grey Ferguson tractors. To be honest, I hadn't expected real vehicles but they were welcome as the exhibition centre would have looked a bit empty without them. Not being a tractor expert, the variety of implements attached was very interesting and should provide some modelling ideas.

Churn carrying

There was plenty of trade. Tractor and plant modelling seems to be largely a diecast collecting hobby and some of the diggers command eye-watering prices. 60 quid will get you a modest, simple model but it's going to be painted in gloss and not nearly as detailed as a working model locomotive would be for a similar price. If you want to go into three figures, it isn't difficult and a fascinating model will be in the box, but it's still static.

Kitbuilding seems to have made little impression although there were accessories to change the implements on your models.

Model farm

Many of the visitors were obviously collecting and modelling what they know. Even the kids seemed to be dressed as posh young farmers with tweed jackets. Looking at the model farms, for which you can buy kit buildings if required, they were small but contained all the features of a real farm. Not many railway modellers would build a silage clamp for a start.

RC digger

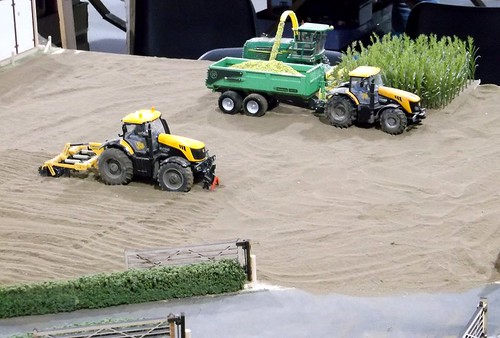
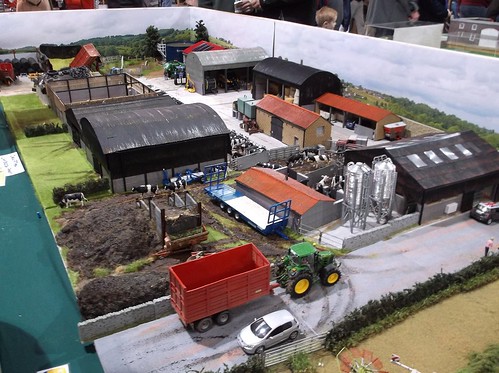
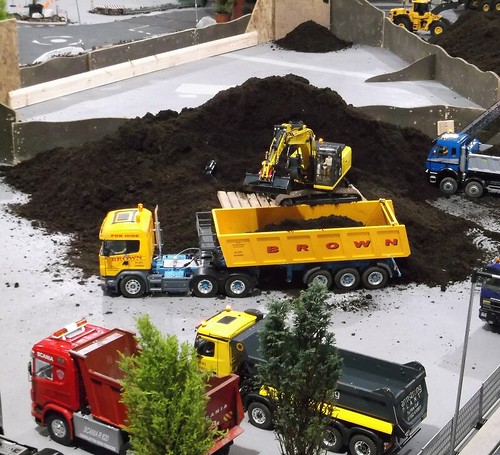
Highlight of the show had to be a the working radio control trucks and diggers area. A roadway was set up complete with Meccano bridges and alongside some earth had been dumped. Model owners then spent the day digging at this, dropping it into trucks and driving these to another area where the load was dumped again. The diggers are amazing bits of kit with many function RC units to allow full operation. Trucks all have lights and sounds so they can operate as the real thing does.

Oddly, none of the kits or bits to allow you to do this were on sale at the show. Not that I was looking to throw hundreds of pounds at a digger but someone must have been judging from the number of models on display.

Anyway, head over to Flickr for my feast of photos.

Saturday, February 13, 2016

Stafford 2016

Vopak Crossing

First class! I travelled first class to Stafford.

Well, from Birmingham New Street anyway. Thanks to bumping in to someone I knew on the station. His pass got us into the coach, although the only seats left were single coach style ones so I spent the journey sitting at right angles so we could chat. Never mind, the vintage bus awaited us so we could escape from the rain.

At the show, I quickly started work on my shopping list. Well, I tried but the list was short and I got side-tracked. There's at least one unexpected kit in the bag. Several new traders were present, replacing others who dropped out. Id' say the range was as good as you'll find at any exhibition. Plenty of kits and not too many box-shifter RTR merchants.

The second hand still is worth a look too although the pack of Triang Modeland buildings at £110 would only tempt the serious collector even though they weren't stupidly priced. I nearly went for a Hornby station announcer unit but decided I ought be sensible...

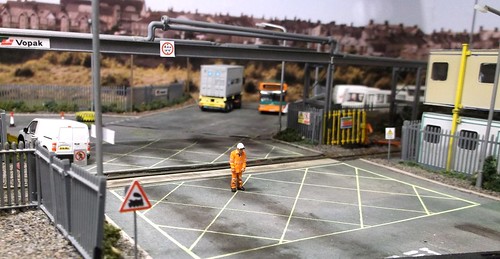
Layouts were excellent as always. My favourite was Vopak Barry Docks, a superbly observed modern scene. Not just an excuse to run some diesels, all the detail you'd expect - signs, barriers etc. was present. The builder visits the site regularly for work and gets plenty of photos from the comfort of a 7 1/2 ton truck!

Allotment

I noticed an awful lot of DCC going on this year. NCE Powercab controllers seem to be the device of choice with many operators staring at the mass of buttons and some actually knowing what to do with them. Plenty of sound equipped diesels were rumbling around but in most cases, adding noise isn't an excuse not to do any actual modelling.

Talking of sound, chatting to a friend with his layout, it seems that some layouts are notorious. We have both encountered one where the volume is far too loud and the operators refuse to turn it down, or at least claim this isn't possible.

Arriving before the doors opened, I took advantage of the excellent cafe on the site for a quick sausage roll. Later on, more tea and a slice of cheesecake kept me going. Both the cafe and the show itself were busy although a couple of people suggested it was slightly quieter than normal. I suspect the heavy rain put people off for a while and I certainly picked the best way to getting there. No trudge across the showground from a car parked to avoid the normal grass parking. A vintage bus is far more fun, even if the windows are so steamed up you can't see out.

Despite the weather, a trip well worth making again. Have a look at my photos on Flickr.

Friday, February 12, 2016

Doncaster bound

Today, I'll be packing up two layouts and heading up North to Doncaster.

It's 20 years since the first Warners exhibition. At the time I was working for a vegetable research institute and writing the occasional article for BRM.

As Melbridge Dock had recently been featured in the pages, we were invited to exhibit. All went well except the organisers needed a bit of education in the importance of paying expenses on the day, not by cheque some time later.

All this has long since been sorted. I did mention it in an article I wrote at the time giving a behind-the-scenes view of the event.

The 20th show sees me working a lot of the time for BRM and of course, I'm expected to bring Ruston Quays along. In addition, I suggested that it might be fun for Melbridge Dock to make a return visit. I'm not sure there will be many layouts able to do both shows!

My father will be looking after the Dock, ably assisted by Chris Mead, another veteran from the first show.

Assuming we get there OK, please drop by and say hello. We'll be in the foyer, except when I'm in the theatre talking and audience through the RQ build.

The Festival of British Railway Modelling website.

Thursday, February 11, 2016

Clapperboard

Clapperboard shed

Duncan asks: Years ago- 40- I bought some Slater's clapboard and clagged it together to make a NER waiting shelter. It did not stand up well to my card models- reinforced cereal boxes with Superquick brick/stone papers. I am returning to card construction- it's a lovely medium- and would be grateful if you would please advise me how to create the clapboard in wooden shelters and signalboxes without going mad!

Hmmm. Not sure I can promise you won't go mad, but maybe I can give some pointers.

I think there are two things to do before you start.

First - Mark the building to be clad with lines for follow with the boards. I draw lots of pencil lines on the card shell. Don't try to do this stuff by eye.

Second, cut lots and lots of strips of very thin card or even paper to use for the boards. Cut more than you think you need. Do this the day before cladding. It's not an exciting job but like tiling a model roof, if you are in the right frame of mind, it can be very relaxing. You'll need to have all the ingredients to hand though.

Planking starts at the bottom with a completely hidden sliver of plank. Then apply a smear of PVA to the wall for the next few planks and fix them in position. Don't rush this, I know real clapboard can be wobbly but it's an easy effect to overdo.

The vertical strips at the end will tidy things up as well and these just stick on the face of the clapboard. This might not be right but it's easy and neatness wins in the job like this.

Don't try to do too much in one session. That way madness really lies.

Good luck!

Wednesday, February 10, 2016

Warehouse Wednesday: Stafford hothouse

Stafford glasshouse buildings
 
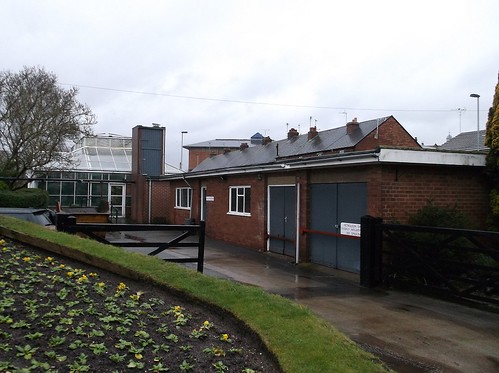
A slightly offbeat building this week. If you take the train to Stafford, just across the road is Victoria Park. In the corner of the park is an aviary and fantastic hothouse. Just the place to escape to when it's cold and wet. Even if the weather is kind, it's a lovely tranquil spot.

Anyway, as well as the glasshouse, there is a civic nursery and these buildings for storing vehicles and stuff. I'm guessing the the Petroleum Spirit sign leads to a council van. An in-town location explains the extra security bars.

What I like is that they are the sort of anonymous structures that used to be everywhere. Built in an era where you did a proper job with bricks rather than a pre-fab, these could be 30s, 50s or even 60s.

This is an unfussy building but that just makes it ideal for modellers looking for a reasonably easy life. Perhaps because of this, you could sit it in the corner of most layouts. It's rare to see one as unmolested as this, not even some signage indicating who it belongs to.

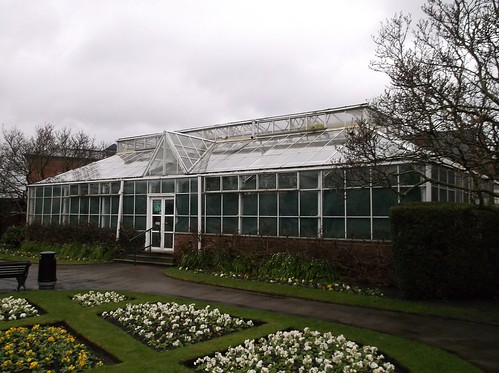
The hothouse itself is simple but interesting.

Stafford Glasshouse

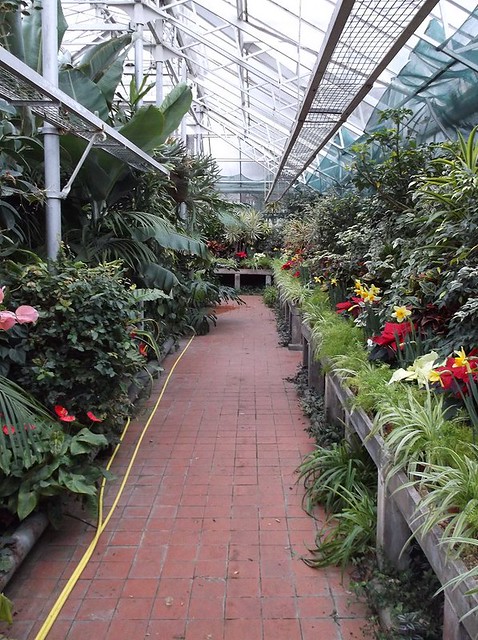
Lots of glass would make it a challenge to build but less so than the more ornate Victorian versions. Inside is lovely and so full of plants, at least that bit of a model would be easy.

Stafford hothouse inside right

Tuesday, February 09, 2016

Hand painting models

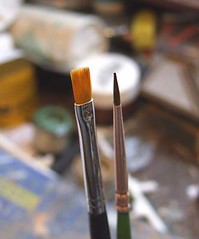
Brushes Jim asks: Can an acceptable paint job be done on a loco by brush - I'm thinking smallish, specifically a Hornby Sentinel - if so, what's the best way to go about it please?
I think it partly depends on what you term "acceptable". If the answer is, "looks like something Iain Rathbone would do" then the answer is no. There's a good reason he uses an airbrush and a bucket of skill.

If you are after a "layout loco" that will appear fine from normal viewing distances then the answer is "probably".

Most of my locos have the main colour applied with an airbrush and the rest, usually black bits and buffer beams, painted by hand. I do this because I'm too lazy to mask these parts up properly and even if I did, sorting out the inevitable paint creep will take longer than doing the job by hand. Some paints seem to work very well when applied by hand and luckily, Humbrol 33 (Matt black) is one of those.

In pre-airbrush days, I'd have painted the lot and been perfectly content with it. The key is to use new paint and a very clean brush. Work logically around the model so you don't need to go over parts twice - once the paint starts to dry you can tear the surface by dragging a brush over it again leaving marks.

Don't try and cover with one coat. Better to apply 2 or 3 thin coats (and you may need to thin the paint, UK produced Humbrol seems very thick these days) than a single sludgy, detail-hiding one. Large flat areas might benefit from a very, very fine sanding between coats. Brush dust away and store the drying model in a warm and sealed box.

Then consider weathering the model. A bit of dirt hides a multitude of sins. A wash of brown and perhaps some dry-brushing brings the detail alive and unless the main colours have applied really badly, will make it looks like the model has seen service.

One issue will be with transfers. These really do like a flat surface and preferably a glossy one. You can hand paint colour but varnish is another matter. I really do suggest getting a spray can for this unless it's a very small area.

Talking of spray cans, don't forget these. If it's a black loco then Halfords sell a nice selection of cans. They also do a huge range of shades for your main body colour. Of course you could buy modelling paints in aerosol too but perhaps these aren't so easily available. Personally, I haven't painted a black loco black since Humbrol introduced their mini-sprays back in the 1980s (I think) as the results were so quick and good it wasn't worth the effort.

Anyway, the answer is yes. Perhaps practise on a cheap second hand model first, but go for it.


Monday, February 08, 2016

Locomotive chassis jigs

Richard asks: I know you have one of the Expensive Frame Jigs, did you get a chance to try any of the others before buying it and which one is it.


I'm guessing you are referring to the Hobby Holidays chassis jig. It's a wonderful tool but, as you say, not the cheapest in the world. Whether you consider £200 a worthwhile investment depends on how many locos you intend to build.

Operation is simple, set the axles to match the crank pin holes in your connecting rods and then build the chassis on them. You'll be confident that wheel and rod centres are identical and that all the axles will end up parallel. I've built several chassis on it and every one has run straight away.

And no I didn't buy it myself, I inherited it from a late friend who would be delighted that it was still in use.

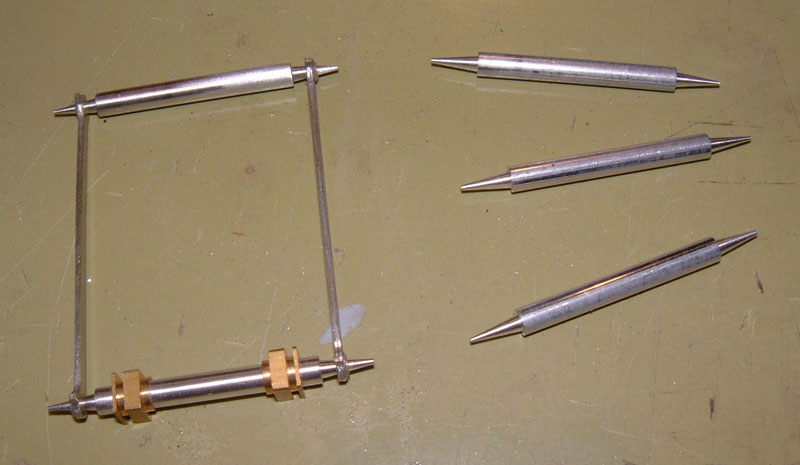
Before this, I used a jig from the other end of the price scale. London Road Models aluminium jig axles.


Now stainless steel, they are only 4 quid a set. With these you build the chassis but don't solder in the bearings. Put the axles through the bearings as though you were putting in the wheels and poke the points through the holes in the con rods. Then solder the bearings.

Again, the wheel centre to rod centres will be spot on removing a major cause of poor running. Making a square chassis is down to you but not too difficult to do as if it's too far out, you'll never get the jig axles in place.

These are the only jigs I've used and I'm happy to say that both are excellent. The axles are so cheap it's daft not to buy a set. The bigger jig, well it makes the part of loco building I hate, reasonably pleasant. I own a few expensive tools and had I not inherited mine, could well have been persuaded to part with the cash for this one.

My feeling is that if the tool helps you finish a kit loco then it's probably worth it. A half finished loco kit languishing in a drawer is expensive no matter how little you spent on it. A completed one you enjoy isn't, no matter how much money it cost to get there.


Sunday, February 07, 2016

Restore the Starship Enterprise


Spotted on The Register a few days ago, Researchers at the Smithsonian Institute are planning to show off the original model Starship Enterprise from the TV show. Before they can though, it needs restoration after years of hard work in the studio.

I'm always fascinated how much mucking around studio models experience and how little we see of this on screen. Space 1999 Eagles were re-painting, repaired and modified through their lives and yet we didn't spot it. (OK, people who sit with the pause button on a DVD probably do but I'm happy that's not me).

It's sacrilege, at least as far as one of my friends is concerned, but I don't even think this is the best version of the Enterprise. The modified and updated model from the first film looks far better to me. I wonder where it it now?

Anyway, go and read the article, it's fascinating.

Saturday, February 06, 2016

Unexciting modelling


I have been modelling recently, it's just not all that exciting. For Ruston Quays, I need a lot of bridge parapet for the back of the high level section. So, on Thursday I made use of the one of the L&WMRS modelling trays and sat at the "tea and chatting" table making up the parts. Assembly is easy so didn't disrupt the main activities. In fact I even manged to east a jammie dodger as well.

Rooting through the Wills arches kits, I found a few but fortunately parapets are also available separately as for some reason I don't have enough. In fact I still need to go shopping for more. 

I like Wills kits a lot but have a problem with this one. When the walls are placed back-to-back, they don't seem perfectly square. I level the top edge and if required trim the bottom but it is odd in an injection moulded part. 

Friday, February 05, 2016

Epoxy bodgery


A feature of Ruston Quays that has proved popular but troublesome is the chimney at the back of the scene.

Popular, because at the touch of a button it belches pungent smoke everywhere.

Troublesome, because the stupid thing keeps falling over. It seems that the Faller plastic kit, fitted with a smoke unit, isn't strong enough to stand being swung around while transporting the layout. The chimney to base join keeps breaking.

At shows, I've also noticed the thing isn't vertical but can be prodded to correct it.

Finally, it had fallen off again so I've determined to fix it for good.

The base is filled with balsa wood, I did this when I built the kit anticipating problems, so I've drilled 2.5mm holes in it and forced cocktail stick in these. Finally, loads and loads of pound shop epoxy has been built up to bind the lot together.

You'll be pleased to know I did remember to check the verticalness with a small spirit level on the top.

Now dry, the stack seems a lot more solid than it was before. Prodding it doesn't move anything. I've still wondering if another dollop of glue wouldn't go amiss though.

Thursday, February 04, 2016

Sentinel, canopies, cakes and a 3mm scale wagon in BRM

It's a busy month for me in the March issue of BRM.

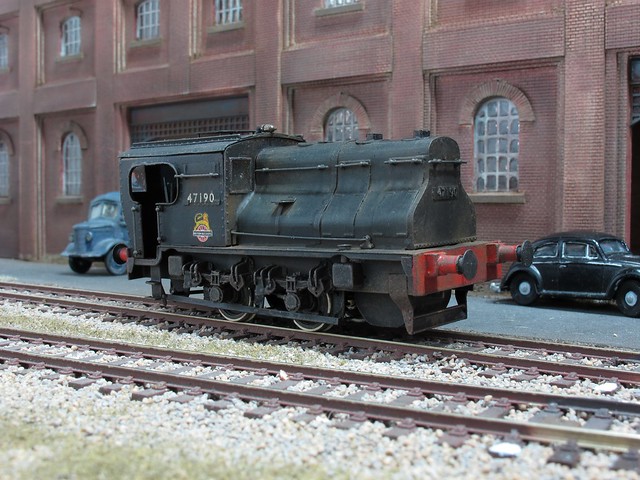
Since this is a Somerset & Dorset special, I find myself building an etched brass model of the Radstock Sentinel.

S&D Sentinel

Not a shake the box kit, this model from CSP/Agenoria is chock full of detail and probably wasn't the best choice for a combination of tight deadlines and a heavy cold. There's a lot of bits in the box and if you fancy having a go, make sure you can take your time and enjoy the assembly process.

As it was, I got out all the toys for this one with rivet press, rolling bars and RSU all finding employment.

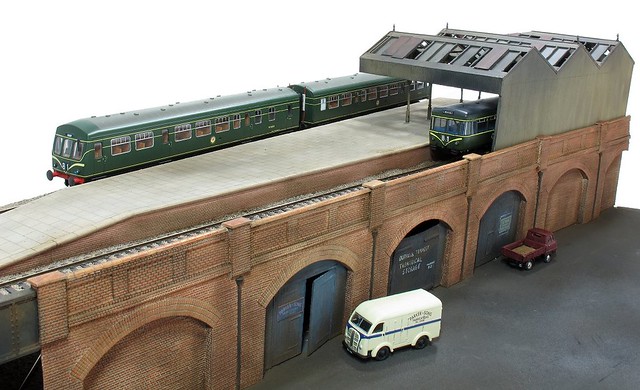
On Ruston Quays I've been building some run-down platform canopies.

Ruston Quays Canopies

This was a project I struggled to get my head around initially. I sort of knew what they should look like but couldn't find a matching picture. In the end, I just built the model and hoped it would be OK.

Leaving the part built version on the layout at Warley proved that if I wasn't right, no-one was going to tell me. The finished model looks great and adds to the atmosphere of the model.

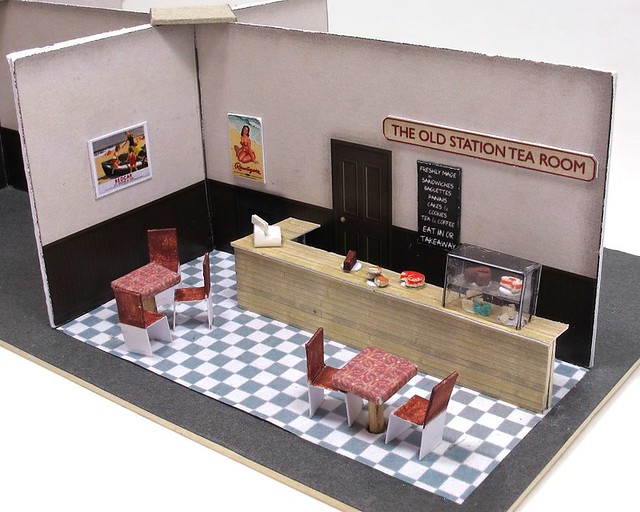
Cafe interior

Work on the BRM card kit continues with fitting out the cafe interior. Obviously this involved making some 4mm scale cakes - which turned out to be a lot easier than I expected, even if they aren't edible!

Since not everyone wants a cafe, I've taken a more general look at building interiors and made up a couple for a Hornby resin building using Scalescenes and Faller parts to produce 2 very different looks. There's loads about this both on the page and the DVD.

3mm Scale Wagon

Finally, we have another wagon, this time in 3mm scale. It's probably the most conventional build I'll do in this series being a nice, modern, Parkside Dundas kit.

Wednesday, February 03, 2016

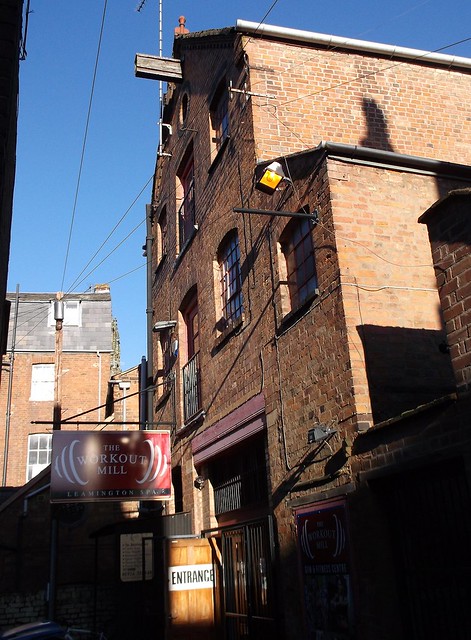
Warehouse Wednesday: Leamington's hidden warehouse

Leamington Warehouse1

Hidden down an alleyway in Leamington is a warehouse.

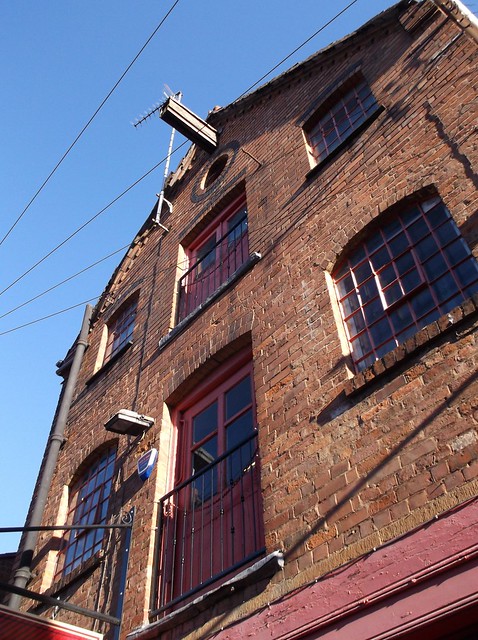
Now a gym, it is an interesting brick building right in the middle of several others. The "road" in front is little more than 10 feet wide.

Logically, the warehouse must pre-date the buildings in front of it. There should have once been more space for goods to come and go. Logically, but the buildings in front seem just as old and certainly date to the Victorian era judging by old photos of the street.

Leamington Warehouse2

So why is it here?

According to the gym website, it is a listed building although I can't find any details - the nearest listing is for the shops in Bath Street next door.

You can see the building on  Google Streetview although the marker is in the wrong place, the mill is the large building at the end of the alleyway/street.

Tuesday, February 02, 2016

A Lister for the garden

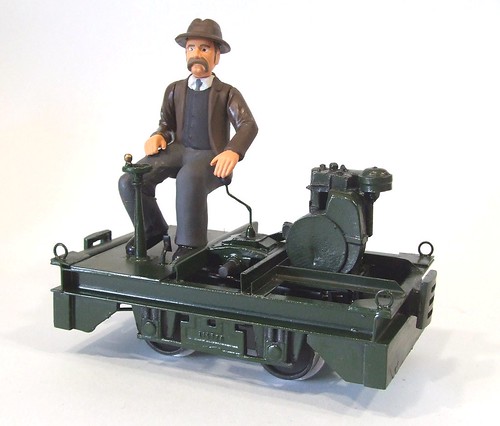
Lister

Today's slightly random picture is an IP Engineering Lister diesel kit I built many years ago.

Picked up cheaply when they were selling some excess kits off, I built the model and then sold it on eBay to help fund my Manx model obsession.

As I recall, it was a pleasant enough kit and looks very nice. At £80 it's not expensive for a garden railway model. The driver is a Bachmann G gauge figure with minimal modification.

Somewhere under there is a motor and battery box. No room for radio control I suspect unless you are very clever.

Monday, February 01, 2016

Normal service will be resumed as soon as possible...

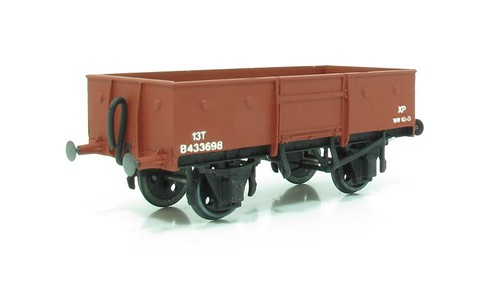
Track cleaner

Apologies if the posts on here have been a bit random of late. I've been working on Ramsay's guide and also a stack of magazine projects. Free time is minimal and if I'm honest, the impetus to rush to my workbench for fun hasn't been strong.

I think there is light at the end of the tunnel and hopefully by the end of this week, things will be a little more normal.

In the meantime, have a photo of the rather excellent track cleaning car on Manston Airport. It's a clever idea - just a piece of hardboard under a heavy wagon. The decoration is what appeals to me and seems appropriate for today.