A daily updated blog typed by someone with painty hands, oil under his fingernails and the smell of solder in his nostrils who likes making all sort of models and miniatures. And fixing things.
Tuesday, January 31, 2012
Trutexture building papers
A couple of weeks ago, I was sent a pack of building papers from a new company: Truetexture.
Brick and stone papers have been around since the dawn of railway modelling time but these are a bit different being based on photographs. The colours certainly look very nice and there aren't many of them exhibiting the repeats you get when tiling photos to fill a sheet.Print quality is very high although they do have a slight sheen which would benefit from a shot of matt varnish.
One surprise was that they are flat - the "texture" part of the name is the graphic design term meaning a patterned fill rather than the modelling version where the bricks or stones would be proud of the surfaces such as in embossed plasticard. From reasonable viewing distances this will look fine and the accurate colour will compensate and fool the eye.
As well as the building sheets, the range includes waterslide transfers for window tops and road markings. There are acetate windows which are designed to look 3D.
I'll have a go with the sheets in the future and say how I got on. For the moment, you can read more about the range on the Truetexture website.
Monday, January 30, 2012
iCar
I can't work out if this is neat or not. What you see is an iCar from Minuteman Scale Models in the USA. The idea is that you slot your iPhone into it and then thanks to an angled mirror on the back, can shove the wagon around your HO scale layout while capturing a video.
I've pondered if mini video is a good idea in the past. Maybe it works better on the sort of giant layouts that Americans can build in their cavernous basements. You probably can't see the edge of the little "world" quite so easily. With even the slightest bump in the track such as a point crossing likely to make the thing bounce around a bit, I'm not sure how good the resulting film will be.
Anyway, even though the price is very reasonable, I don't own an iPhone and have no intention of buying one to find out how well this works, or if it even goes under a UK loading gauge structure. I will admit it's quite novel though.
Sunday, January 29, 2012
You aren't ALL Brian Monaghan !
 (Note to younger readers, Brian Monaghan was the Railway Modeller's official photographer back in the 70's and 80's. A bit like Chris Nevard, but with film. He once appeared in the mag wearing a bowler hat and surrounded by ladies, Charlies Angels style. Mr Nev doesn't get anything quite so glamorous.)
Last weekend I'm sure I notice more cameras floating around than normal at a model railway exhibition. They came in all shapes and sizes from mobile photos to decent high-end DSLR's. It was a real shutterfest. Many hundred of pictures must have been taken of our layout alone.
What the heck does everyone do with them ?
I mean, it's not like you can't find pictures on tinterweb or even in magazines. Are they all carefully filed away for future reference and dug out to aid modelling ? I don't think so. In fact I suspect that any interest passes about a millisecond after the button is pressed. It's the fun of framing the shot, capturing the moment that the photographer is interested in. Like big game hunters, once the trophy is bagged, it's on to the next kill. Sure, friends might be shown the results stuffed and mounted, although probably on the back of the camera rather than framed on paper, but it's a collecting thing.
And what a lot of big cameras. I'd hate to explain that a lot of pro's favour something smaller such as the Cannon G9 rather than lug anything as chunky around a show. A decent compact will give results perfectly adequate for most of this stuff anyway - if you are shooting for print then this isn't done while jostling with the great unwashed over a barrier. One might suspect that they are big boys toys...
The one benefit of all digital as far as those of us inside the barrier are concerned is that you can switch the flash off. This is a simple enough trick that no one with a film camera ever seemed to manage. For years the unwary operator could expect to look up several times a day to BAM, another flashgun and some dazzle in the eyes for the next five minutes. All that for a badly focused shot of a toy train.
It's not like I want people not to take pics. It's flattering and if you ask we're even happy to pose locos for you (Note: This is a limited offer that covers only the loco in use unless the show is very quiet. We do not intend to bring out a series of trains in the middle of a busy session just so you can play at being Tony Wright. And yes that does happen.) so you don't have to click while it's moving. I take photos myself and stuff some on Flickr as well as using them for detail and inspiration. But I never try and record an entire show via the medium of a camera. I like to look at stuff that isn't on a 3 inch screen.
As for video cameras - well they have been mostly displaced by DSLR's but not entirely. And who watches that stuff again ?
Saturday, January 28, 2012
Railmatch 402 = Track colour
 Mike asks: I was reading your blog item on the demise of Humbrol 170, where you mentioned a Precision alternative namely "underframe dirt". Do you have the appropriate Precision reference number for this colour?
I checked their site, but wasn't sure I'd found the correct item by description alone.
There is a good reason for that - I got it wrong. It's not a Precision paint you need but a Railmatch one. Specifically, Railmatch 402 "Frame Dirt". Sorry about that.
Mind you, it is marvellous stuff. I bet I go through 4 or 5 jars of it every year. In fact I went out and bought a fresh one only yesterday...
Stop Press: Humbrol are bringing back track colour ! Number 173 is back in the range this year !
Friday, January 27, 2012
Raise the exhibitors !
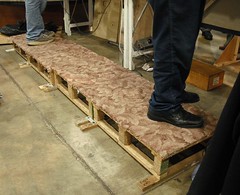 I mentioned on Monday that my assistant operator over the weekend was
 Needless to say, there was a solution. As part of the exhibition kit, the team brought along this piece of staging - looking awfully like three pallets nailed together. As well as raising them up a little, the carpet saves their delicate feet from a day spent on a hard, concrete, floor, keeping them warm and unworn in the process.
And for all those of you who are saying, "What a bunch of wimps", well you try and spend the day standing up on a hard floor. After a weekend, you certainly know about it. Exhibition hall floors seem harder than most, some engineering type can explain why although it's probably something to do with load bearing or having fat sales reps trudging around them a lot, unlike village halls which seem positively civilised. Carpet isn't good news either. I strip of it behind the layout is a good thing, I try to remember some, but under the baseboard legs ? No thanks. You have the layout wobbling around every time you shunt.
Thursday, January 26, 2012
Chassis testing
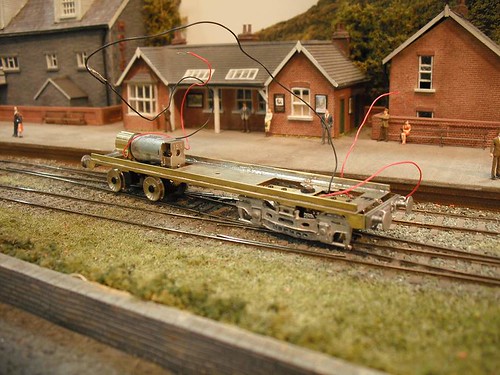
I hate diesels. With a chuff-chuff, you get to build the chassis and then spend many hours tweaking the thing to make it work properly. Not with the Class 25. I plopped it on the track and it ran around the layout perfectly first time. Where is the fun in that ?
I'm joking of course. Before the Leamington show opened, I took the opportunity to stick the chassis on the track and give it a go. It really did run around perfectly. The only problems were when the wires caught on the tunnel mouth exiting the fiddle yard or around the water crane. Putting the body on brought these under control and sorted this out. Those wires are too long anyway but just twisted together for testing. I'll probably use a chocolate block connector on the finished model so the thing can be easily dismantled.
The BullAnt bogies worked a treat. Even my slightly rough and ready regauging was OK. They didn't rumble over the pointwork or get upset about the curves. Even with one wire disconnected and reducing the pickup numbers, we didn't see any stalling either.
All in all, a very pleasing moment. The hobby can be relaxing after all !
Wednesday, January 25, 2012
Class 25 Bogie sideframes
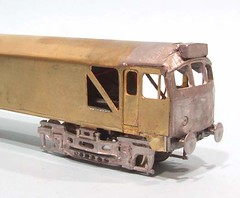 The most striking component of the Class 25 kit were the bogie sideframes. Not an easy part to build as I've found out in the past, I am perfectly happy to leave the job to someone else.
Before sticking the bits in place, I re-gauged the wheelsets from 12 to 14.2mm by carefully pulling them out with a gear extraction tool. A dot of superglue on the axles ends before starting this hopefully get s pulled into the axle/wheel join as I work saving me from the embarrassment of another one falling off in service.
A dry run showed that the whitemetal parts were quite wide. In fact if I'd stuck them on as supplied the loco would have been distinctly bulbous down below the body whereas the photos showed the bogies tucked nicely underneath. I massaged the metal with my fingers to squash the convext part in a bit. The wheelbase grew a tiny bit as a result but at least the middle bit got thinner. Then, by cutting the outer mounting point away, I was able to superglue them in place.
A little care was required as the parts seem deeper than expected and it's always a good idea to have nothing poking below the wheel tread. I suspect that the master might have been slightly over scale as everything else is right. At least the space under the model will be well filled.
Tuesday, January 24, 2012
Class 25 side skirts
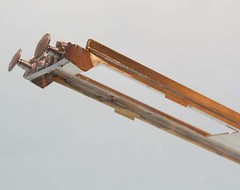 Under the Class 25 body on the etch were some odd dangly bits. The general consensus was that these are supposed to represent those parts seen under the locomotive body. Or that the designer had a brainstorm and went a bit mad. Whatever, they aren't there in the real loco, so I cut them off and threw them in the bin.
The underbody bits on diesels are a bit of a nightmare and working out exactly what should be there isn't easy. The plans are confusing and the photos not much help as they show all the bits at once and I have to try and work out what they are and what order to make them. Eventually I think I worked out the basic skirts, or at least figured out enough to be able to cut something out from a sheet of very thin brass.
Cutting was entirely with the Olfa Plasticard cutter and a small disposable knife. No scissors or sawing this time as the job called for lots of straight lines and I'm rubbish at sawing these. You can cut brass with a knife, it just takes lots of gentle cuts. The stuff is thinner than paper and so if you push too hard it will distort.
Fitting to the chassis involved scribing some lines and using these as a guide. A hot iron, lots of flux and speed were also required as the metal is so thin, heat can distort it if you linger too long.
Finally, the buffer beams are whitemetal castings. I think the buffer shanks are a bit short so had to pack the beam forward with a strip of metal, but it looks the part and that's what matters. To me anyway.
Monday, January 23, 2012
Leamington & Warwick MRS Show 2012
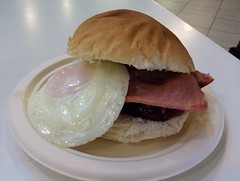 Well, that's the local show over with for another year. It all seemed to go very well. There were a lot of people coming in the door. The layout ran passably well. Excellent breakfast batches were on sale for £3.50 from the restaurant. What more could anyone want ?
Behind Flockburgh, I had the able assistance of Chris Mead since my normal second operator was busy helping out with the club second hand stall. He normally runs his own OO layout, Overlord, and so it was his first go with the finescale 14.2 3mm scale. His layout doesn't have uncoupling magnets either.Finally, he's shorter than me which makes seeing over the backscene more challenging that it might otherwise be.
Anyway, there were lots of really good layouts to look at and plenty of places they could buy stuff from. The crowds were good, especially on Sunday. Maybe modellers have finally worked out that it's a lot easier to get around and see stuff on the second day. This rule applies to all shows by the way...
Both of us found the time passed really quickly. I'm not sure why, but it did - obviously we were enjoying ourselves. We certainly talked a lot, both about the main layout and the tiddly little ones on the table beside us and they certainly attracted a lot of interest. On Sunday, Chris added a new building he is working for his layout. This is a huge model of a bit of Portsmouth Dockyard. It was longer then the micro layouts !
Anyway, if you said hello, thanks for dropping by. If you visited and didn't then don't worry, I won't hold it against you, I just hope you enjoyed yourself.
See the pictures (most of which have model trains in) I took here.
Sunday, January 22, 2012
Fastbuilding ?
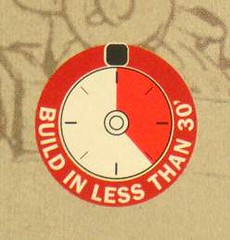 I bought a kit recently which proclaimed that it could be built in less than 30 minutes. Apparently this is A Good Thing.
Surely not ?
After all, you buy a plastic kit with the aim of spending some pleasurable time putting the thing together. A significant chunk of the fun to be had is in the assembly. Take that away and you might as well sell the thing ready built.
Obviously this is partly driven by the idea that people have shorter attention spans than they used to have but I wonder if there is something else at work here. This symbol wasn't put on the box by a modeller, it arrived there thanks to the marketing department.
If I were cynical, which I'm not of course, I might suspect that a group of people sat around a table, none of whom were modellers or even interested in model making, and had to come up with an idea for selling the kit. "I know", said someone in a sharp suit, "tell them it won't take long."
And so an important point was comprehensively missed.
Saturday, January 21, 2012
L&WMRS Show 2012
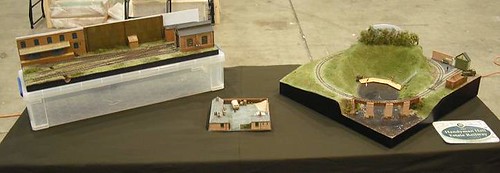
As you read this, I should be standing in the exhibition hall at Stoneleigh on a little bit of carpet which I hope will keep my feet warm.
Even though I'm not a club member, I've been doing my bit to help. At 8:45 on Friday morning, I was sharing airtime with Pete Waterman on Radio CWR's breakfast show. He didn't have to turn up in Coventry at that time, phoning in his contribution, probably from bed whilst being served breakfast by a manservant. Not to worry, my two minutes of fame was well worth the trip.
I also helped mark out the hall. In the cold. Then warmed up by helping unload the 200+ tables from the lorry they arrived in. I might have commented at the time that it didn't look like the club had over 60 members judging by how many were heaving lumps of wood around...
Anyway, Flockburgh is set up. Adjacent to it is a table covered with micro layouts which is standing in for the layout "Hope Mill" which dropped out due to illness. A great shame, but on the other hand you do get 2 replacements even if they are static models. Well I can't run them AND the other layout can I ?
Visit the club website for more details.
Friday, January 20, 2012
L&WMRS Exhibition 2012
Later in the day, I'll nip back home to collect Flockburgh, which will be on show over the weekend. If you are in the area or fancy being in the area, please drop in and say hello. It's worth it, the lunches are excellent !
More on the show at the LWMRS club website.
Thursday, January 19, 2012
Next stop the bonfire
 On Monday, things weren't looking good for my little Isle of Man test track. The boards had warped and I'd dunked them in the bath to try and fix this.
After 36 hours drying, I checked the board on a flat surface. Resut: still warped. Maybe things had improved slightly but not enough to be any use.
So, as a last attempt at fixing the problem, a length of softwood was cut to length and glued in diagonally between the corners. Plenty of weight to make the board flat again and lashings of Resin W wood glue to fix the wood were my last hope. The whole lot was left overnight.
Result: Still warped.
Would you like to guess who has been down the wood shop again ?
Wednesday, January 18, 2012
Joining Lionel Track
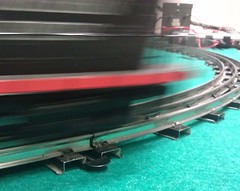 Here's a problem you don't encounter in the finescale model railway world. I was helping a friend set up some Lionel trains track - three rail chunky stuff that would give an MRJ subscriber and attack of the vapours - and once we'd clipped it all together, he handed me a bag of joiners.
These slide under the sleepers at the end of each length of track and stop them working apart. With Lionel trains being made of cast iron and weighing about half a ton each, it seems that as they round the bend, something they are perfectly capable of doing at speed, they can cause the track to "walk" and the joints to open up. Do this too much and the lines splits producing a crash not unlike the final scenes of the 1976 film "Silver Streak".
The joiners are a bit of a fiddle to slide under the sleeper. I found that if you squeezed the nearest ends together you could slide the plate in place and then with a good shove and some sore fingers, use it to pull the rest of the sleeper over.
Presumably this all worked because there was nothing on the local news along the lines of "Small child killed by derailing toy train", although since the stand was promoting the L&WMRS exhibition, it might have garnered plenty of press coverage if it had !
Tuesday, January 17, 2012
G2 boiler handrail mysteries
I've been looking at a lot of photos of steam trains recently. Mostly Super D's which have been in front of many snappers lenses. All with a mounting sense of frustration. You see I was trying to work out how the boiler handrail works.
On a normal engine it's simple, handrail knobs of varying lengths support it out from the boiler. You drill some holes, bend a bit of wire and after a lot of fiddling and swearing, the job is done.
On the G2, it's a different kettle of fish. The handrail runs along side a fat pipe that runs along the boiler. Trying to get a clear view of this is impossible. The plan helps a little but in photos the rail is overshadowed by the pipe. I would guess that there is some clever bracketry going on to hold the two but I can't get a decent look.
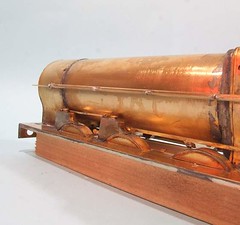 In an effort to progress this model, I've had to make an educated guess. The pipe was soldered into position and then drilled with 0.9mm holes to take some split pins which will act as handrail knobs.
There was still much fiddling and swearing, not helped by the fact that the longest bit of 0.7mm wire wasn't long enough for the whole job so I had to hide joins in the front split pins, but at least it now looks OK.
Update: Of course, now I've done the job, I find this photo on the NRM website. Amazingly, it looks like I got it right !
On a normal engine it's simple, handrail knobs of varying lengths support it out from the boiler. You drill some holes, bend a bit of wire and after a lot of fiddling and swearing, the job is done.
On the G2, it's a different kettle of fish. The handrail runs along side a fat pipe that runs along the boiler. Trying to get a clear view of this is impossible. The plan helps a little but in photos the rail is overshadowed by the pipe. I would guess that there is some clever bracketry going on to hold the two but I can't get a decent look.
 In an effort to progress this model, I've had to make an educated guess. The pipe was soldered into position and then drilled with 0.9mm holes to take some split pins which will act as handrail knobs.
 There was still much fiddling and swearing, not helped by the fact that the longest bit of 0.7mm wire wasn't long enough for the whole job so I had to hide joins in the front split pins, but at least it now looks OK.
Update: Of course, now I've done the job, I find this photo on the NRM website. Amazingly, it looks like I got it right !
Monday, January 16, 2012
Trying to avert baseboard disaster
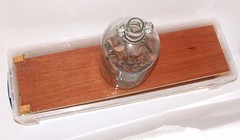 My Dad is ready to finish the track work on the Isle of Man test track so we dug out the board from the plastic box they live in and put them on his cleared desk. It became immediately clear that there was a problem - they wobbled.
Looking along the woodwork it was obvious that the wood had warped quite badly. One board had moved a few millimetres but the other was over a centimetre up in one corner. Both were quite useless for laying track. At first sight the bonfire seemed the most likely destination.
With nothing to lose, I decided to try something desperate. The store box was placed in the bath, the boards put back in and then the box filled with water. A heavy weight on the top of them kept them under the surface.
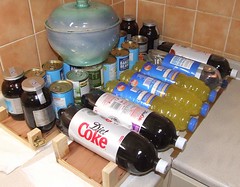 After a couple of hours they were transferred to the kitchen worktop. The first thing I spotted was that they were now perfectly flat again. Soaking wet, but flat.
 To try and persuade them to stay this way, every available weight was placed on top and they were left for 36 hours to dry out again. This meant fish'n'chips rather than cookery for tea but sometimes you just have to suffer for your art...
Anyway, the boards are now up and look OK. I'll check and let you know how they have fared. In the meantime, would any wood fiends out there care to comment ? My feeling is that storage in a plastic box has dried the plywood out and that caused the twist. If I get them flat and varnish both sides, hopefully this will sort things.
Sunday, January 15, 2012
Video: Micro Fairey Huntress on the water
A nice day at the lake allowed me to film the Mighty Atom and its sister boat on the water. These little vessels really do work well - not like some sort of gimmick but a real model boat. Just smaller.
Saturday, January 14, 2012
Basic Class 25 chassis
I don't watch a lot of TV and when I do it's usually while I'm doing something else. However, I do quite like those American shows set in custom car or bike workshops. For some reason the producers seem to focus on the personalities though, rather than the construction of the vehicles. They forget that normal people will get bored of this stuff and the real market is anoraks who want to know the welding method or what CAD package is being used to machine the parts.
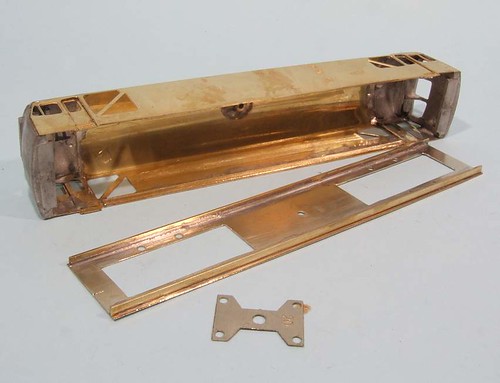
Anyway, watching people welding stuff with carefree abandon made me want to do something similar. Make an item from scratch and wield the soldering iron like only I can. On the shelf was the Class 25 and I reckoned that in a couple of hours, I could get the chassis together well enough to support the newly delivered bogies.
The design is simple - a flat plate into which the BullAnt bogies are bolted. I just had to cut a length of nickel silver sheet to width, mark some holes, cut some even bigger ones and the job would be done !
All of this took about 3 hours. The same number of piercing saw blades were broken hacking out those big holes. Marking out was done with a combination of pencil, scribe and a pair of compasses which have two points. This last tool was particularly useful when a lot of identical dimensions needed to be marker such as the position of the bolt holes.
To stop the plate from bending I soldered a couple of thick bits of brass down the sides inset about one and half millimetres from the edge. The leftovers from old kits come in ever so useful ! More etch edging is fitted inside the body to provide a ledge for the chassis. This was fiddly to fit but with the aid of a couple of clips and a little tack soldering, I managed.
Finally, a long brass bolt reaches inside the body to screw into a nut soldered to the inside of the roof. Doing this up provides the body with a nice flush plate filling the bottom. Now I can bolt up the bogies and look at the under-body embellishments.
Friday, January 13, 2012
Engineering pickups
 The Super D has a fantastic chassis, amazing motor and so I need to do a decent job with the electric collection. Fortunately, there is enough space down there to do something I've wanted to do for a long while - some engineered rather than bodged pickups.
The idea isn't new, in fact I'm sure it dates from a very early MRJ. What you do is fix a bit of copper-clad inside the frames behind each wheel. Then you make the pickup in a U-shape. One leg is soldered to the paxolin and the other bears lightly on the back of the wheel.
In theory, the wheel can move up and down in its hornblock and stay in contact with the back of the tyre. Adjustment can be carried out one wheel at a time as well without mucking up the others.
Well, it was fiddly but I built it. The copper clad strips are attached to the frames with epoxy. This took longer to dry than expected but overnight it fixed them well. Soldering the wires wasn't too bad once I'd done a couple. The wheels have sideplay but stuffing some tweezers behind them moved the wheel as far out as possible. As long as wheel and pickup touch at this point then everything should be fine.
Anyway, the result was, it worked ! Every single pickup worked. On the track, the chassis runs up and down the length of track. I did this for quite a while as I was so chuffed with it.
Thursday, January 12, 2012
Goods shed and 009 Stock in Hornby Magazine
Christmas plays havoc with magazine schedules. I received a call about the February issue of Hornby mag well before Christmas so I could have the latest Parker's Guide submitted in plenty of time to make it into print.
This article is a conversion of the Wills Goods Office to add a side office and replace the flimsy looking (to me) wooden supports with something much more solid from brick. Kitbashing like this used to be very fashionable but with the advent of all those lovely resin buildings has fallen off many people's radars in recent years.
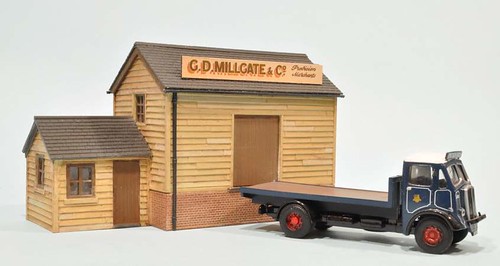
This is sad because it's a great way to make your layout your layout rather than just a collection of bits that you bought and plonked into place. I'm not saying that buying stuff is bad, far from it, but you miss out so much if you don't get your hands dirty and fiddle with them. Wills kits are especially good for this as you can buy materials to match the kit bits so with a little care, it should be impossible to see where the kit ends and the scratchbuild begins.
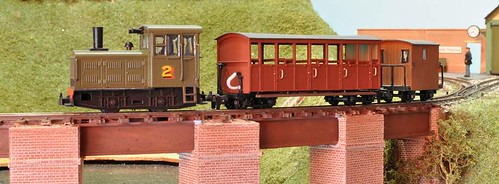
My other main contribution is part 3 of the Handyman Hall Railway series. With the layout finished, I move on to building a bit of stock for it. At this point I have to say a big thank you to Michael Campbell who sent me some couplings to play around with as I wasn't sure what was the "done thing" in the narrow gauge world.
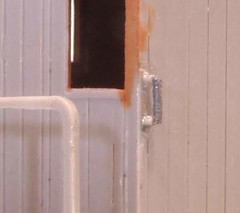 The coach and guards van I built worked very nicely but in print there is a minor error. Photo 7 is captioned "The side handrails are lengths of plastic rod glued to pips on the side of the body. Fix these in place with plastic glue, let them dry and then trim to their final length." The designer obviously say a mention of the balconies and focused on this rather than the side handrails. A shame because the balcony isn't interesting whereas the grab rails are a bit nifty. Hopefully this photo will make up for it.
Finally, I've contributed to The Clinic special on wheel and track cleaning. I know this is an area that interests a lot of people. Judging by the number of times that people ask how we get locos to run so well when appearing at shows anyway. Read the wise words and with a bit of luck, your trains will work as well as mine.
This article is a conversion of the Wills Goods Office to add a side office and replace the flimsy looking (to me) wooden supports with something much more solid from brick. Kitbashing like this used to be very fashionable but with the advent of all those lovely resin buildings has fallen off many people's radars in recent years.

This is sad because it's a great way to make your layout your layout rather than just a collection of bits that you bought and plonked into place. I'm not saying that buying stuff is bad, far from it, but you miss out so much if you don't get your hands dirty and fiddle with them. Wills kits are especially good for this as you can buy materials to match the kit bits so with a little care, it should be impossible to see where the kit ends and the scratchbuild begins.
My other main contribution is part 3 of the Handyman Hall Railway series. With the layout finished, I move on to building a bit of stock for it. At this point I have to say a big thank you to Michael Campbell who sent me some couplings to play around with as I wasn't sure what was the "done thing" in the narrow gauge world.
 The coach and guards van I built worked very nicely but in print there is a minor error. Photo 7 is captioned "The side handrails are lengths of plastic rod glued to pips on the side of the body. Fix these in place with plastic glue, let them dry and then trim to their final length." The designer obviously say a mention of the balconies and focused on this rather than the side handrails. A shame because the balcony isn't interesting whereas the grab rails are a bit nifty. Hopefully this photo will make up for it.
Finally, I've contributed to The Clinic special on wheel and track cleaning. I know this is an area that interests a lot of people. Judging by the number of times that people ask how we get locos to run so well when appearing at shows anyway. Read the wise words and with a bit of luck, your trains will work as well as mine.

Wednesday, January 11, 2012
AMT Depth Charger custom car kit
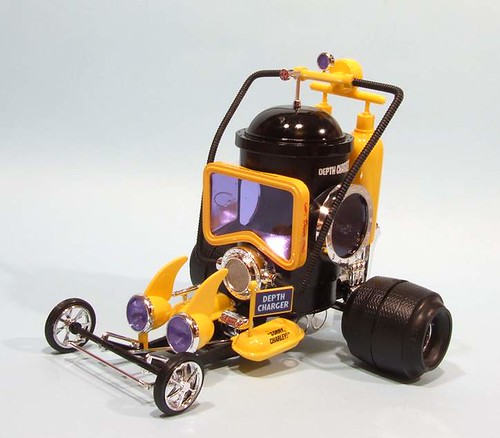
He's something a little different from the normal round of boats and trains - a custom car.
I'll start by admitting that I only painted this model, which was built from an AMT plastic kit - my Dad used to build this sort of thing in his youth, as evidenced by a cabinet of such models, and fancied having another go. The kit can from the US for no more than it would have cost in this country and off he went.
Assembly wasn't completely straight forward. The diving helmet driving position is supposed to be supported on a pair of angle brackets. At least they are on the chassis moulding but the instructions don't show them. He cut them off as they raised the cabin up to a stupid height. A little packing with plasticard off-cuts sorted this out.
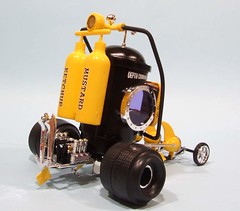 Painting was "fun". You can't hide anything with a bit of weathering so it had to be right. The gloss yellow enamel sprayed well but the black bits were done with Humbrol acrylic which refused to do gloss despite what it said on the tub - presumably the paint can't read. Some buffing with T-cut helped but in the end I shot Johnsons Klear floor polish on to give a shine. While this was a valuable lesson, I could have done without it. Just to add contrast, the air pipes are painted, by hand, in matt enamel to represent rubber.
It's an interesting looking model. You just don't get chrome like this on model train kits. What you do get is lots of alternative decals (American kit, we'd call them transfers in Blighty) so I have some goodies stashed away for future less-than-serious boat projects.
Postscript: I'd just written this post when on my blog reader came a mention of Matt Irvine's new Scale Model Car book, which has this very kit on the cover !
Tuesday, January 10, 2012
Sticking curtains to layouts

After yesterday's glue, here's another industrial sized product - Velcro on a roll.
The local club have been building a OO layout for what seems like the last decade and finally it's ready to go out to a show. Specifically, it's ready (they have been told) to attend the Leamington show on 20th & 21st January. Apart from some frantic modelling, they also have to sort out the presentation, which means a curtain to hide all that ugly mess under a model railway baseboard.
It appear that sewing machines are too difficult for the average modeller so via my the Club President (my Dad) came a request for help. My mother happily acquired the material (something with lots of polyester since it's not going to be seeing an iron any time in the future) and make the curtain.
Fixing was to be with Velcro. You put once half on the the woodwork and the other on the curtain. In theory this makes hanging the thing easy, one person can do it by pressing the two halves together. That is unless the person tasked with buying the Velcro gets two lengths of hooks and no loops. Then spends ages faffing instead of arranging to return the wrong one.
With the deadline approaching, there was much concern about this thing getting finished. Suggestions of using drawing pins were pooh-poohed (they work for me, maybe the layout owners aren't allowed sharp objects) but without loops, we weren't getting anywhere.
So, to the interweb and a search for "Velcro". First result was MPD Hook & Loop who sell Velcro in layout sized quantities rather the domestic ones you find in the average haberdashers. The roll in the photo is 25 metres long, 20mm wide and self-adhesive. The last one was a mistake on my part but did save the effort of pinning the stuff to the material before sewing. Cost - an entirely reasonable £6.46 including VAT. Sadly, delivery was over 4 quid but that wouldn't change if we'd bought a roll of hooks to go with these loops. Not that we worried, an order placed on Friday morning was with us on Saturday. By the end of the day, the curtain was finished.
While doing this I even learned something - who knew you could buy this stuff in different colours ? I want to find a use for the fluorescent orange version. I even wonder if the 15cm wide version could be used structurally to save some bolts and speed set-up and knock down.The little strap thingies look pretty nifty too...
Monday, January 09, 2012
I must be a serious modeller, I buy the big glue
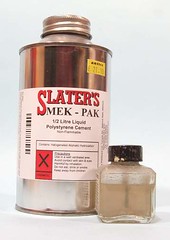 My little bottle of liquid plastic glue was nearly empty so I asked my Dad to pick up some more Slaters Mek-Pak for me while he was in Antics Coventry model shop. You can see what he brought back.
It seems that the shop didn't have the expected modest bottle. No, they only stocked the super-sized half-litre version. Like an American at the head of a McDonalds queue, this is what I had to have.
However, this isn't a bad thing. After all, I have a supply that's going to last me quite a long while now. Over the long term, the investment of £21.30 will pay off rather better than any savings I have in the bank. Unless I knock the thing over and spill the contents, I'll eventually use them up sticking little bits of plastic together. To that end, I'll not be working from the metal tub, it's the small bottle (a Humbrol product) that will live on the workbench. Glue will be transferred by pipette and nary a drop will be wasted.
I think I even like the aesthetic. That metal bottle is so much more workman like than the prettier brown glass one the smaller quantities arrive in. It reminds me of the sort of materials you see in the back of a plumbers van - quite a lot like the ones you get from a DIY store but not as pretty.The manufacturers know it's performance, not beauty that sell to the crowd arriving in work boots. You know once you are buying the ugly packaging, you must be serious.
Sunday, January 08, 2012
Naming the Mighty Atom
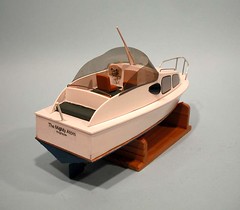 When David handed over the Micro Huntress, he did mention that the paintwork needed a little touch up and that we ought to sort out a name. I think he was being a bit hard on himself - the hull bottom looked OK to me. However he was insistent so I masked off the area using the swage line as a guide, and wafted some dark blue over the area.
Actually this turned out badly, not the paint itself, but the painting. A word of warning, make sure the paint cup is attached to your airbrush properly. If you don't, it drops off, splattering paint everywhere, especially over your sweatshirt and jeans. The later were Primark and well worn so a bit of paint won't hurt. The turps required to clean them would probably cost more than the clothes ! Not the case with the top but hitting this with white spirit and a quick wash solved the problem and saved me trip to the shops.
Naming the boat was via some make it yourself waterslide transfers sealed with several coats of satin varnish. The front names went OK but at the back I should have dried some thin coats over it as the ink ran slightly. Still, as long as they stay in place while sailing.
The varnish also tones down the gold line around the waterline. I couldn't resist adding this with the bow pen. Perhaps metallic gold wasn't the best choice as it's very runny, but it certainly brightens up the colours and adds a bit of luxury.
Finally, the steering wheel comes from a Bill Bedford etch of wheels. I assume there is a wagon somewhere that has a ships wheel to operate a door or something. It's ideal here though so if I build such a wagon, I'll need another etch.
Saturday, January 07, 2012
The Super D gets back on its feet

The freshly cut metal is hanging under the back end of the chassis. It supports the linkage that connects the brake pull rods to the control inside the cab. A bit more planning and I've have remembered to drill holes for the fixing bolts first - as it was I had to fiddle things a bit to allow the heads of these in.
At the front, sand pipes curl around the brake hangers. In real life these are separate but on the model, fixing everything together makes more sens as the separation would be so small as to be invisible. Anyway, the pipes need some support or they will be bashed around in service.
After a good scrub, I masked the hornblocks and blasted a coat of primer followed by some weathered black over the chassis. A bit of touching up with a paint brush to cover the areas where I'd over-masked such as the detailed part of the hornblocks. Life's too short to fiddle around with tape here and you can't tell under the loco as the paint brushes very well.
24 hours hardening later, the wheels and motor go back in. I still need to add rear sand pipes, but apart from that it's ready for the body.
Friday, January 06, 2012
Cutting out metal parts
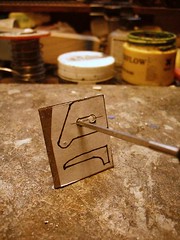 Work recommences on the Super D with the discovery that I'm missing some bits for the chassis - the guard irons (the locos ones, I have three pairs for the tender) and supports for the brake pivot under the cab.
Luckily, in the mountain of paper that came in the box of bits, there were several drawings of the locomotive from which I could trace the parts. Ideally, I would have preferred to use carbon paper but couldn't find any. Luckily the print was strong and the paper I wanted to trace on to thin.
Needing two of everything, I laminated a couple of bits of nickel silver together with a little solder, lots of flux and plenty of heat. The drawing was stuck on with spray glue.
After this it was just a case of making holes (pictured) and hacking away with a piercing saw. Straight lines are formed by cutting near to the line and then filing back to it. Once happy, more heat and a scalpel blade forced between the sheets of metal separated the bits. A course file cleaned away the solder and was followed by a rub with the fat fibreglass stick.
Result: parts that look pretty much like they would if I'd been able to cut them out from an etch !
Thursday, January 05, 2012
Garratt Pivots
 David asks:
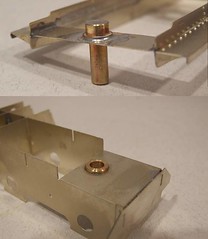
I’ve just been reading your piece dated 10 October 2008 on Garratt Pivots and I have some questions:
1. Do the pivots take the whole weight of the boiler unit;
Yes they do. It's nopt that heavy to be honest, I try to get most of the weight in the engine units.
2. Does the boiler unit “balance” on these pivots alone or are there other secondary bearing surfaces or restraints ;
The female pivot is a top hat bearing so provides a modest extra bearing surface. The streatcher that the male half is fitted to sits on this.
3. Does the bearing itself accommodate the relative motion of the bogies on poor track work and if so how much tolerance do you allow, (eg front bogie on a slope, rear bogie still on the level or front bogie canted over with rear bogie still level).
Nothing sophisticated I'm afrid. There is a bit of slop in the bearing and that seems to be enough to accomodate track irregularities. If the track is very bad then this might not work.
I’m thinking about making a model but I want to be clear about the pivots and anticipate potential problems.
Good luck. I suspect you are over-thinking the problem. On a model, these parts don't need to be very sophisticated at all.
Wednesday, January 04, 2012
New Year Sail

My Dad received a superb present for Christmas this year from the Chairman of our model boat club - a model boat.
Not just any model boat though, a micro Fairey Huntress. This is the Mk2 version of the boat that appears in the January issue of Model Boats magazine. It's a really tiny vessel but can still cut it on the water with much larger models.
Weather, illness and panto work meant that the maiden voyage wasn't until the New Year bank holiday but once on our pool, it raced around like a good 'un. The top speed looks pretty close to scale - David suggested we might want to tweak the blades on the prop for a little more aggression but at this point it doesn't look like it.
The model isn't quite finished. I've been tasked with touching up the paint and adding a name. We'll also fit a steering wheel from the stash of model railway bits. A couple of crew members are required and the new owner (who is well chuffed with his new toy) is going to have a chat with a friend who makes these from scratch to see if he can't make a commodore and dolly bird. If this happens, don't worry, there will be photos !
Tuesday, January 03, 2012
Diary Dates
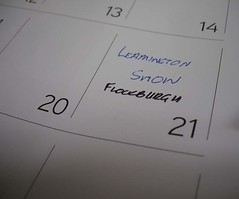 Time to open up the new calendar and fill in the boxes. With so many hobbies, it's easy, even this early in the year, to get clashes between events I was to attend.
The first dates to add are those on my exhibition diary for model railway shows. In the early season, there's a lot going on. Flockburgh is out and about 6 times before the summer. If you are in the area, then please drop in and say hello. It's great fun meeting people who read this stuff. In the meantime, I have some layout modifications to consider.
Then there's the Model Engineering Show and International Model Boat Show, both of which I want to have completed some new models for, so I better schedule some time in to get building.
Life must be a lot easier when the only date you have in your diary is when the next issue of "What's on TV" magazine comes out...
Monday, January 02, 2012
New year, New look
Regular readers will have noticed that Phil's Workbench has changed its look. I've been planning this for some time - months if I'm honest - but never seemed to get around to it. A new year has given me a kick up the bum to do something at last.
The background image is really my workbench, or at least the self-healing cutting board that lives in it when I'm not wielding a soldering iron anyway. It's looking a bit battered compared to it's brand new state last February ! I've already used this on my loco gallery and I think it gives the blog a nice workmanlike feel.
To compliment this, the main text is in a font that Blogger calls "Permanent Marker". This is a bit controversial as I'm not convinced that it's particularly well supported - on my mobile phone I see a Serif font instead but this could be just a mobile device thing. Worse, it isn't hugely different from the hated Comic Sans. Nothing good comes of writing in crayon under the impression that it makes you look "wacky".
Finally, the LinkWithin gadget provides some related posts at the bottom of each entry. Hopefully this encourages anyone who's dropped in thanks to a search engine to look around a bit and maybe subscribe.
Anyway, this is work in progress, there will be more fiddling in the future. Well, if I pull my finger out at least. Let me know what you think.
Sunday, January 01, 2012
Six !
 Another blog birthday, so how are we doing ?
- 2011 saw 367 posts, just keeping me ahead of one a day I'm aiming for. Some days this is more of a stretch than others. At least it gives me an incentive, indeed, often an imperative, to keep working on the projects.
- Visitor numbers are up with around 360 visits, including 80, regulars every day. Google reckons that's over 55,000 different visitors which seems like an awful lot to me. You are coming from over 140 different countries too including 1 visit from someone on St Kitts & Nevis.
- Fixing the Peugeot indicator remains the most popular post but the Miniature V12 engine video is creeping up there.
- I clocked up the 2000th post in October, which is great. Time to head toward the next millennium entry.
As far as my plans this year went, very little happened. The Garrat hasn't changed, nor has the 1/20th Brede lifeboat. In fact I didn't manage to finish a model boat at all this year. Maybe in 2012. I did get another loco for Flockburgh and the Club 500 did sail. And sink. And sail again.
There have been some good shows attended and some very good cake eaten. I've made my mark in some new publications including and non-English one. That's pretty good going. There are a few things lined up in this direction for 2012, maybe I'll even find a publisher for the novel.
For next year, well the Super D and Dunalistair are scheduled for an early finish. Well, in the later case, early as in 4 years anyway. There's also a Canberra to build and maybe, if I pull my finger out, a whole load of other interesting projects that really should be taken from the pile to fruition. Talking of fruition, the pear tree keeps droppings stuff on the garden railway, which reminds me that I haven't done much in that direction for a while. Mind you, the weather is looking a bit iffy at the moment, so perhaps it can wait a while.
I must admit, one of the best things about writing this post each year is that it forces me to re-read some of my old ramblings. Then I realise just how long projects seem to take when I'm driving them forward and feel less good. Not to worry, I will make a New Years Resolution to do better. Let's see if I'm still as bullish about this next year !
Subscribe to:
Posts (Atom)


