Wednesday, July 31, 2013

Alan Gibson Photos: Persil Wagon

PersilWagon

Hand lettering private owner wagons is something that scares the heck out of most of us. What appears so simple to the untrained eye is a nightmare once you get started. Alan was a professional draughtsman in the era where this meant drawing boards, film and pens rather than CAD packages, so presumably setting out text on a wagon side came a little more naturally. This, the paint-job shown here is a paint job with no recourse to transfers.

This model is kit-built (you can see the early Romford/Jackson wheels) and pre-dates Mainline's ready to run version by some time. Those hefty 3-link couplings would work too - none of your tension-lock tosh ruining the end of this model!

Tuesday, July 30, 2013

Alan Gibson Photos: B12

AlanB12

One thing I remember about Alan is that he was never that much interested in creating a model railway. He much preferred to work on individual items of rolling stock. Although complete, his layout was a backdrop for photography and I don't remember him ever mentioning actually running it.

This is why we have a B12 locomotive in full LNER livery complete with the early, pierced splashers. The metalwork under the curved footplate was later removed, presumably as it got in the way and possibly was considered a bit "fussy".

As for the origins of the model - difficult to tell. I suspect that there is some Trinag in here but if there is, not a huge amount. Those handrails didn't come from Margate.

Looking at a back view of the model, there is a cab full of metal block, but not the angled end of an X04 motor so I the jury is out. Peering at the wheels doesn't help are I can't see any Romford axle ends.

Whatever, a lovely model.

Monday, July 29, 2013

Alan Gibson Photos: Setinel Railcar

Sentinel Railcar

A few days ago, while helping tidy up the L&WMRS clubrooms, I found a couple of albums full of photos from my old friend, the late Alan Gibson. Some readers may remember Alan's article on model railway photography in Scale Trains back in the 1980s. Most of the shots were taken on the Aultibrig and Mingulay Railway and for the time, were pretty revolutionary. Most pictures appearing in magazines at that time were "helicopter shots" from a high level.

Getting in low and producing descent results involved proper lighting, a decent SLR camera and practise. The club owns lots of Alans photos but since he processed his own black & white films, we can be sure that there are many hundreds, if not thousands.

Anyway, I thought it was a shame for all these pictures to remain hidden in the clubrooms and so this week, we'll be featureing a different photo each day. I'll do my best to fill in the details but if anyone can help, please do so in the comment. Also, if you met Alan or knew him in any way, please drop comments in there too. The photos will be scanned in from prints without any electronic fiddling so you can appreciate the quality possible in the pre-digital age.

First up we have an LNER Sentinel Railcar. Alan was a serious LNER fan and so it's no surprise that we have one of these in the album. Looking closely at the picture, I can't work out if it's the Nu-Cast whitemetal kit or scratchbuilt. I'm inclined to the later. As well as being a top photographer, Alan was a modeller whose standards I can only aspire to so this simple shape wouldn't have phased him.

More prototype information here.

Sunday, July 28, 2013

Large Scale aircraft at Cosford

Miniature Formattion FlyingHooray for overcast weather!

The trip to Cosford to see large scale model aircraft flying was looking dodgy as the idea of spending several hours on an exposed and baking airfield didn't appeal much. On the day, the skies were cloudy, with just a hint that things might brighten up a bit so off we set.

Arrival involved parking on the field and strolling about 5 minutes to the show itself. Cost to get in was a tenner (9 quid for old people), model rail fans will squeal at this but it isn't that bad value and by the end of the day, were perfectly happy. As we walked toward the flight-line, there was a pair of Red Arrows jets flying formation. !/4 scale versions that is, and boy, they were flying.

The day went on with us looking over the trade stalls, most of whom came with tent-type accommodation, and emerging to see more wonders in the sky. Walking out to 9 WW1 aircraft was particularly impressive.

That's something you can also say about the jets. One was clocked at 160mph along the line. That's at about 20 feet off the ground too. These things might not be cheap of quick to make, the Red Arrows were apparently £15k each and the 20 foot wingspan Vulcan £35k + a new van is it was too big for the one he owned, but they don't treat them with kid gloves.

Fireblade

Basically, the flying was fabulous, apart from one stuck undercarriage there were no problems and thankfully, no crashes. The models were superb. Even if they didn't fly they would have been impressive.

The trade was fun as we've no intention of building a model aircraft so the kits weren't tempting. I still came away with a bag of new clamps and other tools though.

Plenty of photos too. Head over here to have a look.


Saturday, July 27, 2013

Northampton Show 2013

How nice to just visit a show for a change. A late start, no need to hang on to the end of the day. None of the temptation to buy stuff from the trade with your expenses when they turn up...

Anyway, Northampton club have moved to a new venue - a college on the outskirts of town which proved pretty easy to find once I stopped fighting the Satnav's desire to head on to the M1 instead of my preferred cross-country route.

At the cash desk the new venue was already causing problems as one of the organisers was busy explaining to the ticket people that several stands had had to be moved. Setting up in a new place is touch and schools are particularly problematic as all the rooms are too small really.

This did show a bit as the layout was "interesting" and there were one or two tight spots as we worked out way around. Admittedly, this was during the busiest time of the day so things probably improved once we had gone.

Layout-wise, this were pretty good. My eye was caught by a couple of models, Herrenscar Harbour in N gauge took full advantage of it's location on the dark stage. The ligthing was simple but helped with the atmosphere.

Herrenscar Harbour


Elsewhere, the O gauge Treloar Sidings is very much the sort of layout I was aiming at with Clayhanger yard. A simple shunting set-up with a bit of atmosphere. The wagon weathering was nice and I think with some lighting (they were in a very bright bit of hall so didn't need it) the results will impress. I'd suggest a slightly higher set of supports though.

Shunter

Scenic feature of the day had to be the waterfalls on ON30 layout Karolina Falls. The real thing tumbled over a waterfall powered by a garden pump. It's an effect you love of hate. Real water doesn't scale so the waterfall was a bit light on spray but it did keep going and provide movement to what could have been a very static part of the layout. The rest of the model was pretty good too.

My favorite layout though was an Underground Ernie setup. I've never seen the stuff used properly before. I own a few models as mechanism donors but putting it all together and adding a few similar features, I've never seen the programme but I'm pretty sure it's normally Dalek free, looks great. Operation was via big push buttons on the front and I enjoyed making it work even if the rest of the visitors seemed too snooty to have a go!

Underground Ernie Railway

Tradewise, I picked up some very interesting books to review at a later date here. H&A Models replenished my supply of Track colour paint and a pack of wagon transfers.

Even the tombola added to the stash, although the bottle of shower gel would have been better aimed at the many, far more than I've encountered for a long while, smelly visitors. I know it's hot, I know the hall was warm, but some of them really needed to be kept outside...

Finally, cake. Two to chose from, a small fairy cake with a red splat on top and a small ginger cake that had been labeled chocolate cake. Both lovely and home made.

Anyway, there are more photos to enjoy on Flickr.

Friday, July 26, 2013

A home built flying Vulcan

vulcan

My Dad and I went to the Large Model Association meet at Cosford last weekend - pictures from this will be on this blog by Sunday - and it was great fun.

One of the best things is that while we like the aircraft on display, there's no interest in building one. Well, not much. So the "No more Kits" mantra is largely unnecessary. We did come away with some tools and useful radio control fittings but those don't count.

Well, there was one kit. A British Model Flying Association Vulcan. The aged parent has now built it and you can see the results. Lots of old technology with balsa wood stuck to printed tissue paper. The whole lot is powered by an elastic band.

And it flies. Quite well.

Anyway, the interesting thing about this model is it's a part of a range. The idea is that a beginner starts with one kit and gradually advances through the set with each model being slightly more complex than the last. According to the instructions, "Your next model in the BMFA Education programme is the Gyminne Cricket" which requires more skill to build but will reward you with twice the performance.

Packs of planes can be supplied to schools and sound like a great way to explain the mysteries of flight. All good stuff since you get a science lesson and modelling practise in one go. Or parents can buy the kits for a child and they can work their way through the, Just the job for a long summer holiday perhaps.

Clever stuff - let's hope it encourages future generations of modellers. Maybe some of those returning to the hobby could benefit too.

And for those who don't think it looks much like a real Vulcan bombers, here's a model for comparison. Very impressive with a 20ft wingspan but it did cost 11666 times much to build!

Model Vulcan Bomber

Thursday, July 25, 2013

Whitnash Station sign

Whitnash Station SignAnother one of my very early models - the station sign for Whitnash.

I think the basis is a Hornby Dublo cast metal sign. When i had it as a kid, it wasn't collectible or valuable, just old. I have a suspicion that the name was originally "Swindon" or "Crewe". Living in Whitnash, it seemed perfectly logical to me to repaint it and change the name to my home town.

Obviously, I wasn't going to let the lack of a real life station worry me. There was a railway line passing by the edge of the town, I crossed over it every day as I walked to school for years, so there could have been a station.

(Note to modern children, walking to school is is a process that involves putting one foot in front of the other, chatting to your mates and having a good time. You travel cocooned in a people-mover so can't do this. Your loss.)

Anyway, a coat of Humbrol and a little work with dry-print transfers (probably from WH Smith, Letraset being too expensive) made the changes. The little man comes from the Slaters range as I discovered that you could buy unpainted figures from the local model shop for a tiny percentage of the price for the painted versions. Learning to paint people is a useful skill. Mind you, those trousers could have done with a second coat, or at least I should have stirred the paint properly.

It's this sort of job that modern modellers seem scared to do. I know the results aren't perfect but to young Phil's eyes, they were pretty good. More to the point, it was my train set and I'll have the station name I like!

Wednesday, July 24, 2013

Modelcraft Magazine, Vol1 No. 1

Finally, something in modelmaking that increases in value! Sold in February 1947 for a shilling, I bought a copy in 2013 for 50p - a tenfold increase in just 66 years. If the city of London had invested this wisely, then the economy wouldn't be in the mess it is now.

Inside the front cover, the editor announces that this new magazine has been published in response to the excellent sales of the Aug 1946 List which included a few articles. Since WW2 was only just finished, I imagine that modellers were delighted to be able to read anything without the Hun shooting at them.

Anyway, there is a call for articles for which, "We pay well for" and don't need to be of great literary merit since the mag has a tame literary expert on hand to ginger up the text.

So what is in this issue?

Forming and Running a Model Aircraft Club
Making an Artificial Sea
A Rudderless Ship (Information on the Cycloidal Propeller where we don't refer to the German name)
Modelcraft product list for Feb 1947
News Items and Ideas
Some Simple Holding Devices and Methods
Flags and the Ship Modeller
Road vehicle registration numbers
Judging card for Waterline Ship Models.

All good stuff if a bit dry as articles written back then tended to be, Having said this, all of the methods demonstrated would work today and in the Holding Devices, there is a tool I fancy making as it looks very ingenious.

Tuesday, July 23, 2013

Models from the depths of the cupboard: Metropolitan Vickers Gas Turbine 18100

18100

Putting some paint away in a drawer full of train stuff, I found this interesting beast. Doubtless bought cheaply on some second hand stall many years ago for out roundy-roundy layout, I've kept it for a couple of good reasons.

First, I still fancy turning it into a descent model.

Second, no one else would give good money for it anyway.

The prototype is Metropolitan Vickers Gas Turbine locomotive 18100. Ordered by the GWR but not delivered until a few years into BR days, it was one of three gas turbine locos that ran in the UK. Not greatly successful, turbines are heavy on fuel unless you keep them running at full tilt, it was eventually converted to a pure electric loco complete with pantograph and then scrapped in 1972.

The model is, I suspect, a Q-Kits product. The body is a one-piece casting in a dark blue fibreglass. It's a bit crude in places but you certainly can tell what it's supposed to be. Whoever built it didn't stint on the paint, which is a shame as if it were a bit thinner, I suspect the result would be quite nice.

For a chassis we have either a Class 37 or Deltic from Lima. The number of wheels is correct but that's about it. I foresee some work in this area if and when I get to working on the model

At the moment, the loco lives in a drawer, part of the "pending" pile. Were it not already mine, would I purchase it now? Possibly. Although there is no chance I'll build a layout suitable for this engine, I have a soft spot for weird prototypes. Mind you, knowing my luck, Heljan will produce it ready-to-run...

If you want to know more, I can recommend Kevin Robertson's excellent book on the subject.

Monday, July 22, 2013

Pretty Blue(print)


I picked this blueprint up on a second hand stall at the weekend. It's for an LNER Y4 shunter and is reproduced to 7mm scale.

This is one of the those locos that has always appealed to me. Being quite stumpy with all the waggly bits on the outside, I've always felt it would make a cracking model . As far as I know there isn't even a kit available for it, never mind something ready to run.

As a scratchbuilding project, I'm not sure I'd be up to the task, especially in 4mm scale. Walschaerts valve gear isn't for the faint-hearted and cramming it all in a small space doesn't make matter easier.

Stepping back for a moment though and looking at the plan - it's a thing of beauty itself. I know nothing about its origins but assume it's a commercial product dating back to the 1950s or 60s - hence the wonky and small repro here.

I'd be happy to frame the thing and just have it on the wall. Maybe this says something about me that I probably should admit on the Interweb, but I like the neatness and order of a good plan. Printing it in a traditional style of white ink on blue make it even more appealing. Am I weird?

Sunday, July 21, 2013

Support your local model shop

ModelShop Cat

I've just finished reading The Bachman Books written by Stephen King under the pen name "Richard Bachman. The subtitle is "Four dark visions of a terrifying future."

The name amused me, being one "n" from the model train manufacturer. The destopian future thing though, well that's a lot closer for modellers than you would hope.

A message from a friend on Facebook alerted me to the news that Bobs Models of Solihull has closed down. The little cat on the counter won't be getting any fuss from the painty hand brigade any time soon.

Of course this comes hard on the heels of the Modelzone chain of shops shutting their doors.

Bob's Models closure both upsets and annoys me. It was a cracking shop with an excellent range. The staff were knowledgeable and helped the buyer. Despite this, it's gone. Presumably there will soon be another charity shop in the row.

Why is this?

Well, it's not because there is no money around. People are happy to spend over a hundred quid on a RTR diesel and then take to someone who will fit it with DCC sounds and lights taking the bill to nearer £400.

Checking out the prices of modern RTR, they are going in only one direction and its not downwards.

So how come there aren't thousands of happy modellers out there getting gluey and painty building layouts? How come the model shop isn't thriving.

My suspicion is that the answer is simple. The models being bought arrive in the post. They are ordered online from whoever is cheapest. With all the overheads of a physical shop, that probably isn't your local guy. So he might see a punter who wants to chat. Possibly one who buys a few odds'n'sods. The big ticket items - the ones that keep him in business - they go to the web. When they arrive, they get a quick airing on a length of track and then go back in the box.

Sadly, I'm a bit of a lone voice. I don't buy many RTR locos and when I do the local shop gives me a good price and service but 1 every 5 years isn't going to help much. When I suggest they others might like to support their shops I'm told that they can't compete on price.

I wouldn't mind, but this isn't always true. More to the point, they can (if they want) compete on service. What do you do if your new toy is faulty? In many cases, rush to the web and moan on a forum. Then demand that the manufacturer sorts it out. What do you do when the new washing machine doesn't work? You get the shop to sort it out but then you didn't order it by post did you ?

Anyway, judging from a small number of comments on various forums, there are a band of "modellers" who will be delighted when all the shops are gone. They rejoice in the closure of yet another one. I suspect they also enjoy reading that the local pub has closed as they open another can of beer sold below cost price bought from a supermarket and drink it with only a computer and pile of boxed chuffers for company.

Right. Once I've finished this, I'm off to the local model shop. And I'm going to buy something.

Saturday, July 20, 2013

Hartlepool 2013

There's nothing I like better than to spend a baking hot Friday afternoon stationary on the M1 motorway in a small, underpowered van that makes a bonging noise when it thinks it's reached 70mph and has brakes that are either of or ON. Oh yes, what joy.

It's not all glamour this model railway exhibition lark you know. I left home at 2, picked up my spare operator from Rugby, which is on the way, and we pitched up at the venue at 8:30pm. Knackered.

Anyway, the layout was thrown up and not tested. Both of us were more interested in finding the hotel and some fish'n'chips than tidying up the display. Besides, there would be plenty of time for that the next morning.

Stand 26

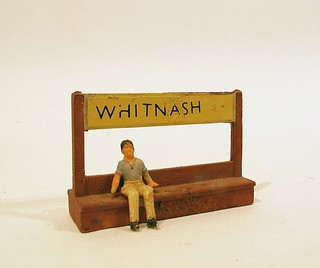
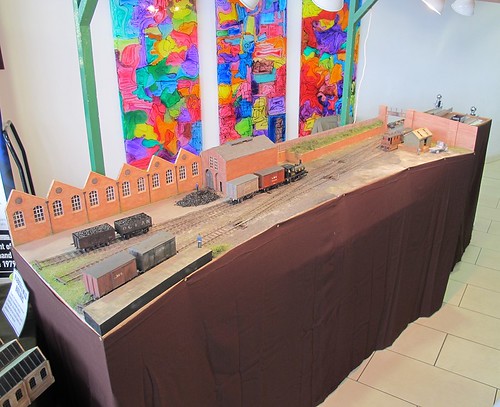
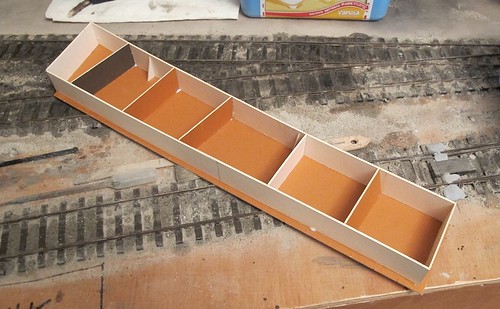
Hotel, food and a couple of pints acquired we settled down and woke afresh the next morning. After a stroll on the front we turned up at the show to finish set-up. A selection of Parker's Guide projects were laid out on a table, 
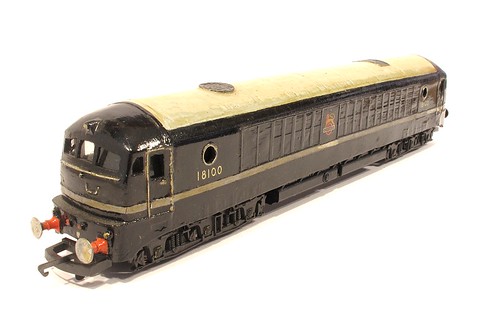
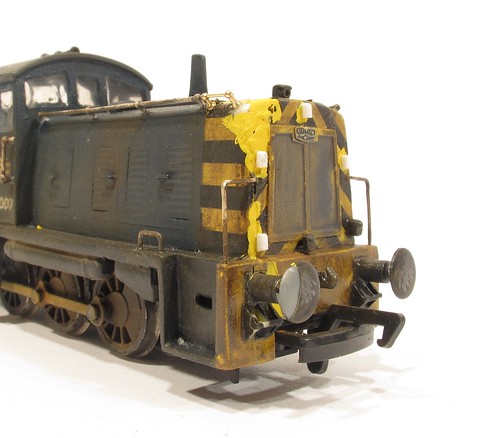
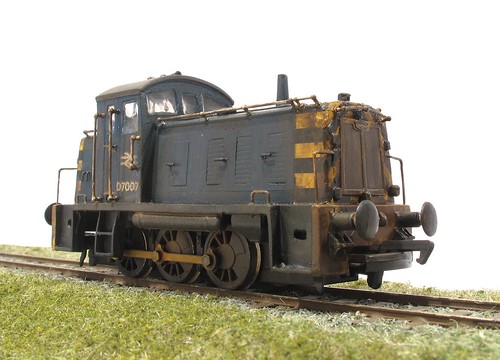
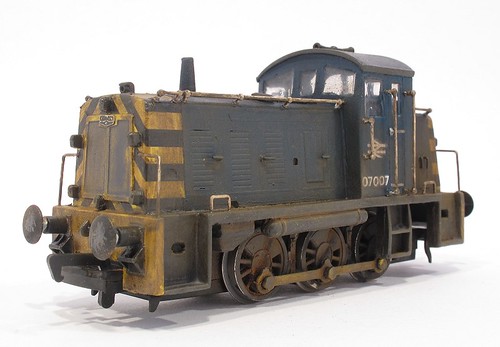
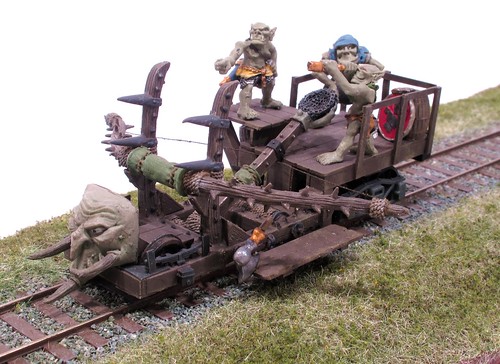
I dropped the 07 diesel and we prepared for the audience.

It was a bit of a surprise to discover the show opened at 9:30 on the first day. If we'd read the poster, we might have twigged this. It didn't say that the punters would be let in at 9 though, but they were. Apologies for those who found us unprepared, we were.

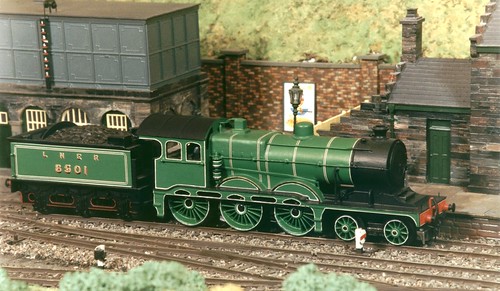
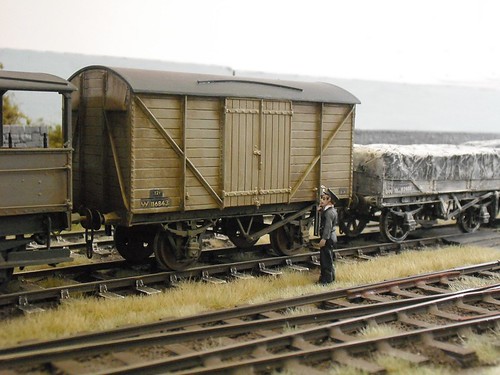
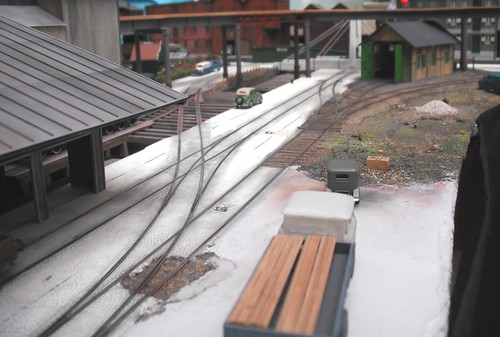
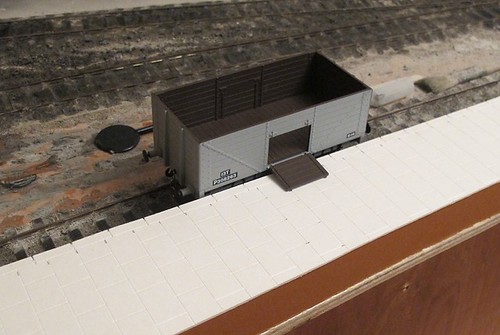
Anyway, the layout ran like a bag of nails and it quickly became apparent that this was to be a show about talking rather than playing trains. Luckily, operator Chris is good at this and quickly settled in. The problems stemmed from relying on the switch rail to stock rail contact on the Peco points. Despite cleaning this up and making everything work a couple of days before, the trip along the motorway had undone all our good work. Gradually, after some cleaning of metal bits, we got most of the points working. Sadly, the manual operating mechanisms that incorporate chocolate blocks to attach the operating rod failed in a couple of places - the rods came out of the connectors and because the layout sits on a paste table, we couldn't get at them to fix things.

None of this seemed to matter much. It seems quite a lot of people have been following the series in Hornby Magazine and were pleased to see the model and talk about it. We explained the problems and they seemed to appreciate the honesty.

Parkers Guide Projects
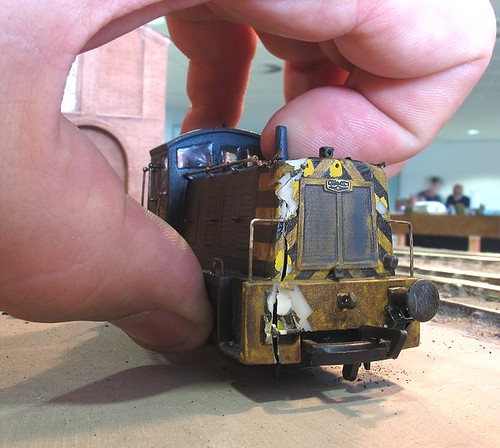
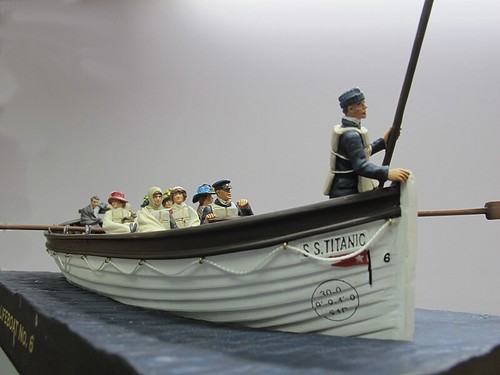
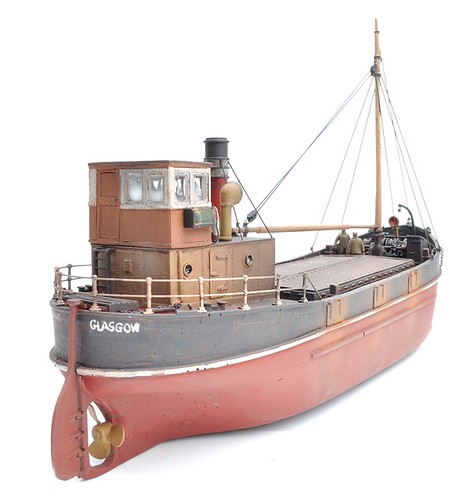
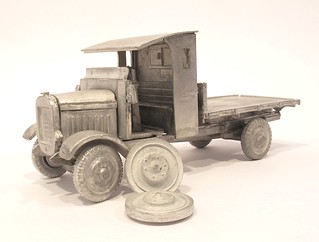
The Parker's Guide projects went down well too, especially the Clyde Puffer. Once chap bought the magazine just to read this article! I enjoy yakking about these models and it's great to let people have a good look and handle them. We shifted all the Parker's Guide bookazines that had been brought along too.

Saturday evening, we took the time to slew the layout on it's table so the operating handles could be fixed. Then a quick trip to 
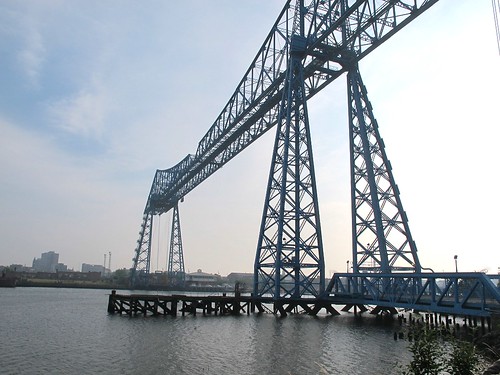
the tiny pub at the station (No beer for me. Boo) and then back to the hotel for food but as we were early, via a drive around the chemical plants of Middlesborough (ugly but interesting) ending at the transporter bridge, which was brilliant even if we were too late for a ride.

Transporter Bridge side

Sunday, Chris went fishing and caught a sand eel before breakfast then 
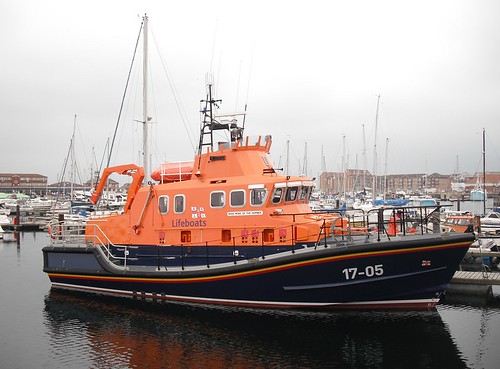
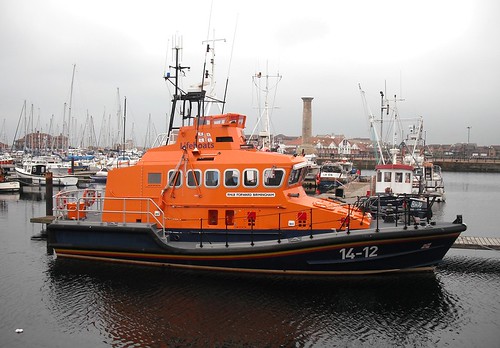
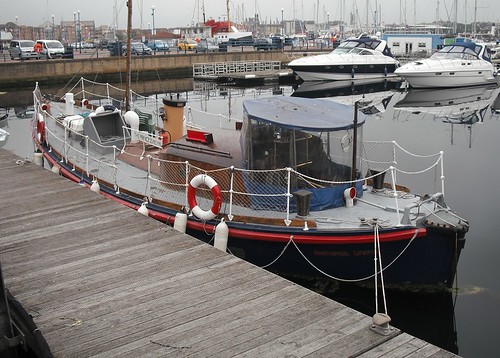
we had a trip around the marina to photograph boats before it was back to the show. Opening time was 10 but the audience came in at 9:30 anyway. We were better prepared this time.

The layout worked better than on Saturday and we finally got a feel for what it's like to run properly. Since about 10:30 the day before, I'd been convinced that I would be ripping out the manual point rodding to replace it with Peco motors. By the end of the show, I reckoned that if I could fit microswitches to the mechanisms to fix the electrical issues, I'd keep manual control. With three-link couplings, pushing and pulling things for switching seems appropriate.

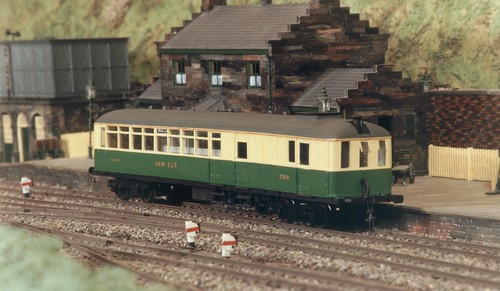
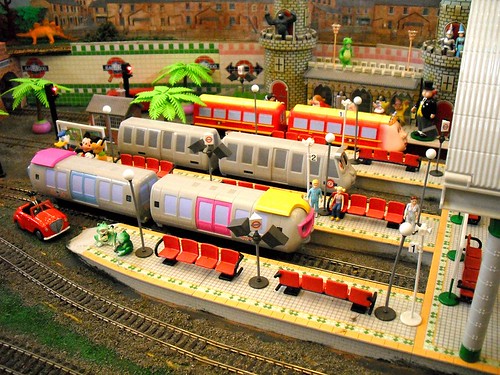
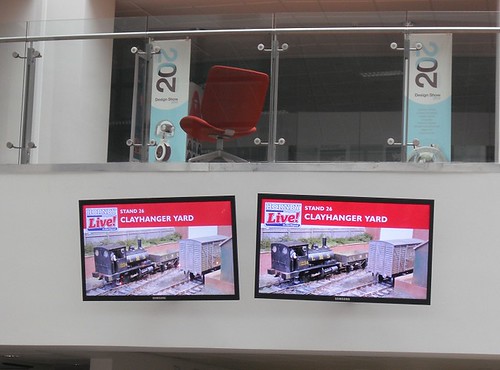
Because of all the chat, I didn't really get to see the show so if you are hoping for photos, you'll be disappointed. The only one I took was of Quai:87.

Quai87

Cake news - there was chocolate cake and it looked lovely. We didn't realise this until far too late on Saturday and then remembered to late on Sunday to. I have quite a Choux Bunnice Choux bun although my preference is for a higher choc to pastry ratio if I'm honest.

Apart from this, the main lesson was that out fascia needs rounded corners and if there isn't a barrier in front of the layout, people will duck under it to chat.

The layout though - ignoring the electrical issues, it works. Quite well too. Looks nice too. Maybe a 7ft 7mm layout is a workable concept. Let's hope so, I think a few people have gone away to build one.

If you were one of the huge number of very pleasant people either of us spoke to, thank you for coming. We enjoy a chat and to be honest, that's what I at least, am there for. I hope you enjoyed the show and if there is anything else I can help with, just hit the "Ask Phil" button at the top right of this page.

Clayhanger Yard

Friday, July 19, 2013

Locomotive Repair

Cracked07Yesterday I had a broken 07 shunter and was not happy. I chucked the bits back in the box, shut the lid and left it for the rest of the day.

As the show quietened down, I summoned up the courage to have a look. It appeared that the model had hit the floor on the bottom corner of the front bufferbeam.

The buffer had broken off and a crack ran up the front and along the top of the nose. A bad crack, all the way through.

The front and top corner handrails were gone, so had several of the marker lights.

I didn't notice it at the time, but so was the back buffer on the same side. This didn't get noticed until I found it while we were packing up.

Back home, I started the repairs. First, the cracks were glued back together with Zap-a-Gap superglue. Then I attempted to make good the paintwork. A quick coats of acrylic didn't do much but puddling it on did. It filled the gaps that the glue hadn't taken care of. Not perfectly but I reckoned, well enough.

Next the new marker lights were made from square styrene strip cut to length and rounded to match the originals. They aren't quite as good but I can live with this, especially since I found some of the originals (little more than black specks) on the floor of the show. And then lost them again.

Restoring the black stripes with a fine paintbrush helped as did making new handrails.

Repairs Pt1

Finally, a few coats of Humbrol Weathering wash, a bit of powder and some matt varnish.

OK, the result isn't perfect but short of a complete strip down or throwing away the body, it won't be. At least I have a presentable blue 07 again - in real life the reapir isn't nearly as visible as it is in the photo. I'll be more careful in the future.

Repaired07

Thursday, July 18, 2013

Locomotive breaking

07 007

I'm quite pleased with this model of an 07 diesel shunter. Built for Modelling British Railways Diesel Locomotives, it's based on a Silver Fox resin kit and runs on a second-hand Bachmann 03 chassis. Basically, it's a model anyone could build - and if you buy the bookazine (on sale 6th October) then you can find out more.

So pleased was I, that I took it along to Hartlepool show to wave under a couple of peoples noses. That was my mistake, pride coming before a fall so to speak.

The fall was made by the loco as I was setting up my stand. The fall was about 18 inches. The fall ended with a hard, tiled floor.

The results were not pretty.

Cracked07

I stuck the loco back in its box and couldn't look at it for the rest of the day.

Tomorrow, I'll explain how I made things better.

Wednesday, July 17, 2013

Bachmann Open Day

Press hat on, I headed off to the Bachmann open day. You might wonder what goes on at these events. Are there dancing girls? Free drinks? Wild partying?

To answer this, yes there were free drinks. German beer for those not driving. I was, so no good for me.

I was also short of time so skipped the buffet lunch and if there were dancing girls, I missed them.


What you do get is a trip into the Bachmann coach (described as the first stage of HS3) beside the warehouse. Inside there are display cabinets containing models (trains, not dancing girls) which we get to look at and photograph. First though, you are grabbed by a Bachmann press person, sat down and walked through the press pack to explain what the new and exciting things you can see are.


Then it's chatting to people from rival publications - the editors from all 4 main UK modelling mags were there as well as lesser editors like me. You'd be surprised how Gibbowell everyone gets along - there' none of the attempts to cover models in sticky fingerprints before a rival can point a camera at them that you might hope for. No fights or even arguments either.

Best of all, for those who can't attend, or do turn up and then lose their information pack, everything, including some photos is e-mailed out.

Anyway, we had a good look around. The news stuff will be over at MREmag.com. However, apart from the toy chuffer stuff, there were other goodies on display.

Bachmann are also responsible for selling Britain's cast metal figure sets and some of these sat, largely unnoticed in a cabinet by the door of the coach.

Needless to say, I took a look. There is a set of airmen climbing into a Lancaster bomber. Since you get a Guy Gibson and his controversially (for the modern world) dog, I assume they are loaded with a bouncing bomb.

The quality is superb. No idea how much this stuff costs, but it's probably worth it.

There is also a nice set of Titanic survivors in a cast metal rowing boat. The model is huge and weighs a ton, so no chance of fitting R/C gear!

TitanicBoat

Tuesday, July 16, 2013

Lifeboat Trio

Light blogging today - I'm still sorting out stuff from Hartlepool show (more on this at the weekend) and the Bachmann open day (more on this tomorrow), so here's some pictures.

While wandering around Hartlepool marina, I found a total of 3 lifeboats. You don't normally find that many in on place, so here's the pictures.

First, Pride of the Humber, a Severn Class lifeboat.

Pride of the Humber


Next, Forward Birmingham, a Trent lifeboat. Part of the relief fleet, presumably Pride of the Humber is heading off for a refit or repair.

Forward Birmingham

and finally, The Pricess Royal, a Watson class lifeboat built in 1938. Some interesting history for this vessel here.

Hartlepool Lifeboat

Monday, July 15, 2013

Sleeper cleaning


All that ask ballast was entertaining to lay on Clayhanger Yard. As mentioned on Wednesday, it sticks everywhere. Standard gauge tracks in yards tend to be ballasted up to the sleeper tops but not above. Something to do with sleeper rotting I think.

Anyway, while wet, the ash can be scraped from the tops with a sharpened ice lolly stick. When its dry though, things are different. Then it takes a blunt chisel slid along the tops. Good job we have some that probably have been thrown away.

Sunday, July 14, 2013

TT Thomas

TT Thomas

While not my favourite character from the Rev Awdry's railway stories, Thomas is iconic and a useful standby for those taking a model to the sort of public exhibition where there will be families. I'm not a huge fan and like to use the model very sparingly, it's model railway not a child's toy after all, but the occasional run makes babies laugh and more importantly, drives MRJ bores away.

Based on a Traing Jinty (it's no loss, they made millions of them that now infest second hand stalls and eBay), the tanks have been extended forward over the wheels with plasticard and a face added. Gloss blue paint and a bow-pen lining job complete the transformation.

The face? Cast in resin (you can't buy spares sadly) by shoving the front of a Hornby Percy into some plasticine. It was obviously oversize so I see I filed it down at the edges. I didn't just copy the 3D bits but the paint job as well 'cos Hornby do a really good job with this.

Saturday, July 13, 2013

Goblin war railcar

RailCatapult

I'd forgotten I'd built this. Constructed from a Games Workshop Goblin catapult and quite a bit of scratchbuilding, it's a bit of an oddity.

Once upon a time I had an idea for building a fantasy railway layout. The Goblins and Warlocks Railway (GWR - geddit?) would make use of all the lovely castings and imaginative features that role playing gamers have access to. To be honest, I've always wondered why none of them have ever produced a fantasy train.

For the moment, the rolling stock is this and a couple of wagons, but maybe one day...

Friday, July 12, 2013

Clayhanger Yard at Hartlepool

Today, I'm packing a little van with Clayhanger Yard and a pile of Parker's Guide projects and heading north to Hartlepool for Hornby Magazine Live!

I'll be around all weekend to chat about the layout, projects or where the best cake is to be found.

Please drop in a say hello. I'll get lonely if you don't.

Hornby Magazine Live! in Hartlepool.

Photos from last years Hartlepool show.

Thursday, July 11, 2013

Clyde Puffer and Boiler House in Hornby Magazine

Hornby Mag arrives this month and inside I'm hard at work in Clayhanger Yard installing a boiler house and several feet of factory building.  This end of the layout is looking good now, which is a relief as it's off to a show this weekend.

BoilerHouse

Parker's Guide sees me heading out to sea with a Clyde Puffer. You might wonder why we are building a boat in a model railway magazine, but only if you've never seen my layout Melbridge Dock. A pair of puffers adorn the layout and it's a very practical and popular ship for railway modellers.

Being only 60ft long in real life, they are small enough for your average layout. The real things are surprisingly large.

PufferBack

Wednesday, July 10, 2013

Ballasting with ash

BallastingMore ballasting. More ash.

If anyone suggests ash ballast is a good idea for your model railway - slap them. It's not, it's horrible stuff to work with.

My initial experiments showed that if you just lay ash, pour on the watered down PVA and leave to dry, the ballast shrinks as it dries leaving gaps around the sleepers. To fix this, I mix in powdered household wall filler.

Of course this stuff doesn't spread easily like small stones. It sticks to everything, coats the sleeper tops, won't move around properly. Horrid. Horrid. Horrid.

Next, I find that the PVA doesn't run through the denser mix like it does through granite. No, it puckers up at the touch of liquid, even if said liquid has the magic surface-tension busting washing up juice in it. Patting it back helps, the end of a 3 inch paintbrush being particularly good for this job.

After all this, the colour isn't right. Putting black powder paint in the PVA mix helps, but I still need to wash it over with some more greys and browns.

Truth is, granite would be a heck of a lot easier and I bet most modellers, having grown up looking at model railways rather than real railways, probably wouldn't notice. Still, I know it's right and once the hassle of the work is forgotten, I will be able to bore show visitors with my tales, so I suppose that makes it all right then.

And the greaseproof paper in the baseboard joint? Hopefully, it will stop the boards sticking together.

Tuesday, July 09, 2013

Loading platform

There's a lot of Clayhanger Yard this week as it's off up to Hartlepool this weekend.

Loading Bay top

Job number 1 is to ballast the left hand baseboard. Before I can do that though, I need the loading platform for the corner.

Constructions is simple cardboard modelling with a scribed top (using the back of the scalpel) and base designed to keep the top 33mm above the woodwork. Testing with a Dapol wagon shows this to be about right.

Loading Bay bottom
 
I've described this sort of work loads of times in print so I'm not going to do it again but as you can see, it's pretty simple if you can cut a straight line. I do like Deluxe Materials card glue for this work as it grabs instantly which is handy when fixing a strip of card that has to follow a curve.
 
Behind, ballasting has started. A swizzle stick from the pub is ideal for mixing the watered down PVA glue mix once I've finished with it in a cooling pink or orange and lemonade. Trouble is, it's dirty now so perhaps I should go and get another one!

Monday, July 08, 2013

Brede in World of Model Boating

Time for the Brede Lifeboat to make its appearance in print. The full story of the build appears in the Bookazine "World of Model Boating", a spin-off from Model Boats magazine.

It's odd to see the article in print. This was at times, a hugely frustrating build. When I say the windows held me up to for a couple of days, I really mean it. With a deadline looming, this was more stressful than modelmaking should be.

Now, I see the piece on the page and it's like it never happened. The photos look good so the pain is forgotten. I suspect childbirth is a bit like this otherwise you'd never have two children...

There are loads of interesting articles between the covers but the one that fascinates me is the selection of Model Boat magazine covers from the 60s. While we now enjoy full-colour photos every time, then the reader would see a dynamic image produced by the in-house graphic artist. I can't help feeling we've lost something somehow...

Sunday, July 07, 2013

The joy of weekday museum visits

Touchatool

Meeting for cake last week, I found myself with time to spare in Birmingham Museum. Wandering up to the new(ish) Brummie Gallery, I found only 3 other people there. Fantastic.

The problem with a lot of museums is that they like to do more than just stick things in cabinets. Now we have to be interactive and exciting. All well and good but if there is more than one of you, these don't work that well for a group as opposed to a single person. Anyone who remembers the Millennium Dome will know what I mean - the building was full of 1-person things to do. I went on a quiet day and even then walked by quite a few interesting looking places because you could only enjoy them one at a time.

Worse, if you are enjoying something, you're likely to gain an audience breathing down your neck and wishing you'd sod off so they can have a go.

The display shown is a good example. It's very clever, the tools are firmly fixed down but if you touch one, it starts a short film. This focuses on a particular manufacturer who makes something interesting - whistles, pewter castings etc.

Of course, I want to see them all and because I had the display to myself, I could. And they were all interesting, especially the Acme Whistles film.

Had the gallery been busy, there would have been spawns of Satan children running by and whacking the tools. Every time they did this, a new film would start. Kids are always doing that sort of thing. They don't want to see the presentation or watch the machine work, they just like pressing buttons. Despite this, we have to make everything child friendly.

Enough. Grown-ups appreciate this stuff and we are the ones paying for it. Lock the children in the "Victorian child experience" where they can be showed up chimneys and down pits. The rest of us who are genuinely interested will do the learning. Thank you.

Saturday, July 06, 2013

Nudie sunbather (NSFW if you work in a convent)

Tiny Sanbather

What's going on? I order a pack of people suitable for a campsite from the German firm Prieser, and in the packet is positive filth! Nudity! Boobies! Smut! Other words that might get me slightly sad purvey visitors via Google!

You don't get this sort of figure from a proper British manufacturers. All those Airfix civilians were properly dressed for a UK summer in duffel coats. Oh yes. Barely a flash of ankle, never mind anything else.

Actually, you DO see this sort of thing and more from some specialist model railway makers. They are bought by the sort of person who then feels the need to point out the "risque" people on their layout to every single person who looks at it. They think it makes them appear to be "a bit of a lad".

It doesn't.

Friday, July 05, 2013

Inside the engine shed

01shed

After escaping the cannibalism of the Holyhead Breakwater Railway, 01 001 finds a safe haven at Melbridge Parva shed. All appears safe - while the building has long since lost its doors, at least there is an inspection pit and some tools so the little engine feels that they must care for locomotives here.

The loco is a Judith Edge kits 01 built here. The safe shed was Airfix although it's been heavily modified. Those missing doors have gone in to the bin because they are a terrible fit and stop a long way from the ground. The photo is one of a set taken for Modelling British Railways Diesel Locomotives but I decided that while pretty, it doesn't fit the bookazine, so you get to see it here instead.

Thursday, July 04, 2013

Wheels

wheelsA nice touch on the Thornycroft kit is the inclusion of 2 sets of wheels.

Because of the age of the prototype, it's perfectly possible that solid tyres might be fitted when the lorry was new. For my layout, some of the those modern inflatable jobbies are more appropriate.

Driving around on solids must have been "interesting" although I suppose when you are used to horse-drawn transport, the lorry probably seemed like a luxury anyway.

The rear wheels were soldered in place but at the front, I used some pound shop 2-part epoxy blobbed on the back of the hubs. The idea was that with a reasonable amount of slop in the setup, left dry overnight, the model would sit square on a flat surface.

Somehow, this hasn't happened but only by a whisker. A few passes of a coarse file will sort this out.

Wednesday, July 03, 2013

Platform 5

Platform5
Working on Modelling British Railways Diesel Locomotives over the last few weeks has made me quite nostalgic for “old” railways. In the search for information (can't rely entirely on Wikipedia after all), I unearthed my old train spotting book.

Hard-core anoraks will recognise the PVC cover (a cagoule for my spotting book, do they make a matching one for me?) which protects the seventeenth edition from 1986.

Flicking through, I discover a couple of things:

Firstly, I was a rubbish spotter. There's not many numbers crossed through in here. To be fair, I knew that already. I like watching trains. I love travelling on trains. When I do the first, I'm usually wishing I was doing the second. Truth is that I might have enjoyed poking around a yard but I never did and even if I had, I'd have been as interested in the buildings and general detritus as I would “copping” all the numbers.

This continues on to my modelling. For me it's the overall impression that matters, not the nth degree of detail. Rivets? Useful to give the weathering something to work around but I couldn't care less how many there are. I'm much more interested in the crews skin-tones than the finesse of the wheels. As long as the model works, then I'm happy. You get chucked out of the paramilitary wing of the P4 Society for saying that sort of thing.

Second, didn't we have a lot more variety on the railway in the old days?

Looking through, there are 03 shunters, Class 25s and 26s and Peaks. Some were just hanging on but all of these were represented in reasonable numbers. This is all far more exciting than the procession of multiple units were get today.

There would also have been interesting goods trains. A line of containers might be efficient, but the artist in me prefers a mix of 4-wheel wagons. They just look so much nicer.


I've always thought that when a time machine is invented, I'd like to go and see steam engines operating for real but a bit of me wouldn't mind a day or two in early blue diesel land now.

Tuesday, July 02, 2013

Have I got the right cab back?

Cab BAckThere is something odd here. The raised moulding along the back of the Thornycroft should, I would have thought, form a continuous line around the three sides.

It doesn't.

Two sides, yes. The short one, no. It misses by several mm.

At least it's another easy fix. Removed the raised lump with a pair of wire cutters (those ones meant to cut flush to the surface, very handy for this sort of job) and file. A quick polish with a bit of emery and the surface is clean. I'll re-instate the line with some plastic later. After I finish with the soldering iron.

Talking of which, the sharp eyed will notice that the corners have been filled with blobs of solder. It's a good filler as well as fixative.