Saturday, April 30, 2016

MERG morning

After my session over at Pete W's playing with Leamington Spa, I felt the need to know more about the rather funky little DCC controllers in use on the layout.

Regular readers will know I'm not a big fan of DCC. I've seen far too many people staring blankly at handsets with far too many buttons and wondering what to do next. I've played with a Dynamis on Ruston Quays and it's the wrong tool for the job - great for circular layouts but not so for anything where locos have to stop on a sixpence for uncoupling.

The MERG (Model Electronic Railway Group)  controllers look like they might be the DCC version of my much loved Gaugemaster handheld.

With this in mind, I spend last Saturday at a MERG meeting finding out more about the system. After a bit of a talk, we were let loose with the controllers and spend a happy half hour pushing buttons, breaking things, finding out what we'd done and doing it properly.

All good fun and well worth the trip, especially since it was held at our clubrooms so I knew the way. These get-togethers are fun and an interesting non-club way of getting together with like-minded (OK, slightly, some of it lost me) modellers.

MERG website.

Friday, April 29, 2016

Can't get stuff for 3mm scale?

"Oh I'd love to have a go at TT, it's the perfect scale. But you can't buy anything for it."

So goes the typical refrain every time the scale is mentioned on forums.

Well, it's not true. My copy of the latest 3mm Society price list hit the mat yesterday with a thump. At 24 A5 pages long, there's plenty to read.

A quick count would suggest around 70 items listed per page so allowing for the front and back cover, we're talking over 1500 kits and components.

Not bad for a scale you can't get stuff for...

You might care to visit the 3mm Scale Society website.

Thursday, April 28, 2016

Shunter tinkering in BRM

Diesel Shunters

I can't be doing without of the box ready to run locomotives on my layouts. Once I get my paws on them, I feel the need to make them "mine". Or ruin them, as a collector might say. 

This month, in BRM, I've taken a perfectly good Bachmann 03 and Heljan 05, and customised them to suit Ruston Quays. The 03 wasn't too tough but the 05 went a bit wrong along the way and there was some hasty rectification work required. And yes, I have explained this on the page. Let's face it, not every project goes right first time does it? 

On the DVD, I'm doing something that many will consider incredibly basic - wheel and track cleaning. 

I know it's been covered before but there is a constant stream of new recruits to the hobby who ask the question, "Why do your locos run so well?" and look quizzical when I talk about cleaning the bits through which electric juice flows.

Wednesday, April 27, 2016

Warehouse Wednesday: Brick substations


Leamington Substation

If I stroll to the railway station, I pass this interesting little building. It used to be, as far as I can tell, and electricity substation.

During the last year, someone has been converting it into a house. Not a very big one it would appear as first, but when peeking through the doors while work was going on, I think there is a basement to double the floor space. The windows and rather twee lamp are additions, as is the white paint. 


There's a similar building near Northampton station which I spotted one evening.

Northampton Substation

Again, it's not large but is, for such a utilitarian structure, pleasantly ornate. 

Do plans exist for these buildings? They would make rather nice models. I could even see them being useful resin ready-to-plonk structures as I doubt the designs were local. 
 

Tuesday, April 26, 2016

Lichen and moss

Tumbledown Barn

Some time ago, Airbrushes.com sent me a Lifecolor Lichens and Moss pack. At the time I had a quick look, tried it out on the canalside on Ruston Quays and then put it away as a useful product for the right project.

RQ hadn't provided much of a test and I thought the barn would do, so with the walls painted, it would out with the green stuff.

Mossing

In the pack are 6 bottles. 4 contain medium coarse flock powders, the other two are fixatives.These are both gloss - "lime" or "muddy" - and wash out of brushes with water. 

Work started by dabbing "muddy" fixer on the stone. It looks horrible but should then be covered with some flock. I used "Lush Plant" picked up with a knife and piled on the fixer. Ideally I'd have used a plastic spoon from an ice cream tub but can't find the one I kept. Must do something about that...

Anyway, once piled, the flock was rubbed off again to leave a thin coating. It seems to soak up the fixative and grab the wall almost instantly so fast work is possible. Working over paper allows excess flock to be returned to the bottle. 

I experimented with a darker flock (Rotten plant) but the colour variation jarred so I stuck to a single one. This might be the limitation of the system in that you can't blend colours (colors?) very easily. That said, the shades supplied work well and I'm very pleased with the results. The gloss fixative can still be seen but seems almost transparent so isn't a problem. A spray of matt varnish would cure it, at the same time you could add slight colour variation if using an airbrush. 

This has been a fun little project and I'm pleased with the result. OK, most of the work is in the excellent Skytrex casting, but that just means that anyone could have a building full of character on their layout. This, and comments made on these pages, have given me some idea for future projects, so watch this space.

Monday, April 25, 2016

Turf?


Barn inside

Inside the barn I fancied an earth floor and as on a high shelf I have an open packed of Woodland Scenics "Fine Turf Earth" (T42), I thought it would be an easy job. 

Spreading a coat of PVA, I sprinkled the flock powder and patted it all down. The colour didn't look very brown but it was late and I left it for the morning. 

After sunrise, it still didn't look brown. Most definitely green. 

Anyway, when the excess was removed, the results were a bit patchy so I sprayed a bit of hair product in and sprinkled some more "Turf". Some stuck to the walls but I think that has enhanced the effect. 

Next time, I'll work over a brown base (yes I was too lazy to paint the thing first) which will help. The green isn't bad but it's not earth or turf colour IMHO. 

Sunday, April 24, 2016

Leamington big and small

As I was taking a train trip on Friday, I couldn't resist snapping shots to try and match the real station with Pete's from yesterdays photos.

So, from the main entrance,

Real

pity about the taxis.

Model
Station aproach from car park

And now from the slope you drive down into the car park.

Real


Model
Station aproach from entrance

Both show just how good the model is, and also that I need to kneel down when taking the real photos as my camera was shooting (on the model) about 2 scale feet off the floor. Taking photos is much harder in the real world as you have to dodge cars and morons "hooning" about on a stupid bicycle.

Thanks to its listed status and careful restoration, the real building has changed little in these views since the 1950s when the model is set.

Saturday, April 23, 2016

A visit to Leamington Spa


Station aproach from car park

Blimey - that's my local station!

Modelled in 7mm scale, this is part of Pete Waterman and his team's superb recreation of the place where he first became interested in railways. Since I last visited, a couple of years ago, the GWR station building has been built and looks great. There's still work to do but it's now easy to take photos from angles to recreate views I have seen in real life.

16T minerals

The whole thing is horribly sentimental. Look at the signal box at the north of the station, it was there when I first watched trains from the platforms in the early 1980s but long since gone, along with the all the semaphore signals that I also vaguely recall.

46446

Although the model has been compressed in places, looking at it gives a whole new perspective on the remaining railway, especially those bits now standing idle but inaccessible and so unsaleable. You really get a feel for the life in the place 60 years ago. I miss those lines of 16t mineral wagons.

As ever, Pete and crew were very generous, letting the members run freely run trains. Gradually, those keen to get hands on with the MERG controller leaned to drive big, heavy trains over the gradients around the room. It's scary stuff taking a 12 coach teak set out of the platform, or letting a Peak with 15ft of wagons head off to areas you can't see from the operating position. 


Friday, April 22, 2016

Flying banana?


Artist Andy  Evans follows this blog and sent me the image above as a potential solution to my railcar chassis problems. All I need is a propeller and a blimp and we are good to go. 

I admit, the idea appeals. The railcar becomes very Battlespace Turbo Car and that's never a bad thing.

Find this picture, and LMS alternative, and lots of other good stuff over on Andy's Wild Goose Website

Thursday, April 21, 2016

Diesel railcar review time

Railcar front

Time for a little railcar review. I'm having trouble with the kit, but is it just me? 

Apparently now. As far back as the second post in the project, someone helpfully pointed me at: GWR Diesel Railcar Saga where the builder assembled the kit but had to find a new bogie mechanism because the kit supplied version wouldn't work. I pretended not to notice...

Then some more digging around on-line threw up this thread on RMweb. It contains the classic phrase "Gateneal and finished don't often appear in the same sentence; well done!". The builder himself says "this has been the worst kit I have built yet" and mentions doubling the weight with body filler. Hmmmm.

To top it all, at the weekend, I am sitting with fellow club members in a pub and find myself next to someone building the same kit! He has also replaced the bogies and is struggling with the body. The super-fine window bars are currently causing problems, something I have to look forward to as those on my kit need attention.

I am not encouraged.

However, I'm certain the model can be built. All I need to do is work at it. I also need to stop beating myself up about a lack of progress. Perhaps a break on one of my other unfinished projects will give me thinking time. On the other hand, there is another idea. More tomorrow.


Wednesday, April 20, 2016

Warehouse Wednesday: Leamington Spa goods shed

Leamington Goods Shed

Like any station of reasonable size, Leamington Spa boasted a good shed. Fortunately, it didn't disappear when falling into disuse, instead becoming absorbed into a builders merchants. Even the weighbridge hut has survived.

Obviously the main building has been extended greatly, and breathtakingly unsympathetically. It now stands unused and available for rent by Cushman & Wakefield. I did try to find it on their website but can't locate anything. Pity, as I'm sure some rich blog reader is itching to chuck a few quid my way to turn it into a museum of interesting things.

Anyway, if you are wondering what the building looked like back in the 1950s, how about this model on Pete Waterman's 7mm scale layout:

Leamington Goods Shed


Tuesday, April 19, 2016

Mortar lines and judgement


Stone Painting 2

The painted stones having enjoyed a nights drying time, I gave them a wash with Games Workshop Agrax Earthshade to bring out the mortar lines. Simply washing the stuff over everything and then wiping the worst off the stone faces worked pretty well. 

Left to dry, the effect becomes more subtle, but I still felt it was a little strong. A dry-brush with Sandstone out to tone it down I decided and carried this out on a corner of the wall for the photo. 

Now I think it's gone too far and prefer the earlier version. Hopefully a second wash will sort this, then I'll do the rest of the building. 

Practise on a hidden area is good advice!

Monday, April 18, 2016

Drinking tea and painting stones

Stone Painting 1

The centre of the social area in our club is home to 4 table. On a Thursday evening, you'll normally find an N gauger or two working away on a Scalescenes kit along with half a dozen others reading magazines, drinking tea and gasbagging. 

Picking out stones on a model building isn't the most exciting activity, so doing the job while drinking tea and chatting seemed like a good idea. 

My palette came from the bin. On it I mixed the base colour (Precision Dark Sandstone) with blobs of lighter browns and greys. after 4 or 5 different colours, I dusted the model with talc to both unify the colours and make sure it was dry enough to go back in my bag for the journey home!

Sunday, April 17, 2016

Coleshill Model Boat show


Lizzie 38-15

I was looking forward to the Coleshill Model Boat show. And then I wasn't as it was cancelled, something to do with a disappearing organizer. And then it was back on again, thanks to support by Component Shop and a top bloke called Stavros from the Model Boat Mayhem forum.

Thanks to off and on nature of the show, a couple of traders had dropped out but still, the hall looked pleasantly full with sales around the edge and model boats in the middle.

Paddle tug

A quick trip around the trade was followed by a slower lap doing my best to support all those who'd made it with some of my hard earned cash. Well, it seems the right thing to do and there were some bargains to be had. I'm stocked up on odd-shaped plastic strip for a start.

The boats were well worth a look too. OK, I'd seen some of them at other shows but you never know what catches your eye second time around. 

Well worth the trip, I'm looking forward to it again next year!


Saturday, April 16, 2016

16mm Society AGM 2016

Indian Hill loco

A bit of a flying visit to the 16mm Society AGM at Peterborough this year. With both parents in tow, but under the weather, we whizzed around the trade and then left just after lunchtime.

The first thing that struck me on arrival was the hall looked a bit empty. Down the centre there was a very wide aisle. So wide I wondered if half the stands hadn't turned up. Once we got into the thick of it however, the reason became clearer. A new floor layout saw the show divided into 4 areas, but it seems that part of this involved squashing all the stands into smaller spaces than before. Certainly, space was at a premium between them and there was a lot of squashing as we worked our way around. 

Another change was the lack of seats in front of the layouts. There was seating, but in discreet blocks with nothing to look at other than the side of the coffee caravan. 

Tradewise, there were certainly stands we'd not seen before. Several new building makers have appeared and other expand their range each year. I've always thought that if money suddenly became no object, this is the one show it would make a big difference at. A couple of live steam Garratts would be joining the fleet for a start. 


Friday, April 15, 2016

Tumbledown barn


While I ponder the joys of soldering GWR railcar bits together, I need a simple project to play around with. Sometimes at the end of the day, I just don't fancy wielding a hot iron and trying to figure out  how to bring the various bits together. Modelling should be relaxing after all.

A project I've had knocking around for some time is a tumbledown barn from Skytrex models. Ever since I saw this casting, I've wanted to slap a coat of paint on it. More recenty, I've been sent some moss kits that I'd like to try properly on it.

Anyway, it's a single piece, so the first job is to open out the resin film left in the windows. 


A sharp knife works better than a file with the added benfit of not releasing the dust that is do bad to breath in. After this, a scrub in the sink and it's off to paint...

Thursday, April 14, 2016

Super-fast ballasting


A couple of days ago, I needed a length of track to photograph my model of the RH&DR armoured train on.

"Ballast" was to be Chinchilla sand. When I've tried this in the past without glue, it exits the spaces between the sleepers rapidly. This time I used a method I emplyed many, many years ago for ballasting - double sided tape under the sleepers.

This helpd the track in place on the background plastic sheet AND kept sand where I wanted it.


Sand on the sleepers is perfectly prototypical and I quite like the effect. Best of all, the clean-up was quick with all the sand back in the carton 5 minutes after the photos were taken.

On a very early layout, I used carpet tape under the track and ballasted with cork granuals. OK, it was far too coarse, but the edges were lovely and neat. Recovering the track was a breeze too as it just peeled away, leaving the corky ballast behind. 


Wednesday, April 13, 2016

Warehouse Wednesday: Aberdeen stone

Shore Porters Society

Up to Aberdeen for this typically Scottish stone warehouse.

To be honest, I can't tell you much about this one, it's from a trip I made to Scotland a few years ago where I broke the journey in Aberdeen and wandered around the docks. These aren't very far off the city centre so it's not a huge trek. Seeing several giant oil rig support vessels moored up at the end of a normal street is a bit of a surprise.

Anyway, for modellers, the square windows would make easy modelling but the stone itself less so. There's virtually no relief between stone and mortar. Perhaps printed paper would work best here?

Tuesday, April 12, 2016

It doesn't touch the sides


Now, I'd expect the bulkheads around the luggage area to touch the sides, but it appears not. 

My sneaking suspicion is that I need to add the doors and these then fit in somewhere. Trouble is, working out where everything goes - there's no positive locations. 

The instructions seem to suggest holding the sides in position with the resin nose and then soldering things. Heat and resin aren't happy bedfellows so I'll not be trying that. Instead I'll be scratching my head for a bit...

Monday, April 11, 2016

Test fitting the nose

GWR Railcar nose test fit

With both etched sides fitted, it's time to see if the noses will go on. There's a little work to carry out removing excess resin but pretty quickly, the first end plugs in place.

The windows fit perfectly, the tumblehome is going to take a bit more work. Although the sides are well wrapped around the bulkheads, there join isn't prefect.


GWR Railcar nose test fit 2

At the luggage end, things are a bit more vague. With no bulkhead to hold the sides in place, the nose fits but I can't honestly say I'm certain it lines up. I don't understand the lack of bolt-in bulkheads, it's like the designer started at the other end and got bored after the centre doors.

It's pretty obvious there isn't any chance of me finishing this before the weekend but I'll plough on, albeit with a little less pressure, as this is a good looking model. Or it will be. Hopefully.

Sunday, April 10, 2016

APT-E Number 3

Can't find this one on the list

Of course I bought an APT-E from Rapido.You can't be as obsessed with the train as I am without wanting one. When attending the 3D scanning at Shildon, I trotted off to put my order in as fast as I could.

Last week a beautifully presented package arrived and I opened it up eagerly. I wasn't disappointed.

Mind you, it wasn't until last Thursday I managed to take the thing out and put it on some track. I don't own a suitable layout...

Assembly is fiddly. There is a knack to plugging the coaches into each other. Mostly it involves tilting one coach down by something close to 30 degrees (not the 10 degrees in the instructions) when inserting the plugs into the sockets. Once you get the hang of it, things become a lot easier but the first go is a little scary.

The big problem is that nose overhangs on curves. This meant when I tried it on the club OO layout "Duxbury" I needed to use the inner circuit to avoid bashing into the tunnel mouths. Sadly, on the inner circuit there were a couple of line side cabinets and a tunnel mouth that caught the side of the coaches so the train was restricted to the fiddle yard for fear of scratching the paint after a single trip to the station platform.

Never mind, it looks great and on the straight, runs perfectly from the box.

APT Frenzy 
 
Sat beside the Hornby APT-P, you can see the different 30 years makes in model railway design. Mind you, the -P would go around all the curves!
 
My early order did win me one prize. I have certificate number 3 of 2000. I know who has number 2 and we assume the NRM have kept number 1. If they have, and they kept the full-fat sound version, mine is the very first DCC-Ready example. That probably makes it worth beeeelllions of pounds on eBay. Something I have no intention of finding out. This one isn't for sale!

Saturday, April 09, 2016

First end fitting


Well the bulkheads were all fitted back to front, but then there's not indication which way round they go until you try the side in place. Not a problem, just a few minutes spent fiddling with nuts and bolts. 

The sides fitted OK on the bulkheads but there is a gab above the spaces were the bogies will go. On early railcars this was all covered with fairings but in BR days these were left off to improves access. Trouble is you can see the bottom of the floor. 

Is this right? Well all the photos in books and on-lie are murky in this area. The chassis would be seen but on the prototype the spine is a lot narrower than on the model. It doesn't step back like the model does either. I suppose I can paint it black and hope no-one notices but I'm not convinced. I have a feeling that the kitmakers assumed everyone would fit the valances and didn't think beyond this. 

Hmmm.

Friday, April 08, 2016

Make your sides look like a fat man


"Form a slight tumblehome" say the instructions. I wasn't looking forward to this bit. 

Tumblehome forming is something I've managed to avoid so far in my modelling career. By studiously not building any coaches, I've not faced trying to put a gentle but accurate bend in brass sides. A job that if you get it badly wrong, can ruin your kit. 

Looking at the profile of the partitions, the shape required is that of a fat bloke wearing a tight t-shirt in profile. At the top, the side is straight but further down there is a bulge. 

With no real idea if this would work, I stuffed each side in the GW Models rolling bars and introduced a gentle curve into the main panel. Fortunately, there is sufficient space in the centre doors that I can do this in two halves - the whole side is longer then the bars. Well no-one told me I'd be building O gauge coaches when I bought them did they? 

Anyway, a gentle curve looks about right and they sort of match the partitions. Hopefully a bit of pressure will bring everything into line once soldering starts. 

Thursday, April 07, 2016

Does my plan have a floor in it?

Railcar floor

Before I make any further progress with the bogies, it would help if I got my head around the "big picture" of this build.

Some kits provide you with an exploded diagram which helps the modeller understand how all the parts relate to each other. Not so here. We have a single, double-sided, sheet of A4 with lots of text. In three different typefaces.

I thought I ought to try to understand how the body goes together so I can work out the correct height for the bogies. The work starts by soldering two great big slabs of brass together using the gas torch and lashing of Powerflow flux. Work isn't helped because the bits to be bent down have the lines etched on the wrong side so end up fractionally larger than required to drop into the half-etch line on the lower floor.

Next, the bulkheads are bent and bolted to the floor. I've guessed which way around the go although I know where the toilet door is - it's etched on the upper floor. These stay connected with bolts so the sides and roof can be released from the finished model. Nifty.

Wednesday, April 06, 2016

Warehouse Wednesday: Baltic Flour Mills

Baltic Flour Mills

Another honking great building for you this Wednesday.

Baltic Flour Mills stands 138ft high and 170ft long. Built by Rank Hovis in 1950 but to a 1930 design, what you see is the current building as converted to an "arts space" in 1994 - there used to be a couple of warehouses on the left hand side making it even more massive.


For the modeller, although it's a huge building, the design lends itself to fairly simple Plasticard and cardboard construction. All the windows are square so no fiddly lintel-work. Most of the walls are blank, presumably because of the silos inside. Another useful background building and one usable anywhere as the design isn't obviously of an area and other mills were based on this after WWII.

Plan view on Google maps.

Tuesday, April 05, 2016

Railcar bogies part 1

Railcar Bogie Bits

According to the box,this kit complies with the Gauge O Guild Code of Practise CP1 for the content and quality of model railway equipment kits. 

Interesting. The code presumably doesn't cover holes for wheelbearings then. These are 2mm oversize.

Undersize I can deal with. Oversize is more tricky involving lots of soldering, poking, soldering and checking to make sure the thing will sit flat.

This is after I find the minimal instructions mention that the original design has the buffers sit 4mm too high in an effort to get the model around 6 foot curves. An alternative construction method is suggested to sort this out but I couldn't make much sense of it.

Finally, the sideframes - soldering these in place is fine if you don't mind trapping the wheels.

So, I'll work out my own pivot arrangements and have provided a large area for the sideframes to be glued in place after the wheels go in and painting.

The second bogie should be much quicker to build...

Monday, April 04, 2016

Crazy railcar project?

Railcar Kit

In 13 days time,we have a club trip to see Pete Waterman's model of Leamington Spa. I've been a couple of times before and it will be interesting to see how the model is progressing. That and it's always fun to see a model of somewhere you know so well.

One of the comments made is that no-one seems to take any stock with them to run on the layout. This is true, I don't recall anyone taking a loco with them in the past.

However, in my stash, I do have a kit for something that I've always wanted to pose in the bay platform of Leamington station. A GWR railcar.

This Mega Kit was bought second hand several years ago for a reasonably bargain price. I entertained ideas of building the model and then selling it for a mahoosive profit. However, as realistically, this won't happen, it's lain in store for years.

The feature that attracted me to the kit, apart from it being a prototype I really like the look of, was the fantastic 1-piece resin ends. This should take much of the hard work out of building the model. Apart from this, there are some big bits of brass and a load of castings.

Can I build it in time for the trip to Pete's? Dunno, but it will be fun to find out.

Railcar Nose

Sunday, April 03, 2016

Thomas has foreign friends? Quelle horreur!

The Interweb is getting excited because the owner of the Thomas the Tank Engine franchise are releasing a new film featuring some new characters - foreign trains!


As expected, the Daily Mail is very angry, although not fuming as much as some of their nuttier commentators. I hadn't spotted the story until the guy looking after the York show Facebook feed decided to go off on one. At that point I was slightly annoyed, not because of the new characters, but because a show I usually enjoy had decided to turn all xenophobic (the writer claimed to have accidentally logged on with the wrong account eventually). After all, they hadn't complained about this monstrosity:


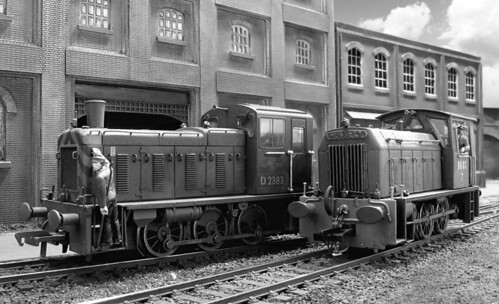
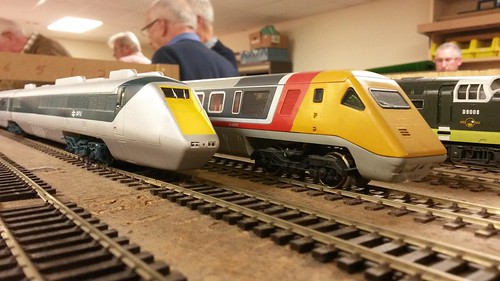
"Diesel 10" from the Thomas & the Magic Railroad film. If Rev Awdry was to spin in his grave, I think a Peak with an out-of-gauge grab would probably do it rather more than some new characters who happen to be based on non-UK prototypes.

Bad things have been happening to the series since the rights were sold back in the 1980s. The stories have moved far away from the gentle tales based on good railway practise. Worse, the toys might have started out as model of real engines but now we have horrors like this:

I'd recommend you go and have a look at thing on Amazon to see just how witless this is. Watch the video and then ask yourself, "How long would this amuse a child for?".

5 minutes?

Let's face it, once they have watched Tomas complete half a dozen circuits they'll work out that nothing new is going happen and head back to the telly. Compared to a train set, especially one with a siding you can shunt into, it's complete rubbish IMHO.

So no, frothers on the Interweb, Thomas is not being ruined by the addition of new characters. I'd say these were a positive development. The good Rev always considered the locomotives to be children and at a guess I'd expect the film to finish with everyone good friends. That sounds like a pretty positive message to me.

As for the evil "diversity" that exorcises the Mail commentators?

Digging out my copy of "Thomas the Tank Engine" printed in 1970, what do we find on page 35?

A coloured engine?

Sadly, appearances are deceptive as this is supposed to be Edward. Whether illustrator C. Reginald Dalby was trying to make a change, show an engine in shadow or just made a mistake is unclear. It stuck in my mind though.


Saturday, April 02, 2016

K6 'phone box

7mm scale K6 telephone box

The finished K6 phone box looks rather nice.Dry brushing with a mix of Humbrol 153 and 147, the effect is of slightly faded paint - the state most boxes spent their lives in once the initial gloss had died down.

Telephone signs are printed on the instruction sheet and are therefore the wrong colour (black instead of maroon) but they look sharper than hand lettering would do. Perhaps a waterslide transfer would have been better?

Anyway, a nice little kit from Peco. Cheaper than etched brass and something pretty much any O gauge layout could find a home for.

Friday, April 01, 2016

How to make tie-down loops

Steve asks:
On one or two occasions you have mentioned making tie down rings by twisting wire round a 1mm drill. What is the material and diameter of the wire and where can I buy it?

Well, Steve inspired me to have a go at making a video showing the material (soft iron wire) and method used to make loops.