Saturday, March 31, 2012

Skelly Engineers

Skelly Engineers

I'm working on a little project that needs some industrial buildings for the background. As a start I've taken the opportunity to have a go at one of the free downloadable kits from Scalescenes.com

At first sight, it's a pretty simple building. Once you get started though, it's more involved a build than certainly I expected. Time taken is at last 3 hours over a couple of evenings.

The first thing to realise is that you have to print the parts yourself. According to the instructions you ought to use photo quality paper but I find this too thick to work with. Normal paper is thinner and a lot more flexible. Print quality seems acceptable too so the more expensive photo paper is probably an extravagance.

Glues used were Deluxe materials card glue and Pritt Stick. Both are excellent for the job. They aren't smelly either which makes them ideal for the modeller who likes to work on the kitchen table when the rest of the family are around.

One nice feature, apart from the ability to reprint parts you've mucked up (three goes at the front in this case) are the options. I've used the old brick finish but there is a new brick version. You can pick from 4 different versions of the big doors and the same for the little ones. There's even more variety in the signage. Basically, you can build the 1950's version I've gone for or an ultra modern one with painted roller shutter doors. I might try this at some point for reasons that will one day become apparent.

Download the kit for this building

Friday, March 30, 2012

Beattie OO Van from Graham Farish

Beatties VanIt seems that heritage models are popular at the moment, or at least Matt Scruton thought it was worth saying he was enjoying them, so because of him, you are getting this as Friday's posting.

Actually, this fits in very nicely on this blog. Regular readers will know that I've already celebrated the Beatties plastic carrier bag, only to be topped by a friends 1975 version.

Well, Beatties didn't just produce bags, they sold stuff to go in them too. Here we have a limited edition railway van that ticks every collectible box imaginable. It's a limited edition (sort of) and in it's packaging, probably unused. Best of all, despite being firmly OO gauge or 4mm scale, the model was produced by none other than Graham Farish.

Better know nowadays for their N gauge products, they are now part of the great Bachmann empire. In those far off days of my youth, they produced a pretty good OO scale range too. I know that most of my early wagons came from their factory. At the time I think they looked a lot better than the contemporary Hornby or Lima offerings. The wheels were certainly a lot finner than the silver-seal Hornby ones.

I can't claim to know much about the range but a little digging shows that both a Black 5 and 94xx tank were in the range. I can't recall those but have seen plenty of the wagons, often mint in box. Were I feeling a little flusher, a small collection would look nice on the shelf. They might even make half-decent finescale models unless someone with more prototype knowledge would like to to disabuse me of this fancy.

Thursday, March 29, 2012

Match wagon

Loriot and match wagon

In the current (for the next couple of weeks) Hornby Magazine, I built a Loriot wagon and loaded up with a Bucyrus excavator. For the benefit of the photos, this was shown with an LMS 3-plank wagon.

This "match wagon" is required because the load on the Loriot sticks out over the end. You'd not get a tall wagon coupled at the bucket end and if you did, at the first curve, the bucket would swing round and take out the end. You'd be OK on the second one though...

Match wagons were common on real railways but they wouldn't have used the one I did, it's a little bit too tall. In my defence, there was a deadline and I didn't have anything else suitable - much to my surprise.

Well, now I do. A Cambrian single plank wagon does the job nicely. It's a good kit, a fuller review will appear in Hornby Mag in due course but I didn't take a photo of it painted for this. I put the kit together together in an evening without breaking sweat. Paint and weathering didn't take much time either. I decided that a simple wash of track colour would do for the later with just a soupcon of weathering powder to finish up.

The last job is to add couplings. Parts are included to allow Bachmann tension locks to be fitted but I'm more tempted by some Spratt & Winkles so both wagons can join the Melbridge Dock fleet.

Wednesday, March 28, 2012

Handrails and grab handles

Handrails onThere's not a lot of detail on the 01 but what there is, is a plethora of handrails and door handles. For such a small loco, it does seem over-supplied with these things. A big steam engine doesn't have nearly as many !

All of this detail comes from an Alan Gibson packed of 0.45mm wire. I know some stuff is provided with the kit but I instinctively reach for the supplies in a pot within reach of the workbench. Not that there is anything wrong with the wire that comes with the kit - a stout cardboard box ensures that it gets to the builder nice and straight, unlike some kits where the lengths are stuffed into a container slightly too small and take on an annoying bend. The leftovers go back in the same packet if they are long enough to be useful. Id not its the brass leftovers drawer for them.

Spacing from the body was set using a bit of melamine trim filed down slightly to reduce its thickness. Being thin and heat-proof, it's idea for the job. Placed against the body side followed by the wire and then a bit of lolly stick to protect my fingers from the heat, the 'rail is held securely enough for me to be able to solder from the inside with aplomb. Clever chaps would clamp this lot together and not risk their fingers.

A nice detail is that the bonnet handrails are held on with the correct form of handrail knob. Not for this diesel the standard ball-type version found on steam engines but the prototypical stub of metal with a hole through the side. I suspect that on the real thing it was cheaper to manufacture them this way and they certainly provided less dirt holding nooks and crannies. If you want to buy some yourself (mine came with the kit), try Markits who have made them for a few years.

Finally, I know the bonnet handles are different lengths. I make them long and will crop them back later. Just didn't get around to it before taking the photo.

Tuesday, March 27, 2012

01 Roof

RooftopMore nifty design on the Judith Edge 01 diesel kit - the roof.

I've had plenty of "issues" with model diesel locomotive roofs in the past. Several of my models are running around with something other than the kit part on top as it's either too small or I screwed up the fitting. At least one whitemetal kit had a lid that far too narrow...

Anyway, I wasn't wild about this one. Although relieving lnes are etched into the back of the cabside tops, my efforts and bending these over didn't look great, but I pressed on anyway with a mix of stupidity and optimism.

As it was, things have turned out OK. The centre section drops in between the sides and solders in place from the underside - the cab floor is separate don't forget. Then the wire rain strips are added which cover the join. Simple, and to fair not unique to this kit, but effective. Any gaps or poor alignment is hidden. You can even emery paper the curve over the top before you do this to make it nice and consistent. Another horrid trick I do sometimes, but don't tell anyone.

Monday, March 26, 2012

Cab controls

Cab insideBack inside the 01 diesel locomotive, we have the cab interior. The control desk is a simple enough fold-up construction. Surface detail is laminated onto a thicker brass box. Looking at the photos I can find, I'm not sure how accurate everything is here but I'm no expert and anyway, once the roof is on and the windows glazed, no-one will be able to see.

The sides of the raised section are left empty but I reckon it might be possible to see that this isn't a solid item so I filled them in with a little bit of scrap etch. I'm a bit surprised that this part wasn't supplied as a resin part - it could easily have been glued in after painting. The handles, made from wire and soldered in here, could still be glued in.

The seats are a masterpiece of design and incorporate the rail along the cab wall that allowed the bases to flip up. Very clever. To clever for me. I gummed the lot up with solder and decided that it would be just as easy to fix the base to the wall without the fiddly bits. Making working seats I leave to people who can't grasp that the roof will be very firmly soldered down and the doors don't open...

Sunday, March 25, 2012

Ingenious loco drive mechanism

Clever mechanism

50p on the Nottingham second hand stall. Bought out of curiosity, this American loco is to be powered by a AAA battery fitted in a box on the top. The box is missing its lid but I didn't care. I wanted to know what was inside.

The wheels are horrible. Traction tyres and flanges to cut pizza. Overall standards that make 1960's Triang look MRJ-worthy. Presumably the model came in a box with plastic track and a few wagons. Actually, I know that last bit is true as I couldn't resit buying one (there was only one) from the same stand for the same money. Heaven knows what I can do with it but that doesn't matter. It was cheap and bright orange so worth every penny.

Bogie gutsInside the beast is a very interesting mechanism. The double reduction drive (yes, double reduction, like posh loco kits have) powers a shaft that goes through the bogie pivot. This then drives the wheels. Both axles. Hidden behind a very Triang like set of sideframes.

This might be cheap and tacky but the engineering is pretty nifty. I'm surprised that the real RTR makers haven't looked at a similar thing. In fact I'm amazed they didn't try it long ago in preference to pancake motors. This thing is built down to a price yet it's got all this clever stuff going on and "proper" locos had much more horrible drive systems.

What I think, is that the wheels could be replaced with something decent and maybe the motor swapped for something capable of surviving 12v, and then this could be the basis for a decent model. For the minute I'll screw it all back together and put it in the maturing drawer. But ideas will form in the back of my mind.

Saturday, March 24, 2012

Clever chassis cutout mystery solved

Neat cutoutIn the 01 diesel chassis frames were a couple of odd cutouts in the top edge. I had a good look at the plans but couldn't see why they were there. In fact, I had a good old think and they remained a mystery.

Then I built the body and plonked it on the chassis and all became clear. They are there to clear the bolt heads that hold the bonnet/cab assembly to the footplate.

That's a really clever detail. You can't see them when the loco is the normal way up so there's no need to solder the two lumps together and then remove them. I like this sort of thinking a lot. It's the sort of thing that encourages confidence in the rest of the range. Well, if I didn't look at the rest of Mike Edge's kits and want to build them all anyway !

Friday, March 23, 2012

Shoehorn that motor

Motor fittedReturning to the 01 diesel, I've been assembling the sub-assemblies to see if they will fit around the motor. The good news is that with only a hint of fettling (read: filing the sides of the footplate hole), everything goes together OK.

There is a cab floor to go in and fill the hole. Working out how this went together made me scratch my head quite a bit, then I looked at the parts and realised that that was what those half etched lines are for ! Basically you build a little stage that fits over rails on the floor. I'm not sure I just helped you with that description but you'll know what I mean when you see it.

Anyway, next up I think will be the cab interior which is a mix of soldered brass and resin bits. I'm going to keep dry-assembling stuff as the roof has to be fitted in place soon and that will stop me painting the inside unless it goes in from under the bottom.

Thursday, March 22, 2012

Track testing with TT wagons

Track testingTesting the test tracks track has presented us with an interesting problem - the Isle of Man wagons I've built so far has chassis that are distinctly average in quality, and I'm being generous here. The whitemetal body and solebars look OK but as far as providing something suitable for mounting the w-irons and hanging the wheels, they were rubbish.

This isn't a problem to a resourceful modeller. In my box of "stuff" is quite a lot of vintage TT, all with lovely 12mm gauge wheelsets. Looking at the wheels, the Triang version is a bit course but Peco did a lot better. These "Wonderful Wagons" have much narrower treads and the back-to-back is withing a smidge of that set by the gauge. They are certainly close enough for me to accept than as test vehicles.

Another advantage is that despite their vintage, there are loads of them out there. If the cardboard bodies get a bit scuffed then I'm not going to lose any sleep. The Mazak that it's attached to won't be damaged unless I hit it with a hammer anyway. Should I want to restore these wagons at a future date then the card is probably still to be found in Devon or at least on the 3mm Society second hand stand.

The pair of wagons are now whizzing around the trackwork as my Dad gradually refines the running. As laid there are a few lumps and bumps but with the help of the little Peco's, these will be ironed out. If only the chassis could be removed and put under a 4mm scale kitbuilt wagon !

Wednesday, March 21, 2012

Laying some IOM track at last

TracklayingTracklaying has commenced on the IOM test track. The replacement baseboards seem stable - I can't tell if this is due to better quality wood albeit from the same supplier, or that they were varnished as soon as they were built - but all looks OK so far.

The track is code 75 nickel silver rail soldered to copper-clad sleepers. All the pointwork  was constructed off the board and is being stuck down with PVA glue. The plain sections are made with a single rail and laid, the second one being added once the alignment is known.

Plenty of weight is sued to to make sure the track is firmly in place. I this case this means a couple of V-block holders and some of those really useful angle things that Squires sell. I know the engineers are cringing at their use for this but the metal doesn't touch the glue and none seem to have suffered any ill-effects so far. You buy special tools for holding track down if you want, I'll use what comes to hand !

Tuesday, March 20, 2012

Large Scale Model Rail Show 2012

Lady Florence Dixie


Held around the corner from where I live, the Large Scale Model Rail show has in the last few years been a bit the starter course for the main meal that is the 16mm Scale AGM a few weeks later. You will probably see the same trade plus many more at the later event. As likely as not there will even be some of the same layouts. If you are in a hurry then you skip straight to the main course.

This year though, the main course has moved from the Midlands to Peterborough. Not a difficult trip in the car once you get over the M6/A14 junction but if you have laready had to drive for a couple of hour to get to the old venue, likley to be very off-putting. This could explain why this show has grown a bit.

"Large Scale" is an interesting label. It includes O gauge which you might think is well enough served already but that's the way things go. On the other hand, the trade was mostly G1 and G scale with plenty of meths-based (or gasseous if you like that sort of thing) entertainment you could take home an enjoy in the privacy of your own garden. Or other peoples if you are into the group thing.

Anyway, I was taken by a few locos on display there. For a start there was the wonderful Lady Florence Dixie - an Emett-like creationg with vertical boiler, oscilating cyliners and articulated stagecoach style body. Watching this trundling around the 16mm test track was wonderful. This is a scale where it's perfectly acceptable to have some fun whilst still doing serious engineering.

On the sales side I liked the Max Micro-locomotive which at at £249 for a machiend kit from Martins Model Railways has got to be some sort of bargain. OK, it's unsophisticated but if you have a circuit of track and just want something to pootle around making nice noises and blowing smoke, you probably can't go far wrong. I could just see it on my line if enough of you click on my Google adverts !

An awful lot of moving trains were dsiplaying before surprisinlgy small crowds. I reckon most kids would live to see working, steaming, chuff-chuffs or bit electric chuff-chuffs that make all the right noises yet cruel granparents hadn't thought to bring them along.

A few photos on Flickr

Monday, March 19, 2012

Leighton Buzzard

Leighton Buzzard entranceI was on my way out of the Nottingham show on Saturday when I spotted a side room. Had I not been so stingy and purchased an exhibition guide my discovery might have happened earlier. Or not as I probably wouldn't have bothered reading it properly.

Anyway, in the room were some demos from members of the EM Gauge Society. Nice, but I had a bus to catch back into a town where I hoped to buy a Mothers Day present. Then I realised what I was standing next to.

Leighton Buzzard. Built by Rev Peter Denny. Of Buckingham fame.

I have the books. Even the old ones, but I've never seen the real model. This model is truly a legend. Built in the days when everyone thought Hornby Dublo to be a bit whizzy, it's a tribute to the work of one man who had to do it all the hard way. Apart from some basic parts such as wheels, rail and ERG brickpaper, the modeller was on his or her own.

What he or she did have was the real world to look at. My favorite feature on that layout is the gas works. When Denny built his, every town had one so he could go and have a look. In fact it probably wouldn't have occurred to many people to not build a gas works in the same way a modern image modeller would leave out a big aluminium shed-based industrial or retail park.

Leighton Buzzard Gasworks

There was a very comprehensive series of articles in the Railway Modeller on this corner of the model. I'm sure I have them saved in a box file somewhere.

You might look and say that the workmanship isn't that great compared to the best on show now but then you would be forgetting that this was pretty much the only model being built like this at the time. Beal and Ahern were at the same sort of thing but with no interweb you had to rely on magazines to share information. They weren't the full colour productions of today - a contemporary Nevard would be snapping away with a bellows camera and roll film. No shooting until your finger hurt and picking the best from a few hundred pictures. Film wasn't cheap and so you spent a lot of time on each shot. You had to, if it was wrong, unless your darkroom technique was good, there was nothing you could do about it.

Leighton Buzzard ControlsDenny didn't just build a model, he wanted to operate it like a real railway too and so despite being next to each other over the baseboard, the operator and fiddle yard man communicate with bell codes and some boxes with lights on to indicate the status of the the lines. While I was there, these were supplemented by speaking but I can see how you could stay silent and operate the timetable.

One myth I was happy to see scotched was that the locos didn't run that well. Given a modern Gaugemaster controller (on the main board, the fiddle yard is still H&M), they run a sweetly as my stuff. Mind you, they are all well run in by now !

OK, so if I produced a model like this now it wouldn't grace MRJ but I was ever so pleased to finally see a model I've read so much about. I want more than ever to try some of the techniques used too. I bet when my glue isn't made of boiled cow and the cardboard isn't straw-based, there is still lots of life in them !

You can see my other pictures from Nottingham on Flickr

Sunday, March 18, 2012

From 1983: Do you model railways ?

From the Tail Lamp column of Model Railways magazine, June 1983 written by Cyril Freezer:

Do you model railways ?

No, this is not a silly questions, for it is perfectly easy to produce quite a good layout anything more constructive then opening the correct boxes and link a lot of sectional track together on a baseboard that someone else has built to your requirements. Nor is this an altogether recent phenomenon. If you can get hold of a copy of Gilbert Thomas' Paddington to Seagood, you can read how this was done in the old days using Bassett-Lowke models.

Of course, it is a lot easier, and cheaper to do so in 1983. Furthermore, every item is a far better model of its prototype, but I do think it is time we grasped the fact that, although this is an important part of our hobby, and that, perhaps we don't always realise the full potential of the system, opening boxes is not modelmaking.

There are two special features of modelmaking that must never be forgotten. The first is the satisfaction one gets from creating a model, though in all honesty, I must stress that this depends on your possessing the necessary skill and the correct temperament to build the model in the first instance.

The second is more subtle. The modelmaker is independent. He and he alone (well, she in rather too few cases), decides what will be built, and sets the level of accuracy of the layout. Kits can be used, boxes will probably be opened, though the chances are that each item will be given some sort of special treatment. Certain models which are not commercially available are produced, either by massive reconstruction, or from that most versatile material "scratch". Above all, the modelmaker can specify prototype and period to suit himself.

Saturday, March 17, 2012

Quick and useful: Making flyleads

FlyleadsLast week I was packing up the toolbox to go exhibiting and I couldn't find one of my more useful tools - the long flyleads. For the uninitiated, these are lengths of wire with a croc clip on each end.

For such a simple tool, they are incredibly useful. Every morning at a show, I connect one end of them to the back of an old controller and hold the other on the wheels of a loco. Turn on the power and the wheels revolve for cleaning.

Beyond this, if there is an electrical problem, I can connect them on to the end of a tester to extend its wire if required. While not required that often in the toy train world, when you are working on a 14ft long VW campervan, this can be invaluable.

Sometimes they are a fix in themselves. I've sometime found there is a problem in a particular wire and rather than dismantle plugs and sockets to trace it, I'll clip a flylead in place to funnel the electric juice where I want it. That buys me time to do the job properly when it suits me and there aren't a load of punters gawping at me from the other side of the barrier.

Making a lead is easy. These were both produced using equipment wire from Rail Room Electronics. This is extra-flexible stuff intended for test leads. Normal wire is stiff and doesn't take too kindly to constant waving around - it will work but not as well as this stuff. A 4 metre hank cost me £1.65 to which I added a couple of croc clips at 50p each. These are soldered to the wire and the job is done.

Guess what I found when I put my new leads in their drawer ? Well, two more will always be handy...

Friday, March 16, 2012

ERG Wagon

TT Wagon

Continuing with the vintage theme this week, another refuge from a box of bits is this TT wagon that arrived in a job lot of 3mm scale bits.

The body appears to be cardboard with a wooden floor and a Peco chassis - yes the Beery model makers produced quite a range for the scale back in the the day.

Underneath the TT WagonKnowing nothing about the model but suspecting it was a bit more special than all those Triang examples that hang around on second hand stall, I posted the query to the 3mm Society e-group. After a few suggestions, John Sutton came up with the definite answer:

I suspect it may have been made from one of the ERG (E Rankine Grey of Bournemouth) "kits" - in TT this was a very large sheet of paper, with drawings of the sides, ends and the like of a variety of Grouping and pre-Grouping wagons on it - several layers in the case of an outside-framed van (there was certainly a Midland one on the sheet).

The idea was to glue these to 1/32in card with Seccotine (wow! ancient history), scribe the planks and glue on card framing layers and paper strapping, after which the thing was shellacked, assembled and eventually stuck to a chassis and painted. The results were good for their time (sixties) and I still - somewhere - have the Tredegar coke wagon, SR 8-plank and RCH 7-plank I made as a teenager. The idea was to make boltheads on strapping by prodding with a darning needle. It took ages (by candlelight in t'olden days, of course, which folk who have never known anything but inside toilets will find hard to imagine.... You were lucky etc etc).

So not scratch built so to speak but the next best thing. Of course in those days we didn't expect the level of trade support enjoyed by modern modellers. The concept of carefully cutting out bits of card and then riveting them with a darning needle wouldn't go down too well now. Come to think of it, I doubt many household own a darning needle !

So it is a bit special. Someone made this the hard way and as such I feel duty bound to look after it. Maybe one day there will be another TT layout in the Parker collection. One with kitbuilt items from the 1960's. OK, they might not be perfect, but there is a style about this model that you just don't get from the mass produced items. It's certainly too good for track testing anyway. What track ? Well that's for next week...

Thursday, March 15, 2012

Romford tender drive unit

Tender drive

Here's a blast from the past, a Romford tender drive unit. Nowadays we laud manufacturers for moving away from motorised water carts and cramming the motive power back in the locomotive. In the past things were different. Producing a powered loco chassis wasn't that easy and yet there were some lovely Airfix loco kits that people wanted to build and then run on the railway.

With it's 52mm wheelbase, I'm not sure which kit this was intended for but despite its age, you could still use it for the intended purpose. Attaching some leads and cranking up the DC, it turns over and runs like a sewing machine. That's a 5-pole motor in there.

While tender drives might have earned a dubious reputation, in my experience they aren't as bad as many think. In theory you can see a loco with stationery wheels being shoved by it's tender but that doesn't happen often. The advantages are that smaller wheels mean smoother starts - look at the way a model diesel will often out-perform a chuff-chuff. With all the waggly bits on the outside there's lots more to stick and jam. The added complexity of course is why tender drive was so popular in the first place.

Value ? No idea. Probably next to nothing. I found this one in a box of unsaleable bits left over from a club second hand stall. It would be fun to do something with it one day. Maybe a Kitmaster Stirling single in BR Black perhaps...

(Thanks to Colin Snowdon from DOGA for identifying the unit with his encyclopedic knowledge of things model railway. Reason enough to belong to the Association)

Wednesday, March 14, 2012

What a difference some scale makes

TT VeeDub

Digging through my box of stuff for the 3mm layout, I found a little plastic VW bus bought from 3SMR. According to the packet, it's 3mm scale but not the UK version which is 1:100 but Johnny Foreigners flavour, 1:120.

Not to worry I thought, it's probably going to be nearly right. Perhaps a little small but not something anyone will notice if I don't sit it near a person.

So, I spent a pleasant evening painting the model in an approximation of the classic VW colour scheme of cream over sealing-wax red. The windows filled up with Krystal Klear for flush glazing looked better than the very recessed supplied glass. Even a painted VW emblem on the front looked the part.

Into the box it went and off to Basingstoke. Once everything was set up I put my new model in place. Instantly I could see just how big a difference there is between 1:100 and 1:120. That bus is tiny. So it's back in the box for the time being.

VW Van

Tuesday, March 13, 2012

Basingstoke 2012

Basingstoke cakesI'll confess to being less than enthusiastic about attending this show before we went. The paperwork was on the late side and I didn't worry about chasing it up as I wasn't too worried if the trip fell through. Basingstoke isn't a town that fills me with the urge to visit - I doubt many people chose to holiday there and all I recall from my only other visit was that there was a long and complicated journey to a place with a shopping centre with roof-top car park.

A few weeks ago, things began to look up. At Doncaster we met the exhibition manager, Jeremy Bagshaw. He made the effort to come and find us to have a chat and apologise for the paperwork delays which were due to a few changes of personnel within the team. Better still, he made a real effort to stay in touch.

On arrival at the show, a relatively simple journey it turned out with the Satnav picking a good route, we wandered into the hall and accosted someone waving a tape measure. He quickly pointed us to our spot which was well marked showing both layout and barrier lines. We were in a sports hall, the floor of which had been covered with a rubbery sheet to protect the surface. It did this well and as an added advantage stopped dropped little parts from bouncing too far when dropped as I found out later.

A quick set up was followed by a wander where we found tea was being served along with free fairy cakes ! Now that is a good thing. OK, so they were on the tiny side but you don't look a gift cake in the mouth. At least the L&WMRS members with Meacham didn't when we delivered their refreshments.

Accommodation was around the ring-road at the Hilton Hotel. Apparently this isn't a crazy as you might think, the place was pretty much empty apart from us exhibitors so I bet a cracking deal had been struck. Show to hotel were less than ten minutes apart on fast roads. Truth is, we are aware there is a town of Basingstoke but never saw any sign of it all weekend.

Saturday arrived and we started to play trains. Being in the hall furthest from the door, it took a few minutes before we saw anyone. When they arrived the trade was more interesting as is normal at this time. Soon we had an audience and amazingly, for a Saturday morning, chat. Real people talking to us and asking interesting questions. Just what we love. Better still this carried on through the weekend.

Saturday evening saw a quiz in the local indoor bowls club. This was run by the treasurer and won by the exhibition manager. Something going on here we all thought ! And as for the question about flightless birds, if it had mentioned swimming, I would have known about the penguins. After all, I've seen Happy Feet 2 twice ! On the plus side, for the first time ever, I got a football question right - What nickname is shared by a football club and a WAG ?

Sunday was much like Saturday. Sadly the numbers seemed a bit hit by the good weather driving people to garden centres but there was a rush towards lunchtime and there were apparently respectable amounts of people in the door.

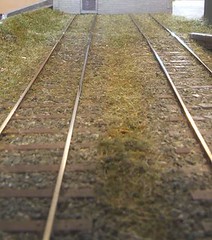
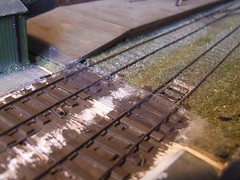
Our layout ran amazingly well. The extra little bit of track added last week makes a huge difference to the way it works. As well as allowing sensible running around with the diesels, the headshunt sees lots of use now as the brake van dumped in there can be left a long way down and out of the way. That means shunting isn't carried out over the crossover resulting in an improvement in running.

Thanks to all those blog readers and 3mm Society members who dropped in to say hello. None of you brought any cake I noticed...

Kidmore Manor

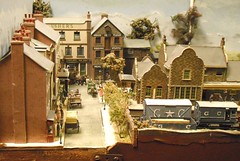
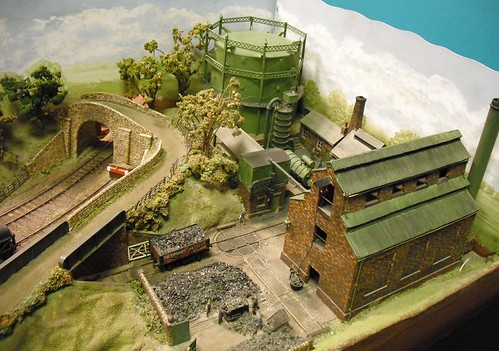
Layout wise, the show was mixed. Some I liked, some not. Just like any other show really. It's not helped that I have weird tastes in trainsets. The prize for Layout Phil Would Like to Build goes to the N gauge Kidmore Manor. A tiny roundy-roundy with loads of delicious detail in the scenic section. Not the most exciting model to operate, as I found out for a few minutes, but great to build. Mind you, no one told me about the working signals which would have provided some switch wobbling action !

Owoh Nine Wells watercress farmSecond prize goes to Owoh Nine Wells Watercress farm. I like the pun and I like the weird prototype. OK, so it's a single line in a box file, but that is certainly different.

Mention must be made of the fantastic modern image 7mm scale rolling stock on the layout next to us on Invergeachy. I don't think I've seen better quality modelling for a long while. Maybe I could have lived without the sound which seemed a bit distorted in the DMU's and earned a cheer from the room when it was switched off, but the smoke effects were clever. The operator switched them off as a loco approached me in case I didn't like the smell (I was hanging over the model with the camera) but as I explained to him quietly later, it was nicer than the aroma of the person standing next to me.

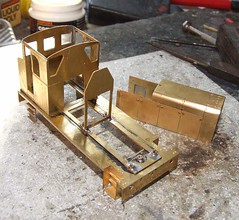
Trade wise I picked up some bits and pieces. There are some projects for magazine work and a new tool or two. Blog readers also have a treat coming up with one purchase. Watch this space for more.

Anyway, it was a good show. A very good show. We were well looked after by a friendly club. After all our initial scepticism, I'd now say we'd be happy to take an layout if they wanted us. Mind you, with over 10 enquiries from other clubs, we might be a bit busy in the future.

See more pictures on Flickr.

Monday, March 12, 2012

Souvenir of Basingstoke

Basingstoke show was excellent - I'll fill in a longer post tomorrow once I've sorted out the photos and unscrambled my brain a bit.

In the meantime, here's the best buy I've made at a show in a long while. Regular readers will know that our 3mm scale layout, Flockburgh, arrives at exhibitions complete with a row of souvenirs in an effort to impart more seaside air than simply having a beech, bit of sea and some beach hits. Enough so you might be tempted to check your shoulders for guano...

These are unearthed from car boot sales, seaside resorts and now the bus enthusiasts stand at Basingstoke model railway exhibition. The truly horrible key rack I am holding in the photo was picked up for 50p

Bargain. All I need to do is add the town name (Flockburgh, not Basingstoke) and hang it on the fiddle yard. I'll even keep the photo as it looks just how I imagine the beach on our little bit of Scotland to be.

(Thanks to Chris Nevard for the use of the photo)

Sunday, March 11, 2012

Nikko VaporizR

Nikko VaporizR

Everyone wants to be a big kid sometimes. My Dad certainly did when he saw a Nikko VaporizR in the pool last weekend. For those not familiar with this radio control car, it's a sort of bloated Audi TT with 4 wheel drive.

And it's amphibious.

So, you drive it around on land and then have it leap into a nearby pool and carry on. The speed is stupid, the steering like a tank and all in all it's great fun. Best of all, the radio control is set to 27.145mhz so it can be used with other RC stuff. We could take it down to the boat club, nab the peg for the yellow frequency, and play with impunity. Power is from a separate rechargeable battery which is supplied. 5 hours charging give about 45 minutes play.

Launching took place off the end of a bit of plywood on our landing stage. Thanks to the dry winter this means a drop of nearly three feet but the car was more than man enough for this much to our fellow club members surprise.

Then we had a little troll around the water. It's messy but great fun. I find the trick with tank steering (you have two forward and reverse sticks, one for each side) is to keep one stick forward and handle the steering on the other. I don't think I'll win the docking competition this way, but it's a start.

Battery duration was probably about 2/3 what we'll get after a few charges. I don't think this is a problem, this might not a be serious model but when your boat club has lots of off-road and plenty of on-water potential, it's going to be fun.


Our toy came from Argos. Details here.

Saturday, March 10, 2012

Ready for Basingstoke

New trackOK, the track is laid, ballasted and blasted with lots of lovely static grass. I've wire a link in to the main board so we get that electricity stuff in the rails to allow the locos to work. It seems to work OK so we'll give it a go.

As you read this, we should be in sunny Basingstoke. All being well, there will have been an adequate breakfast and then a pleasant drive to the venue. The wheels will be cleaned and the layout operate as expected.

There will be many people "helpfully" point out that we don't have any buffer stops in front of the chapel because they want to show off and don't think we are clever enough to realise this. I will try to be patient when I explain that it's on the "to do" list and will be completed.

By lunchtime this might be with the added suggestion that if they had ever built anything themselves and not just spent their hobby time salivating over the pictures of choo-choo's in adverts in whatever magazine they prefer, then thy might understand that it takes time to do some jobs, especially when you have to make everything.

Alternativly we will have abandoned our trip somewhere around Oxford in a traffic jam and given the whole lot up as a bad job.

Whatever, I'll do my best to let you know next week.

In the meantime, why not visit the Basingstoke Show website. Then come along, say hello, don't mention the buffer stops and bring cake.

Friday, March 09, 2012

Getting ready for ballast

Test run

The new track has taken a little leveling. I also managed to get the uncoupling magnet in the wrong place at my first attempt. Bits of thin cardboard have been slipped under the track to sort of both of these problems and wagons can now be shoved back and forth along the lines. The front one seems especially smooth, which is good news as it's going to be seeing a lot of use in the future.

Positioning magnets is a bit of an art. The allow the coupling to do their thing, the wagon must be pushed beyond the magnet so the hook can come up again. With a building at the ends of the track this requires the uncoupling position to be on the old board. The alternative is a wagon pushed to the wall with its coupling over the magent. Guess how I know that !

Preparing for ballastOnce happy, we gap the track and cut the baseboard joins with a slitting disk. Droppers for electricity are soldered in place and rail joints bonded, something I've not done elsewhere and sometimes regretted.

A waft of primer and couple of coats of Railmatch underframe dirt and it's ready for ballast. A sliver of plastic packing between the boards will hopefully stop them sticking together whilst only leaving a very tiny gap in the stones.

Thursday, March 08, 2012

Lariot etc. in Hornby Magazine

One of my favourite projects appears in Aprils Hornby Magazine - a loriot wagon complete with a Bucyrus shovel.

What started out as a "that looks like an interesting wagon" moment in my local model shop ended up as a model I'm really proud of. Plenty of character and using a variety of techniques, it's the sort of thing I aspire to produce more often than I actually do. I find a use for all those wooden coffee stirrers you've been pinching too !

Lariot

Elsewhere in the issue, I'm painting a Ten Commandments plaster building. Working on a stonecast model is interesting - the paint doesn't behave as you would expect if you're used to plastic and metal models. The process is much more akin to tinting the surface with water colours - repeated applications build the colour slowly. It's great if the effect you are after is faded paint as what is normally difficult to achieve is dead easy.

Plaster buiding

Finally, I've got a few items in for review. The speed that some of these have appeared in print amazes me since they were nothing more than words in my head about 3 weeks ago. The Gramodels terraced house kit was only picked up at Doncaster, which was less than a month ago !

Terraced house

Hornby Magazine website

Key Publishing: You've probably already read elsewhere that Key Publishing has bought the entire Ian Allan magazine group. I've already spoken to Mike the editor about this and it appears that nothing should change in the magazine for the moment. Looking at the new owners portfolio, Hornby Mag fits in very nicely alongside Airfix, and is a good deal less specialist than their aviation titles.

For someone who remembers the debacle that surrounded Irwell Press selling Modelling Railways Illustrated, it's a little disconcerting but hopefully everything will be all right. In one way it will make life easier for the behind the scenes people as the owners and editor are now a bit closer together as far as I can tell. Maybe I'm due a slap-up lunch at some point by the Key people. If I do, I'll let you see a photo of the pudding.

Wednesday, March 07, 2012

Achieving flat trackwork

Chisel and trackThe inter-baseboard gap might have been filled but it showed up another problem - the ground level between the two boards included a step. Not a problem for the scenery but those finescale locos are as good as (proper, pre-CGI) Daleks at working the stairs so this needed fixing.

Digging out an old chisel and honing the edge on a stone, I set about shaving the extension top away. I didn't use a best chisel for this as I wasn't entirely sure what I'd find in there. A stray nail wouldn't do the cutting edge any favours.

After half an hour I'd stripped away several layers of plywood and had a feeling the base was below the level of the trackbed bottom. The resulting surface isn't pretty but I'm sure the track won't mind too much. As long as those rail tops are level and smooth, the trains will run.

The short panels of PCB track are just long enough to allow us room for an extra wagon. A couple of sleepers removed from the end of the old track should let the join be tidy. Hopefully all this can be done without too much damage to existing scenery.

Tuesday, March 06, 2012

Bad joints

Baseboard jointThe first problem taking track onto the extension is that the joint between the two baseboards is a bit rubbish. I used to slide the chapel back over it to hide the worse of our dodgy woodwork but that's not going to be an option now. The gap must be filled.

Ideas considered mostly included covering the station end with clingfilm and then smearing Polyfilla or No More Nail glue over the end of the extension board, clamping them together and letting the stuff set. The clingfilm would stop the boards being permanently bonded. In thoery.

My Dad wasn't convinced by this hi-tech stuff and decided to have a go with some thin plywood and a sanding block. After a fair bit of fiddling, he managed to shape some lite-ply to fill the gap and extend down the board some way so it can be stuck in place. We've still got a problem at the sea wall but I might just pretent not so see that for the minute.

Monday, March 05, 2012

The headshunt problem

The headshunt problem

Our 3mm scale 14.2 gauge layout Flockburgh has developed quite a bit from the way we built it originally. Once we'd been through the pain of making the thing work and taken it out to a few shows, people whose opinion we respected starting making helpful suggestions.

The most influential was Cyril Freezer who pointed out that the line finished rather abruptly at the end of a baseboard and we really needed to put something in to explain why it stops where it does. From this grew an 18 inch long scenic extension with a small harbour entrance and an inconveniently, for the railway company, placed chapel. The sort of thing you can't knock down and don't gain much if you do since the water edge is so close.

This worked fine for a while but more recently we've hit another problem. I can't build locomotives well enough to produce a reliable stud of steam engines to work the model. Sometimes they work, sometimes they don't and I can't improve on this despite much effort.

On the other hand, I can made diesels that work. They run nicely and shunt the sidings so to reduce my pre-show stress levels, I want to build and run more of them. Fine, except the end of the runround loop in the station will only hold a loco and one wagon. Shunting is boring for both operator and viewer. Something needs to be done.

The plan is to extend the tracks on to the extension by a wagon length. Both lines will grow and a new uncoupling magnet will permit leaving a brake van further down the headshut which in turn will allow this to be used for it's prototypical purpose and save shunting over the station crossover.

We just need to get it all done before Basingstoke show on 10th March.

Sunday, March 04, 2012

Sadly, car parking matters

Yesterday I headed off to the Gauge O Guild spring event at Kettering. According to the programme, it was going to be a cracking event. I had a couple of things to do there so I was looking forward to it.

Although the venue is close to Kettering station, a quick check showed that this would cost a fortune and involve 3 changes of train as well as taking 4 hours. With three shoebox sized items to deliver I didn't think this was (sadly) much of a plan.

So, I set off in the car. The route planner showed about 45 miles and by ignoring the sat-nav until the last 8 of them I could eshew the motorway system in favour of A roads which saved me the awkward M6/A14 junction too.

Arriving at the venue, I caught the back of a traffic jam. A big one.

It seems that the "Leisure village" the show is held in has perfectly adequate car parking for a normal Saturday morning. What it doesn't have is sufficient when the sports hall has been let to a model railway show and several hundred modellers have chosen to attend. The parking was full. Cars were "creatively" parked on flowerbeds and corners. A nearby housing estate, which like most modern estates is designed to discourage on-street parking, was also full of cars.

After 5 minutes I turned around and headed home. Getting a bit lost meant 110 miles worth of petrol used for no reason. I mean, I don't like driving. If I just wanted to listen to the radio for a couple of hours I could stay at home with a cup of tea and do it without peering through a rainy windscreen.

Sadly, this is a problem all exhibition manager have to face. If you want to hold a big show you need a big car park. A very few modellers will use public transport. Most screw their faces up if you say that's the best option. For years I used to stand behind the layout talking about the Leamington show and being told that the person wouldn't be coming as it was an in-town show and so there would be no parking. There was, but they wouldn't believe it.

The problem is the numbers. You need spaces for all the exhibitors and traders. The club members and then the visiting public. For most shows that means well in excess of 1000. For the larger events 2000+ is more like it. A leisure centre simply doens' have this sort of parking spare on a Saturday morning. Even some exhibition centres struggle. Don't think the punters will car share to help either. 1.25 persons by car is the best you hope for. Most of them will arrive on Saturday morning too so while a few hundred spaces might be OK in the afternoon, you will be stuffed if that's all you have in the morning.

Those are big and scary numbers which most managers deal with by pretending that they don't exist or hoping that some magic will happen on the day. The alternative is to get a venue with enough space and accept that this will be several thousand pounds a day to hire. Which the punters will moan about when they see the price to get in.

Saturday, March 03, 2012

Every kit CAN be built

Model Brede

From Brighton, a little ray of hope. It really IS possible to build any kit if you try hard enough. Back in 2008, I abandoned a kit I'd bought for a Brede Class lifeboat. The think seemed impossible to build as the vac-formed parts were unsymmetrical along the keel line. Marking out the desk also looked impossible. Scratchbuilding seemed like a better idea to me, or at least more likley to produce a good model.
It seems I was wrong. This lovely looking boat was on a display and the description of the kit is exactly the same as the one I gave up on. It seems there is at least one modeller out there with more commitment and skill than I have.

In my defence, I don't think the deck line is quite correct, on a Brede it lifts more to the front. That's one of the problems I couldn't see past in my version. Those window frames are a bit heavy too but they aren't in the kit. At the end of the day though, it is a a pretty good model of a Brede. Better than my attempt anyway. I hope to replicate it one day when time allows me to get back to my version.

I'll try to remember this next time I'm looking at a kit and thinking it's impossible.

Friday, March 02, 2012

Bonnet building

Bonnet BuildingReading the 01 diesel instructions (yes, really !) the bonnet doors can be attached before or after bending the thing to shape. I looked at the half etched area they were to be fitted into and decided that if I tried bending before fitting, the result would be a mangled mess. Sometimes you need structural strength in a part before you mess with it.

Or at least I do. Reading on, it's assumed that you bend then fit, but that must the way the good modellers work.

Anyway, the doors are soldered from the back through holes in the sides. To assist alignment, the handle holes are etched through both parts and so if you line them up, the part is in the right place.

Bending the wrapper is more interesting. I tried bending using the half etched relieving lines on the back as a guide but this didn't work very well. To be honest I'm not good at getting bends in the right place and having bomped a load if rivets in the sheet didn't help as attempts with pliers were hindered by me not wanting to flatten them again.  Using the front as a former worked well though and after a little tack soldering all appeared well - or at least the wrapper stopped at the end of the former as it should.

With the doors in place, access to solder the top to the plate is limited but enough for big blobs of molten metal to be flung in place.

The fuel tank hump former were fitted even through you are told not to use the back one as it gets in the way of the motor. Anticipating this I'd hacked a hole out of it the same size as the one I'd already put in the cab. These set the width of the bonnet and keep everything in line.

Provision is made for separable bonnet & cab assemblies but even the instructions say this is a bit pointless. I suppose if you like to display your model in bits it's OK but with livery being plain black or green, there's no other reason.

Finally fitting of the bonnet to it's sub-plate took place with the unit removed from the footplate. Access is a little better this way but in the end I carefully worked from the bottom and burnished all the solder away so the thing would screw down properly. If I've not moved any of the fixing nuts that is. I'll find out about that later.

Thursday, March 01, 2012

Cab fitted

Cab fittedThe 01 cab starts simply enough - locate the front over the sub-base, centre it up and solder.

Then think, "I wonder if the motor will fit ?" realise it doesn't and remove the part you've just fitted. Cut a big hole in this part and re-assemble to the sub-base.

In theory, I don't need to do this but it seems that the DS10 motor I'm using because that's what the instructions say, is bigger than the DS10 motor on the plan. Well, it sticks back a bit further than it should anyway. Basically, I'll need a hole in the cab front and I might as well make it now rather than trying to wield the piercing saw on the finished model.

The sides went the same way. Attach. Realise you've forgotten to punch the rivets. Remove. Dimple the metal and then re-assemble.

All went together well. If you mess up, the half-etch lines need to be cleaned of solder before bringing the bits back together but that's not the kits fault.

At the back, the bunker is fun. I bent it around a screwdriver but wasn't happy so unbent it again, soldered the top and bend it around the sides. Much better.