Sunday, September 30, 2007

Flockborough wakes up


Flockborough
Originally uploaded by Phil_Parker.

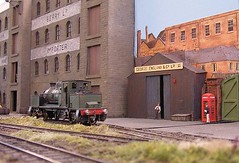
Today, Flockburgh came out of hibernation. It’s off to Sudbury show next weekend with us in tow.

As usual we had forgotten how to assemble the clever flat-pack legs. This is perfectly normal and is only discovered when the boards go on and don’t line up properly. The whole set up is a 3D jigsaw made of plywood. The system works really well so we stick with them despite the fun and games.

Once up there were a few bugs to be fixed:

  • A pair of dry joints which were quickly heated up and repaired.

  • The point motor for the sidings only threw in one direction. Half a gallon of WD40 later and a lot of manual waggling and it was back to its reliable self.

  • The fiddle yard end of the look failed in one direction. This was due to a lose wire in the plug between panel and baseboard.


Apart from this all was fine. Most of the locos are OK. The class 22 only works in one direction so I’ll need to take a look inside this. I need to adjust the pick-ups in the Y7 too, but this isn’t vital as it rarely makes an appearance. Even I can’t properly justify it on this model !

Saturday, September 29, 2007

Today's post


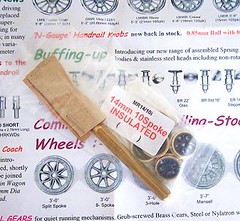
Wheel pack
Originally uploaded by Phil_Parker.
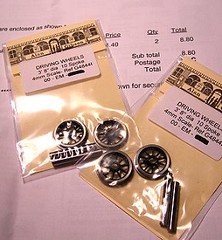
The Romford wheels for the 1361 class have arrived. With a bit of luck this means the problem Markits has been having with the post have been solved.

The package also contained a shock. Each wheel cost around 4 pounds. That put these wheels at 9 quid an axle !

In comparison, a set of Gibson wheels will cost just under a fiver an axle from Mainly Trains while they are still available.

Romford wheels have never been particularly cheap. You are paying for some beautiful engineering and excellent quality. They aren’t easy to make either – but the pay off is the extreme ease of use. That alone will keep me using them.

I suppose in the overall cost of most of the models I build it’s not a huge chunk of the bill and since even I can’t destroy them (something I’ve managed with both Gibson & Sharman wheels) then they are a good investment.

Friday, September 28, 2007

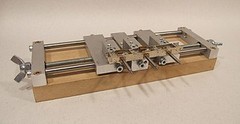
Chassis Jig


Jinty chassis on jig
Originally uploaded by Phil_Parker.
The Jinty chassis is calling. After thinking I had all the parts it turns out that I’m missing the coupling rods. Not to worry as I can always make up a new set. In the meantime though I assembled the chassis.

To keep everything square I used my Mastermodels chassis jig again. To get the positions I slipped bearings into all the axle holes and set the rods to these. I then fixed the spacers in, building the chassis on the jig as intended. Apparently this will keep things square – it certainly looks good so far.

The slots for the hornblocks were cut out with a piercing saw.

Next the rear bearings were soldered in. Finally the hornblock assemblies went in one at a time with lots of clips to hold things in place while I wielded the soldering iron.

Wednesday, September 26, 2007

Slingshot coupling - again


sligshot coupling
Originally uploaded by Phil_Parker.
The reason I’ve been checking the Slingshot over isn’t because I’m packing it away for the winter. It’s because I’m not always that great at controlling it.

After our final race in the series we decided to have an endurance challenge. The plan was that the race would last 10 minutes (normal races last 4 or 5) and must include one a battery change.

So I prepared some extra bits of black tape read for my hurried pit-stop. This might not be Formula 1 but wielding scissors while in a hurry seemed to be a quick way to a world of pain and sticking plasters.

On the water we set of for our first slow warm up lap. I noticed as I went round that the rudder trim was hard over to the right. So thinking this was wrong I centred it. Of course this made the boat pull to the left. By the time I realised this of course I’m back at the start.

Which explains why after the first corner my boat is half way up the bank.

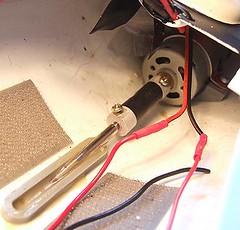
Once retrieved all I get is a death rattle from inside. Hitting the bank side on had tugged the prop shaft out of the coupling. Again. This is the second time it’s gone in a week.

So that’s why I had the boat apart and spotted the battle scars. The shaft has now been Araldited into the coupling – superglue obviously not being quite man enough for the job.

I have greased all the shafts and oiled the other metal parts ready for the months of storage. Even the mud that coated the hull has been removed. The model deserves a bit of pampering after winning I suppose.

Tuesday, September 25, 2007

Battle Scar


battle scar
Originally uploaded by Phil_Parker.
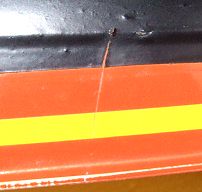
I need to do a little work on the Slingshot before it gets tucked away for the winter. Taking a closer look I found this.

Someone has gouged the side of my boat and even cut the insulating tape that holds the top on. This can only have happened during the last race when someone collided with me.

For plastic boats with plastic propellers and plastic rudders, this is an impressive amount of damage. Looks like I’ll need to be careful next year !

Sunday, September 23, 2007

The winner is...


Slingshot
Originally uploaded by Phil_Parker.
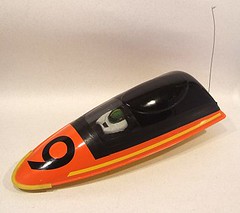
Me !

Yes, after a years hard campaign, I am the Knightcote Model Boat club Slingshot champion., by 4 laps.

Stupidly, I’m quite pleased with this. After several early sessions where I failed to finish some good, consistent races saw me rack up the laps. Sadly it doesn’t make me Lewis Hamilton, nor does it give me his budget. My fellow competitions were mostly older than I am and we know we’re just playing. It’s still fun..

We banter and take the mickey out of each other. Barging other boats is against the rules but it still happens accidentally. What we do have is a good time. Only the kids take it seriously, the rest just have a laugh.

What the racing has done is brought us together as a group regularly. Sailing can be a bit lonely as you often find yourself down at the lake on your own. Pleasant but the occasional group sail is nice too. People often bring down their Slingshot and another boat so you get to see what they are making, something that didn’t happen before.

Still, time to look forward to next year. I think the competition’s going to be a lot hotter and I have a title to defend.

Saturday, September 22, 2007

Jinty Kit


jintykit
Originally uploaded by Phil_Parker.
OK, so it’s another new project. I’ll get around to finishing one soon, promise. At least I’ve got all the bits for this one.

With a couple of weeks top go until Sudbury show I think it’s time to unearth a new 3mm scale model. Yet again my logic is that with the layout up, I can test the chassis. While I have a test track, it’s only a straight length and so not exactly a realistic simulation of the environment the locomotive will be required to operate in.

The kit is an old 3mm Society model. Looking at the etches though it seems a promising prospect. The chassis is designed with 14.2 and 12mm gauges in mind. It even has provision for compensation !

Talking to the guy who runs the Society shop I discover that this is basically a shot down 7mm model and he has built a few which all went together well. Of course he is an engineer but even then…

We all have different reasons for choosing prototypes for our layouts. This one is being built because the first 3mm model we owned was a Triang Jinty. It will be nice to compare the two.

Friday, September 21, 2007

Look what rolled in


gibson wheels
Originally uploaded by Phil_Parker.
Look what came through the post today – my Gibson wheels ! After a bit of a misunderstanding, Mainly Trains came through as usual and delivered the goods.

This leaves me with a dilemma. These are good looking wheels but they aren’t self quartering. I also have a set of Romford wheels on order from Markits who apparently are suffering from a local postal strike. These are easy to use but perhaps don’t look as realistic for this prototype.

Whatever – I’m going to wait as another project has been unearthed. More on that later.

Wednesday, September 19, 2007

Back in the box


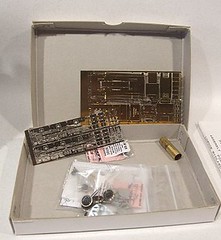
1861parts
Originally uploaded by Phil_Parker.
This was supposed to run on the layout last weekend. I had a vision that the locomotive would cruise around the model smoothly and silently. People would marvel at the quality of the modelling and ask if it was an etched kit. When I identified it as an old K’s model they would gasp in admiration at the wonders I had performed with 40-year-old material.

Instead it’s going back in the cupboard. There it will stay for the foreseeable future.

Why ? Because I can’t get any wheels for it. Currently I have an order in with Mainly Trains (4 weeks old) and Markits (2.5 weeks old) and at present all I have in my hand is a single pair of Gibsons. That’s four wheels too few for a reliable chassis.

At present I’m not sure how or indeed if this situation can be resolved. In the meantime the model sits in its box, packed up with all the other goodies I bought to improve the body awaiting the day when the essential round parts arrive.

I know you are saying, “Why don’t you just get on with the body ?”,well I don’t want to. There’s no point it doing the top bits if the bottom bits don’t work, so my heart just wouldn’t be in it. Besides, to be practical for a moment, I’m not sure how the two halves fit together. I think some of that whitemetal will have to succumb to the attention of a dental burr and so there’s no point putting things on that are only going to get knocked of with clumsy handling.

Tuesday, September 18, 2007

Usurped


Selah (Fruit Row)
Originally uploaded by Phil_Parker.
I used to think I had the most reliable overhead in 4mm on my model of the Hellingly Hospital Railway. In fact it’s something I boasted about on a regular basis – not to show off you understand but because it had taken so much effort and pain to get it to this state.

This weekend I saw Selah (Fruit Row) by Andy Gautrey. It’s an HO layout with overhead electric locomotives moving bogie reefers around set in the 1980’s.

The overhead not only works superbly, it even crosses baseboard joints, something I chickened out of as I had no idea how to make it work reliably. Andy simply used a washer, which the ends of the overhead hook into. I didn’t believe it could work, but it does.

He’s also devised a device for putting the trolley pole on the wire at the entrance to a fiddle yard which incorporates a tensioning spring. It’s not as pretty as mine is, but a whole lot cleverer.

I suppose I can still claim to the top man in the 4mm overhead department but he is streets ahead of me and working in a smaller scale.

Sunday, September 16, 2007

Birmingham Show part 2


Dock at Brum
Originally uploaded by Phil_Parker.
Day Two: Arrived at the show about 8:15. Tried to park behind the hall but couldn’t get a space. Luckily there was parking in the public car park at the side which turned out to be absolutely ideal.

After a quick wander around looking at layouts and chatting we somehow managed to buy a couple of Bachmann On3 model locomotives from different traders – both called Pat ! I blame the guy next to us with his On3 layout. At least I would if we didn’t have so much stock already and vague ideas for a future project…

The show opened at 10 with no rush of people. In fact it stayed quiet until lunchtime. Worst of this was that no-one talked to us for over an hour. They came and watched but never spoke. Spooky.

You would think this wouldn’t matter but trust me, it does. You see, with a little one-man operated layout, it’s nice to have a chat. We like to feel that we’ve helped people by answering their modelling questions, or even just given them a chance to talk to someone with the same hobby. Families are better that this than enthusiasts. The later seem afraid to show ignorance as though the whole show was some sort of test of strength.

Still, once things picked up a bit we chatted and operated happily. The layout worked well with none of the sticky pickups and dry joints of yesterday.

Melbridge groupies even turned up. One guy (sadly it’s middle aged men not nubile young women that we get as groupies ) spent over an hour talking and watching. It’s gives you a nice glow when people compliment your work, although obviously this isn’t why we do it…

Lowlight at the end of the show was an annoying child who had obviously drunk his own body weight in Sunny Delight or similar. He ran around the front firing stupid questions, remarks and suggestions. Granddad looked on occasionally but did nothing to control the little sod. At least one visitor went away and came back later admitting that the little spawn of Satan had caused him to give us a wide berth for a while. Quite why people think it’s someone else’s job to look after their offspring was explained by a very late visitor who turned up with 25 minutes to see the show and commented, when with 5 minutes to go we had pretty much run the stock off the layout, “You’re working to a tight contract”. He actually thinks we get paid to be there !

Now we get expenses but it covers fuel and not much else. If you think we do this for anything other than love and the occasional ego stroking then you’re wrong.

Anyway, the child caused a new operating method to be developed. A small number of wagons were continuously shunted around despite his requests every ten seconds for new and more locomotives. The plan, unsuccessful as it turned out, was to bore him into clearing off and annoying someone else. I’m not sure this is an MRJ approved tactic, but it’s more legal than hitting him with a sharp object.

At the end of the day we managed to get everything down and into the back of the car in exactly 30 minutes. The handy parking worked well.

All in all, a good weekend.

Saturday, September 15, 2007

Birmingham Show

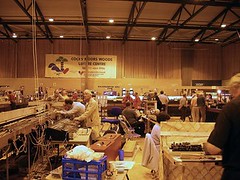
Day one. An easy 25 mile journey. We set up and everything seems to be working. There’s a bit of moaning from the next door N gauge layout because we are cluttering up the control panel at the end of their layout while getting ready. In our defence the panel was covered up when we arrived and there isn’t much space.

The show opens with a small queue and soon busies up. Through the day the crowd are quite chatty but there are never that many of them. The layouts are really top quality so it’s a shame. Trade isn’t so good – to many box shifters and DVD stalls. If you want loco kits or anything specialist apart from card buildings or scenery, tough.

The layout develops a dry joint beside one point. I fix this but another appears. Since this is during the busy morning period I solder a point blade to the stock rail and leave a siding out of use. This gets fixed at the end of the day when the “crowd” is other exhibitors wandering around. Frustratingly the fix takes less time than the bodge but I needed the thinking time first.

Apart from this things go well. A couple of the locos are a bit sticky but that’s just lack of use. Some of the couplings suffer the same problem. We loose a wagon thanks to contact with the floor but as we carry far too many spares this isn’t the end of the world. I just need to replace a buffer and it can go back in the box.

Lunch is good – chicken and chips. For a leisure centre the snacks and drinks are reasonably priced and very nice too.

At the end of the show there is birthday cake to celebrate the clubs 40th birthday and a presentation of the public vote cup to a nice O gauge layout.

Friday, September 14, 2007

Tooled up


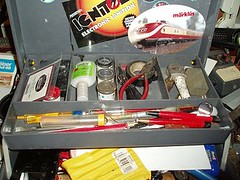
Tool box
Originally uploaded by Phil_Parker.
The last job before setting off for a show is to pack the exhibition toolbox. This isn’t superstition but practicality. The way I work is to go through all my modelling drawers and pull out those items I think I’ll need over the weekend.

There are a few obvious candidates such as the track rubber, screwdrivers and a fibre pen for wheel cleaning. I like to take some glue and a supply of different pliers, tweezers and other “tweaking” devices. Some electrical testing tools are needed along with solder and flux to make things good.

After this it’s a bit of a free-for-all. Once upon a time I’d take practically my entire toolkit. In the 80’s though someone kindly stole the toolbox out of the back of a van we were travelling back in so I’ve been cured of that trait. Besides, I own a lot more tools now so I’d need a van just for them !

I know one famous modeller who used to boast how his exhibition toolbox was a tobacco tin – but then he always relied on being able to borrow from other exhibitors, something he did on a regular basis while facing much derision !

Thursday, September 13, 2007

African Queen Engine


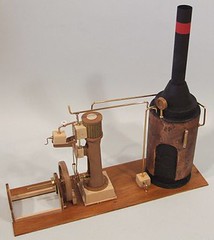
African Queen Engine
Originally uploaded by Phil_Parker.
Looking at the listing on the right hand of this blog I see that the African Queen hasn’t merited enough mentions, so as my output this week has been negligible I’ll fill you in on some of the progress.

The boat is pretty plain other than the centrepiece, a steam engine.

Now I’m no engineer as you’ve probably realised so the engine used is as provided in the kit – a fake.

The boiler is made of tube that looks like it came from a Scandinavian DIY store. Much of the metalwork is wood apart from a few plastic mouldings and the odd brass bit.

For a boat made famous in a film, you would have thought the research would have been easy. All you do is watch the movie and base the kit on that. No chance, the boiler is too tall and thin. The castings for the cylinder are fluted whereas the prototype ones aren’t. Looking at the plan, pipework sprouts in all directions compared to the simplicity of reality. Event the cover beside the flywheel is wrong – you can’t balance a cup of tea on the kit version (which I need to fix) like the actors do !

So I grabbed some stills from the DVD and based my version on this. It’s not prefect but once on the water it still looks the part. I need to work out how to motorise the unit, and the instructions don’t help much, but one day I’ll figure out something.

Tuesday, September 11, 2007

Awakening from slumber


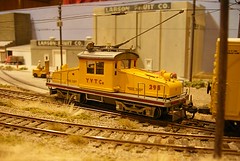
Melbridge Loco
Originally uploaded by Phil_Parker.
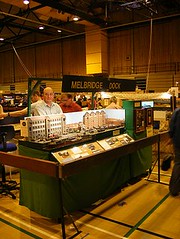
With a trip to the Birmingham exhibition looming this weekend it’s time to retrieve Melbridge Dock from its store and make sure everything works. With over a year having passed since this model railway has seen the light of day we expected some trouble.

The first shock is that the fiddle yard is twisted. It lives strapped to the top of the layout boards and has been deformed thanks to the effects of heating and cooling. The board will go flat under gentle pressure but returns to the bent state left to its own devices. Fortunately when the baseboards are set up everything is OK. I blame the lack of diagonal bracing, which we ought to rectify but probably won’t.

With everything set up, I tentatively try the electrics. All the point motors work. Not one is even slightly sticky – it just goes to show that PECO motors liberally sprayed with WD40 will keep on going. I know people moan about the thunk they make, but it’s the sound of something operating properly and I ain’t complaining about that !

Running a short wheelbase loco round exposes three dry joins which are easily fixed. After all the storage we’ve got off very lightly. Mind you this always have been a reliable layout, I just hope it carries on that way.

All the locomotives are tested and despite not having turned a wheel for months they all seem OK as well. Some would benefit from a little run to move the oil around a bit in the bearings but basically we are OK.

The main work is in repairing the display case, which needs its front plastic refitting. A little glue will sort this out.

For a 19 year old model railway I think this is pretty good going.

Monday, September 10, 2007

Success


ashleyinfield
Originally uploaded by Phil_Parker.
This is what success looks like.

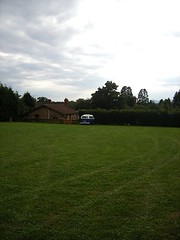
I know to you it might just look like a VW camper in a field. You might arguably think it’s nothing special. You would be wrong.

The point is, it is my VW camper in a field. A camper that has driven over 50 miles and visited Vanfest earlier in the day. A camper whose brakes were in pieces a week ago and which covered 300 miles between the last two MOT’s.

Best of all it’s a camper I slept in, in a field (OK, campsite but it’s a basic one) for the first time in two years. It’s a camper doing what campers are supposed to do.

At last.

Oh, and if you want some pictures of Vanfest, here they are. Enjoy. I did.

Saturday, September 08, 2007

Deans Marine Open Day


wilanne
Originally uploaded by Phil_Parker.

Deans Marine hold an open day every year for model boater’s. As well as giving us the run of the factory and the chance to have a good dig around their showroom, there are displays of models from the Peterborough Model boat club and trade support from Mobile Marine Models.

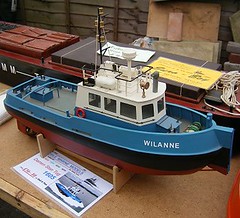
As is traditional on this blog, the photograph shows my favourite model at the event. This was a closely fought contest but the winner was MMM’s tug Wilanne. While not the greatest model there, it was the one I really fancy building. If there weren’t a number of projects already sitting in the cupboard I’d probably have ordered a kit there and then. Given the attention of someone putting a lot of effort in, this would be a superb model. The proportions are right and there is the potential for a model boat full of character. The one on the stand fulfils its role as a demonstrator assembled by the manufacturer to entice would be tug owners into parting with their cash very effectively !

Obviously there were lots of really nice vessels on display. When I have time I’ll stick a Flickr group together so you can all take a look.

The benefit of going to a small friendly show like this was apparent almost immediately – we found a model of a cargo vessel that we have a hull for in store. The hull was bought second hand without a plan. After a chat to the owner a plan is on its way.

One thing to watch out for next if you go to next years even – Peterborough Model Boat Club have a stall which always seems to relieve us of money. I’m the proud owner of all sorts os useful bits and pieces now that I didn’t know I needed before today !

Update: The photos can be found here.

Friday, September 07, 2007

Other peoples trains


ntrack
Originally uploaded by Phil_Parker.
Once people get to know you are a railway modeller it’s amazing how many “come out” as modellers themselves. The conversation usually starts along the lines, “Well I’ve got a layout in the loft you know. It’s not a very good one but…”

Obviously they don’t want to reveal themselves to “normal” members of society since building model trains is a terrible thing to admit to. Let’s be honest, given the choice between a convicted rapist and train-spotter as dinner guests, most people would choose the former. Railway modellers aren’t quite so reviled but it’s not a huge difference.

Anyway, once they’ve outed themselves you often get requests for help. Hopefully you escape the “opportunity” to go around and built their layout for them, most of the time it’s wanting help getting locomotives to work. Sometimes these are favourite models that have mysteriously stopped operating and the owner doesn’t know what to do next. Perhaps the local model shop, if there is one, will be approached but the proprietor will want money for his time and effort and so the model will be removed and put aside to be fixed, “one day”.

This probably sounds really ungrateful. After all we should all be happy to help out our fellow man and I like to think I do my share of this. If you genuinely can’t fix it and can’t afford to get it fixed then I’m there. I won’t take the work away from the local shop though as he needs to make money to stay open – most shops are plagued with people after free help who then go elsewhere when it’s time for the big ticket purchases.

The worst offenders are the pains who buy junk from a local swapmeet and then expect it returned to mint condition for no money. I know they helped contribute to the demise of one local shop years ago. We British love a bargain but often fail to understand the difference between something that is cheap rubbish and reasonably priced, but slightly more expensive, quality items.

How fun it must be to be behind the shop counter after an event when a “modeller” comes in with the latest knackered offering bought for a few pounds at weekend and they wonder, “if you could just take a look.”. Best of all, while you prod at the lifeless specimen which was sold off for a good reason they tell you about the latest Hornby model they bought online or mail order for a few quid less than the ones on your shelves.

Anyway, getting off my hobbyhorse, last weekend I had the chance to try and service some N gauge items for a friend of my Dad. The gentleman planned to put them through a local auction as he was downsizing and needed to concentrate on the OO collection.

Now he had an idea of values and these were scary. The other thing I hate about this job is fiddling with stuff that I can break and demolish it’s worth. In fact I nearly had to buy one model, A Farish West Country, when it went back together wrong and jammed. The chassis was half in and half out of the body and not moving. Fortunatly it went back together and I was saved.

In the end the auction man gave what, in my opinion, was a very low estimate but I’d had the sword of expectations hanging over me while wielding the screwdrivers.
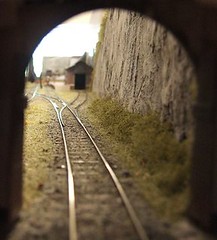
Thursday, September 06, 2007

Cranky Pin


wheelpin
Originally uploaded by Phil_Parker.
Well, after plenty of testing the old K’s wheels have given up the ghost The non-powered end worked fine but the powered axle to middle rod gave me endless grief. I even had to remake a couple of the rods as I’d reamed out the crankpin holes too much in an effort to make things work.

I actually managed to get the whole chassis to run smoothly in one direction. Reversing involved either a clank or at least a long pause in rotation.

Eventually the crank pin on one of the driven wheels worked loose. The plastic surrounding the pin broke away terminally – I’d already glued it back in place several times but this wasn’t enough. I suppose these wheels were at least 30 years old so they had done pretty well really.

The pin may have been the cause of the problem. Certainly the fact I was beyond relying on the K’s D-shaped axle holes wasn’t helping. Unfortunately these give up after a few uses and become round so the automatic quartering doesn’t work.

I need new wheels. About a month ago I ordered a set of Gibson wheels from Mainly Trains but they are still awaiting delivery from the manufacturer. The good news is that the death of the Romford wheel is greatly exaggerated. A perusal of the new Markits Catalogue showed they were back in production. I couldn’t get a 15mm 10 spoke (problems with the pattern maker and the new mould) but a set of 14mm one has been ordered. I know they are a scale 2 inches under size, but who’s counting ?

Tuesday, September 04, 2007

Assembling the chassis


1861chassis
Originally uploaded by Phil_Parker.
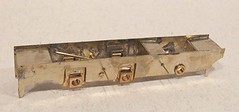
Sticking the chassis together was suprisingly painless. First I cut some strip to act as spacers. Lengths of this were bend into L-shapes and soldered to one side. Then the whole lot was set up on a flat surface (an old CD) with a square across the end to fix the other sides.

The hornblocks were fixed using some jig axles that allow the connecting rods to set the wheelbase. In theory this will set the wheels exactly the right distance apart to ensure free running. As I’ve already mentioned, I did this once and realised that I’d set these too high – the axles would need to be at the very bottom of their travel to be level with the fixed axle. Fortunately a bit of heat and a sharp blade separated the parts and I was able to put them back in the right place.

And no, I don’t know if this will really work. That’s the next step.

Monday, September 03, 2007

Old tricks


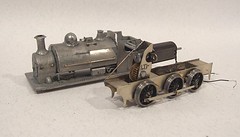
1861 stripped
Originally uploaded by Phil_Parker.
Since bleeding the brakes on the camper, I have a load of second hand brake fluid kicking around. Now, I could try selling it on eBay but I reckon even the muppetest eBayer isn’t going to buy that – not unless I can convince them that I’ve seen Princess Di’s face mysteriously floating in it anyway !

So plan B was to try stripping paint with it. It’s often written in old model railway magazines that brake fluid has excellent paint removal qualities. It's not something I’ve ever tried, preferring proper commercial paint stripper for fear of damaging the model itself.

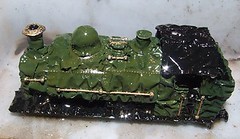
Still, nothing ventured, nothing gained. The fluid was poured into an old jam-jar (marmalade actually but we use the generic term) and then the loco body was dunked in and left overnight.

In the morning I took the photo so you can see the result. Paint made very wrinkly and loose. A bit of a scrub with an old toothbrush (Why do articles always say this, is anyone really likely to use a new one ? Surely being that stupid would have killed you years ago ?) saw a reasonably clean whitemetal loco body emerge. A little picking was required in the corners to finally remove the leftovers.

Sadly the glue the kit was assembled with wasn’t attacked so I had a little work to get the cab roof off to get at the paint inside. The cab back also turned out to be made of plasticard making me wonder if the original modeller had bought the kit second hand and found a bit missing.

Sunday, September 02, 2007

Calliper in bits


calipers
Originally uploaded by Phil_Parker.
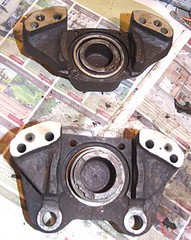
With the calliper off the van at last I’ve taken it to bits on the workbench. According to my friendly mechanic getting the pistons back in is a nightmare – so I’m about right after all !

He recommends gently tapping them back with a hammer once I’ve replaced the seals. I ordered the bits from Just Kampers and fitted the outer ones seals. The inner ones require removal of the piston and they aren’t budging. I’d thought that once the callipers were in bits they’d pop out easy enough but it seems that only pressure from the braking system would do this – and the braking system is currently on the drive.

Anyway, the seals went in with a bit of a fiddle and the after some tapping, so did the pistons. I’m not convinced they will stay there under use but hopefully I’m just being pessimistic.

Now I’ll re-assemble the sides and try them back on the van.

Saturday, September 01, 2007

Hornblocks


hornblocks
Originally uploaded by Phil_Parker.
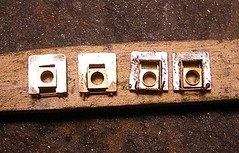
Soldering the chassis together didn’t take long – about an hour and half, which even included sort of watching some television at the same time. I’ve decided that this locomotive should have a flexichassis so great chunks were fretted out to allow for the hornblocks.

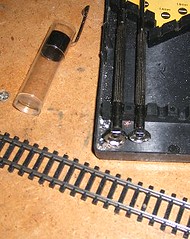
Because they are handy I’m using MJT hornblocks. These assemble easily enough – you bend the guides up, push them in and run the tiniest amount of solder around the edge. Then the bearings are fitted one at a time. A lot of delicate filing later (use a big but fine file) I have four sets which slide freely.

You might notice solder on the face of the guides – this is ‘cos I remembered to take the picture only after I had removed the hornblocks from the chassis where I had fitted them too high the first time around…