Sunday, July 31, 2016

10000

10000

I'm pretty sure I've show John Webb's wooden model of ex-LMS 10000 before. However, sorting through a pile of magazines, I find a copy of Hobbies Weekly from December 24th, 1952. As you can see, the same loco is on the cover. 


Inside, we have some instructions for assembling the locomotive and even and advert for a kit, costing 5/10 including tax. 

If you didn't want to shell out that sort of money (was this a lot back then?) of course, you could do it yourself, as a separate plan is included. 


Most of the part are cut from wood, apart from the roof (postcard) and cab windows (celluloid). Details are limited but the article suggests that household pins without heads could be used for the uprights for the steps, card being used for the treads of wire and more pins "if the worker is not afraid of a soldering iron".

I find all this fascinating and a real look into the past of our hobby. Can you imagine the face of one of today's keyboard warriors when faced with something like this? "I have to make it myself?! Out of wood?!"


Saturday, July 30, 2016

Beatties Model Boat Catalogue 1967

"This first model boat catalogue is a start. I hope to improve it as further additions appear.". So said SN Beattie inside the ochre cover of this A5 sized publication.

The biggest surprise found within the covers, is quite how little have changed in the hobby in 49 years.

We start with the Model Maker Plans Service, now run my MyHobbyStore and with many of the plans still on sale. Maybe you'd be advised to fit a brushless electric motor rather than a 34cc J.A.P. but the boat is the same.

We don't have free runners now either - cheap RC gear means people aren't so happy to point their boat at a faraway bank, wind the engine up to full chat, and let it go. Why hope someone catches it when you can take control and run into the bank anywhere?


Next we have a selection of Rip Max marine fittings. These are still available, something you can't (as far as I am aware) say about the Steingraeber "Floatable ship model kits in wood" range. They seems to concentrate on galleons and old sailing ships which aren't that popular nowadays. 

Aerokits models still have plenty of fans and many are available from The Vintage Model Boat Company.  

We then see Billing Boats - nice to see the Zwarte Zee in the range, and again, still available. Revell plastic kits appear, followed by Marinecraft. These aren't around, but if you want to have a go, this site includes outlines of the parts for some boats. 

Finally, we have Graupner and Airfix, still very much still with us. 

Amazing how much of the boating hobby started half a century ago!

Friday, July 29, 2016

Hot Air Engine


If you fill in enough surveys for the Guardian, they give you 50 quid to spend at Amazon. In those balmy pre-Brexit days, a touch over half of that bought me a tiny hot air engine from Amazon. Now it costs about 4 quid more.
ELENKER Mini Hot Air Stirling Engine Motor

But what fun it is. A little bit of meths (is it wrong that I like the smell?) and off it potters.

The lack of instructions with the model caused me a slight issue. As packed, there is an elastic band holding the waggly bits still. It's not obvious, but this has to be removed for the engine to work.

Torque is minuscule, so I don't think I'll be able to make it do any useful work, but who cares? 


Thursday, July 28, 2016

Mannin

Mannin

Some things are worth the wait.

Accurcraft's G scale model of Isle of Man No.16 "Mannin" is just such a thing. 

When the big box arrived last week, my dad and I were in a hurry to get it open. After working carefully through all the packing, always terrified that a rogue piece of sticky tape would touch the paint, we sat the model on the worktop and were very happy. 

While the price is scary, the model isn't. It's all metal for a start and beautifully finished. Despite being a garden scale, there is no shortage of detail. 

Manin rear

Looking inside the cab the controls are present - not something you'll see in the garden, but for a showcase queen, important.

The model feels solidly built. Looking inside the smokebox, the Pitman 24 volt motor can be seen. There's plenty of space in there for a DCC chip if you fancy fitting one too.

One query I had was the lack of brass numerals on the chimney. Photos of the loco in the days when it was running show them in place. I can only assume it's been modelling museum condition where they are missing.


Wednesday, July 27, 2016

Warehouse Wednesday: Converted hangars


Converted hangers

Last week, I looked at the grass-covered hangars at Cosford. Not an obvious modelling choice perhaps, at least for railway geeks, but hangars can be re-purposed. 

These two are on a storage place near where I live. The site was an airfield during WW2 called Bonickson's aerodrome. It's most notable for a Canadian Whitley Bomber crashing into a nearby hill on approach. Bombers were stripped for repair, the parts being sent to Coventry, and re-built to fly again. 

Now, the landing strips are long gone as all that remains are a pair of hangars. One is the base for a modular floor installation company. The other a go-kart track. In between are the offices for the storage company. 

There are still a few aerodrome features such as this tiny tower on one corner. 


The site isn't very far from a railway line - you can see it on this Google aerial view.  

As background models, these could work. You can stick any firm you like in them too. Anything that can made use of lots of space. It's certainly smaller than an airport!


Tuesday, July 26, 2016

Colron replacement

Sean asks: I came across your Blog by pure chance I was looking for information about a replacement product for colron wood dye, for use on plastic stone kits any info would be a great help.

I'm not actually sure what Colron wood dye is supposed to do. It's a name that I know from very old model railway magazines, but I don't own a can myself.

(Incidentally, Colron still make it)

At a guess, the dye is painted onto the stone to add colour, especially in the mortar joints.


If I'm right then there is a readily available product that also does this - Citadel Agrax Earthshade. You can buy it from any Games Workshop.

An acrylic wash, you can paint it on anything that needs brown stuff in the nooks and crannies.

My experiment is on a sheet of Wills stonework. I've painted it with Humbrol 121 and picked out a few stones in variations on this. Once dry, aided by a dust of talcum powder, the Earthshade is washed over everything.

I think the results are a bit brown. Perhaps a few drops of black wash (Nulin Oil) would help. A final dry-brush with 121 would help too.

Monday, July 25, 2016

A happy customer service story


Let's start the week with a happy story (SPOILER ALERT - everything works out fine). 

On the back of our house is a waterproof socket. It's the second one to be installed, the first having rapidly fallen to bits because the electrician brought in to fit it bought cheap rubbish. This one works much better, is easier to close and generally is good. 

Last week, one of the grey catches that clamp the  door shut broke. 


Looking at the (paper) catalogue, these clips seem to be common to several sockets so I wondered if I could get a replacement. Ringing the number on the book didn't work (always engaged) but a Tweet sent to @Screwfix got a response within 20 minutes.

After direct messaging them with the order details, and I didn't have the number, just the date of purchase and my address, I received a phone call - at 8:10pm. This was a surprise but welcome and Audrey explained that if I dropped into the local branch they would try to help. She also e-mailed me the original order so to make things easier for the branch.

The next day I explain the story to the local people who do their best to extract a good clip from a socket in stock. This proves impossible (you need a tiny punch to remove the hinge pin, hardly a common tool) so we agree that if I buy a new socket, I can go away and use the entire front panel, then put the broken one in the box with all the other bits and return it for a refund.

8 simple screws later, the new door with 2 working clips is installed - no need for an electrician as I didn't disturb any wires (still switched it off at the distribution box though) and all was well.

Finally, everything was boxed up and returned for the promised refund.

All in all, excellent service. So good, I felt I wanted to write a blog about it to say thanks to everyone who helped.

Sunday, July 24, 2016

Flash - saviour of the universe!


2 boats for £20? 

According to the label, they were returned models that had been checked and were OK. A nice couple of speedboats fitted with 2.4mhz radio so they could be sued alongside other models. 

"Can't go wrong", I thought, "I'll use the bits in one of the many vac-formed hulls I have in the store."

So I came away from an aircraft show with a pair of boats. Of course, I need to test them, so the battery is charged (only one between them. Boo) and off the water I go. 

Flash Speedboat

On the lake? Brilliant fun.

The top speed appears to be the 20kph promised, fast enough for me. Control is excellent and very responsive. Slowing for corners is perfectly possible, or at least it will be once I get the hang of the trigger/wheel transmitter.

I still think one of the boats (they both work and I will get a spare battery) will be donating its innards to another model but for the moment, the other will be doing speedy service on Thursday mornings as a change from pootling.

And the title of this post? From the theme tune to the Flash Gordon movie. And from the first line of the introduction in the instructions. Seriously. A tenner for a boat that can save the universe. Is there a better bargain anywhere? 

Saturday, July 23, 2016

Large scale model aircraft - Cosford 2016


Man and machine


The weather was perfect - sunny with a little breeze. Perhaps a little less of the later would have been nice as it was at the 15mph limit that the 1/3rd scale WW1 planes can fly in, but otherwise ideal. Certainly warm enough to justify a couple of ice creams with "strawberry" on sauce on them. 

In the sky were the usual selection of amazing models. Keeping these going can be a challenge. The owner of the Vulcan put out a call for assistance in an "operation" at one point. This cured the engine problem enough to get it in the sky, but after a flame-out, he had to land the 20ft span model dead stick. A bit heart in mouth I suspect!

Anyway, I came back with lots of balsa and a couple of model boats. More on these tomorrow. 


Friday, July 22, 2016

Bachmann Action Depot


Another operating accessory from the Bachmann back catalogue - this time a miniature forklift truck runs in and out of a "depot". 

As I say in the film, I wondered if the mechanism could be converted for a more scale layout. The answer is, probably not worth the effort, but it has given me some ideas in this direction.

Thursday, July 21, 2016

7mm halt, overhead wires and a Toad in BRM

There's more scenicing going on than normal from me in this month's BRM.


Tollhouse Halt

First up, we have a 7mm scale diorama based around one of the wooden railcar halts built on the Tetbury branch in a last ditch attempt to beat the competition from road traffic. As well as the halt, the scene also features a bus stop - waiting to steal the passenger traffic from the rails.

Some interesting scenic items from Polak have been used as well as a couple of Delux Materials products for the rather effective water draining from that culvert.

More product test, this time Dapol's catenery system.

APT under the wires

A "photo plank" fitted with overhead wires allowed me to get the measure of the product. It's also made use of some Hedgerow Scenics mat for fast grasslands. Neadless to say, my stock of locos that can make use of overhead wires is pretty much nill, especially if you don't count a broken HO scale French model. Not to worry, one of my Hornby APT-Ps can stand in.

A Wagon Kit in Every Scale reaches Gauge One this month.

Gauge One Wagon under construction

Finally, we are working in wood. This time it's a Tenmille kit for the classic GWR Toad. Obviously, on the page you see the finshed model, but I really rather like it in unpainted form. Am I the only one who finds models like this in their raw state appealing? 

On the DVD I'm showing off the finished retail park diorama and talking about the Faller Road system. It's considered by many to be a bit of a toy, but I think with some imagination and modelling effort, there is an awful lot more you can do with it. 


Wednesday, July 20, 2016

Warehouse Wednesday: Grass top hangars


Hanger12

Last week, I wondered how it would be possible to model the curved roof of a light industrial unit. This week, the curved roof would present no problem at all.

A couple of aircraft hangars at Cosford. The concrete fronts are made up of panels and large doors, but the curved roof - grass.

Hanger11

No problem here - a sheets of suitable scenic mat will do the job in one go. 

These are both within sight of the railway line, but I suspect for modelling purposes, they could be moved much closer.As far as I can tell, construction took place at the start of WW2 so presumably, you could justify their inclusing on any layout from this date.


Tuesday, July 19, 2016

Building a quick and simple voltmeter

Sometimes, knowing the voltage coming out of a circuit can be very handy. For us RC boaters, knowing which of the three identical 6V batteries has some charge left in it can make the difference between a good mornings sail and a rubbish time willing a dead boat to float to the bank.

Railway modellers also want to know there the volts are. The good news is that for a tiny £3.50, Component Shop sell a little device with LED display to do just this.


I bought one of these at the last model boat show and it's been very handy. Used as supplied, I worried about breaking the leads off the circuit board. Let's face it, they are supposed to be boxed up and made tidy. Which is what I did. 


A plastic box and some ready-made leads from Maplin, a couple of sockets for these to plug in to, half an hour and the job is done. The finished unit is nice and tidy and I hopefully, will never turn up at the lakeside with a dead battery.  


General Purpose Voltage Meter - WHITE 0.28" (7mm) display


Monday, July 18, 2016

Making pit props


The first lesson to learn when making 4mm scale pit props is that a wagon can hold an awful lot of them. 

The second is that the Chopper II tool was worth every penny. 

Sunday, July 17, 2016

Condon Ballast Wagon

Condon Ballast Wagon

Part of my workbench clear up revealed this little wagon. I picked it up for a quid from a box at Stafford show a few months ago.

I knew I'd seen something similar before in print but couldn't place it. Since the show hadn't been as expensive as expected, I thought I'd have it out of interest.

Digging through old issues of Narrow Gauge and Industrial Modelling Review, I find the piece by Roy C Link I remembered. 

The wagon is part of a set made by British toy maker Condon. For your 2 shillings spent at Woolworths, you got a loco and 3 wagons. Each has a tilting bucket that's missing from mine. Ostensibly OO gauge, the loco wasn't motorised and you'd not want to put it on any 2-rail track as the whole thing is diecast with no insulation. 


I have a feeling that this wagon will find its way into the background of a layout, sat in some weeds and growing rust. 


Saturday, July 16, 2016

German pizza in NGW

Barnstorff

Bit of a surprise in WH Smiths yesterday - my "pizza" layout appears in the latest issue of Narrow Gauge World magazine. Quite fitting as much of the rest of the content has quite a military bias with some fascinating railway machinery on show in the modelling and prototype sections. 

At the same time, I picked up the latest Practical Classics and there's a photo by me in there too!

Friday, July 15, 2016

Bachmann operating gravel car


I've always been a fan of operating accessories for railway modellers.

Some will know I have a fine collection of Triang Giraffe cars, but I didn't know that Bachmann  in America produced some working models too. Here's a look at the first one I've managed to add to the collection - the gravel car.

Thursday, July 14, 2016

Renumbering locos for Hornby Collectors Club


"Why won't the manufacturers make this particular locomotive?" is a constant refrain. 

Trouble is, even if they release a different number model every 6 months, many classes would take years to work through. You might be luck, but you're more likely to have given up model railways due to old age before your pet loco appears.

Renumbering isn't hard though. There are plenty of transfer makers out there producing superb products to help. All that is required is a little nerve to remove the old number and replace it. The help, I've written up the process for the latest issue of the Hornby Collectors Club magazine.

Wednesday, July 13, 2016

Warehouse Wednesday: Light industrial unit

Daventry factory unit

Here's a challenge. These light industrial units in Daventry are pretty common across the country, but how would you model them? 

Obviously the brickwork and doors are easy enough, but that roof and wall material is shaped and bends around the top of the building. My best guess is some large scale corrugated iron sheet bent with the aid of the some heat - but it's not really the correct shape. Bending it will be "fun" too. 

I suspect I'd cheat and just bend plain plastic over the roof and side, then add square strips for the raised bits. Again, not the right shape, but unless you are an architectural modeller or demand perfection, it would do for the back of a layout. 

Any other ideas?

Tuesday, July 12, 2016

Choosing a soldering iron


Choosing a soldering iron is an interesting job. There are loads of cheap irons to appeal to beginners but the wrong tool can make the learning curve a whole lot harder. 

The first thing to realize is that there are two types of iron - those with the heating element inside the bit and those with the bit inside the element. The cheaper irons tend to be the later, which is less efficient. They work though and many people are quite happy with them. 

With soldering, size matters. Too low a wattage and you'll struggle to heat anything up, especially if you aspire to making an etched kit. I recommend for most modellers at least an 18w iron, preferably 25w. Keen types like me go larger still, the one on the photo is 45w but that's probably overkill if you just plan to do some wiring. My 25w iron lives in the exhibition tool box and is more than fine for trackmaking and wiring. 

Bit size also matter. The photo shows and very small bit fitted to the iron. That's because I've been doing some detail soldering on a kit. The standard bit supplied with the iron - usually 3-4mm wide and chisel shaped - will be fine to start with. Cheap soldering stations often have pointed bits which are hopeless, you can't carry enough solder on them, so you end up spending more to buy a spare set that will work. 

Finally, cable length matters. Soldering stations often have little more than a foot of cable which isn't enough for wiring as you'll spend your time lifting the heavy transformer in the air. Far better to have at least a metre of nice silicon flexible cable. The exhibition iron is fitted with 6 feet of cable so I can reach over the layout. 

My choices come from the Antex range. They are tough and reliable. I started using them because a friend who worked for British Telecom used them, for the reliability. BT didn't want engineers stopping work because of a duff tool. 

I like the range of bits which are readily available from model railway tool suppliers such as Squires Tools. Replacement heating elements can also be acquired and fitted with nothing more than a screwdriver. I've only ever replaced one bit, which considering the amount of use my iron gets, is pretty impressive. 

Price: £25 for an 18w, a couple of quid more for 25w. 

Don't forget you also need a stand to sit the thing in, with a sponge that should be kept damp so the bit can be cleaned regularly. The ones we used on the course came from Toolstation for just over £3. Wiping the bit will be fine to keep it clean. Don't use a file - you remove the special coating that allows the solder to flow. 


Monday, July 11, 2016

Useful modelling suppliers

During last week's course, I promised the attendees that I'd put a couple of posts up to provide a little more information. Since this would possibly be useful to others, and because web links don't work if you hand them out on paper, here we go.

First up, a short list of useful suppliers. I've concentrated on those mentioned during the day rather than trying to list everyone who make useful stuff. These are all suppliers I've used and whose products I'm happy to recommend. There are others but we don't want this page a mile long do we?

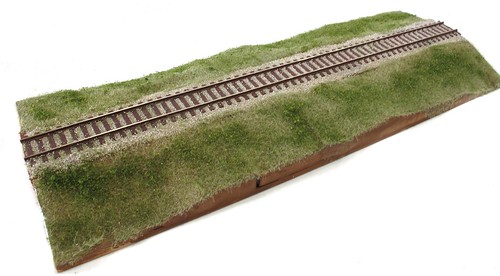
Deluxe Materials - We used the "Ballast Magic" glue to instantly set the ballast on the test piece. Several also asked about water and I recommend the "Making waves" and "Scenic Fibres" as shown on the O gauge diorama. I'm a big fan for the card glue too.

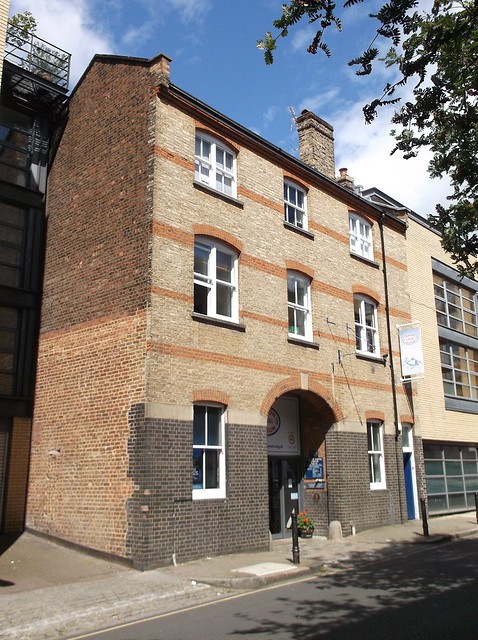
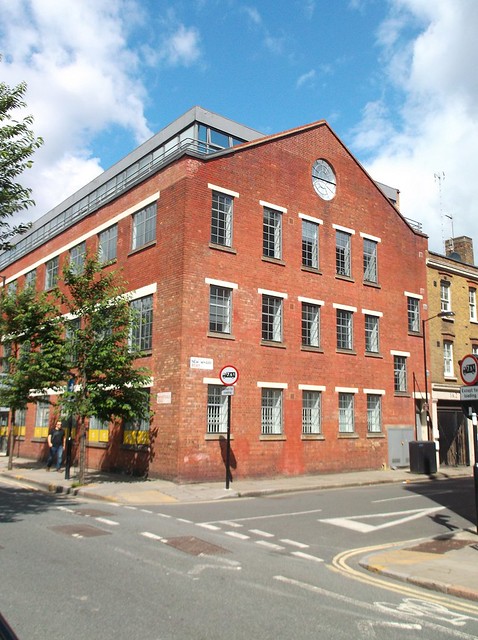
Skytrex - The resin brick walls we coloured in came from here. Excellent range of modular buildings which I've used on several layouts.

4D Model shop - Oddball modelling products including blue foam in thin sheets suitable for scribing to make stone walls. If you are in London, it's worth dropping in for a look although I find myself wondering how I'll carry large sheets of stuff on the tube afterwards.

Woodland Scenics - Suppliers of the ballast and electrostatic grass used on the course. Widely available, although I bought the ones we used from Hattons.

Greenscene - Excellent scenic items and supplier of the electronic grasser tool we used. If you get the chance, spend some time at a show chatting to John and Pat who will be happy to answer scenery based questions.

Gaugemaster - I buy my DC controllers from here as IMHO they are the best. Also suppliers of the polythene puffer bottles for applying electrostatic grass.

Wilko - I use their "Nutmeg Spice" for earth colour over the landscape. Good range of ready wall fillers and other stuff too. Other DIY store suppliers will be just as good I'm sure but it's a start.

Modelrailwayscenery.com - Someone brought along one of their bespoke station sign kits. Nice range of laser-cut bits and downloadable cardboard kits.

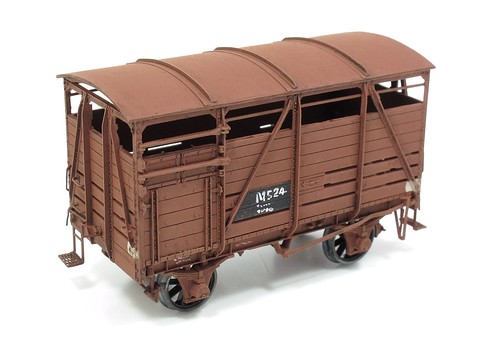
Metcalfe Models - Pre-printed card kits which I mentioned are fun to assemble and provide an excellent guide to anyone wanting to learn about scratchbuilding structures.

Slater's Plasticard - If you do have a go at scratchbuilding structures, you'll need a surface finish and that either means a printed version from modelrailwayscenery or something embossed such as Plasticard. Widely available in model shops.

Don't forget, you can see me in British Railway Modelling magazine every month and I edit the free on-line Model Railway Express magazine.

I hope this helps. If there are any I've missed off then stick something in the comments and add them in.

Sunday, July 10, 2016

Smallspace 2016

Brian Johnson and Eagles

With this years HaMeX Smallspace event celebrating my favourite spacecraft - the Space 1999 Eagle - even getting lost coming off the motorway wasn't going to stop me visiting.

A reorganization of the canvas covered areas freed up a little more space than in previous years. This was handy as one of the non-1999 star exhibits was a freshly restored Shado jeep.

Shado mobile

Based on a Mini chassis, the work carried out on this vehicle is staggering. Even the windscreen has been replaced, and it's not a standard item Autoglass will keep in stock!

Inside of course we were excited to see a pair of original 44 inch Eagles alongside special effects guru Brian Johnson, their designer.

Not only this, a whole lot of 1999 props were on show. Apparently these belong to a Belgian collector who has previously been happy for them to reside in the UK and been shown, but post-Brexit, wants them back in case he might struggle to export them in the future!

Meta probe

K9 was present, and in his cafe there was the usual array of delicious food. The sausage bap was lovely and chocolate cake superb. Not bad for a metal dog who cooks everything with a laser in his nose!


Saturday, July 09, 2016

David Heaton etching


Last week I dropped in to an art exhibition on my way through town. To be honest I'd expected to have a quick snoop around and carry on, but instead I ended up chatting to artist David Heaton about the process of etching - that's not etching as in kits but as in printing pictures.

David carries out the whole process himself from design, to carving, to printing the finished pieces. Many artists just do the first part and farm the rest out to others, but I'd say this makes their work less personal. With art, I like to feel that I'm in touch with the person who created the piece, which is why I haven't bought a Damien Hirst piece or similar as they rely on a skilled, but uncredited, craftsman to do all the hard work.

(Lack of the major funds required is another reason but I'll stick to my artistic qualms).

Anyway, one thing we talked about was the idea of demonstrating skills via video - and David pointed me to the film on YouTube above which he'd put together. It's well worth a couple of minutes of your time - fascinating.

Friday, July 08, 2016

Loco on the plank


View with background

A quick post today showing the a loco posed on my new photo plank. The background is the Isle of Man, which of course never saw any standard gauge steam engines.

Looks nice though, and despite the small size of the plank, it should be pretty useful, which is handy because after yesterdays course, there are 8 more planks in existence.

The day went very well and everyone said they enjoyed themselves. If I ran the course again, there's a few niggles I'd sort - more pots of paint and bottles of PVA for a start, but generally I think this teaching lark has potential.


During the day, a few questions popped up which deserve long answers so I'll try to post these at the start of next week - after all, if one person is asking I assume others are too. 
 

Thursday, July 07, 2016

Today we make a photo plank

Photo Plank

All being well, as many of you read this, I'll be standing in a classroom showing a group of people how to make one of these - a simple photo plank. 

Basically, this is a model railway layout distilled down the minimum you can get away with, and about the most anyone is likely to complete in a day, especially as I'm going to be wittering on about a bucket full of other model railway subject. 

Hopefully all the glue and paint will dry quickly. My laptop will work and I won't forget anything vital. Fingers crossed. 

Wednesday, July 06, 2016

Warehouse Wednesday: London Canal Museum

London Canal Museum

A trip to London last weekend saw me on a warehouse hunt. I thought it would be sensible to add the London Canal Museum to the list.

Tucked away behind Kings Cross, it's not a huge museum but there is plenty to see including the Bantam Tug out the back that I modelled some time ago. It's worth a look at the museum website to see what they have on display. 

Strictly speaking, the museum isn't in a warehouse, it's in an ice house. OK, that's a warehouse for ice, but not exactly conventional. Because of this, I'll throw in an extra photo this week. Don't know much about it other than the building looks industrial, and old factory maybe, and it's on the corner before the museum.

New Wharf corner

Tuesday, July 05, 2016

Production lines


Everyone on Thursday's course will be building a simple "photo plank". Basically, this is a length of track on an embankment. Simple enough but the problem with scenic work is drying times. 

By the end of the day we need people walking away with a completed model, not a soggy lump of wood with green bits. 

With this in mind I've been mass producing the basic plank. It's nothing more than a length of 2X1 on a 3mm thick MDF rectangle, but these all have to be cut and fixed together. Then the track is laid and spray painted. A dozen times. 

I'm in two minds about fitting the polystyrene sides. These will need to be cut to size and one of the fun jobs on the day will be attacking this with a variety of tools, so perhaps I'll leave it off and just take a car load of insulation. 

Monday, July 04, 2016

Non specialist modelling equipment


I'm preparing for the course I'll run on Thursday by buying in some of the supplies needed when a group of people are doing some modelling. A surprising amount are available on the high street, or at least they were last Friday when I went shopping. 

At the back we have hair spray for fixing flock. Straight from Poundland, this is the "extra hold" stuff that really grips scatter material. At the same time I've picked up a bottle of PVA glue which we'll need for electrostatic grass. 

The grass will be fixed to some earth-colour paint and Wilko "Nutmeg Spice" is my paint of choice for this. Matchpots at a quid a go are fine. Maybe for a layout you'd buy a big can but for small projects, these are easier to store. 

Brushes and spreaders also originate from Wilco. Glue spreaders  have always been tricky to find in the past but now I've got loads. I wear them out on my own projects by peeling old glue away using a knife, so those that survive the week (probably all of them) will simply head into my toolbox. 

Obviously, many materials still come from "proper" suppliers but it's amazing what you can find away from the approved sources.

Sunday, July 03, 2016

More for the Beatties collection


Time for a quick update on the Beatties collection. I've bagged a few more goodies to add and I know people are interested.

The first is actually a bag. Not the regularly seen yellow Tamiya RC cars version (got one already) but a more modern radio control one. Won on eBay for sensible money from Justin at modelrailwayscenery.com, it's a design I'd not seen before. Of course, having seen this design, I now discover there is a rucksack version as well...

Another eBay find was issue number 1 of "Train Topics" from September 1968. This appears to be an in-house magazine providing details of new and upcoming products. Aside from fitting the collection, I love the pasted typewritten paper design. Not DTP back in those days, I presume this had to go out to a proper print shop for duplication and the two colour design would have made it extra special. Lead story involves Flying Scotsman though, so not much changes.

Was there an issue 2 I wonder?


Finally, thanks to Nickbrad on RMweb who offered me a Beatties point. I knew they produced some OO track, presumably a badged Peco product, but hadn't picked any up. Now I have a perfectly usable turnout. 

I know this is a silly collection of items from a long dead chain of model shops, but I always wonder what will turn up next. That's what makes it fun.

Saturday, July 02, 2016

Ask and ye shall recieve


For the last couple of weeks, I've noticed that a builder living up my road has had a pile of old lead flashing half under a pile of wood in his front garden. 

A few days ago, on the way tot he pub, I spotted him sorting out his van and cheekily asked if it was scrap. 

Yes it was, and I could take it away. Which I did on the way back. 

Result: I reckon about 15kg of lead suitable for weighting model railways and boats. OK, I had to flatten it and clean the muck off with a hose, but it's a small price to pay for a few years supply. 

Friday, July 01, 2016

M wagon finished

Victorian Railways M Wagon

After adding thebrake lever and guide - a couple of ingenous fold-up etched brass components - I could move on to painting. 

Livery appears to be rust brown so a quick spray with Humbrol 70 did the job. The white patches indicate the side the brake lever is on, there is only one, and of course there is the black patch for the numbers. 

Ideally I'd have used transfers for digits but as I'm only doing one wagon, I'm not going to spend money on a set. As it is, the on the prototype the numbers are applied using a stencil so I tried to copy this with a mapping pen and some ink. It's not perfect but will be fine for now. 

Weathering is just a wash of Games Workshop Earth shade ink to excentuate the detail. Left for a few minutes and then wiped away it gives the dusty appearance of the prototype to my eyes. 

This is a cracking kit. Lovely crisp mouldings with the added etched parts to improve things futher. I could imagine a small layout with a train of these things looking smashing. Not for now though...