Showing posts with label model railway "Handyman Hall". Show all posts

Friday, November 18, 2011

Nearly Warley

Yes, this another post about the Warley Model Railway Exhibition taking place at the NEC this weekend. I know you've read the same sort of thing on other train blogs and if you aren't going or even don't live in the same country, it's probably not that interesting. Sorry about that.

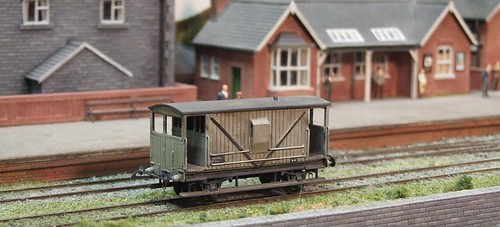
Flockburgh Brake Van

Anyway, I will be exhibiting Flockburgh at the show. Stand E54, about 2/3rd's of the way across the hall from the main door. Later today we'll load it into the car and trundle through some of the back-roads of Warwickshire to the big tin shed in Solihull, next to the airport.

The wheels are cleaned, some of the jobs are done and hopefully everything will be working as you burst through the doors at 9am (yes, 9am !) on Saturday morning. Please come and say hello, it's nice to meet people who read the blog. At least that way I can believe that there are some real humans out there !
Builders Yard

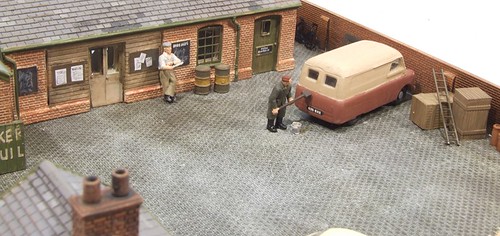
Over on the Hornby Magazine stand (A12) I'll have the Skaledale conversion builders yard on display. We reckon it will fit in one of the glass cases so you can have a proper look and say "It's smaller than it looked in the magazine".
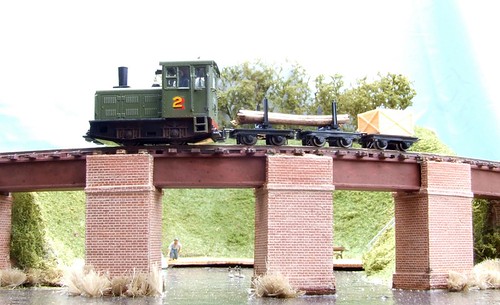
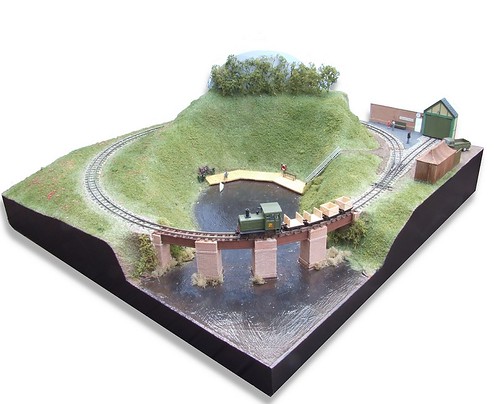
Loco crossing viaduct

Making it's exhibition debut is the Handyman Hall railway. You've seen it in print and on this blog, now have a look at the real thing. I've had to sort out some light as the NEC illumination is a bit rubbish for this sort of thing. In my case, this is a desk lamp rather than anything more sophisticated. I'm not anticipating taking the layout out on the circuit so no great efforts are going to be made in that direction. The model might even be operating, such as it is, if you ask someone on the stand nicely. Well, ask them to turn the controller on anyway.

Warley Show Website

Tuesday, November 15, 2011

Handyman Hall and oil tanker in Hornby Magazine

December already for the magazine world and issue 54 of Hornby Magazine sees me building a Peco Wonderful tank wagon. It's an old kit but still available. Despite its age, this is a very advanced model with working leaf springs, something I don't think is available anywhere else. Even the finescale boys who do spring their rolling stock use a wire behind the W-irons rather than proper, working springs. Maybe we've stolen a march on the MRJ crowd with this !

Down at the clinic I've explaining how to avoid burning your delicate fingers while soldering, stopping your paint from drying out, measuring rail and making baseboards. This last answer sees the first appearance of our late lamented cat Tiger in print. When I was snapping a picture of the part-built boards, he decided to wander up and sit on the corner. Two and a half decades later, he is seen posing in the sunshine.

Finally, this issue is the start of the Handyman Hall Railway series. We move from plywood bits to some rough scenery and a big pile of mess. Unlike the slightly random ramblings here, in print you get nicer pictures and properly edited text. Next month, more scenery, water and buildings.

The Handyman Hall Estate Railway

Tuesday, September 13, 2011

Brown brown, deeper and brown.

Lots of brown

Do you use proper model making products for all your model railway needs ?

I don't. I prefer to use everything and anything as long as it does the job. Model making stuff is frequently real stuff re-packaged into small tubs with a 500% markup. I know someone who took a tub of Halfords molybdenum grease, some little jars and funded his trade stands tip to the show with the profits. My conversion to real stuff happened thanks to a Blue Peter annual back in the 70's where it showed how to make a wagon load of pipes from pasta. Just as good a Merit ones to someone with little pocket money.

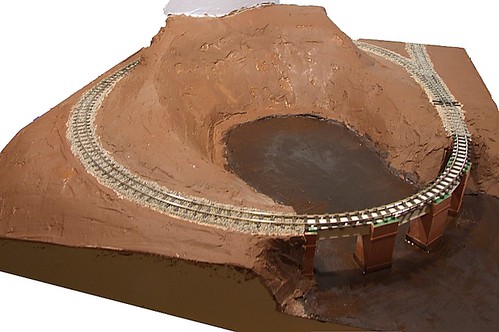
Anyway, the plaster needs a coat of paint as it's not nearly brown enough for my liking. Doubtless there is something sooper dooper available from the trade that all the P4 modellers will flock to buy, but I'm stingy so a couple of matchpots from Wilkinsons will do just as well. I pick the most mud like shades (who has these on their walls ?) and slop them around everywhere. Using more than one shade while wet gets them to mix. I suppose some sort of shading effect could be applied to the hill to make it look even more 3D but I didn't worry.

In fact the hill has me worried. It's looking like something from a film. Close Encounters of the Third Kind to be precise. If you've seen it, you'll know that Richard Dreyfuss builds something very similar in the middle of his train set. And then in his lounge. And then he find the real thing and aliens happen all over the place. Who know what is hiding in the fiddle yard ?

Below the slopes I've started on a lake. At this point it's just a pure coat of the dark emulsion with some black powder paint chucked in it to give some streaks. I'll gloss it up with varnish later to make it look wet but the moment you can see it's all coming together.

Tuesday, September 06, 2011

Just like icing a cake

Plaster slappingMarvelous as insulating foam is, it still needs a surface coat of plaster to smooth things out.

I picked some Homebase own brand filler. Into this I squirted some brown emulsion from a match pot, then made the filler up with water as per the instructions. A stiff mix works better than a sloppy one.

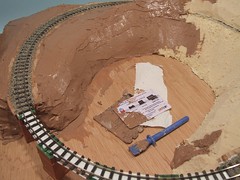
Application is just like covering a cake with icing, which might not help explain but go with it. Take a nice flexible plastic thing - one of those fake credit card things that appear in junk mail is good for this (mine came from LoveFilm). Pick up a dollop of filler and slap it on the foam. Then smooth it around. A tile adhesive comb is handy to have around for sharpening up edges and the little glue spreader gets into the nooks and cranies around the bridge.

Clever modellers will protect the track work with some masking tape before starting. I didn't but only got a couple of blobs in the rails and brushing them immediately with water washed the stuff away. If you don't, clipping it off won't be nearly as easy.

The filler takes 24 hours to properly harden and goes a lighter brown when it does so you can see the state of play. I love this bit of layout building, the model takes shape before your eyes and it's proper messy.

Tuesday, August 30, 2011

Test trains over the gap

Test commences

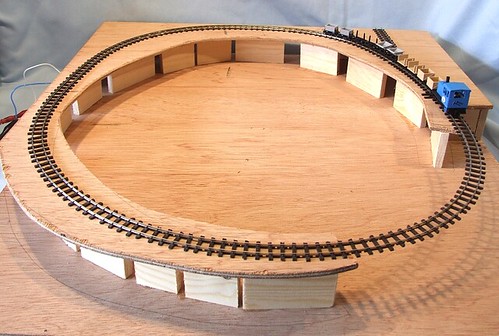
This probably looks a little foolhardy. Running trains over track supported by nothing more than thin air ought to be a recipe for disaster. Luckily the Minitrains stock isn't very heavy and Peco track is strong so despite the mid-air curve, nothing bent as the little train ran around.

With the curves being fairly generous(!) I didn't expect any problems and that was the case. Just to be on the safe side I let the train run round and around for several minutes both forwards and reverse. This was proper testing, not just running trains for the fun of it. Heavens, no. And running the stock at top speed was essential to spot any future problems obviously.

From this angle you can see I didn't get my baseboard line into the bridge quite right and the trackbed around the sides is a bit more generous than it needs to be. Both of these can be fixed now I know exactly where the rails are going to be.

Monday, August 22, 2011

A little 009 project

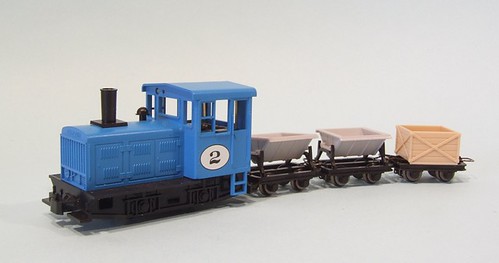
009 Train

When I first saw the Minitrains HO scale narrow gauge pack, I knew it had great project potential. A loco and 10 wagons for £100 - bargain. Add a bit of track and some sort of controller and you have everything required for a small layout, for less than the price of many OO locos.

A little arm twisting saw me liberate the sample pack supplied to Hornby mag for review with the intention of building a layout for the magazine. This is a rather larger project than the ones I normally tackle, a new scale/gauge combo for the magazine too.

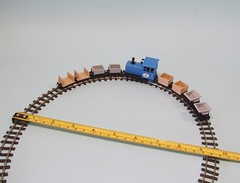
First up I needed to work out just how big a project I was looking at. My hope was that I could be thinking along the lines of a pizza box style layout - a circular track that takes up very little space. A purchase of a couple of lengths of 009 track from Classic Train & Bus, who amazingly had this and a point in stock, saw me testing.

009 Train testGradually a length of flexi was bent until it was a u-shape of under 10 inches diameter. Despite the curvature the little loco ran happily and the wagons seemed inclined to stay coupled up so this looked positive. In my head a 2 foot square board sounded goo and this proved I could happily get the train around it.