Monday, March 31, 2014

H&M Walkbout - the coolest model railway controller ever

HW WalkaboutBack in the 1980s, H&M produced what I consider the coolest model railway controller ever made - the walkabout.

Just look at it. Pure 80s hifi design. Black with green and red highlights. Big, chunky switches to control the direction of the train and its level of inertia.

Best of all, a proper sliding speed control like the ones you find on mixing desks in radio studios. All this attached to the layout via a curly cable.

Overall length, 21cm. Proper big enough but not too chunky to wander around the layout with.

It was sold with magazine adverts that poured scorn on the modellers obsession with buying locomotives. The text took us through the thoughts of such a person - he is dissatisfied with his layout but decides that buying the latest version of "Mallard" will improve matters. It does for a while but soon the feeling returns.

The good people at H&M suggest that if he bought a decent controller, the improved running would restore the fun back to his hobby.

Strangely, this is still true today. How many people would buy another new chuffer instead of a quality controller? I often get asked how my locos run so well and when the reply reaches the point of the Gaugemaster handheld I use, there is always the response, "Well I use an H&M Duette/Clipper myself.". Basically, I use a tired bit of 60s kit to run my trains and can't understand why they don't work as well as yours....

Anyway, I picked this beauty up at Alexandra Palace for a fiver from the second hand stall. Back home, I eagerly wired it up (Note: the input wires for 16V AC are black and white. 12V DC output will come from red and blue) but nothing happened.

Off came the outer case so I could have a look. A quick read on RMweb suggested that dry joints on the transistors can be a problem so I heated these up. Nothing.

Actually, not strictly true. Resistor 30 warms up pretty quickly. Apart from that, no lights, no output, nothing.

HM Walkabout Circuit board

So, I have a super cool controller that doesn't work. Not being an electronics whizz, I've no idea what to do next. Does anyone repair this stuff? And would it be cheaper to gut a Gaugemaster and put it in there?


Sunday, March 30, 2014

London Festival of Railway Modelling

Alexandra Palace
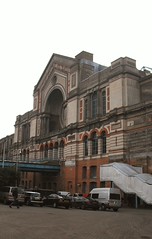
From Leamington, Alexandra Palace isn't too bad to drive to, even on a Friday afternoon. Well, it wasn't last Friday anyway. Maybe most of the Londoners were at home sewing buttons on their pearly King costumes or rolling out the barrel. Whatever, a trip I hadn't been looking forward to wasn't as horrific as expected.

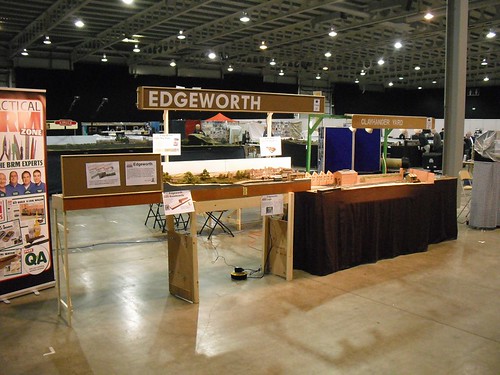
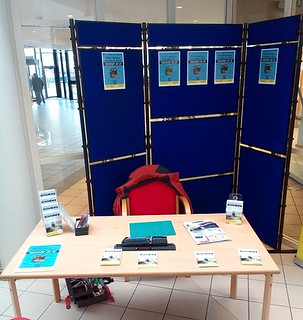
Anyway, as usual, I arrived at the wrong half of the hall, found out where I should be and then proceeded to unload and set up 
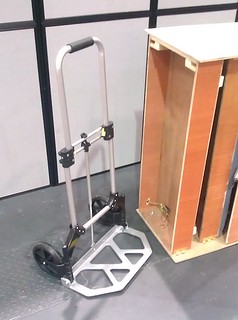
thanks to my new trolley. About half way through this, the rest of the team arrived and we put the Practical BRM section of the exhibits together.

Thankfully, I was able to leave my car in the service area of the hall and cadge a lift to the hotel - a trip of nearly an hour. Andy is used to driving in the smoke, and his satnav got us there as quickly as traffic on the North Circular would allow. Presumably all the Londoners had finished sewing and were heading out to the old rub-a-dub for and evening of watching Mother Brown get her knees up.

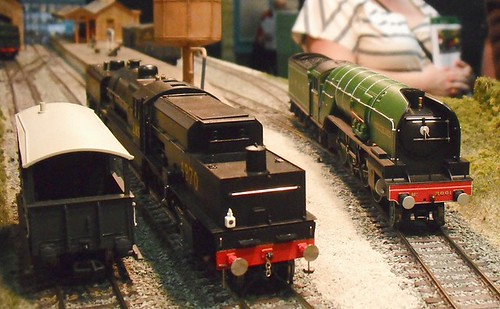
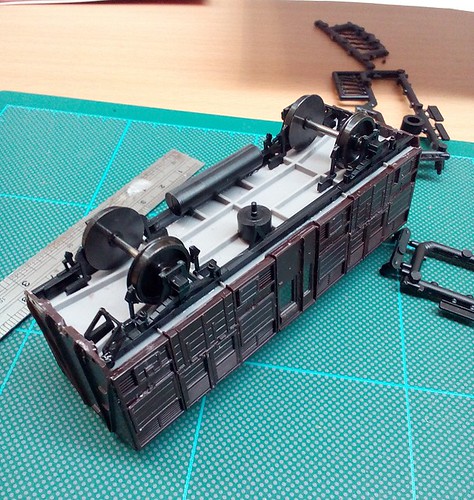
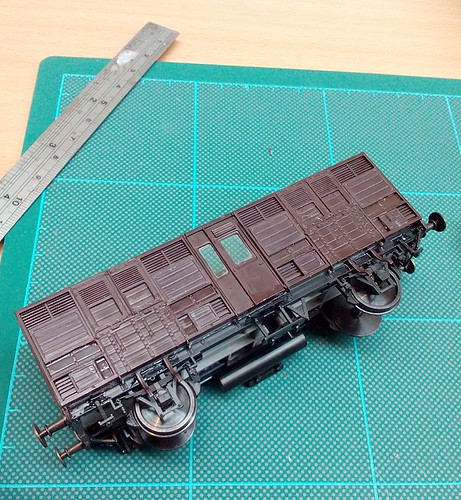
On Saturday, after a hearty McDonalds breakfast (the hotel didn't start serving until after we wanted to be at the hall) we pitched up at the show for a mooch, final setting up and general hanging around. Nick Freezer dropped off a back of rolling stock for the layout. It seemed appropriate as his father, Cyril, had designed the track plan!

Edgeworth

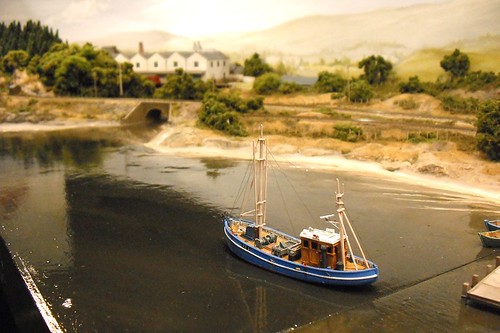
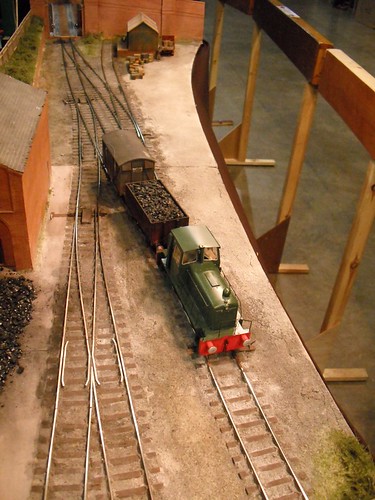
The stock was a mixed selection of GWR items dating back at least 25 years. The Airfix B set looked great, especially attached to a Prairie tank. I'd not planned on acquiring one of these until I saw it on the model - now I really want one as it looks fabulous, even if this and a 2-coach train are about half an inch too long for the fiddle yard.

Advance ticket holders were let in at 9:30am but they all sprinted for the Bachmann stand to see what goodies were on sale at bargain prices. One of our first visitors was a Dutchman who handed me a sealed parcel which contained something I couldn't make out as his accent was strong and my hearing hasn't recovered fully from a recent cold. Needless to say, I put it under the table and left well alone.

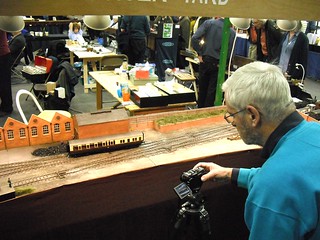
After a while the crowds made it to us and I started talking beginners railways. Well, that and pizza layouts as I'd brought the finished model to the show, where it sat with a big button that made the train work and proved incredibly popular.

With a layout full of stock, new BRM editor, Ben Jones, took it upon himself to be the "Operating Monkey" and make things move. This would have been a bit easier if I'd fitted uncoupling ramps, but a dental tool found in the toolbox was pressed in to service and worked OK. It was certainly interesting to see how well the model worked - not something I've done before. The general feeling from Ben and Andy, who couldn't resist a go as well, is that the layout works really well - a passenger service and bit of shunting makes for fun playing trains!

At 2pm I headed off to the BRM Theatre where just over 50 people were waiting for me to talk about building layouts. I'm not sure how, but I managed to rattle through the 40 minute talk in around 30 mins. Still, everyone clapped politely and there were a few people queueing up at the end to ask questions.

Operating monkeyBack at the stand, the Dutchman arrived to collect his parcel. Apparently it was for the MERG group behind us - their labels were on the back of the boards that made up the stand and he mistook us for them.

I still have no idea what was in the packet.

Chucking out time arrived and once the last people had left we headed back to the hotel. The plan was to go out for a meal but I sat on my bed and woke up just over 2 hours later. A couple of missed calls told me I had long since missed the boat for dinner...

Sunday started as Saturday but an hour later for us. I had time for a quick stroll to discover the bit of London we were in didn't get up very early unless it worked in McDonalds. Fortunately, that breakfast wrap is lovely, something I've never said about their pre-burger food until now.

Again, the crowds took around an hour to find us but once they did, the day followed the same pattern as Saturday. Lots of questions and plenty of chat. We sold out of layout building supplements (set of 3 for 2 quid - a bargain). My talk lasted a bit longer today and judging by the feedback in person and on RMweb, went down well.

Ben had brought along a couple of new locos, a Garratt and P2, that attracted a lot of attention. This meant I didn't feel guilty not operating the layout. Visitors seemed happy to take photos of these rather than see some GWR action. This left me plenty of time to engage with visitors, show them around the back of the layout, explain what I'd done and why. Some even professed to be so enthused that they were going to head home and have a go at their own versions.

At the end, we knocked down and then carried the model down the apples and pears as the cargo lift was only working intermittently. The stairwell was decorated with photos showing various acts who had played the 'pally over the years. I'm pretty sure that The Rolling Stones, Jay-Z and Florence & the Machine have roadies to all this sort of thing...

The trip home wasn't quite as smooth as the one in - Mrs Satnav likes the North Circular and I don't so there was a bit of messing around with me trying to find the M1 and not the M40. How anyone drives in London is a mystery as I only went 10 miles and wanted to start two fights especially with a taxi driver who didn't feel the normal rules of rights of way applied to him.

Still, an enjoyable show, if hard work. If you dropped by to say hello, thanks very much. It's really nice to meet so many readers of this blog. My hope is that a few more people who weren't building layouts before the show are now at least considering having a go. At the start of both talks I asked how many people had a layout and only half the hands went up. There is work to do.

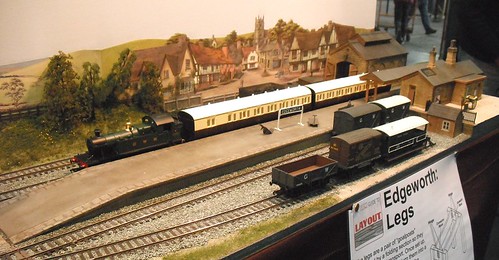
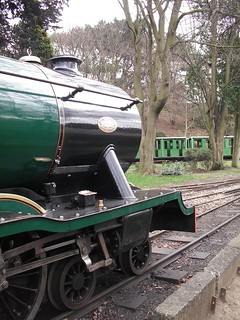
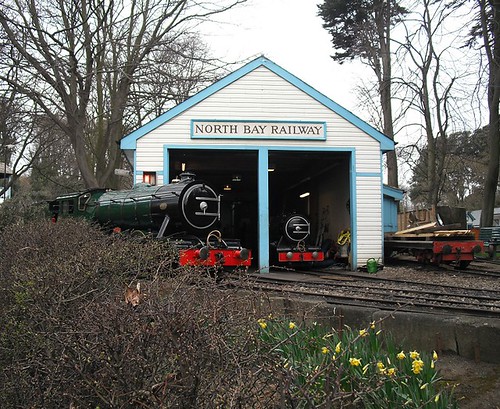
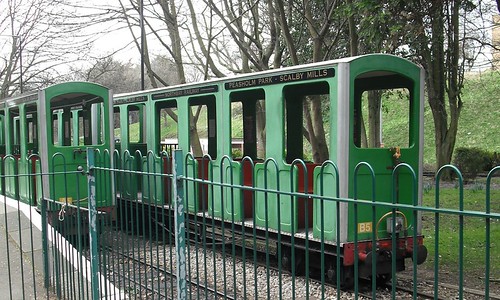
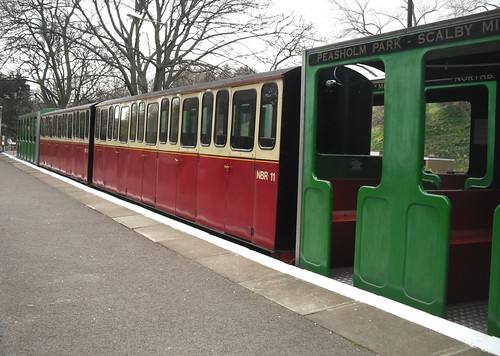
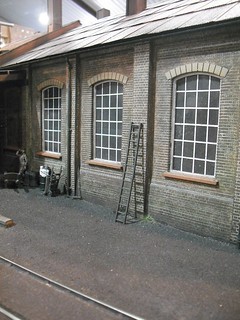
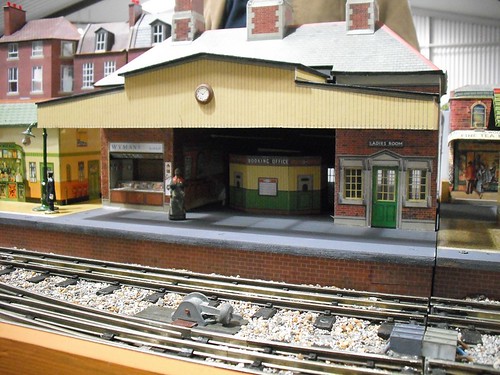
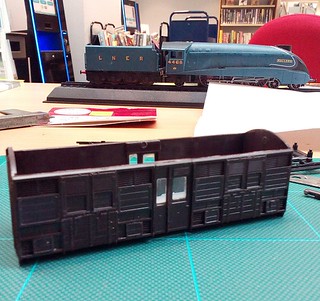
 I'm afraid it's another "I didn't get out much so there aren't many photos" time, what there are, can be found on Flickr.
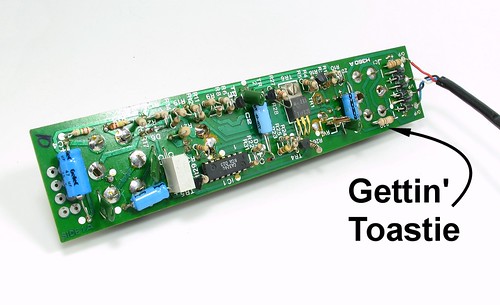
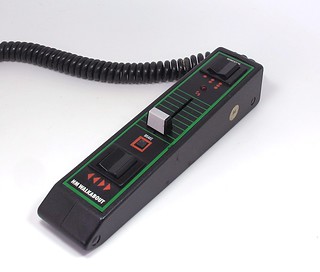
Saturday, March 29, 2014

History under our feet

PO Manhole Cover

Wandering around, it's amazing how some incredibly mundane things survive. Take this manhole cover I photographed in Finchley at the weekend. A perfectly serviceable item, still doing the job it was intended to do after many years, it celebrates a time many, many years ago.

Once upon a time, well until 1981 anyway, the Post Office ran Britain's telephone system. Then British Telecom was created, we saw the end of lovely red 'phone boxes made of cast iron and the introduction of stainless steel items ushering in an age when we stopped making anything to last. Cheap and nasty - that's what we wanted.

The manhole cover dates from the old days. I particularly like the fact it includes the word "Telegraphs" in the casting. Does this place it in an era when the telegraph was still a serious communication tool? I'm sure I've seen these with "Telephone" cast in them. In fact there is probably a specialist website for spotting them...

Of course, if I'd thought about it, I'd have measured this so you could print out the photo and set the result in to your model pavements. But I didn't. It was early in the morning and I wasn't really thinking properly.

I did find a Morris Minor van in the same street though. I wonder if this also used to work for the Post Office?

Moggie Van

Friday, March 28, 2014

The North Bay Railway

North Bay EngineEarlier this week, I took a trip to Scarborough. One of the discoveries I made was that it's a b****y long way from where I live.

The second is that it is home to the worlds oldest 20 inch train ride - The North Bay Railway.

As it turned out, the line starts at Peashome Park which was just behind the hotel I was staying in. Therefore, when I checked out, my first stop was a car park about 3 minutes drive away.

That might sound lazy but while the park, or at least the bit full of pagodas, was a pre-breakfast stroll away, the railway is a bit further but I wasn't sure how far.

Wednesday morning isn't a normal running day but when I strolled over, having ditched the car in a park that was free until 9am, one of the locos was sitting outside the shed.

North Bay Railway

Walking up to the station, I took some photos of the coaching stock.

North Bay Coaches

North Bay Coaches 2

North Bay Coaches 3
 
 
These vehicles are certainly narrow. Apparently the underframes are original but the green bodies date from 1998. The blood and custard set are more recent additions having come from the  Golden Acre Park railway in 2007.
 
Walking along the road, there are some steps up to a staff-only gate. The loco "Neptune" was stood next to his and here it was I received the biggest surprise. Far from being silent as I'd expected, it was rumbling away with the unmistakable sound of a diesel engine. All four locos on the line are excellent steam outline diesel-hydraulic machines dating back to 1931 and the Hudswell Clarke factory.
 
Sadly, there was no chance of a ride along the 7/8th of a mile line as daily services don't start until April. Next time perhaps.


Thursday, March 27, 2014

Screwfix folding sack truck

Sack TruckOne problem with talking a layout (Edgeworth) to exhibitions on my own, is that this can mean carting the baseboards around halls single handed. Ideally I grab someone from the BRM team to give me a hand but as we can all arrive at different times, this isn't always going to be possible.

The boards are liftable by one person and if required I can carry them a short way. Re-starting my gym membership will help too, but really I need a trolley. A sack truck that folds up flat for easy packing in the car would be best.

Looking around I found a couple of options. Robert Dyas on the high street had something but it was only rated to 20kg. I'm not really sure how this compares to the layout, I should have stuck the thing on some bathroom scales, but it didn't sound enough.

Head on down to the world of "Trades" that is the Screfix counter, and you can buy a suspiciously similar looking version rated to 80kg. That ought to be enough. Price £29.99 compared to £19.99 for the lighter model.

In use, you grab the handle and give it a shake to extend. The wheels fold out and foot drops in a same way with a clever geared action.

The foot hooks under the layout and carried it across the floor perfectly. Large wheels allowed me to cross cables and a 1 inch square metal bar that was part of the barriers. So far I'm a happy bunny.

Screwfix Folding Platform Truck

Wednesday, March 26, 2014

Locomotive Superpower for Edgeworth

Super Power at Edgeworth

While exhibiting my beginners layout, Edgeworth last weekend (blog post about this on Sunday) we had a few invaders on the tracks.

In the platform road, a Hattons/Heljan Beyer-Garratt. Sneaking in to the sidings, one of the first production Hornby P1s. Sharp eyed readers will spot a far more appropriate Pannier tank in the engine shed. Only the pannier belongs to me sadly. The others were brought in by the operating monkey left in charge of making trains move.

The Garratt found clearances beside the coal stage a bit tight but managed OK. The P1, with the loco-tender connection set at it's longest setting, handled the tight curves surprisingly well for an 8 coupled machine.

Pedants might suggest that neither machine is idea for a GWR branch line but the visitors disagreed judging by the number of photos taken!

Tuesday, March 25, 2014

Tiny Toolbox

ToolBox

When people ask which aspect of railway modelling I enjoy most, the answer is simple - adding detail.

One of the reasons I build little layouts is that time spent creating fiddly little scenes with tiny details pays off. On a 50ft long model you need a vast amount of detail and even then people are so awed by the size of the model that they ignore most of your efforts.

In a 6ft scenic space, a cameo scene with 2 or 3 figures is a major feature. With a bit of work you can persuade viewers to peer into the scene and when they do, they appreciate the work you've done. My spotting list of animals fixed to the front of The Hellingly Hospital Railway keeps non-enthusiasts enthralled for ages.

Details don't come much more tiny than the one above. A toolbox with spanners made from a Brengun etch of parts. The 2 by 3mm etch contains over 60 tools plus a couple of boxes.

The boxes were folded up and handles soldered across the top. Then everything was dunked or rubbed with gun blue followed by a dry-brush with Humbrol polished steel metalcote.

The results are tiny - that is a 5p coin they are balanced on. I've fixed them to the pizza layout and had to point them out to viewers, who all made suitably impressed noises. Well, apart from those who thought I was mad to do this sort of thing.

Monday, March 24, 2014

Ooops

Never let it be said that I hide things when they go wrong. Sometimes bad things happen and there's no point in pretending they don't. Here's a couple of times when they didn't.

 
First - MiG weathering powders. Open the pot, and about a quids worth of the contents leap out all over my jeans. Trust me, cleaning this stuff up is a nightmare. You have to wash it out of the clothes, the floor, the bottom of your shoes and pretty much everywhere else.
 
Horrid, horrid stuff.

 
Second - Electrostatic grass and the lose top on my Flock-it tool. Wave it over the area to be grassed and the whole lot dumps itself on the model. At least some quick work with the vacuum cleaner, holding a handkerchief over the end to save the fibres, sorted this out. 

Sunday, March 23, 2014

Larger Scale Show 2014

G3 CoronationSome people only go to the big shows. The ones that are fashionable. The ones everyone else goes to.

I've always said this is a mistake and last weekend, I think I was proved right.

The Larger Scale show is a funny beast. It covers everything from O gauge to engineering sizes, not always logical bedfellows. The bulk of the event is 7mm, G1 and garden railway scales. I like this sort of thing but if you are a hard-core OO fan then perhaps this seems less interesting.

Leaning LadderAround the event there were some fantastic models but the star, for me at least, is the O gauge locomotive shed layout 82G.

This is a popular model at normal exhibitions. Large crowds clutter up the front of it. You struggle to see what is going on.

Not here. On the Sunday I visited, half-a-dozen people was the norm. The operators seemed relaxed and kept things moving around. I just enjoyed the scenery. For a large layout, whose main focus is locomotives, there is an awful lot of well modelled and very atmospheric detail. Fire iron filled racks that will have taken many hours to model. A rather simpler ladder leaning against a wall. Both caught my eye and camera.

And I could drink in the scene free from jostling, body odour and backpacks.

Elsewhere, the garden scales were lovely - who can resist the smell of real, working, steam locos?

My favourite model - a scaled up Superquick Main Line station on an O gauge tinplate layout. Very clever use of the photocopier and it looked marvelous.

Giant Superquick

Tradewise there are good things too. A Gauge 3 streamlined Coronation class loco RTR? Projects to produce Glyn Valley Tram locos and even a K1 Garratt in live steam RTR models? It shows that there is a market out there for interesting and well made miniatures, even if the price will run well into 4 figures. These are investment models. Buy and enjoy them and your money is safe.

Who says that there is no money in the hobby? Probably the same people who tell you to go to the "right" shows...

Photos over on Flickr.

Saturday, March 22, 2014

A discrete turntable


Found in the August 1950 issue of The Model Railway News, is this fantastic turntable. I love the neatly made curtain around its perimeter, not just a plain cloth but something carefully tailored and ruched.
 
The layout belonged to PH Leigh and was built to a 6 inch track gauge in 1896 by Messrs. Lucas Davies of Farringdon Street, London at a cost of £3,000. According to the Internet, that would be worth £83,000 today. Quite a tidy sum for a model railway!
 
Not only did he pay for the railway, it was housed in a room 24 by 30ft and featured 520ft of track. There were 2 stations, a tunnel, signal boxes and goods warehouses complete with loading bank.
 
Coaches were detailed inside with mirrors, goods van doors slid and the loco ate real charcoal.
 
What an incredible model - sadly it has long since vanished. The article is written by the owners son who entitles the piece, " A forgotten model railway", but doesn't mention what happened to it. 

Friday, March 21, 2014

The London Festival of Railway Modelling


According to the blurb in the latest magazine:

The BRM Project Layout Edgeworth will also be in attendance. Edgeworth was built by BRM's Phil Parker and searialised in the Janauary, February and March issues of the magazine. Phil will be on-hand throughout the exhibition to answer any questions you have on the construction of this beginner's layout.

There's even a picture of me so I can't escape.

Looks like I better head soutwards today then. See you there!

More details here.

Thursday, March 20, 2014

Paint it white

Canberra kit

David Asks:

I was given an Airfix model of the Canberra as a child and it came out  of the box white. Roughly forty years later I bought the same Airfix  model again (for nostalgic reasons after I had sailed aboard the real  liner) and to my chagrin it was in a military olive colour. I have  never had the nerve to try to build it as painting an olive model  white seemed a bit daunting.

May I ask what colour your model was to start with?

And how you would go about repainting an olive green ship white?

An olive green kit? That does seem an odd colour in which to mould a boat famously painted white. My kit was the "correct"colour so I didn't have any problems.

Despite this, I still spray painted the model white as I dislike self-coloured plastic. It never looks right and worse, if you need to touch a part up, the paint and plastic colours never match perfectly.

Which I think would be my solution. I'd stick the hull together, possible even some of the other sub-assemblies such as the bridge too. Then a spray of Halfords white primer followed by some Humbrol satin white. Build up the colour with lots of light coats - resist them temptation to try and do it all in one hit or the paint will run. Dry the paint between coats with a hair drier or in the sun.

The process will take time but the result will be worth it. Mind you, if you could track down a white kit, you could sell the green one as "Rare" on eBay...

Wednesday, March 19, 2014

Beetle Built

Beetle Built

3 hours steady work and this is the result - a GWR "Beetle" prize cow wagon. If I'd pushed myself, I reckon half an hour could be shaved from that time but this is a hobby, not a race. Besides, I was doing my best to look like I wanted a chat while building it in the library.

That and I'd bought some tiny gingerbread men from the Co-op to sustain myself during the morning and so I had to keep checking they all tasted as good as each other.

Anyway, by the end of the morning, all I had to do was stick the roof on - each as it was an excellent fit on ends and sides. The later are chamfered along the top to provide a descent area for the glue, not a given on many kits.

Underneath, I've fitted some Sprat & Winkle couplings (more on this in an upcoming BRM) which fit well as the brake gear is just out of the way.

Next job is painting and I fancy BR Maroon, which I think might prove challenging as the glazing is in and I've only got Railmatch paint. This is a bit thin and will need to be sprayed. I have some ideas to solve this problem and will let you know how they work out once I've had a go.

Beetle Bottom


Tuesday, March 18, 2014

Below the solebar

Underframe bits

Back to the Beetle story and I stuck the brake gear stuff in place pretty quickly. To help the builder, Parkside mould guide marks under the floor. That's not to say you can't go wrong, just that if you pay attention, you'll put the hangers for that weird GWR brake gear in just the right place to allow space for couplings to lodge under the buffer beam.

Steps on

The steps are a bit fiddlier. In an idea world you would attach the tread to the hanger and then let it dry properly. I was working in a library and knew my replacement on the stand would be taking over in under an hour.

Que lots of fitting bits and then fiddling to keep them straight as the solvent hardened. Much poking and prodding later, they are hanging right, I think. I suppose etched bits would be nice here but the plastic ones don't look too bad to me.

Monday, March 17, 2014

Unusual visitors and test running

Import

We had one unusual visitor to Edgeworth at Leamington - a Korean brass Ho American loco. Not a normal thing to find on a 1930s GWR branch line...

The model had been purchased from another stall and it's new owner politely asked if we would mind testing it for him. Since you don't get the chance to play with these sort of things very often, and it was a quiet period towards the end of Sunday, I was happy to help.

A superb runner, before I snapped the picture above, the owner was happy to remove the packing behind those delicate handrails so I got the best shot possible.

All in all, very pleasant.

This is in sharp contrast to the grumpy trader who saw my layout and demanded I test something he had bought second-hand. It didn't matter that there were people looking at the model or that I was in conversation with someone. He wanted his diesel tested and he wanted it tested now. Nothing and no-one was more important at that moment in time.

Sadly, I'm not very good at this "the customer is always right" stuff, put it in the fiddle yard and said I would test it eventually, then returned to my conversation. He didn't look best pleased but then he didn't realised that the alternative was being told to @*^& off and go bother someone else. Mine may be a OO layout but it is most emphatically not a load of rubbish for testing tired locos.

Half an hour later, the model was returned with a vague report of it moving but stuttering a bit. It can now go to the owners mate who mends these things, pretty much what was going to happen no matter what I said.

The moral: It is possible to have your new toy tested on a layout but that isn't the main reason the layout is at the exhibition. Wait for a quiet time and ask politely. Don't be surprised when your 1970s model doesn't like the modern finescale track and even less surprised if the layout owner isn't wild about letting the loco crawl over his nicely finished model and won't let it out of the fiddle yard.

Also, it's not the exhibitors job to take your toy apart to make it better. We sometimes will do, especially for beginners (who tend to ask nicely anyway) who will benefit from some advice on cleaning wheels and track. After all, we want to encourage people in to the hobby, except if they are grumpy old men.

Sunday, March 16, 2014

Leamington Spa 2014

Early morning Radio CWRAn early start for me - 7:45 at Radio CWR for a quick interview to plug the event. I'm told that it all sounded OK but have managed to avoid hearing it so far. The sausage bap on my return was very welcome.

I know this doesn't sound early but I had to park on the far side of the city and walk across, either that or try to navigate THE RINGROAD OF DEATH. I prefer the walk. Of course, the even really started at noon on the Friday when we were faced with a large, empty hall and had to scurry around marking everything out. To be honest it got a bit sketchy towards the end as despite telling people they couldn't get in until 2, several were setting up by 1.

Laying out a hall is an interesting challenge. Although I wasn't responsible for this one, I've done it in the past. You make every effort to fit things in and still you can't please everyone. On a forum, it was suggested that a headline layout was the first thing you should see on entering the hall. Sadly we didn't fancy persuading either headliner to cut 2ft square holes in their model to fit around the row of pillars occupying the space they would need to be.

Anyway, I was there. How much more headline do you need?

Edgeworth and Clayhanger Yard

Last year I displayed Clayhanger Yard as a set of bare boards with track nailed to them. The idea was that I would bring it back completed. Which I did. But then, my life has changed and I've built another layout since then and since this is now the famous one, I brought that as well. At least it was a static exhibit.

With this in mind, the layout was shown without a curtains and with several printed sheets explaining parts of its construction. Visitors were encouraged to come around the back and poke their heads underneath - something many were keen to do.

The last few show reports have included something along the lines of "I didn't get out from behind the layout" but in an effort to change the story, I made an effort to get out there with the camera. There were many fine layouts but I think my personal favourite was Loch Tat - a beautiful slice of Scotland in N gauge. The loch that dominates the front of the display is particularly well done and sets the atmosphere up well.

Toch Tat

I talked a lot over Edgeworth. Chris Mead generously operated Clayhanger for most of the weekend and didn't complain too much about the 3-link couplings. People said nice things. And it didn't snow. What more could you want?

Oh yes, some photos on Flickr.

Saturday, March 15, 2014

Dragline digger

Bennie Ruston-Bucyrus 54RB

I'm a bit busy today, so please amuse yourselves by looking at these pictures of a Bennie Ruston-Bucyrus 54RB I spotted at the Snibston Discovery Museum a couple of weeks ago.

I don't know much about this fantastic machine, nor the museum I didn't have time to look around. The website looks good so I must make an effort to go back and have a proper nose around. In the meantime, if anyone is a dragline expert, please fell free to fill in the details in the comments. I'd be interested and I suspect, so will everyone else.

Bennie Ruston-Bucyrus 54RB detail

Friday, March 14, 2014

Sides on

Sides fittedSimple task next on the Beetle van. Stick all the sides together.

The parts locate well enough. A little plastic solvent run in to the corners and then left alone to dry as a pair of L-shaped parts. Then these are brought together as a box. Finally the floor drops in and is secured with a bit more solvent.

In case anyone is wondering, the A4 in the photo is a cheapo partwork model plonked on the table to attract attention. I know that building wagon kits is exciting but Mr & Mrs Average don't know we're talking about railways unless they see a steam engine.

Mind you, most of the visitors were much more excited about books than trains. I remember how thrilled I was with a trip to the library as a child and it seems that some kids today are just as excited. While they might have been ignoring me, I'll let them off for having a love of books.

Thursday, March 13, 2014

Dirty Sentinel, Pizza and coupling in BRM

In the first post-Edgeworth BRM of the year, I've not been idle.

First there is a Hornby Sentinel loco weathering project. Regular readers of this blog will know that I was keen to get my paws on one of these as soon as the model was announced. In fact, as far as I was concerned, they could have dropped everything else and just made Sentinels.

In the plastic, the model is impressive, especially for the price. Kitbuilding anything similar will cost twice the RRP, never mind the discounted street prices.

Anyway, having wrestled our review model from Andy's hands, I set about ruining it with paint, filler and weathering powders. This is an industrial locomotive, not a pet so it needs to be properly mucky. While I was at it, I permanently fitted the coupling blanking plate so no-one can have it back and put tension locks in there.

Sentinel

Talking of tension locks, we have part 1 of a series on different couplings for railway models. It seems sensible to start with the things dangling off the front of every RTR 4mm model. We'll move on to alternatives next time.

Finally, I'm building another layout. This one is a bit smaller than Edgeworth. In fact it's only 44cm in diameter. Pizza layouts are quite fashionable right now and I had a narrow gauge train set to play with. Of course, I'm doing something odd, so it's a model loosely based on a British Army depot in Germany. A bit of Germany quite near the bit of Germany where they made Volkswagens...

Part 1 takes the model to bare scenery with a diversion into unsuccessful magnets magnetic paint along the way. Next month I'll finish the model (new editor Ben Jones will be pleased to hear that), but here's a sneak preview.

Ferret

Wednesday, March 12, 2014

Beetle windows and doors

GlazingFirst job according to the instructions, with the Beetle van kit, is fitting the glazing. Plastic sheet is provided along with measurements for cutting.

After truing up the edge I roughly measured these and cut out my rectangles. These were then dry-fitted in to the window rebates. I'm glad I did this as there was then several rounds of trimming a bit off and trying again until a perfect fir was reached. The rebates around the window are less than 0.5mm wide.

Fortunately, there is plenty of spare glazing, I threw away a couple of attempts until I was happy with the results.

Once OK, the plastic was prodded in place and fixed with a tiny, tiny drop of solvent. How I will paint the frames is a mystery at the moment and I wonder if I'll regret not using Krystal Klear later on as I normally do.

Doors inAfter this, the doors are checked for fit in the sides. These aren't symmetrical which is why they aren't integral with the side moldings - you'd need 2 tools for that instead of 1.

The doors took more trimming than expected for a good fit but time taken here is worthwhile as if you wedge them in, the sides bow outwards.

Next, shutters are fitted. No problem here except with the bottom right one which has a label holder that should be at the bottom of the shutter.

I've set them all mostly open as it looks (to my eye) more interesting that way. I'm sure you'll bear in mind the temperature you model is set at when positioning them on your model.

Tuesday, March 11, 2014

Building GWR Beetle

Library Modelling BenchLast week I spent a morning in Leamington Spa library promoting our exhibition. The idea was simple enough, turn up, sit and do some modelling, chat to anyone passing by and hand them a leaflet, go home.

This wasn't just blatant promotion. The L&WMRS is a charity and as such, we are required to promote the hobby to the general public. Thus, we put on this "meet the modellers event" as part of this.

I booked in for Thursday morning and set myself up on the table provided. When I arrived, just before opening, there was a healthy queue of around 30 people. Not to see me, they were here for books.

Anyway, I had brought along a toolbox and Parkside PC64 GWR "Beetle" Prize Cattle Van kit.

The kit was bought many years ago because it was new, supposed to represent a leap in quality for an already well-regarded manufacturer and 'cos it's a Beetle.

Opening out the parts, they certainly looked OK. Moulded in a very dark brown plastic, Romford metal wheels and metal buffers are included. Everything looked clean so I proceeded to see how much I could build in a morning.

Photos, by the way, are taken on my Asus tablet PC. I thought it would be interesting to see how this got on compared to a "proper" camera.

Kit parts

Monday, March 10, 2014

Farewell, Clayhanger Yard

Clayhanger Yard - Last trainBack in late February, I mentioned that my 7mm scale layout, Clayhanger Yard was for sale. At Kettering show, I was made an offer and accepted it. The buyer was keen enough to borrow a packing end board first to make sure it would fit in his car.

The plan was for the new owner to collect the layout after its final show with me, Leamington Spa last weekend. This happened and now the model has a new home.

It's very possible that Clayhanger will return to the exhibition circuit in the future, probably 2 feet longer than it was when I owned it.

Before handing the model over, I took the time to run a last train.

From the stock box, I selected the big, green, Barclay diesel. While not in period for the model, it was the first locomotive to run on the layout.

Behind this we have a wooden wagon with "Parker" painted on the side. Bringing up the rear is my GWR van with a apparently torn roof canvas.

This train ran around the layout, collected a couple of 1 plank wagons, and left for the fiddle yard leaving the layout empty of stock. After this, the lights were switched off, layout packed up and loaded into a new car.

Farewell, Clayhanger Yard. I hope to see you again one day.

Sunday, March 09, 2014

My Paddington shame


I was catching up on some TV a couple of nights ago - the programme I was watching being Series 2 of Danny Baker's "Brushing up on..." This episode being titled "Miniature Britain."

You can catch the programme on the BBC4 website for a few weeks.

Normally I like Baker but the "talking head" bits he does linking snippets of old documentaries together are quite snide both about the subjects and people in them.

Anyway, at 10 1/2 minutes in, there is a film about Ken Rotherham and the amazing wooden models he produces. What caught my eye first was his Banbury engine shed.

"I know that model", I thought, "It was down the railway club when I joined."

Just as this thought is crossing my mind, the film moves on to Ken's masterpiece - a 7 foot long and 4 foot wide model of Paddington station. It has taken him 25 years to complete and is a marvelously detailed creation, all made in balsa wood.

I remember this model too.

Most of it had been donated to the Leamington club sometime in the very early 1980s. What they were supposed to do with it was lost in the lists of time even when I turned up in '84. By then, the overall roof and most of the buildings were kicking around our damp store room.

The scale was something like 4mm:1ft but cartooned so the trains (also balsa) were shortened and the building proportions adjusted to make a pleasing scene. All of which made it useless to the club.

Some of the model survived for another 10 years until a move of premises forced us to take the remaining items, including the train shed roof, to the tip. Quarter of a century's work chucked in to landfill.

I did save a couple of the train sets including a delightful Blue Pullman. These were returned to the family when a couple of members tried to track the model down a few years later.

This is a great shame but does illustrate the problem with old models. If you've built something large and unwieldy, it's very difficult to find someone who loves it as much as you do when you pass on. There must be many layouts in this position, and looking at the programme, several model boats too.

Saturday, March 08, 2014

Kettering 2014

My second proper, serious O gauge show!

Sausage BapKettering is a great show to exhibit at. You have to be there early enough to get a parking space at the hall. Very early as it happens, stands must be set up by 9am according to the paperwork, with advance ticket holders arriving half an hour later. Between agreeing to take part and setting out, it seems that Kettering has been moved half an hour further away than I expected but even so, with a 7am departure we were set up in time for a wander.

Well, set up in time for a yummy sausage bap with red sauce. Just what you need after an early start.

As I've mentioned before, Kettering is a funny show. 6 small layouts and over 80 traders. You know what the visitors are coming for, and it's not to see the trains running.

If there is a recession, it wasn't obvious from the number of boxes walking around during the day. I suspect the O gauge modeller decides that if he or she is going by something, trusting it to the Royal Mail isn't wise. Nor is it cheap. Far better to have a day out at a show and get some retail therapy in.

We certainly had a good day. I was busy chatting and operating most of the time. My aged parental spare operator hates 3-link couplings so I save him from too much chain fiddling. He keeps up the supplies of tea and doubles the amount of chatting we can do. Anyway, I can't hold the fascia up to install it on my own...

Ian Rathbone photographs models on my layoutWe were on the receiving end of many nice comments. People were fascinated by how small the layout was. It must have looked OK too as Ian Rathbone asked to use it as a backdrop for photos of a couple of coaches.

One thing I spotted was that quality paste tables seem to be the legs of choice for the minimum space 7mm modeller. On one side, the Coney Hill Light Railway was on a pair from Wickes, on the other Eastbridge sat atop a B&Q example. Of course, I put it all down to my use of a Homebase version in the magazine a year ago...


Not many photos this time, but those I have are on Flickr.

Friday, March 07, 2014

Preparing for Leamington Exhibition

LWMRSAdvertAnother weekend, another model railway exhibition. This time though, it's the local show, just down the road from me at Stoneleigh.

I'll be taking two layouts: Clayhanger Yard and Edgeworth.

This might sounds ambitious, but I'll have helpers and Edgeworth is more static exhibit than layouts. A lack of stock means I don't have anything to run on it!

Clayhanger Yard will be more impressive as I'll be giving all my stock a last run before it heads back into its storage box as the layout departs with its new owner. Maybe one day, I'll build another O gauge layout for it to work.

I'll be there to chat t anyone who'd like to drop by about all aspect of modelling.

Apart from this, there's a hall full of good stuff - Visit the L&WMRS website for more details.

Thursday, March 06, 2014

Cab steps

Fowler StepsWithout the instructions, figuring our the cap steps is a challenge. The prototype photos show them clearly but I could only find the sides and one tread on the etch.

Worse, the tread appeared too wide for the folded up steps.

Never mind, a strip of brass was cut using the Olfa cutter and then trimmed to length with scissors.

Using chip forks and wooden stirrers to hold the bits in place, a few dots of solder fixed everything together.

I like the large glueing area at the top - this makes it far easier to stick them in place. Hopefully that will make fitment reasonably robust, if not, well, hopefully the superglue join will break before the steps bend.

Wednesday, March 05, 2014

Grab rails and handles

Fowler Body TopChassis assembled, it's back to the body.

Not much to do here for finishing touches. Most of the work was drilling 0.7mm holes to fit grab handles on the bonnet and cab side with superglue. At the front there are 4 handles which I made out of the same wire.

Pedants will probably tell me they should be different thicknesses from each other - I'd reply that the difference in size on the model would be tiny, Anyway, finishing the thing for Clayhanger Yards final show is more important.

The cab front is fitted with a honking great horn as the LMS were different from the Great Western in their realisation that modern motive power shouldn't sound the same as steam engines. I like the look of the trumpet anyway and might have fitted it regardless of the adornment of the prototype.

Tuesday, March 04, 2014

Fowler Brakes

Fowler BrakesIf the Pug blogged yesterday was a case of, "fix it to last the last few days of owning an O gauge layout", then the Fowler shunter is, "Finish building it before you don't own somewhere for it to run."

Needless to say, I have loads of work on so time is precious. Still, the deadline is tight and so I better get a move on.

First problem - All the parts are in the box, except for the instructions.

A few days spend digging around doesn't solve this so I dig through my books and peer at photos to try and work out where the remaining parts fit. The brake gear is well hidden but with the combination of guesswork and the CAD pictures of Ixion's version, I think I figured it out.

The vacuum cylinder mounts at a crazy angle, but prototype photos who this to be correct. I couldn't work out how the handbrake connects to the pull-rods but this is hidden between the frames anyway so I don't care. What you can't see doesn't matter I'm afraid.

The biggest problem was that I put the hangers and rods on back to front at the first attempt. Wagging the superglue joints broke some and a bit of judicious use of wire fixed the others and now it all fits together. Not that you can see much anyway. Never mind.

Monday, March 03, 2014

The worm that turned away

Horrid worm gearPreparing Clayhanger Yard for Kettering, I gave all the locos their usual pre-show wheel clean. Reaching the Pug, I remembered that it needed a little more attention than a polish with the fibreglass pencil.

With power applied to the wheels, the motor whirred away but nothing else moved. Splitting the body from the chassis, the cause was obvious - the worm gear was completely worn away.

Luckily, one end was intact so with a little levering and then the attentions of a gear puller, it was taken off the shaft, turned around and shoved back on. With everything screwed back together, the wheels on the train go round and round again.

With a bit of luck, the gear will survive the final 3 days of exhibition and then the loco can go back to being a display case queen again. Once day, I'll need to find something metal to replace the nylon(?) item, but hopefully this has staved that day off for a while.