Showing posts with label Harpers Yard. Show all posts

Tuesday, July 31, 2018

Topping off Harpers Yard

I've been putting off tiling the Harpers Yard roof. Being too stingy to spring for laser-cut roof tiles, I planned to cut them out of paper and apply each one individually. Let's face it, there are so few it should be a quick job.

Only when I started did I remember that it's a dull job cutting the tiles out (7 by 5mm, a bit big but easy to measure) of paper. Worse, even when drawing lines on the roof, I never stick them on as neatly as I would like, not helped by the tiles all being a very slightly different size from each other.

At least this is a backscene building. Anything further forward will get Wills or pre-cut tiles...

Harper's Yard 
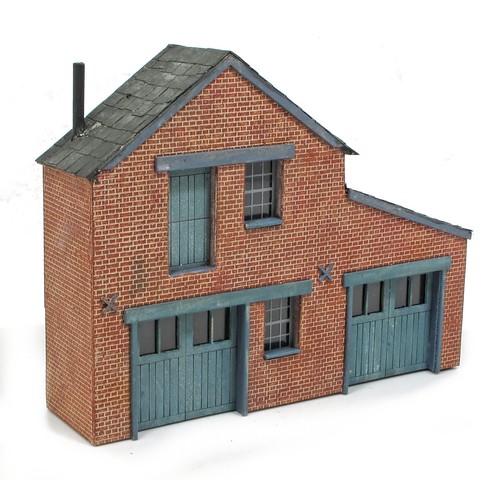
The finished model looks every bit as good as I hoped it would though. Building is simple and the design is perfect. Just what the sort of structure I like. 

Monday, July 30, 2018

"Weathered" doors

Dave asks, "How did you get the effect on the doors of your Petitie Properties brick building? The weathering effect is subtle but effective."

Thanks Dave, but there is nothing clever, I just painted the card board they are made from with a weak wash of Humbrol 144. Being a porus material, they soak it up but don't give a perfect finish. Nothing else was required.

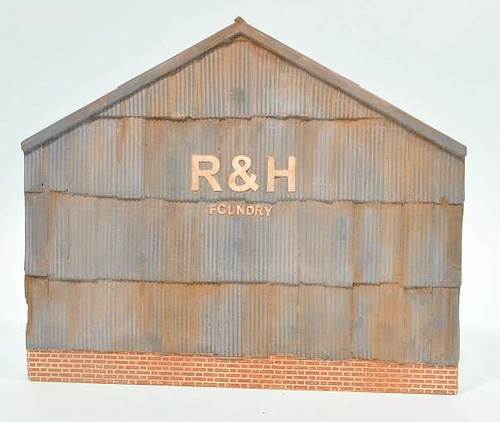
You get the same sort of result when painting plaster buildings. It's important to wait for the paint to dry as it will look very different from the freshly painted appearance. This model from Ten Commandments faded in the same way, and I was really pleased with it.

Plaster buiding

Who says modelling has to be hard work?

Monday, July 23, 2018

Putting brick Plastikard on the walls

James asked "A question though. When I scratch build I sort of work backwards from the brickwork, to avoid odd edges and corners where the bricks seem only an inch wide. How do you go about making up the brick panels to add to a kit like this? Do you only do it after you've built the structure?"


I suspect the answer is "I cheat" or more likely, "I don't do it properly". Working on the basis that there is always a wall nearest the viewer, this one gets the bricks stuck on first with a slight overlap around the edge.

The others are then covered with the plastic butting up to the overlap and given a good wash of solvent (the plastic is stuck to the MDF with solvent-free UHU, never use a glue with solvent) to ensure a nice tight join.

Finally, I trim the overlap back to the edge. If I were proper finecale, I'd then cut the mortar horizontal lines before painting, but I reckon that most of the time I can get away without doing this. Maybe if the building is right at the front, but the work needs to be neat or it will look worse than the 1mm thick blank spot. Personally, I think a bit of dirt will help and perhaps a drainpipe to distract the eye.

Another option (I've not tried this) would be to leave loads of overlap, scribe along the edge and then band the plastic back at 90 degrees so it wraps around the model. A wash of solvent to soften it might be a good idea and you'd need to be careful not to scribe all the way though which will be tricky.

Tuesday, July 17, 2018

The perfect tool to dry-brush brickwork


I've decided that the Harper's Yard brickwork should be painted rather than pencil-crayoned. I'll probably use some of the Robert's mortar stuff too, but the key is - no brickpaper. I want all the finishes to match up and for me that means taking control. 

Dry-brushing bricks is a bit of a fiddle, that's why I evolved the crayon method. It's very easy to get brick colour in the mortar lines. I've found a brush that makes the job easier though, a Humbrol Coloro Number 8

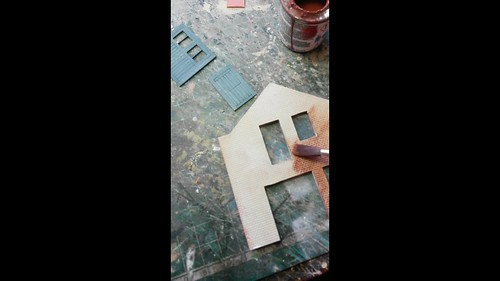
These are the cheaper end of the Humbrol brush range and if I'm honest, not my favourites. They lose their pointed shape almost immediately and are very stiff. But, it turns out this makes them perfect for brick-brushing. See the exciting video below: 

Dry brushing

Shot on my 'phone, you can see how easy the job it. Paint is picked up on the brush, worked off again on the corner of the modelling board and then brushed over the bricks. A shallow angle to the surface is essential, but once you get the hang of it, pretty easy and with hardly any paint where I didn't want it.

I'll go over the surface with brick and a couple of browns to add variation, but the results look pretty good so far. And I'm keeping all those Coloro's safe now.

Monday, July 16, 2018

Back to the yard

Regular readers might remember that last month I started building a Petite Properties "Harper's Yard" kit. I got as far as sticking some Plastikard on the front, and then it all went quiet.

I had carried out a bit more work - the openings were all lined with plastic and I'd got as far as trying the windows. At this point I realsied that losing 1mm off each side made the pre-printed glazing look odd. On the PP stand, the model is covered with their brickpaper and the problem doesn't occur.

So, the lining was carefully removed despite all the effort I'd gone to to put it in neatly. Then the plastic started to peel from the front. Then it tore. Then I'm embarrassed to say, I had a bit of a meltdown and screwed the whole kit up and lobbed it in the bin.

But, I still like the model and with the bit more care, I think I can do a good job. So I ordered a replacement kit which has arrived and I'm back to making progress.

This time, the inside edges of the openings will just be painted. Some need to be a painted wood colour, others brick. While the lack of mortar lines might annoy me a little, once on a larger model, no-one is going to notice. At least I'm not going to tell them.

So, I'm going to learn from my mistakes. A slightly different tack to the build and no more modelling while stressed.

Tuesday, June 26, 2018

Weighty tools

My plan with the front of Harpers Yard is to use Slaters embossed Plastikard bricks rather than the brick paper used on PetitieProperties stand. I think this will blend with the other buildings I'm likely to use better.

Fixing the plastic with Deluxe Materials Speed Bond, I wanted to let the glue dry under some weights. These lumps of steel are offcuts bought from a model engineering show for 50p each and have proved invaluable for all sorts of jobs. They are a perfect fit for this building!

Basic items like the steel lumps are cheap and useful, but not "proper" tools in many modellers eyes. They are wrong. 

Monday, June 25, 2018

Harpers Yard


I've long been a fan of the Petite Properties range - I like the idea of basic but well-designed buildings that you can assemble but have to sort out your own surface texture for. A recent addition to the range is Harpers Yard, a low-relief industrial structure. I've looked at it many times on the stand but resisted buying until I had a use for it.

The photobox has me thinking about a tiny industrial model and that's enough to persuade me to hand over some cash.

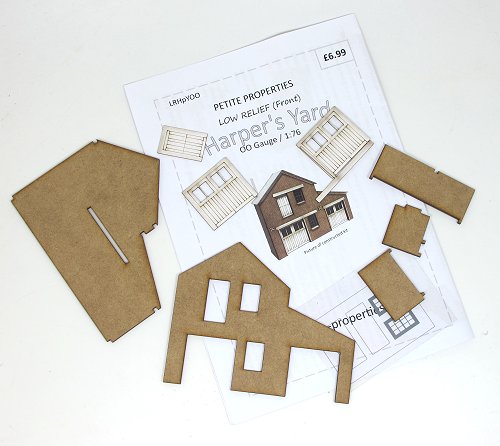
Anyway, the parts are laser-cut MDF with card detailing. Construction starts with the main MDF parts being fixed together to form the back of the building, leaving the front free for the moment.

 I'll work on that next.