Friday, September 30, 2011

Melbridge Town goods shed

Old Goods Shed

Digging through some old photos, I found this one of the layout that persuaded me to stick to small model railways. I was always quite proud of the building despite it being a really simple project.

The layout was Melbridge Town - and 18ft long roundy-roundy with lots of track. My father and I fancied having a go at something bigger than Melbridge Dock and looking at various models at exhibitions we came up with a plan involving long trains running through a station set in a cutting. Behind the running line would be some transfer sidings to the docks. We'd also have a tramway with a town scene. All this was fine but building the thing took forever and we only exhibited it twice before giving up.

Despite this, I was quite pleased with some of the results. 20+ foot of retaining wall looked OK. The buildings were nice too, especially the simple ones like this.

Construction simply required me to assemble a Wills Goods Yard Store (SS63) but replace the wooden legs with something rather more substantial - in this case brick platicard. Using the same companies sheet materials a little office was added on the side too. This sort of modelling is great fun, in fact I'm already thinking another attempt at this model would make an interesting idea for a magazine column.

Since the model was of a station that had seen better days, an etched sign, from Langley I think, proclaimed that the building was available for rent. A little Woodland Scenics course ground cover blended the base to the cobbles to give a slightly run-down appearance. Nowadays I'd probably add some static grass or a bit of plumbers hemp for even more decrepitude.

Now for the plug - read a little bit more about Melbridge Town in my book.

Thursday, September 29, 2011

Facilities for miniature model boaters

Lifebelt and seat in minatureDown at the model lakeside on the 009 model railway, I felt it was time to make sure my model boaters were both safe and comfortable.

The first stage is easy - if anyone is going to fall they will need a lifebelt to keep them on the correct side of the wet stuff (we will ignore the fact that the wet stuff is in fact varnish so if anyone fell in they would get a bump on the head making a crash helmet more useful than a lifebelt). The belt comes from my model boating supplies. Originally it had a set of ropes sticking out from the side but they looked wrong so I cut them off. Real lifebelts do have ropes to make them easy to grab in the drink, but these stuck out at all angles.

Once I did this I realised I could have just cut a disk from plasticard and then knocked a hole in it for the same effect. Never mind.

The support is from scraps of plasticard. They all seem pretty similar, a backboard and small sloping roof nailed to a post. Green is the most popular colour too, presumably to blend in with the countryside.

Since model boaters tend to be old, a nice bench from the Merit range suitably painted will give them somewhere to sit down. People overlook these bits as they have been around since Cyril Freezer was in short trousers, but with a little cleaning up and a lick of paint, they are pretty good. This one looks nicely municipal too.

Finally, I need someone down at the lakeside and handily, Monty's Models produce a suitable figure and his yacht. To be picky, the boat looks more like a traditional pond yacht rather than the sort of radio control boat we now use but it is still possible to build one of these from a kit and you could RC it so it's not out of the question. Maybe I need to build a 1/72 handset to fend of the model boat anoraks (sou'westers ?).

Mini model boater

Wednesday, September 28, 2011

Failed experiments in pagoda painting

Camo pagodaNot everything I try works, but since you lot seem to like to read about failed experiments, here goes.

The plan:
Paint the pagoda in rusty colours.
Slop a bit of wet salt on the surface.
Spray with a creamy colour - just a thin coat.
Remove salt.
Look at wonderful building with rusty base and patched breaking through.

The problems:
The salt wouldn't come off properly and stuck in lumps
The rusty colours didn't show through as I hoped
It looked rubbish.

Result - respray the model properly and attack with weathering powders.

Still, nothing ventured, nothing gained eh ?

Tuesday, September 27, 2011

Whitemetal pagoda

Whitemetal pagoda buildingThe GWR had some funny ideas and one of the odder ones was the choice of pagoda roofed buildings for branch line halts. Distinctive but, why ?

Anyway, I decided that the Handyman Hall Railway should have one of these in the station area. It's not that I'm going all Great Wobbly, just that preserved lines have a magpie like tendency to acquire little buildings and re-erect them in odd places. I think that my miniature volunteers have bagged themselves a pagoda and decided to put it in the yard to impart some big railway atmosphere.

Well, that and I found a whitemetal kit for just such a building in my spares box and thought it would be fun to give it a home on the layout. Please don't ask me who made the kit however as the bag was unmarked.

Even if I did work it out, or someone answered the question in the comments, I'd not loose sleep trying to find another. Wills produce a very nice version as part of a halt kit. One of the RTR firms does a resin version too. Either would be easier to use than the poor-fitting parts I contended with.

To be fair, pagoda's aren't easy to make. There are curves and angles that make the kit manufacturers life difficult. As it was I quickly decided that only low-melt solder would do the job here. Glue is fine if the bits all fit well but soldering is better when you need to fight the kit. It's faster and if a joint breaks it can be remade in seconds. Also, the metal can both attach and fill the gaps between parts, very handy on the roof which would have been a tad leaky if I hadn't worked on it a little.

Monday, September 26, 2011

Making loco wheel balance weights

Loco weights

Not being happy with the supplied C15 locomotive balance weights, I decided to have a go at making them myself. This being a 7mm scale model, I didn't think the result would be too fiddly to handle, in fact I reckoned I might make a reasonable job of it.

My material of choice was thin black plasticard and the plan was to use the old set of compasses with two points to scribe the curves. I've found in the past that if you scribe them back and forth, the plasticard can be snapped along the lines without any further cutting.

The outer line was easy - measuring the outside diameter of the spoked section gave me this. The inner curve is larger but by an amount I couldn't work out. If anyone knows the match for this, please enlighten me but with a method suitable for someone who only scrapped an "O" level in the subject.

compasIn the end I used good, old fashioned trial and error. After a few goes I got something that was about the same depth as the etched weight and carved the moon-shaped out of the plastic. These were then stuck in place using superglue.

The glue seemed to affect the plastic a little, probably because I used quite a lot to build up the depth. A little green filler and some smoothing down soon sorted this though.

Once problem I did have was working out how far around the wheel the weights should be fitted. The photos appear to show the centre matching the crank-pin sometimes and other being slightly offset. I went with the former but if someone can prove me wrong then I might be up for modifying them.

Sunday, September 25, 2011

Phil's Model Railway Fillets

Promted by my work on the novel, I decided to dip my toe into self-publishing with a collection of old articles that have appeared in various society magazines over the years. None of my mainstream mag stuff, just the fun bits I wrote for newsletters and the like.

The result is "Phil's Model Railway Fillets". 59 pages of paperback book which I hope will entertain and possibly even inform the reader.

Contents:
My modelling bench 
My first scratchbuilt wagon 
Scratchbuilding a simple wagon 
Building a Palbrick 
Modelling in the public eye 
Perfecting Percy 
A scratchbuilt Z5 
Souvenir locos 
Modern(ish) Music to Accompany the Manufacture of Miniature Railway Models. 
Road vehicles 
What's under the sink ? 
Melbridge Town - A cautionary tale. 
GWR 1361 Class
or putting Humpty Dumpty back together again. 
Eating custard doughnuts in the gallery 
10 Handy Hints 

The book can be purchased now:

£4.75 (plus postage) for the print version
£2.50 for the downloaded version

The book is printed on demand by Lulu.com so take a few days to arrive. The buiying process is a bit fiddlier than I'd like too but not too difficult. I'm trying to get it listed on Amazon but this seems to take a long time so I'll post here if and when it happens.

Saturday, September 24, 2011

Ian Allan - Waterloo

Ian Allan WaterlooIf there was an Ian Allan spotting book for Ian Allan shops, I'd have just crossed off another one. This time I've "copped" the Waterloo branch leaving me only Cardiff to go.

The branch is tucked away under 5 minute stroll from Waterloo station, in a side road that is pleasent and full of interesting shops. Google streetview wasn't aloowed down it so you'll have to go and take a look yourself. While I was there, the street was home to a food market with dishes on sale from around the world.

The shop has this wonderful 1960's or 70's tiled facade. It's like nothing else nearby or even very much else that isn't nearby. I suspect the window shape is a happy accident but it does look similar to the windows on a Mk1 coach.

Inside, as you'd expect, there are lots of books. On a raised area cabinets full of model railways care found with a good selection of accessories and bits'n'pieces.You can also find Humbrol paints and some materials. I don't think the range is as wide as the excellent Birmingham store but there's not much in it. In a model shop-starved capital city, it's certainly well worth the visit.

A full list of Ian Allan shops can be found here.

Friday, September 23, 2011

Brakes and balance weights

Brakes and balance weightsTaking a break from narrow gauge matters, I've been back working on the C15 engine. Maybe I'm missing the smell of burning flux !

Assembling the brakes is simple enough, there is a hanger into which a shoe is soldered. Since both parts are etched in nickel silver, tinning the parts, holding them together and then heating the lot worked well with nice clean results.

Attaching them to the loco itself was carried out using an acid free flux as I can't stick the chassis in the sink to clean it off. Once hung, the rigging goes on underneath and all seems to fit very nicely. It doesn't seem to align very well with the handbrake lever but I suppose you can't really see under the loco so this won't be a real problem.

What is a problem is that the balance weights don't seem to fit the wheels very well, The curve on their outermost edge and the inner curve of the wheel don't match and just like when I travel on a tube train, I certainly do Mind the Gap.

Thursday, September 22, 2011

Building detailing

Building in the raw

Sticking with card for the time being, the building detail was built up from off-cuts of a sheet intended for use in a domestic printer. It's cheap, reasonable quality and I've got several packs of it.

Cutting strips and sticking them in place with Rocket card glue, the detail appeared quite quickly. As a guide, I built the entire model from start to finish while watching "The Davinci" code film. Scratchbuilding doesn't have to take ages once you get your hand in as long as you don't want to build to Pendon standards.

Most of the job involves cutting strips of various widths and occasionally, such as for the barge boards, building them up in layers. Some needed to be scored with the back of a knife, like the doors. The only plastic is the brickwork and tiny bits for the hinge pins.

You'll also spot that the platform has been built up to two layers of Daler board. I'm glad narrow gauge platforms are usually ground level as it saved me loads of work. Is this why people like it ?

Wednesday, September 21, 2011

Cardboard tile cutting

Tile cuttingNormally I like to top model buildings with Wills moulded plastic slate roofing but for Handyman Hall, I thought that something different was more in keeping with the economy methods employed elsewhere. On that basis I cut out individual tiles from cardboard.

Each tile is a rectangle about 4mm square. Before cutting I marked an extra line about 1mm in from the edge to be the overlap. Then I set too and made a little pile of card.

Fixing is easy enough, smear some PVA on the roof. Pick up each time with the point of a knife and put it in place. It helps if you've drawn some guidelines on the roof first. I know everyone goes on about wavy tile lines being something to aim for, but if you look at real roofs, this is the exception rather than the norm. Maybe on buildings near collapse but this one has been maintained properly thank you very much.

Tuesday, September 20, 2011

Freelance card buildings

Building in the card

One of my ideas behind the 009 model railway was to try and create lots of vantage points to watch the trains from. In the corner of the board I'd put in a siding to the engine shed and while pondering how this would work out, had an idea that this would be near the car park. That way, the boaters could get their models reasonably near the water and the punters who just wanted to ride trains wouldn't have to wander too far from their motors.

Now I don't have space for a car park but if I assume that the Handyman Hall estate has a walled garden or two - something the Victorians liked to build - I could block the view with a simple bit of brickwork. Watching the trains from behind the wall seemed fun and provided a limit to how much of the tiny scene you can see.
Beside this we have a shed based loosely on the ones at the Evesham Vale Light Railway. Again, there isn't space for this in it's entirety but one of the tricks micro-layout use is to model part of a building so we have about 10mm's worth of it. Not ideal but I ran out of baseboard !

With no plans to work with I just drew things until they looked right. As long as the loco will go in the door, nothing else really matters. Sometimes this is more fun than worrying about every last mm.

Monday, September 19, 2011

Mud, glorious mud

Muddy Path

With my model, model boaters tramping to and fro to the steps down to the lake, the path they wear is going to get a bit muddy. I suppose they could have laid some slabs to keep their shoes clean but you know how it is, playing boats is more fun than DIY.

Starting with my grassy bank I decided to try out some Greenscene Textured paint - after all the stuff about non-modelling materials last week you're probably surprised by this. On the other hand, lots of people make the stuff and this is a proper British product (waves Union flag) so by buying some we are supporting the economy and lifting the country out of depression etc. etc.

After giving the bottle a shake I opened the top to find it a bit like the Crown stuff I used last week except three times as thick and a much darker mud colour. Splodging it around (you don't really paint it) the fibre grass sticks down well. Leaving it to dry gives a brown mess, just like a real muddy track.

Sunday, September 18, 2011

VeeDub trams

VWT5 trams

I'm a bit short of time today so just a quick post - how about these VW Type 5 vans running on Amsterdam tram tracks ?

The photo turned up as I was digging through some old pictures for a project I'm working on (watch this space kids). All I remember is that around 10 years ago I was dispatched to an obscure bit of the Netherlands for work. Since I'd blagged a train ticket, I reasoned I might a well take a couple of days holiday while I was over there. What a surprise to be greeted by this sight as I exited the railway station.

From memory, you couldn't ride the buses, they were just an advertising thing - but what an advert.

Now if only I knew anyone interested in model railways and VeeDubs, we could have the makings of an interesting project...

Saturday, September 17, 2011

HobbyStores - Camden

Hobby Stores - CamdenStrolling around Camden town, as us fashionable types like to do, a shop frontage caught my eye. Palmers pet stores claims to supply talking parrots and naturalists, or at least used to before it became a cafe. So entranced was I with this old shop name, I got a real shock when I glanced next door and spied a huge PT boat and a couple of massive gliders in the window.

An unexpected model shop !

To be fair, if I'd done a bit of research on t'web I'd have spotted it but I was there for literary reasons rather than model making ones. No matter, when you find a new model shop you have to investigate. Or I do anyway.

HobbyStores specialises in radio control models. Not box-shifting RTR ones but actual kits you have to put together. As you walk in there are plastic kits on the right but as the shop opens out you find boat kits, lots of of car kits, model rocakt kits and aircraft.

In fact it's the fly boys toys that really catch the eye. There are several of them hanging from the ceiling. A Gee Bee really caught my eye, well they are quite unusual planes. At about 2 1/2 fee long, it was very impressive, and upside down.

The staff were busy unpacking more stock but were really helpful and seemed to care about the hobby. I think they are real modellers and seem to know their subject - very important here.

My only purchase was 3 rolls of masking tape but a very impressive range of tools and materials is on offer including a few that were new to me. I spotted Humbrol paint, balsa wood, K&S Metals but there are more. A big chunk of one wall along with many shelves are devoted to these with decent stock levels - no keeping the odd item and then taking forever to re-order I suspect.

A very nice shop. Well worth a look if you are in the area. If not, try the website: www.hobbystores.co.uk

Friday, September 16, 2011

Grass'n'Flock

GrassnflockStatic grass is nice but I didn't want a lawn on this model railway, I wanted the sort of unmown scrub you see on hillsides.

To get this effect, I waited until my nice nylon fibres had dried and then gave them a waft of hair spray followed by a sprinkle of different shades of green Woodland Scenics flock. Other flocks are available but I had this stuff to hand. For this job I used the finest version but the coarser variants might produce some useful effects if you want the really over-grown ground found where only sheep and goats dare to tread.

Whisper it if you need, but hair spray is basically glue in an aerosol. OK so it has perfume but it's still not a lot different from SprayMount. In fact I bet there are a good few metrosexual graphic designers who've experimented when they are doing a layout and run out. Likewise, how would you explain Jedward ?

Anyway, get the cheapest stuff, I use a can sold as "Clubbers Extra Hold" which is presumably something for Canadian Seal farmers to keep their barnets under control in the icy wastes. Or maybe for those working for Jacobs producing the delicious chocolate covered biscuit (Club Biscuit, keep up. I'm trying to make you laugh as it's Friday).

Whatever, it seems to last for many years in the role of sticking ground foam to stuff. The smell dissipates after a few minutes too although I have wondered if a quick re-application wouldn't be a bad idea when I get certain people in front of the train set at a show...

Thursday, September 15, 2011

Noch Grass

Noch Grass

All that brown paint needs to be covered in something and the fastest and most realistic option is static grass.

Now the fashionable way to do this is with a Grass Master static flocking device.It's good but I'm too stingy to buy one. Anyway, if I did I'd go for the Greenscene version which is cheaper and just as good. However there is an even better priced version - the original Noch puffer bottle. (Yes I know you can make your own, I did but simply prefer this method and it's my blog)

Back in the early days of static grass, this is how we did it. Paint PVA on the area to be grassed. Let it dry a little then puff the nylon fibres out of the bottle on to the surface. Because the bottle is made of polythene a charge is applied to the nylon and it sticks up like, well grass really. When the technique was first described in the august Model Railway Journal, this was how it was done and the results were good. And they still are even though a new toy is on the market.

Cost of the bottle, under a fiver. The fibres are the same as you'd use with other methods so if you find yourself wanting electrical stimulation for your blades, you haven't wasted much money.

Wednesday, September 14, 2011

Crown Textured Emulsion

Textured paintAnother non-trip to the model shop. It seems that after yesterday being spent wondering who wants mud coloured walls, I now have to consider that there are even people who want rough, mud coloured walls. How else do you explain textured emulsion ?

The paint seems to be perfectly normal emulsion that someone has thrown sand into. Someone can pick me up on the precise manufacturing details of how the silica is held in a delicate suspension within the pigment base but let's be honest that's what it is.

Never mind, two and half quid buys a decent sized pot and a quick coat on the untreated plywood of the station area shows it works well. You can see the wood grain has almost gone and we have texture. Exactly as it says on the tin.

Until I put a new label on the tin saying it is "Fine scale non-metaled road surface suitable for P4 layouts" and charge a tenner for it that is.

Textured paint results

Tuesday, September 13, 2011

Brown brown, deeper and brown.

Lots of brown

Do you use proper model making products for all your model railway needs ?

I don't. I prefer to use everything and anything as long as it does the job. Model making stuff is frequently real stuff re-packaged into small tubs with a 500% markup. I know someone who took a tub of Halfords molybdenum grease, some little jars and funded his trade stands tip to the show with the profits. My conversion to real stuff happened thanks to a Blue Peter annual back in the 70's where it showed how to make a wagon load of pipes from pasta. Just as good a Merit ones to someone with little pocket money.

Anyway, the plaster needs a coat of paint as it's not nearly brown enough for my liking. Doubtless there is something sooper dooper available from the trade that all the P4 modellers will flock to buy, but I'm stingy so a couple of matchpots from Wilkinsons will do just as well. I pick the most mud like shades (who has these on their walls ?) and slop them around everywhere. Using more than one shade while wet gets them to mix. I suppose some sort of shading effect could be applied to the hill to make it look even more 3D but I didn't worry.

In fact the hill has me worried. It's looking like something from a film. Close Encounters of the Third Kind to be precise. If you've seen it, you'll know that Richard Dreyfuss builds something very similar in the middle of his train set. And then in his lounge. And then he find the real thing and aliens happen all over the place. Who know what is hiding in the fiddle yard ?

Below the slopes I've started on a lake. At this point it's just a pure coat of the dark emulsion with some black powder paint chucked in it to give some streaks. I'll gloss it up with varnish later to make it look wet but the moment you can see it's all coming together.

Monday, September 12, 2011

Slag Ladle and nightime bungalow in Hornby Magazine plus the bear costume in BRM explained

Octobers Hornby magazine is already widely regarded as the best ever and not just because of the stuff I wrote in it. For your money you get a big fat issue with the first part of a nice looking card kit.

From me, we have:

A Slag Ladle from an RT Models kit
Lighting up a Hornby Bungalow
Several answers in The Clinic
Reviews of containers and George Dent's airbrushing book

I'm very pleased with the wagon as it's the most complex kit built for the column yet and I had to employ some interesting techniques to get it together. The problem with writing for beginners is that you can't really assemble a whitemetal kit using solder - it's scary enough for modellers with a bit of experience under their belt to work with low melt parts and a hot iron. On the plus side, this makes me innovate and in this case I worked out a method involving epoxy resin glue.

Chatting to Robert of RT Models, he assembles the test models using superglue which proves it can be done, and that at least one manufacturer tries his kits before selling them. It's fine to do this if you are confident or have a never ending supply of bits, but for my audience I reckon that some adjustment time is more helpful.

Now, my second magazine appearance this month is in BRM where I'm the subject of a 30 second interview. Something carried out so long ago that it was before I failed to renew my L&WMRS membership and Radcliffe & Maconie were on Radio 2 instead of Radio 6.

The sharp eyed will notice that I am pictured wearing a bear costume. I know this because at least one person already has.

To explain, a few years ago, I was in charge of the Warwickshire County Council website. The county shield has a bear on it. The country museum has a stuffed bear in it. The Council had at least 2 bear costumes.

Looking to promote our new Events Guide, I foolishly said to the press office that I would be happy to do anything we needed to get some coverage. On wandering down to the office at the appointed time for the photo, I was greeted by Caroline. And a black sack. In the sack was a costume.

20 minutes later I was posing for the local press dressed as a bear. Needless to say, since I had the head on, I could have just sent anyone !

Mind you, it didn't stop me. I definitely wore the thing at least twice more. Back in those days I needed padding to do it justice too. Sadly, I think I'd be better fit now !

Sunday, September 11, 2011

Keeping it real (and small)

Last week, Chris Nevard wrote a post about trying a realistic sized project. I popped a comment on the bottom but as I typed, I quickly realised that I was going to write loads, and if I'm doing that, it can go on my blog.

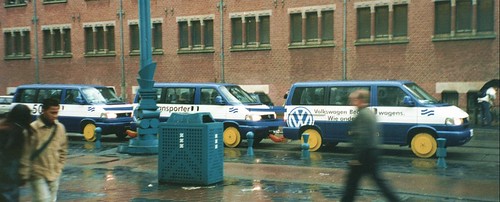
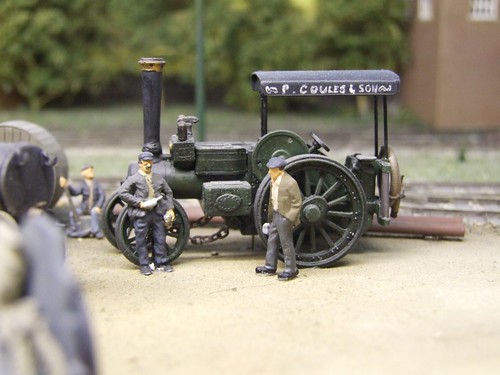
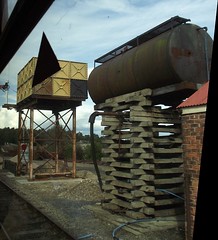
Chris's example revolves around a beginner approaching him at a show saying he was going the build 'Caerphilly in P4'. I don't know the station but Wikipedia says it was a 4-way junction which means lots of track, lots of trains and plenty of operation. Basically a great model to see at a show if it's working properly, but a heck of a challenge to build, especially if you've never seen a bit of Peco before.

Over-ambition seems to be a perennial problem. I have lot count of the number of people who have talked about starting a model railway but after a few minutes it becomes obvious that they want to build Kings Cross but never never hammered in a track pin. The problem is probably that they have seen big layouts at shows and want a bit of the same excitement. Who doesn't love to see long trains trashing round, appearing and disappearing from all directions ? And why doesn't the idiot behind the little shunting layout realise that that's what they are going to build and not some 6 foot long bit of wood with locos pottering about.

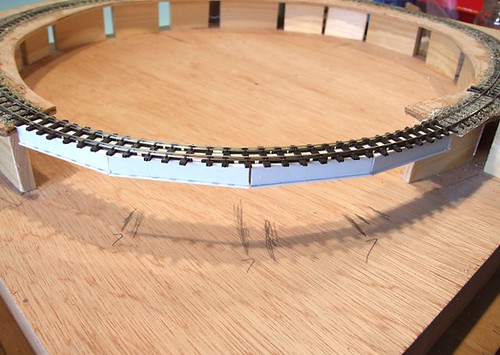
Well, for once the idiot behind the shunting layout knows more than he is credited with. You see, behind the enormous roundy-roundy layout is many thousands of hours taken up with building wooden bits, laying track, ballasting the same and then wiring it up. On a big layout that can 2 or 3 years before a train turns a wheel in anger. That 2 or 3 years is pretty solid model making time too. If you decide that you can't face another Sunday of picking stones out of pointwork then it can be 4 or 5 years, of over a dozen judging by one pair of blokes I spoke to at a show recently.

Big layouts really need big teams of people working on them. 
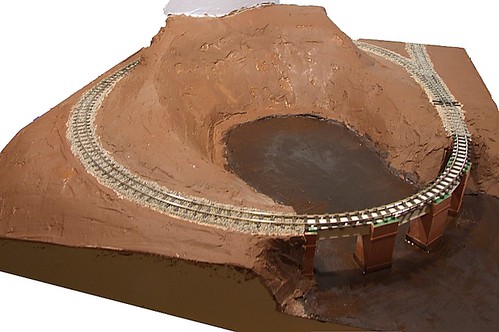
The L&WMRS layout "Clarendon" is a big P4 project, certainly one of the largest and most complex on the circuit. It is also the modelling output of a team of experienced modellers. 10 years worth of output. A long modeller can multiply this by 10 to get an idea how long it could take to achieve the same result.

I suppose it's all down to what you enjoy. If operation is your bag then some Peco track and a big pile of RTR trains would be the best bet. You can nail your rails down quickly and if the wiring goes OK, start playing withing a few months depending on the complexity of your plan.

On the other hand, if model-making is your thing then a small layout will give you the chance to see the results of your labours come together reasonably quickly. You can hand build absolutely everything if you want but try to avoid having to spend too long on any single aspect. That way leads to disappointment and abandonment.

You may simply enjoy planning layouts. Many people enjoy using Templot to layout huge models and realistically have no intention of building them. Putting a point in place on screen is far removed from making it up from 50+ components and then trying to make a locomotive run over it.

"But I'm special" I hear you cry, "I have the commitment and enthusiasm to build a massive solo project from start to finish."

Well done, I reply, but think of this, you might be able to build the model (but I bet you won't) but can you move it on your own ? I know one massive, largely solo, project that suffered because it's builder had very limited help putting the layout together. The result was impressive but when it came to going to a show, there was no ready team to put the thing in a van and set it up. Operating required at least 5 people too. The result was frequently a group of operators who didn't have the same feeling of ownership of the model that they would if all had contributed to the building.

And even bigger problem was that the model was so large it could only be set up at shows so never got the proper de-bugging it needed. This resulted in large crowds sometimes watching a big model with nothing running at all.

I suspect I'm wasting my time though. No one looks at the Triang Book of Plans and wants to build number 1. We all aspire to number 22 with a four track main lines and 6 different trains operating at once. Even me.

Saturday, September 10, 2011

Peugeot 206 rear brake load sensing valve linkage

Last year I took my car for its MOT and was presented with a green form for a pass and a yellow advisory form listing things I should look at during the year. It said:

Rear Brake load sensing valve linkage stiff [3.6.E.4]

I had meant to look at this during the following 12 months. I really had. But I didn't.

This year I picked up a red form with some bad stuff on it starting with the word FAIL.

Among the grief was this:

Rear Brake load sensing valve linkage seized [3.6.E.4]

Or to put it another way, I hadn't bothered to look at the problem when I was told to so now it was coming back to bite me on the backside.

My first problem was I didn't actually know where this linkage was. A quick look in the Haynes manual, followed by a peek when the rear tyre was being replaced showed me it's at the back, on the drivers side (this applies to cars where the driver sits on the right, as God intended, where the thing is on other vehicles, I dunno.)

Sideview

(Note: Car is on a 3 tonne jack AND and axle stand. Do not rely on a single jack when sticking you head under 1 tons worth of motor vehicle)

It's behind the wheel arch. You can just see the spring that connects it to the rear suspension. My understanding is that the linkage controls a valve that alters how much brake force is applied to the back wheels depending on the load you have. Put some fat blokes in the back seats and you get more or less brakes at the back. Not sure which to be honest, but that's not the point.

At one end there is a spring:

Springy bit

which connects to a lever. The other end of the lever wraps round the valve here:

Levery bit

As the suspension goes up and down, this lever should move a bit and presumably alter the position of a plunger in the box with all the brake pipes coming out of it. Mine had seized up solid thanks to its position under the car, right where all the wet and muck is.

Now what I should have done is sprayed it regularly with penetrating oil and then greased it up. That would have stopped the problem in the first place. Faced with a fail sheet, what I did was spray about half a can of the stuff over the pivots, spring, and pretty much anything else in the vicinity over about half a Saturday. Then I tried to waggle the lever by gripping one end with a pair of mole grips. This produced movement but not much and I wasn't sure if the metal was bending (bad as it could snap) or the pivots had freed up.

As it was I took the car to Geoff. There was a gaiter to replace as well and I wasn't in to this - VeeDubs are so much easier in this respect - and he's next door to the MOT people so I can be confident he will do the work to their satisfaction.

Geoff said that 2/3rds of the Peugeot 206's he sees with MOT fails have this problem. What he does is stick a screwdriver under the plate and waggle it about. If it's not too rusted, this will solve the problem. My oiling didn't hurt though and a future treatment will hopefully stop this appearing on the sheet next year.

Legal note: This is an accurate description of what I did. I am not a professional mechanic and these notes are offered for entertainment only. If you chose to follow them and things don't work, it's not my fault. Sorry. If you are at all unsure then get a professional to do the job.

Friday, September 09, 2011

Coulls traction engine - life imitates art

Hellingly Traction Engine

Many years ago I built a W&H whitemetal traction engine kit for the Hellingly Hosptital Railway. It's the sort of mobile powerplant that contrators would have used in the late 19th Century as opposed to those thumping modern diesel boxes littering out high streets now. I'm not sure what my miniature railway builders were using it for but I like it and it's my train set etc. etc.

At the time I was looking for a suitable name to emblazen along the roof and thought of my friend Pete Coulls. He used to own a traction engine, and his son Ant was also into them. So much so that he now is in charge of some real Chuff-Chuffs and Nee-Narhs (I know all the technical lingo you know) and spends his working days plotting different ways to desecrate Flying Scotsman.

Anyway, Petes name seemed as good as any for the model traction engine, although I still managed to spell it wrong, just so he couldn't claim copyright you understand...

Now, life now imitates art. Its seems that Coulls junior has his own road going steamer which some of us have been watching the re-build of thanks to the WWW. Needless to say he hasn't got all the details right. As you can clearly see, the front end hasn't got enough wheels and he didn't go with my suggested paint job either. Still, not a bad effort.

Thursday, September 08, 2011

Edging and smoothing

Edging and smoothingThe sides of the Handyman Hall model railway exposed the structure that supported the track and it wasn't pretty. I had expected this and while buying wood, picked up an off-cut of hardboard. This was cut roughly to size and then the final contours formed with a surform. Some blending with filler brought the earthworks up to the edges.

To be honest, I hadn't expected the difference doing something as simple as this made to the look of the model. Suddenly the groundwork's looked solid and substantial. The model looked like it had been cut out of the earth. I suppose it's like stage sets which look terrible if you can see the edges but fine when these are hidden away with the simple expedient of hanging curtains in front of them. They wouldn't provide the protection to the plaster that the wood does of course. And I'd have to iron them which would be rubbish.

While the surform was out, I've been smoothing off any ridges in the plasterwork and filling in any hollows I didn't like. My mix wasn't as good as it could have been so the earth is several different shades of brown, but that won't matter soon.

Wednesday, September 07, 2011

Bent wood fiddle yard

Wood bending 1Even on a pizza box model railway, hiding the trains away for part of the circuit seems like a good idea. I fancied a convex curved wooden section on one corner that the train could disappear into. All I had to do was make it.

From my boat building work, I knew that bending wood was simple enough, just soak it in water and hold in the bend you want while it dries, but wasn't sure how well it would work on plywood thick enough to be self-supporting. Still, nothing ventured, nothing gained, a cut a bit of 6mm ply and left it in the sink for an hour.

Next, the wood was clamped up as shown in the photo. Two clamps were advanced by squeezing the handles to keep the bend constant along the length of the sheet. 24 hours in the sun and it worked ! I had a carefully warped bit of plywood, a bit like the stuff you get from the DIY shed. As it turned out the bend was too sharp but easily eased with a bit of hand presure.

Anyway, holes were cut for the entrance and exit. These had to extend to the edges as the track is very close to the sides of the baseboard. The result left my ply as a giant T-shape but I hacked away some scenery and fitted it anyway, blending the top of the hill into the wood.

Having built it, I'm not sure I like it though. Maybe it will grown on me.

Wood bending 2

Tuesday, September 06, 2011

Just like icing a cake

Plaster slappingMarvelous as insulating foam is, it still needs a surface coat of plaster to smooth things out.

I picked some Homebase own brand filler. Into this I squirted some brown emulsion from a match pot, then made the filler up with water as per the instructions. A stiff mix works better than a sloppy one.

Application is just like covering a cake with icing, which might not help explain but go with it. Take a nice flexible plastic thing - one of those fake credit card things that appear in junk mail is good for this (mine came from LoveFilm). Pick up a dollop of filler and slap it on the foam. Then smooth it around. A tile adhesive comb is handy to have around for sharpening up edges and the little glue spreader gets into the nooks and cranies around the bridge.

Clever modellers will protect the track work with some masking tape before starting. I didn't but only got a couple of blobs in the rails and brushing them immediately with water washed the stuff away. If you don't, clipping it off won't be nearly as easy.

The filler takes 24 hours to properly harden and goes a lighter brown when it does so you can see the state of play. I love this bit of layout building, the model takes shape before your eyes and it's proper messy.

Monday, September 05, 2011

Foam scenery

Faom chopping

Back in the old days, railway modellers would use chicken wire and wooden formers covered with plaster bandage for hills. This works well but chicken wire is nasty stuff in my opinion - difficult to cut and with loads of sharp bits to damage delicate hands. I'm not much cop at making accurate wooden formers either.

Anyway, more modern layout builders moved on to expanded polystyrene. This is really easy to cut either with a saw blade or bread knife. The mess is incredible though. Millions of stupid white balls that get everywhere and are nearly impossible to clean up. Even a good vacuuming will leave some behind.

A hot wire cutter reduces the mess but at a cost of producing poisonous gases so it has to be used in a well ventilated space. Anyway, I don't own one of those and if I did, the shapes aren't that easy to get in an out of the model landscape.

Lucky for me then that our next door neighbours are busy converting their garage to a room. It needs proper insulation and this is carried out using a dense foam covered with silver paper. Being as transparent as a breeze block, a section had to be cut out for the window and so a little bit of skip-diving saw me with a slab big enough for a couple of layout.

The foam cuts with a wood blade in a Stanley knife handle. It's still messy but the mess is heavier than styrene would be so it doesn't spread all over the place. The silver paper peals off but the stuff can be stuck together with "no more nails" glue even if you don't do this.

The job is a bit like sculpture but a heck of a lot easier than chipping away at a bit of marble !

Sunday, September 04, 2011

Cut up the Flying Scotsman


Isle of Man Number 3

I pick up from the model making grapevine that Dragon are releasing a series of plastic kits under the name "Project Cutaway". Each will allow the modeller to build a model but with the extra excitement of clear plastic parts and interior detail so you can see how the machines or buildings are made. Apparently "it's as close to walking inside the real thing as you can get!"

Now I wouldn't normally bother with this sort of thing except that a couple of subjects chosen could be of interest. They plan to do a Routemaster bus, which will be handy for anyone restoring one. Haynes could slap on the macro lens and produce one of the famous manuals - the ones based on a complete strip down of the vehicle concerned - on a desktop.


The other is Flying Scotsman. If done well this could be really interesting as there is quite a lot of detail inside a steam engine. You'd be able to excuse the purchase as an important educational tool for your kids too, if you have any.

The scale chosen will be important. Should they go for 1:43 or 1:76 then there is a possibility of using the parts on a layout to model engines being restored or scrapped. I can see many models of the loco appearing with the boiler partly cut away and all the tubes on show. Mind you, there are those who think that's what the evil people living in the NRM want to do in real life. But then those are the same people who have an attack of the vapours when the thing doesn't emerge in LNER apple green anyway...

And finally, this is not new. Indeed there is a prototype in Isle of Man Number 3 which appears in this form at the Manchester Museum of Science and Industry. Now if someone made a kit of that, I'd be first in the queue.

Saturday, September 03, 2011

The disappearing fuse

4 amp blade fuse

I am the proud owner of a rather longer MOT fail sheet than I had anticipated receiving for my Peugeot 206. This does not Phil a happy boy.

Items 1 and 2 are related. The rear fog light isn't working and neither is the "tell tale" on the dashboard.

I wasn't going to pay good money to change a bulb so set to to do this myself. A look in the manual, thankfully still with the car, showed that both were operated through fuse 19, a 5amp'er. If something electrical is duff in a car, start with the appropriate fuse as there is a good chance that's what it will be. If not, at least you've eliminated the fault that you'll kick yourself for ignoring.

So, I look in the fusebox and what don't I find ? Fuse 19. It's not blown, it's completely missing.

Putting a new fuse in place restored both fog light and tell-tale.

What I don't understand, is where the thing has gone. Presumably there once upon a time. I certainly haven't taken it out. The car passed the MOT at the same garage last year where they certainly checked the front fogs.

Oh well, at least that's two items off the list. Now a new tyre, gaiter and freed up brake load linkage and I'll be legit again. Pity all these are the expensive ones !

(I know the photo shows a 4 amp fuse, the spare 5 amp is going to live in the car so I had to use this one for a picture. Yes I know I could have gone and got the right one but that would have meant going downstairs and unlocking the car, and I couldn't be bothered.)

Friday, September 02, 2011

Strathspey water towers

Strathspey watertowersMy parents went up to Scotland last week to see the Edinburgh Tattoo. The organised tour they were on had scheduled a trip to a distillery on the Friday and since they don't drink, and had already seen all the copper pipework they could handle on a previous tour, they decided to bunk off. A short walk from the hotel was a station and a short train ride from there was the Strathspey Railway.

Ensconced on a steam hauled train and stuffing themselves with a lovely afternoon tea, they took a few photos out of the window so they had something to show me what a good time they had enjoyed. Out of all the shots, I particularly like this one. Obviously there were more scenic photos but this is interesting. Two water towers.

The steel version is standard enough. Lots of identical panels are bolted together and stood atop some spindly legs braced with thin rods. The unusual feature is a signal bolted to the side. I'm not sure this ever happened on the real railway, but if you know better, please drop something in the comments.

The other tank looks like a oil tank thanks to the walkway along the top, but the pipe out the side would indicate that it's currently being used to dispense water. What really interests me is that it's supported on a pile of sleepers. Not wooden ones, as you might expect, bu concrete ones. Again, can anyone suggest anywhere else this has happened ?

On my narrow gauge model, I wonder if I ought to try something similar. This sort of made-do engineering is certainly in the spirit of narrow lines.

Strathspey railway website

Thursday, September 01, 2011

Bridge building

Bridge building

The more observant amongst you will have spotted that I appear to be building a fairground ride rather than a model railway. Track floating through mid-air looks exciting but in real life, isn't a good idea. Passengers get nervous and you tend to find the rolling stock doesn't last very long.

My bridge is in fact a curved viaduct. Lots of looking through books and surfing the web made me hopeful that I could go for a very simple design without leaving for cloud cuckoo land. Big, fat girders with no sides was what I wanted and that's what I've built.

Box girders were made up from plasticard, I know you can buy these things but it doesn't seem extravagant for such a simple job. Initially they were all the same but then I laid them on the track and worked out where the joins and therefore the angled ends needed to be. All the pencil marks on the baseboard shows you that I took several attempts to decide exactly what I wanted, this isn't just a technical decision, the supports would look prettier if evenly spaced and with the middle one in the centre of the gap. This isn't just engineering, it's art !