Monday, January 31, 2011

Southampton Exhibition 2011

Melbridge Dock
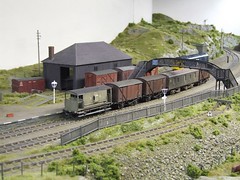
Satnav programmed, bags packed, model railway layout loaded in the back of the car and off we went to the show. A couple of hours later, after a pretty much clear run down the motorways, we arrived at the show. Specifically, at the back of the show. And then we realised that we had meant to go to the B&B first as we were too early and the exhibition team were still marking up. That's what happens when you have two postcodes and put the wrong one in...

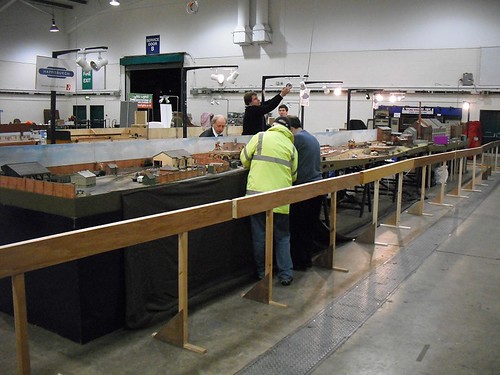
Anyway, we hung around for a bit and our space appeared in the cafeteria between two pillars, The layout fitted nicely and everything seemed to be working so we headed off to some excellent accommodation for a good nights sleep.

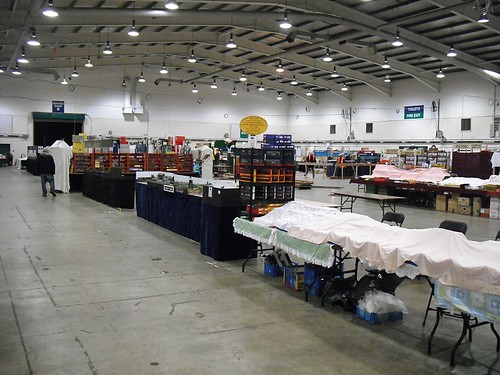
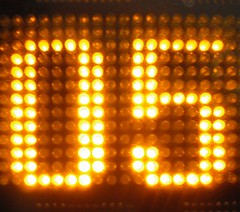
In the morning the shows started in earnest. Truth be told, it started a bit earlier than we expected. According to the guide, doors opened at 10:30 but from about 9:45 it seemed that the public were being allowed in, at least to sit in the cafe area. That's fine but while we were ready, plenty of others weren't. The N gauge layout next to us had a curtain hanging from its fascia to allow the owner to prepare stock without interruption. We hung around but didn't start operating until 10:15 when the numbers at the front of the model were too large to ignore.

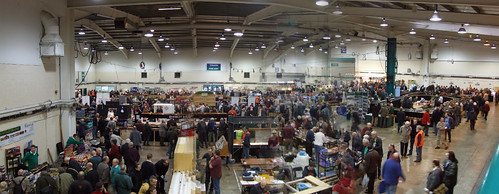
Numbers were good though. There were plenty of people (the show numbers were up on the Saturday) and best of all they were chatty. We had lots of questions which is brilliant and quite unusual for a Saturday morning. By the end of the day, neither of us had seen much of the show but were pleasantly tired. Like we'd done a good days work but not knackered. The rubber floor surface helped of course, much nicer than operating on concrete.

PortchullinSunday dawned and since the hall didn't open until 9am we headed to the coast for some ship watching. I'll mention this later in the week as there were some interesting sights.

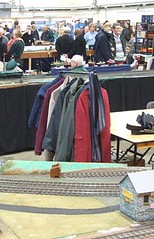
Day two was quieter but not by much. Visiting the rest of the event was easier though. The venue is a FE college which means the layout covers several rooms. The layouts in the "performance spaces" seemed to have the best lighting conditions as these were blacked out rooms so those who had brought a rig with them, got the maximum benefit from it.

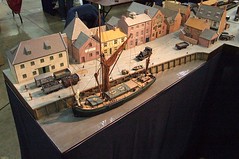
Elsewhere the mix of layout and trade was good. Not too much RTR or diecast vehicle and a nice covering of interesting specialist suppliers. The layout quality was very high and so I'd think that the entry cost of £6 for adults, very reasonable.

Blueberry Muffins
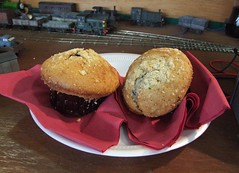
The absolute highlight of the weekend though was being presented with a pair of muffins by a reader of this blog. I didn't get your name but thank you very much. The cake was excellent - the top was crispy and pulled away from the lower part beautifully. The main body was properly gooey and being a blueberry muffin (a "Superfood" apparently) very healthy I'm sure. This isn't to suggest that presentation of cakes to us should be a regular occurrence but if you want more cake review on these pages, then you all know what you have to do !

The thing with being in a college is you realise how much education has changed since I was at school. Who, for instance, decided photography was a suitable subject for an A level ? No one offered me that one and I'm sure it would have been more interesting than the ones I did and failed. Also, there were elections for the student committee and so our area was plastered with posters advertising the candidates. What I want to know is, exactly when does "Jen makes monkey noises" as her manifesto posters proclaim ?

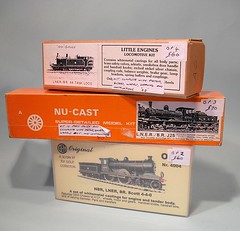
The trip back was uneventful and we were back in Leamington by 8:30 even allowing for the traditional stop at the Little Chef. A few further invitations were brought back so it looks like our little layout, now 23 years on the circuit, has a bit more life in it. Which is good since I've several loco kits to build for it...

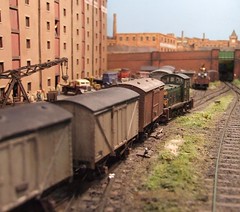
More photos of the show on Flickr

Sunday, January 30, 2011

A pair of Sentinels

2 SentinelsBefore I go to a model railway exhibition, I like to empty out my stock box a little. Melbridge Dock has been around for many years and for most of that time I've been building locos for it. This has resulted in more locos than the display box can house and certainly more than we need to actually run the model.

One of the models normally left behind is the Sentinel Y3 shunter. There's nothing wrong with it. In fact it's quite a nice model. But we have to make decisions and the loco runs on a Tenshodo SPUD and so it doesn't run quite as well as some of the other models. However, while pre-show testing the layout, I ran the Y3. You know what ? It works pretty well - so into the box it went.

Anyway, at the show the loco did some real work. In fact it proved quite popular with the crowd who asked where the model originated from. The answer to this was simple - it's a Crownline etched brass kit built many years ago. As far as I know the thing isn't even available any more.

But - on the next door stand, there is a display case full of pre-production models from Dapol. In this case there is the pre-production model of the ModelRail Sentinel shunter. I know Dave who is responsible for the case and arrange to have a go with it.

And it is lovely. The mechanism runs as well as anything I've ever built. There's no problem over the hand built trackwork. It even looks pretty good.

OK, so the sides are a bit plainer than my model but then it's not the final version. The roof and chimney is very nicely done. The body is full of mechanicals but a driver in the doorway will cover most of this. The kit version does look better in this respect, in fact it's a bit empty !

Out of deference to the fact I'd only borrowed it I resisted the urge to remove the couplings and stick something Spratt & Winkle on the end. It was tempting though.

Of course the problem with this model is that once it comes out, you won't be able to move for the things. Every OO branch line will have passenger trains pulled by them. They will be hauling trains that the prototype could only dream of - especially considering it's rather low top speed.

And that means that my model will return to the stockbox. I don't like to run anything that you can get RTR. People have paid to see something different. The same reason that the Pug doesn't come out to play. Never mind, I'm still proud of my model and enjoyed building it.

Saturday, January 29, 2011

Hobby Corner, Wrexham

Hobby CornerOn the outskirts of Wrexham, just past the Four Dogs pub, which is next to the now incongruously placed entrance to the long lost Action Hall, you find Hobby Corner modelshop. It's about 25 minutes walk from the railway station if you are on foot.

The shop is set back from the road a little which allows a tiny bit of parking. Inside it's a modest size but absolutely stuffed with stock.

The main business seems to be radio control cars and aeroplanes. Certainly the owner was advising a new aeromodeller about his options and obviously doing this from the position of being properly involved in the hobby. In fact he was bemoaning the way that cheap RTF models were killing off the building side, but being completely pragmatic about it. His suggestion of using a simulator to get the hang of flying made sense too, especially when you are looking at proper RC model helicopters.

At the back of the shop is a selection of railway models. Some Hornby train sets and a few scenic bits are on offer. In the middle there is a range of plastic kits and spare parts for cars and planes. You even find some model boats, both RTR and Billings kits.

Most importantly (IMHO) though, you find lots of materials. Paint, glue, wood, metal, plastic are stocked in abundance. It's the first place I've seen Tamya masking tape refills too. About half the price of the pack in the dispenser ! One customer was buying enough wood for a serious aircraft project. Either that or he was building a balsawood cabin.

Finally, in the window were adverts for local flying clubs, let's hope the member keep this place in business for many years to come.

Hobby Corner Website

Friday, January 28, 2011

Fungal treatement


Back in June, we took our model railway, Melbridge Dock, to be filmed for Modelrailway.tv

Once it had been unpacked and set up it became apparent that storage hadn't been kind. The were white fungal patches on the cobbles. At the time we just rubbed them off as best we could and hoped the camera wouldn't pick them up. Back home, the model was stored where it could get some airflow and then re-packed back in it's insulated plastic bag.Since there was also mould on the packing boards that bolt to the ends, these were cleaned and varnished at the same time.

This weekend, we're off to Southampton Exhibition so I decided we better get the model out and take another look at the problem. I've also still got idea on the Melbridge book so some decent photos are a must.

The good news is that the drying and then sealing process has helped. The fungus is no longer white and tentrilly but has died down to become brown spots on the plasticard. A quick scrub with an old toothbrush and touch of water has removed the spots, or at least reduced them to something that looks like weathering.

Mind you, the cleaning has highlighted just how dusty the model is. Time to give it a proper clean I think !

After

Thursday, January 27, 2011

Ruston 165DS chassis test


With power coming from the desperately unsophisticated H&M Controller I like to use for this sort of job, the Ruston 165DS chassis sits on the rolling roads to begin running in.

I need to tweak the pick-ups a little and there is obviously some paint in the wrong place somewhere, but with a bit if weight this little loco should run OK. Top speed is adequate but not excessive. Bottom speed is walking pace. For a very slow person. Just right.

Wednesday, January 26, 2011

Sartorial planning

Coat rackNow this is a new one on me. I take all sorts of stuff to exhibitions but have never considered a clothes rail.

This one was seen in the centre of the Gauge 1 layout "Stanley Midland". At first it seems an odd addition to the kit but on reflection, there will be a quite a crew as they only tend to bring a couple of locos each, and they will probably all have coats. The resulting pile would be quite a mound in the middle of the layout. Anyway, G1 modellers tend to be dapper chaps and so they won't want their tweeds on the floor.

Worse, they could actually be a fire hazard - coal fired locos can chuck out sparks from the chimney so loads of cloth lying around probably isn't a good idea.

The crucial thing though is that your model engineer likes to wear a workshop overall (think a laboratory coat but in brown, like the sort of thing Arthur English wore in "Are you being served") when operating his locomotive and this is incompatible with an overcoat. Hence, coats are replaced with more suitable apparel during the operating session.

This has me thinking - maybe a stylish chap should carry all the railway kit, and clothes, in a gentleman's travelling trunk !

Tuesday, January 25, 2011

Electric modifications

Electric modsTo turn a diesel-mechanical Ruston 165DS into a diesel-electric one, there are two jobs to do. At least as far as the model version is concerned. The real thing would be significantly more work and probably involve spanners and stuff. Probably can't do it on the workbench very easily either.

 
On the model:
  • Use the correct coupling rods. The ones without the extension for the mechanical drive. That's easy, just make up the correct ones from the etch.
  • Turn the hole for the crank drive into an inverted U shape. Blank it off a bit and put the bolts on that would hold the gearbox in real life.

That second one is more "entertaining" on a chassis that has all the mechanical bits fitted when you don't want to take them out. Some careful work with the piercing saw was required, not just to make the U, but to remove the carefully soldered in bearing as well. I was blowing swarf away at every other stroke to keep the stuff out of the motor.

 
The blanking is just plasticard and the bolt heads are cubes of plastic rod picked up on the end of a scalpel and attached with superglue. I cut about 5 times as many as I need 'cos they either don't attach to the knife or fall in the glue when dabbed in it. That way I have plenty.

Monday, January 24, 2011

Book Review: St Merryn. What we did, why, and how we did it

Subtitled "Aspects of building a finescale model railway described by The South London Area Group", this is essentially a super-long layout description. It's what you would hope to get if the normal limit of around 2,500 words was lifted from magazines.

St Merryn is a P4 (4mm scale 18.83mm gauge) model railway. The book describes all aspects of building the layout and even if you don't fancy going all finescale, many of the techniques would be applicable to other scales. If nothing else, it is very interesting to see, in detail, what other railway modellers get up to.

The text is interesting and the photographs, mostly colour, OK although some would have befitted from the person with the camera getting a bit more light on the subject. Like many P4 modellers, it can all get a little bit po faced at times, something the author admits is happening occasionally, especially when the rules around exhibiting are discussed !

For a tenner, the price of a couple of magazines, you really can't go too far wrong.

Now, I didn't buy this book to read how to build finescale, I bought it because I fancy writing something similar for my layouts. Even my ego doesn't support the idea that anything called "The Chronicles of Melbridge" would be a best seller, but I think it would be an interesting exercise in self publishing, probably using Lulu. That way, even if only one copy was sold (to me) then all that is wasted is my time.

The question is, can I sell a second one ? After all there are plenty of web sites out there for layouts, but in the second decade of the 21st Century, could publishing on paper be the new web ?

Buy the St Merryn book here.

Sunday, January 23, 2011

No time for lazy modellers

I don't normally simply re-post links to other blogs - you've come here to read original content - but in this case I'm going to make an exception for an excellent posting.

Read this post on the 1:220 blog

I agree with pretty much all of this. Once upon a time modellers used to read books and magazines. They used to try stuff and sometimes fail. Now they just hit a forum and demand the answer to their question. Now. Immediately.

This isn't an uncommon problem. In the early days of t'interweb I worked on the helpdesk for a research centre. One of the more common e-mails received to the general mailbox was along the lines:

I have to do a project on ????? Please send me all that you have on the subject.

Which was the senders way of saying they had to write something and all they were going to bother to do was write a whiny e-mail and expect someone else to do the rest for them. Needless to say this was to be carried out at no cost to the requester no matter how long it took. The correct answer was "Go to a library and do some research" but normally these e-mails were just quietly lost as no doubt that response would not be appreciated.

In a similar vein, there is a post on one of the few forums that I watch asking that a magazine runs a series on producing a fully automated layout run with DCC by a computer.

Why ? If the mag did do this, it would cost s fortune and the results would be applicable to a tiny handful of modellers worldwide. This sort of job required quite a lot of R&D and if you aren't interested, would be deadly dull for readers. Even then, what are the chances that the original writer would then follow the details published ? Very small I suspect. Their response would be along the lines of, "Very nice. I might have a go one day..." or "It's not exactly what I was looking for."

Saturday, January 22, 2011

Mobile crane in Hornby Magazine

February's Hornby Magazine arrives and inside you'll find my description of building a Langley Models whitemetal kit for a Ransomes Rapier 6 ton mobile yard crane.

It's a complicated kit with an awful lot of parts but the end result looks fantastic. These things from the days before hydraulic power are all detail. Certainly not something I'd want to have a go at scratchbuilding !

Hornby Magazine Website

Ransomes Rapier 6 ton mobile crane

Pete's cake

Cake cutWe have a handy celebrity for the Leamington exhibition - Pete Waterman. Since he is building a model of Leamington Spa station and a local lad to boot, he always brings some stuff down to the Saturday of the show and happily sits and chats to people. He enjoys himself and hopefully gets a little more information to help the model along and we get a name to act as a draw for the show.

As it happens, last Saturday was his 64th birthday so we thought it would be a good idea to get a cake. It's a nice thank you for coming to the show and doing a radio interview for us.

Now I might be reasonably good at making things but I'm out of practise with cake - baking it anyway, eating it is fine - so it looked like something horribly generic would be required. Then I remembered getting a cake printed for a promotion I ran years ago at work. A quick web search for "photo cake" revealed that Asda could do the honours.

All I needed was a picture. Now Chris Nevard took some photos at Mr W's railway a few months ago and a quick e-mail found me a with a choice of pictures. I liked the blue "King" a lot. It's a pretty colour and will probably anoy the GWR enthusiasts. Best of all, when I saw it in real life and queried the colour, it seemed to be a particular favourite of the birthday boy.

At the store I had to poke my head into the bakery section, not over a counter or anything handy, and ask. The lady behind was ever so helpful and showed me the two sizes and prices. I plumped for the bigger one, handed over a 6 X 4 printed photo, then a couple of minutes later changed my mind and ordered both sizes on the basis you can never have too much cake.

Pete cutting cakeAs it turned out, this was a good move. The photo I had added "Happy Birthday Pete" to didn't fit the big cake format properly so we used it only on the small cake and the word-free version on the larger one. Total cost for the two cakes was just over £23. The technique is simple, they print the photo on a sheet of icing and stick it to the cake in a pre-cut rectangular hole.

At the show the results went down well when presented at 3pm. This was by far the tastiest GWR loco I've ever eaten, what with being made of sponge and jam. We had plenty for the the hungry hoards behind the stand and it lasted well enough that it wasn't stale on Sunday, or at least the bit I had wasn't. Yum.

Friday, January 21, 2011

Getting cranky

Crank pileWith the con rods rotating well, the next step was to build and fit the cranks that on the real locomotive would drive the thing. Three sets are provided on the etch. A nifty shouldered axle is also supplied.

Sadly, none of the centres are big enough for the axles. Attempt 1 saw me clamp each lamination (3 per crank) in a hand vice and ream out the centre. Result, squashed brass lobes.

Attempt 2, the crank was soldered up and then reamed in the same way. Still not very effective and the lobe still squashes.

Number 3 - ream the axle hole while the part is still on the etch. By this time I'd found that a tapered reamer was more gentle than a broach and all the holes were made the right size. The crank was soldered up and another problem reared it's head.

You see, this is a HO model and the kit has been produced by reducing the etch photographically. That's fine except I have several cranks whose throw doesn't match the wheels. By at least 1mm. The only way I can make this work is to bin the lot and make new cranks from scratch. And I can't be sure of the throw on the wheels. Even if I could, I bet I'd screw up the measurements.

So, plan B is to build the diesel-electric version.

Thursday, January 20, 2011

165DS wheeled up

Chassis with wheelsReturning to the Ruston 165DS, it was time to fit the wheels. As mentioned earlier, I've had to eshew Romfords for Gibson wheels to get an appropriate size for the prototype. These have to be quartered and pressed on to the axle. And once they are on, they are on.

Anyway, I started by fitting the bolts that act as crank pins, remembering to countersink the back of the wheel so the cheese head sits flush. Then I dug out the GW Models quartering jig, only to discover it doesn't work for anything with this small a throw. Great.

Still, I pressed on. Literally in this case. The unpowered axle went first. Inside each wheel a little superglue (never, ever, use Loctite on Sharmans) and the wheels were roughly pushed on. Then the assembly was placed in a vice and this was gradually tightened to act as a press. This has the benefit of applying slow and controlled pressure and keeps the wheels square to the axle. Quartering doesn't matter too much at this point, as long as it looks OK, it's fine. The other pair of wheels just has to match.

The powered set was done next in the same way. As it happens, I managed to get the quartering spot on first time. I think this is something to do with the crank pins having to be on different 90 degree faces on the vice with the axle in the corner. Something like that anyway. I don't care, it works.

Rotating the wheels by hand, everything moved OK so the brass final gear was glued by running superglue around the axle/gear join. This was left to dry and power gently applied. It works. In fact it works very well. I think I need a lie down now.

Wednesday, January 19, 2011

Don't do this

White paintPaint has to be thinned to go through the airbrush. Not a lot sometimes but it's still not the same as the neat stuff in the can.

What you should do is look at the nearly full paint cup left after spraying and think - I don't want to waste this stuff, I'll pour it back in the tin. It will be fine. There's plenty of neat stuff in there after all.

No it won't.

What it will be is too thin for brush painting. .

Guess how I know this.

Tuesday, January 18, 2011

Radio star


Since I volunteered to look after the media stuff for the exhibition I knocked out a press release to send around. Then I sent it to a friend who does PR professionally and she re-wrote it into something that would appeal to real people and not anoraks. This was duly dispatched to any organisation I could find an e-mail address for.

Within 3 hours I'd had a trio of offers of radio interviews plus the local paper wanting to send a photographer. That shows what a difference someone who knows about doing this properly can make. One station knew Pete Waterman was coming and wanted him, another was the religious slot on Sunday and I manged to find a suitable retired vicar to cover this. The final one was for me to do.

Now I am not unfamiliar with radio work. 10 years of hospital radio plus a few appearances on the real thing mean I can just about speak without sounding completely stupid. So it was I ended up in Radio CWR at 8:40 in the morning, ready to appear on the breakfast show.

The interview went pretty well apart from me getting the month wrong at the end. I was keen to show the breadth of the hobby rather than just banging on about playing trains. We had some photos of Clarendon and a couple of models for the presenter, who is apparently an enthusiast although he doesn't mention it, to look at.

They even filmed it for the programmes Facebook page.

So, you can go and see how it went for yourself by following this link.

Please get in touch with job offers !

Monday, January 17, 2011

LWMRS Show - Day 2


East Lynn
Originally uploaded by Phil_Parker
Well, I'm still tired - and dehydrated, sometimes you are so busy you don't get time for a cup of tea - but the show is over for another year bar the shouting.

Highlights were many. The new layout of the hall worked very well. Last year we did the sensible thing and set it up so that the aisles ran away from the doors, which resulted in the electrical drops in the middle of the room ending up in the aisles. This year we swung it around 90 degrees and they cam from the ceiling perfectly. That's the joy of a proper exhibition hall, you have to think of these practical aspects.

The traders seemed happy. Even those who were with us for the first time did well enough to make them keen to come back again. Since I looked after the trade, this is good news ! Those with a bit of experience know that it takes a couple of years for visitors to expect to see a trader at an event. It doesn't matter how much we tell them in advance who is going to be there (and we do on the web), most still walk in and get a surprise to find someone who wasn't there last year.

Coal firred G1 GarrattA layout I lobbied hard to get in the event, the Gauge 1 "Stanley Midland" went down very well. Despite being huge (it didn't look it in a hall this big, but it was), there was always a line of people along the barriers. Best of all they were a real mix from the hardened enthusiast to family just enjoying real steam trains thundering around. The biggest crowd though, was by the loco preparation area where everyone seemed fascinated watching the guys get their machines ready for a spin. As for the coal fired G1 Garratt, mmmmm.......

Elsewhere the layouts were excellent. The photo shows East Lynn, a model I've always enjoyed but elsewhere Happisborough in its penultimate appearance was also stunning. It would be unfair though to try and single any model out though and I'm too tired to knock out a complete list.

At the end of the day it took almost exactly 3 hours to see everyone off. In the end it became a race between Happisborough and Squires Tolls to see who would be last out, something the layout won by about 15 minutes !

Now all we have to do is work out if we can do it next year !

Anyway, plase go and look at the photos.

Sunday, January 16, 2011

LWMRS Show - Day 1

LWMRS Show Panorama

When you get to a show at 6:50 in the morning, the cafe opening up for sausage butties at 8:30 had better open on time. It didn't, but the three sausages in the batch made up for this.

Apart from that, well lots of people came in the door including one or two surprises. Trains ran. Stuff was sold. I added a kit to the maturing pile. We discovered a door that wasn't there last time we looked and I made a celebrity happy with a cake.

More later - too knackered now.

Oh, go and look at the photos.

Saturday, January 15, 2011

Setting up the show

Shopping aisle

To be honest, I can't claim credit for much of the physical putting the show together this year. I did my stint on local radio and by the time I got to the hall, much of the marking out was done. I delivered some tables.

Most of my time was spend outside in the car park directing traffic. It's not a glamorous job but us celebrities have to keep our feet on the ground don't you know. Anyway, after several hours developing cold tootsies, I went back in to the hall and lo, there was quite a lot of a train show there !

How did that happen ?

Hapisborough

Friday, January 14, 2011

Leamington & Warwick MRS Exhibition 2011

LWMRS Handout

This weekend is the 36th annual Leamington & Warwick MRS Exhibitions.

  • 25 layouts
  • 40 traders
  • Huge second hand stall
  • Free parking.
What more could you want ?

Go to the exhibition website. You know where you want to be this weekend !

I've even been on the radio promoting it - listen to 2hrs 42in to the end

Thursday, January 13, 2011

Souvenir van

Hornby Live Van

This project is going to have to end up filed under "Not awfully successful". However, someone might get something from it, so I'll tell you what I did anyway.

A few weeks ago I mentioned that I had some leftover projects, one of which was an LMS van. Well, after the post I found the remaining plastic parts and fitted them. That still left me with a van I had no use for but while printing some decals for another project, it occurred to me that I could turn my van into a souvenir of the show. A bit like the promotional vans Hornby bring out every year.

So, I pinched the logo from the website and printed it on a make your own decal system. This requires you to print the stuff and then varnish it using the spray can in the kit. I gave it several coats which may have been a mistake as this left me with quite a thick transfer that wasn't very flexible. Less is more obviously.

The van was sprayed with gloss white and stuck in a box to dry overnight. Once the paint was hardened, black areas were brush painted with matt Humbrol.

Then the transfers. The first attempt was a disaster. By the time I had soaked the transfer from it's backing, the ink had run and putting it on the van resulted in a squidgy mess.

Attempt 2 - the back was peeled from the transfer while dry leaving only the varnish and a very thin paper layer. This was soaked and peeled off as quickly as I could persuade it to let go. The decal was then placed on the van and blotted with paper. A bit of micro sol was tried to persuade the thing to sit down over all the lumps and bumps. The result is the one show above, which looks better in real life than the photo !

Attempt 3 - like attempt 2 but I painted micro sol over the van side and slapped the transfer on. Results, the ink ran again. Badly.

So, the moral is - don't use an Epson printer as the inks don't like any form of liquid. Less varnish on your transfer makes it more flexible. And not every project works out.

Wednesday, January 12, 2011

Do people still build locomotive kits ?

Locomotive kitsAnother pile of goodies for the second hand stall at the weekend. Some 4mm scale locomotive kits.

These come from a member who dies a few years ago. Each is complete and includes all the parts needed to finish the model. In fact sometime they include 2 sets as the owner originally planned to use Romford wheels and gears and later changed his mind to Gibsons and High Level mechanicals. When he did this the new parts were just added to the box awaiting building.

The question is, will we sell them ?

After all, do people still build 4mm scale locomotives any more ? I know I do but then I'm a raving weirdo. I've even ordered a new kit that I have to pick up. But what about others ? The feeling in the trade is "probably not", or at least not in anything like the numbers they used to.

Of course the main reason is the amazingly high quality or ready to run stock we now enjoy. Why build a model of something that you can buy ready to use ? The cost of the kit will probably be higher when you include all the parts and unless you are a top flight builder (not me) then the results will probably not be as good.

Despite this, I hope we find these kits a new home. Hopefully there is someone out there who gets as much pleasure as I do from putting things together and seeing a model they have built traversing the layout.

Anyway, if you are such a person with a penchant for LNER locos, then get yourself down to the Leamington show this weekend and deals will be done !

Tuesday, January 11, 2011

For sale: Desirable 7mm scale warehouse

7mm warehouse front

It's the new year and time to have a bit of a clear out. Top of the pile to go is this part-finished 7mm scale (O gauge) warehouse. Originally intended for a shunting layout - a bit like Melbridge Dock but in a larger scale and with canal boats - it now has no home since we abandoned the plan through lack of time.

However, as with a lot of these things, it seems a shame to throw the model away, so this weekend it will be headed for our club second hand stall unless someone wants to make me an offer for it first.

7mm warehouse backConstructed from plywood and Daler board, the model is 76cm long, 28cm tall and 22cm wide. I reckon it's about 5 years old and still seems as good as the day it was built. A few hours with some stone plasticard, windows and doors should see a pretty impressive model.

As I say, it will be on our second hand stall at the weekend, unless someone wants to bag it for 20 quid. Sorry, no shipping so you need to pick it up from Leamington Spa or the show.

Monday, January 10, 2011

Crowd barriers

Barrier inardsOf all the unsung tasks required to be carried out when arranging a show is making sure you, the great unwashed, have something to lean on while marvelling at the masterpieces in front of you. If we don't then some of you will use the edge of our baseboards for this job ruining the scenery along the front inch and earning you a slap in the face.

So, with our show on the horizon, the exhibition manager decided we needed another 200 feet of barrier. Another 200 feet - I mean it's not like we don't have several hundred feet of the dammed things already. And of course we only had two weeks to build them.

Fortunately the L&WMRS barriers aren't particularly complicated, basically being a pair of 6 inch deep strips of 6mm ply separated with some softwood. Legs are plug in softwood inverted T-shapes braces with ply triangles. Over the last few years they have proved effective and don't cost much to make. In fact the first batch cost the same as hiring metal barriers for a show so we've saved quite a bit of money over the years. We even make a few quid hiring them out to other clubs.

So it was that at the start of last week a few of us met at the clubrooms to be confronted by several piles of wood and a small number of semi-completed barriers assembled by an exhibition manager who knows he left it late to tell us about this and put in a day cutting wood before we arrived to make up for it a little bit...

To be fair, if you get the ply cut at the wood shop, and get the softwood chopped as a separate job, then putting one of these things together doesn't take that log. With 2 people hammering and gluing, I reckon that you can easily do 10 an hour with reasonable results. Legs take about 2 minutes once the components are ready.

Then the barriers have to be varnished to stop people getting splinters in their delicate little pinkies. On Thursday night the clubroom was full of barriers getting a couple of coats of floor varnish (acrylic so there is no real smell and the stuff dries fast) and members moaning we were getting in the way.

Yesterday, they were sanded down and had another coat which seems to be smooth enough. Let's hope so anyway. With a bit of luck everyone will just lean on and ignore them.

Finished barriers

Sunday, January 09, 2011

Magazines

Magazine spinesWhy do modellers keep piles of magazines ?

Let's face it there are plenty of books and of course teh Interweb. Despite this we still all need our monthly fix of new reading and once we've finished perusing those wise words on a perfect bound cover, we stick the magazine on a shelf. Forever.

Joists groan under the ever increasing weight of our reading matter. One day a little voice says that they have to go. For railway modellers this might mean that they join the pile under a local club's second hand stall where they prove even less saleable than second hand trackwork.

And so it came to pass, that the Parker pile of Model Boats magazine has come under scrutiny. It is time to thin it considerably. Much as I might like the idea of having the whole lot bound in leather and stored on the baronial library shelves, the binding takes forever and the library has yet to appear.

Plan B - Remove all the interesting articles and put them in a box file. With MB, this is easier than you might think. For a start the show reports can go. News stuff can go. Anything on grey boats can go. Yacht stuff can go.

Result, a big pile for the recycling boys and half a box file full of plans (with the related articles attached), useful articles (many of which I'd forgotten, there are some really good ones on lifeboats) and a few complete issues that I have articles in. And a lot more shelf space. It's really satisfying too.

Saturday, January 08, 2011

K8 Telephone box


K8 Telephone box
Originally uploaded by Phil_Parker
I've been writing about telephone boxes this week, a subject that fascinates me (I'm such an anorak) and has resulted in a quite a lot of models in my collection.

One that didn't make it into the piece was this little diorama. It's a K8 box built using a Shire Scenes etched brass kit. Inside is the man from a Peco 'phone (Am I the last person to put an apostrophe before this word) box kit. The base comes courtesy of Games Workshop and the dog and road sign are Langley.

The finishing touch of the sign along the front came from the kit etch. Probably not what the designer intended, but it works just the same.
Please ecuse the lack of prototype history. I simply can't get better than this website.

Friday, January 07, 2011

Squeezing the mechanicals in

Shunerinside

The instructions might say to drive this model on the front axle, but I'm building it and I say the power should be on the middle one. That jackshaft is going to be enough of a pain without making things difficult by running it via an unpowered set of wheels.

So, as you can see from my slightly crudely assembled photo (I'm sure Photoshop has a funky overlay thing but I couldn't be bothered to work it out properly in PaintShop Pro, although if anyone has any suggestions) the gearbox fits pretty well.

The only modification required was to lengthen the hole in the footplate by a few mm towards the cab. That job means spending more time digging out the piercing saw and fitting a blade than actual cutting. After this the body components dropped straight on.

Another benefit of driving the rear is leaving plenty of space in the bonnet for a DCC chip which this model will eventually sport. I'm not sure how big these things are but I reckon one will go at the front. I should even be able to fill the top with lead to get the haulage capabilites up.

Thursday, January 06, 2011

High Level Models Hump shunter gearbox

Humpshunter gearboxkit

The 165DS needs a motor and gearbox if it's be something other than a static model. As a shunter it's top speed needs to be low, instead an ability to traverse the goods yard at walking place. Once upon a time we'd have struggled to mesh some Romford gears, nowadays it's a whole lot easier to buy a simple to assemble double reduction gearbox from High Level Models.

For your money you get a slim package with an etched cradle, some plastic gears, bearings and steel rod. A motor is also required, I've used a Mashima 1220. This combination has proved reliable in other models I've built so I can't see any point in getting experimental.

Construction starts with the fitting of the axle bearings. The holes have to be reamed out very slightly to accept these. I'd recommend a tapered reamer for this. In fact I wouldn't try and put one of these 'boxes together without one or a decent set of cutting broaches. Round files are OK for some jobs but the accuracy available to the user of the proper tools does make the job a lot easier.

Next, the etch is folded up and checked for squareness. Tweak with fingers to get this right.

Then the steel rod has to be cut to length for the intermediate gears. The instructions say to use a cutting disk but I find a big pair of wire cutters works fine. Finish off with the file (hint, hold the rod in a pin vice) and keep it no longer than required.

Then fit the worm gear to the motor and pop the rest in. I retain the intermediate shafts with a smear of superglue on the outside of the cradle. Engineers will solder a little plate over the ends but I wasn't sure if this would make the gearbox too wide for the chassis. Anyway, I'd probably have melted the gears.

I can honestly say that no adjustment was required to get the mechanism running perfectly smoothly. Now will it fit in the loco ?

Humpshuner gearbox

High Level Models website

Wednesday, January 05, 2011

Book review: an A-Z of Railways

I don't really like railway books. Most of them are just pictures of trains thundering by in some fairly random bit of countryside. If it's a static train then normally the photographer has gone for the classic three-quarters viewpoint. Just occasionally the rest of the scene gets a look-in. And everything stops at the end of steam.

Of course there are those specialist publications that go into immense detail on their subject and these definitely have a place on my bookshelf if I ever plan to build a model. I can't have too many books on Garratts for example, or Hellingly Hospital. Or the Isle of Man. Most though seem to be page after page of nice pictures of chuff chuffs.

Personally I like stuff not aimed at enthusiasts. Stuff written by humans. Now there is a fair quantity of "nice chuff chuff" in this category too, in fact it's probably worse when you look at books intended to be bought for enthusiasts. However this book is written by the nice man from the Antiques Roadshow and yet he seems to have brought together lots of really interesting content that doesn't normally get an airing.

The basics: 176 pages, Hardback, odd size. Colour and black & white photos.

As you might guess from the title, the books runs through different subjects in alphabetical order and for each you get 4 pages of pictures and a bit of text. It's unashamedly "coffee table" and I'm sure the true enthusiast will whinge that there isn't nearly enough detail - but then you could do a book on each subject, for example I have 2 volumes on camping coaches but then I'm weird.

Subjects covered include:
Ambulance trains
Architecture
Art shows
Beeching
Boat trains
Bomb damage
Camping coaches
Car trains
Closures
Crashes
Day trips
etc.etc.

The subjects are eclectic and pedants will complain about eXcursions landing between Young Railwaymen and Zoo on rails but they can get back to the "10 items of less" counter in their nearest supermarket until they come up with a better selection.

Quality of reproduction of the images which comprise photos, postcards, posters and leaflets, is good enough for the book to be a useful source of reference. One thing that immediately strikes this reader is just how different 1970's and 80' leaflets look to modern ones.

Best of all there is something very rare, even in those scholarly books for railway fans - an index. A proper one. Why these aren't more common is a mystery to me.

So - I enjoyed this book. It can stay on the shelf and be fun to flick through from time to time. The random subjects might inspire some modelling and will certainly inspire some days out. If like me, you are interesting in the big picture rather than the minutiae of railways, then for the price of a couple of toy train magazines, it's a good buy.

More on this book at The Hobby Warehouse

Tuesday, January 04, 2011

Painting the 165DS chassis

Painted chassisIf I were building this model with Romford wheels, I wouldn't be doing this. Their design allows removal and re-installation as often as you like. Gibson wheels though, need to go on and stay on.

This means the chassis needs to be painted before I get to try any of the mechanical bits and this paint will need to harden before the next step. Luckily I'm a bit busy at the moment so this is just the sort of little task I can do.

The cleaned chassis received the usual coat of etched primer from an aerosol. I ought to have sat the can in some hot water as the resting coat was a bit thicker than I'd like. That's probably due to the freezing conditions in our garage over the last few weeks.

Once dry I brush painted the whole thing with Precision weathered black. I didn't have time to set up the airbrush and you won't be able to tell on the finished model anyway. I like the thicker coat you get this way because it's probably stronger - at least to my mind anyway, there is no science behind this opinion.

Finally the bearings are cleaned out with the reamer inside and file on the outside. It looks quite pretty at this stage doesn't it ?

Monday, January 03, 2011

165DS Bonnet part 2

Bonnet 2Returning to the bonnet I fitted the radiator and was initially very pleased with how well it went on. The step section at the back clipped nicely above the bonnet doors and getting it vertical took only a little prod. No gaps were to be seen and happy I soldered it in place.

Removing the half etched bonnet top from the fret I test fitted it and it too looked promising. I still wasn't looking forward to bending it up but things looked good.

They continued to look good right up to the point where I examined a prototype photo and realised that if I used the parts as supplied the top would overlap the radiator and the fit would be even worse than the panels on the real thing.

Pondering for a few minutes, I reasoned that if I removed the step from the radiator, the top would but up against the back of it and all would be OK. Out came the piercing saw (a tool far more useful than I would have thought a few years ago and now indispensable to me) and after carefully marking the cut, gently sawed the metal away. A combination of cutting and twisting away the excess saw the radiator given the correct flat back. I wish I'd spotted this before fitting as the job would have been a bit easier.

Bending the top started with a gentle bend just to give the metal some strength. Then the sharp bends were made around some brass rod using the handrail holes as a guide for position. Soldering started at one side from the inside. Lots of flux and quick bursts of heat were the order of the day as I didn't want the rest to the ting falling apart !

I found the fit to be excellent but the final side bend needs to be made slightly sharper than expected so the edge tucks in properly at the top of the bonnet doors. You can't get an iron in easily here so the metal has to hold itself in place while you heat as it's difficult to apply enough pressure from outside to push it where you want it.

Sunday, January 02, 2011

The year is filling up already

The start of 2011 means it's time to break out the latest calendar and start filling it in. The trouble with having hobbies is that you can book up weekends months and even years in advance. My railway exhibition calendar runs into 2013 already !

Then there are all the other places I want to be - Model Engineer and boats shows at the end of the autumn. And the oddball ones like the Large Scale Aircraft (16/17 July) Add to that the VW car shows (Stanford Hall 1st May, Vanfest 9 to 11 September and maybe I'll even make BVF) and the number of free weekends starts to diminish rapidly.

To be honest what I need is an extra weekend in the middle of the week, I wonder if the Government has thought of this ?

Saturday, January 01, 2011

Half a decade

05Yes, amazingly it is a whole half decade since I started writing this blog. That's 1/8th of my life, or approximately far too much time sat typing.

For anoraks, here are the statistics:
  • 372 posts this year - I've easily beaten the 1 a day I've been aiming for. Sometimes this has been tough and thanks to the whole "going to work" thing, occasionally been difficult. Sorry if you feel there have been some lightweight posts but since you're getting this for free, stop moaning.
  • An average of 225 people visit every day. 45 people turn up every day. 18 people follow the blog.
  • The most popular post is the one about fixing my car's indicator switch with 7485 views.
  • Thanks to an e-mail doing the rounds, Scratchbuilding a hut is second followed by the mini sandblaster review and the Flying Scotsman partwork.
  • And finally this is the 1700'th post on the blog since I started.

Looking back at last year's New Year post, some things never change. I still plan to get on with the Brede Lifeboat which hasn't moved on since 2009 ! The Garrat hasn't progressed either. Maybe 2011 will be the year for both. Since I've given up building models for other people, apart from the 2 or 3 I have to finish, perhaps things will be different.

On the plus side, there have been plenty of magazine articles last year and hopefully this year will see plenty more. I have a few other ideas in this direction too. There is a book I want to talk to someone about and another under construction, except that this last one is pure, and hopefully very funny, fiction being written with a friend. More on this in a few weeks when we're ready.

So what can I promise for this year ?

Dunno. I haven't finished a boat this year (the Club 500 needs more work and paint) and feel the need to launch another one. There isn't a shortage of kits in the cupboard either.
I need more 3mm scale locomotives. These will initially be diesels since I've sorted out the drive system.
More shows. Obviously in a couple of weeks we have our own event and after this there should be some wandering up and down the country.
The garden railway has emerged from the snow and I have a station kit for it. Perhaps I'll be able to enjoy it this summer.
The aged VW's need some attention. Could 2011 be the year the bug gets back on the road ?

Sounds like plenty to do and that's not the full list. Oh well, at least I won't be bored !