Friday, October 31, 2014

More souvenirs

Oz Kits
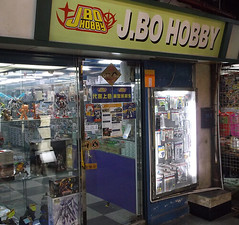
Well, I couldn't visit all those model shops in Oz without buying a few kits could I?

The range of Australian prototype kits is greater than I had expected. Maybe visiting modellers interested in UK railways influenced me, but I'd expected this to be the realm of scratchbuilders whittling things out of gum trees.

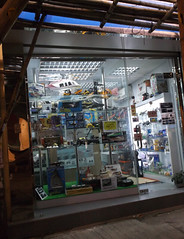
Not so. There is a modest amount of RTR and quite a supply of kits. Not anything like as much as on the UK scene, and diluted because of the countries 3 different track gauges, but still enough to make a reasonable start on a layout.

Limitations on the amount of baggage I could bring back on the 'plane restricted my buying but I have a few bits to dabble with.

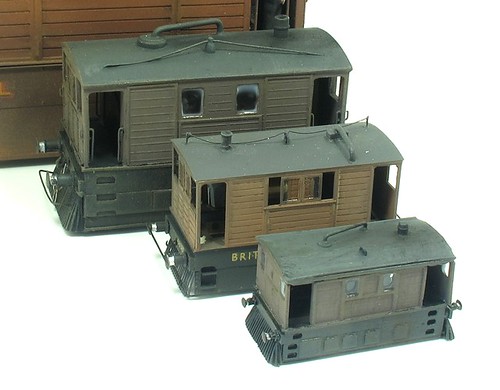
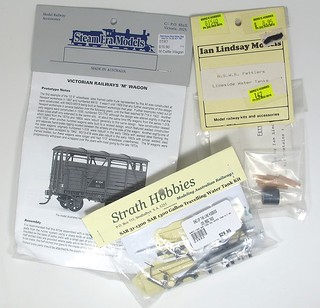
Top of the tree is the Steam Era Models kit for a Victorian Railways "M" wagon. Sharply injection moulded, the kit includes wheels and some etched details. Price $16.90Aus, or about 9 quid in her Britannic Majesties coinage. A real bargain in many ways and slightly cheaper than a comparable Parkside kit.

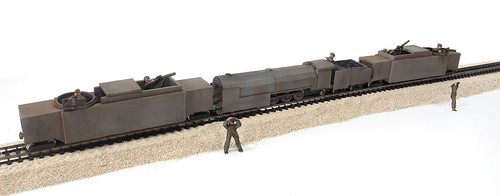
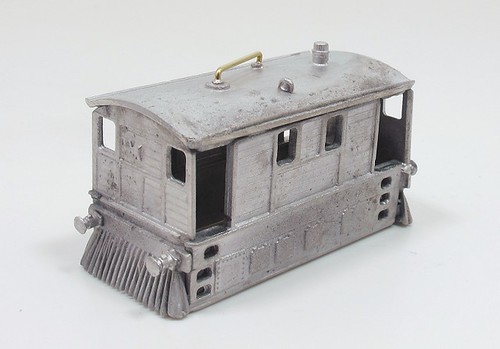
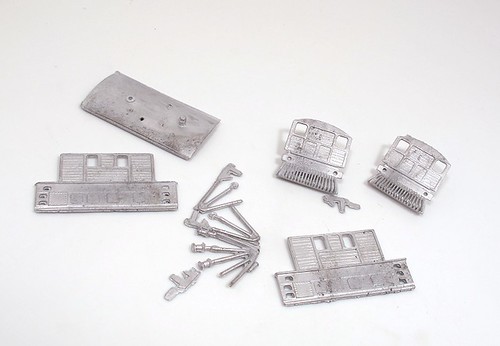
Next is a Strath Hobbies SAR 31-1300 Travelling Water Tank. Injection moulded solebars, metal wheels and a resin body and some plastic strip. Obviously more of a cottage industry kit than the one above but I've seen a finished model and it looks OK. Price $29.95Aus - not dissimilar to a UK kit from the same sort of firm.

Finally, as the holiday drew to a close and I really was worrying about the suitcase, a couple of NSWR lineside water tanks from Ian Lindsay Models for $8.95Aus. Resin corrugated tanks and bits of wood. Nicely moulded and they will look great on a diorama one day. The Aussies collect water obsessively so you can't model the country without these.

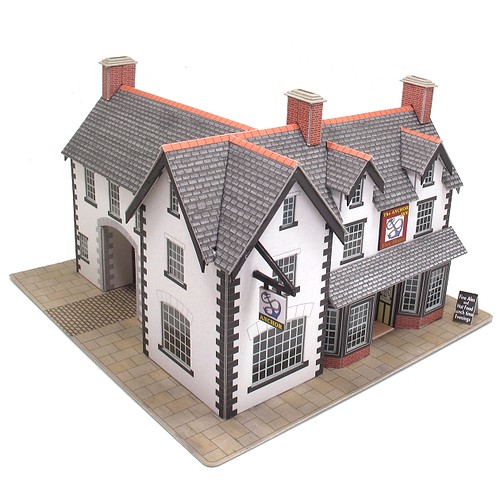
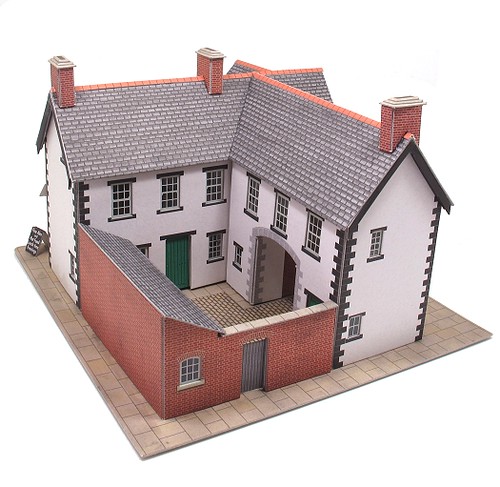
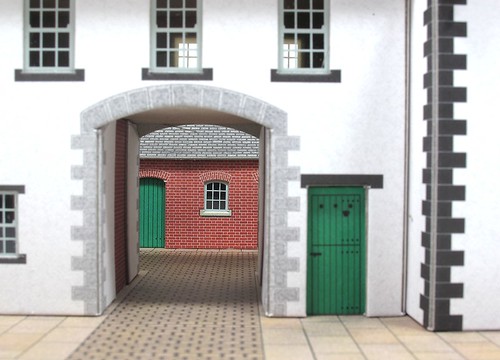
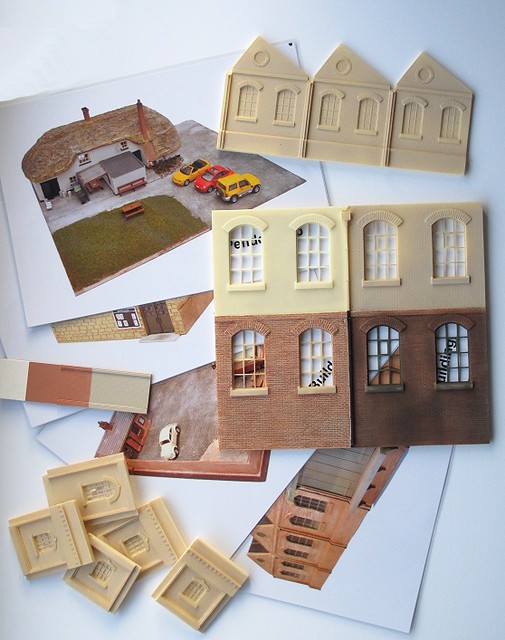
In addition, there were some rather nice building kits, Korean brass (lovely Garratt for $1700Aus), brass and whitemetal kit locos and loads of other stuff. While the Aussie modeller might have to build more than his or her UK counterpart (no bad thing some may say), there's certainly a lot on the market.

Thursday, October 30, 2014

A couple of souvenirs


"What did you bring back from your holiday Phil?", I hear you ask.

Well, there is an awful lot of stuff the tempt the tourist but assuming you don't need a "genuine" Aboriginal boomerang or didgeridoo and prefer something railway related then the list becomes a lot shorter.

In my suitcase, a GWR 0-4-2 was to be found. Purchased for $20AUS from the convention second hand stall, this is a K's whitemetal kit still running on its original wheels. While the paintwork could do with a little touching up and a new smokebox dart is called for, the loco runs quite a bit better than the poorly Airfix GWR version I bought from eBay to operate Edgeworth.

I quite like the idea that I've imported a British model built by an Aussie. It's perfect reminder of the convention.

A plastic Koala might at first appear to have less of a model railway connection, but I spotted a wild one whilst photographing a model railway out in the wilds of Adelaide. Not something that happens in the UK!

Koala

Wednesday, October 29, 2014

Yard crane

Yard Crane

Yard cranes in Australia, at least those on branch lines, seem to have two designs.

The first we can describe as "looking a lot like the Wills kit" and because of this can be ignored.

The other, and far more common version, is this tall example. For some reason, even though none appear to have seen any lifting action for many, many years, there are loads around. I reckon I saw at least 20 in my short time. Examples have survived even when the tracks they would have served have long since gone.

Yard Crane base

The design is ingenious. A central pivot point anchors the crane and the base rotates around this. Sadly I didn't get any measurements - long tape measures and long haul luggage allowances do not make good bedfellows - but I'm sure someone has a plan somewhere. Possibly even a kit.

Monday, October 27, 2014

Stobie Poles


It's funny what you become interested in on holiday. Or maybe it's just funny what I become interested in.
 
On the other side of the world from my home, the object that fascinates me more than anything else in the country is the Stobie Pole. Yes, poles supporting power lines. Something never seen on a postcard.
 
It seems that South Australia is short of straight trees suitable for making poles. Gum trees are wooden knots so not suitable for the job. If that wasn't enough of a problem, termites love wood so even if you have a straight length, it will be dinner pretty quickly.
 
The solution James Cyril Stobie came up with was to make a pole from two lengths of H-section steel filled in with concrete. Apparently alternative designs are regularly looked at but in nearly a hundred years, nothing superior has been found.
 
I pondered how I'd make a miniature version and thoughts of brass section filled in with plaster had crossed my mind. BRMA member Gavin Thrum has a better solution (seen on the right) with the metal section filled with basswood. This provides a suitable texture and is pretty close to the right colour.
 
Why they don't appear on a postcard though, remains a mystery.


Back from a land down under


Right - I'm back from Australia. The trip was great, none of the flying involved crashes and I'm now faced with trying to get back to normal. 

 
Whilst I'm sure no-one wants to read me banging on about my trip, it's my blog so I'll be putting up a few bits and pieces. After all, with no model-making done for 3 weeks, I need to talk about something! Besides, I had hopped to drop a few Aussie posts in while I was away but with the pricey Interweb over there and so many things to see, this didn't happen.
 
The BRMA convention went very well. My workshops were well attended and all finished with modellers having a go at the brick colouring method I now use. It's quite fun to see a group of middle-aged modellers wielding pencil crayons on resin building parts and being pleasantly pleased with the result.
 
During the main sessions, my talks went down well too. It's a bit nerve-wracking heading to the other side of the planet to talk to a group. If you bore them then they might reasonably wonder why they asked you in the first place. Fortunately, there were many other talks so if I had fallen flat, then there was other entertainment.
 
After this we enjoyed visits to many different layouts. All that space allows the locals to build some magnificent empires. I'll post a few pics later once I've sorted out the 2611 photos I've returned home with!


Sunday, October 26, 2014

Broken, but not in the way you think

 
Controller turned on.
 
No red light.
 
No locomotive movement.
 
Faulty electrics?
 
Nope. The knob isn't gripping the shaft properly. It's turned around a little bit. As it happens, I didn't spot this originally but then realised what was happening. At least it was a simple fix!

Saturday, October 25, 2014

Q Car

 
Behold. The Holy Grail of Triang collectables.
 
R571 "Q" Car
 
Produced in 1968, it's an exploding wagon that when open reveals a pair of "Red Eye" missiles. The mechanism swivels these into firing position when the sides come off.
 
Only 2,700 were made.
 
Price £345
 
I'll admit to being in awe of this. I have been a fan of the Battlespace range for years but this is the first time I've ever seen inside one of these. WM Collectables kindly lent the model to me for a few minutes so I could take some pictures for another job in the future.
 
If I had the money, I'd not have handed it back. This is hard core collecting at its best. Never mind your endless lines of diecast cars, when you've tracked one of these down, you are an alpha male in the collecting world.
 
And if I owned it, of course I'd play with it. I'd blow all those super-dooper finescale models off the tracks. This is what I call fun!

Friday, October 24, 2014

Triang R298

 
How nice is this set?
 
A Triang R298 Home Maintenance set for your model railways. Complete and untouched.
 
Containing some tools: tweezers, and electrical test light and some screwdrivers. Spools of wire in four colours, track pins and a tube containing couplings, screws and other sundries.
 
Once upon a time we fixed our model railways.
 
Yours for £145 from WM Collectables. Yes, I know it is a lot of money but find me another one in this condition. Of course I'd like it. But not as much as I'd like tomorrows blog subject.

Thursday, October 23, 2014

4 wheels on my loco

 
The big worry with a whitemetal chassis is that the thing won't be flat. Castings have a tendency to subtly change shape as they cool and while that might not be an issue with the pretty bits, where accuracy matters, this is a bad thing.
 
You might wonder why if I'm so worried, I didn't replace the lump. Truth is, while there are only 4 wheels, I'd need to hang the cylinders and valve gear of it. More to the point, the body has to sit on top and pivot. Since the arrangement shown in the exploded drawing looks pretty promising (read, quite like the setup seen in old RTR) I don't fancy trying to re-engineer this.
 
Anyway, a quick check shows the chassis is flat so far. If it need a tweak, at least the metal is soft enough for this to be reasonably easy.
 
And in case you are wondering, the metal disk is from a computer hard drive. It's more robust than glass and flatter. I'm proper hard finescale like that.

Wednesday, October 22, 2014

Bushed chassis

 
I'm not sure what world Nu-Cast were operating in when they decided that the whitemetal loco chassis would provide adequate bearing surfaces, but in my world they were wrong.
 
With all those waggly bits hanging on the outside, I really don't want to have to strip the mechanicals down just because after a prolonged period of running, the axle holes are the shape of a Wheetabix rather than round.
 
So, after digging four brass bearings out of the pot you saw yesterday, I reamed out the holes in the alloy lump and glued the metal bits in place. Reaming took rather longer than I expected as the hole enlargement is greater than I expected but once done and with the holes countersunk, the bearings were pushed in to place and then pressed home in a vice. Only one needed a smear of runny superglue too.

Tuesday, October 21, 2014

Pot of bearings


When I pen a magazine article, one phrase I hope never to write is, "I got this from the spares box."

How frustrating is that for the reader? I might have a spares box able to provide the vital missing part but that's not much help to anyone trying to follow the project. Not unless I'm selling special spares boxes with all the rubbish you might need for modelling.

Actually, that's an idea. I bet they would sell. Especially if I got someone famous to brand them...

Anyway, on the blog it doesn't matter. So, here is my brass bearing jam jar. It's where I go when I need to stick some bearings in a chassis and the kitmaker hasn't thought to supply them. Once you've been modelling for a while, you build up this sort of bits stock and the building process becomes quicker and easier.

Mind you, I can't remember why I bought most of this stuff.

Monday, October 20, 2014

Hobbyco Store - Sydney


Apologies for the lack of posting from a land down under. It seems that WiFi here is limited and/or expensive so I've had to concentrate on working on MREmag.com or backing photos up to Flickr.

However, I felt I ought to share this model shop with you. Possibly the biggest I've found. HobbyCo describe this on their website as a “Flagship store”. Now, as far as I know, only fashion emporia have flagship stores – that being the big shop in the capital where all the trendy stuff goes.

Well, this isn't in the capital city and if the contents are trendy then I've suddenly become cool.

Sited in the top floor of the Queen Victoria shopping centre, the most impressive building in the centre of Sydney, it has everything you could wish for.

Obviously I headed straight for the model railway section, right as you walk in the door and behind the operating railway in the window if further guidance were needed. That railway, by the way, looks like a standard Hornby display item and was running Flying Scotsman double-headed with Thomas on one level and something German looking on another.

Train wiser there is a huge range of Hornby products, both rolling stock and Skaledale. You can have Bachmann too, and most surprisingly, Peco. Not just track but O gauge building components. If you need road vehicles then a pretty impressive selection of Oxford Diecast are stocked.

Foreign models aplenty include American and Australian locos and rolling stock. Ausie wagons are rarer but several box sets were on sale. A sale bin had some bogie hopper kits, a local production complete with transfers but not bogies. $25AUS a kit if you fancy them.


Outside trains, I found a huge range of plastic kits, slot cars, R/C cars and aircraft and piles of laser cut model boat kits, many from manufacturers I'd not heard of. Plenty of Manga stuff if you want it as well as all the normal ships, aircraft and cars.

Paint and glue is stocked along with a wide range of tools. As befits the location, Tamiya and Mr Hobby Japanese materials are available.

This is one heck of a model store. I can't comment on prices as I'm still halving everything to convert it in to pounds sterling so it all looks reasonable. I'd certainly love to have a shop ike this in a few UK cities!

Me, I left with an Assie diecast car, a cartoon Karman Ghia and an etched brass kit for the Sydney opera house. And even more worries about future excess baggage charges. Suggestions for methods of shipping a lot of magazines and books from Aus to the UK would be welcomed...
 

Sunday, October 19, 2014

Patina

1F front

Wandering around Barrow Hill a few weeks ago, I spotted a familiar shape - a 1F. Just like the one I bought from Mr Bachmann. Apart from the open cab anyway.

1F smokebox

Looking at the loco, what struck me was how pleasantly dirty it was. Not disgusting, but a workaday level of muck appropriate to a hard working shunter.

Rust brake block

The loco isn't black. At least it isn't fresh from the paintshop black. But it is covered in black and brown. And dark grey. Quite streaky too in places.

Footplate

And all the dirt has texture. Not great lumps and bumps, but it's definitely not smooth. I wonder how I can reproduce it?

BR Crest

Saturday, October 18, 2014

Bachmann 1F

3F

"What?!?!"

"Another RTR loco? That's the second one you've bought this year!", I hear you cry.

Guilty as charged. I appear to have fallen in to the trap that has already snared so many modellers. I have bought a toy chuffer just because I like it.

It's been a long process. The first production shot appeared over a year ago and the moment I saw the detailed cab, I knew I wanted one. Yes, there is no use for it at all on any of my layouts, but I don't care.

3F cab

Just look at the exquisite workmanship going on in here. I'd struggle to produce a kit that looked this good and not just 'cos I'm not very good at making things. This little loco simply oozes character.

Of course, the cab glazing includes a joining piece that is very visible. And we really need a crew in there. It's far too clean too.

Basically, I've bought one and now (according to a proper collector) I'm working out how to ruin it.


Friday, October 17, 2014

Traditional instructions

 
Traditional instructions. A great long parts list which you are supposed to check through before starting - and never do. Well I don't anyway and even if I did, it wouldn't do me any good here. It's not like I can ring the manufacturer up for spare parts. Not unless I have a special old telephone anyway.
 
After the list, lots of words in great big slabs of text. The sort of great big text slabs that people tell me they prefer in magazine article rather than all those new fangled pictures and boxes and stuff. The sort of thing that every other type of magazine outside toy trains has. The ones that sell in any numbers anyway.
 
Sorry, moaning. Seriously though, I hate digging through this stuff. At least give me a bulleted list so I can tick stages off as I work.

 
This is more like it. A great big exploded diagram. All the parts shown and clearly enough that I probably won't bother reading the words.
 
Sadly, producing this sort of diagram is horribly expensive now. Draughtsmen aren't easy to find and those you can hire want hundreds of pounds per day to draw simply because they know they are worth it. Why can't people work for three shillings, a bowl of porridge and a day off being horsewhipped? The good old days have certainly gone...

Thursday, October 16, 2014

What's in the railcar box?


I don't know why, but when I first opened up the box, I was surprised by the cast whitemetal sides. In my mind, I'd expected etched brass parts for these and had already started to ponder how I would form the tumblehome - something I've had little success with in the past.
 
No worries here. Wrapped in tissue paper are cleanly cast whitemetal bit ready to be slotted together. OK, so the moulded handrails need to be replaced but that's not a great problem.
 
 
Where I expected etched, I got whitemetal. Where I wanted etch, I got whitemetal too. The chassis is a lump of the stuff plus etched waggly bits and a load of fittings. the brass pins for tieing waggly bits together could be interesting. I'd have expected rivets to squash, so some neat soldering will be required here.
 

Wednesday, October 15, 2014

GWR Steam Railcar


Back in August, I suggested that since I was going to be away from the workbench for a goodly chunk of October, I ought to build a kit to entertain you for the duration.

You voted, and the clear winner was the GWR Steam railcar.

Now, you can probably guess from the slightly random nature of the posts so far this month just how far I've progressed with the build, but we'll have a look anyway.

Tuesday, October 14, 2014

Prototype follows model - Part 2 - Signwriting

Wagons

Sign writing. Is. Hard.

The red wagon looks like I've had a go, which means it doesn't look like any prototype. The letters are too thin for a start. Neat, but too thin. I'm not sure the shape of the letters is quite right either, are those on wagons normally squarer?

Interesting though. It could well be a wagon straight out of a model railway magazine from the black & white days.

Monday, October 13, 2014

Prototype follows model - Part 1 - The Baby Deltic

Baby Deltic to be

Many years ago, if you wanted a Baby Deltic for your model railway, you took a Class 37, a saw and started chopping. You'd need a Class 20 chassis for the underpinnings too. After a few hours happy modelling, the result could be a pretty good facsimile of the prototype. If keen, a quick article in one of the magazines of the day would follow. I know - I read at least one.

Now you can buy a RTR model from Heljan and all this sort of fun has ceased.

Except it hasn't. Tucked away in Barrow Hill is the Baby Deltic Project. In real life they are doing what we used to do in model form. Taking a Class 37 (37 372) and chopping the shell to produce a Baby Deltic. Class 20 bogies support the loco.

This isn't some dodgy cut'n'shut job either. Unlike the traditional second hand car dealers "modifications", this is a fully engineered transformation. Looking at the photo, you can see the work being carried to shorten the locomotive nose. Amazingly, all this will be completed for a mere £33,000. A tiny amount to plug a gap in the list of prototype locos we can enjoy.

Visit the Baby Deltic Website for more information.

Sunday, October 12, 2014

Starting small

S + KI speak to a lot of beginners setting out in railway modelling. I do my best to dispense helpful advice. The main thing I say is "Start small".

Sadly, by the time I say this, it's often too late. Lofts have been boarded out. Vast empires have been embarked on.

I have an analogy. It's a bit like taking up baking and deciding that the first thing you'll have a crack at is a wedding cake.

It can't end well.

My advice - try and batch of cupcakes first.

Saturday, October 11, 2014

A cardboard coaching inn

Metcalfe Coaching Inn

While on holiday a couple of weeks ago, my Dad took a Metcalfe card kit to amuse himself with. You need something to do in a Cornish caravan if you aren't to overload on cream teas apparently.

Courtyardview

On his return, the model was mostly assembled, just needing barge boards and chimneys. These are now attached and the result is a pretty handsome building in my opinion.

Card courtyard

The kit was apparently well designed and more importantly fun to put together. OK, so it's not the most finescale thing out there but then would spending hours prodding computer chads into position provided entertainment as pleasant as seeing the 3D structure appear quickly and painlessly?

View from the street

Looking at the model though, I wonder if it could form the basis for a more detailed model. If the quorns were beefed up, the window cils and lintels given addition layers, brickwork covered with plasticard and perhaps some individual slating on the roof, would this pass muster on a more advanced modellers layout? Maybe some guttering and drainpipes, better windows or at least ones with more depth might be a good idea. There wouldn't be any need to mess around with the kit too much, just use it as a shell to be clad. The card walls would be fine for stucco. If you needed more, paint them and pounce with talcum powder for texture.

I'm not saying this is on my projects list, but maybe somewhere there is a modeller who fancies a go. If so, let me know how you get on.

Friday, October 10, 2014

The many scales of Toby

Tram 4

You might have been wondering why I have been building an N gauge J70. Well, here's a hint. You'll have to wait a while for the full reveal.

Thursday, October 09, 2014

WW1 railway in BRM

 
It's British Railway Modelling time again!
 
The November issue sees a major change to the magazine. For a start the price has risen by 50p. Bad news you might think but in this case the rise is to cover a new addition - BRM TV.
 
Each issue will now come with a DVD fixed to the front cover (digital subscribes get a free download) containing layout films, product tests and best of all, a practical feature staring - Me.
 
We've been filming these for some time and to date the DVDs have been part of a Premium Edition sold through WH Smith as a test. Well, it seems the test has worked (don't ask me for the details, I'm talent, not managment) and so we're going to carry on.
 
Hopefully, this extra content will appeal to readers. It's the 21st century so a multi-media publication isn't such a surprise. What it is, is a brave move to do something different with a model railway magazine. I'm still getting used to being on-camera but if you've seen any of the films and want to let me know how stupid I look, go ahead. I've already inflicted the films on some freinds and so far things aren't looking too bad.
 
So, what is in this issue? For me it is the first part of a major project - a World War 1 railway system.
 
Not being what you might call a fan of wars, I decided to eshew the front lines and try for a scene away from the fighting. "Owne's Bridge", named after the war poet Wilfred Owen, has as its centrepiece a lifting bridge based on a design used by the US army to get over French canals. I've built this out of wood, as per the prototype, and also cover miniature woodworking on the DVD, talking about the materials and tools required.
 
Obviously we need more than just a bridge so this issue covers the baseboard and building an armoured Simplex loco from a kit. Future instalments will include rolling stock, scenery, a farm and detailing.
 
Talking of detailing, I'm looking at military figures with both Airfix and Revell represented and some more accurate whitemetal models, including the best figures I've ever seen in this scale from W^D Models.
 
Finally, sticking with the wartime theme appropriate for November, I've written up the build of my RH&DR armoured train. Unusually, this regular readers will have seen this on the blog but I've taken the opportunity to use different photos and a more balanced description of the build.

Finished Train1

Wednesday, October 08, 2014

Missing the incandescant light bulb

Tram 3

In the good old days of incandecent light bulbs, a modeller could use the heat from his or her desk lamp to dry paint, or in this case Micromark Krystal Klear glazing.

No such luck with the modern low-energy version which couldn't melt an ice cube. I just hope the polar bears appreicate the suffering caring about the environment is causing.

Tuesday, October 07, 2014

Soldered up

Tram 2

What a cruel enlargement!

The main kit parts were soldered together for speed, and because I needed to test my newly cleaned soldering iron. Fit was pretty good with no significant clean-up required.

On the roof we have a condensing pipe made from brass fixed with the magic C&L 100 degree solder. One mystery is how anyone would fit the traditional N gauge coupling. I assume it would poke out through the cow catcher, there is a support inside for an NEM box. It wouldn't be pretty but then N gauge couplings never are...

Monday, October 06, 2014

A tiny J70

Tram 1

According to the packet of this kit, it's for a "Toby J70/Y6". Interesting that Thameshead Models think that we hard core chuffer builders will associate the design with the Rev W Awrdy's books before we think of the LNER prototype!

The 2mm scale kit is a simple whitemetal model designed to fit on a Lima motor bogie. A neat piece of design is that the sides are double-sided. Since the loco is not symmetrical along the centre axis - the cylinders are at one end, all the modellers has to do is use the inside out on one side and the result will be accurate (that doesn't make sense I think.).

Other parts are fiddly, small and not very cleanly cast. Feting the buffers will be an act of sculpture but never mind, for the purposes I have bought this for, it's not going to be examined too closely.

Sunday, October 05, 2014

Barrow Hill Live

Diesels in the evening

Barrow Hill is a new exhibition to me. It takes place in Britain's last railway roundhouse. When I arrived late on Friday afternoon, after setting up in a marque, I took a walk through the building and was immediately struck by the atmosphere.

Maybe it was the setting sun, or that I had the place to myself, or maybe that this isn't a Disneyfied attraction but one full of muck and grime, but there really was something special. I've looked at hundred of photos showing these cathedrals to railway engines in the past, but this was like stepping in to the picture.

Although there were steam engines present, most of the roads are taken up with what we might call "modern image" locos - even though these are all since long banished form the real railway and into preservation. Just looking around, it's obvious how much the railway has changed and the great loss of variety.

Cake!Saturday morning was cold. Cold enough for me to stop off en-route and pick up a hoodie from a supermarket since I'd forgotten to bring a coat along and would be wearing my BRM polo shirt. Before opening, I nipped to the buffet and picked up some hot tea and a huge chunk of chocolate cake. Well, you never know when you'll get the chance to eat!

Visitor numbers weren't great but I enjoyed a constant stream of people who wished to ask questions and chat about Edgeworth and model railways in general. It's difficult to tell how many people were there as you could loose quite a few on trains or simply standing on the viewing bank watching Tornado or a coal tank bustling up and down with a shuttle train.

Both days saw an interesting mix of people. Possibly the large number of September shows or simply the mix of real and model railways seemed to discourage the hard-core enthusiast. Those I chatted to were very much at the beginner end of the spectrum but to a man (or woman) wanted to enjoy their models. Ballasting seemed the most popular topic for the weekend but I covered pretty much everything else at one time or another. There was no sign of the normal Saturday morning silent staring we see at a "normal" exhibition.

Orestone Qauy

As usual, I didn't get much chance to look around the show but I have to comment on Orestone Quay. Looking like a John Ahern layout had fallen out of a 1950s Railway Modeller, it is built using techniques from those day and looks fabulous - at least to me. The buildings have charm and atmosphere that is often missing from sharper layouts owing more to RTR structures or modern techniques.

I'll be mentioning a few bit and piece from this show in later blog posts as there were a few very interesting sights. For the moment, have a look at my photos on Flickr.

Saturday, October 04, 2014

Hong Kongs many model shops

Hong Kong Model Shop 3Since I don't really have a plan for my stopover in Hong Kong, on the first afternoon and evening, I decided to have a walk around the block from my hotel just to soak up some atmosphere.

This walk turned in to more of a wander than planned and I was eventually a bit lost in he maze of streets. No worries thought I, if I head over in that sort of direction, I'll probably be about right.

Walking past a shopping alleyway, I spotted a sign for J.BO hobbies. "That looks interesting", I thought so wandered up there. Before finding shop, in the 30 feet before this there were two more. And just beyond, another two. An at the end of the shops, Hong Kong Model Shop 2another one at the end of the street. Around the corner, another 3. At this point I turned in the direction of the hotel and passed 3 more shops.

All in, I think I counted 12 shops. All within 4 minutes walk. Some were next door neighbours. All were open even though it was 6:30pm on a Friday.

Looking at the stock, small, battery powered racing cars seem to be the thing. All the shops stock them and one has a host of tune up parts. These were so popular, a big crowd of youths were going through them and you couldn't get in the door.

Hong Kong Model Shop 1After this, it's R/C stuff, mostly Tamiya of course. Cars, planes and even a few boats. One shop is stuffed with plastic kits.

The only thing missing is trains. Presumably there is a Hong Kong model train scene but I've yet to find it.

More importantly, I need to work out where these shops are so I can visit properly on the return leg of my trip. The last 3 are on Waterloo road so let's hope I can work it out from there!

Friday, October 03, 2014

Getting things ready for the trip

Aussie Bits

The last few days have seen some frenzied activity as I prepare for my trip to Aus. Talks have been tweaked (I've already tested these) and handouts produced. There has even been some modelling. Thanks to the generosity of Skytrex, I have some castings to demo brick colouring.

My workshop will be on modifying resin buildings. I'm not filling a suitcase with model structures so the audience will have to make do with photos. However, the brick colouring technique I use has made a huge difference to my modelling and so I'm going to finish each workshop with this and let people get a bit "hands on" with it.

If you are down-under, please come along and say hello. Looking at the schedule, this looks like a fantastic event. All being well I'm going to be a busy chap in Adelaide. Hopefully I'll get some pictures posted on here, so watch this space.

Thursday, October 02, 2014

Off down under

OK - All being well, when you read this I will be on the very first leg of a trip which involves the British Railway Modellers of Australia convention in Adelaide.

Blogging for the next three weeks might be a little bit erratic. I have set some posts up in advance but as I write this one, I'm not sure if there is enough for one every single day. Sorry about that.

Of course, this is the Interweb and I understand it is available all over the world so I'm very hopeful that I can pop in a few posts about my travels as I make them.

As they say, watch this space.