Monday, February 28, 2022

Brownhills West Station model shop


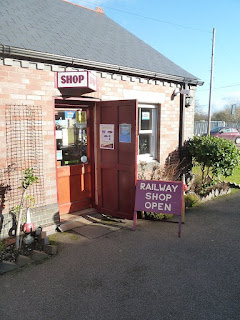
On a chilly, but bright, February morning, I was visiting the Chasewater Railway's Brownhills West station, and was surprised to see that the model shop found at the end of the platform was open. 

It seem that both this, and the cafe, stay open, even when the railway itself isn't working. A popular spot with the locals for country walks around the resevoir, both do good business, even in the off season. 

Many preserved railway shops are full of train-themed stuff for the benefit of the visiting public, with perhaps a nod toward the enthusiast. To be fair, the public are where the money is, gricers being notorously tight-fisted. 

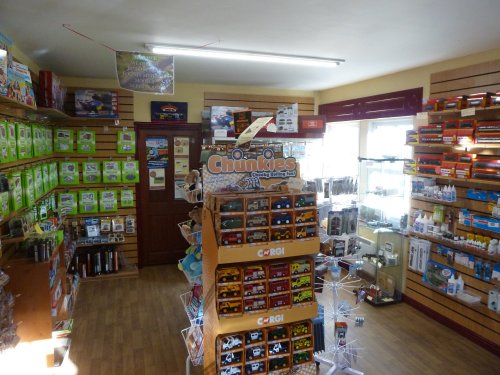
However, this shop is a bit different - it's a proper model shop stocking Bachmann, Hornby and Peco products. Streamline track is particually popular I'm told. 

There's plenty of Metcalfe plus tools and glues to assemble your kits with. The second hand cabinet is small, but managed to tempt me to leave a few quid behind for a W&T 6-wheel milk van kit. 

There are souveniers of course, and some nice tasteful ones. It's only forgetfulness, and the realisation I needed to get back out and do some work, that meant I didn't come away with some Hitachi Rail pens to go with my kit. My only complaint was the lack of railway postcards - I always send one to a freind when I visit odd places. 

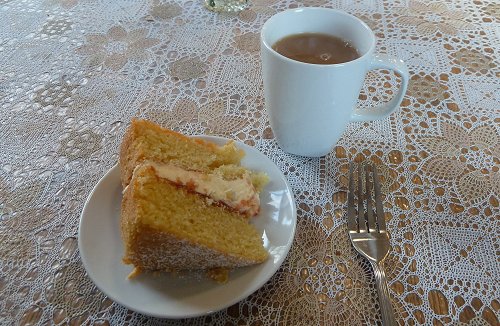
Best of all, next to the shop is the cafe, purveyor of excellent cakes. 

So, if you find yourself in Staffordshire, looking for a nice day out, check out the railway and model shop. 

Chasewater Railway website.


Sunday, February 27, 2022

Pilot Boat at "speed"

Pilot boat

The camera never lies? 

It does in this case. You'd think my Pilot Boat was racing along, blasting everything out of the way with it's wake. Nothing could be further from the truth. It's slower than MisChief, a real Karmann Ghia of boats (all show, no real go) even though the nose is in the air and we seem to be generating plenty of spray. 

Sailing this model is pert of my plan to get a variety of boats on the water, so I dug this out of storage and managed to find a battery that fitted it. Sadly, said battery has been around for years and was bought second-hand from the club. 

All that time with no charge hasn't done it any favours, and despite several charge/discharge cycles, the runtime was not much more than 5 minutes. 

So, time to buy a new battery, but maybe also replace the 540 with something brushless? 

You can read the build of this model here.

Saturday, February 26, 2022

Saturday Film Club: Why do you build a garden railway?

Garden Rail regular, Rik Bennet, explains why he built the Peckforton Light Railway. Lovely line, and with some really good invented history. This isn't just about running trains in circles.

Friday, February 25, 2022

I got my APT!


I wasn't sure that I'd be adding Hornby's latest version of the Advanced Passenger Train to my collection, so standing outside my local model shop holding the box pleased me enormosly. Nearly enough to make me forget the £430 I'd shelled out for it!

You see, Hornby have introduced a Tiers system for shops - those in the top teir have large and well laid out premised plus an efficient on-line operation. My local guy is in the bottom (3rd) tier thanks to a tiny premise and no web sales. New models go to the top teirs first. 

But, he got one! I ordered the model the moment it came out (OK, when I could officially know, about a month after I actually do), and two years later, allowing time to save some pennies, it has arrived. If you think that the teirs system means no models for the little guys, it seems that this isn't the case. I didn't pull any strings or make a fuss, it just arrived in the shop. One phone call and I was in the car to wave my credit card. 

I'll admit that this did leave me with a quandry - the weekend before I got the call, I had seen several sets at Doncaster, including on the excellent Tony's Trains stand, but I'd placed the order and wasn't going to walk away. This sort of big ticket item makes a big difference to local shops. I'm sure I was the biggest sale of the day, if not the week. Anyway, I can't bang on about supporting real model shops and head to the web the moment it is time to buy something. 

I've gone for the 5-car set DC set for several reasons: 

  • It's the same as my 1980s version.
  • It's the cheapest option. 
  • I don't have anywhere to run it, so there's no point in spending even more on a cupboard Queen. 

I mean, I want an APT, but it hardly fits in with the sort of layouts I build. This is just plugging a gap in the collection. A lollypop loco. But I deserve a lollypop. Occasionally. 

Comparing the packaging (no, I'm not doing a squeally unboxing) you can see that Hornby has changed a lot. The new model is in moulded cardboard trays, far more eco-firiendly than the big slab of poystyrene the old model arrived in. 

Out of the box, the shape is noticably less square then the older model. Colours are better (ignore the bright yellow, a trick of the light) and so much better applied too. The red line on the 80s version is best described as "fuzzy". There's more detail as you'd expect, although the train isn't exactly bristling with the stuff. 

Am I happy? Yes. There will be more detailed reviews in all the magazines, but I'm pleased with my model, although this is from an APT collector point of view rather than as a finescale modeller. Maybe one day I'll have somewhere for it to streatch its legs properly and enjoy it tilting around the curves. That will have to wait, but if it does, I'll still run the old one too!

Thursday, February 24, 2022

Lots of 3D prints and some recycling in the Spring BRM

Progress continues on my wagonworks project - this time I put together the buildings and scenery. 

Those two make up the lions share of any model railway, so I've found a few shortcuts to try to ensure construction doesn't take up ALL my life. 

First, needing some storage containers, I dug out an old diorama and recycled not only the boxes, but all the scenery too! How's that for green? 

Then, a lot of detail comes in the form of laser-cut and 3D printed parts. A little assembly, and a lot of painting, and the job is done. Not too painful, despite needing to fill a big shed with details because you can see loads through the big doors!

For BRM TV, I take viewers through the process of preparing 3D printed figures and details. To be honest, it's really not rocket science, but I've seen a few people on the web making a real meal of it, frequently because they don't see lack of knowledge or experience as a bar to authority on a subject. 

Obviously, I AM an expert... :-)

Wednesday, February 23, 2022

Daihatsu Midget - Part 3: Job done, lessons learned

Daihatsu Midget

Finishing the Midget is pretty simple. Part fit is good, you just need to trim the odd bit of flash away, especially on the clear parts, and glue them in place. Deluxe Glue'n'glaze handled the windscreen and lights. Odd there is no glazing for the doors, did the prototype have it? 

Silver lines were applied by bow pen, much easier then trying to keep the brush on top of the raised area. Of course, this lagely vanished in the dirtying. As with the T2000, the transfers needed a lot of excess carrier film trimming away. I didn't bother with anything for the sides as I doubted it would have sat properly on the "dirt" and if applied before that, might have affected where the paint sat on the body.

Daihatsu Midget

Around the back, I've kep things simple. Probably should have painted the tail lights, but I'm not sure of the colours - presumbably just red as there's no sign of any indicators. A black dot will do the job as you often don't see the colour until the lights are illuminated. 

The canvas cover is going in the bin - it's a terrible fit, only just sitting in place. It could be glued on, but I think the model looks nice without it. One day (!) I'll make some stuff up to go in the back. The box art shows crates of fish, which looks nice. Maybe if I see some suitable mouldings, I'll pick them up and spend time with a paintbrush detailing the scales. 

At 10cm long and 4cm wide, this really does have diorama potential. One day. In the meantime, it was fun to build, which is the point.

Tuesday, February 22, 2022

Daihastsu Midget - Part 2: A lucky painting accident


Painting the Midget didn't start well. I chose some Humbrol satin grass green for the body colour, but my airbrush was playing up. In fact every airbrush I tried played up, until I dug out an Badger 200 which seemed happy to throw paint around. 

In the garage, the results looked OK. The next day, less so. Although there was good coverage, it was far from smooth, there was actually some texture. Paint or tool? I didn't know, but the die was cast, this model was going to get weathered. 

Another bit of web searching, and I failed to find a single photo showing a dirty Midget. Contemporary images all seemed to be taken of new vehicles. I was on my own...

On the shelf are a couple of Vallejo colours - brown and rust. I slapped a mix of both on the sides with a sponge, didn't much like the result so wet them with a brush and wiped the resulting mess away with a paper towel. 

Result - surprisingly good. Once dry, REALLY good. And so simple. 

Defintely a happy accident. The acrylic seems to cling to the rubbish enamel base coat in a way that looks realistic to me. Maybe there is skill in knowing how much to wipe away, but I'm not claiming that this is all down to me. 

Around the doors, I have fiddled with some MiG weathering pencils, but the results don't wow me at the moment and I can't work out if they are just another toy, or something that will make a big difference to my modelling. I've watched a few videos, but aren't convinced yet. More research needed.


Monday, February 21, 2022

Daihatsu Midget - Part 1: Look in the box


Moving on the second wierd Japanese 3-wheeler kit in the pile I bought, I'm looking at the Daihatsu Midget. A quick web search shows that this truck has been through several facelifts, the most recent of which sees the spare tyre pearched on the nose in a way I can't decide is hideous, or quite appealing

Anyway, this model is of the 1958 version, which I suspect is the classic Midget. By this point it looked like someone had designed it for a start, and that curvy nose is really attractive. 

Inside the box, there's a one-piece moulding for the body, which has some pretty bad flash, in some anoying places - along curved edges beside the windscreen which won't be easy to clean up without taking off detail. 

The first thing that struck me was how much smaller it is than the Mazda T2000, under half the overall length for a start. It is undenably cute and would make (in real life) a lovely vehicle to potter around on short journeys in. 

As ever, the plan is to stick this thing together with no pretentions to super-detail. 

Rubber tyres are a nice feature of the kit, although I'm tempted to argue for plastic ones. These could have better tread detail, and would be easier to flatten at the bottom in a realistic way, but I said I wasn't going to get all finescale. 

One thing I found out by accident was that twisting and pulling the tyres from the runner gives a better result than cutting with a knife. This tends to put a flat in the tyre, whereas the twist'n'pull doesn't. I wonder why?

Sunday, February 20, 2022

The Festival of British Railway Modelling 2022

Little Salkeld bridge

You know what you can't do while wearing a facemask? Drink. 

Which is why I'm typing this and trying to rehydrate myself after consuming little more than 500ml of liquid between show opening and leaving the venue yesterday. Yes, I am an idiot, but in my defence, I was busy taking photos and video and didn't really think about it. 

As the first major show in the sort-of-post-Covid era, no-one quite knew what to expect. My guess was that numbers would be down as people avoided crowds. I was wrong, they held up nicely. The audience seemed unmoved by any warnings, and for the most part, ignored the posters asking them to wear masks too. Brave or foolish? Only time will tell. 

Those posters meant that I wore an FP2 mask all weekend - which apart from the lack of drinking, was very comfortable. It also made walking through the crowded areas, and there were plenty of those, worry-free. My thinking was nothing more than "We are asking you to wear a mask, so the least I can do is lead by example."

Anyway, the show was typical Warners fayre - slightly heavy on trade, but with some really excellent layouts. There really wasn't a duff one amoung them, but since you expect me to have favourites, I love Sandy Bay and Locktern Quay, both models I'd be proud to have built, and tick the box for tiny model railways. 

Sandy Bay 

The trade was interesing too. A stand from Southestern Finecast was full of whitemetal loco and vehicle kits, and according to the owner, did very well.  I could have picked up a selection of model boat bits from Vintage Miniature Models too. Just two new stands to the show. Yes, there were RTR models on sale, including several new Hornby APT's (mines' still on order from the local shop) and some cracking second hand stock. I had to resist a couple of original 3-packs of Graham Farish wagons for £12.50 each. Not that I want them for any other reason than my first train set included some...


Cake-wise, the show was a bust - until a kind RMwebber arrived with some of his wife's delicious millionaire shortbread. I'm not normally much of a fan, but this stuff was brilliant. The caramel wasn't bitter, which it can be. 

Anyway, a good show, that seemed to go down well with the crowd. Maybe it's the lack of events recenlty, but those that came stayed a long while, although things dropped off around 3pm a little, by the end of both days, there were visitors to be cleared out of the hall. The trade seemed happy too, all that pent-up demand for model bits? Or just the joy of being able to wander around looking and being tempted. 

If you dropped by for a chat, thank you very much. If you shoved a mobile phone in front of me with some modelling on it, thank you too - we saw some cracking stuff and have lined up some feautures for the future with a bit of luck.

Chatting, buying and being inspired, it's what shows are all about. 

A few photos from the show on Flickr.

Saturday, February 19, 2022

Saturday Film Club: The Investigator

Unpopular opinion: Gerry Anderson shows looked great - but the stories were rubbish. Space 1999 - what the hell was going on there with it's hippy-dippy metaphysical stuff? And Thunderbirds, at least they sort of made sense, but plot holes ahoy. 

I still love them though. 

Anyway, I didn't know about "The Investigator", a show that didn't even make it all the way through a proper pilot episode. You can see why - two teenagers shrunk to 1/3 size for no apparent reason and a plot revolving around stopping the theft of a painting. 

Still, there were a couple of funky vehicles, and Dinky made models of them despite the searies never happening.

Friday, February 18, 2022

Making a key for Percy


Last month I mentioned that a Meccano Percy had joined my collection - but that it was missing the all-important key. 

Well, I've done something about it, and written the process up for the World of Railways website, so you can read it (for free) over there.

Thursday, February 17, 2022

Building a Powerbox - Part 3. More switches and sockets


One feature I've always built in to my layouts is an extra direction switch below the controller socket. 

You see, I'm not that good at making sure my kit built locos all operate the same direction when you drive them, and since it's easier if the switch on the controller is matched to the direction of travel, the extra one sorts this out. 

I'd like to say I note those models running reversed and swap the motor wires when back at home, but I'm usually more interested in doing something else. Besides, I have a switch, so I might as well use it. 

From my electronic bits drawer, I found a nice chunky slide switch and wired it in. I like chunky switches, they are so much more satisfying to use. 

This one has a centre off, which has already caught me out once, but I'm sure it's a good idea. 

While the output posts are nice, I thought some chocolate block style versions would be useful as well, and I have some that are pushed to grab/release the wire. 

I know these came from a show because I'd never seen them before and knew there would be useful for something. As well as track power (red and black wires) I've connected the second 16V AC output from the transformer, just in case this is handy one day. 

Finally, the same input that goes to the controller is wired to a chocolate block poking out the side and operated through a couple of holes in the top of the box using a long flat-bladed screwdriver. This isn't an output, but an input. If I don't have access to mains electricity for the transformer, I could feed some 12V DC in here from a lead acid model boat battery. Obviously, not at the same time as the 16V AC is going in, but I made this, I know how it works, so (hopefully) I'll not cock it up. 

There we go. A useful tool made up that I'll hopefully use for many years. There's plenty of space in the box too, if I find more gizmos to add!

Wednesday, February 16, 2022

Building a Powerbox - Part 2. A pretty, but useless voltmeter

I love light up gizmos, and what better, and potentially more useful, than a voltage readout on the panel? 

Component Shop sell something suitable, but I went down the eBay route as I wanted one with bezel and ordering from weird people was part of the fun of this project. How you can have a business that sells components so cheaply, including minimal or no postage, and make a profit is a mystery. 

Anyway, the meter needs a feed from the track output that is the correct polarity, so it's fed through a tiny bridge rectifier

You're supposed to solder these to a circuit board, or some veroboard. Mine floats in mid air, although I have used some heat shrink on many of the connections to both support them, and avoid short circuits if the wires move around.

Track power goes in through the inputs that would normally take the AC power, and it ensures the outputs are always the correct polarity. 

The good news is, the panel lights up and changes value as you twiddle the controller knob. 

The bad news is that according to my old dial multimeter, it's reading 2V too low. Are those volts being lost in the rectifier? I don't know, but I'm not losing much sleep over this, the display is mostly for show anyway. 

You'll notice that I've added a couple of LEDs which hadily tell you when you've reversed the polarity to the track, in case you didn't notice you'd flipped the switch. They are petty though.

Talking of switches, I've added another one...


Tuesday, February 15, 2022

Building a powerbox - Part 1. Basic ideas


The Problem: I use a Gaugemaster handheld controller and transformer on all my layouts. Both have 5-pin DIN plugs on the end. Handy for the fully wired layout, but no good when I need to test a model on a new product or a rolling road. What I need is something to plug them in to with suitable outputs for the track. 

My solution, the Powerbox. 


16V AC in. Track power out. All controlled from a Gaugemaster handheld. 

The thing is, my favourite section of the old Maplin catalogue was the one full of lights and switches. 

Anyway, the basics: 

I found an old plastic box in the garage and decided to make use of it. In the side, I fitted the transformer input and on the top the controller connection. For the track output, there is a pair of post connections designed for stereo speakers, I think. 

A lot of this stuff came from odd places on eBay. I tried to stick to UK suppliers, but this was being done on the cheap with the risk that stuff bought in might be rubbish. Sadly, I haven't enjoyed an electrical components supplier locally since Maplin, and before them, Tandy, vanished from our high street. Once or two bits are from the stash of electrical items bought at shows though.

The basics are really all I needed, but then the box is quite large, so I added a few extras...

Michael Campbel faced a similar problem and developed a little box to deal with it. Needless to say, I saw this just after I had finished my version.

Monday, February 14, 2022

Big bottle supplies

Slater's Mek-Pak

 It's the end of another big bottle of Slater's Mek-Pak. This one arrived on the workbench in February 2017, and has lasted 5 years. Not bad at £5.20 a year, or 43p a month.

The new one cost £27.08 compared to the £26 of the old tin. At this point someone is going to tell me I can buy a gallon for 50p from eBay or similar, and I'm going to ignore them. I bought this from Squires Tools at a show some time ago, Eileen's Emporium currently lists it for £28.50. 

Am I showing off my mahoosive wealth doing it this way? No. 

Firstly, I want this tin for the simple reason that there is a space for it on the shelf near my workbech. Near enough that when I need to top up the ancient Humbrol bottle on the bench itself, I don't need to reach far. If I bought a different sized container, I'd need to re-organise the shelf. 

Second, and this is the big one, I've always advocated buying "big ticket" items from proper shops. If you buy trak pins from your local shop, but use the cheapest box-shifter for locomotives because the local guy ia s few quid more expensive, he'll soon be gone, and you will be mail ordering track pins and paint. If my local shop stocked this stuff, I'd buy from him, but it's not something he sells enough of to make stocking the big bottles - so the second best bet is a trader I know at a show.

OK, I'm lucky, I can afford to think like this. For me, Mek is an essential part of my work (although I pay for it myself as it's used for Phil projects), not a discretionary purchase. That's why I buy the big bottle! For most, model railways are a luxury, so if you can, (and I know lots of people don't have this option) then please support the local trader.

Sunday, February 13, 2022

Ballasting Basics in The Collector


My latest contribution to the Hornby Collectors Club magazine, The Collector, is a simpler project than I've produced for the last few issues. 

Ballasting is one of those tasks that we all have to do, but none of us really enjoy. 

Pushing little stones around the layout is important, but let's be honest, we'd rather be running trains or putting some nice scenery together wouldn't we? 

Neatness is essential, as is sticking everything down properly. Stones need glue, tiebars really don't. 

Anyway, there are lots of beginner out there and with a bit of luck, my guide will help someone with this aspect of layout building. We all need basic skills.

The Collector is the house magazine of The Hornby Collectors Club. 


Saturday, February 12, 2022

Friday, February 11, 2022

Back to Doncaster


I've got a clear lateral flow test and a box of FFP2 facemasks, so today I'm going to be heading to The Festival of British Railway Modelling at Doncaster this weekend. 

Full details on the official website. 

I'm there to carry out a couple of photo shoots before the crowds come in, and then to video and chat during the day. If you see me, please say hello.

Please note, masks are encouraged with a load of posters at this event unless you are exempt. Please wear them for the good of everyone. I will be, but then that's a good thing with my ugly mug!

Thursday, February 10, 2022

Bumper Garden Rail issue alert!


Ed and Dick may want their layout back.' was the gist of a conversation shortly after the Exeter Garden Railway show in 2003. This left the Severn Mendip 16mm Group with a bit of a problem. The result was the impressive exhibition layout, and star of our bumper issue, Medip Vale. You'll be able to see the model at the Midlands Garden Rail show, and the guide is also included this month.

If you are feeling inspired to create a line, Martin Ranson covers the construction of his in detail, and since it's now six years old, we can be confident the methods work well.

Once you've built a layout, you'll need rolling stock, so on the workbench are two sets of coaches some incredibly detailed RNAD wagons and a simple railcar.

To celebrate the 40th birthday of the UKs most prolific locomotive producer, we've been behind the scenes at Roundhouse and see what make their models so special - and then reveal details of their latest locomotive in our Product News.

Wednesday, February 09, 2022

Mazda T2000 kit - Part 3: All done.

Arii Owners Club Mazda T2000

Job done. I hadn't planned a blow-by blow account as I didn't do anything special on the model. As I say, the plan had been to glue the bits together and slap a coat of paint on. Despite those limited ambitions, the the end result looks pretty nice. 

This is a working machine, so I started the weathering with a wash of ink, but it didn't seem to stick properly, so this was wiped away and I hit the model with powders. Some of these were wiped with a damp cloth to turn them liquid so they stuck in the nooks and crannies.

Arii Owners Club Mazda T2000 

The load bed (not quite as mahoosive as the photo makes it look like) is painted with Lifecolor wood effect paints. Probably a bit brown, but I'm experimenting. That's what you do with a model like this. 

One feature I'm not happy with is the canvas tilt. The two parts don't fit together well, and even lashings of filler don't entirely cover things. When in place, it makes the lorry look massive too. I think that one day I'll build some boxes to tie down in the back and ditch it. 
 
The kit is well worth the money, and some. There are part fit issues such as the dashboard which just has to be glued in as best you can, accepting the steering wheel won't be at the right angle. The lights are hopless, almost as though they are from another kit. Maybe the designer though they would fit into holes in the cab, but I had to hack 2mm off the back with a saw. OK result, but it shouldn't be necessary. The front wheel support needed trimming to tuck under the bonnet too. 
 
However, as a bit of fun, it did the job. I'm sure a better and more comitted modeller could really do something with this model and it would look really terrific, as well as being very different from everything else in the collection. Put it in a suitable street scene diorama and you have a winner. 

Tuesday, February 08, 2022

Mazda T2000 kit - Part 2: Build the chassis and start painting.


First impressions - this is a whopper of a kit. It might be 1/32nd, but the chassis measures 17cm long and seems really chunky. OK, the prototype can carry two-tons, so perhaps I shouldn't be surprised, but I am. 

Working out exacly how the parts go together is made tougher by the tiny diagrams in the instructions, but I think I managed to work it out. The fuel filler comes in at a a funny angle, the end hanging on the corner of the fuel tank, but most of the rest is easily guessable. 

Despite my best intentions, I did drill out the end of the tailpipe, but otherwise the bits have just been stuck together with Contacta cement and washes of Mek-Pak. 

A blast of Halfords black paint was followed by a dry-brush with dark grey and rust. This is a fairly basically detailed model, but this just brings is alive a little. 

I really did stick to my plan to brush paint the body. A fresh pot of Humbrol 144 - Intermediate Blue - an excellent colour for jeans on model figures by the way - was stired and coats the main parts. For some reason though, it didn't seem to want to stick to the cab. Does this complex mouding need mould release to get it out of the machine perhaps? 

Anyway, after wiping the paint off again, I shot it with the airbrush which worked well. I'm obviously too finescale and picky nowadays!

Monday, February 07, 2022

Mazda T2000 kit - Part 1: Look inside the box


Time for another kit from the Plaza Japan pile - this time the one that started my spending splurge, the Arii Owners Club Mazda T2000. 

If you aren't familair with this vehicle, and they are pretty rare outside Japan, read this article on Ptrolicious which descibes it.  The thing that piqued my interest originally is that this is a three-wheel truck, with a two-ton load capacity. In the UK, when you say something has a wheel less then normal, we think Reliant Robin or Bond Bug, nothing with a serious load capactiy. 

The T2000 exists for the same reason that the UK three-wheelers proved popular, tax benefits. But the Brits decided that loads needed more rubber on the tarmc, not so the Japanese. 

Inside the box is well filled with bright blue plastic parts along with some green "canvas" bits to cover the load. There is flash visible, but then that's what a kit costing under a fiver is likely to show. Not much, but to anyone used to modern injection moulding, it will be a shock. The cab is a seperate single-piece moulding not in the box. Presumably it is produced on a different machine. I'd expect it to need a higer presure to mould then the flat sprues.

Rubber tyres and a sheet of transfers are also in the box. And instructions. One side of A4. With tichy, tiny diagrams to peer at. 

My plan is just to stick this thing together. Brush paint it, and weather to cover up the brush marks. This is not going to be a serious modeling project, I'm just doing it for fun, and to get my modelling mojo back...

Sunday, February 06, 2022

Changing the bulb in a Berlingo High-Level brake light

The shame. Being picked up on the MOT for a faulty high-level brake light. That's what happens when you ask a non-driver to check the lights when you press the pedals...

Anyway, I dug out the Haynes manual, and it is utterly wrong, so here's what I did. 

Access is through this rubber bung in the tailgate which peels away with your fingers. 

Inside you find the bulb. 

It pulls out, in fact the thing doesn't seem that firmly seated, but I'm assuming that's how it should be since there is no locking system. 

Stick the replacement (Halfords 955 - W16W) on the end of a stick with some Blu-Tack and manouver it into the holder, then push home with your finger. 

If you don't use the stick, you'll do what I did the first time, and drop the bulb inside the door. Efforts to rescue it were fruitless and now it will live out its days somewhere in the box-section. If you have very long and skinny fingers, maybe you won't need this, but if yours are the correct proportions to fiddle this bulb into place, you are an alien and not driving French cars anyway. 

Overall, I'm really impressed with bulb changing on this car. The sidelight bulb is accesed through another rubber bung, and it's the same one as the numberplate light - Halford 501 - W5W. The latter can be accessed by wiggling a screwdriver in the hole at the side of the clear cover. 


Less good: Haynes manual. It's wrong on the brake light and suggests taking the door apart for the numberplate. YouTube proved more useful. 

Also, Halfords have replaced their book of bulbs with a computer. Sadly, this has a dredful interface which required scrolling, but you don't know this because there are no scroll bars visible. Fortunatly, I took my old bulb along and helpful assistant instantly identified it. 

Finally, I bought a couple of Universal Bulb kits on eBay. They said they were for the Berlingo, but didn't include with brake or sidelight bulbs. The returns process worked I'm pleased to say, because I didn't see the point in carrying a box of bulbs that didn't fit the car.

Saturday, February 05, 2022

Saturday Film Club: ISLE of MAN railway steam train to Peel & Port Erin 1965

 "More Isle of Man Phil?" - Yes indeed, Some cracking cine film shot in 1965 when the raiwlay was struggling, but you could see ALL the history.

Friday, February 04, 2022

Mending the Steampunk Whale


One of the weirder things I own, and there's quite a lot of competition for that title, is a Steampunk Whale brought back from Cornwall for me by my parents. 

It's a really nicely cast resin model, and looks (IMHO) absolutely fantastic. At 32cm long, it's no lightweight, and being resin, those gun turrets are a little vulnerable. 

Last week, one finally got knocked off as I dusted it. Fortunatly, the break was nice and clean, and I found the turret before it hid away in the corner of my office. 

A blog of superglue would probably have produced an acceptable repair in the short term. Not epoxy, as it's too bulky, I don't want to see a splurge, and touching up the paint would be a heck of a challenge. 

I opted to do the job properly and drilled as near the centre of both halves with a 1.5mm drill bit, and then superglue a scrap piece of tube in. This provides a bit of strength, hopefully avoiding me having to do this again!.