Friday, February 28, 2014

Off to Kettering

 
Today, we will be packing up Clayhanger Yard in preperation for its trip to the Gauge O Guild show at Kettering.

For those who don't know the show, it's a trade extravaganza for the 7mm modeller. There are layouts, but only small ones. All the emphasis is on re-stocking the model makers stores.

A quick look shows 93 stands selling all sort of bits and bobs plus 6 layouts and 4 demos. Not bad for a little event!

My advice - get there early or late. The car park tends to fill up rapidly and the overflow parking is a short minibus ride away and not spacious.

To find out more - download the programme from here.

Thursday, February 27, 2014

For Sale: Clayhanger Yard

The time has come, with 2 exhibitions this month, to part with Clayhanger Yard. I need the storage space for more projects and don't want to leave it to deteriorate when someone else can enjoy the model.

For those who don't remember, the layout was built as a minimum space O gauge shunting plank. At 10 feet long (7ft scenic, 3ft fiddle yard) and 2 1/2 feet wide, it should fit into most peoples homes. You can also get it in the back of a reasonably modest car if the new owners fancy taking it on the road.

Built for and serialised in Hornby Magazine(who are happy for me to sell it)  in 2013 , there are plenty of people who know the model and no secrets about its construction. Plywood baseboards are topped with Peco trackwork and buildings from several sources.

Point operation is manual via rods and can be operated from front or back.

Price £350

The buyer gets the layout, fiddle yard and cassettes, fascia panel and legs.

They don't get a controller (Gaugemaster plug-in will do), rolling stock stock or the fascia supports and lights (I use these on another layout), any details not glued down (the little car and lorry although I'm happy to chuck the later in), or the curtain.

The model can be seen and operated at the Kettering and Leamington shows. If you want, I'm happy to load it into your car at the end of Leamington. If we need to deliver, I'll discuss this at the time.

Basically, this is a nice layout that needs a home. The price covers the track and some of the woodwork. You couldn't build the layout for less.

Personally, I'd love to see it back on the exhibition circuit. As a magazine based layout, it wouldn't be difficult to get booked in to shows, I have one who'd like it already. Were I to do this myself, I'll be honest ans say I'd replace the point operating rods with Peco motors because I prefer these. At the same time I'd ditch 3-link couplings in favour of something automatic. Both are my preferences though rather than essentials - after all, we've exhibited it as it is several times.

On the other hand, if you want a home layout for shuffling wagons around, it would be ideal for this too.

Update: The layout has now been sold.

Wednesday, February 26, 2014

Painted and weathered Bedford

Painted BedfordAfter a couple of extra scrapes of filler, I decided the Bedford was ready for paint. Trying to match the colours of my AEC lorries, the top half of the cab is Humbrol 103, the bottom half, the wrong green. Far too bright.

More interesting is working out which bits should be black. Looking at photos, the mudguards aren't body colour, something I had always assumed they would be. Photos of the prototype tell me I'm wrong so black it is, as is the radiator, something I'd normally paint silver.

Choosing the too bright a green makes the model look a bit toy-like but having carefully painted the bars on the radiator, I decided against fixing this, hoping the weathering would take the edge off it.

Applying dirt kicked off with a wash of thinned track colour (173) carefully worked downwards to replicated rainfall. With a less than perfect model, the trick is to stop it collecting in the places you don't want it too - it's easy to see dirt in those bits that could have taken just a smidge more filler for example.

Next, some brown powders were brushed over the model. For once, the paint grabbed the powder and hung on to it, resulting in a muckier lorry than I'd expected. Wiping the stuff with a damp finger made little difference so it's a pretty mucky vehicle in the end. The photo is possibly a little cruel to the finish as it will be fine on a layout.

Weathered Bedford

A drop of Krystal Klear in the windows and the model is done. You might suggest that a wing mirror would be nice - the prototype has an easy to make disk on a stalk - but my road vehicles travel in a foam lined box that would probably remove such an item so I left it off.

In the end, this turned out to be quite a nice model. It looks the part and once I'd sculpted the parts out of the moulding flash, assembly wasn't difficult. If I built a second one, I think I'd be happy to make something that could sit alongside a diecast version without looking like the poor relation. A successful project I think.


Tuesday, February 25, 2014

Bedford in primer

Primed Bedford

If I told you this was a whitemetal kit, and you weren't an avid reader of this blog, you'd probably believe me.

With a coat of Halfords primer showing up every lump and bump, the initially disappointing kit isn't looking too bad (I don't normally prime plastic models, I just do it here to show the defects so I can fix them). The corner of the cab nearest the windscreen is the worst problem and even that needs another smear of filler to smooth it off a bit. I might even get away with a heavy application of paint.

I have managed to avoid filling gaps where there should be gaps such as around the doors. British workmanship and subsequent ownership being what it is, perfect panel lines are not required. Many restorers actually produce a vehicle far better than it would have rolled off the assembly line in this respect.

There's a sink hole to fill in the fuel tank too - I should have done this before primer really. Apart from that, it's not bad. OK, not a Pendon model but for something on a layout where the eye doesn't bother to linger, perfectly acceptable to me.

Monday, February 24, 2014

Partwork season - A4's everywhere!

Mallard_cabTwo new partworks out in the shops this month - Great British Locomotive Collection and Build the Mallard.

The first arrives every 2 weeks with a static, OO gauge, plastic model of a locomotive. The first issue has Mallard on the cover and it's quite a nice model. The detail is pretty good, certainly better than we used to accept on RTR models - separate handrails for a start.

I'd certainly snap these up at £2.99 but even at the full £8.99, I can see them being a popular collectible. For modellers looking at scenic items or shed fillers, then you can't go far wrong. I plan to use nine in weathering experiments.

More sophisticated is the Build the Mallard set which follows "Build the Flying Scotsman" from the same publisher. Again, they have teamed up with DJH to produce the model. Presumably the last series was enough of a hit to justify this one.

I decided to put the cab together with solder rather than recommended superglue. This was a bit of a mistake. The lacquer protecting the brass burnishes off with a fibreglass stick but there's a lot of metal and I needed to use the gas torch to melt the solder. Glue would have been faster!

More details over on MREmag.com today as I've reviewed both mags there.

Sunday, February 23, 2014

Fun, free, card kits

We all love free stuff don't we?

Well, if you have a printer and some card that can be run through it, the people at Confused.com have produced a rather nifty model of the star of their latest adverts, Brian the Robot.

I passed the bits over to my Dad, also called Brian, who had them assembled in double quick time. He reports that the model is easy to put together and therefore probably suitable for children to cut their teeth on.

At 14cm tall, it's not big enough to be a storage problem but large enough for play value. They even suggest a way to make the arms move.

Quite who thought up the idea, I'm not sure. It's a bit of a laugh though.

Download Brian the Robot in kit form here.

Less easy, which is why you don't see a finished model here, are the Koolwheelz ShowRodz from Dave's Card Creations.


I did download the drag racing VeeDub but all the curved parts defeated me - and that's only a medium skill kit!
 
The Locomotive is based on the Monagram "Honest Engine" kit, another I now wish to add to my collection if I can find one at a price I can afford.


Saturday, February 22, 2014

A few old models of lorries

Bedford Lorries

A slight hiatus in the build of my Cooper Craft Bedford is filled with old pictures of lorries I built back in the days when diecasts were horrible, unavailable or stupidly expensive.

The Bedfords above are a Spingside whitemetal kit (Blue) and converted Airfix Emergency Set Fire Tender (BR Colours). Despite its shortcomings, I have a feeling that the latest model will hold up quite well against both of these. The metal model is an especially odd shape with too high a cab by the look of it. As I recall, it wasn't the easiest kit to put together either.

AEC Monarch

I've mentioned the Cooper Craft AECs I've built and here they are. I've always thought that for the money, this is a pretty good kit. The bottom of the windscreen isn't quite thought through, although if I'd glazed them with Krystal Klear this would have improved matters.

If I can remember the colours, I want to paint the new Bedford in the William Berry livery seen above. Green and cream are a nice combination and have a certain "vintage" look about them which sits well on old lorries.

Friday, February 21, 2014

4 wheels on my Bedford

Bedford 4

I was determined this lorry was going to sit flat on the deck so wanted to fit the wheels as early as possible. All model vehicles can be made to sit with four wheels touching the road, it just takes a little bit of surgery and that's easier the earlier you get started.

The rear axle had been fitted to help tie the chassis together but the front is part of a cross member that is fixed under the wheelarch moulding. I didn't realise it at the time but the U-shaped part has to be attached with the U upside down. I seem to recall it's the other way up on the AEC kit but if you don't get it right, the wheels won't fit under the arches.

As it is, they really fill these up. I have a sneaking suspicion that they are a touch on the large size although I have no measurements to back that up. I'm sure they are the same moulding as that found in the AEC kit.

Getting things flat meant sticking the back wheels in and fixed with liquid glue. The fronts were fitted to the cross member and this fixed with plastic cement. With the model sat on a CD case, this allows the front to be jiggled so both wheels touch down.

Elsewhere, there's a little bit of filling going on around the cab top. Hopefully I can sand this back so it doesn't show on the finished model.

Bedford Lorry first assemblies

Bedford 2Some of this work is more like sculpture than modelmaking. Take a randomly shaped plastic part and try to work out what you have to carve away to reveal the component within.

Having said that, the first stages of the build have progressed better than expected.

Once you've whittled out the cab floor and footsteps, there are some lines underneath that the main chassis members locate in. This sets the width and is followed by more cross-pieces along the back. Quite where they fit is a mystery to me - not on top of the frames and presumably not underneath. In the middle? Not sure they fit there either. Anyway, I fitted the back one and left the others off for the moment.

The sides of the cab needed tidying up. Inspecting the back part, it becomes clear that the rear edges behind the doors shouldn't be tapered but flat, at right angles to the side. Sort this out and they fit nicely in place.

Bedford 3The bonnet sets the angle at the front thanks to more guides moulded in the bottom. Cleaning up the radiator proves easier than expected as long as your knife is sharp. Even turning the lights in to near hemispheres at the back can be done and one complete, looks very nice.

Making the cab sit level on the mudguard moulding is more fun, Some scraping at the curved edge of the bonnet sides was required but worth it for a neat fit.

I am wondering about that pink plastic though.

Thursday, February 20, 2014

Cooper Craft Bedford Lorry

Bedford 1I think Cooper Craft kits are fantastic. Over the years I've built an awful lot of them. From the basic OO wagons and GWR platform trolleys through to the 16mm rolling stock, every one has been beautifully mastered and moulded., a joy to stick together.

There are a couple of AEC Monarch's on Melbridge Dock from the days when it was this or converting an Airfix kit for the plastic lorry maker, but I know I've used several more than this over the years.

Not everything is rosy in the range however, there is one kit that has defeated me in the past - The Bedford Lorry.

A relatively recent addition to the line up, I can only assume that the toolmaking was contracted out to someone very different to the person who produced everything else. It's quite frankly awful.

This isn't due to being an old mould. I snagged one of these almost as soon as it appeared on the market. The Bedford is a lovely looking lorry and I really wanted one. Sadly, the kit was more flash than part and after an abortive attempt at assembly, I threw it in the bin.

At Warley, Matt Dawson presented me with a bag of kits'n'bits. In there was another Bedford. I knew I was destined to give the model another go. And if it all went wrong, I could blame Dawson for lumbering me with a rubbish kit.

Anyway, a quick look shows the parts to be as horrible as ever. Flash everywhere and those parts that I can see look a bit indistinct. Even the wheels, the same sprue as in the AEC kit, are poorly moulded as though the machine didn't close properly or the two halves of the mould aren't perfectly in line.

Never mind, I will not be defeated this time!

Wednesday, February 19, 2014

Country House

MiniArt Country House

A little taster here for a project I'm working on. The model is built from the MiniArt Country House plastic kit and very nice it is too.

Assembly is reasonably simple and after painting using my usual methods (pencil crayons on a mortar colour for the walls) it looks pretty nice. Idea for a gatehouse at one end of the drive for a stately home, the later being hidden away by some trees perhaps.

Tuesday, February 18, 2014

3D photos. The future?

Fuji 3D cameraOver the Doncaster weekend, there was a first for one of my layouts - it was photographed by a proper 3D camera. Years ago, some kid had a go with a Nintendo 3DS but the little tyke ran off before I could see the results so it doesn't count. This time it was a grownup with a real camera and he was happy to let me have a look.

The camera in question is a Fuji Finepix 3D W3

It has two lenses that take the left and right "eye" pictures. The results can be viewed on a lenticular lens covered screen on the back of the device. For larger viewing, the camera can be plugged in to the 3D TV or the results can be expensively printed at several places. The device even supports the traditional red/green glasses system.

As well as still pictures, the camera can take video and the results look pretty impressive.

Is this the future? Will toy train magazines go all 3D?

Not for a while I suspect but it's certainly an interesting idea. If the printing problems could be solved (i.e. made cheaper) then I can actually see the results being really interesting. I'm hoping that initially they are only used for layout pictures though - editing out bad background and dust from 2 images instead of 1 for the step-by-step guides will be a pain unless someone invents a 3D Photoshop system.

Still, interesting to see the camera produced by a mainstream manufacturer. You can even buy them on Amazon. And yes, I am tempted...

Monday, February 17, 2014

Double ended embossing tool

Card ScriberSomething a bit specialised has been added to the toolbox recently - an Amaco T-3 double-ended embossing tool. I bet Iain Robinson is coveting it already.

For those who aren't nerdy about scribing tools, this is a well made device for drawing lines in soft surfaces such as the face of cardboard. At the end of the prongs sticking out of each end is a tiny ball. One end is larger than the other.

The wooden handle is comfortable to hold and it's easy to produce consistent depressions, not grooves as you would get with a knife, in the card. I quickly and cleanly marked up some brickwork. Yes, I know you can only see the horizontal lines in the picture, the verticals are there but white card marked in white is difficult to photograph.

4 quid for a blunt metal spike probably seems like an odd way to divest yourself of money to some. Not me, I anticipate marking out lots of paving slabs with this thing in the future.

Amaco T-3 tool came from Freestone Model Accessories.

Sunday, February 16, 2014

Steampunk Steam Train race


Hat-tip to Scale Model News for spotting this fantastic bit of animation.

Steampunk chuffers in a race that reminds me of Whacky Races more than Formula 1. Aside from being incredibly well done, it makes me wonder if a model version of some of this would be possible. We see an awful lot of realistic minitaures of days gone but what about applying the same level of care to some futuristic models?

Saturday, February 15, 2014

Doncaster 2014

Edgeworth at Doncaster
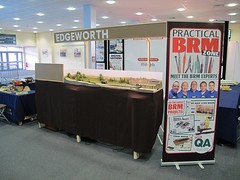
After 4 hours of a 2 hour journey up the M1, I pitched up at Doncaster Racecourse with less than an hour to go before the place was shut up for the Friday night. Fortunately, Edgeworth goes together very quickly and so with the aid of BRM's Howard Smith to hold the fascia panel up, both layout and project display were ready just before we were cast out on to the pavement.

The trip to the hotel was made more interesting by turning up at a really nice looking Holiday Inn to be told that we weren't booked in there. It seems that this happens all the time so a set of printed directions is available to guide lost travellers to the right place. Better still, the right place comes complete with not a health club as the wrong place did, but with a pub that serves mahosive deserts.

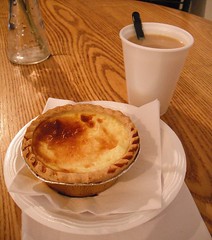
So mahosive are they that both Howard and I were defeated by our choux pastry, custard, cream and ice cream confections. Amazingly, this heart attack on a plate prompts the question, "Would you like normal or pouring cream?" when ordered. Apparently, half a pint of "normal" cream isn't enough in the cake, you need more on the side!

Holiday Inns are set up for breakfast to be served at a leisurely pace, not to the whole hotel at one go. Luckily the organisers had asked for it to be available from 7am and chatting to the staff, they took this to mean they had to start preparation for 6:30. 6:45 Saturday morning, several of us enjoyed first pickings and were not in the least surprised that 15 minutes later, a queue for food appeared. If you want to eat AND get to the show well before opening, you have to wake up pretty early.

Look Mum I'm on telly!

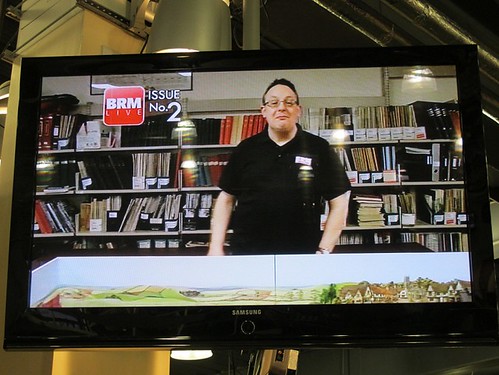
At the show, I was shocked to discover that the numerous TV screens dotted around the venue, normally used for gee-gee spotting, were to show a short, and mercifully silent, advertising film for various BRM products including the latest BRM live for which I filmed some stuff just before Christmas. What this meant is that directly opposite me there was a giant telly with me gawping out of the screen every 10 minutes. That's at least 6 times an hour I get a reminder that I'm going bald. Yippee.

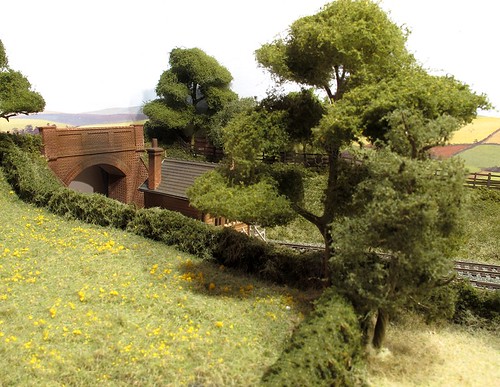
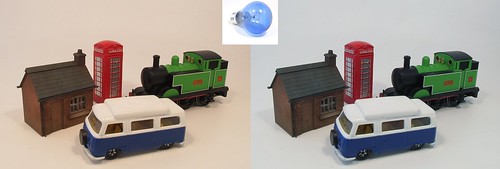
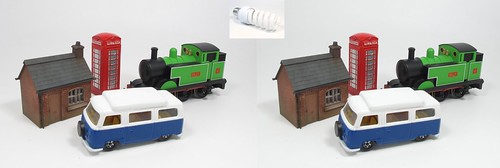
Fortunately, there were so many people in front of me that I spent the time chatting and answering questions rather than fretting about my hair. Top topic of conversation was the Peco backscene. Lots of people had either never seen one or forgotten they exist. Most were pleasantly surprised how good they can look with careful use. A couple even thought I'd painted it myself.

Time flew and soon I was due to perform in the BRM Theatre. This didn't go quite as well as hoped due to the presentation I'd put together failing to load on the laptop. Of course, I wasn't prepared for this and so had to do my best to entertain the audience by talking without pictures. They politely clapped at the end so I probably got away with it. At least the chairs were comfy which is probably what everyone wanted anyway...

HMS Doncaster
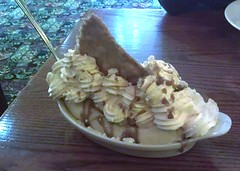
Saturday dessert in the pub was HMS Doncaster. Ostensibly this is the healthy option as it includes a banana at hull underneath an ice cream and cream superstructure. The sail on this boat was, I though a wafer, except it wasn't, it was a triangle of sweet batter with sugar frosting. I scooped out the fruit along with the little cream and ice cream but left around a weeks worth of calories on the plate...

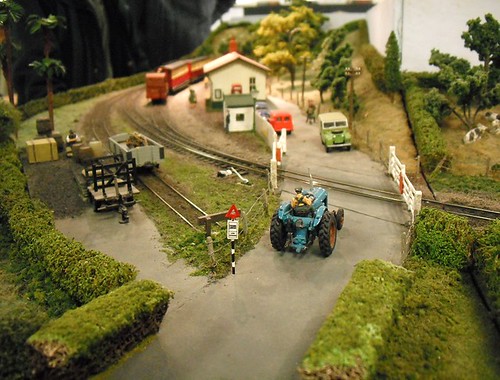
Sunday began with a quick run around pointing my camera at things, the only chance I had to do this. There was no time at all for looking round once the show opened as again, the stand was inundated by people asking questions.

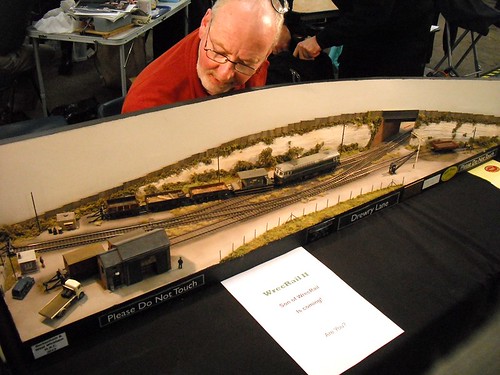
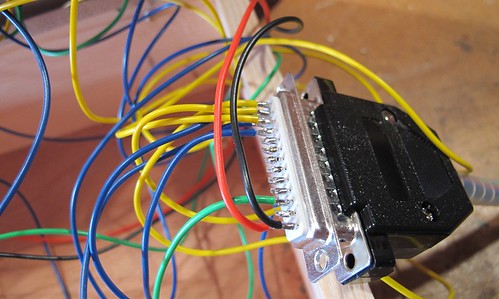
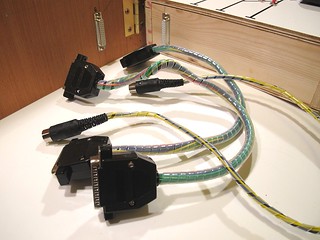
One unusual aspect to the layout is that people are welcomed around the back to have a good look at the areas normally hidden from view. I seriously considered exhibiting without a curtain around the legs but decided that it would look better to have one but then invite interested visitors to come behind the layout. Quite a few took up the invitation and I think some might have thought the system I've used to attach boards together and hold them off the floor wasn't completely mad. Conveniently, the last part of the series was available fresh from the printers so I could show the diagram that explains things while people looked at the model.

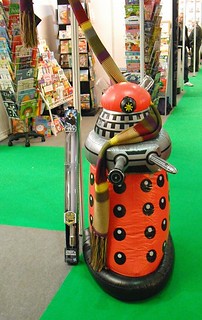
Sundays are always quieter than Saturdays and this allowed me a brief break right at the end of the day to see the Luton club's "Great Train Robbery" model. It's a controversial piece, with some people determined to be offended and to let the people who built it know. This isn't something they mind, everyone is entitled to an opinion, unless offence has been taken without bothering to read either the article on the model or actually view the presentation itself.

As it is, the 5 minute show is a very dry history of the railway parts of the robbery. There's no sensation, certainly a lot less then the mainstream media have made around those events.

4:30 saw the crowds depart and we packed up the layout for the trip back down the motorway. I should have mentioned to RMweb's Andy York that when I unscrew the two fascia retaining bolts, the thing will start to fold itself up - he looked most surprised when it happened.

Anyway, an excellent weekend. I apologise for the lack of pictures during my talk. We'll sort this for next time. Thank you to everyone who stopped by to chat and ask questions, especially those who said the layout had inspired them to have a go at some modelling. This makes it all worthwhile.

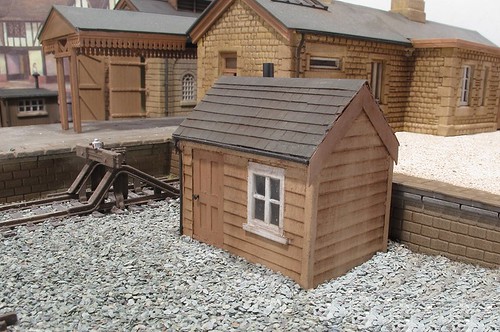
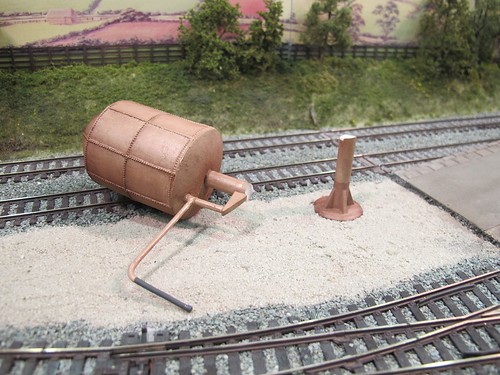
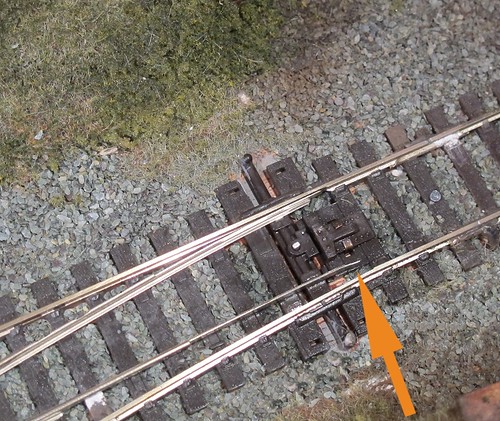
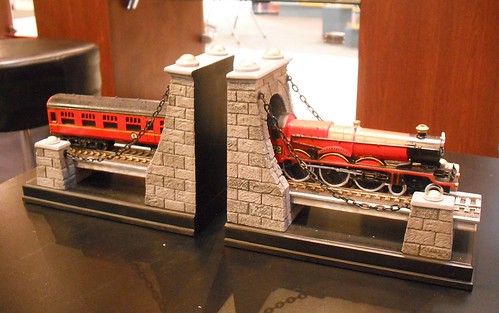
My photos from the Doncaster show on Flickr - all the shots with trains are here.

Friday, February 14, 2014

Painted dog cart

Dog Cart

Google quickly showed me that I could paint the dog cart nice bright colours. While there were quite a few in plain black, a couple were colourful with black highlights and so I thought this would look a lot prettier on Edgeworth.

An hour later, some buff paint and weathered black detail produced an eye-catching livery that still fits in with the rest of the layout. I'm glad I didn't go for a more strident colour that would demand attention at the front of the station.

Mind you, the work would have been easier if I hadn't fixed the wheels in place, dodging around the back of them to get at the springs.

Thursday, February 13, 2014

Dog Cart

Dog Cart kit

Detailing a model railway, as the excellent BRM Guide to building your first layout suggests, can eat your time like a fat footie fan can chomp his way through a pie at half-time. Painting figures can easily consume as many hours as slapping plaster over the landscape. As far as I'm concerned, it's a lot more fun though.

This probably explains why I'm a magpie for detail bits on second hands stalls and swapmeet tables. Not for me the gleaming locomotives proudly displayed on the counter, I'm rooting through the little boxes of bits on the floor.

Which is probably where this venerable Slaters kit for a Dog Cart (actually a 2-wheel horse drawn trap) came from. At the time it probably looked a good bet for space on the Hellingly Hospital Railway. Now, I need something that can sit in front of the station on Edgeworth and should 1930s.

While Slaters nowadays make kits of breathtaking quality, especially the larger scale items that I covet in a big way, this ancient model is a bit more basic. The parts don't have any locaton aids. The springs need to chopped up if you want the wheels in the right place relative to the sides and I had to make my own seat base as I couldn't work out which random plastic rectangle was to be used.

Despite this, it looks nice and is a heck of a lot cheaper than an etched model. The wheels have a depth that the metal versions can't match either.

It just goes to show that not all the stuff in those boxes under tables is rubbish.

Wednesday, February 12, 2014

Sentinel, trees and a little hut in BRM

 
The March BRM arrives a couple of days early this month, for subscribers and those who visited the Doncaster show anyway.
 
My contributions are varied. For a start, we've a bit of a Sentinel-fest with a look at the prototype over the years including a fantastic collection of colour shots. There's a review of the Hornby diesel version  and I broke out the soldering iron to assemble the RT Models etched kit of the 100HP steam version.


Sentinel and van

The two-hour project has a different format to previous efforts. This time I've been making trees using different methods. None of these take 2 hours so instead I've given a guide to the time required for each. A bit of a cheat I know, but planting Edgeworth did take around 2 hours...

EdgeworthTrees

Talking of the beginners layout, we reach part 3 of the supplements which is where the basic model comes alive with some detail. Since I was given a free hand, the beginner is introduced to scratchbuilding with a little, wooden hut as one of the projects.

Edgeworth Hut

"You can't ask beginners to build something from scratch!", I hear you cry.

I can you know. There's nothing scary about chopping up bits of cardboard and (IMHO) it's great fun. More to the point, if you enjoy modelling rather than just owning stuff, why not have a go at using raw materials? And what better place to start then with a small building?

More about the March BRM here.

Tuesday, February 11, 2014

Norwegian Blue water tower?

Dead Water tower

'Ello, I wish to register a complaint.

A complaint?

Yes. I wish to complain about this Great Western water tower that I installed on my layout just 2 days ago.

Oh yes, the, uh, the resin model. What's,uh...What's wrong with it?

I'll tell you what's wrong with it, my lad. 'E's dead, that's what's wrong with it!

No, no, 'e's uh,...he's resting.

Look, matey, I know a dead water tower when I see one, and I'm looking at one right now.

No no he's not dead, he's, he's restin'! Remarkable model the Great Western water tower, idn'it, ay? Beautiful  light and dark stone paint finish!

The paint finish, either light OR dark don't enter into it. It's stone dead.

Nononono, no, no! 'E's resting!

Hmmm. What I do know is that when I unpacked Edgeworth for testing, the Skaledale water tower had snapped in half. It's a bit of a mystery since as far as I can tell, nothing hit it while I packed the boards up.

Maybe the layout was swung around too violently at one point and the heavy tank top caused the stem to snap?

Anyway, at the show, I drilled out the top and bottom so I could stuff a length of brass wire in the centre and then made good the repair with some pound shop epoxy. Well, sort of made good. The stem now shows a crack and is slightly bent. Time for some filler me thinks.

Monday, February 10, 2014

Peco point bodgery

Peco fudge

Much as I love Peco pointwork, it can be troublesome sometimes. As supplied, the track polarity changing works perfectly. Once laid and weathered though, the reliance on using switch rail to stock rail contact isn't so clever.

Edgeworth uses Peco track and I'm keen to keep things as simple as possible. Therefore, we have point motors but, at the moment, no supplementary polarity switching.

Testing the model, this appears OK, except on the first point after the fiddle yard. Aim the track at the loop and all is OK. Go for the platform and the electric juice isn't flowing.

After cleaning all the contact points, I improved maters a little but not enough. Still unwilling to give in and fit the switch, I tweaked the switch blade where you can see the arrow and lo - it works perfectly!

Now, I may come to regret being lazy, I did with Clayhanger Yard, but hopefully this will see me through at least one show. If not, well, I'm prepared. My local model shop now has only half the Peco PL-13 stitches they had earlier on last week. Just in case.

Sunday, February 09, 2014

NEC Spring Fair 2014

The Spring Fair at the NEC is one of those events that make the local TV news every year in the Midlands. I've always thought, "I wonder what it's like?" but usually forget to do anything about it until too late.

Anyway, this year was different. I registered for a ticket and popped along for the morning.

My plan was to go and see Bachmann, find a few train and boat shaped things to photograph and then have bit of a mooch around. Trade fairs fascinate me and this looked a goodie.

First impressions are , "Wow". This is a huge event. Every hall of the NEC is full of stuff. Lots and lots of stuff. Most of which will be in the shops later in the year.

I stopped first at the Noble Collection stand where they had a couple of Hogwarts Express locos on display. The bookends looked rather fun, just the thing for keeping your important volumes on the shelf.

Harry Potter Bookends

Next up was Bachmann with their display of the very interesting train packs. Below this was an N Gauge display layout with a Standard tank shuttling back and forth. By the end of the show, this will have worked for 50 hours and yet with less than 5 to go, it still seemed to be working well. Quite a tribute to the construction.

Bachmann Train Packs

Over the aisle were Oxford diecast. I'd enjoyed a long chat a few weeks ago in London so didn't expect anything new to see. However, this is a fair aimed at public outlets so they had some London souvenirs on display, Concorde and the London Eye looked nice. At the back of the stand was something I really hadn't expected - models of roller coaster cars. It seems that many theme parks like to sell you a miniature version of the ride you have ridden!

Oxford Diecast roller coaster

After this I wandered. Boat shaped stuff was thin on the ground. The only stand with interesting models was staffed by people who didn't want to talk to me, or indeed sell any products it appears. To be fair, this was the last day and with thin crowds, many of the stand staff were more interested in prodding iPhones than looking around (not all, some tried to drag me over to look at products).

Moving to the huge picture framing area, I spotted a tool I really want. Gunnar of Switzerland produce computer controlled cutting machines for chopping up Daler board. Watching these work, I thought how fantastic they would be for cutting out the parts for model buildings. I can't really justify what I assume is several thousand pounds or the same for the kit but wonder if there is anyone out there offering bureau services.

Gunnar cutter

I left having simply ignored some of the halls. Proper new reports will appear over at MREmag on Monday. Until then, content yourself with some photos I snapped as I walked around.

Saturday, February 08, 2014

Stafford 2014

Custard tartIt's not snowing. That is a good thing. Stafford is a show I have visited many times with the white stuff on the ground. Instead the ground is wet, but since I travelled by train and then vintage bus service, it's not something to worry me.

Public transport worked perfectly. My train got me to the station in time to get a good seat on the 1973 (same age as my Beetle, that's how I know) Leyland Bus. We trundle though the countryside and are deposited at the showground just before opening time. A couple of chaps left their seats and were standing on the stairs as we entered the showground site. Not sure how much time this was to save them but I suppose they were in a hurry.

I wasn't. There was a healthy queue and so I repaired to the excellent cafe beside the queue to have tea and since I didn't fancy a cream cake at 10am, a paddling pool sized custard tart which was delicious. It lasted me until the back end of the crowd was level with the window I could see out of. After this, 5 minutes saw me inside.

Heading for the back hall to avoid the crowd, I perused the second hand stall but there wasn't anything I fancied adding to my collection of unstarted projects so I moved on the trade and layouts.

Manx tractor

Or at least I tried. Truth is, I spent the entire day talking to people. In fact this was the first time I've wished a show went on longer as I left at 4:30pm (didn't want to risk aiming for the last bus) and could have done with another hour. There was at least 2 people I wanted to chat to who I didn't get the chance and I think quite a lot of layouts that didn't receive the attention they deserved.

Drewery Lane

Of those I saw, I loved the micro layout selection. It's my sort of thing. I mean, I've seen Gresley Beat (surely and deservedly the favourite layout of most visitors) but it's not what I want to build. I can't say there was a duff layout there either. In fact the balance seemed more varied than some years with something for everyone.

My shopping list was the only disappointment. I went with one item on it, a diesel loco crew and came away empty handed. Well, not so much empty handed as I didn't find one to buy. I still managed to fill my bag with other stuff though. You'd have thought that with so many diesels models out there, crews would be ten-a-penny but obviously not.

If you decide to fill that gap in the market, you owe me 10% for pointing it out. Or the price of another custard tart. Mmmmmm.

My photos of the show on Flickr

Friday, February 07, 2014

Off to Doncaster


Today, I will be packing Edgeworth in the back of the car and heading north to the Festival of British Railway Modelling at Doncaster.
 
Over the weekend, I'll be standing behind both the layout and selection of other projects I've completed for British Railway Modelling and talking about them to anyone who wanders by. Please drop in and say hello. I'll be in the BRM theatre too so if you want a nice sit down for a while somewhere not too taxing, it will be dark so I won't be able to see you snoozing. Just try not to snore. 

Thursday, February 06, 2014

Wiring D-connectors

D Plugs

Handy hints for wiring D-plugs and sockets:

1 - Get someone else to do it. Preferably the sort of person who likes this sort of thing.

Seriously, it's a fiddly job better suited to an electrical whizz.

If that's not possible:

1 - Fill each little hollow tube inside the plug/socket with solder.

2 - Tin the wire and then cut it so only 3mm or so is exposed.

3 - Heat the connection and poke the wire into the molten solder. Because both wire and connector have solder on them, you don't need to introduce more to the joint, reducing the number of hands required.

4 - Let the joint cool and then tug the wire. If it doesn't come off, it's probably good.

5 - Scrutinise the joint to make sure mo stands or wire are touching other connections.

6 - Where appropriate, cover the wires with the appropriate plastic covers and use these to plug and unplug things. Never pull on the wires. If you catch someone doing this, stick a soldering iron in their ear. If they keep doing it, switch it on first. Fault finding in these things is a nightmare when an idiot tugs a connection lose. Guess how I know...

Work slowly and methodically with regular tea breaks and it's do-able, just not the most fun in the hobby.

Wednesday, February 05, 2014

Leads

LeadsIt was Dave Elbourne who put me on to connecting leads back in the very late 1980s with his layout "Scotland Street Yard".

At the time, model railways layouts tended to be adorned with dangling leads to transfer power from one board to another. While these worked, they were prone to getting caught on things as the model was transported around. Snagging one during set-up could result in a few broken connections and some swift soldering iron work before operation could commence.

Dave worked for BT back in the days when quality and reliability mattered more than all-out profit. Taking his cue from this, and I suspect the easy availability of leftover free connectors, he made up all the layout connections as lead - bundles of wire with a plug on each end.

Sockets were fitted to both layout and control panel and dangling wires were no more.

OK, you could forget the leads and there were twice as many connections to be made but to my mind, the results were an awful lot tidier.

On most of our layouts, I've gone for leads. Only Flockburgh has dangling cables and that's because I used obsolete chunky plugs and sockets and couldn't get enough to make them self-contained. The result is a panel with long bundles of wire floating around that I am always terrified will snag on something.

So far we have been lucky, it can't last, so Edgeworth has leads.

Tuesday, February 04, 2014

Lighting tests

A couple of weeks ago, I wrote about my search for some new daylight spotlights. After a host of helpful suggestions (Thanks for these) I bought some bulbs and decided to test them

The setup involved putting a pair of bulbs in the photo spotlights in my mini-booth. My Cannon G12 was set up to shoot at F8 for 1/6th of a second. Each image is show as original on the left and with the colour balance corrected by Paint Shop Pro 7 using the white background as a guide, on the right. The relevant bulb is shown in the centre.

First, conventional 60W incandescent bulbs. Unsurprisingly, the colours are horrible, even after correction with a definite purple tinge.

Conventional Bulb


Next, 60W Bell Natural Daylight incandescent bulbs. For a blue bulb, the results are still very brown.

Blue Bulb

60W blue spotlights. This is my current setup for both modelling and photography. The hottest bulb on test, or at least the only one that required me to use a handkerchief to unscrew them after a few seconds use.

Blue Spotlight

Fiesta 20W Energy saving daylight bulbs. These have the advantage of giving an equivalent of 100w rather than the 60 of all the others. They are 3cm longer than the others which could be an issue in some situations.

Daylight Energy Saver
 
 
The clear winner is the energy saving bulb. There is next to no change after the correction which has to be good news for photography. The saving on electric juice is always a good idea and they won't get toastie unlike the others.
 
Thanks to James Finister for the suggestion. I'll be stocking up on a few more of these while the price is low I think.

Monday, February 03, 2014

Eddie's eyes

Before my friend Eddie died last year, he was building a model of a German wartime boat by converting a plastic kit.

He was very keen to super-detail the model and to this end had bought in quite a few after-market bits and pieces. There was quite a lot of brass etching, not just on the boat but also on the uniforms of the figures.

In addition, he hadn't been able to resist some transfers for the men's eyeballs. These came from Archer Transfers.

We'd joked about these as the idea of going to this level of detail fascinated both of us. Sadly, Eddie passed away before he finished the boat but when a large collection of tools and materials from his estate arrived at the club rooms, I was delighted to find the part-used sheet amongst them.

It's not much to remember a really nice guy by, but some day I'll have a model that deserves these and will think of Eddie when I use them.

Sunday, February 02, 2014

London Toy Fair 2014

Tom Baker DalekPress pass downloaded, I headed off to the London Toy Fair a week ago. To see if there was anything of interest to railway or boat modellers. Obviously. Not to look at all the new toys because I'm a big kid.

First stop was the Hornby/Airfix/Humbrol stand where there weren't any surprises as all the announcements had taken place weeks ago. However, it was useful to chat to the reps and see some of the new Humbrol goodies in the flesh. The textured paint looks very interesting, if a touch pricey. We'll have to see how far it goes though, if one can lasts for ages then it will be a permanent addition to my scenic toolkit.

After this, upstairs to Oxford Diecast for a long chat with Malcolm and the chance to photograph some of the new models for this year. I remembered to take some white plasticard to act as a background this time so the pics are fine for on-line use.

See the Hornby & Oxford diecast photos on MREmag.

When you look at the quality of models now available for a few pounds, you can see why people ignore the whitemetal kits available. Unless you want something very specialised then it's hard even for me to make a case for sticking things together.

Tiny BoatElsewhere I picked up a few leads on new boat models - we'll see what becomes of these in a few weeks. Suffice to say I found the worlds smallest RC boat in pre-production from BladezToyz and look forward a lot to seeing the production version.

One theme seemed to be Dr Who toys. They were everywhere - presumably the BBC is making a fortune from licencing deals. It's nice to see that many ranges include the full range of Doctors and not just the modern versions even if the TV company seems to want to pretend that the series is only 5 years old.

The other trend seems to be wooden toys. Loads of them in all sorts of shapes and sizes. Maybe this is just the things I spotted or maybe as these tend to be more expensive, the firms have to make more of an effort to sell them to distributors.

One disappointment - I placed one foot on the Lego stand and was stopped and asked where I was going. Apparently Lego operate a closed stand policy, I wasn't on the list so I wasn't getting in. A shame really as I could see through the gaps in the walls some train-shaped models. With most model railway exhibitions featuring a Lego layout, I would have liked to be able to report on these. But I couldn't. Even though the stand was empty. Hmmmm.

London Toy Fair photos on Flickr.

Saturday, February 01, 2014

Off to the library


Needing inspiration and information for a new project, I did something that would be as alien to most modellers as chewing off their leg.

I went to the library.

Since 1996, the way to do research is to hit the Internet or better still, fire off an e-mail demanding someone do fact-finding for you. I remember well working for a horticultural research company and at least once a week, the general e-mail address would receive a missive along the lines of,

"I'm a student who has been told to write a dissertation on ??????? Please send me all the information you have on the subject."

Seriously, some were no longer than that. Needless to say they didn't go any further. If you couldn't be bothered to find out who to write to, you got the help desk guy. A guy who knew that passing this sort of thing on to someone who HAD A JOB would just generate grief, even if he had a clue who might be expert in the obscure branch of plant research you were writing about. Nor would said researchers be happy if I said that I wasn't getting their computers fixed because I was too busy trying to track someone down to write a dissertation for someone who preferred to spend the day in the Student Union rather than the library.

Anyway, now, people hit Google or if that is too much work, write on a forum demanding answers. The answer usually being along the lines of "Why don't you use Google you ??????".

I like the library. It has lots of books, most of which are up to date and on subjects my own substantial collection doesn't cover. There is even a descent selection of railway titles, now spread among three sections but still there. I wasn't after railway stuff this time but it's nice to know.

There are also comfy arm chairs for perusing the books you might wish to borrow. And if you really need Google, WiFi and computers.