Showing posts with label Mock Georgian House. Show all posts

Wednesday, April 13, 2022

R279 Mock Georgian House - Part 6. Job done.

Hornby R279 Mock Georgian House

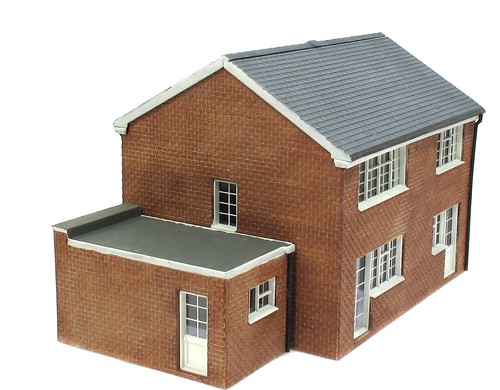
And there we are, with the addition of some fancy brickwork (which wasn't a great fit) under the guttering and some downpipes, the Mock Georgian House is finished. 

With a footprint of 110 by 86mm, 27.5 by 21 feet, it's a little on the small side compared to similar houses around here, but not ridiculously so. Shrinking buildings is a common trick on model railways - most resin models seem a little small compared to real life. 
Hornby R279 Mock Georgian House

I like the design a lot - it captures the look and provides a model that we don't see enough of in the hobby. I can imagine an estate full of these would look right, ig not that exciting. 

Apart from the brickwork, everything goes together really well. I like the details around the bay window, especially the supports underneath which poke through the wall making painting a breeze. 

Realistically, you could stick this together in an evening without breaking sweat. Painting the windows speratly does make sense, and ensures a tidy job.Good fun, stress-free modelling.


Tuesday, April 12, 2022

R279 Mock Georgian House - Part 5. Getting it wrong.


Recently, a friend who is house-hunting and I discussed the merits of houses that have their stars in the living room and no hall. It seems this is a common feature which keeps the price down, at the cost of higher heating bills. 

It seems that I've built the Hornby kit this way. You see, I messed up and transposed the end walls. As designed, the stairs will go up from the hall, which is behind the front door. Half way up, they will be illuminated by this window, which is just above the first floor level. 

Put the sides in the wrong place, and those stairs are in the living room. Not ideal, but not out of the question either. I seem to recall as a child, one of my friends houses being re-built to include this feature, and I thought it very avant-garde at the time, this open-plan look. 

I'll admit when I realised this, there was some thought about running some solvent into the corners to disassemble the model - but I decided that I'd ruin the paintwork. Also, that it would be a pain and not the fun sticking a kit together experience I was after. Besides, if I don't tell anyone, they probably won't notice.

However, I might have messed up a little, not this bad. 

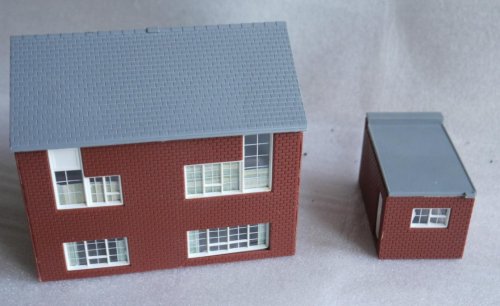
Described in the auction as: Hornby OO gauge plastic mock Georgian house with detached garage. Garage door opens and closes. This has been glued together quite nicely.

Quite nicely, apart from fitting the back wall upside down then!

Monday, April 11, 2022

R279 Mock Georgian House - Part 4. Roof and floors.


To my mind, a model building benefits from fitting floors (not flaws, I'll talk about that tomorrow) and walls, so viewers can't look through the windows and see out the other side when they aren't supposed to. Worse, sometimes you can look through the top windows and see through the bottom ones!

A floor is supplied with the kit, but I've bodged the walls out of Daler board card. Black colouring is from a fat permenant marker as I couldn't be bothered to use paint. It all looks the same once the roof is on anyway. 

Painting the roof follows the instructions in St Martyn's book, The Art of Weathering - always a useful resource for ideas and well laid out for dipping in and out of. 

Bacially, a coat of tarmac followed by a small number of tiles picked out in a tarmac/lead mix. Finish up with a dry brush of tramac/pale grey mix. He then goes on to wash with dirt, but for this model I think that's a step too far. If I find it a home on a layout, my mind might change, but it's easier to add the wash than take it away.

Thursday, April 07, 2022

R279 Mock Georgian House - Part 3. Windows.


Looking closely at the box photo, I think this kit is supposed to have wondow sills - but they are noticeabley missing from the parts in the box. 

But if you look at the stock window on the left, it seems odd. No problem, some Microstrip painted up (Humbrol 147) and glued in place improves things. I didn't have anything bang on the right thickness, but it's close enough for this build. A couple of thick coats of paint seems to hide the worst of the problems, at least from normal viewing distances. 


The glazing includes extra bars, and these are really effective IMHO. Better still, it's designed sufficiently oversize that I was able to blob on the glue (Deluxe glue'n'glaze) around the edge, put the window in place and not risk seeing the adhesive, even after wiggling it around to ensure the bars are horizontal. 

Finally, loads of printed curtain material is cut into strips and fitted with the same glue. There's plenty left over, so I will tuck that away in the transfers draw for future use. I love having useful leftovers.


Wednesday, April 06, 2022

R279 Mock Georgian House - Part 2. Painting bricks.


Dry brush painting

I'm not sure why I chose to dry-brush the bricks on this model rather than using pencil crayons. I think it might produce a more consitent colour appropriate for a new build property, or maybe just for variety. 

Work starts with a thin coat of Humbrol 121 for the mortar colour left overnight to harden. I didn't aim for a perfect covering as I hope the variety of shades in the base will produce some variance in the final brick colours. It's a bit like the "pre-shading" techniques military modellers use. 

This has worked well. Combined with a less then perfect brick colour, there are variations, yet I've only used two colours, or three if we count the brick colour plastic. I'm sure there are more sophisticated methods, but 85% or the result for 20% of the effort sounds like a good trade-off to me. 

When dry-brushing, the advice it to wipe the paint off the brush on a rag or bit of kitched towel. I don't do this, I wipe it off on the corner of my modelling board. And have been doing for many, many years. 

This mound of paint and glue used to facinate a previous BRM editor who I suspect had dreams of removing it from the board and cutting through it to reveal all the layers. Maybe I'll do that one day myself, but it would seem a shame to ruin the mound. I'm thinking the result would be a rather dreary version of Fordite

Using the mound, I can pick up more paint from where I've worked it off the brush, so I'm sure it's more economic this way. It works for me anyway.

Tuesday, April 05, 2022

R279 Mock Georgian House - Part 1. What's in the box?


R279 Mock Georgian House kit
Regular readers will know I'm a fan of the Hornby Town & Country range of plastic kits produced in the 1990s, so when I chanced upon a pile of R279 Mock Georgian House, I snapped a couple up for a "stick it together for fun" session. Well, it makes a change from 3-wheel Japanese trucks

In the box, the plastic mouldings are all very nice and crisp. Self-coloured too, if you like that sort of thing. Windows are pretty good and will be augmented with printed glazing. 

The prototype is one of those identikit dwellings that proliferated in the later years of the last century. Nowadays, I notice a greater variety of designs on new estates, but I'm sure I've seen plenty like this. The designer did a good job. 

And who was that designer? Well, the Pola branding on this part tells us it wasn't someone from Margate. The range was bought in, but none the worse for it, and handily, you can still buy them fromn Gaugemaster.