Sunday, November 30, 2014

Annoying things about Warley

Reading popular web forums after the Warley weekend, it seems that there are some British Standard moans. Rather than enter into arguments, I thought I'd look at some of these and give my opinion. It is after all, my blog and unconnected with anywhere I might work. If you think I'm wrong, put it in the comments.

The show is just too big

Really? It's not as big as the classic motor show the previous weekend and very little different in size from the IPMS show at Telford a couple of weeks earlier. I visited both as a punter and after 6 hours knew I hadn't seen absolutely everything. To me this didn't matter. I'd had a nice day out and looked at an awful lot that did appeal.

Rather than make the show smaller, the trick is just to look at the stuff that interests you. We all enjoy some aspects of the hobby more than others and with so much on offer, it's perfectly possible to wallow in those and ignore the rest. Think of it like a Chinese buffet meal. One where you can enjoy just the dishes that you like and don't feel the need to eat the ones you don't.

More to the point, how big is too big? I've seen visitors exit a show after an hour. For them, anything more than the tiny amount they have seen is too much. What's the level? A hour? 2 hours? half a day?

Now if you want a really big show, visit one of the major European events like Eurospoor. If you think the NEC is too big, that's going to make your head explode.

Why is the lighting a horrible yellow colour?

Because this is an exhibition hall and if you visit a "normal" show, all the stands bring their own lighting. The stuff in the ceiling is just to stop you tripping over between stands.

Admittedly it is a horrible sodium yellow colour. Modern halls have white lights which might still be on the dim side, but at least there isn't the horrible colour cast when taking photos. Demands that the NEC change them aren't likely to be met with enthusiasm as it's probably only the tiny (in NEC terms) toy train show that is bothered. When we take multiple halls for several days like one of the big shows they might be a bit more interested in spending a significant amount of money.

This does expose one of the problems with the hobby - we are amateurs and it shows.

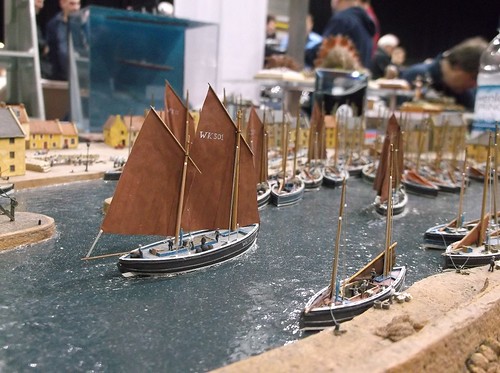
Layouts generally turn up with their own lighting. Illumination in venues varies enormously and so it's pretty much essential to bring your own light if your efforts are to be presented to best effect. Trade stand though, very few have any form of lights even though they know just how bad it will be.

This isn't the case in other hobbies. That classic car show was much better lit everywhere but the autojumble. Head abroad and the standard of trade stands is much more slick and professional with display cases and shell schemes being common.

In the UK we tend toward the "chuck the stock on a paste table" approach. Maybe this is cheaper, or maybe it just looks like it. OK, so presentation costs money but when you are competing with so many other stands, a few lights that make it easier for the customers to see the stock has got to be worth considering hasn't it?
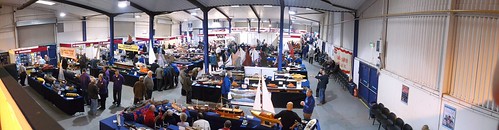
It's too crowded.

Yes, lots of people want to visit. 17,000 of them over the weekend apparently. This is A Good Thing.
Hiring a proper exhibition hall is horrifically expensive. That means you need decent crowds to make the show pay.

Large numbers mean the show is popular so someone is doing the right thing. Oddly, people also complain when a show seems empty. Everyone likes to be at a successful event so if you are generous with the aisles and it's easy to get around, the moan but if you tighten them up and it's a bit harder, they moan.

The other problem is that modellers all want to visit on Saturday for fear of missing out on a bargain. Shows attendance over a weekend is always 60:40 and yet it's almost impossible to persuade anyone to do the second day. Sunday this year was quite pleasant to walk around, especially after an hour when the crowds had distributed themselves evenly through the hall.

One problem that can't be fixed is crowds around popular exhibits. If everyone wants to see a layout, you'll have to wait. No matter how big the venue, or how much space allowed around it, the layout doesn't get any bigger.

It costs too much.

Tickets on the door were £14. Advance ordering save £1.50. For that you had a full days entertainment in a show that was big enough for there to be something for everyone. If you spent the money on beer it would last less than 2 hours. Coffee in a chain shop wouldn't last any longer. Spend it on football and they wouldn't let you in past half time.

Maybe the problem is that it costs a lot compared to other model railway shows. If you never look outside the extremely price sensitive hobby then it's difficult to judge. IPMS Telford cost a tenner, the GOG event at the same venue costs £12. The classic motor show was £21 and that's not uncommon for car based events. Brick 2014 in London will cost the Lego fans £30 to enter.

£14 isn't an insignificant amount of money but on it's own it's not the end of the world for a big event once a year. However, there is the cost of travel to add to it and if you drive there's a tenner to spend finding a home for your car on site. Assuming that like most visitors, you came on your own, that's nearly doubled the cost, not good.

Of course there are ways around this. My travel by train on Saturday worked out at less than the price of the parking. There are several stations on the same line that offer cheaper parking even when you add in the cost of a couple of stops worth of travel.

For longer trips, it sounds crazy but a cheap flight might be better value. I can't claim to be an expert but the airport is right next door and plenty of European visitors find it cheap enough to make the trip.

The food is horrible and too expensive.

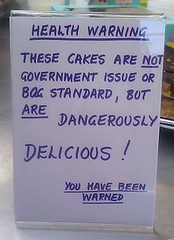
That's exhibition catering for you. Posh burger vans that have to extract every pound out of the people trapped in the hall. It's the same at every exhibition hall in the country. With thousands of people to cater for, you can't suggest that the club members wives whip up a few cakes to sell. Having said that, the Subway sandwiches were less than a quid more than the high street price and perfectly nice, or at least I though so.

The cheapest alternative is to bring a packed lunch. Plenty of seating was available for those who wanted it. Yes it got busy in the middle of the day but that's when most people wish to use it.

Next up, there are eateries within the NEC but not in the hall and they aren't quite as expensive. You'll probably get a sit down too and even beer in the Weatherspoons.

Finally, the airport branch of Frankie & Bennies fed me on Saturday evening with a delicious spaghetti bolognaise for under a tenner. It arrived so fast, they have to cater for people heading to aeroplanes, that I would have been able to leave the show, eat and return in under an hour. OK, it's a 15 minute trek each way but you do get a ride on the cable railway.

The staff are rude.

NEC security are notorious but then if you spend all day trying to direct people around, especially when every second one thinks they know better than you AND you're out in the rain then you'll be a bit grumpy too. This year everything was sweetness and light in my experience and that of many other people so I can't complain.

As for the Warley stewards, well, most of the time they are brilliant. I had a bit of an issue with one individual this year but apparently he's officious with everyone. The problem is that these guys are all volunteers so there is an element of you take who you've got rather than necessarily who you might want. They are there hours before even the exhibitors turn up and don't get to leave until after we've escaped. That's a looooong day for no money and everyone, even you, have an off day sometimes. If you think you can do better, I know the club are always looking for volunteers.

There's not enough N gauge/American HO/Swiss On30 etc...

A general show has to be all things to all people. If your interests are very specific, you will probably be a lot happier at a very specific show.

As it is the layout bookers try for a balanced display but can only book the layouts that actually exist. If you desperately want a huge roundy-roundy set in Canada in the summer of 1932 then the chances are no-one has built one. There is no magic want to whip these things up...

Where are all the small traders?

At specialist shows. Look at the Warley crowds. They represent the current state of a market that wants ready to run models. They might like to look at some of the oddball kits, but only in passing.

Traders need to make money and that means selling products. They need to shift enough over a weekend to cover travel, accommodation and stand rent. For most that's very difficult. At a specialist event where the ratio of serious punters to general visitors is high, they might just do it. If not at least some of the loss can be put down to marketing.

Having said that, what was missing? You could buy etched loco kits, scenic materials, track and pretty much everything else you might need. If your list includes exotic very finescale products then a Scaleforum is probably more use to you, but then it wouldn't interest the general visitor.

Many years ago, I was chatting to the Warley treasurer and he explained a problem I hadn't thought about. The people with money are the box-shifters. Set the stand rate too low and they will buy up miles of hall. Set it high enough to prevent this and you'll price out the little guys. There have been a few changes - the MRJ small suppliers area is considerably cheaper to exhibit in than the main hall, it's still more expensive than a standard exhibition but at least it's something.

-----

As you might guess, I'm a big fan of the show. While not perfect, it's the sort of centrepiece the hobby needs. I also appreciate that you can't please all the people all of the time. I don't think I can do better but if you do, I'm sure the organisers would welcome you volunteering to hep out.


Saturday, November 29, 2014

Warley 2014

St Ives

Warley = Work

For the last few years, the national show at the NEC has involved me sitting behind a demonstration table chatting to people. This time it was my first stint standing behind a table on the British Railway Modelling stand, chatting to people.

In front of me I had Owen's Bridge, my recent WW1 project now half way through its serialisation in print. There was also the layout on a tray and beer festival diorama. Sunday saw some table space open up as Andy York was sat at home processing photos, so I added my campsite and painted people scenes.

What this meant was I spent virtually all day chatting and hardly any wandering around looking at things. Trips to the Subway stand at the back of the hall via a circuitous route were my best hope of spotting anything while the event was open. That's not a complaint, I love chatting to people more than anything else, but if anyone is expecting a full show rundown, you're going to be disappointed.

What I did spot was St Ives, a fantastic gauge 3 layout with scenery. I've not seen this before and probably won't again. The model is due for only one more trip out and it takes a show held in a hall the size of the NEC to accommodate it. Well, that and the 5 inch gauge shunting plank layout behind it - both were very popular with the crowds.

Apart from this, I nipped out to look at some new products. Peco's laser-cut station building looks very nice and of course I was stupidly excited about Accucraft's "Sealion". The Dapol O gauge Terrier looked very pretty too in it's yellow livery although I'm told that's it's a dreadful model that brings shame upon the hobby or summat. I liked it though so perhaps I'm dreadful too.

No, the weekend belongs to chatting. Lots of people wanted to know how to model a canal. Quite a few were very interested in electrostatic grass and my techniques for enhancing it. We also discussed how green a WW1 Simplex should be although I'm still not convinced on this point.

At the end of Sunday, I wheeled out my stand on a trolley and was on my way off the site by 6pm. Not bad at all.

If you dropped in to say hello, thanks for stopping by. If I was already chatting to others then I'm sorry - this is one show I wish was a day longer so I could speak to more people. Mind you, then my feet would hurt even more...

A few photos on Flickr.


Friday, November 28, 2014

What makes a good Radial?

Subtitle: Why I can't be bothered to fit lamp irons to this loco.

Primered Radial

With the Radial now in it's first coat of primer, I've been pondering how I will finish off the model.

A couple of months ago, I ruminated on exactly how good a model needs to be if you are planning to use it on a layout. My feeling was that once you look something as part of a complete scene, it's more important that everything is to a similar standard rather then be perfect to the tiniest detail.

One detail I have always had a bit of a blind spot over is lamp irons. Yes, I know they should be on the ends of the model but if they aren't, I don't miss them. Sacrilege I know, but that's me.

The Radial should be festooned with the things including a pair of entertainingly shaped ones sticking out the sides of the smokebox. I looked at these and decided I couldn't be bothered. Maybe the straight ones could be made out of staple but those "wings", that's a job for brass strip and doing things properly. Mess up and it would be better to leave them off. An added benefit is that the pretty front end of the model is, to my eye, enhanced by the lack of sticky up bits.

This isn't madness. You can report me to the finescale police all you want, but I think it's the right decision.

Too much detail would be inconsistent within the model. Look closely and you'll notice a lack of brake gear. Well, the frames are made from armour plate cut out of a decommissioned battleship. Drilling through this for hanger wires would technically be possible but hard work. I'd have to take the wheels off and I'm not sure they would go back on the axles properly. Some brake gear would also need scratchbuilding and I don't have a plan to hand.

Even if I did this, the cab is full of mahosive open frame motor. One of those bombproof jobbies from the 1960s that runs sweetly but at a cost of being the size of a small car. Really I ought to replace it with a more modern smaller unit and then build a cab interior.

But then the fit of the body around the splashers isn't perfect. There's some work to do shown in the photo along the footplate - I said this was the first shot of primer.

No, basically this kit is what it is. Attractive but on the basic side. If I want a hi-fi model I need to build an etched kit, or just wait for a RTR model to appear. I've seen the first shots from Hornby and they are better than my version if you want to look closely.

So, I'll build the kit and enjoy it. Maybe my model won't win any prizes but I think it's going to capture the character of the prototype and look very nice indeed. At the end of the day that's what matters.

Thursday, November 27, 2014

Brass buffers bad

BrassBuffersOne surprise inside the box'o'bits that contained my Adams Radial kit was this set of natty brass buffers.

Ready made and nicely sprung, they are just what we keep being told that modellers want to find at the ends of all their rolling stock.

I've no idea how old they are but I have a feeling they might be contemporary with the kit so over 40 years.

Sadly, there is a bit of a problem here. They are ALL brass.

While brass housings are fine and perfectly normal, brass heads and shanks aren't. What they are is the wrong colour because they are the wrong metal. What we need here is steel.

Sadly, this means the whole lot is going to have to be painted and then fixed solid so the paint doesn't rub off when the buffers are compressed. Pity, as they are quite nice.

The sharp eyed will have spotted the vacuum pipe has been fitted and that instead of running up the face of the buffer beam, it emerges from behind it. Just as it does in the photos I found of the real loco. Not sure how common this is but I'm pleased to have modelled it and will now boast every time someone looks at the model.

Wednesday, November 26, 2014

Book Review: Create Exterior Finishes by Bea Broadwood

Much as a I love working with plasticard on model building exteriors, I look at the work of people like Iain Robinson and think perhaps I could be trying something a little different. There's a bit of me that is itching to find a project suitable for some scribed stonework for example.

Before this, I like to swot up on the techniques involved and like so many people who own a shelf full of cookbooks and still order takeaways, I've plenty of "how too" literature and lots of plastic sheet.

New to me is the company Petite Properties . To date they have worked in the dolls house scales of 1:16 and 1:24 but are now producing kits in 4 and 7mm scales.

Bea Broadwood is an architectural illustrator so has the background to care that the models look right and the skills to ensure they do. Chatting to her at Warley last weekend, she grew frustrated that most dolls houses are used as display cabinets for miniature furniture - every room is perfect but when you shut the front it's back to the world of giant-sized brickpaper.

Reasoning that the exterior should be as good as the interior, she has developed techniques to model all sorts of surface finishes simply and cheaply. This book is the result.

After covering scales and tools, the book cracks on with chapters on bricks, renders, stone, timber and roofing. These are divided to cover a variety of finishes and methods of creating them. You get three options for brickwork - card bricks, clay bricks and scribing. On the roof we have three pantile methods and also 6 different techniques for tiles.

Everything is comprehensively illustrated in full colour with step-by-step guides. Although this is a self-published book, A5 in size and with 92 pages - it's jam-packed with information.

Most of the techniques look like they will work in railway scales too. None of them use anything more expensive than air-drying clay or couscous. Mostly were in a world of cardboard, another joy when so much of the time we are encouraged to spend on specialist products.

Create Exterior Finished is available from Petite Properties for £11.99

Tuesday, November 25, 2014

Replacing a moulded smokebox dart

Right you lot, pay attention. If there is a simple improvement anyone can make to a model steam locomotive, it's replacing a moulded smokebox dart. Yes, I know that a lot of modern ready to play locos now come fitted with a nice seperate item but most of the older ones didn't and nor do those from Hornby's very economic Railroad range.

I've talked to "modellers" about doing this in the past and get very frustraited when I'm told "It's too difficult" to make this change. After all, there in an Interweb to whine on and one day the manufacturer will listen...

Well, tough. This is a model making blog and so I'm going to show you just how easy this job it. You'll need a small drill bit, sharp knife, superglue and some emery paper.

Smokebox Dart1

Exhibit A. A moulded smokebox dart (Yes, I know that's a modellers term but we'll stick with it) on the face of my Adams Radial. Back in the 1960s, people used to put up with this sort of thing, but then they used to accept all sorts of things back then.

Smokebox Dart2

The moulded dart is cut away with a sharp knife and the remains sanded away with emery paper. Before the last vestiges are removed, drill the centre with a 1mm drill bit. A polish with a fibreglass pencil is an excllent finishing touch.

Smokebox Dart3

The replacement part comes from Eileens Emproium as 3 tiny and nicely turned brass parts - a base and two arms. Some of you are probably thinking that £2.50 is a lot of money for very little metal but it's quite a lot of lathe work to get this far. Alternatives are available but if they are whitemetal castings, cleaning them up can be fiddly so I stick with what I know. Anyway, the improvement is worth it.

Smokebox Dart4

You pop the base in the hole drilled earlier then thread the arms on the spike. Positions them to match a photo of the real loco. Fix everything in place with tiny amounts of superglue. Place this on some plastic and trasfer to the model with the end of a pin - you don't need much. Finally, trim the spike and arms to length (look at the photo again) with some wire cutters or a file.

All of this is even easier on the plastic loco body. Best of all, touching the paint up is really simple as smokeboxes are matt black and Humbrol's version of this colour (No 33) is an excellent brushable paint so you don't even need to spray and it will stick to the new brass bits adequatly.

So, a nice simple upgrade for an older loco. Every time you look at your model you'll know it looks better than it did and more importantly, you'll be able to say, "I did that."

Monday, November 24, 2014

Radial handrails

Handrails

There's not a whole lot of detail to add to the Radial but you can't avoid the handrails. I wish I could, they are always a fiddly job.

Anyway, first I counted the knobs. I needed 8 to fill the holes in the boiler sides and 10 if I wanted to include the two that should be in the smokebox front but K's had "forgotten".

In the box, there were 7. That's the perils of buying half-completed kits for you.

No matter, digging through my pot of leftovers, I found enough to replace the lot. They all look the same even though the leftovers come from a variety of sources.

One problem with using knobs (stop sniggering at the back) is that you need a variety of lengths (I said STOP sniggering) as the smokebox is wider than the boiler. Pragmatic modellers like Tony Wright use split pins to get around this figuring that the straight handrail trumps a wobbly one even if the later is hung from the best brass turnings Mr Gibson doth supply. I've tried pins but just can't get on with them which is a nuisance.

Anyway, the handrail was first bent over a pen of a smaller diameter then the boiler and then the corners put in using small pliers. The knobs were threaded on the wire and pushed in their holes. I opened out the ones in the smokebox to allow the knob to seat all the way in. Some filling superglue will hide this subterfuge. Then there was lots of tweaking and a little bad language before the job was done.

Sunday, November 23, 2014

NRM - Australia

NRM Sign

While I was in Oz, one of the trips I was taken on was to their National Railway Museum in Adelaide. It's a fantastic place, not unlike our own NRM in blighty albeit a bit smaller.

The slight snag is that while I can present you with photos of all sorts of train-related things, I didn't pick up enough information to be able to properly identify the different classes of loco.

97

This didn't stop me snapping all sorts of very modellable things of course.

523

Even the diesels appealed.

930

And of course there was a Garratt.

Garratt front

So instead of me writing stuff, why not head over to Flickr to look at my photos. After this, take a trip to the very comprehensive National Railway Museum, Port Adelaide website.

Saturday, November 22, 2014

A feast of classic cars

Off to the NEC...

No, I wasn't a week early for Warley. Sometimes I like to do something that isn't toy train related. There was a big classic car show and I had a spare Saturday when I could have done some useful work, but decided I'd rather enjoy some time off.

Anyway, since I didn't have anything proper to do, I thought I'd try to work out which classic car I'd like to own next. Little details like money can be safely ignored. The only rule is no VW's since I own two and am only selling one of them...

I'll admit my choices are on the odd-ball side. A Morris Minor is (apparently) an excellent starter classic, good parts availability and easy to work on, but the car has never appealed to me. The van on the other hand always looked rather pretty and this pickup even more interesting. I've been told that the steering is heavy but even if that's true, it just makes driving like a session in the gym and that's supposed to be good for you.

Morris Minor pickup

Perhaps that's a bit sensible. I like colourful things and you don't get much brighter than a Nash Metropolitan. Funky 50s styling with a handy indentation in the door tops for your elbow when driving along the open road.

Nash Metropolitans

Good looking cars, but even I'd have reservations about looking after one. Pretty in nice paint but I bet pretty terrible for rust and slow and wobbly in today's traffic I suspect.

Micro cars have always fascinated me and for trips around town, I think they make an awful lot of sense. Being tall, I'm going to have to be careful I can actually fit in the things. While a Peel might satisfy my love of all things Manx, perhaps something roomier and with a railway connection? The Scootacar was built by Hunslet when they weren't hammering out locomotives.

Scootacar

OK, so it's going to be a bit limited in carrying space although it is a two-seater. 96mpg is pretty exciting though.

How about a small van? Something with some Italian style like the Lambretta three wheeler?

Looks good to me although I wonder what it would be like to drive since the seating is very "sit up and beg". Should be nice and nippy around town and according to thelambro.com, all sorts of special bodies were available. Now, if I could find a ratty one, it would be a great restoration project as the thing is small enough to work on in a normal garage.

Lambretta Trike

The classic cars we dreamed of as children often come back to haunt us in adult life. Perhaps I was a bit weird but I never liked Lamborghini's, preferring Talbot Racho's which are now rarer than hens teeth thanks to being built from steel that even Alfa Romeo thought was a bit rust-prone. I also liked Beetles but today is a no VeeDub day, so my second choice was the TR7.

How can you not love a sporty wedge-shaped car like this? OK, so the ones made in Liverpool were a bit rubbish but they've probably all fallen apart by now. I'll have a Coventry or Solihull version please. Hard top and as standard as possible, even with the tartan interior.

TR7

OK, so I have no idea if I'd fit inside and the seats are pretty close to the floor but it would be great fun to try. I actually wanted to ask the question, "What's it like to live with?" but couldn't identify anyone on the stand.

But you can't really end like this can you? I mean a TR7 can be had for under £5000 and that's hardly the stuff of dreams is it? Fortunately, with my imagination off the leash, I found a proper dream car.

I want a Mercedes 300SL roadster.

There was a gull-wing hard top on sale at the show for £995,000 but I assume since you don't get the complicated doors and all that roof, this has got to be cheaper hasn't it?

Mercedes 300sl roadster

For more photos, including some in black & white thanks the horrid NEC lighting, head over to Flickr.

Friday, November 21, 2014

Off to Warley

Today is all about heading to a little local show a few miles away in a tin shed at the edge of Solihull.

I know local shows aren't everyones thing but I like to support these events where I can. Anyway, I'll be on the British Railway Modelling stand (BO4) over the weekend with Owen's Bridge and a few other projects.

Please drop in and say hello. I'm sure there will be a few other things to look at while you are there!

Warley Show website.

Thursday, November 20, 2014

Boxing Owen's Bridge

Layout Box

Transporting layouts is one of those things that most people don't think about when gawping from the public side of the barrier.

Once you've built a model though, it becomes pretty important to you, After all, there's a lot of work been put in to the model and you don't want to be setting up at a show to discover it has been reduced to miniature rubble.

Owen's Bridge is particularly vulnerable. Unlike most of my layouts it consists of a single baseboard so can't be turned into a box with the scenic areas protected in the middle. At the front is a reasonably delicate wooden bridge crying out for a wallop to destroy it. No, this time I had to make a box for it to live in.

The box is in fact a lid made from 6mm thick plywood. The insides are braced with softwood angle and for extra protection, the corners are covered with L-shaped mouldings. There's lashings of PVA glue and quite a few 15mm long panel pins involved holding the who lot together.

In use, the box is placed over the model and then screws are inserted in through the sides - you can just see them in the photo.

Of course I now have a 64cm by 104cm by 44cm box which is an absolute pain in the backside in a domestic room. After Warley, it will be shipped off to storage to get it out of my way.

To make sure I know what's in there, and which way around the cover goes, I've painted the name on the box.

 
To give a suitable military feel, a stencil was made by printing the name in an appropriate font on a sheet of paper and then cutting the letters out with a sharp knife. The sheet was stuck to the woodwork with masking table and painted with some sponge and emulsion. Looks about right to me and didn't take too long to do.


Of course, if the layout arrives at the who with no damage, it will all have been worthwhile.

Wednesday, November 19, 2014

Body fiddling

Radial build

Why did the previous owner of this kit stop work, put it in a box and flog the thing on a second hand stall for no money?

Quite a mystery since they had done such a good job of assembling the parts. All is neat and tidy. The filler work is far better then I usually manage and as far as I can tell, the loco isn't more than a few hours off completion.

Although the kit is glued together, I set to with some low-melt solder and attached a couple of steps. So far so good.

Then I looked at the roof. It should just drop on but most of the locating lumps had been filed away. Trying it in place I realised why. Somehow it didn't line up. The front was fine, but the back was distinctly off-centre.

I ran square over the model and all appeared OK. Then some close examination revealed that the cab back wasn't symmetrical - about 2mm thin on one side which definitely made a difference but that wasn't all of it.

After tack fitting the roof, I fiddle and faffed for about an hour. Happy, I fixed it in position properly, cleaned the model up and took the picture above.

Then I decided that it still wasn't right, fought the solder to get it off, and tried again. I think I'm happy this time.

Tuesday, November 18, 2014

Better wheels

Radial wheelsThe Keyser kit dates from the 1960s and shows its age. While I can live with most of this, it's going to be a layout loco after all, one or two upgrades are required.

The driving wheels look OK to me but not so the bogie and trailing wheels. These are (I think) Jacksons from the land that time forgot.

Spokes stamped from a sheet of metal and incorporated at the back of the wheel don't look right to my eye. There is an awful lot of depth from front to back which might have been OK back in the day, but not now. Well, not if they aren't hidden under a wagon anyway. The photo does them a favour...

Replacements come from the Hornby range. People will doubtless be horrified that I haven't picked anything more accurate, or at least with the right number of spokes (1 too few), but I had some to hand and if they really bother me, I'll change them later.

For the moment, I've filed the pinpoints off the ends and popped them in place. At least they keep the model in the air.

Monday, November 17, 2014

Adams Radial

Radial

It seems that the most popular prototype locomotive in the UK is currently the Adams Radial. One manufacturer (Oxford Rail) has already announced a ready to run version, and there are rumours that another will do the same in a few days.

Some Aussies have been looking at the prototype for years and a fourth company started the research and then bailed out once it became clear the market was crowded. Bachmann also had a shuftie but felt the large number of variations was more trouble than it was worth.

Anyway, I thought I should get in on the action and have hauled an ancient Keyser kit out of the stash to have a look at.

Bought for 20 quid on a second hand stall a couple of years ago, this isn't a bad little project. Regular readers will remember it was in the running for the kit I'd build to cover my holiday but didn't make the cut. Mind you, the railcar that did hasn't progressed that much either...

No matter. The model, as you can see, is mostly assembled. The chassis is built and works pretty well. All I have to do is stick a few bits on it and paint. Another helpful step was to search on the web, where I found a photo of a model in a rather handsome early BR livery.


Of course, as a finescale modeller (stop laughing), I am concerned that I am being properly accurate. To this end, I did what everyone else does and e-mail the guru of all things railway south of the Thames, Graham Muspratt to find out what I'd got in my box of kit. He kindly responded:

Well the Radial is an interesting minefield...

The model you have so far has an Adams style boiler and safety vales with a Drummond chimney, luckily for you number 30584 with such an Adams boiler and chimney ran in unlined black with cream gills sans ‘British Railways’ lettering between April 1948 and May 1951.

So it looks like my plan has legs and I'm not going to be fighting transfers to apply mixed traffic lining. Mind you, it's my model and so if I want to paint it black... If you're not happy, get your own. It's not going to be difficult!

Sunday, November 16, 2014

International Model Boat Show 2014

Pamorama

This years model boat show looked very much like every other years shows. Lots of model boats on display and some trade. Less trade than previous years I felt, at least one major stand was notable by its absense.

Some of the boats looked pretty familair too, but then if your club has to travel to exhibit, the chances are the people willing to do this are the same ones who do it every year and they will tend to bring the same models.

Never the less, there was still plenty to look at. Our stand was well-manned so I had plenty of time to wander around and take photos. The more I looked, the more I found interesting models. Again, I largely ignored the military stuff but they left a huge amount to chose from. I'd suggest that there were approaching 1000 miniature vessels in the hall, so something for everyone.

RememberHighlight of the day was, as usual, the 2 minute silence for Rememberance Sunday. I try to be at the water for this as there is a display of military models and it helps to focus your mind when you realise just what the crews of these ships had to go through.

A first this year was that there wasn't a single kit that really appealed to my wallet. Maybe it's that I have more than enough projects already, but then this hasn't stopped me in the past. Possibly there wasn't anything much new out there apart from a newly tooled Metcalf Mouldings "River Star" which now features CNC cut plastic for even easier construction, but as I've already built one of these I'm imune.

I suppose this is a good thing in a way, but when I go to this sort of show, it's nice to leave full of enthusiasm and I didn't get that this year. Maybe it's show fatigue. I certainly met plenty of interesing people and we've signed up a few new members so at least one objective has been achieved.

Now, what shall I build for next years event?

Plenty of photos on Flickr

Metal boat


Saturday, November 15, 2014

IPMS 2014

Dont touchTelford is a dump.

I mean, who thought it a good idea when planning a "New Town"that the railway station should be a long and hilly hike away from the shopping centre at the middle of the place? Walking through desolate office blocks in the pouring rain isn't a great way to arrive anywhere.

You might think that travelling by car would make more sense, but you'd be wrong. At least after the hike from the shopping centre to the exhibition centre, pedestrians know they will be able to get in. Not so the motorist who will find that for an event attended by more people than might be expected at Nigel Farrage meets all the foreigners he likes convention, the modest car park will be full and you'll be cruising around the road system looking for somewhere to stop.

If the show wasn't so spectacularly good, I'd definitely think hard about braving the place.

The queue 15 minutes after opening was so long that there was plenty of time to dry off. Efficient door teams and a sensible, 1-note entry price saw us all in the 4 halls quickly and painlessly.

You can judge how popular the event is because in the furthest hall from the entrance, one Japanese high-end kitmaker was telling crowds their latest release was sold out by 10:45. 200 German WW2 flying wings with 3-figure price tags and a level of detail to match, all gone.

BMines bigger than yoursusiness was brisk around the rest of the show too. A staggering array of trade from those selling new or second-hand kits through to people with resin or etched upgrades and even complete models to paint and pigment suppliers.

Wearing my journalist hat (the one with a card marked "Press" tucked in the brim), I was on the lookout for new product to bring to the attention of the railway modeller. I also felt that I didn't own enough un-built plastic kits and needed to do something about this.

Inspiration models were everywhere. In an effort to see the show in a reasonable time, I largely ignored military models. Even then I was there over 6 hours. By the end I'd seen many model boats I fancied having a go at and quite a few road vehicles. I know I'd struggle to paint cars as well as those on display but that doesn't stop me wanting to have a go, or to buy the sort of polishing abrasives that might make this possible.

Plane Crash

One of the more interesting dioramas was of an air crash. Not a gory spectacle with bodies strewn around but a realistic depiction of a real event where no-one was hurt. In December 1946, after taking off during a heavy snowstorm, a Douglas DC-3 operated by British European Airways, flying from Northolt to Glasgow, crashed onto the roof of a house in South Ruislip. Once ice covering the fuselage was chipped away, the crew and passengers exited and walked down through the house. This was later restored and named "Dakota's Rest". Amazing.

Barges

I also really liked a harbour scene which appeared to be built to 1:450, what railway modellers know as T Gauge. The level of detail was amazing and the colours of the sailing vessels spot on. Not a kit in sight either as far as I could tell.

By the end of the show, my bag was heavier to the tune of a cartoon resin Dalek, Captian Bluebear and crew and a Space 1999 Eagle - a kit I've always wanted and managed to bag for sensible money. Mind you, I bought Moonbase Alpha last year and it's now been re-released for about a fiver more than I paid, but at least mine is in the original box, which it will stay in until I get around to building it.

Oh, and Telford managed to work it's magic even on the way home. While the rain had stopped, the train I aimed for broke down en-route and a huge crowd spent half an hour worrying they were marooned in the place...

More photos on Flickr

Friday, November 14, 2014

Captian Bluebear

 
This is a hobby and as such, should be fun. That's my excuse for this little project. Spotted on a stand at the IPMS show (more on this tomorrow) for 4 quid, it was pretty certain that the serious modellers weren't going to be grabbing Captain Bluebear from the shelf. They prefer to leave that to idiots like me.
 
Captain Bluebear appears to originate from a 1999 novel called The 13 1/2 Live of Captain Bluebear published in Germany. This has been turned in to a film and animated TV show and from this in to a set of easykit plastic figures by Revell. Why? No idea.


Anyway, each figure is supplied on its own coloured sprue. The smaller bears (Bluebears nephews apparently) are 6cm tall and the main man just under 10cm.
 
What fascinated me is that all are pre-painted. Looking closely, each sprue has been sprayed with several colours. Presumably some sort of 3D masking method is used. I certainly can't see anyone doing this by hand. Now this is a technique I'd like to know more about - can anyone point me at some resources on the Interweb that describe the process? I'm assuming the sprue is fixed in place and the mask is a moulded metal thing placed over the top and then sprayed. The results are certainly neat.

 
Assembly is appropriately simple. The parts are trimmed from the runner and clip together without glue. Juggling the loose hands, feet and heads is a little tricky though. I found it best to clip the front and back of the bodies together but not squeeze them until the extremities were fitted. Even then they occasionally dropped out and the parts had to be prised apart with a screwdriver.
 
I did try a little cement but the plastic is very hard (ABS?) and seems immune to normal cement and solvents.
 
My completed crew look fab and will one day find there way aboard some model boats. Just not the serious ones.  

Captain Bluebear and crew


Thursday, November 13, 2014

WW1 layout part 2 and an interesting building build in BRM

In the latest (December) issue of British Railway Modelling you will find that after starting Owen's Bridge in the last issue, I finally get around to laying some track and cracking on with the scenery.

Appropriately for the time of year, one of the main features is a field of poppies. Building these individually is normally the sort of thing that only the perfectionists at Pendon get involved with but we've found some plastic kits in HO scale from Busch that are filling our fields.

Despite being kits, this is still fiddly work but I think I found a few ways to make life a little easier. The results are nice and provide some useful colour to one end of the layout.

 
Since we need some rolling stock, I've built this from a variety of kits. There's an awful lot on offer here so I've stuck with Parkside and W^D models but each has it's own idiosyncrasies. One handy hint I can offer, when building resin models, use fresh superglue. Old stuff just leads to frustration - ask me how I know!
 
One of my more interesting projects recently is to scratchbuild a small parcels office. Those who follow the RTR scene closely will recognise it as being a copy of the Bachmann resin model. This probably seems an odd thing to do but I was interested in finding out how creating a building yourself stacks up against buying one from a shop.
 
 
I've deliberately picked the simplest building in the range - square and with limited detail. Obviously it would be daft to buy a building to copy - but this is the sort of test we can do in print, and the results are interesting.
 
On the DVD I'm giving you a tour of Owen's Bridge. Our cameraman took the opportunity to poke his lens in all sorts of places so if you don't get the chance to see the model at a show, at least you have an idea what it looks like when moving.

Wednesday, November 12, 2014

Weathered store

Weathered hut

Time to get the store hut dirty. Since the magazine part of this project isn't about the painting, I could experiment a little with some of the products sitting around my workspace.

First up, the roof was painted with Modelmates Rust Effect. A couple of years ago, I tried these and while I could see potential, the immediate results didn't do much for me so I passed the potions on to someone with more patience and returned to my normal paint'n'powder methods.

Now, the pots have changed and I felt I ought to try again. A good coat over the roof and door gave me a really nice effect. The liquid dried quickly and nicely mat. Results were patchy, just like large areas of real rust. The leather base colour might have helped but I was really impressed and will use this again. I'll investigate some of the other pots in the stash too.

After this, the building was dusted with weathering powder - mostly Humbrol brown but some Mig rust too. I work over a plastic box lid and use the leftovers that drop in here as a mixed colour. Everything was applied with a inch wide cheap paintbrush mostly working from top to bottom. The effect I was aiming for was dirty, not ramshackle.

A finish that you ignore rather then look at was the plan and I think I'm there. This could sit in the background of a layout and look right without shouting about itself. Using weathering powders is simple enough for anyone to do too.

Tuesday, November 11, 2014

GWR Corrugated Store Shed

Resin Hut

For a little magazine project, I needed a resin building to work on. Nothing grand, just a simple hut. A quick call to Skytrex saw me with a 20ft long GWR corrugated iron store building.

Made up of resin and whitemetal parts, it's simple enough to assembled with superglue. The pieces need a little fettling for a perfect fit, although the prototype material tends to be less than perfect in this respect so slight gaps in the corners are realistic as well as saving time filing the chamfer joins.

Primed Hut

A handy hint is that behind the sliding door, a couple of plastic slips can be glued in place so the bottom is firmly, but invisibly, attached to the building. On a permanent layout this isn't a consideration but if you plan to move the model around, the bottom of the door flapping around isn't a good thing.

Once stuck together, the model was given a good scrub in the sink with some washing up liquid and an old toothbrush to removed any grease. Next a coat of car primer was shot all over from an aerosol.

Painted hut

The pale colour comes from a pot of Railmatch GWR light stone. Looking at photos, the darker parts didn't look like dark stone though. These seemed more orangey so I used Humbrol matt leather. This is perhaps a bit bright but as the next stage is weathering, I can live with that.

Monday, November 10, 2014

Locomotive tail lamp

 
I've been out an about over the last few days and happily, this has generally been by train.
 
In a siding usually occupied by DMUs at Leamington station, stands 66 171. I'm presuming it's dead or at least very poorly as I can't see any other reason for it to be stored there.
 
The bit that interests me is the tail lamp attached nearest the camera. At the other end there is a lamp in the cab, shining outwards. Not being a modern train aficionado, I wonder what they are doing?
 
Maybe the lamp in the cab is to stop DMU drivers running in to the thing but at this end? Has the loco been towed and the light clusters don't work with the power off?
 
Whatever - an interesting modelling point for anyone dumping a model in a siding on the layout.

Sunday, November 09, 2014

Wycrail 2014

Bathing huts

I love taking photos at model railway exhibitions to share with you on this blog, so it was a bit of a shock when I got to the doors at Wycrail and remembered that I'd left my camera at home. This means all the pics are courtesy of my mobile phone which provides slightly soft results. Sorry about that.

Cake warningThis wasn't the first disappointment either. Arriving just as the show opened, I noticed that there were signs out for VIP parking and yet uncountably, they had forgotten to allocate a space for me!

Anyway, once inside the light and airy venue, we headed around the ground floor hall. If I'm honest, most of the time was spent chatting to traders - Wycrail boasts possibly the best selection of any one day show in the country - and boring them with details of my Oz trip.

IvorAfter this, a stop at the refreshments for some excellent cakes. I know I bang on about the food a bit but it sets the tone for many smaller shows and in this case, the tone was very good indeed. It's interesting people who need gluten or sugar free cakes were catered for as well as those of us who will eat anything. A little detail but one that would make a huge difference to many people.

Upstairs, I resisted the boat kits on the second hand stall and concentrated on layout watching. Fourgig East was especially entertaining as Ian Mellers was running,or at least trying to teach Chirs Nevard to use evil DCC to run, an Ivor the Engine. Complete with the correct pishticof pishticof sound effects, it's make me want to pull the kit out of my "to do" pile and get a move on...

I could ramble on about the layouts - the selection was top notch with no duffers - but many have appeared before on here so I'll skip straight to the "Layout Phil would like to build" which in this case is an On30 model called "Stout Oak".

Stout Oak caravan

Regular readers will know I've dabbled in the scale but this looks like the sort of thing I could produce as a nice little test track. Nothing more than a run-round loop with a couple of kickback sidings, the scenery was a mass of detail. Buildings were nicely weathered with peeling paint on the woodwork. All in all, very me. And of course the lack of camera means very few pics. Sorry about that.

Slightly fuzzy photos on Flickr.