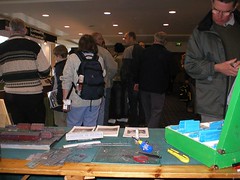
After 6 months building and painting and sanding and re-painting, we finally threw open the doors to the Leamington & Warwick Model Railway Societies new clubrooms.
Lots of people turned up, Pete Waterman performed the opening ceremony. As half of the kitchen staff I served up gallons of tea and coffee (the beer was for the barbecue in the evening, it’s not one of the normal kitchen fittings) and cakes.
And finally I get my Saturdays back !
A daily updated blog typed by someone with painty hands, oil under his fingernails and the smell of solder in his nostrils who likes making all sort of models and miniatures. And fixing things.
Saturday, April 29, 2006
At last - the big project is finished !
Friday, April 28, 2006
Painting with jelly
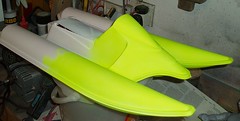
I know what the worlds worst paint for spraying is: Revel Fluorescent Yellow.
It’s very jelly like in the tinlet, not improved much by stirring. This isn’t a rogue pot either – I’ve bought from different shops at either end of the country, such is my dedication. Trouble is, only Revel make fluorescent yellow as an enamel.
Still – mix in some Precision general purpose thinners (about 3:1 paint:thinner) and it goes on. A hair drier stops the runs. Strangely you get a matt finish but it’s the brightest matt finish paint you’ll ever see !
Thursday, April 27, 2006
Guantanamo Bay Action Man
Is this the latest topic dress for the popular boys doll ?
Have the manufacturers gone mad ?
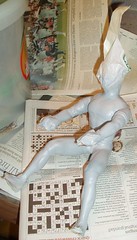
Sorry, no. What you are looking at is the driver for my Tomkat being painted. The figure needs a wetsuit to look right so I filled all the joins with Milliput and then sprayed the figure with high-build filler primer. Loads of it. Enough to take the edge of Action Mans rippling torso as well as the slightly lumpy filler around his knees and elbow.
What I didn’t want to do is paint the bits that should be skin coloured, hence the masking tape. No point in taping up the head though so that gets a bag with just a hint of tape.
Who knows, perhaps I’ve started a fashion !
Wednesday, April 26, 2006
Farewell Test track, my old friend
Our railway club has moved. We have built magnificent clubrooms and will throw the doors open this weekend. Time for the finishing touches.
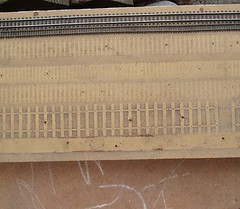
In the library/social area we have some low bookshelves, the top of which will host the club test track. This is a board with some straight lengths of track on it in various gauges. People bring locomotives along and run them up and down, showing them off to anyone standing around drinking tea. It’s not a real test of course, just a promenade. When you have built a model it’s nice to show it off, hence the tracks location in the social area.
We had a test track at the old clubrooms. It came from the previous venue. I unscrewed it from the wall and gave it legs so it could be free standing. For a while it fulfilled it’s role as a showcase for stock but one day it was moved behind one of the layouts where it sat largely unloved. At moving time I carefully split it in two and it came with us.
Trouble is it doesn’t fit the new space. What we have is an area shorter and wider than the old tracks. Anything other than a new build will look dreadful so it’s time for the old stager to bite the dust. The tracks have been taken up ready for re-use where possible. After over 20 years the fibreboard goes to the tip. It’s done well considering it’s moved twice and never really been looked after.
Out of the ashes will rise a super new track. There will be more gauges and better wiring. As a regular locomotive promenader though, I can’t help feeling that I’m loosing an old friend.
Tuesday, April 25, 2006
Prime position
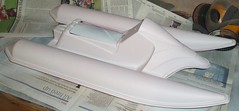
If I want a fluorescent boat, I need to paint over a white base as the coverage is hopeless. Therefore, after a final sail the Tomkat has been stripped down and sprayed with primer. Since I couldn’t get the normal stuff I have used something described as “High build”. Don’t think it makes much difference. Perhaps it fills very slight scratches but I don’t think it has any real body.
Monday, April 24, 2006
Painting Pussy
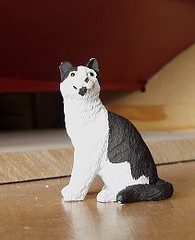
All ships need a cat and my boat is no exception. Rooting around a dolls house shop (the boat is 1:12, the same scale as most dolls houses) I found a cat – painted a weird black and orange. No wonder it was in the 50p box !
Anyway, the strange colour disappeared under a coat of Humbrol 147. This was dry-brushed with white to highlight the fur. All I had to do then is paint the black bits.
My model was my pet cat, Splodge. Getting him to sit still for me to paint the mini-Splodge was impossible. All I could do was splodge (pun intended) the paint on roughly and tidy it up later. Even that took two or three sessions.
I’m not sure Splodge is going to be a happy ships cat. He like to roam too much. Mind you he’ll want to explore all the nooks and crannies of the boat first.
Friday, April 21, 2006
Nature's not the only one to abhor a vacuum.
In the days when all aeroplanes had propellers and many didn’t have a closed cockpit, plastic kits meant vacuum forming. You opened the box or bag to be presented with some lumps in plastic. The modeller would carefully cut these from the sheet trying to work out where the part finished and the waste material began. Then he or she would stick them together with glue derived from the bones of old horses.
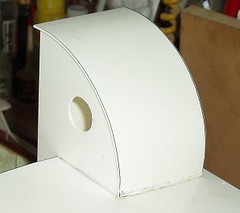
The glue has changed but you still get vac-formed parts. The funnel for this boat was one. Three parts with indistinct lines indicating where you might wish to cut. Go too far and you have to ring the manufacturer to try and buy another.
All I can say is, you realise what a joy it must have been to buy your first injection moulded kit.
Trouble is this funnel is curved, needs a big chunk cut out for the bridge and has to have a flat top and bottom. Challenging isn’t the word. Of course I made it even harder when I decided I was fitting working navigation lights. This means the roof and therefore funnel has to be removable for bulb changing. This means get it right as you can’t bodge it up with filler later.
Well I did it. Not sure how but it’s there. The base needs a little packing for a perfect fit and the roofline has been helped by a little bit of microstrip. I still need to make the roof hook onto a crossmember at the front and bolt the funnel down but this particular tunnel has light at the end of it.
Pity the prototype builder didn’t think of the poor modeller. This funnel is fake. On the real thing it contains a water tank. Wouldn’t a square one have been just as good ?
Wednesday, April 19, 2006
At last, whitemetal !
Finally, after many weeks of chopping plasticard, I get to use some of the whitemetal parts !
The box of these has been lurking in the main box. They look pretty good and there are lots of them.
From my locomotive building experience, once I start sticking whitemetal onto a model, it’s getting close to being finished.
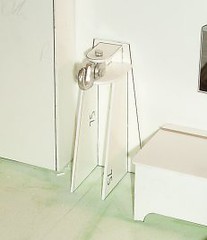
Of course I’ve still got a long way to go but the tow hook assembly cried out for the business end being built in. Casting quality was pretty good. I cleaned off a mild mould line to make things perfect – not something that will show when it’s on the water but modellers do this sort of thing. Since the bolt and nut casting were roughly 8BA I was able to break out the tap & die to make it work. Perhaps they should be replaced with brass items but I think they will be OK.
Apparently you can tow with the hook as supplied. The reviews I have read in magazines show the unit attached to the saloon but I fancy sticking it to the deck. With a bit of bracing this should be pretty firm and won’t flex under pressure.
Monday, April 17, 2006
Hotting up - replacing a VW Thermostat
What else is there to do on Easter Monday other than to get a bit grubby replacing part of a VW engine ?
Since the motive power for my van was replaced a couple of years ago, I’ve run it without the thermostat to give the maximum cooling air. New engines run hot and the mechanic who installed the lump suggested that this would be best. Long term this isn’t a good option as on short runs the engine isn’t warming up properly.
Let’s face it, if VW could have saved a few marks by leaving it out, they would have done. This isn’t an optional part.
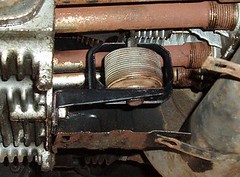
I acquired the replacement part for free recently. Unfortunately it needed repair. The remains of the rod that the thermostat screws onto were still in the top. I drilled this out and re-tapped the hole with a 4 X 0.7 tap. The bracket was already re-painted so all (!) I did was assemble the parts. The vanes in the air system made the right noise when I pulled the system together putting the part in. Once it warms up an expands they will move to allow full airflow. I have checked the bellows expand by blasting them with a hair dryer while it was on the bench.
Not a bad job. I wasn’t rushing and only took an hour to do it. Hopefully I’ll find that my engine is warming up and running better on those short runs.
Sunday, April 16, 2006
York
This was the view from my workbench over the weekend. I was hard at work manning the DOGA stand at York model railway exhibition.
The idea is that I sit there, occasionally building something, while chatting to visitors and trying to persuade them to join the association. One of the indicators of a successful show is, unusually, a lack of progress on whatever you are building.
First job was to find something to build – a set of Ratio LSWR coaches did this. I’m building them for a friend who needs an ambulance train for his WW2 layout. Since they are viewed from quite a distance away behind a collection of boats and submarines, ultimate detail is not required. No replacing of grab handles with etching or bits of wire for example.
I must have had some success because I managed a single coach in two days or about eleven hours work.
There was lots of chatting and a couple of modellers signed up. Some people love to ask questions and there is a lot of fun to be had working out the answers. One guy was struggling to work out how to bend a cab roof – I helped out with this and he went away very happy. Plenty of others just enjoyed the chance to have one of the “experts” talk to them about their hobby. Lets face it, if you don’t belong to a club a show is probably the only chance to you get to talk to like-minded individuals without fear of getting laughed at.
Opposite there was a group of modellers from the Larger Scale Model Railway group – gauges S upward. Unusually there were two women working and turning out superb work. Needless to say they have to fend off a few comments from people who think modelling is “man’s work”. How one idiot managed to walk away with all his limbs after asking how she managed to do thins and keep up with the housework amazed me.
A photo in the in-house magazine of a recently scratchbuilt locomotive was captioned, “Who would say that women can’t build models ?” – someone who with a recently acquired serious injury that’s who.
Friday, April 14, 2006
Pootling around
Hooray for light evenings.
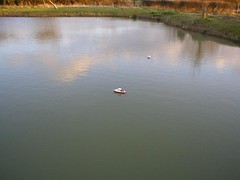
There’s nothing better than a bit of quiet sailing. Standing on the new landing stage sailing “Pootle” around. The only noises are the birds singing and sheep bleating.
Perhaps the wind was a bit stiffer than I’d like and a fleece was required ‘cos it wasn’t that warm but the sun shone and the sky was clear.
I’m not really that excited about operating models normally. Building them is the fun bit in my eyes. However, meandering around the lake is incredibly relaxing.
Wednesday, April 12, 2006
Filler time
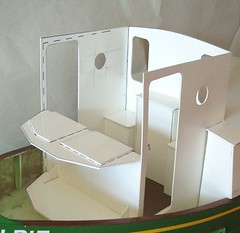
The next big section on Pigeon Pie is the entrance at the back of the salon. This is a pretty standard bit of plasticard work. Cut the bits out and stick them together. By this point only a the really ham-fisted are going to be struggling as it’s just more of the same.
The fun comes when you try and fit the part to the main boat. Because the roof curves in one direction across the end of the curved roof there will be a gap. I hate gaps because they mean filler.
Now I’ve never got on with any filler. This time squadron putty has been used. It comes ready mixed and dries pretty fast. I removed as much excess as I could before it went completely hard. Since I’m going to be spraying this roof I suppose there is plenty of sanding and re-filling ahead of me.
Monday, April 10, 2006
Boat Face
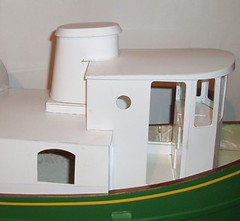
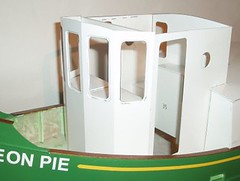
I admit to being a little bit nervous about finishing the front of the bridge. This is an area you have to get right as it’s the face of the boat.
All those curved windows and joins between sections bode ill. As it was I needn’t have worried.
The windows are easy. The curves are hidden by the outside window frames so as long as I made a reasonable job, the bad stuff would be covered up. My corners aren’t perfect but they aren’t bad. The scalpel received a new blade (Am I the only person who uses them longer than I really should ?) and made sure the big knife had a keen edge. A ruler aided straight sections. Corners were cut freehand.
The vertical joins between sections – I cheated. By scoring the back of the plasticard with an Olfa plasticard cutter, I managed to keep the front whole while bending it properly around the existing bridge structure. At one end there was s tiny gap easily filled with microstrip.
The whole job took a couple of hours including cutting and fitting the inner frames.
Sunday, April 09, 2006
Dismantling a Big Boy
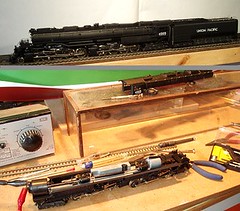
I’ve acquired a box of model trains. Someone got in touch with the club with models they wished to dispose of from a dead relative. As they were TT items, the club isn’t going to risk funds - we aren’t likely to find many buyers at the exhibition second hand stall. As someone who works in the scale I offered to go and have a look.
In the box was a HO scale “Big Boy”. This is an amazing model of the largest steam locomotive ever built, a truly titanic machine.
Unfortunately the model hadn’t run for a long time. While I don’t have anywhere other than a test track, suitable to run such a monster, I did want to see all the waggly bits moving ‘cos I have a soft spot for articulated locos
The motor sounded like it was trying when power was applied but nothing moved. I put power directly on the terminals. Still nothing. Rats. I was going to have to take it to bits.
To cut a long, fiddly story short, there are three fixing screws. One just forward of the firebox underneath (slew the bogie over to get a screwdriver in). One under the dome which pulls off. Finally the bolt holding the bell support has to be removed. Then you can lift the top off.
Once inside I removed the motor. It ran under power but was oiled anyway. The problem was the rest of the drive. I could just turn the first black shaft with my fingers and one it had been rotated a few times it seemed to free up. The mechanism is superb with tiny gearboxes driving down vertically to each bogie.
Re-assembly was the reverse of dismantling. Most mechanisms like this are fine when they have turned over a few times. This one is no different freeing up completely once it had shuffled back and forth on the track.
The loco looks lovely. Luckily the previous owner didn’t have anywhere to run it either and built a little display case. Once I find somewhere to put it at least this will keep it dust free until I find someone with an American layout where it can run properly.
Plastic Propeller
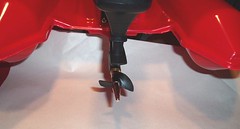
Against received wisdom the brass propeller on the Tomkat has been replaced with the original plastic version. Normal service has been resumed with the boat skipping speedily across the water even on a breezy day.
At the lake there was a group installing a landing stage. Several had also had the same experience. The quality of the castings appears very poor. While I had to ream out the hole to install the prop on the shaft, others had it slopping around ! Everyone felt that the casting was too long although I seemed to suffer less as there was about 3mm of thread to work with while others had half this.
So brass isn’t always best.
Thursday, April 06, 2006
Action man rides again
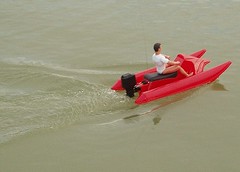
Now the lighter evenings have arrived it’s possible to do a little sailing in the evening. Time for a bit of Tomkat testing.
The Knightcote Model Boat Club rules say that each boat has to have a driver. After a brief flirtation with some dolls Poundland (no joints, too small) a suitable figure was found in a charity shop. Action man to the rescue. He may not have any clothes apart from a weird moulded T-shirt (when I was a kid, only the underwear was moulded on, what changed ?) he comes with a complete set of joints, gripping hands ™ and is the right height for the model.
A long screw (insert double entendre here) holds him to the seat, which has had to be altered so it can be removed for access with the figure in place. What we needed to know was, would he fall off when racing.
The answer, fortunately is no. Tight turns don’t even cause a wobble. The boat behaves well any initial concerns about weight are unfounded. I had considered replacing plastic with polystyrene where I could but then discovered in the float test (Action man will float) that his chest is hollow so nothing to be gained there.
What was less successful was the new propeller on the boat. I had replaced the plastic one with a brass item. The theory is that brass props are always better. Not this time. Apart from being pig to fit with reaming and filing required to get it to seat properly – the result is a drive full of cavitation and not enough speed.
This was ably demonstrated when another boater brought down his Tomkat which is straight out of the box and it zipped around the lake far faster than I could manage. Even the fact I had a figure onboard didn’t account for the difference. You can hear the pop and flutter of cavitation with the brass prop – the plastic one is smoother.
My fellow sailor had also fitted the brass prop but changed back to plastic thanks to the fitting issues. Guess what I’m going to be doing too !
Wednesday, April 05, 2006
Bridge over untroubled waters
Sometimes you get really into a project. Things are going well, you can do no wrong. The scalpel blade stays sharp and never leaves the line you wish to cut. The glue (Revell Professional) sticks what you want and not what you don't.
This is how it was when I starting building the boat bridge. Time seemed to disappear – not a good idea when you have to get up the next morning and go to work !
One thing with this kit is that it doesn’t fall together. Lots of dry runs are needed to understand how the parts should be assembled. While you get the components marked, skill is still needed to make the model. The end result is a complicated 3D structure. Once you’ve finished it you wonder how anyone can consider this to be “playing boats” !
What I was surprised about was the way building the bridge altered the look of the model. Because it is higher than the cabin and because I have been looking at the part finished model for so long the change is stark. I feel like this stop-start project is going again. Of course 80% of the model takes 20% of the time and I’m sticking big bits together at present. Still, it’s fun while it lasts.
Monday, April 03, 2006
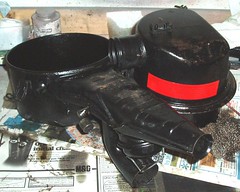
Air on a Ghia string
Among the things I try and fix is my 1971 VW van. It’s the most wonderful vehicle in the world but every so often I have to attend to its wants.
Now in the ten years I have owned it, the one thing it has never done properly is start. We normally do get going but only after the engine has run for a few seconds on the starter motor. All apart from the last few weeks. However normal service was resumed when I noticed that the air filter connection was loose. Tightening it up I find that my previous excellent starting disappeared.
“Why not just loosen the filter ?” you cry. Well I had gained proper tickover and I wanted this more. I also had an idea.
If the filter was blocked, perhaps it was restricting the air into the engine. Alternatively, perhaps this is a vacuum issue. Vacuum is used to advance the spark depending on speed and load.
Either way, the answer lay I hoped in the collective brains of type2.com would be able to help. I sent a message and as an aside asked about the vacuum lines coming out of the top of the filter.
The reply has really surprised me. It appears I have been driving a van with a late model Karman Ghia filter.
So now I have to go and get the correct filter and fit it. More project creep !
Subscribe to:
Comments (Atom)

