Sunday, May 31, 2009

Track down. Sort of.

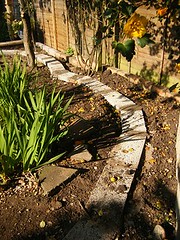
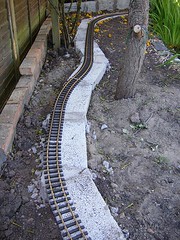
Track and baseWith the blocks for the track base set in concrete, it's time to put the track back. I thought I could remember how it all went but after several tries it became obvious that the exact positions eluded me.

In a rare moment of sensible pre-planning I'd taken quite a few photos of the construction from all angles. Reference to these, one the baking sun had moved to give some shade, showed me a fundamental long straight section was the wrong side of "the wiggle". Putting this in the right place and knowing where the short tunnel section was allowed the circuit to be built up without concreting over the whole garden.

Of course our marking out wasn't nearly as good as it could have been - as you can see the LGB track only just sits on the base. A little shuttering and extending of this will be a good idea so the ballast has something to stick too. And before you say it, we can't just twist the oval to get a better fit on this section, this is the worst bit, everywhere else is fine so that's the way it is staying.

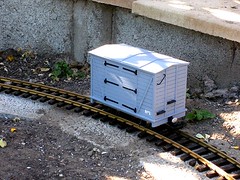
First trainOn the plus side, the levels seem OK. The first train, an IP Engineering WD box van, has been pushed around the circuit without mishap and it's pretty top heavy. OK, so this isn't much of a test train, it will be a while and many screws before one of the Isle of Man steam locos ventures out, but it's a start.

The best bit of the job is handling the LGB track. It's so lovely and chunky. Far better play value than finescale indoor stuff.

Saturday, May 30, 2009

Garage signs.


Garage signs.
Originally uploaded by finestoneminiatures

You gotta love teh interweb. As many will know, the photos on this blog are hosted on Flickr. I like the ability to upload a photo and then blog straight from the site.

I also watch a few people's uploads and occasionally spot things that deserve a wider audience. Today finestoneminiatures uploaded a couple of very nice sheets of garage signs taken from his own photos. To use them, all you'd need to do is print onto some semi-gloss photo quality paper and cut out with a sharp knife.

Result: Instant decoration for the price of a bit of ink and some paper. Even if they fade a bit over time the results shouldn't be unlike the real things fading in sunlight !

Boat modellers might like to print them on some of that "make your own decals" stuff and then use on racing boats for sponsorship logos. Give them a coat of varnish and you'll be fine.

Sheet two here.

Box company website


Box company website
Originally uploaded by Phil_Parker

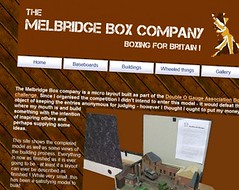
The Melbridge Box Company is heading for an appearance in a proper model railway magazine very soon. This made me think it was about time the the web site for the layout was updated. Originally checked together very quickly to give me somewhere to dump some construction pictures, it was looking very, very dated. Besides, I have done web stuff professionally in the past so a site as basic as this wasn't doing me any favours.

A few hours work and the site looks rather more interesting. OK, so most of the content hasn't actually changed that much - all the stuff about construction was pretty good. The text is now written in the past tense, when I built the site the model was still under construction and my intention had been to update it as I worked - like many best intentions this didn't actually come off but then the speed I was working I didn't have time to fiddle with web stuff at the same time. Or at least that's my excuse.

Anyway, never mid reading about its, head over to the web site, then come back and tell me what you think.

Melbridge Box Company Web site

Friday, May 29, 2009

Building a good solid trackbed


Track bed
Originally uploaded by Phil_Parker
In an effort to use up the excess blocks bought for the wall, we've been burying them in a trench and then joining them with concrete to act at the base for the garden railway track. Since setting the key stones nice and level and flat, the task has been "joining the dots" so to speak, by bridging the gaps between these.

One surprise has been just how wonky the garden is. On one side of the line the tops of the blocks are a couple of inches below the surface. On the other the trench is less than an inch deep. The circuit is pretty level. The main gradient is in the photo - about 2cm over 8 feet (yes I know I'm mixing imperial and metric units. I use the former for arm waving approximations and the later where some measurement is required) which I'm sure the trains will cope with easily enough. To get anything better would have required an awful lot more fiddling around in some surprisingly warm weather - and since every block has been laid flat both cross ways and length ways AND relative to its neighbours, there has been plenty of that.

Anyway, the lines has (hopefully) a good solid base that should last for many years. I just hope all this stuff is in the right place...

Thursday, May 28, 2009

LNW Coal Tank


LNW Coal Tank
Originally uploaded by Phil_Parker

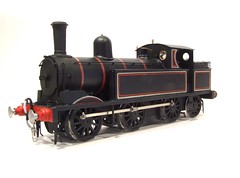
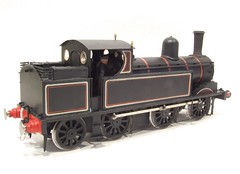
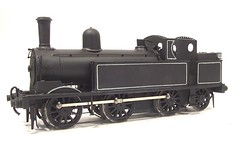
With a final push the coal tank is finished, and it looks good.

The locomotive kit is a good solid and reasonably simple one to assemble. Whilst it doesn't give you a Finney style level of detail that doesn't really matter. All the fundamentals seem right. If you want to ice this particular cake then you can do. I made a few improvements during the build but nothing major.

LNW Coal TankThe real challenge was painting. Full lining is a first for me. I think the results have come up OK, but can see why you pay the money if you want one of the top painters to topcoat your model. The techniques aren't that difficult in theory but do require a confidence acquired only through practice.

In conclusion: Nice kit giving a very nice result.


Wednesday, May 27, 2009

Buffer beam and couplings


Buffer beam
Originally uploaded by Phil_Parker
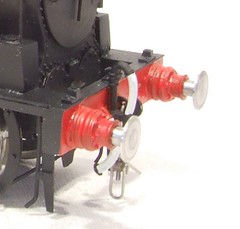
Final push on the Coal Tank locomotive - fitting the buffers and couplings. There is something about this stage when the loco starts to look at it's best. Buffers are funny thing, some people get incredibly excited about them and will agonise for hours about the correct shanks for a particular model. Others (like me) are happy to have round things sticking out from the beam that have heads of about the right size. OK, so on a loco I can muster a bit of enthusiasm but on wagons ? Is it really that important ? Even if you have a tension lock in the immediate vicinity ?

Anyway, the buffers for this particular steam engine are the right ones according to the photos. Sadly, on the real thing they would be self-contained but on a model the springing requires a tiny shank sticking out through the back of the beam. Since this is sans hole, the retaining nut can only move in a very limited space - about 2mm I think. Mind you the springs in buffers rarely do much on a model and so a small movement ought to be sufficient and at least you don't get to see an unprototypical nut bouncing back and forth just under the footplate.

The couplings are quite a nice set of screws that can actually be tightened up should the operator desire and have nothing better to do. And have a screwdriver as the tightening is achieve with this... Still, they do look the part. Again the lack of space behind the front beam means this set aren't spring but Araldited in place. Curse the designer of the real engine who put as great void in front of the smoke box, leaving modellers with nowhere to hide stuff.

Tuesday, May 26, 2009

Local Gates

In these days of homogenised town centres and centralised distribution, we tend to forget that not so long ago there were real local differences. Obvious ones are variations in building material such as yellow London brick or honey coloured Cotswold stone.

Out in the sticks though, these changes were even more marked. Local animals, what we'd now call "rare breeds", proliferated. So if you want to model Gloucestershire pigs, make sure they are old spots and not just standard pink porkers from the Merit stand. Cattle too varied with the most obvious local variations being the well know Highland cow with its thick coat and long horns. Fresians for example only appear across the UK in the 1950's yet I remember as a kid in the 70's thinking milk cow=black and white one. Even now they are becoming rarer as the grumpier Holstein has been bred into the bloodline for improved milk production.

What set me off thinking about this was a blog posting on The Countryman magazine web site on gates. I didn't realise that even something as simple as a gate design could vary across the country. Nowadays modern communications mean everyone can share gate technology quickly and easily. Even if they couldn't farmers don't make gates any more, they buy them in from a central supplier who in turn uses a centralised maker, so gates in Aberdeen are the same as those in Cornwall. However if we want a model to have a proper local feel then we need to find out about these variations and reflect them.

Check your gates on The Countryman blog.

Monday, May 25, 2009

Levelling


Levelling
Originally uploaded by Phil_Parker
A nice day gives me a chance to make progress in the garden. For the last week the entire circuit of track complete with passing loop and siding has been connected up and laid on top of the earth to see what it looks like. For some reason the LGB track allowed an asymmetrical plan - not sure how but there doesn't seem to be any problem with slack joints which is what I'd expect.

Anyway, some soft dry sand was trickled over the track and the later was removed leaving the sand to mark the spot. We had to be careful not to stand on this or brush earth over it, not easy as there isn't a whole lot of space around.

Anyway, next it's time to find some levels. Burying the first block and using this as a datum was the plan. Two more blocks were tried and we pretty quickly found that the datum needed to go down several centimetres or everything else would be running on an embankment. With half a dozen blocks in there is still about 2cm difference over the circuit but I think the locomotives will handle this OK. We will be trying a billiard table loving Mamod or two but mostly it will be electric and this has a bit more grunt.

Sunday, May 24, 2009

Railex 2009


Big Red Bus
Originally uploaded by Phil_Parker
On paper this looked like a good show - and in reality I wasn't disappointed.

Chiltern Railways run as far As Aylesbury with a change and excellent sausage sandwich at Princess Risborough. The next step is onto a big red vintage bus for the final leg to Stoke Mandeville Stadium. Full marks to the bus owners too as this was one of the best condition vintage buses I've ever been on. And it was free.

Inside the show (£6.50 since you ask) there were 80 stands. Yes, 80. First layout seen was Beachley Dock - 7mm scale dockside shunting layout from Holland. Now this is an excellent model but am I the only one who finds the name "Modelspoorteam" amusing ? Yes I know it's Dutch and everything but it's still funny.

There's not great show review this time because that's not really what I went for. No, I was chasing up trade reply forms from people who have been invited to next years Leamington Show. It's bigger than Railex as well. 30,000 sq ft as opposed to 20,000. Not that size matters or anything. And I know I could have done all this by Beachley Dock telephone boxphone but the personal touch is much better and I get a nice day out with a train show so why not ?

I'll be honest I hadn't planned to buy anything at this one. Oh, I was tempted. Dragons Models do a very nice model of Rocket in 7mm scale. £275 all in and it's a beauty. Pretty much made up of lost wax castings, I have no use for it but would still like to build it. Judith Edge kits of course have a range I would like to build, especially the early LMS shunter. High Level call with their range too - I've built a couple and have another in the cupboard but there are still the diesels to do...

As it was my bag arrived full of show leaflets and came back full of books. Cheap ones mostly but books all the same. The Hythe Pier Tramway by Peter Harding is particularly good.

As for the layouts, well most I liked and some I didn't. There are some amazing projects out there - fancy having he audacity to model Liverpool Lime Street Station for example. Personally I'd rather have seen it after a couple of years extra development but I suppose after putting in as much work as has obviously been done you need to show it off a bit to encourage the group to carry on.

Lydham hutOf course I prefer the little layouts - which was good because there was a lack of big roundy roundy models. And some of the details grabbed my eye. If I were to award the "Layout Phil would like to build" prize, it's going to either Lydham Heath, Catcott Burtle (crazy name, crazy builder) or West Harptree. The later not in GWR obviously but 12mm gauge 3mm scale is very good. And it did work well.

I originally went to this show because it was recommended to me by a friend. He wasn't wrong, it's well worth the visit. I spent around 5 hours in the hall, didn't stop to eat and spent most of the time chatting to people. That's a good day out.

I didn't take many photos but those I did are here.

Saturday, May 23, 2009

Boiler bands

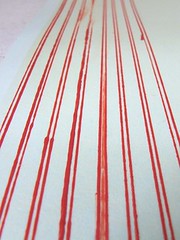
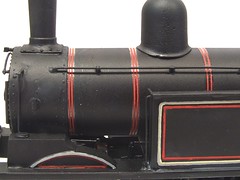
boiler bands on the sheetAccording to the book, the approved way of doing boiler bands on a model steam engine involved drawing the lines on some transfer paper and then using these home made decals on the model. Since I'm not in a position to disagree, and don't fancy my chances of running a bow pen round the boiler, under handrails and pipes, that's what I have done.

In my stock of stuff I had an unidentified A4 sheet of blank transfer paper. The bands were marked out as a series of dots 1mm apart. Than I took the bow pen that worked best for me and joined the dots with some nice red paint.

Working on the shiny paper made things difficult - on the finished body or a rubber cutting mat the paint is pulled from the pen. This doesn't happen on the paper as it's so slippery. The angle I held the pen at seemed to make a bit of a difference but the only plan that made sense involved making far, far to many bands and hoping I had enough good stuff to do the job.

Once dry I carefully cut the strips out and soaked then in water. The transfers seemed to take a long while to release from the backing paper and once off were very thin and difficult to handle. Once a band twisted on itself it was almost impossible to recover. Luckly I had almost twice as much bad as required even allowing for the duff early efforts that had to be thrown away.

boiler bands on the locoThe end result is good. The transfer sheet gives enough thickness to represent the very thin strips of metal. Those lines look really good and once on the body could be poked around easily enough with a wet brush to make sure they were upright when viewed from the side.

One minor issue is in the kit instructions. Measurment are provided for setting the bands out but looking at the photos of finished model, these are wrong by a few mm. Follow these and the band comes out from under the dome when it should cross in front of it.

Friday, May 22, 2009

More lining


Lined coal tank body
Originally uploaded by Phil_Parker
That grey lining look so good yesterday. Then I started with the red lines and realised that it wasn't as perfect as I though. In the end I spent an entire morning chasing around the coal tank locomotive body fiddling with paint.

First the red lines went on. Then I re-worked some of the grey ones which now appeared to be incorrect. Then added black between them where required. And repeated the whole process. Again. And again.

After a tea break I moved on the the last bit - on the inside edge of the grey line there is a cream one. Deep joy ! By this point I was getting my eye in and was finding some from my selection of bow pens easier to use than others. Those with a flat and curved tips didn't work quite as well for thin lines as those with two curved tips so I employed the later for the cream bits.

OK - so this isn't as good as one of the best pros would do it. I always say that I produce a "layout loco" rather than a glass case example, but I'm quite pleased with my lining. I'd certainly be happy to run it on any layout and I've seen a lot worse at shows. From normal viewing distane it looks good. You'd possibly get a slightly better result from transfers although I doubt it would be any less trouble to do - except in front of the cab where matching that curve would be impossible and on the splashers. Leaving these areas blank would be the best option I suspect..

Thursday, May 21, 2009

Grey lining


Grey lining
Originally uploaded by Phil_Parker
Here's a job I've been putting off for a few days. Lining. Obviously this was to allow the black base coat to dry properly rather than through any nervousness about the task...

I'd promised to try to paint this locomotive in full LNWR lined black. That means a grey line, red line and then inner cream line on the grey.

So I broke out the bow pen and a nice fresh tin of Humbrol 64 and had a go. It won't suprise you that I re-read the relevant sections of Rathbones' book on painting and lining first.

A piece of mircostrip was selected to act as a jig for marking the centre of the line. I used this against all the edges to ensure consistence. Just a little pencil dot showed up well against the sating black paint.

With some trepidation I thin loaded the pen and started work. With care I think the results aren't bad. Maintaining a constant rate of travel along the line with the pen seems to be the most important thing. The straight lines actually went on very fast.

The corners are brushed in with a tiny Humbrol paintbrush. Then the tidying up starts using the same paint, from the same can , that the engine is sprayed in. This is the bit that you don't get to hear about normally but according to Rathbone, is important - even the professionals don't get everything on exactly right first time !

Wednesday, May 20, 2009

Spratt & Winkle swizzle stick


Modified swizzle stick
Originally uploaded by Phil_Parker
Overlord uses Spratt & Winkle Mk2 couplings. Unfortunately when the layout was built, no uncoupling magnets were installed so all operations are manual. Over time the amount of proper shunting has increased - originally the layout was run by moving entire trains around the various sidings and never disconnecting locos from stock. To achieve this various sticks and brushes are pressed into action.

In my non-drinking state last weekend I ordered an orange and lemonade, which came with a swizzle stick to mix the two ingredients. Looking at the stick it occurred to me that this would make a more colourful uncoupling stick than the coffee stirrers we had been using. Back at the layout the next day I clipped the points from the end of the stick (Pimms intend these to poke through strawberries I think, not that I'd know, you don't get them in beer) and the resulting saddle, when poked over the coupling hooks, depressed them nicely so the loco could pull away and leave the train.

I don't think this would work with my favoured Mk1 Spratt & Winkles as the second over-hook of the Mk2 doesn't catch in the same way the simpler Mk1 would. I will test this though as this isn't unlike a doofer, just bright red plastic !

Tuesday, May 19, 2009

Cyril Freezer - RIP


1973 Railway Modeller
Originally uploaded by Phil_Parker
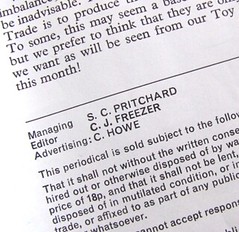
I've just recived a very sad bit of news by e-mail; Cyril Freezer, editor of the Railway Modeller 1950 to 1980, died last night.

Cyril edited the Modeller during arguably it's greatest period - the days when people actually made things. Old issues are full of articles about taking basic materials and making a model railway, the sort of things I love to read about. Obviously the world has moved on, the period spans the end of wartime austerity to the serious emergence of quality RTR and finescale modelling, but I'd happily give shelf space to a mag from this era.

On top of his magazine commitments, which also included contributing to several other publications, he was author of many books on railway modelling. My layout even appeared in one of them - First Steps in Railway modelling. The title pretty much sums up Cyril. He wasn't elitist, preferring to get people involved in the hobby at any level. Much of his work was very inspirational, the famous Peco plans for smaller layouts book can be found on most railway modellers bookshelves and recently there has been some fuss over the 50th anniversary of one Minories, one of the plans within it that has inspired many a layout.

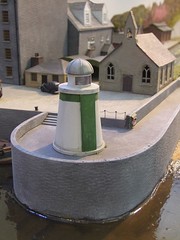
LighthouseOn a personal note, I met Cyril many times at exhibitions. He is responsible for the scenic extension to our 3mm scale layout, Flockburgh. During a very early appearance he look at it and suggested that the display would be much improved if we added some scenery beyond the end of the station. We took his advice and built a short section of dockside and it has changed the feel of the entire model for the better.

Cyril will be missed a lot by this hobby.

Trainwest 2009 - Part 2

Any day that starts with a headache is bad. In this case it was distinctly unfair too. 2 pints of Abbott shouldn't cause a hangover even for a lightweight like me.

Breakfast at eight allowed me time for a quick stroll around the town centre first to try and get better. I made it down to the impressive Brunel viaduct at the bottom of the hill before needing to return for a rather good full English and tea. This helped a little and I survived the drive back to the hall despite being squashed into the back of a Renault with two other adults and a driver who thought he was navigating the Arc d'Triumph. The car appreciated it as bit less – we thought the occasional rubbing noise was the rear mudflaps touching the road until on arrival we discovered there weren't any flaps at the back.

The layout was still where we left it so the day started with track cleaning. A Peco rubber carved into a diamond shape did the honours – the shape helps get at the rails as nearly all the trackwork is buried tramway style, in plaster. So buried were some of the recently completed bits that a little screwdriver was needed to chisel down to the metal. At least we knew it was clean !

The doors opened and in came the crowds. Quite a lot of them, in fact nearly a thousand over the day. There were people the length of the layout and we did our best to keep things moving to entertain them. The point motors had woken up which was a little surprise as the one thing everyone agreed on about the hall was that it was COLD. In mid May you don't expect to need the heating and even with it on the high roof meant that the warmth took a long while to reach us.

Looking around was difficult so we didn't get to see much before lunch. Afterwards things thinned enough to get out a have a gawp at other layouts and perhaps buy the odd souvenir from the trade. When we escaped our railway it became apparent that despite being on the more expensive side to get in (£6.50 for adults) compared to many shows, you could see where the money had gone. 33 layouts and not a bad one in there. In fact several of them were absolutely superb. It's easily one of the best shows I've been to for quality and anyone should have found something that pleased them immensely. Had I been visiting I'd have wanted to get there early to get a good look and left feeling I had had top value for money.

Rowlands Castle - BridgeSome of the highlights for me were:
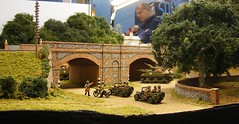
Rowlands Castle (4mm, OO) – a wartime layout (you might have thought I'd had enough staring at tanks all day but no) showing a typical village in the south east. The quality of modelling was very high and the attention to detail most impressive. The tanks on the village green awaiting the drive to the docks standing on crushed bricks so as not to sink into the mud. Signposts were piled up with the names painted out. All the windows were taped up in case of bombs. The troop trains had people hanging out of the windows – all just as you see in contemporary photos and films.

Stoney Lane Depot - shedStoney Lane Depot (2mm, N) – A slice of 1990's London. Electric trains run along a viaduct over the top of a depot. It sounds dull but isn't. I have no interest in EMU's but this looks like a real view in the capital. There is loads of movement in a small area but none of seems forced or contrived. Excellent modelling in this tiny scale.

Willowbrook Marsh (7mm, O) – This is probably the layout I Willowbrook Marshwanted to build. Minimum space O gauge has always interested me. Perhaps a bit “quart in a pint pot” but only just. By modelling a good station and eshewing passenger stock the scene looked good and provided lots of opportunity for action.

I could go on all day but to be honest can't remember every layout and even over two days didn't have time to see everything properly.

Of course we spent most of our time behind the barriers and good fun it was too. Overlord isn't too demanding to operate because most people seem more interested in the spectacle of the boats and military stuff. Sure, we shuffle things about but only because we feel we ought to. A few mentioned they had seen the model in Hornby Magazine, at least one mentioned it in a way that suggested he thought we might not know it had been photographed ! In fact it probably didn't need a proper shoot at all – just gather all the images taken over the weekend and by the law of averages you ought to end up with enough decent ones for an article. If we'd remembered the light bulbs (and the tow lorry for the barrage balloon and the WD40 etc.) they might have even been properly lit !

Not everyone's operating sessions went quite as well. We backed on to a 4mm narrow gauge layout of monumental proportions. The owner used a small electric buggy to get around. He was very nimble on this and zipped back and forth quite happily despite the space between us being filled with table, chairs and the odd corpulent operator. Three times during the day he managed to get the reversing a bit wrong and clobber the 4-way block supplying the layouts with electric juice. Each time he managed to hit only one plug – his own – in the middle of the others and pull the cable out from it plunging his model into darkness and upsetting the DCC . Three times. Only his plug. I'm not sure if that counts as lucky or unlucky. Whatever, the 4-way was taped down under a table the next day...

You'll also be pleased to know we didn't starve. Saturday lunch was a ploughman's served by a slightly exasperated and very hard working member of the leisure centre staff. The biggest surprise was the cheese. It was very nice, as cheese goes (I'm not that fussed), which was good as the chunk on the plate would have kept most people going for a weeks worth of sandwiches. Most of us were beaten by the quantity, all except for one of the club members who managed someone elses portion while waiting for his to arrived, ate this and then started on the leftovers from another friend. Maybe he had mouse genes...

Saturday night saw us in a faux Wetherspoons where there was good food, a desert called “Berties Belt Buster” that we were more than man enough to handle and some reasonable beer, except for me as I hadn't felt better until mid afternoon so skipped the stuff. By around half nine we realised that everyone else in the pub was many years younger than us and slunk back to the New Inn where the landlord treated us like regulars and nearly poured 5 Abbots until the order was reduced to 2 and a diet coke.

Sunday I felt better and headed down the station. It's very nice even though the tracks have been dramatically reduced. The railway club has it's premises in a weighbridge come warehouse on the edge of the car park and used this to good effect to hang a banner where all the commuters could see it.

The show was as expected for a Sunday, quieter and we manged more looking, a bit of layout and trader booking for our own show and more operating. With access to the stands a bit easier I rummaged around under one and bagged several plastic bags of very nice 4mm scale screw couplings for 45p for 6 pairs. They will be adorning new locos in the future. The local cheese supply had been exhausted too so we ate bangers and mash for lunch served by the same girl who had learned that it was OK to boss the crowd around a bit and had gained an assistant. It was cheesecake for desert mind you. Perhaps its the national dish of Chippenham.

Packing up took just over the hour including loading into the van and since Chris and Tim reckoned they could put the layout away on their own (actually we were told we'd be in the way) I was back home stunningly early. A good weekend was had by all, exhibitor and visitor alike.

Photos on Flickr

Monday, May 18, 2009

Trainwest 2009 - Part 1


Trainwest 2009
Originally uploaded by Phil_Parker
"Phiiiiiiil, I'm short of operators for Trainwest in a couple of weeks, do you fancy helping out ?"

And that is how I ended up spending a weekend behind Chris Mead's layout, Overlord, last weekend. We expect it to be popular after the Hornby Magazine photos appeared a few days earlier. For those not familiar with this particular model railway, and since it's been trundling around the exhibition circuit for 15 years you probably have seen it at a UK or even European show, it's a 40 foot long model of Southampton docks in the run up to D-Day. If you still can't place it, it's the one with all the big ships on the front and tanks everywhere else. For further help, go and buy the magazine, the photos are really rather good.

Anyway, we met up at Chris's house and emptied pretty much all the contents of his garage into the back of a long wheelbase, high roof van. The only things left were the washing machine and freezer - plus a few boxes full of stuff we didn't think we'd need. The route to the show was simple enough - follow the Fosse Way for about 100 miles. On the way there were a few interesting sights to be seen including several Cotswold towns and an airfield with surprisingly large passenger planes in the middle of nowhere.

Christie Miller CentreAirfields seemed to be the theme of the day - the show is held in the Christie Miller centre which looks like a converted factory unit flanked by old hangers. I'll be honest, it's not a pretty building. The local authority obviously took the opportunity to convert it and save building from scratch. Inside it's much nicer and the exhibition is held in a single large hall with a nice flat wooden floor.

We found our spot and set up the layout in about an hour and a half. The model was built in two stages. The newer boards are 5 feet by 4 feet, these are a bit unwieldy but manageable by one person using a sack truck. The benefit is that you very quickly have a lot of model railway assembled. The older section comes as conventional 4 by 3 boards which are paired up for transport. These assemble two deep which means lots more joins and bolting up. Even so, with 5 of us, progress was swift. One exciting new feature was a set of lighting gantries nicely made and promising even illumination over the whole model as well as supporting a glider and tow plane.

This would have been a lot better if the light bulbs, some fancy halogens ones, weren't back in the garage 100 miles away. Still, the lighting in the hall was pretty good and we still put up one support for the flying display.

Construction was aided by a delivery of fish'n'chips arranged by the club and by the time they arrived we were able to sit back and take stock. Everything was up and sort of working. Some of the new point motors from Guagemaster seemed reluctant to operate. My feeling was that the long lay up between shows didn't help as they were trying but not reliable. The WD40 was also in the garage but some spray lubricant was acquired and used which helped a bit. The bomb-proof H&M's on the older section of course worked fine.

Anyway, we couldn't do more so headed off to the digs which were 9 miles away in Chippenham. The New Road Guest House was lovely. Comfortable and in the centre of town making it handy for local refreshment. Don't listen to the landlady for pub recommendations though - the first was for a small place directly opposite which we were assured was quiet and had good beer. On entering the gate we could hear music. Punk music. By the time we'd got to the bar we'd worked out that it didn't matter how good the beer was, we were all 20 years older than any other customer. The only advantage being that we knew how stupid their clothes looked !

The New Inn up the road was much more suitable. It's tiny but does a nice Abbot Ale. There we relaxed and pondered the point problem. After some thought we think the issue is the thin wire used for connections. All that is required is for this to be replaced by something fatter and the full complement of oomph will be supplied to each solenoid. This wasn't a job for the weekend though.

Tomorrow I'll write about the show itself. For the moment, content yourself with some photos I took.

Sunday, May 17, 2009

Wanted: Model Boat

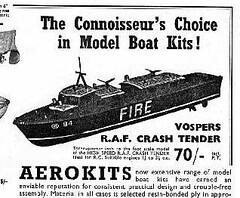
Aerokits advertRoss writes: I was interested to see an RAF tender,(boat) on your site,just the sort of thing I'm looking for,to get back into sailing models,after an absence of 20 years.I'm not a builder as such so I'm looking for something scaleish around 60" max, and ready built,I do have the radio gear!

Although I live in Stroud in Glos,I would be willing to travel if the right model came up.I'm hoping you may be able to suggest somewhere to look, or someone to ask perhaps,other than ebay. I've found nothing really suitable up to now.

Ready built boats come in various forms. To start with the most basic, there are plenty of ready to run (RTR) models available from various vendors such as Howes. They are cheap and you can just charge the batteries and launch them on the water. In recent times the quality has improved and they look a lot less plasticy. However, the downside is that the radio gear is rubbish. It will be described at 27mhz - much like proper gear but (and it's a big but) proper gear splits the bandwidth up so several boats can sail at the same time. Your Chinese RTR model will swamp the entire frequency, fine if you are on your own and a long way (1/2 mile) from other modellers but should you want to sail in company then don't be surprised if they chuck you in the pond for crashing their boats ! I did say you needed to be half a mile away unless you can run very fast...

Oh, and don't think you can easily change the radio gear to the good stuff you have either. Taking one of these models apart and doing this is often harder than building a nice simple kit.

Moving up a bit, if you can track down any of the "Thunder Tiger" range of boats then take a good look. We've got a couple of these and they are pretty good. The radio gear and speed control are the same as in "real" sets and you can sail with other people as long as you check the frequencies in use - there will be a board with these on if you are at a club. Supplies are dodgy at present, the models were being sold off late last year so it may be the range is being discontinued.

Up a bit further and you need to talk to Deans Marine who import a range of scale nearly RTR models which look impressive. That Wavney lifeboat is particularly good and not at all annoying when compared to the Billings kit I have in the cupboard. Oh well, I'm sure mine will be more satisfying when done...

After this you could do worse than keep an eye on the radio control boats section of eBay. Second hand complete models come up on a regular basis and often sell for less than the price of the kit they are built from. OK, so it's a bit of a pig in a poke as you have to gauge the quality of workmanship from the photographs and once bought, there is nothing you can do about it if you get a duff one. Having said this there are lots of bargains to be had as long as you aren't too fussy or are happy to wait for the right model to come along. Model boats are a pain to ship (pun intended, they always are) so if you will travel you'll stand an even better chance of getting a good 'un. You might even get lucky and get and Aerokits model of the RAF tender - these are popular and the kits have long been out of production though.

After this, you can try talking to other model boaters. Start with Model Boat Mayhem Forum which is probably the largest on the web. Lots of modellers there and that means quite a few who will be looking for good homes from excess boats from their own fleets. There is even a Sales & Wants section. After this head over to the Model Boats Magazine website which offers the same sort of thing along with lots of interesting articles.

Of course if you have money to burn and want a particular boat then you could commission someone to build a model. I could do a fire boat but be warned that paying for someones time isn't cheap and model boats take a long while to build. Figure on a months work for a decent usable largish model and you won't be to far wrong.

Finally though, my number one suggestion for finding a boat - your local model boat club. In your case, try Gloucester & District MBC. As well as being a good source of second hand boats the members will let you have a go with various models so you can refine the sort of thing you are looking for. Most clubs don't insist that you actually have a boat when you join - in fact most of our members seem to spend time chatting rather than sailing !

Good luck with your search.

Saturday, May 16, 2009

Cat on the line

Minty on trackEarlier this week the sun was shining so I decided to try laying some track on the garden railway. The plan is to lay a concrete base underneath it so we need to work out where it's going. A solid foundation is essential for the long term life of the railway. No bits of wood, marine or otherwise, for us ! Of course the pile of leftover concrete blocks that we over ordered may have influenced the decision...

Anyway, the first thing to establish is the position of the curve nearest the house. This is going through a tunnel which will be under a rockery. And the stone and waterfall for this are one of the largest material piles left. Rather than a smooth curve, the subterranean bit will be straight.

Having plonked this track in place it made sense to try the rest of the layout to get a feel for the job. At this point a problem appeared in the shape of Minty. She sat in the path of the railway and stared at us. And refused to move. When eventually persuaded to vacate the site she dug up some of the nice soft earth in the raised bed, and did what cat's do.

Swampy would be proud.

Friday, May 15, 2009

Locomotive driver and fireman

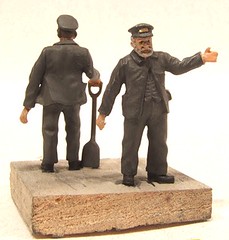
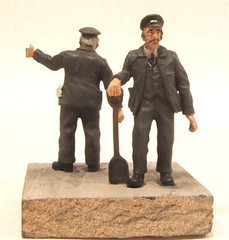
A steam engine needs a crew and the coal tank is no different. Finding footplate figures ought to be easy but I've often found the quality to be a bit iffy. In 4mm scale you are probably best off with the Monty's Models figures or the Alan Gibson ones if you can get them. Of course if you've lots of locomotives this could get a bit repetitive !

In O gauge I've plumped for Phoenix Miniatures sold by S&D Models, numbers OF23 & OF24 at £3 each. Both are excellent quality models which are a real pleasure to paint. Carving figures is probably the most difficult job you can undertake in railway modelling - if you want them to look right and not cartoonish anyway. I think Phoenix have a background in military modelling which shows. Those guys are pickier than railway fans in this respect. Some assembly of the pewter parts is required, the arm on the driver and arm and hand on the fireman which I carried out with superglue.

7mm scale locomotive firemanPainting followed my well worn methods - flesh from Humbrol and then dry brushed with Revell. waistcoats are dark blue or dark grey. Overalls are Precision Weathered Black. When this was nearly dry I covered it with talcum powder to take the shine off and then worked black powder paint into all the crevasses. Although the waistcoat colours became less obvious I think you can just about tell.

Finally the hair (head and facial) and eyes were done with a tiny brush. I like the moustache and bear, they were compulsory on railway worked in the early part of the 20th century as far as I can tell from photos so they give the crew the right look for a pre grouping locomotive.

Thursday, May 14, 2009

Coal tank in primer


Coal tank in primer
Originally uploaded by Phil_Parker
Thanks to some new photos showing the front end of this particular steam locomotive, I've been able to sort out the sanding gear mystery. My guess was correct, the operating mechanism from the cab only exists on the left hand side of the engine. From a lever on the side of the smokebox a rod goes to the right and pulls from that side.

Of course this throws up more questions - with the operating rod going through the smokebox, how did the holes to let it enter and exit affect steaming ? Why didn't it get covered in ash and muck seizing up ? Maybe it did as the linkage isn't obvious on later photos of this engine.

The sharp eyed will spot that there are two whistles. Apparently there is a normal one and one for the train crew to use, connected to the train with a bit of rope. No. I'm not modelling the rope.

Anyway, this put me into a position to prime the model. This has gone well despite my hairdryer having broken down so I had to rely on normal drying. Time for a new one I think.

Wednesday, May 13, 2009

Photographing models


Photo session
Originally uploaded by Phil_Parker

David Gander asked: I wonder if you could give me a few pointers on how you get your photographs whilst modelling. They're always so sharp and clear - and close up. What set up do you have? Whenever I try something similar, I never end up with anything good!

Any hints, tips and advice gratefully received!

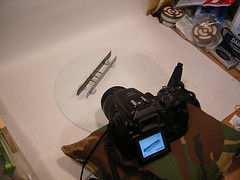
My set up isn't awfully sophisticated. As you can see from this shot of yesterdays photo being taken. The background is a sheet of card from an art shop which is stuck to a worktop with Blu-tack. You can see that there is all sorts of detritus surrounding it, which I try to keep out of shot.

The camera used is a Fuji S9500 bought in 2006. It's a bridge camera which means I get a nice focusable lens, excellent macro capability (focusing down to 1cm) and, most important, a live view on the back screen. When I bought this camera, having seen it demonstrated during a photo shoot for BRM, the only DSLR that offered this was an Olympus at £900 - a bit outside my price range !

For blog work, a reasonable compact will also do the job. My Fuji F460 takes shots that appear in here every so often, including this one ! None of the photos are large even if you click on them and view the bigger version in Flickr so the 5mp limit isn't an issue. Of course the larger camera at 9mp will produce stuff suitable for print work as well as blog.
The camera is supported on a bean bag which hold it steady. If I need more height then I put a box under it. There are usually some kits in boxes kicking around. Mind you a book would probably be better but boxes are thicker.

For a long while I've let the camera sort out its own exposure and then lightened the image on the PC. More recently I've been using the manual settings, stopping the lens right down and then taking a series of shots with different exposures. It's vital to have a solid support for this as some of the exposures can be quite long in photographic terms. The advantage is better depth of field, something the auto setting doesn't really give. Focusing is still done automatically, whack the macro mode on and then let the camera do the work.

Light comes from the spotlights I use for my layout Melbridge Dock. These come from Ikea and are fitted with daylight balanced bulbs. This arrangement solves a couple of problems - storage of the lighting bar and illumination for the worktop. When I take the layout out I just unscrew the lights, change the bulbs for normal one and off we go.

The main trick is practise. Writing this blog I have to produce a photo for every day. That's over 1000 shots so far. At some point I hope to be getting good at this !

You find more hints on Chris Nevard's blog.

Tuesday, May 12, 2009

Etched chassis building basics

Mog asked: I'm making a start in 3mm 'finescale' (14.2mm). Just having a go at my first ever chassis kit. I got a whitemetal J72 with NS chassis from 3SMR. A couple of questions I don't know if you have any advice?

Society wheels and axles.. am I right in thinking; slight chamfer on the end of axle, slight countersink in rear of wheel..ram axle into wheel (!). The 'shoulders' I'm guessing is where the back of the wheel should sit to be in gauge?
I haven't got anything like a chassis jig. 3SMR have run out. I'm trying a couple of mackles. Do you think it would work to solder up chassis spacers to one side, and then attach the other side?


Big question there. Building a chassis is probably the most scary thing any railway modeller undertakes. You are trying to make something that looks good and more importantly, works well. When things go wrong there are a huge number of variables and the beginner can spend hours tweaking this and that, always in the hope that everything will work properly.

An analogy - chassis building is a bit like learning to juggle. When you start juggling throwing the balls in the right direction is difficult. Sometimes a throw goes too far, sometimes not far enough. Either way you can't get the catching hand to it and the juggle stops. As you get better, the throws get more accurate but at the same time the catching hand becomes able to deal with mis-throws and can pluck a ball out of the air from nearly anywhere.

The same thing with chassis building. Experience often comes with an increased toolkit - the modeller gets fed up with hassle building chassis and goes to buy some jigs to aid the process. Therefore the results are better and at the same time experience makes it easier to work out where the tweaks need to be carried out for best results.

However, back to our beginner with no jigs facing the dreaded etched parts that must be assembled and made to work or money spent on the kit will be wasted.

Stage 1: removed the chassis sides and compare them. Make sure the top edge, which is usually flat, and one of the ends are identical when the sides are placed against each other. The holes for the axle should also match up. If anything doesn't, try to make it so. Line the wheels up and file the back/front and top so they match each other. This gives you some datums to work with. If the axle holes don't match then you are a bit stuffed. If the kit is new, take it back. If it's second hand then put it aside and buy a new one. I could fix it but as a first effort, you would be better off cutting the sides out from scratch. To be honest it's unlikely you will find any problems but it is important to check this.

Stage 2: Fit the spacers to one side of the chassis making sure they are perpendicular to the face of the sides. Some prefer to fit the front spacer to one side and the rear to the other. I don't think it matters much, especially if you are working methodically as there is no chance of heat build up. With the spacers in, place the chassis upside down on a sheet of glass, or at a pinch melamine board but glass is better, and tack the chassis together. Check everything for squareness. On it's back the chassis shouldn't rock on the glass (that's why you checked the top earlier) and a square should show that the checked ends are square. If all is well then solder up properly . Then check again. In theory the all important axles holes should be square.

Stage 3: Open out the axle holes to accept the bearings. Try not to make them too big as you want the bearing to be a tight fit and stay put with friction.
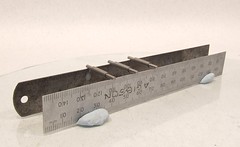
Axle testingStage 4: This is where jigs help enormously. Since we don't have any, we'll need to improvise. Set up a couple of identical steel rules on some glass. Hold them up with blobs of blu-tack either side bu not underneath. They need to be parallel and far enough apart that the ends of the axles sit on them.

Put the axles into the chassis and then onto this jig. All the axles should touch the top of the rules. If they don't there is a problem and you will need to open out the bearing hole a bit to allow adjustment to be made.

One caveat - if the centre axle of an 0-6-0 is a little high by say 1/4mm then leave it alone. These wheels will be just shy of the track bu this is so much better than having that axle low by the same amount. In the later situation the chassis will see-saw and either front of rear wheels will be clear of the track. For the finner scales this can mean the flanges are above the rail top leading to derailments and misery. In OO a see-sawing chassis can be identified by the amount of dirt on the centre wheelset compared to the end ones as the flanges are deep enough to cope - but the running suffers because you are never using the maximum wheels to collect electricity.

Stage 5: Check the cod rods against the axle spacing. I would sight through the hole in on end of the rod against the front edge of the axle (it's easier to see than the middle) and then make sure the fronts of all the other axles can be seen through the holes at the same time. The axle spacing and con-rod hole spacing must be the same for a free running chassis.

Stage 6: If all is well, tack the bearing in and check everything again. A pain but thing can move during soldering and it's easier to move a tacked bearing than a properley soldered one !

Stage 7: OO modellers using Romford wheels - assemble your wheelsets and check the chassis on the glass. Then add the rods and see all works well. You may need to open the rods out a touch but don't go mad. Too much slop can be as bad as too little.

Stage 7: 3mm 14.2 modellers. Shorten the axles are required, they are supplied long enough for outside framed locos. Clean the ends and chamfer them, do not countersink the backs or you screw up the gauging. Fit one wheel to each axle with slow set Araldite. Let this dry and clean up the inside corner where wheel joins axle. Check the wheels rotate freely in the bearings. Now clean and paint your chassis. Let it dry before going further.

Stage 8: Put the wheels motor and gears into the chassis but don't fix the final drive. One side of wheels will need to be put on in roughly the right way round for the minute. Test the chassis on the glass. Hopefully all the wheels touch. If not adjust. You really don't want to remove the wheels if at all possible but better to do that now than later.

Stage 9: Quarter the wheels by twisting the un-fixed ends. I find it easier to get this as close as possible and then put the rods on. These give an easier visual reference than trying to sight through spokes or other similar methods. The wheels should turn with the rods on. If they do then fix the final drive (dot of supeglue next to the gear but keep it out of the bearings !) and some glue on the faces of the ends of the axles just to fix the wheels a bit. Some recommend drilling through the wheel and axle and inserting a bit of wire. Fine if you can do it but I've never managed this.

Hopefully, if all this has gone well then you have a working chassis. Sadly I can't build this for you via the blog, only give you some pointers. These things work for me, they might not work for you. Everyone develops their own techniques. They also go and buy jigs - start with aluminium jig axles from London Road Models which makes stage 5 easier - and work on from there. I'll be honest and say that I have never made a succesfull 14.2 gauge 0-6-0 solid chassis and prefer to build flexi-chassis. Others tell me it can be done and I've never persevered since I have a work-around.

Sorry - probably basic questions, but any advice you can offer will be gratefully received!

The only stupid questions are the ones that don't get asked. Good Luck.
Monday, May 11, 2009

Painted coach side


Painted coach side
Originally uploaded by Phil_Parker
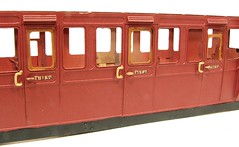
A coach side in a single colour shouldn't be too challenging to paint. Having been asked for "something vintage" and using the box photo as a guide my aim was browny/red with pale brown sliding windows in the doors.
Attempt number one involved a bottle of Revell email airbrush-ready carmine red. It sprayed superbly but came out a lot brighter and redder than the bottle top colour would indicate. As a paint for airbrushing though it worked so well I'll be stocking up on some of the basic colours to save the trouble of thinning standard paint.

Attempt two went better. Humbrol 73 (Wine) turned out a much better match for the paint in my imagination. Next the black bits (ends and solebar) were brush painted with matt black. The grab handles etc. could have been scraped back to brass but I find paint gives a neater job.

Transfers came from a 4mm sheet intended for coaches. Large numbers for the doors would have been my first choice but smaller text has worked very well indeed. In fact I think they look more sophisticated.

Finally a spray of satincote varnish which protects the transfers and brings the body colour alive.

Sunday, May 10, 2009

7mm Narrow Gauge Association AGM


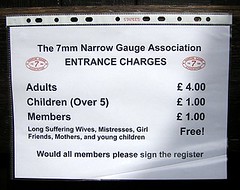
Entry Prices
Originally uploaded by Phil_Parker

I nearly didn't go here. The plan was to take the narrow gauge coaches to their new owner who was helping out on a stand at the show. Of course the coaches weren't finished (not my fault, I'm missing some castings) but it was a nice day and by booking a little in advance the trip cost 7 quid which meant a nice train ride...

On arrival at Burton on Trent it's important not to do the sensible thing. Do not head towards the town, which is where you might expect the town hall to be, turn left away from it and head towards the tower about 5 minutes walk away. That's were you want to be. If in doubt, follow the single, middle age men. They are drawn to these sort of things.

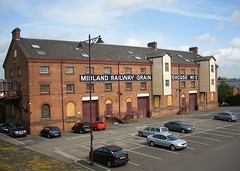
Midland Railway warehouseOf course as a real enthusiast you'll be wanting to take a good look at the Midland Railway warehouse on the way. It's been very nicely restored and I suspect, apart from the car park, doesn't look very different from the way it did when new. It's nice to see an industrial building that hasn't been turned into posh flats for yuppies with lots of faux gantries nailed to the front.

Inside the hallInside, the building is very impressive - high vaulted ceiling, wooden floor, as an estate agent would say, lots of original features. The layouts are arranged in an island in the middle of the hall with the trade lodged between the columns around the outside. A second room has more layouts and a third the modelling competition.

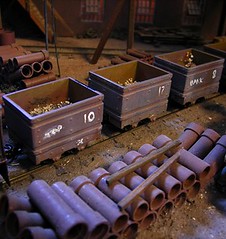
Mine tubsOddly the things that interested me most turned out to be small tub wagons. One layout had metal tubs that came from Black Dog Minning models. Another some KB Scale V-dump tippers. Both look like the sort of thing that ought to work very nicely on the future On30 layout. The later are in fact designed for the correct 2-foot gauge (14mm) but can normally be converted using a special set of axles to run on the slightly wider OO (16.5mm) track favoured by most.

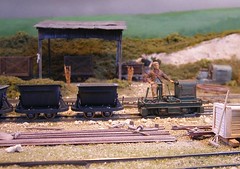
Lister & tippersTrade wise there were all manner of wonderful things. I had to keep my hand very firmly in my pocket to avoid buying a couple of PECO Hunslet kits from the second hand stall. They were bargains as they came with Branchlines Chassis for £60 but I really have no use for them. Really. I had to keep telling myself. Sternly.

Visit the official web site.

Saturday, May 09, 2009

Coach bodies

Etched coach bodies

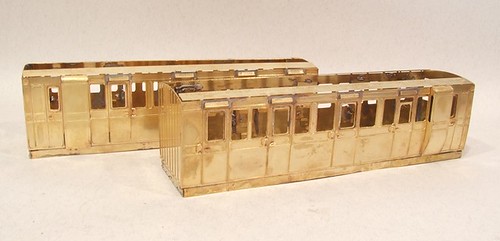
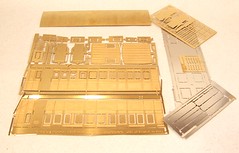
As I said before, a coach body is little more than a box so once the detailing of the sides had been completed, putting the bodies together didn't take long.

The underframe is a nickel silver rectangle with sides that fold down. These are covered with solebar etches. The the four parts of the body are tacked together. These are placed over the underframe, resting on top of the soldebars. I taked these in place and then fiddled about a bit with the square to make sure everything was happy. A few tweaks later and it was time for final fitting.

With this mass of metal, plenty of heat is called for. A few more bits of solder were blobbed in place and plenty of PowerFlow flux wiped around. Then I fired up the gas torch. This might seem like overkill but here it's very helpful - the heat goes in so fast it stays localised so the half etched sides don't buckle. In fact you can direct the flame accurately enough to blow solder around joints in the same way children years ago used to poke mercury in science lessons, although with possibly fewer ill effects.

Friday, May 08, 2009

Grab rail jig


Handrail jig
Originally uploaded by Phil_Parker
Two jigs in just over a week !

After forming the tumble home in the coach side using a set of rollers and then fitting the inner windows (the bits in real life that would slide up and down), I started the job of fitting grab rails.

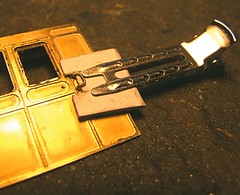
On a 4mm coach, the grab rails would be supplied as etched parts but in 7mm these need to be formed from wire to have the correct shape. Using the holes in the side as a guide I bent up some brass wire into a U shape. Getting the right angle bend in constantly on all the rails was more of a challenge. After a couple of false starts I hit upon scribing a line on the inner jaw of my square ended pliers and using this as a guide.

The soldering jig in the photo is made from an old business card folded in two and notched to fit around the grab handle. It's held in place with a hair pin and the handle is held with a lolly stick so I could solder the back without burning my fingers.

The results aren't perfect but are pretty good. If I were to do a lot more then perhaps a better jib for bending would be required as I can see some inconsistency in sizes - although I'm probably more critical than most. At least I hope so !

Thursday, May 07, 2009

Vote for me !

Dorset Cereals little awards
Dorset Cereals are hosting a blog award and you can vote for this blog.

Go on click on the picture and vote, it will make me famous and you proud. I might even get some muesli out of it !

North Wales Narrow Gauge Rly coach


NG coach kit
Originally uploaded by Phil_Parker
The coal tank has reached the point where I need to keep my stick fingers off the new paint while it dries, so I needed to find something to keep my hands occupied. A couple of Merican NWG etched coach kits should do the job.

The kit looks simple enough - let's face it, a coach is only a box after all. One snag is that the packet of whitmetal bits for one coach but these are in the post. There isn't much in the packet mind you - the bogies and some 6BA bolts basically.

The etched paneling on the kit certainly looks nice. My brief is to build the models and paint them "too look old". The box (which is big enough for the finished model) shows a plain brown livery that I ought to be able to replicate.

Wednesday, May 06, 2009

Gibson Axles

Fellow 3mm'ller, Richard dropped me a line:
I'm also interested in 7mm Narrow Guage and am putting together an old Wrightlines 0-4-0 Chassis
Having put the first pair of Alan Gibson Wheels on the Chassis we checked the back to back and it seemed 1mm greater than my colleagues competed Chassis and the OO gauge back to back Gauge
Have you come across these longer axles and have you any ideas how to get around it as I cant see how to easily remove the wheels

Well I'm no great expert on Gibson wheels but wonder if the axles were wrongly packed and you have an EM set ? That would give just over 1mm too much back to back. If not it may be a manufacturing fault and I wouldn't put any more wheels on before checking !

Anyway, to remove the wheel, assuming no superglue has been used to stick the centre to the axle you need a wheel puller. Assuming one isn't available, and lets be honest it's not the sort of tool most us buy, try supporting the wheel in a vice with the axle loosely gripped in the jaws. Then tap the end of the axle with a small hammer and punch (a small screwdriver or scribber will do). The support in the vice ought to mean that the pressure from the punch is taken on the centre of the wheel NOT on the spokes. There may even be some mileage in sticking the wheel in the freezer over night as the metal axle will shrink slightly compared to the plastic centre. No idea if the plastic an handle the cold though.

With the wheels off then check the axles for length. It might be possible to fix the 1mm error by countersinking the back of the plastic wheels to move them in a bit. No guarantees here (or anywhere else since you ask) and getting the wheel on perpendicular to the axle might be interesting. Better still, use a set of Romfords...

One thing I do know about Gibson wheels - they are allergic to Loctite. To stick them to axles use superglue. Loctitie makes the plastic crumble which is interesting but not all that useful.

Good luck.

Book Review: Building Small Steam Locomotives by Peter Jones

I appreciate that every model railway publication in the world seems to have reviewed this book (the publishers have been very generous with copies) but since I bought my copy and this is my blog, I'm going to have a go as well.

The subtitle on the cover is "A Practical Guide to Making Engines for the Garden Gauges" and that pretty much sums it up. By garden gauges the author mainly means gauge 1 and above although the are some nods towards 7mm scale, you get to hear much more about 2 1/2 inch. Mostly he very sensibly talks about 16mm and G gauges - the most commercial sizes for the target market and also the most suitable for the early projects which utilise commercial parts.

Even if you have no interest in model engineering and wish to do no more than tinker with OO RTR locomotives the initial chapter naming the various parts of a steam engine is very valuable and enough of a reason to badger your local library to get a copy in. The emphasis is on not only what various parts are, but their purpose. In fact by the end of the first chapter you (or at least I) have a much better understanding how coal and water makes motion. Of course I knew the basics but valve gear was always a bit of a mystery. It appears that its purpose isn't just to make my life difficult when kit building !

On the practical side some basic metalworking and machining receive their own chapters. This book won't tell you into a model engineer - if it could then the tomb would be several feet thick - but the reader comes away with and overall impression of all the task and a feeling that you have had a peek behind the magic curtain that separates the wizards of the machine show from the rest of us.

The first project involves little more than re-working an Accucraft Ruby from its American originals into a passable Cornish Box Tank. Now with many years brass bending and soldering behind me, I read this and though that I could do this. Everything is explained clearly with lots of pictures (high quality photos and graphics run through this book like letters through a stick of rock) which makes things a whole lot easier.

As the book progresses the projects get ever more complex. I'll admit to skim reading some of the finer details but I get the drift and can always go back and read things properly if I'm ever in the position to do something about it. The G1 Motor Tank is particularly interesting as I'm building a 7mm Coal Tank at present which has a very similar outline. While running through a project the author explains how a reader could use the information for other models so the reading isn't wasted even if you don't want to build that particular prototype.

As well as the full featured projects, the pages are littered with short descriptions of other potential models covering a huge range or prototypes and freelance creations. I didn't like the look of a few of these but that's a matter of taste and nothing to do with the book. Mind you there is mention of using the engine I built for a Fantail Launch last year which was interesting...


This book is about inspiration. I'm sure there are plenty of books giving explicit details of individual projects, or you can buy a couple of tons of Model Engineer magazines to get your hands on the same sort of information. Here though, you find a nice lead into the subject. I read it and felt that perhaps I could build a steam engine. Not imediatly, but now I have an insight into this world, maybe one day I will.


Buy the book from Amazon

Tuesday, May 05, 2009

Sandbox mystery


Front end complications
Originally uploaded by Phil_Parker
The front of the coal tank is looking suitably complicated now but has thrown up a mystery. On the left hand side (looking at the front of the locomotive) there is a sandbox operating lever. The rod to work this appears to run through the handrail - a similar system is used on other steam engines so this isn't that unusual.

According to the kit instructions the linkage only appears on one side only though. Presumably there is a hidden mechanism in the smokebox or under the footplate to work both sides simultaneously. This would make sense as you'd want to do this and certainly wouldn't fancy working levers on both sides of the cab at the same time if at all possible. When sanding is required, the driver really needs to concentrate on the regulator rather than flailing around like an octopus.

Of course photos would clear this up but there are very few of this engine in original condition and those that there are are inconclusive or even contradictory. That's one of the problems with modelling pre-grouping and one of the benefits - there is less chance of being proved wrong !

Monday, May 04, 2009

Finished chassis

No great problems finishing off the chassis for the coal tank locomotive. With the wheels out, a coat of primer and then a brush painted covering of Humbrol matt black. This is an excellent brushing paint and application by hand gives a slightly thicker, and therefore more robust, coat than spraying. Besides, it's easier to get paint into all the nooks and crannies this way.

With the paint dry AND hard the wheels, motor and gears went back in. With all well the pickups were fitted and tested. I love watching a chassis I've built run up and down the test track and probably do this a bit more than absolutely necessary. Of course it is important to get things run in properly of course...

The brakes are soldered to the support wires next. Using Cars Red flux is important as it's non-corrosive. I can't stick the chassis under a tap at this point to clean it up, hence the specialist but less effective flux. The same stuff is used for the pull rods which on this steam loco, go on the outside of the wheels. The curved hangers and outside rods are part of making this early prototype as elegant as it is.

After another quick(ish) test the chassis is now on the shelf waiting for me to finished the body. And yes, I have checked that this still fits,

Sunday, May 03, 2009

Brake hanger jig

Brake hanger jigNormally I can't be bothered to make jigs. Obviously for many people if you are carrying out a repetitive job it makes complete sense to construct a tool to ensure consistency in construction. Often the time spent making the jig is more than saved in increased production speed to say nothing of improved accuracy.

Me - I'm normally too lazy and will struggle on rather than devise something to help.

Not this time though - 6 brake hangers for wooden brake shoes were required and even I spotted that trying to hold all the parts in place and wield a hot soldering iron was a recipe for frustration. Well, that and I realised that the jig needed to be no more than three holes drilled in a bit of wood and couple of lengths of wire.

T o use the jig, the first hanger was threaded over the wires. Then the brake shoe and second hanger were put on the middle one and then on top of the first. The shoe was soldered in place with loads of flux and a reasonable slug of solder. Finally the centre wire was chopped back to become the pivot the shoe hangs on. Simple and effective, a bit like me really !

Saturday, May 02, 2009

Pickups


Pickup
Originally uploaded by Phil_Parker
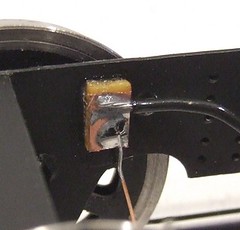
I've always had a problem with fitting model locomotive pickups. Normally these are attached to a PCB strip fitted across the chassis. Phosphor bronze wire is my favoured medium - it's nice an flexible so seems to stay in contact with the back of the wheel better than any other metal.

Getting the tension right has always been a fiddle. I tend to settle for soldering the wire in place and then tweaking it around with small pliers to get it in position. This might work but doesn't seem like proper engineering to me.

On the coal tank I've been able to do things a little better than I have with previous attempts. There is enough space in the chassis to give each pickup its own bit of PCB. That makes things easier as soldering a wire in place doesn't dislodge other wires. It also keeps the bronze wires out of danger under the chassis. This might sound daft until you have heard someone describe the results of an O gauge locomotive running over a slug on his garden railway !

The PCB scraps, cut from OO sleeper strip[, were glued in place with superglue. A wire joined them together and on to the motor. Finally the pickup wire was pre-bent and soldered on. There was still some tweaking required but it's not as bad as previous efforts.

Incidentally, the chassis is supplied with holes in place for plunger pickups. I have tried these and when they work they are great. The downside is that any maintenance requires the removal of the locomotive driving wheels as access into the plunger is from the front. So a sticky spring, not an uncommon complaint, requires major work to fix. I suspect you'd look at this and decide to bodge it with a bit of wire making a scraper !

Friday, May 01, 2009

Polished dome


Shiny dome
Originally uploaded by Phil_Parker
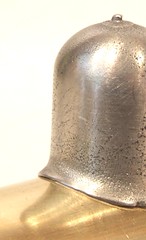
The whitemetal casting for the dome isn't the best I've ever seen but it can be made good. Luckily a spigot is cast in the bottom and this can be fitted in a chuck which in turn fits into an electric screwdriver. Don't use a power drill for this if you are trying the same thing - the screwdriver, being slower, is much more finger friendly.

Rotating the dome I cleaned the surface with some flexible grit stuff. Then the metal is given a good polish using some Brasso wadding. This always brings whitemetal to a nice shine. I think it looks like pewter rather than a lead based alloy. Whatever, this is a job worth doing and hopefully will result in a top quality finish once painted.