A daily updated blog typed by someone with painty hands, oil under his fingernails and the smell of solder in his nostrils who likes making all sort of models and miniatures. And fixing things.
Thursday, February 28, 2013
Pickups on - Chassis tested
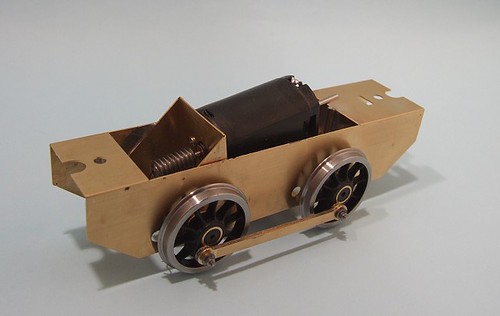
There's loads of space under an O gauge loco, or at least this O gauge loco, for pickups.
The kit has holes in the chassis for those intending to use Slaters pickups. I seriously considered ordering a set but in the end, stinginess overcame me and I've plumped for the same phosphor-bronze wire I use for everything else.
While it might not look pretty, the set-up works. I've run the chassis over the Clayhanger board I have to hand and even with an H&M Controller, all is fine. The gears are a bit grindy but I suspect will wear in and quieten down a bit. Some grease might help too.
Wednesday, February 27, 2013
Book Review: Locomotive modelling from scratch and etched kits
Geoff Holt is the sort of modeller I aspire to become and know that I never will. He is the man who scatchbuilt many engines for Pete Watermans collection in both O and 1 gauges. Each one is a masterpiece of the modelmakers art.
His book, the first half of a set, is really aimed at people who aspire to be great workmen but realistically never will. We like to perv over techniques but the truth is that we won't even care very much about the retaining nuts on a locomotives valve gear other than to hope they won't fall off while its running.
It has to be this way. If the market is really for people who are going to do this sort of thing then the book will sell 10 copies and it's far too good for that.
While etched kits are mentioned, this is a book for scratchbuilders. That's how Geoff works and sensibly who he writes for. That's not to say kitbuilders won't learn a lot - quite the opposite as there is much shared ground - it's just that the approach is different. When you are working with raw materials to produce a museum quality model, you head off to the NRM for the drawings. Kitbuilders will probably rely on the designer (it's what he's there for) or dig something out of an old Railway Modeller magazine.
At the back of the book, two engines are started - one scratch built and one from a kit. The idea is that the different techniques are shown although I think this is marginal at this stage, especially when it comes to inside working valve gear. The next book will probably show more variety.
This volume covers materials (choice and usage), tools, drawing and frames. The photos are excellent and the words very readable.There is a lot of information contained in the softback covers on real engines and how they are put together - the brake gear details are better than I've seen before for example.
It will live on my shelf and occasionally come down for reference and inspiration. I'll buy volume 2 too.
Locomotive Modelling from Scratch and Etched kits from Amazon
Tuesday, February 26, 2013
Y6 Chassis
A simpler chassis for a model railway engine, you couldn't hope to find. Only 4 wheels, a short wheelbase and since the whole thing is hidden under the body, none of that fiddly brake gear or indeed, any detail whatsoever.
The main part folds up from flat. Simply solder the bent down spacers to produce a nice strong box.
Next the bearings are fitted. Both the chassis holes and bearings need to be reamed out a bit to get them in the sideframes with an axle through the middle. Since I'm not that well equipped for O gauge, I had to use one of the axles I intended to fit later to line everything up. I really need to pick up a spare so it can be covered in flux and muck. Never mind, a quick wipe with WD40 will hopefully prevent problems.
The gears are from London Road Models and massive chunky beasts. The gearbox allows for a couple of mm adjustment but this wasn't needed. It doesn't have it's own axle bearings, just slipping over those already in place. Best design feature of the whole thing is the inclusion of a couple of slots in the spacer to allow a screwdriver to get at the grub screws to release the motor. If only other kit designers were so thoughtful.
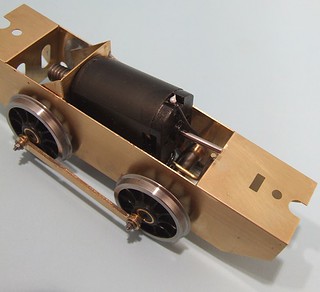 At the back, an L-shaped bit of wire is soldered in so it touches the centre of the axle. Then the bearings are filed so the holes are oval. That way the axle and pivot around the rod providing 3-point compensation. Clever eh?
 While possibly not required for a short wheelbase 7mm loco, it's not a bad idea as the squareness of the chassis isn't so vital.
Next - to try it on the layout.
Monday, February 25, 2013
LNER Y6 kit
 Sometimes you acquire kits and sometimes they are thrust upon you. The later is how I ended up with this Connoisseur kit for an LNER Y6 tram engine, or Toby if you prefer.
 The donor is an old friend of mine who found it surplus to requirements and knew I was building an O gauge layout. It's a very generous present as I only had to add wheels to the box to complete. To be fair, I had given him the now unavailable 4mm version some time ago but then since that kit was also passed to me for free, I really can't complain.
Basically, there were some kits floating around the model railway ether and after a bit of swapping, they have all ended up with the right people.
This should be an interesting build because I have assembled this kit before - but last time it was in 3mm scale. As I recall it went pretty well. To be honest, most models in this range do so I've no worries there. One advantage of the larger scale should be that I can make up the interior of the engine.
The only shock - Slaters wheels cost £20 an axle - Ouch!
And yes I know I'm being a project butterfly again but that's how I roll. Anyway, judging from the stats for this blog, you lot love a bit of etched brass action.
Sunday, February 24, 2013
Exhibiting a model railway by public transport
Over at Wood End and Beyond, there is a thought-provoking post post about the idea of transporting model railway layouts by public transport.
The cause of this speculation is the rather excellent looking S gauge layout "St Juliot". It'd 5 feet long yet packs up into a carryable package complete with castors on the bottom. The photos show it stowed on a train and it appears to be about a third taller than a rucksack but a comfortable fit in the luggage section of a Class 158, whatever that is.
Anyway, this might be the solution to my exhibiting woes. If we built something similar, and at 5 feet, that's not far off the size of most of the layouts anyway, then there's no need to use the car. Result!
As I commented on the original post, I'm not so sure. Since this is my blog, I think I can ramble a bit and expand on the points mentioned.
First, the trend for UK exhibitions is to move to out-of-town venues with little or no public transport access. I know from years helping organise shows that the biggest selling point to the punters are the words FREE PARKING on the poster. Talking over the barrier at shows many years ago, when we mentioned being in a rather nice town centre venue, faces fell. Put simply, railway modellers do not travel by train.
The move to an exhibition centre made a lot of people very happy. It also made one customer at the local model shop quite unhappy but since he had been slagging the show off for years in a local fanzine thing he ran whilst never offering any help - I thought that on balance we'd done OK with that one.
Yes, I know I could pitch up at the station and call a cab but this brings us on to the other problem - cost. Exhibitions want the lowest costs and that, in the UK, means petrol money only. Not a couple of train tickets and then some taxis. I know they can be bought in advance to save money but a trip to York (for example) with be 60 quid each. The diesel Berlingo will go there and back for that in fuel.
Oh, and while I think about it - without transport, getting to the accommodation will be tricky to impossible. You might get a lift from a fellow exhibitor but there's no guarantee.
While I suggest that the layout at 5 feet long might be a Parker-stylie model, realistically there are limitations. We're talking micro-layout rather than full-blown train-set. No matter how clever the model, it's not as interesting to operate or as public friendly as a proper model. Some major planning is required to pack the baseboards, stock, controllers, power, lights and other stuff into a single box too. I notice that St Juliot requires tables, another risk as there are some horrors out there. You want them all the same level?
So, is it a goer? Not sure. My feeling is that one or two layouts like this are fine. After that an exhibition manager is faced with an expensive layout that isn't very big. Too many of these pushes the expenses bill through the roof.
The trick is, I suspect, to work in an oddball scale. S gauge is good and I've always wanted to have a go at it. 3mm would be fine too - we certainly received invites simply because of the scale where a manager wanted a full spread. Produce a largely out of the box OO or even one with kit built stock and I bet there is a lot less interest.
I love the idea. I'd happily put up with the travelling problems (early start on Friday, desperately late back on the Sunday) to have a go. I just don't know if it is worth it. What do you think?
St Juliot on at the S Guage website
Saturday, February 23, 2013
Cheap tools have a place
Behold, the latest addition to the Parker tool kit. A pack of "precision" screwdrivers.
You may see a price tag of $9.95 but to me, these cost a whole pound. Yes, it seems that one of the Queens pound sterling is worth nearly ten of your Yankee dollars, which is as it should be.
Tool snobs might think that these aren't likely to be much good and I suspect they are right. What they are good for are the jobs I expect them to do.
On my workbench for a long while, there has been a very similar set of screwdrivers. I use them for screws (obviously) and poking gluey substances into joins. They also find themselves acting as punches, levers and prodders. Every so often I'll scrape the glue from the blade. I might even sharpen it up with a file.
What I never do is look after them properly. I have a nice set for cosseting.
Despite this, they are essential to my modelling. So important that they live actually on the bench within easy reach. There is no space in the drawers as they are never put away - that's how useful they are.
Sadly, a couple of the useful sizes have vanished from the box, hence my shopping trip to the pound emporium. Another indication of usefulness - I made an effort to find some more rather than waiting for a show to acquire some.
It just goes to show, building a toolkit of useful tools doesn't have to be expensive.
Friday, February 22, 2013
Jouef Goods Shed
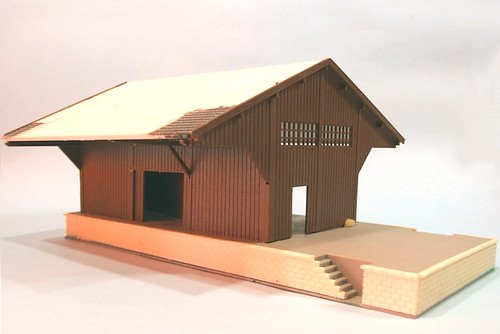
Here's a little puzzler for you on a Friday. I've been asked to Anglicise this Jouef goods shed.
As you can see, it's a wooden structure that looks a bit Swiss chalet to me. Most UK facilities would be made of brick, stone or corrugated iron but I found a photo from Ramsey, Isle of Man, that is similar. Wooden construction was quite common in the Highlands too.
This is going to be a bit of a challenge, which is why I'm open to suggestions. I'm thinking that the awnings would be better with ironwork holding them up rather than the wooden ends. On the road side, the awning should be shorter than the rail side.
One advantage is that we're looking for an industrial setting rather than mainline railway so a bit of modellers license is perfectly acceptable. That means I could add some corrugaed ironwork too, which would make it look a lot less European.
Suggestions in the comment please.
Thursday, February 21, 2013
Can you glaze a big window with Krystal Klear?
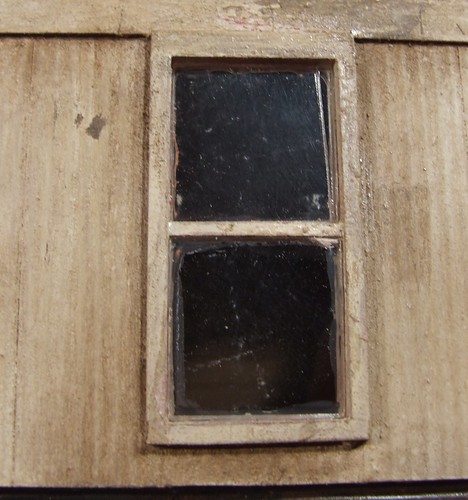
Well, to find out, I had a go with a pair of skylight windows in a Skytrex O gauge goods shed. Each pane is 20mm square.
The answer is - Yes
It's true, you can glaze with Krystal Klear, a high quality PVA designed to fill windows in model aircraft. By wiping the liquid across the back of the window with a long screwdriver, it is possible to get the pane filled using just surface tension. It's a messy job, wasteful of the material and ultimately, the results are a bit rubbish.
The trouble is that Krystal Klear needs to be thin before it drys properly transparent. You can see that the bottom pane has a section which has worked well but it's really thick around the edges. Air bubbles are a problem too.
So, you can do it. Should you ? No.
Peeling the glazing away (easy to do), I replaced with with clear plastic sheet stick in place with canopy glue. The job took no longer for both windows in the roof than the Klear took for a single pane. The result is tidier too. If there is a snag, it's that the windows are too see-through and I need to muck them up a bit.
Wednesday, February 20, 2013
Book Review: 7mm Modelling Part Two - Building a Layout
As you may know, I'm currently building an O gauge layout, Clayhanger Yard. To help me, I've been reading up a bit on the subject. In this case, that means buying the second part of Gordon Gravett's two book series on the subject. Book 1 has been on the shelf since it came out but I never got around to buying the sequel until spotting it on a second hand book stall. That's not a comment on Book 1 - it's just that I bought it when I was going to build a 7mm layout and then I wasn't so Book 2 wasn't so essential.
As it turns out, that might have been a mistake. To be honest, apart from a few pages showing the important measurements and clearances for O gaugers, the rest of the book is very applicable to any scale.
There's consideration of different types of layout and then it moves from theory to practise showing how to plan the model properly. Four different layout plans are worked through. I really like the small brewery but the through station and terminus are also good. Each plan is used as an oportunity for looking at different ideas such as wood-free baseboard design.
In between the plans there are chapters on building buildings - the considerations on scale and how to get the most in to the space without looking rubbish are well worth reading, vehicles and figures, and finally exhibiting the model. All good solid stuff that anyone could get something from .
If I have a complaint it's that the book ends without a nice wrapping up or conclusion. It's almost as though they ran out of pages.
Verdict: An enjoyable and surprisingly useful read.
Tuesday, February 19, 2013
Halfords spray enamel
As a wise man said to a group of RC aircraft modellers last week, "When painting a large area you are probably better off with an aerosol can than an airbrush."
How right I am. Which is why when it came to paint a boat hull over a metre long for my Dad, we went shopping in the car paint aisle of Halford motor centre. In the past I've used their paints on boats to good effect, the range of colour is excellent and the cans are designed to be easy enough for the sort of bloke who aspires to being in the Top Gear audience but hasn't worked out the pretty ladies get pushed to the front while anyone who can reel off the specs for the Subaru range will be a long way from the presenters.
Anyway, colours were picked out and then I spotted on the other side of the aisle, a small range of spray enamels. Something made me swap the acrylics for these. After all, I use enamel on everything else and they had the colours I required, so why not give them a go? It's not more expensive than the car stuff and since it wasn't my boat, I wasn't paying anyway...
Working over a grey primer base coat, the paint went on well. A couple of reasonable coats didn't show any signs of running or sagging. I accelerated drying with a hairdrier but mostly because I was in a cold garage. Coverage was very good, although being blue over grey this probably isn't the toughest test in the world. The finish was nice and shiny - just what I wanted for the model being constructed. Even the smell wasn't as bad as the normal paint, although I wore a mask anyway.
OK, it's not Humbrol, but when if I need a spray paint when the local model shop is shut or out of stock, I think I'd be happy to give it go again.
Halfords Enamel Paint Range
Monday, February 18, 2013
Frogtape masking tape
While yapping about painting on Tuesday, a guy in the audience asked about something called "Frogtape" which he'd seen at the local DIY shed. He didn't know much about it other than the makers claimed it was especially good at delineating paint lines (he didn't say delineating, that's a posh writers word I put in).
I assumed that this was marketingbollocks hyperbole and could safely be ignored. Doubtless the phrase "As seen on TV" would also be there and we all know that is Marketing for "This is rubbish but the sort of people who watch shopping channels might be dumb enough to buy it."
Anyway, at the weekend I was wandering around a DIY shed and spotted the fabled tape on sale. So I took a look.
Supplied in an over-large plastic box, the tape can be purchased in two flavours, normal and low tack. It employs something called "PaintBlock" technology to stop seepage between colours. Apparently it is the ONLY tape that features this, presumably because the Frogtape makers have seen fit to patent it and will take anyone to court if they try and nick it. According to the website, "Paintblock" is a super-absorbent polymer which reacts with emulsion paint and instantly gels to form a micro-barrier that seals the edges of the tape, preventing paint bleed - so no use to me then.
More importantly, the stuff costs 7 quid for a roll which contains 41.1 metres of tape. Basically, a pound buys you over 5 metres. I think this is cheaper than Tamiya tape, although I can't find any indication how much they supply on a roll. Anyway, I had a boat hull to mask so it seemed worth a go. The job required something better than cheap automotive tape but I wasn't going to splurge on the real model stuff if I could help it. I opted for the Low Tack version as I was masking over paint.
The tape feels plasticy, certainly much smoother and better quality than the normal stuff. It stuck well enough and could be smoothed down just like the best tapes. It feels thicker than Tamiya etc although I didn't bother measuring anything as I wasn't going to get my calipers all sticky. This might be a problem for model work as it's going to be less flexible.
As far as keeping paint under control, for the job I was doing it worked very well. I masked along the chine line (an angled section of hull for non-boaties) and this involved spraying upward against the sticky side - surely where the masking should fail. As it was, the lines were clean and neat. Peeling the tape off was smooth and easy with no paint lifting from underneath.
The stuff certainly feels quality. I'll use up the roll on other projects, especially those where flexibility isn't important. I also want to try cutting the 24mm width down a bit for small jobs.
Frogtape Website
I assumed that this was marketing
Anyway, at the weekend I was wandering around a DIY shed and spotted the fabled tape on sale. So I took a look.
Supplied in an over-large plastic box, the tape can be purchased in two flavours, normal and low tack. It employs something called "PaintBlock" technology to stop seepage between colours. Apparently it is the ONLY tape that features this, presumably because the Frogtape makers have seen fit to patent it and will take anyone to court if they try and nick it. According to the website, "Paintblock" is a super-absorbent polymer which reacts with emulsion paint and instantly gels to form a micro-barrier that seals the edges of the tape, preventing paint bleed - so no use to me then.
More importantly, the stuff costs 7 quid for a roll which contains 41.1 metres of tape. Basically, a pound buys you over 5 metres. I think this is cheaper than Tamiya tape, although I can't find any indication how much they supply on a roll. Anyway, I had a boat hull to mask so it seemed worth a go. The job required something better than cheap automotive tape but I wasn't going to splurge on the real model stuff if I could help it. I opted for the Low Tack version as I was masking over paint.
The tape feels plasticy, certainly much smoother and better quality than the normal stuff. It stuck well enough and could be smoothed down just like the best tapes. It feels thicker than Tamiya etc although I didn't bother measuring anything as I wasn't going to get my calipers all sticky. This might be a problem for model work as it's going to be less flexible.
As far as keeping paint under control, for the job I was doing it worked very well. I masked along the chine line (an angled section of hull for non-boaties) and this involved spraying upward against the sticky side - surely where the masking should fail. As it was, the lines were clean and neat. Peeling the tape off was smooth and easy with no paint lifting from underneath.
The stuff certainly feels quality. I'll use up the roll on other projects, especially those where flexibility isn't important. I also want to try cutting the 24mm width down a bit for small jobs.
Frogtape Website
Sunday, February 17, 2013
Talking about painting
The meeting took place at the Blue Lyas pub. It has a small function room and more importantly, a lovely pub cat that wanders around the bar looking for fuss. The food looks good too so a return visit is called for.
I pitched up with a pile of paints and some airbrushing tools which were spread arnounf over a couple of tables. Once the meeting kicked off I took the crowd through all of these, starting with basic paints, then methods of applying them. I rambled for 3/4 of an hour which seemed plenty. Not my most reactive audience perhaps, but I did manage to raise a few smiles with some jokes.
Anyway, everyone seemed to enjoy themselves. A few admitted they had picked up a bit of useful info in there so that makes it all worthwhile. I'll be honest and admit that I enjoy doing this sort of thing. For years when I had a proper job, I spoke at conferences explaining web site usability so being on the stage and talking holds no terrors for me. Maybe there is a speaking career going begging talking model making?
Saturday, February 16, 2013
Meccano Fire Engines
AGM's can be dull at the best of times, so The Knightcote Model Boat Club always tries to book someone to give us a talk on something interesting after the official business has concluded.
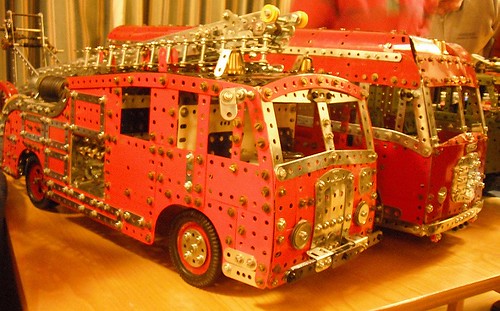
This year, none other than the Mayor of Kenilworth brought along his collection of 1/12th scale fire engines constructed from Meccano. They were a seriously impressive selection ranging from vehicles that would have seen the birth of the construction sets, right up to the modern day. It's a clever idea and the singles scale and subject provides a superb display.
What you don't appreciate is just how large these things are. The Dennis (I think) is over 2 feet long and it's by no means the largest model on show. Sadly, the poor lighting in the room and crowd around the models meant that I don't have any more pictures to show, but it certainly was a fantastic show.
Friday, February 15, 2013
Bedford QLD and QLT
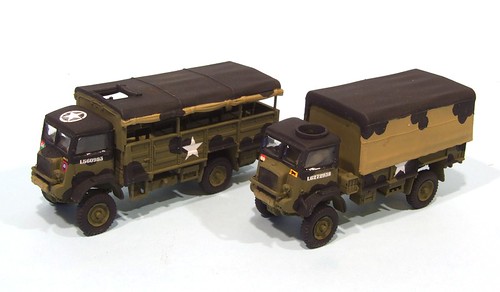
I don't do military modelling but know someone who does, so when Airfix released their new Bedford QLT and QLD truck set, I generously thought I'd build him a pair. In the real world, as opposed to the one most modellers live in, armies use many more "soft-skin" vehicles and steel ones with guns pointing out of the front. Sadly, the later are more fun to build (apparently) and more exciting to look at if you spent your youth pointing sticks at your friends and shouting, "Bang! You're dead!"
Anyway, the upshot is that a military model needs trucks and lots of them.
The kits are very good indeed. You might think that there's no need for them as there are so many lovely diecast lorries around. This depends on the level of detail you would like. These are simply superb models. Designed for off-road work, they ride very high and from the ground you can see all the drive shafts, especially looking at the front. All are present and correct on these models. My favorite feature though are the tyres which have a flat and slight bulge at the bottom.
Painting is tricky. I should have carried this out as I worked but an unpainted photo means I can recover the kit cost with a quick magazine review. Spraying the green paint and then touching up with brown was fine but the black "Mickey Mouse" camouflage is trickier. A fresh pot of black would have been a good idea as mine is slightly thick making painting decent circles tricky.
Transfers took a little settling down with Micro Sol as very few sit on a flat surface. They are commendably thin and the solvent does it's job well. Finally a shot of Testors Dullcote protects them but annoyingly, intensifies the black. I should have used weathered black for this. I can't even hide it with dirt as the layout vehicles are pretty much freshly painted and I'm certainly not going to offer to weather them all!
Note: These models are 1:72nd scale rather than 1:76th for OO modellers. I don't care, it's a tiny difference and these are still good kits.
QLD and QLT truck pack from Airfix
Thursday, February 14, 2013
009 PW Train and tracklaying in Hornby Magazine
It's all a bit high-tech in this Month's Hornby Magazine. I've built the Narrow Planet multimedia kit for a 009 diesel and added a Boston Largs Works flat wagon.
Multimedia kits are nothing new - we've been using etched brass and whitemetal in the same model for many year. Here though, there is a loco featuring a 3D printed body on to which etched panels are glued. Simple enough for the beginner in 009 (that's 4mm scale on N gauge track to represent 2 footish narrow gauge). The wagon is cast in resing with more etched bits to handle those areas castings don't work well for.
Both kits are well out of the mainstream but are well worth a look. Narrow minded modellers have been snapping them up in droves proving that cottage industry manufacture is still going strong even with all this lovely RTR around.
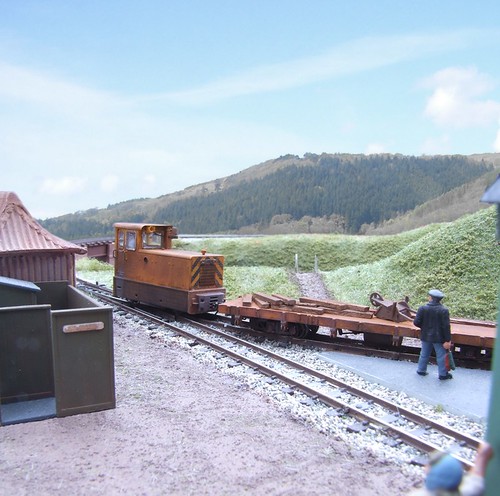
Clayhanger Yard reaches the point of being a model railway with track being pinned in place. It's a bit scary doing this job in O gauge with points working out at £36 each, but hopefully this is the last big bill for the model. To be fair, with the Peco pointwork, you are getting excellent quality and for something that will sell in fairly tiny numbers, that means you'll have to shell out for than a fiver to build a layout. Bit of a shock that to modellers who still think fivers are white and pop bottles can be returned to the shop to redeem a penny but in the real world, that's how it is and no amount of moaning on the Web will change it.
On the other hand, once the pain is over, the layout should give many. many years of pleasure so it's hopefully worth it.
Wednesday, February 13, 2013
Modelling rising damp
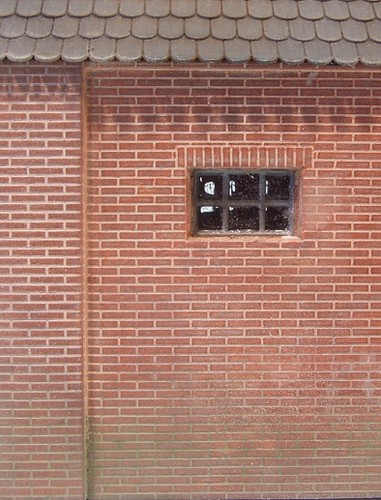 When Humbrol produced their range of weathering powders, one colour stood out amongst the selection - Chrome Oxide Green.
 It's a pretty vibrant colour and for railway modellers, one that you don't see in the sets aimed at us train fans. This is because (some chuffer enthusiasts might want to look away at this point) there are other hobbies. Military modellers for example, often have different requirements to our diets of sludgy brown and black.
In this case, the green (think powdered frog) pigment is used to represent rising damp on buildings. I've had the chance to prove this on a recent model and it looks pretty good. Just brush the powder over the surface working up from the base. How high depends on the level of decrepitude your model represents. Mine has probably been standing for 50 years so the green has reached well up the brickwork (don't mention that this is probably the wrong bond...).
The results look better than my quick snap shows. I'll not be using huge quantities for the stuff, dark earth and smoke are my favourites, but it really does the job when required.
Tuesday, February 12, 2013
A view along the river
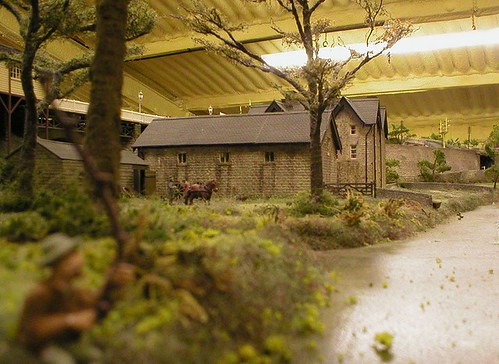
Found buried in my collection of old photos - this shot of the Hurt Arms take looking along the (flock covered) river at Ambergate in Derbyshire.
Of course, this is a model. It's part of John Webb's massive layout which my Father and I contributed to. The Hurt Arms was his project. After visiting the site and doing our best to measure the building, he made it up from Daler Board covered with Peco stonework. This unusual choice was the best available at the time to represent the building which was very different in finish to all the other structures.
To add to the challenge, we had to build the long-lost stable block for which the only information was to be found on the pub walls in the form of old, and difficult to photograph, photos.
The results came out OK, which was good as the model sat right at the front of the layout. To be honest, I doubt anyone really noticed in the 36 foot frontage, but we did and were always proud of our efforts.
You can see the real Hurt Arms on Google.
Monday, February 11, 2013
Humbrol Tool Set
If you put yourself in the mindset of a complete beginner to model making, one of the first problems you will face as you look at your freshly unpacked project is where to find suitable tools to work on it. Looking around most modern houses, I bet you will be lucky to find a selection of large screwdrivers and perhaps a Stanley knife. None of these will be suitable for small scale assembly.
Experienced hands will suggest you head over to some specialist tool suppliers and pick the best. That's fine, but if you just want to get going, or don't know where to find the specialists, then you could do worse than buy this little pack of tools from Humbrol.
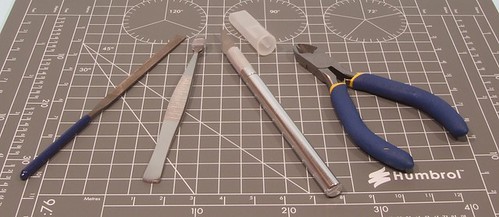
For £8.99 SRP (£4.99 from Amazon) you become the owner of a knife, cutters, tweezers and a flat needle file.
The first thing that has to be said is that none of these is the best quality tool ever made. They are good enough to get you going but will eventually be replaced with better items as the owner gains more experience. I know that some will think this a bad thing but I'd far rather someone got going than didn't do anything because of a whopper bill for the basics.
Starting with the knife - this is a Xacto look-a-like. I think I started out with one of these and it didn't do me any harm. The round aluminium handle is easy to hold. Changing the blade involved unscrewing the end, easier than the fiddly pliers efforts required for my preferred Swann Moreton. Blades are presumably available from any model shop that has a Humbrol rack. A cover is provided to protect the sharp edge.
Those things that look like wire cutters are apparently for removing parts from plastic kit sprues. They will cut wire though and should last as long as any cheap pair of cutters used this way. On plastic, I bet they go on forever.
For some reason, the tweezers remind me of a Duck Billed Platypus. It's probably the spade ends which recall the creatures beak. I've never had a set like this and am not sure what to make of them. The metal isn't stainless steel, at a guess it's an aluminium alloy which seems a bit soft. They will probably last forever and still be found in the bottom of the toolbox for many modellers in a decades time.
Finally the flat needle file which is probably better than the ones on my bench as it's got a non-slip handle.
Not a bad set then. I've seen worse and if given to a newbie along with a plastic kit, would make an excellent present. If I have a criticism, it's that a couple of spare knife blades would have been a good idea. I suspect that people will forget to buy them when they get the tools and that Humbrol rack is a long way away on a Sunday!
Humbrol AG9150 Modeller's Tool Set
Sunday, February 10, 2013
Quiting the exhibition circuit
 The sharp eyed will have noticed that we aren't at Doncaster show as previously advertised. Last minute transport problems meant we had to let the organisers down. We don't like doing this. It's the third time over our exhibition career that it has happened. That's too often.
So - we are going to leave the model railway exhibition circuit.
I'm in the process of writing to all the show managers who have booked us to let them know that we're giving up. Since the next booked event in a few months away, hopefully the loss of a small layout won't cause any headaches.
Getting off the circuit isn't easy - the latest layout, Clayhanger Yard, is being serialised in Hornby Magazine so even though I don't get anything for attending, I feel duty bound to show it at the 4 events it's already booked in to: Hartlepool, Midland Railex, Telford and Gaydon.
Our other layouts will be kept nice and safe while we work out what to do next. My feeling is that we'll be aiming to take Melbridge Dock to the L&WMRS 40th anniversary show in 2015 as a final hurrah. Apart from that, we'll do our booked demos at Warley NEC as long as they will have us and I'll probably have to turn up at a couple of other events in connection with magazines.
You might be thinking this is a bit of an over-reaction to having problems with one event, but the truth it, this has been coming for a while.
The Parker exhibition team is my Dad and me. He doesn't drive and so transport falls on my shoulders. And I hate driving. I do it, but only because I have to. I might like cars but if I never had to get behind the wheel again, I'd be happy.
This makes the joys of getting half way around the country pretty unappealing. Maybe it's because I'm getting older but these are starting to outweigh the fun of the event itself. Last years Warley show is a good example - For two days my ego was massaged by visitors saying how much they enjoyed my work. All I remember is breaking the car exhaust driving through some flood on the way in and the frustration of dealing with the NEC security staff when attempting to get near the hall at the end of the event to collect our stand.
There have been other events where the nitty-gritty of being part of the show has overwhelmed the events itself for me. I enjoy the practical aspects a bit, but less than I used to. I am fed up of the feeling about half way through the second day when I wish the public would get lost so we could go home. It's not fair on anyone.
We cause ourselves some problems with high standards for putting on a display. Our model will work and work all day. For the Dock, this isn't much of an issue. Once up and running it's pretty reliable. The Hospital is more cantankerous with the overhead but we can usually work around this. It's still boring to operate. Flockbrugh sees me constantly on edge. Finescale 3mm is at the limits of my construction abilities and even though it works OK, I don't really relax.
Finally, there is the cost. Ignore the expenses for the moment - increasingly these are petrol money only with receipts provided please - to move even a little train set you need a reasonable sized vehicle. In our case, this is the family Belingo as my 206 is far too small. In an ideal situation I'd upgrade the Peugeot but finances don't allow for that and even if they did, I hardly drive at the moment so I'd be buying a car just for exhibitions. This isn't a business, it's a hobby (even for me) so that isn't going to happen. Don't mention van hire either - it whacks up the expenses so we don't use it and on the odd occasions I have, there is usually a £500 excess hanging over me...
Of course, over the 25 or so years we've been shuffling layouts around the country, exhibition circuit has changed. Some of this is for the good - better accommodation for example. We haven't been put up with a member for many years, something I'm very happy with. Reasonable B&B's or Travelodges (cheap for block weekend bookings and easy to manage) tend to be the order of the day.
The Saturday night socials do seem to have died off. Even if you didn't want to go, at least there was an option and we've enjoyed many an evenings entertainment with other exhibitors, traders and club members. I miss those.
Layouts have changed too. The world is moving towards RTR based, DCC controlled displays with flashing lights and noise controlled by operators prodding at keypads. Plain DC with no gizmo's but a loads of kit-built locos is pretty unfashionable now but that's what I enjoy doing.
We will miss some parts of the hobby. Chatting over the layout to visitors. That's the best bit by miles. That's why we plan to carry on with Warley demonstrations as long as we can. Lots of chat, but your display is small and doesn't take a lot of effort to get in and out of the hall. We can even get there on the train on Saturday. I'll certainly miss taking part in something that made me feel special because I was inside the barrier and listening to people saying what a nice model I'd brought.
Both of us will carry on model making but will need to find new focus without a project layout to aim my efforts at. Mind you, that is another change over the period, I have to do a certain amount of modelling now for publication so this takes me in different directions.
It's been fun but the time to call it quits has arrived. Thanks to everyone who has been kind enough to book one of our layouts. At a rough guess this amounts to over 150 shows, most of which we've enjoyed, the others making for good anecdotes. At least now we can turn up at shows as visitors without a stupid o'clock start!
Saturday, February 09, 2013
Build the Black Pearl
Partwork season is upon us and knowing my interest in the subject, Matt Dawson alerted me to the new Hachette "Pirates of the Caribbean" series. A quick squiz in Leamington WH Smiths left me wanting but the next day, Stratford-upon-Avon's store sorted me out.
As is usual with these things, issue one cost 99p. Future installments run to £5.99 and since the model is complete in 100 issues, will cost you £594
The kit is by the well known firm Amati, so it isn't going to be rubbish. The details shown in the photos certainly look impressive.
With the first mag, you get some laser-cut MDF parts that make up into a frankly unrecognisable bit of the ship. There's a self-adhesive pirate flag too, probably the bit I'll keep. The print contains step-by-step instructions, stuff about the Black Pearl and Jack Sparrow. It's profusely illustrated with photos from the films so Disney are presumably taking a chunk of the money in licencing fees.
Recognising that kids will like the look of this, there's a few mentions that an adult should be involved with the building process. Inside one of the covers there is small print pointing out this is not a toy and isn't suitable for the under 14's, nor should you set it on fire.
Treated as a "bonding exercise", I can see this project working. A keen child working with a parent of grand parent could get a lot out of putting this model together. If I have a worry, it's that with it taking 2 years to acquire all the parts, I bet that a lot of kids lose interest before they reach the half way point. Not being able to sail the finished model won't help either.
If Granddad has space to store the work in progress and uses it as a treat when the young model maker comes to visit, then it could work. By the end of the build, hopefully the youngster will be hooked and want to do something else. Probably something else that comes in a single box. albeit with rather less fulsome instructions.
Friday, February 08, 2013
(NOT)Getting ready for BRM Doncaster
All being well, as you read this, we'll be getting ready to head up to sunny Doncaster to take part in the British Railway Modelling show.
For the first time in ages, we're taking Melbridge Dock our OO dockside layout. Despite being the oldest of the models we have on the circuit, it's still our favourite and so any invitation to show it is grabbed with both hands. Of course, the knowledge that I still have several locos kits to assemble for it, makes a difference...
Anyway, if you are heading in this direction, please drop by and say hello.
Doncaster Festival of Railway Modelling.
UPDATE: A Poorly car means that we have a front room full of layout which isn't going any further north this weekend. Sorry about this.
Thursday, February 07, 2013
Pilot Boat in Model Boats magazine
It's taken a while, too long to be honest, but the Pilot Boat now appears in Model Boats Magazine. It's not entirely my fault, the kit took a while to arrive and there is an issue (fixed by me in the article) with holding the top down properly.
Never mind, in the latest issue (or on the website for magazine subscribers), you can read a concise version of the build in four pages. Hopefully this will help anyone with the same kit on their shelves. While I showed some of the work on this blog, pulling it together for print does produce a superior result. It's likely to be more comprehensive as well. Before you complain, you aren't paying to read this and I do get some much needed income from the magazine...
The text has come out well, apart from a sub-editor rather keener on exclamation marks than I am and maybe "plastic" didn't need to be in quotes, but then both of these are subjective points and I'm probably being too fussy. Photo reproduction is absolutely top notch and since it's a piece with more pictures than words (each of which is worth a thousand of the other, but you try and tell the editor that when invoicing...) that more than makes up for anything.
I can't complain too much anyway - the model made the cover so I can't have done that bad a job with at least one photograph.
Speedline Pilot Boat
Model Boats Website
Labels:
Magazine,
model boat,
Pilot Boat - Speedline Kit
Wednesday, February 06, 2013
Book Review: The Isle of Man Railway
This book is unashamedly for Isle of Man railway anoraks. Which is why I bought it as soon as I saw a copy.
The book contains the photographs of David Odabashian who took them on his holidays to Mona's isle. They aren't simple holiday snaps though. What we have is an amazingly comprehensive set of images covering the rolling stock on the steam railway. There are some shots of stations and a few but he seems fascinated by the rolling stock. So much so, that there are compete sets showing every single wagon in its own photo. Likewise, we get the vans and coaches and of course, locos.
Line side features aren't forgotten, I've never seen so many signals, in fact I didn't realise there were that many on the island.
There is only one omission I can see and that is that there's nothing for the Foxdale branch, but I think I can't complain about that (well, I could long an boringly but that is for Internet forums) since there simply isn't a resource around as comprehensive as this for rolling stock.
Photo reproduction is as good as the black and white originals will allow. Fortunately these are pretty good and show details that are far from likely to be modelled by normal people.
Top marks to Peco Publications to putting this book out too. OK, so at a tenner for 66 pages, some will suck the breath through their teeth but it's never going to sell millions. For anyone who aspires to model the IOM steam railway, or even has a serious interest, it's a must-buy.
The Isle of Man Railway at Peco
Tuesday, February 05, 2013
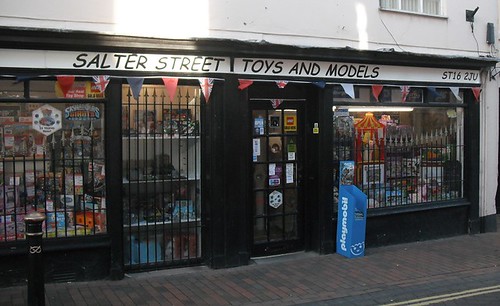
Salter Street Toys and Models, Satfford
Just off the main drag through Stafford town centre is Salter Street Toys and Modes - in Salter Street as it happens.
While a general toy shop, and not a huge one at that, the range is decent enough. Some Bachamnn, Hornby, LGB, plastic kits, balsa aircraft,Humbrol paint and a smattering of oddball specialist items. Basically, something for everyone but don't expect a big-time specialist.
Watch your head as you walk in - the ceiling in this old building is all over the place - but well worth dropping in when you are around.
No specific website, but there is this on the Stafford Town Centre website
Monday, February 04, 2013
Stafford 2013
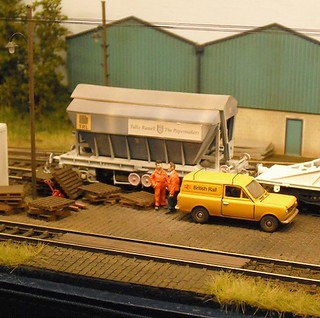 Like Leamington, Stafford Model Railway exhibition is one where the organisers look at the weeks weather forecasts with great concern. This year they escaped the snow but that's not always the case - the event is held on an agricultural showground and I've been there with snow in the ground.
 To be honest I'm not that fussed. There is an excellent vintage (read: unheated) bus service from the station and if this is running then the weather is OK. The trip is free but the people running the bus rattle a bucket for donations. Listening to some of your fellow passengers boasting how little they gave (I put 50p in and took a pound change. Hilarious) was a bit annoying. The same cheapskates were probably happy to stuff a DCC chip into a brand new toy train later on...
It also attract bus enthusiasts. The pair behind me were discussing the specifications of our transport, only interrupting the flow when a new Scania (or something) modern bus hoved into view. Still, I know a lot more about the Kidderminster bus politics now, so who am I to complain. They were happy enough when it was spotted there were two vintage vehicles on the service and plans were made to ensure they got a ride on both.
Anyway, inside the hall, I dropped the WD Barclay off and it was soon looking lovely on the stand. Then I had a mooch around. The trade is good but I wasn't after much. The second hand stall was busy and it was fun listening to one punter explaining to the staff behind it that the Wrightlines kits were priced at more then new ones, which he reckoned are still available. This might be true, but the person who entered them onto the stand will have set the price and there's not much those volunteers working it can do about this. If they don't sell, it's not their fault.
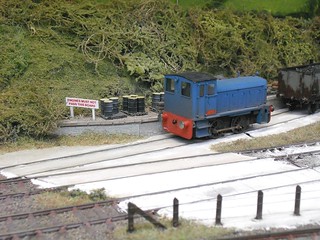 Layouts were largely ones I had seen before. This was lucky as the crowds were good and I couldn't get near very much before lunch (sausage roll and a cake to sickly for even me).
Once things settled, I found a few scenes that I really like. A couple of blue diesel layouts caught my eye, one in 4 and one in 7mm. Both seemed to have caught the 1970's atmosphere just right, or as right as someone born then who augments his memories with episodes of "The Professionals" can tell.
Sadly the 7mm was full of steam engine among the BR blue. I know I love to run what I like but at least this is usually left until late in the day, not prime time. Worse, the engine had a smoke generator, something that was getting couple of gricers very excited. Presumably they had never actually looked at the chuffy bits of a choo-choo or they would have realised that the smoke was pouring out of the chimney like oil heated by and element and not in any way like a real steam engine.
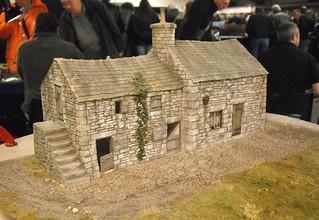 In the middle of the 2nd hall were some demonstrations. Some of the best I've seen to be honest. For sheer oddness, the 1/32nd German wartime trains take a lot of beating. I've always wondered what those kits look like made up and now I know. And I want to do the rail-mounted gun even more. Mind you, I've had a 1:97 kit stashed away for over a decade...
David Wright of Dovedale models was showing some lovely, atmospheric buildings including a cracking stone structure that is one of the best I've ever seen. Behind him, Ian Thompson showed tram construction in plasticard to a superb standard. What's interesting is that this work was attracting loads of attention despite being the exact opposite of what the majority of people attending will ever attempt. Perhaps if visitors could take away an understanding that the construction is just as much fun as the owning, the hobby would be in a better shape.
My Stafford exhibition photos on Flickr
Sunday, February 03, 2013
Auxiliary engine
Having decided that the auxiliary engine (used to start the main engine I presume) supplied in the Fowler kit was too small for the LMS version of the shunter, I had to build a replacement.
Needless to say I don't have a plan to hand so I'm working from photos so the first job was to work out dimensions. Height of the box is easy enough as it can be judged from the panel lines on the bonnet. Width was harder. I made a square that ought to be right but on the model it looked too long. It might have been right but it looked wrong.It's half as big again as the original whitemetal part though.
My choice involved going with something that I suspect is a few mm short but looks better in 3D. To be honest, I'm lacking so much detail in this area that anything is only going to be an approximation. I've also cheated even more as when first built the cover features small louvres. It lost those later in life and I'm assuming that when I modelled the engine, they had gone.
Anyway, the box has a 2mm thick plastic core covered with 0.5mm sheet fixed with that nice citrus smelling solvent that doesn't buckle the surface. The lump on the side is whitemetal and comes with the kit. It looks a bit close to the main engine box to me but I can't tell what goes between the two so I'll live with it. Parts are included with the kit but they all look wrong , and don't match the diagram in the instructions, too.
This all sounds very poor but I bet once the engine is finished and running on the layout, no-one notices. Truth is, they probably wouldn't have noticed if I'd just used the old bits.
Saturday, February 02, 2013
The future of layout levelling
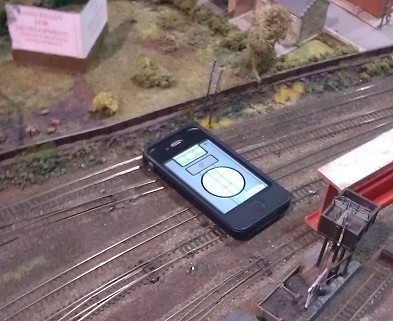 Spotted at Leamington, the N gauge layout "Meacham" being set up with the aid of both an electronic spirit level and a real one.
 The electronic version is an iPhone app. Lots of similar versions can be downloaded for free for Android phones. I grabbed one ans it really is clever.
As good as the real thing?
Probably. I normally carry my phone with me so I suppose it means I now have a spirit level wherever I go. On the other hand, the real ones are cheap and you can chuck them on the toolbox without worry. Thy come in various sizes too so you can fit them between obstacles or bridge long distances. Most importantly, they tend to be plastic so won't short out your track work if the power is inadvertently applied. Not sure what a dose of DCC juice will do to an iPhone!
Friday, February 01, 2013
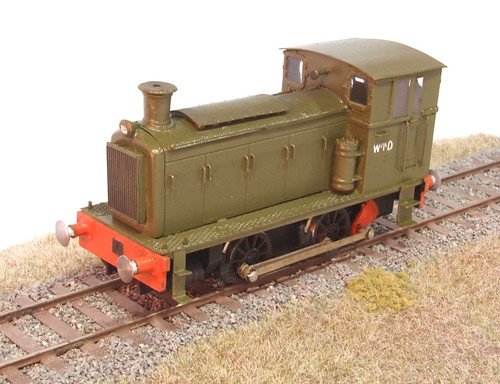
WD Barclay - Now in green
I must admit that the finished WD Barclay looks very pretty in green with it's red buffer beams. On the Mercian Models stand, it will show up better to any potential customers, which hopefully will result in a rush of new sales for the OO model.
I mention the OO version because the fret originally contained 3 OO and 1 HO version. Trouble is, thanks to the devaluation of the pound and desirability of the prototype, the HO model has been selling well. This means a small glut of 4mm kits to sell. The etch has been sorted out to stop all this silliness but OO modellers - get your wallets out!
The cab side sports a WD logo applied by map pen and ink as I can't find any suitable transfers. Doubtless, someone will point some out to me now, but by the time you read this, I'll have the model packed up to go home. It will help future builder though, so comment away!
Subscribe to:
Comments (Atom)


