It's embarrassing to fail an MOT on faulty light bulbs. Checking before the test takes no time at all, especially if you have a helper, and the fix is usually quick and cheap. Needless to say, I have been too busy and lazy to do this do this so the latest fail sheet gave me a face as red and glowing as the lights should have been.
Rear lights matter, or at least they do if you don't want anyone driving in to the back of you at night. I once worked in an office where a colleague had a bit of a rant one day because the Police had pulled her partner over due to none of the lights on the back of his car working. I'm sure she would have been just as happy had she run into someone in the dark because of their similarly working illumination...
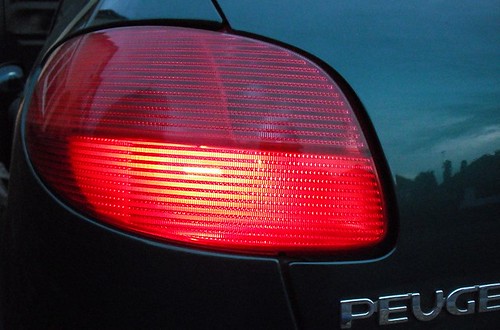
Anyway, here's how I changed the bulb on the back of my 206. This works for both the rear lights and brake lights as they are the same bulb. The indicators are in here too.
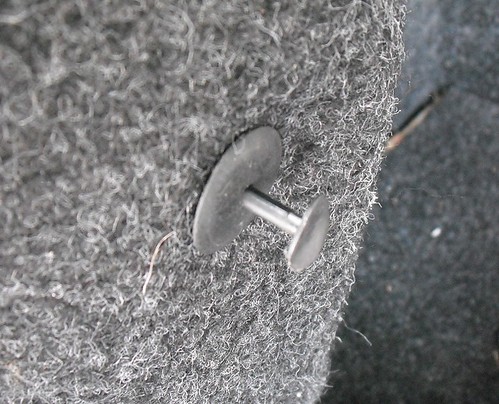
The cover inside the book is held in place with a plastic bung. Pull the centre of this out and the whole thing should then be removed. You might need some small pliers to do this. Don't lose it as you'll put it back later. Pull the covering away so you can get at the back of the light unit.
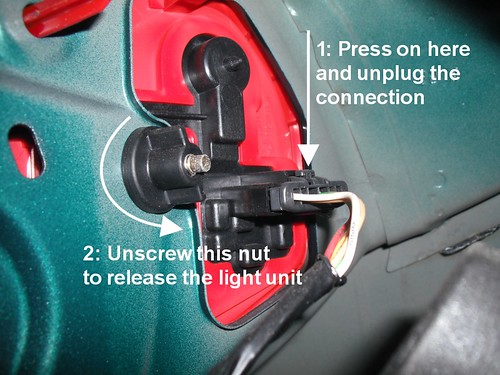
First, unplug the electrical connection. Push the lump on top of the plug and it should then pull away. Next, undo the plastic wing nut and put it somewhere safe.
The whole unit is then pulled away from the car. It will take a wiggle and be careful not to drop it.
I was following the Haynes manual to get this far but at this point it just tells you to put the thing back in the car. That's not going to fix any bulbs...
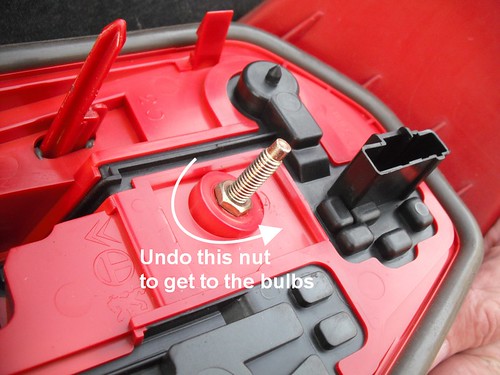
Anyway, to get at them, undo the nut on the back. Small pliers help here. Put this in the safe place.
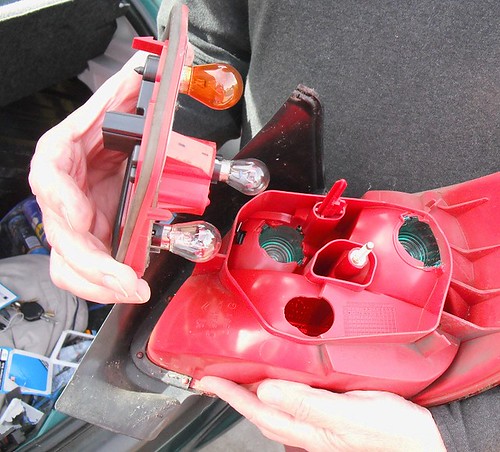
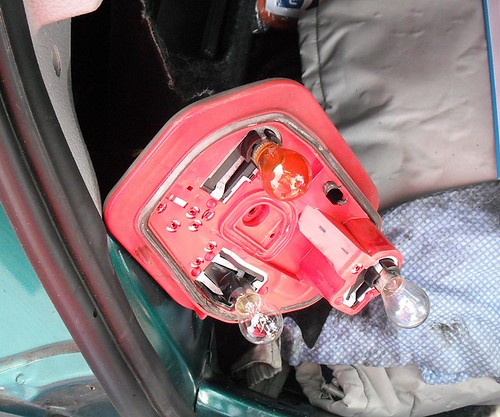
A bit of a wiggle (these bits have seals to keep the muck out so they should just fall apart but gentle pressure did it for me) separates the bulb and lens units.
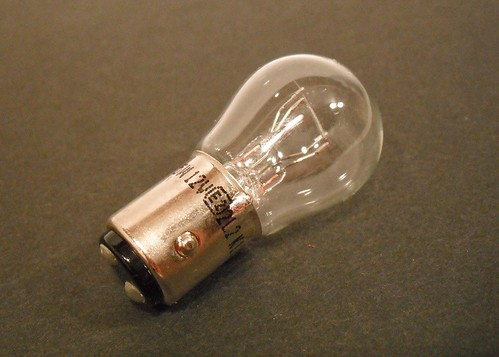
The tail light bulb is a bit clever, it lights up for both brakes and rear lights and so has two different filaments (the bit that glows) in each one. On the sides are two projections at different heights (you can see this clearly on the Halfords website) so when you replace the bulb, it should be possible to put it in only the correct way. In aged VeeDubs, that doesn't always work but on the 206 it seemed OK. If you aren't sure, take a good look at the old bulb before you take it out and put the new one in the same way.
Before putting it all back together, I plugged the unit in and tested it. This isn't an essential step but it's not a bad idea as it saves you taking things apart again if you've put the bulb in wrong. Test the rear lights, brake lights (same bulb, different filaments) and the indicators too while you are at it.
Reassembly is the reverse of the above. Unplug the lights, put the covers back on doing the metal bolt up as tight as you can manage with fingers. Don't go mad as breaking the plastic would be easy if you screw it on too tight. Put the complete unit back in the car, plug it in and test again. If all is well then put the cover back over the lot and push that bung into place, finishing but pushing the central pin back in to hold it.
I used Halfords HBU380 bulbs. Since I only needed one, the other lives in the car for emergencies (on the road, even if you call a breakdown service, it's not a bad idea to have a spare in case they don't). The old bulb in my car looked OK but was faulty as its replacement worked fine. To be honest, these bulbs are so cheap you change them if you aren't sure.
Legal note: This is an accurate description of what I did. I am not a professional mechanic and these notes are offered for entertainment only. If you chose to follow them and things don't work, it's not my fault. Sorry. If you are at all unsure then get a professional to do the job. The car used was a 1996 UK spec 206, other models may be different.
10 comments:
Hi,
Thanks for this. I'm surprised that the seals haven't fallen apart though. My 2003 206 had the gasket crumble away and the bulb holder corrode to the point where the brake bulb failed.
Hi,
Thanks for this. Most sites don't give that much detail about the 206. I'm surprised that the seals haven't fallen apart though. My 2003 206 had the gasket crumble away and the bulb holder corrode to the point where the brake bulb failed.
Hi There,
After doing the aforementioned steps i seem to have a problem with only the brake light, it doesn't appear to be lighting up when pressing the brakes but the normal light is fine.
any ideas?
The brake light is fine passenger side (not been touched) and only driver side(replaced light cluster) has been changed, also the bulbs are brand new seen as some drunkard decided to smash my lights in.
Thanks
Almost certainly a faulty bulb. I know it's new but I've had many faulty out of the packet. They are very cheap and I suspect the QC reflects this.
Also worth cleaning the contacts in the bulb holder with some fine emery paper.
If all else fails, and you are in the UK, Halfords are very cheap doing this sort of thing and will work through bulbs at their expense until they get it working...
How to remove this wing nut. Could you post an image of tool to do that please?
No tool required for the wing nut - it should undo with your fingers, that's why it's a wing nut.
https://toyprevia.blogspot.com/2017/02/light-bulbs-toyota-previa-1995-1998.html
Use the wheel brack wheel nut spanner it's the same size
Thankyou I would have been stood outside in the freezing cold trying to work out how to get the light cover off...turns out I was on the right track with the wing nut but I wasn't thinking it through that that actually held the whole light assembly on with the bulb holder aswell...'Doh!!' but as it also turns out Halfords sold me the wrong bulb 😂😂 teach me to forget the wife's registration number when they say they can check the bulb for me 😂😂
You shouldn't need a pair of pliers to remove the small nut on the central stem. The whole system is designed so you can immediately change a blown bulb on the road without requiring any tools. (Peugeot = French car = French laws = Carry a full set of bulbs and be able to fit them at the roadside.) There is a plastic spanner similar to the wing nut you point out which has the correct sized recess to act as a socket for the nut to fit into. This has no central thread so it slips over the nut and can be turned by hand just as the wing nut is. In the older 206s it is pushed onto a pin in a recess in the back of the light cluster. If it is there just lever that out gently and you will find it does the job. Remember, these nuts are only supposed to be finger tight. They are only holding plastic parts in place.
Post a Comment