OK, so this is a bit late as I got this far on Friday but I thought I might as well blog it anyway.
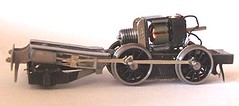
The Isle of Man Peacock chassis is finished. Not completely, there is still brake gear to add, but enough for me to be happy I can build these things and make them work.
This is a pretty fiddly build. Not that this is the fault of the kitmaker, Beyer Peacock have to take the blame. If only they had used a more conventional design. Everything assembles OK as long as you take care to open slots a little or file cusp away. Nothing too challenging although perhaps off-putting for the beginner. If you’ve done a couple of etched kits and take your time then this is do-able.
One point to watch is the front pony, which is fiddly to hold while keeping everything square. The bearings need to be pushed in a bit to grip the axle properly and this is the first time I have preferred top hat to waisted.
Anyway it’s back in the box now. Once day I’ll get around to building the body to go with it.
Tuesday, December 05, 2006

Sunday, December 03, 2006
(Not) Planning ahead
Yesterday I was walking around the largest model railway exhibition in the country.
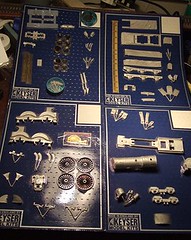
Today I decided to get out the Armstrong locomotive kit I promised top build for George.
Then I discovered that the box didn’t contain the motor, wheels or gears required to complete the model. Guess who now has to order all the bits he could have bought over the counter 24 hours ago…
The Armstrong will be an interesting project. I’ve always considered anything Great Western to be beneath me. Lets face it, GWR modellers aren’t really all there are they ? Lots of bucolic branch lines and pannier tanks but no proper engines. They take themselves soooo seriously too – some of us still remember the fuss they made when “City of Truro” was painted BR black for an April Fool years ago.
Perhaps I am jaundiced from the early years of my railway modelling life when every second layout was a GWR branch, probably Ashburton, so exhibitions all looked the same. I wanted something different which probably explains my love of little industrial engines. Preferably grimy, ugly ones.
Anyway, George seems to have a knack of picking the good ‘uns. This loco has the outside frames and elegant lines of a true thoroughbred. It has style and beauty and class. This is going to be a good looking model.
Today I decided to get out the Armstrong locomotive kit I promised top build for George.
Then I discovered that the box didn’t contain the motor, wheels or gears required to complete the model. Guess who now has to order all the bits he could have bought over the counter 24 hours ago…
The Armstrong will be an interesting project. I’ve always considered anything Great Western to be beneath me. Lets face it, GWR modellers aren’t really all there are they ? Lots of bucolic branch lines and pannier tanks but no proper engines. They take themselves soooo seriously too – some of us still remember the fuss they made when “City of Truro” was painted BR black for an April Fool years ago.
Perhaps I am jaundiced from the early years of my railway modelling life when every second layout was a GWR branch, probably Ashburton, so exhibitions all looked the same. I wanted something different which probably explains my love of little industrial engines. Preferably grimy, ugly ones.
Anyway, George seems to have a knack of picking the good ‘uns. This loco has the outside frames and elegant lines of a true thoroughbred. It has style and beauty and class. This is going to be a good looking model.
A problem solved
I think it makes sense to finish the chassis for my model Isle of Man Peacock before putting it away again. If I’m confident it is running up and down the track, I’m confident that I can finish the model. Then I can get stuck in with something else. Also if all the bits are soldered in place I can’t lose any of them can I ?
Anyway, I have the chassis trundling up and down a bit of GEM flexitrack (I think that’s what it is – it looks older than me) and decide to fit the rods and cross heads. The model continues to work but not awfully well. It’s a bit hesitant at some parts of the wheel revolution. I put this down to stiffness, iffy pick-ups or dodgy quartering. Things do seem to improve a bit as the model runs.
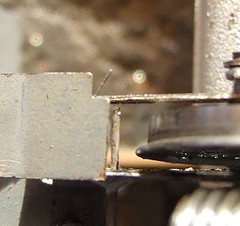
Then I spot the obvious. The rods are touching the wires to support the brake hangers. Not enough to jam things solid – I have been there before – but enough to make the wheel pause as it rotates.
There is no need to have the wires that long. On the finished model they need not reach as far as the face of the wheel but it is convenient to leave them longer than required while building as it saves measuring things.
Of course I have now chopped the wire back as the photo shows and the chassis runs a lot better for it. Perhaps by adding this to the blog I’ll remember next time !
Anyway, I have the chassis trundling up and down a bit of GEM flexitrack (I think that’s what it is – it looks older than me) and decide to fit the rods and cross heads. The model continues to work but not awfully well. It’s a bit hesitant at some parts of the wheel revolution. I put this down to stiffness, iffy pick-ups or dodgy quartering. Things do seem to improve a bit as the model runs.
Then I spot the obvious. The rods are touching the wires to support the brake hangers. Not enough to jam things solid – I have been there before – but enough to make the wheel pause as it rotates.
There is no need to have the wires that long. On the finished model they need not reach as far as the face of the wheel but it is convenient to leave them longer than required while building as it saves measuring things.
Of course I have now chopped the wire back as the photo shows and the chassis runs a lot better for it. Perhaps by adding this to the blog I’ll remember next time !
Saturday, December 02, 2006
Warley & the demise of the hobby.
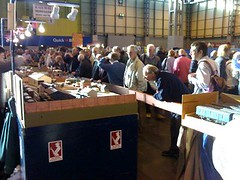
This is the view from behind a layout appearing at the Warley NEC show at about 11:30 today.
As you can see there is hardly anyone in the hall. Look at the empty gangways and the tumbleweed rolling through the venue.
This is obviously a hobby that is, as we are often told by wise letter writers, in it’s death throws. No one is taking part. The people who are interested are dying off. Strangely I remember that this has always been said. The attendees at exhibitions have always been middle aged and older men. Presumably they have dies off and been replaced by other middle aged and older men. I wonder if this is a pattern.
The show itself is excellent. I wouldn’t say it is the best in the world – something this big simply can’t guarantee that every layout and every trader is the best possible in the hobby. What you get is quantity. Hopefully there is something for everyone and most people will see something they haven’t seen before. On this basis you should leave happy.
I managed to spend money as expected. I was also very good and resisted some of the goodies on offer. If you bought an Impetus kit for a 4mm scale Fowler diesel then than me for leaving it there even though I really wanted to bring it home to my “pending” pile. Yet again I didn’t buy a Russian locomotive kit either. Or any Garrets (Ok, I’ve sort of ordered one but it is from a friend of a friend). Or anything for the garden railway (nice boxy loco kits from GRS for only £150, tempting). I couldn’t get to the Squires stand to buy a new tapered reamer either because of the crowds.
In fact there were only two downsides. First I had to come away at 3pm although the NEC is pretty tiring (not that I came back from the pub last night late) and the idiot who barged past me violently while I was queuing at a stand. Note to idiots: if you say, “Excuse me” people will often get out of the way. Otherwise you are obviously the sort of sad act with not interpersonal skills the media loves to portray railway modellers as. And that goes for you Mr Exceptionally smelly at the Bachmann stand as well.
If you are reading this on Saturday night you still have Sunday to get down to the NEC. Do it, you won’t be disappointed.
As you can see there is hardly anyone in the hall. Look at the empty gangways and the tumbleweed rolling through the venue.
This is obviously a hobby that is, as we are often told by wise letter writers, in it’s death throws. No one is taking part. The people who are interested are dying off. Strangely I remember that this has always been said. The attendees at exhibitions have always been middle aged and older men. Presumably they have dies off and been replaced by other middle aged and older men. I wonder if this is a pattern.
The show itself is excellent. I wouldn’t say it is the best in the world – something this big simply can’t guarantee that every layout and every trader is the best possible in the hobby. What you get is quantity. Hopefully there is something for everyone and most people will see something they haven’t seen before. On this basis you should leave happy.
I managed to spend money as expected. I was also very good and resisted some of the goodies on offer. If you bought an Impetus kit for a 4mm scale Fowler diesel then than me for leaving it there even though I really wanted to bring it home to my “pending” pile. Yet again I didn’t buy a Russian locomotive kit either. Or any Garrets (Ok, I’ve sort of ordered one but it is from a friend of a friend). Or anything for the garden railway (nice boxy loco kits from GRS for only £150, tempting). I couldn’t get to the Squires stand to buy a new tapered reamer either because of the crowds.
In fact there were only two downsides. First I had to come away at 3pm although the NEC is pretty tiring (not that I came back from the pub last night late) and the idiot who barged past me violently while I was queuing at a stand. Note to idiots: if you say, “Excuse me” people will often get out of the way. Otherwise you are obviously the sort of sad act with not interpersonal skills the media loves to portray railway modellers as. And that goes for you Mr Exceptionally smelly at the Bachmann stand as well.
If you are reading this on Saturday night you still have Sunday to get down to the NEC. Do it, you won’t be disappointed.
Friday, December 01, 2006
Running - sort of
The experiment has been a success. Well nearly anyway.
It looks like I can build an IOM loco chassis and get it running without too much pain. Good news as the new layout isn’t really viable without them and I can’t see Hornby coming to my rescue any time soon.
Obviously there is supposed to be a front bogie to keep the nose out of the sleepers – I’ve built this but need another half hour to fit it. Instead a big nut on the back balances things out.
Quartering was “fun” as the jig wouldn’t fit the front ‘cos the running boards get in the way. The back was OK though so I set this and adjusted the fronts. Getting the rods over the fat Gibson bushes was interesting too. Not much metal left at the end of those rods.
However it looks like it works and so tomorrow I plan to spend some money with Mr Branchlines.
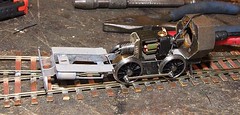
It looks like I can build an IOM loco chassis and get it running without too much pain. Good news as the new layout isn’t really viable without them and I can’t see Hornby coming to my rescue any time soon.
Obviously there is supposed to be a front bogie to keep the nose out of the sleepers – I’ve built this but need another half hour to fit it. Instead a big nut on the back balances things out.
Quartering was “fun” as the jig wouldn’t fit the front ‘cos the running boards get in the way. The back was OK though so I set this and adjusted the fronts. Getting the rods over the fat Gibson bushes was interesting too. Not much metal left at the end of those rods.
However it looks like it works and so tomorrow I plan to spend some money with Mr Branchlines.
Wednesday, November 29, 2006
Beaten
OK, I have been hacking away at the back of my Type 2 over the weekend. Most of the rusty rear valance has been removed and despite my best efforts with the grinder I didn’t set fire to anything with the shower of sparks.
This job has beaten me though. As I dig I find some solid metal and some rusty stuff. I think most of the rust is out but can see some at the ends of a box section.
Trouble is I can’t get the stuff out. The grinder is too big to cut away without removing loads of good metal to create access. I’m really feeling out of my depth here.
So, much as it pains me to do it, I have accept defeat and hand the job over to a professional with a plasma cutter and the experience to do a good, structurally sound job. Having looked at the job he’s complimented me on stopping when I did and agrees that if I were to start welding I would be trapping rust that would appear in time. I’ve also saved him time, and therefore me money, with the work I’ve done so far.
I suppose this is success of sorts but it doesn’t feel like it at present, especially as the van can’t go in for repair until Christmas. In the meantime Ashley sits on the drive making me feel guilty for not being up to the job.
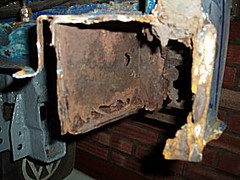
This job has beaten me though. As I dig I find some solid metal and some rusty stuff. I think most of the rust is out but can see some at the ends of a box section.
Trouble is I can’t get the stuff out. The grinder is too big to cut away without removing loads of good metal to create access. I’m really feeling out of my depth here.
So, much as it pains me to do it, I have accept defeat and hand the job over to a professional with a plasma cutter and the experience to do a good, structurally sound job. Having looked at the job he’s complimented me on stopping when I did and agrees that if I were to start welding I would be trapping rust that would appear in time. I’ve also saved him time, and therefore me money, with the work I’ve done so far.
I suppose this is success of sorts but it doesn’t feel like it at present, especially as the van can’t go in for repair until Christmas. In the meantime Ashley sits on the drive making me feel guilty for not being up to the job.
Monday, November 27, 2006
Off to the Isle of Man (I wish)
New project ahoy !
Let me tell you a secret. The next layout my father and I build will be based on the Isle of Man. OK if you’ve talked to us at shows this isn’t going to be a huge surprise. Even if it is, I doubt it is as exciting as the story of Elvis being found on the moon or something.
If you model the Isle of Man (hereafter called IOM to save my fingers) and doing the steam railway, you build Peacocks. Loads of ‘em.
With Warley show at the NEC this weekend I’m going to be adding to the stock of IOM loco kits currently maturing the in the cupboard. It seemed prudent though to see if they were any good before trying to persuade Branchlines to do a deal for another eleven. (Note to self: This is a joke. You will only be buying one kit this time). Digging the kit out of the box labelled "IOM” I find that the wheels are Gibson and not the normal (and preferred to be honest) Romfords. Since the next big project will have Gibson wheels, albeit with EM axles, I might was well get the practise in.
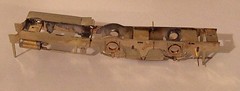
IOM Peacock chassis are complicated beasts. There is a lot on show and what you see give the locomotive most of its character. The Branchlines kit was designed in the 1990’s and was one pretty state of the art then. It’s good today as well. Etched in nickel silver, a lot of thought has gone into its design. So much that I had to follow the instructions to the letter to get this far. What you see is just under two hours work and I still have work to do, notably on the prominent front pony.
It all looks fine so far. As long as it if flat and square I should pretty quickly have a running chassis. Then I get to decide how many more to add to the collection this weekend.
Let me tell you a secret. The next layout my father and I build will be based on the Isle of Man. OK if you’ve talked to us at shows this isn’t going to be a huge surprise. Even if it is, I doubt it is as exciting as the story of Elvis being found on the moon or something.
If you model the Isle of Man (hereafter called IOM to save my fingers) and doing the steam railway, you build Peacocks. Loads of ‘em.
With Warley show at the NEC this weekend I’m going to be adding to the stock of IOM loco kits currently maturing the in the cupboard. It seemed prudent though to see if they were any good before trying to persuade Branchlines to do a deal for another eleven. (Note to self: This is a joke. You will only be buying one kit this time). Digging the kit out of the box labelled "IOM” I find that the wheels are Gibson and not the normal (and preferred to be honest) Romfords. Since the next big project will have Gibson wheels, albeit with EM axles, I might was well get the practise in.
IOM Peacock chassis are complicated beasts. There is a lot on show and what you see give the locomotive most of its character. The Branchlines kit was designed in the 1990’s and was one pretty state of the art then. It’s good today as well. Etched in nickel silver, a lot of thought has gone into its design. So much that I had to follow the instructions to the letter to get this far. What you see is just under two hours work and I still have work to do, notably on the prominent front pony.
It all looks fine so far. As long as it if flat and square I should pretty quickly have a running chassis. Then I get to decide how many more to add to the collection this weekend.
Saturday, November 25, 2006
Petrol tank - In
Today was a good day. After weeks of slow and intermittent work, the petrol tank is back in the van.
I poked wire through all the holes to make sure they were clear. Cleaned out the outlet with a drill as it was very full of hard tank paint and then slid the tank back into place.
Obviously there was a bit of pushing and shoving involved but nothing major. The wires to the reversing light need replacing as they got in to way once too often but apart from that everything went fine.
There is extra rubber between tank and tank hole (what else do you call it ?) which I slid in before tightening the retaining straps. The threads on these had to be cleaned up with the die (8 by 125 I think) and as usually every bolt has been greased to build my stock of karma up.
With the firewall in place again the job is nearly done. In theory I could have the engine put back in and drive off into the sunset.
With the lump out of the way though it’s time to tidy up the engine bay. I’ve scraped and re-painted a fair bit already but there is another horror awaiting me. The rear valance is well rotten. With access as good as it will ever be I can’t put off tacking this any longer.
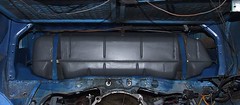
I poked wire through all the holes to make sure they were clear. Cleaned out the outlet with a drill as it was very full of hard tank paint and then slid the tank back into place.
Obviously there was a bit of pushing and shoving involved but nothing major. The wires to the reversing light need replacing as they got in to way once too often but apart from that everything went fine.
There is extra rubber between tank and tank hole (what else do you call it ?) which I slid in before tightening the retaining straps. The threads on these had to be cleaned up with the die (8 by 125 I think) and as usually every bolt has been greased to build my stock of karma up.
With the firewall in place again the job is nearly done. In theory I could have the engine put back in and drive off into the sunset.
With the lump out of the way though it’s time to tidy up the engine bay. I’ve scraped and re-painted a fair bit already but there is another horror awaiting me. The rear valance is well rotten. With access as good as it will ever be I can’t put off tacking this any longer.
Thursday, November 23, 2006
It's raining lead
Everyone says that you have to put as much weight as possible into model railway locomotives. Many magazine descriptions say, “I filled the boiler with lead” as though a model that is heavier than your car is a good idea.
Some weight is important and etched brass locomotives definitely need a bit of help. The mineral engine doesn’t offer much scope for lead though – the boiler is pretty much full of motor, gearbox & flywheel.
Fortunately the bulges in the saddle tank are hollow and have holes obviously intended to give access for weight addition. Just the job for some of that “liquid lead” I bought a long while ago and have hardly used I thought.
Pouring it in was out of the question but a small plastic spoon, the sort you get with ice creams in tubs, shovelled it in and some superglue poured on top should have solidified it.
I needed more glue as it turned out. Running in was interrupted by stopping to pull squashed lead balls out of the gearbox. I think I dismantled the model half a dozen times before giving in and pouring more glue into the hole. Even now the odd ball escapes but I’m hoping all the loose ones will soon fall out. I want the ratio of brass to superglue to stay about the same as it is now and not tip in favour of the adhesive.
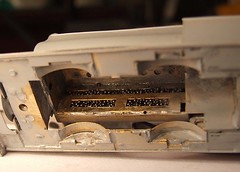
Some weight is important and etched brass locomotives definitely need a bit of help. The mineral engine doesn’t offer much scope for lead though – the boiler is pretty much full of motor, gearbox & flywheel.
Fortunately the bulges in the saddle tank are hollow and have holes obviously intended to give access for weight addition. Just the job for some of that “liquid lead” I bought a long while ago and have hardly used I thought.
Pouring it in was out of the question but a small plastic spoon, the sort you get with ice creams in tubs, shovelled it in and some superglue poured on top should have solidified it.
I needed more glue as it turned out. Running in was interrupted by stopping to pull squashed lead balls out of the gearbox. I think I dismantled the model half a dozen times before giving in and pouring more glue into the hole. Even now the odd ball escapes but I’m hoping all the loose ones will soon fall out. I want the ratio of brass to superglue to stay about the same as it is now and not tip in favour of the adhesive.
Wednesday, November 22, 2006
Tap and tank
Now I’ve painted my fuel tank inside and out it’s nearly time to put everything back together. Since it’s cold and wet outside, not to mention dark I need a job that can be done on the bench. What better than putting the fuel gauge sender back in ?
Sitting in the sofa and eating chocolate since you ask but I want the van back on the road so it’s into the garage.
All my painting had closed up the holes the sender bolts in to. After careful measurement and a lot of squinting at the top of the bolts the number 8 tap looked like it should clear out the threads. Before I could do this, the holes had to be opened out with a 3.5mm drill.
With everything cleaned up, the sender was bolted back in. It’s rubber seal didn’t seem to line up with the bolt holes very well but was flexible enough to allow some prodding to get things together. All the bolts were greased of course before they went in as I’m hoping the karma will spread and I won’t have to undo too many of their rusty cousins in the future !
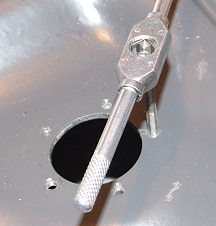
Sitting in the sofa and eating chocolate since you ask but I want the van back on the road so it’s into the garage.
All my painting had closed up the holes the sender bolts in to. After careful measurement and a lot of squinting at the top of the bolts the number 8 tap looked like it should clear out the threads. Before I could do this, the holes had to be opened out with a 3.5mm drill.
With everything cleaned up, the sender was bolted back in. It’s rubber seal didn’t seem to line up with the bolt holes very well but was flexible enough to allow some prodding to get things together. All the bolts were greased of course before they went in as I’m hoping the karma will spread and I won’t have to undo too many of their rusty cousins in the future !
Sunday, November 19, 2006
Lovely day
This morning saw a bit of a first. We took two boats (Minty & the 40 year old boat) to the lake. Sailed both and had no problems whatsoever. The boats launched, tootled around for 30 minutes or so and then came out. The weather was lovely, cold with a bright sun and no wind. Model boating isn’t just a summer hobby !
Minty’s new coupling worked well. She has a nice turn of speed, reasonably fast but no scary. You don’t have to concentrate too hard to avoid the bank or other craft. Good thing too as the pair of dogs living on the site decided that we had nothing better to do than kick their football.
The duration of run is very impressive. I sailed pretty solidly for 30 minutes and there was more in the tank (battery). I suspect that another 10-15 mins wouldn’t be out of the question. This makes the boat ideal for regatta days when the water is busy. Since our lake is on the small side half a dozen boats mean “near-misses” are common.
At the end of the day I have built what I wanted. A model that can be quickly charged and taken out for a pleasant sail if the weather looks good. No fuss or setting up, just enjoyable sailing.
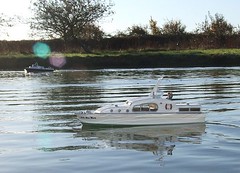
Minty’s new coupling worked well. She has a nice turn of speed, reasonably fast but no scary. You don’t have to concentrate too hard to avoid the bank or other craft. Good thing too as the pair of dogs living on the site decided that we had nothing better to do than kick their football.
The duration of run is very impressive. I sailed pretty solidly for 30 minutes and there was more in the tank (battery). I suspect that another 10-15 mins wouldn’t be out of the question. This makes the boat ideal for regatta days when the water is busy. Since our lake is on the small side half a dozen boats mean “near-misses” are common.
At the end of the day I have built what I wanted. A model that can be quickly charged and taken out for a pleasant sail if the weather looks good. No fuss or setting up, just enjoyable sailing.
Saturday, November 18, 2006
Welding lessons
Welding the Type 2 today. First I tried to repair the tinware but gave this up as a bad job when I spent more time blowing holes than filling them. Grinding another hole in it didn’t help.
Still, with this practise under my belt I moved on to patching the holes under the petrol tank. In theory these would be reasonably easy (read: doable by a newbie welder) but to be on the safe side I made a trial piece up out of a couple of off-cuts. One reasonably successful lap joint later I decided to be bold and try it for real.
First I cut the patches from 0.8mm thick steel. They seemed to fit OK. Next I cleaned the area to be welded again with the angle grinder. I’m smart enough after years of soldering to know that you need clean metal and it’s not clever to struggle with anything else.
Then I took the welder for its first trip outside. The ensuing struggle lasted about an hour I think (don’t wear a watch while doing this sort of thing, a lesson learned a long while and several watches ago) but resulted in two bits of metal attached over the holes. Fortunately they aren’t structural although most of the welds aren’t bad and some of them are very good.
What I learned today is:
Use the red welding visor. It doesn’t have a flip up lens like the black one but what it does have isn’t so dark. I can actually see what I am doing but not get dazzled.
Welding visors protect your head when you keep hitting it on the engine bay roof.
The engine bay roof is in the way.
If you kneel on the lead to the welding torch the wire won’t feed through.
You can’t tell that you are kneeling on the cable when wearing kneepads.
Other than this, kneepads are good. I must buy a better pair that the ones from the 99p shop I’m using.
Getting a good earth on a vehicle isn’t as easy as you think.
Welding isn’t affected by failing light as much as other activities.
Seam sealer is difficult to get off your fingers.
I love my new metal cutting tool. Except when I catch my fingers in the handles.
A small hammer is good for persuading metal into shape. You don’t always need the “proper” tool. Brute force can work. Sometimes.
I would like a proper indoor garage. And a vehicle lift.
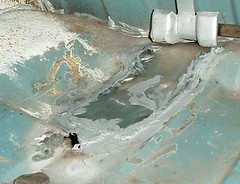
Still, with this practise under my belt I moved on to patching the holes under the petrol tank. In theory these would be reasonably easy (read: doable by a newbie welder) but to be on the safe side I made a trial piece up out of a couple of off-cuts. One reasonably successful lap joint later I decided to be bold and try it for real.
First I cut the patches from 0.8mm thick steel. They seemed to fit OK. Next I cleaned the area to be welded again with the angle grinder. I’m smart enough after years of soldering to know that you need clean metal and it’s not clever to struggle with anything else.
Then I took the welder for its first trip outside. The ensuing struggle lasted about an hour I think (don’t wear a watch while doing this sort of thing, a lesson learned a long while and several watches ago) but resulted in two bits of metal attached over the holes. Fortunately they aren’t structural although most of the welds aren’t bad and some of them are very good.
What I learned today is:
Use the red welding visor. It doesn’t have a flip up lens like the black one but what it does have isn’t so dark. I can actually see what I am doing but not get dazzled.
Welding visors protect your head when you keep hitting it on the engine bay roof.
The engine bay roof is in the way.
If you kneel on the lead to the welding torch the wire won’t feed through.
You can’t tell that you are kneeling on the cable when wearing kneepads.
Other than this, kneepads are good. I must buy a better pair that the ones from the 99p shop I’m using.
Getting a good earth on a vehicle isn’t as easy as you think.
Welding isn’t affected by failing light as much as other activities.
Seam sealer is difficult to get off your fingers.
I love my new metal cutting tool. Except when I catch my fingers in the handles.
A small hammer is good for persuading metal into shape. You don’t always need the “proper” tool. Brute force can work. Sometimes.
I would like a proper indoor garage. And a vehicle lift.
Friday, November 17, 2006
Gluey lesson
A lesson to be learned – you can’t stick wood to plasticised* hardboard with wood glue. If you do the parts separate again.
If the parts are a stand for a model boat then you end up dropping the model and breaking bits off.
The flagpole went back on without any problem. The top of the searchlight will be more of a problem.
The stand has been re-assembled with 2 part epoxy. It won’t come apart now !
*It said it was painted, but the paint feels like plastic.
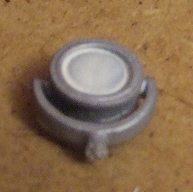
If the parts are a stand for a model boat then you end up dropping the model and breaking bits off.
The flagpole went back on without any problem. The top of the searchlight will be more of a problem.
The stand has been re-assembled with 2 part epoxy. It won’t come apart now !
*It said it was painted, but the paint feels like plastic.
Wednesday, November 15, 2006
New coupling
As an aside from all of this railway modelling, I’ve managed to do a bit of work on a boat.
“Little Miss Minty”’s biggest problem was the coupling between the motor and propshaft. I had used molybdenum tube but this kept failing. It looked like that I’d need to do major surgery to get a conventional coupling to fit – they were all too long for the space available.
At the boat show when I wasn’t buying new kits (yes more projects, but I only go to one big boat show a year so I have to stock up OK !?) I took a look at the Deans Marine stand where they had several couplings. These look like they are modular and the smallest version looked promising. At seven quid it wasn’t a cheap bet but I though I could always use it on something else if needed.
An initial check showed things looked promising. All I had to do was release the motor from its mount with a bit of screwdriver fiddling. The access wasn’t easy but I managed by using a combination of tools. If I had planned better perhaps I’d get a straight run at the screw heads but then I don’t intend taking the motor out much.
The couplings input & output shafts were 2.6mm. This is fine for the motor but my enlarged propshaft was too big. A few minutes with drill and reamer cured this giving me a nice snug fit. Happy I reassembled everything.
Once I’d done this I rotated the prop and noticed it caught on the hull. A quick look showed it had moved backward by about 4mm. The problem was that the propshaft was as far into the coupling as possible and it wasn’t enough. I did ponder living with it but gave in and took everything to bits again.
A big fat pair of wire cutters dealt with the excess shaft with a bit of a struggle but they did it. I then put it all back together. Result a nice free running propeller which under power is quiet and therefore efficient. I haven’t had a chance to try the boat on the water but hopefully (fingers crossed) this won’t result in another drive failure in the middle of the pond.
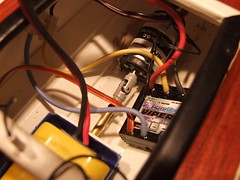
“Little Miss Minty”’s biggest problem was the coupling between the motor and propshaft. I had used molybdenum tube but this kept failing. It looked like that I’d need to do major surgery to get a conventional coupling to fit – they were all too long for the space available.
At the boat show when I wasn’t buying new kits (yes more projects, but I only go to one big boat show a year so I have to stock up OK !?) I took a look at the Deans Marine stand where they had several couplings. These look like they are modular and the smallest version looked promising. At seven quid it wasn’t a cheap bet but I though I could always use it on something else if needed.
An initial check showed things looked promising. All I had to do was release the motor from its mount with a bit of screwdriver fiddling. The access wasn’t easy but I managed by using a combination of tools. If I had planned better perhaps I’d get a straight run at the screw heads but then I don’t intend taking the motor out much.
The couplings input & output shafts were 2.6mm. This is fine for the motor but my enlarged propshaft was too big. A few minutes with drill and reamer cured this giving me a nice snug fit. Happy I reassembled everything.
Once I’d done this I rotated the prop and noticed it caught on the hull. A quick look showed it had moved backward by about 4mm. The problem was that the propshaft was as far into the coupling as possible and it wasn’t enough. I did ponder living with it but gave in and took everything to bits again.
A big fat pair of wire cutters dealt with the excess shaft with a bit of a struggle but they did it. I then put it all back together. Result a nice free running propeller which under power is quiet and therefore efficient. I haven’t had a chance to try the boat on the water but hopefully (fingers crossed) this won’t result in another drive failure in the middle of the pond.
Tuesday, November 14, 2006
Tolworth Part 2
Sometimes at a show you can be standing behind the layout and someone comes out of the crowd to surprise you.
In this case the surprise was in the form of a couple of brick remnants in a plastic bag and some bad news. It seems that the most important surviving survivor of the Hellingly Hospital railway, the engine shed, has been burnt down by vandals.
Until recently the shed had been in use by a garage as a workshop. It featured the original trolley wire in the roof and embedded rails outside the front doors. I had always dreamed of retrieving some or all of this for preservation. The idea of stringing some of the wire across the top of the model seemed good. Of course living 200 miles from the shed meant I couldn’t visit nearly often enough to try and arrange this.
Now the shed has gone but at least, thanks to the generosity of a visitor, I have a small part to display with my model railway. For the rest of the exhibition I merrily told the story and allowed others to examine my precious artefacts.
Coincidentally, my benefactor is a volunteer at the excellent Amberley Chalk Pits Museum. This is home to one of the engines from my favourite railway – The Groudle Glen Railway on the Isle of Man. We spent a good while chatting about this as well.
This sort of meeting makes getting up at 5:30 in the morning, driving half way down the country and standing on a very hard floor for eight hours a day.
Oh, and the answer to everyone who asks, “Do you have your layout set up at home ?” The answer is most definitely no. I just can’t enjoy operating without someone to talk to !
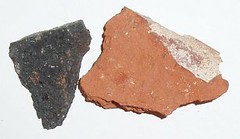
In this case the surprise was in the form of a couple of brick remnants in a plastic bag and some bad news. It seems that the most important surviving survivor of the Hellingly Hospital railway, the engine shed, has been burnt down by vandals.
Until recently the shed had been in use by a garage as a workshop. It featured the original trolley wire in the roof and embedded rails outside the front doors. I had always dreamed of retrieving some or all of this for preservation. The idea of stringing some of the wire across the top of the model seemed good. Of course living 200 miles from the shed meant I couldn’t visit nearly often enough to try and arrange this.
Now the shed has gone but at least, thanks to the generosity of a visitor, I have a small part to display with my model railway. For the rest of the exhibition I merrily told the story and allowed others to examine my precious artefacts.
Coincidentally, my benefactor is a volunteer at the excellent Amberley Chalk Pits Museum. This is home to one of the engines from my favourite railway – The Groudle Glen Railway on the Isle of Man. We spent a good while chatting about this as well.
This sort of meeting makes getting up at 5:30 in the morning, driving half way down the country and standing on a very hard floor for eight hours a day.
Oh, and the answer to everyone who asks, “Do you have your layout set up at home ?” The answer is most definitely no. I just can’t enjoy operating without someone to talk to !
Sunday, November 12, 2006
Tolworth Part 1
We’ve just returned from Sunny Tolworth with the Hellingly Hospital layout.
It’s not a bad model railway exhibition as they go. There were plenty of layouts and certainly in the main hall and not a duff one to be seen. Some seriously impressive modelling was on show. If I’d been a visitor I would have felt I’d had my moneys worth. Since you get three halls for the price of one there really is something for everyone.
I was especially impressed with the American hall. The models in there were proper modelling with dirt and wear and nothing taken straight from the box. No cowboy hats to be seen either.
Trade was good too. Perhaps not the best in the world but no-one could complain about the selection of locomotive kits (in 4mm scale at least) with one kit manufacturer (Roxey) and a couple of stalls with good stocks of second hand kits. Despite my plans not to buy any more projects I have come back home with a couple. Of course they were kits I had planned to buy one day anyway, and they were a bargain…
The biggest downsides weren’t the organisers fault. The leisure centre owners have employed the slowest builders ever to refit their toilets. For two and a half months they have been messing around and still haven’t finished the job. This means a reasonable sized exhibition has to content itself with three loos. Two for men and one for women as the former made up the largest percentage of the crowd by far.
The other problem was the crowd itself. For the first half of Saturday they didn’t speak. At all. Absolute silence despite my best efforts to get some chat going. The first morning is always filled with enthusiasts and they never speak to the layout operators. Oh no we have to far too serious for that. With the Hosptial offering limited operational potential, we are as keen as possible to get to talk about it. There is history and model making techniques to discuss. Or you can just stand and look serious.
Fortunately the atmosphere improved after lunchtime on the first day when the normal people start to arrive and the serious people loosen up a bit. We managed a good few conversations and even some laughs. As we’d left home at 6:30am earlier we needed this to keep our spirits up. Early starts and 104 mile drives tend to take the shine off playing trains even in a good show.
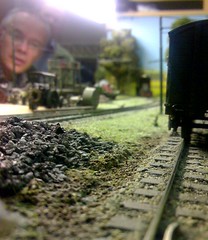
It’s not a bad model railway exhibition as they go. There were plenty of layouts and certainly in the main hall and not a duff one to be seen. Some seriously impressive modelling was on show. If I’d been a visitor I would have felt I’d had my moneys worth. Since you get three halls for the price of one there really is something for everyone.
I was especially impressed with the American hall. The models in there were proper modelling with dirt and wear and nothing taken straight from the box. No cowboy hats to be seen either.
Trade was good too. Perhaps not the best in the world but no-one could complain about the selection of locomotive kits (in 4mm scale at least) with one kit manufacturer (Roxey) and a couple of stalls with good stocks of second hand kits. Despite my plans not to buy any more projects I have come back home with a couple. Of course they were kits I had planned to buy one day anyway, and they were a bargain…
The biggest downsides weren’t the organisers fault. The leisure centre owners have employed the slowest builders ever to refit their toilets. For two and a half months they have been messing around and still haven’t finished the job. This means a reasonable sized exhibition has to content itself with three loos. Two for men and one for women as the former made up the largest percentage of the crowd by far.
The other problem was the crowd itself. For the first half of Saturday they didn’t speak. At all. Absolute silence despite my best efforts to get some chat going. The first morning is always filled with enthusiasts and they never speak to the layout operators. Oh no we have to far too serious for that. With the Hosptial offering limited operational potential, we are as keen as possible to get to talk about it. There is history and model making techniques to discuss. Or you can just stand and look serious.
Fortunately the atmosphere improved after lunchtime on the first day when the normal people start to arrive and the serious people loosen up a bit. We managed a good few conversations and even some laughs. As we’d left home at 6:30am earlier we needed this to keep our spirits up. Early starts and 104 mile drives tend to take the shine off playing trains even in a good show.
Friday, November 10, 2006
Fame again
Model Boats have published an excellent special edition on kit building.
Best of all (from my point of view) is that on page 72 there is a two page article by ME describing my experiences with a Compass Models (marketed by Ripmax) Slingshot. Fame at least in the model boat world !
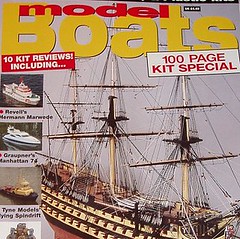
Best of all (from my point of view) is that on page 72 there is a two page article by ME describing my experiences with a Compass Models (marketed by Ripmax) Slingshot. Fame at least in the model boat world !
Thursday, November 09, 2006
Rust removed
Time for a quick petrol tank update.
The inside has now been treated with the fuel tank paint. I poured it all in as instructed, sloshed it around and then poured the remainder out. About three-quarters of a can came back out so I’ve put the lid back on and let everything dry.
Peering inside as best I can it looks like everything is painted a silver colour. Where the surface isn’t pitted it looks really good. The previously rusted areas have a rough surface but at least it is a silver painted rough surface. I plan to repeat the sloshing to use up more paint and give a better coverage inside. Better safe than sorry – I don’t want to pull the tank again !
The outside was rubbed down and painted with Smoothright satin grey. This is a bit light for real concours buffs but it’s near enough for me. The results look very nice – like a brand new tank. Hopefully with both inside and outside treated my tank will be better than new.
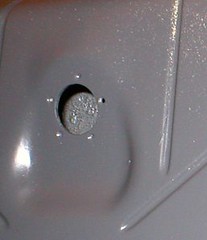
The inside has now been treated with the fuel tank paint. I poured it all in as instructed, sloshed it around and then poured the remainder out. About three-quarters of a can came back out so I’ve put the lid back on and let everything dry.
Peering inside as best I can it looks like everything is painted a silver colour. Where the surface isn’t pitted it looks really good. The previously rusted areas have a rough surface but at least it is a silver painted rough surface. I plan to repeat the sloshing to use up more paint and give a better coverage inside. Better safe than sorry – I don’t want to pull the tank again !
The outside was rubbed down and painted with Smoothright satin grey. This is a bit light for real concours buffs but it’s near enough for me. The results look very nice – like a brand new tank. Hopefully with both inside and outside treated my tank will be better than new.
Tuesday, November 07, 2006
Off to Tolworth
On the road again this weekend. Thanks to work commitments I can’t get the Friday off to travel. This means a 6:30 start but at least the M25 should be quiet then.
We put the layout up quickly to make sure everything works. Apart from a couple of dry joints in the fiddle yard, everything does. The joints wouldn’t be a problem if I bonded around them with extra wires (the joins are in rails soldered together) but it’s not a job I ever get around to.
I took the chance to gather everything into the same room as well. Hopefully this reduces the chance of forgetting that vital lead or important tool.
There was even time to run the new locomotive. Of course it decided to play up. As far as I can tell some glue vapour has got into the gearbox. A bit of power forward and reverse seemed to cue things but some running in will be required. Just the thing to do in those quiet end of days bits of the show.
We put the layout up quickly to make sure everything works. Apart from a couple of dry joints in the fiddle yard, everything does. The joints wouldn’t be a problem if I bonded around them with extra wires (the joins are in rails soldered together) but it’s not a job I ever get around to.
I took the chance to gather everything into the same room as well. Hopefully this reduces the chance of forgetting that vital lead or important tool.
There was even time to run the new locomotive. Of course it decided to play up. As far as I can tell some glue vapour has got into the gearbox. A bit of power forward and reverse seemed to cue things but some running in will be required. Just the thing to do in those quiet end of days bits of the show.
Sunday, November 05, 2006
Fiddly waggly bits
As light relief from treating the fuel tank in my van, I’ve been working on the waggly bits for mineral engine. I still hope to have it available for test next weekend at Tolworth.
As I’ve found before, the design of this kit is superb. The cylinders fold up and are strengthen with some thin tube that the piston rods run in. The slide bars are etched and also fold. Holes are provided to line parts up. If there is a fault it’s that the cylinder wrappers are on the thick side and could do with annealing before you try and form them. I managed but would do things differently if I built another.
The crossheads are cast brass. Very clean too. You solder a brass piece to the back of each to finish them. This traps the rod so some tidy soldering is needed. I cheat a bit and coat anything I don’t want soldered with permanent pen. Solder hates dirt and this keeps it away from problem areas – mostly.
This whole arrangement is very fine. Although it is stronger than it appears I’ll still be glad once it’s firmly fixed to a locomotive.
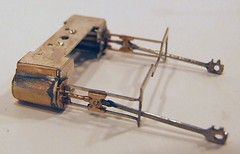
As I’ve found before, the design of this kit is superb. The cylinders fold up and are strengthen with some thin tube that the piston rods run in. The slide bars are etched and also fold. Holes are provided to line parts up. If there is a fault it’s that the cylinder wrappers are on the thick side and could do with annealing before you try and form them. I managed but would do things differently if I built another.
The crossheads are cast brass. Very clean too. You solder a brass piece to the back of each to finish them. This traps the rod so some tidy soldering is needed. I cheat a bit and coat anything I don’t want soldered with permanent pen. Solder hates dirt and this keeps it away from problem areas – mostly.
This whole arrangement is very fine. Although it is stronger than it appears I’ll still be glad once it’s firmly fixed to a locomotive.
Friday, November 03, 2006
McDonalds - the model makers friend
I was picking up my McDonalds order the other day when I stopped off at the straw and napkin stand for, well a straw and a napkin. On the stand was a pot of wooden coffee stirrers. The fast food chain has decided to challenge the Starbucks market and you do so need to swash the contents of your batte latte matte around a bit.
Anyway, I’ve seen these before and they are a useful part of my modelling toolkit.
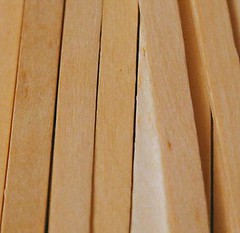
The first option is to see them as a source of raw material. The wood is close grained and suprisingly good quality. By splitting the stick down the centre along its length you get two nice 4mm scale planks. After a light sand the results are great for loading wagons. There are a couple running around my hospital layout like this.
The second use is in holding bits of brass while soldering. Lolly sticks and wooden chip forks are also good for this. Once the bit of wood gets charred, chuck it away and use another. They last for a very long while. I often push one end of the stick against the board and stuff the brass bit under the other. This keeps my delicate pinkies safe from the nasty heat.
If you can’t face a trip to the golden arches, Weatherspoons pubs and some coffee shop chains also offer these so help yourself !
Anyway, I’ve seen these before and they are a useful part of my modelling toolkit.
The first option is to see them as a source of raw material. The wood is close grained and suprisingly good quality. By splitting the stick down the centre along its length you get two nice 4mm scale planks. After a light sand the results are great for loading wagons. There are a couple running around my hospital layout like this.
The second use is in holding bits of brass while soldering. Lolly sticks and wooden chip forks are also good for this. Once the bit of wood gets charred, chuck it away and use another. They last for a very long while. I often push one end of the stick against the board and stuff the brass bit under the other. This keeps my delicate pinkies safe from the nasty heat.
If you can’t face a trip to the golden arches, Weatherspoons pubs and some coffee shop chains also offer these so help yourself !
Tuesday, October 31, 2006
Cleaning out the tank
Looking at the stats on visitors to this blog, most people arrive from my main web page or from one of the descriptions of the layouts I have built. As such you are probably hoping to read about some model railway work I’m carrying out.
Well I have to disappoint you. Currently I’m still working on the fuel tank from my VW Camper van. So far I’ve taken it out of the vehicle and have been pouring treatments into it in an effort to remove all the muck in the bottom.
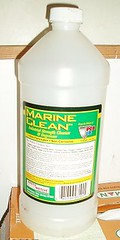
The first stage of the process involves “Marine Clean”, a high powered degreaser. It’s so powerful that the bottle in the picture has to be diluted 5:1 with water. The results on the tank contents appear impressive. On the first washing (half a bottle) a load of rust coloured muck poured out. The second gave more but not as much. A screwdriver scraped along the inside of the tank brings back no lumps of crud.
Now a regular task when kit-building is to clean the grease off a model before painting. I wonder if this stuff would be any good ? There is a little left in the bottle for me to find out, so where is that mineral engine kit ?
Well I have to disappoint you. Currently I’m still working on the fuel tank from my VW Camper van. So far I’ve taken it out of the vehicle and have been pouring treatments into it in an effort to remove all the muck in the bottom.
The first stage of the process involves “Marine Clean”, a high powered degreaser. It’s so powerful that the bottle in the picture has to be diluted 5:1 with water. The results on the tank contents appear impressive. On the first washing (half a bottle) a load of rust coloured muck poured out. The second gave more but not as much. A screwdriver scraped along the inside of the tank brings back no lumps of crud.
Now a regular task when kit-building is to clean the grease off a model before painting. I wonder if this stuff would be any good ? There is a little left in the bottle for me to find out, so where is that mineral engine kit ?
Sunday, October 29, 2006
Trial and error
This afternoon I spent some time learning to weld. My method was to try and close up the holes in some tinware from the van and grind the welds flat. Then discover that I had made the holes bigger in some places and try to close them up again. Repeat until madness arrives.
To be fair I learned a lot. Having been on a proper course it is really time to put the lessons into practice. At the college the machine is pretty much set up for you. The material you play with is thick and you are only doing fairly simple joints.
I have to set my machine up and work on thin metal. Of course I’m not joining to bits, I want to try and build up my weld pool to fill a rust hole. This is like trying to ice a cake with molten metal. Not being able to see anything properly doesn’t help. I need a strong light so I can see the work piece through the welding mask – or I’ll continue to miss the bit I want to fill and blow a hole in something else.
After two and a half hours of messing around and frustration I thought I had it. My weld pools were getting better. I learned to use the green gloves not the red ones as they gave me better control over the trigger on the welder. I learned that the contact the earth makes with the metal is vital and can be disrupted by a bit of rust or dirt. I tried different settings and made holes when I shouldn’t have. I fiddled with the wire tension and speed. I heard the sound of a good weld crackle and the spit of a duff weld as well.
I had to give up through lack of light. Not inside on the bench but outside where I was grinding the welds flat. Through sheer laziness I hadn’t installed a light outside so when the daylight disappeared I was grinding in the dark. A lead lamp helped but only to make me over confident. So over confident I ground right though the metal I was welding back in.
I learned about grinding today.
To be fair I learned a lot. Having been on a proper course it is really time to put the lessons into practice. At the college the machine is pretty much set up for you. The material you play with is thick and you are only doing fairly simple joints.
I have to set my machine up and work on thin metal. Of course I’m not joining to bits, I want to try and build up my weld pool to fill a rust hole. This is like trying to ice a cake with molten metal. Not being able to see anything properly doesn’t help. I need a strong light so I can see the work piece through the welding mask – or I’ll continue to miss the bit I want to fill and blow a hole in something else.
After two and a half hours of messing around and frustration I thought I had it. My weld pools were getting better. I learned to use the green gloves not the red ones as they gave me better control over the trigger on the welder. I learned that the contact the earth makes with the metal is vital and can be disrupted by a bit of rust or dirt. I tried different settings and made holes when I shouldn’t have. I fiddled with the wire tension and speed. I heard the sound of a good weld crackle and the spit of a duff weld as well.
I had to give up through lack of light. Not inside on the bench but outside where I was grinding the welds flat. Through sheer laziness I hadn’t installed a light outside so when the daylight disappeared I was grinding in the dark. A lead lamp helped but only to make me over confident. So over confident I ground right though the metal I was welding back in.
I learned about grinding today.
Saturday, October 28, 2006
Petrol tank out
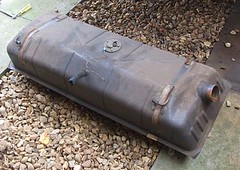
This is what a Volkswagen Type 2 petrol tank looks like after it has been hauled out of a 1971 camper van.
It’s not as big as I thought it would be. Not sure why, but I expected something at least twice this size. Stupid really as there isn’t the space for anything larger.
Anyway, apart from having to stop work to buy a deep 13mm socket to remove the retaining straps, everything went pretty well. The bolts and screws undid OK with only a little effort. Of course the tank has been out in the last eighteen months for a new fuel gauge sender to be fitted so this isn’t that much of a surprise – except to anyone who has ever worked on an old car and knows from painful (!) experience how fast a bolt can decide it wants to stick in a hole.
In the bottom of the tank is a nice thick layer of sludge made up of muck and rust. The top of the inside looks clean though. I’ve got some POR Marine clean soaking the sludge away at present. Two treatments each lasting 24 hours are proscribed on the side of the bottle so that’s what it gets. I only plan to do this job once so I will break the habit of a lifetime and do what I’m told by the labels.
I have found more rust to deal with in the tank compartment. Looks like I need to get aquainted with the welding kit to sort this out. The whole job is suffering mission creep as I add to the “to do” list all the time. I know this is what happens with old vehicles and I know that if I do a proper job I’ll be much happier. Doesn’t mean I wouldn’t love to have just one job go quicker and easier than expected.
Oh yes. My plans to re-paint the outside of the tank have stumbled as well. It’s dark grey (“Tank grey” to Humbrol paint fans…) not gloss black. Still, I’m sure I’ll find another use for the paint I bought !
It’s not as big as I thought it would be. Not sure why, but I expected something at least twice this size. Stupid really as there isn’t the space for anything larger.
Anyway, apart from having to stop work to buy a deep 13mm socket to remove the retaining straps, everything went pretty well. The bolts and screws undid OK with only a little effort. Of course the tank has been out in the last eighteen months for a new fuel gauge sender to be fitted so this isn’t that much of a surprise – except to anyone who has ever worked on an old car and knows from painful (!) experience how fast a bolt can decide it wants to stick in a hole.
In the bottom of the tank is a nice thick layer of sludge made up of muck and rust. The top of the inside looks clean though. I’ve got some POR Marine clean soaking the sludge away at present. Two treatments each lasting 24 hours are proscribed on the side of the bottle so that’s what it gets. I only plan to do this job once so I will break the habit of a lifetime and do what I’m told by the labels.
I have found more rust to deal with in the tank compartment. Looks like I need to get aquainted with the welding kit to sort this out. The whole job is suffering mission creep as I add to the “to do” list all the time. I know this is what happens with old vehicles and I know that if I do a proper job I’ll be much happier. Doesn’t mean I wouldn’t love to have just one job go quicker and easier than expected.
Oh yes. My plans to re-paint the outside of the tank have stumbled as well. It’s dark grey (“Tank grey” to Humbrol paint fans…) not gloss black. Still, I’m sure I’ll find another use for the paint I bought !
Friday, October 27, 2006
Petrol tank treatment stage 1 - Engine out
Time to pull my finger out and treat the rust in the fuel tank in my VW Camper. The usual plan is to use a product from POR in the USA to treat and then seal the inside of the tank which will stop it rusting and let me travel without stopping to change the fuel filter every thirty miles.
Stage one is to get the engine out of the way. I’ve never done this myself so have had to pay to get the work done. Because I’m on good terms with the guy who does mechanicals (& welding) for me, I’ve had the engine dropped on the drive. This allows me to work on the petrol tank at my own pace.
Engine removal isn’t too painful. If I had a suitable trolley jack I’d be able to do it myself I’m sure but as I don’t, I can’t. I do get to help which is always interesting and educational.
For now I have a mid-engined van. Admittedly this isn’t going to give the performance and handling you normally expect from this sort of vehicle, what with it siting where the cooker is supposed to be and not actually attached to anything.
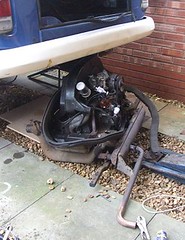
Stage one is to get the engine out of the way. I’ve never done this myself so have had to pay to get the work done. Because I’m on good terms with the guy who does mechanicals (& welding) for me, I’ve had the engine dropped on the drive. This allows me to work on the petrol tank at my own pace.
Engine removal isn’t too painful. If I had a suitable trolley jack I’d be able to do it myself I’m sure but as I don’t, I can’t. I do get to help which is always interesting and educational.
For now I have a mid-engined van. Admittedly this isn’t going to give the performance and handling you normally expect from this sort of vehicle, what with it siting where the cooker is supposed to be and not actually attached to anything.
Tuesday, October 24, 2006
Armstrong Whitworth Diesel Shunter
What a handsome beast eh ?
This is the first finished model Armstrong Whitworth locomotive from the Mercian Models kit. Apparently she was called “Alice”.
Built and painted this is an impressive model. If I worked in 016.5 I would be sorely tempted. I know that there was (apparently) only one built but it looks like a very typical diesel shunter. At the head of a train of hoppers of other metal wagons the locomotives strong, purposeful shape would fit in fine.
Preserved railways often have something like this for shunting, works trains and when they can’t be bothered to steam a chuff chuff.
This isn’t a difficult kits to assemble. It’s etched in nickel silver – always a plus because it solders so much better than brass. There is a bit of forming to carry out on the bonnet but this isn’t too bad and can’t really be avoided on this sort of loco. Apart from the issue with the buffer holes (this is going to be fixed) then there isn’t anything wrong. There is plenty of space for a motor & gearbox. I would recommend a two stage unit as the model demands a very low top speed. Event with a flywheel fitted as well there would be loads of space for lead in that bonnet.
Best of all I’ve knocked off another of those projects from my list.
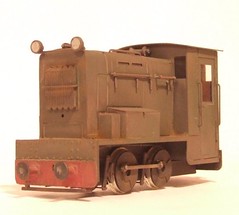
This is the first finished model Armstrong Whitworth locomotive from the Mercian Models kit. Apparently she was called “Alice”.
Built and painted this is an impressive model. If I worked in 016.5 I would be sorely tempted. I know that there was (apparently) only one built but it looks like a very typical diesel shunter. At the head of a train of hoppers of other metal wagons the locomotives strong, purposeful shape would fit in fine.
Preserved railways often have something like this for shunting, works trains and when they can’t be bothered to steam a chuff chuff.
This isn’t a difficult kits to assemble. It’s etched in nickel silver – always a plus because it solders so much better than brass. There is a bit of forming to carry out on the bonnet but this isn’t too bad and can’t really be avoided on this sort of loco. Apart from the issue with the buffer holes (this is going to be fixed) then there isn’t anything wrong. There is plenty of space for a motor & gearbox. I would recommend a two stage unit as the model demands a very low top speed. Event with a flywheel fitted as well there would be loads of space for lead in that bonnet.
Best of all I’ve knocked off another of those projects from my list.
Monday, October 23, 2006
Fiddly Bits
Grand Prix races are good for something. Being dull most of the time you can get things done while watching them. The Brazilian race gave me the chance to fit the fiddly bits in the cab of my mineral locomotive.
This was a challenge but a good one. Each lost wax cast brass part has to be removed from its sprue, doing my cutters no good at all, and then drilled for the bits of wire to be attached to it. The instructions give different wire sizes but as they vary by less than .3mm I just used the .5mm wire for them all. Well except for the .3 stuff, which I ignore entirely.
One drilled, tinned brass wire is inserted into the indentation (I can’t call it a hole as the brass is too hard to drill very far) and lightly soldered. Suprisingly this works very well as long as plenty of flux is used. I cleaned the joins up a bit with a file but not much. Far harder was getting the wire in at the correct angle – I had to remake several joins as the pipe exited the fitting at an odd angle.
The results are everything a Victorian railway locomotive should be. Overly ornate with too much pipework on display. Lovely.
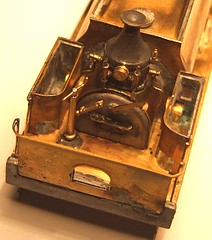
This was a challenge but a good one. Each lost wax cast brass part has to be removed from its sprue, doing my cutters no good at all, and then drilled for the bits of wire to be attached to it. The instructions give different wire sizes but as they vary by less than .3mm I just used the .5mm wire for them all. Well except for the .3 stuff, which I ignore entirely.
One drilled, tinned brass wire is inserted into the indentation (I can’t call it a hole as the brass is too hard to drill very far) and lightly soldered. Suprisingly this works very well as long as plenty of flux is used. I cleaned the joins up a bit with a file but not much. Far harder was getting the wire in at the correct angle – I had to remake several joins as the pipe exited the fitting at an odd angle.
The results are everything a Victorian railway locomotive should be. Overly ornate with too much pipework on display. Lovely.
Sunday, October 22, 2006
Grot
Some models need to be dirty. The diesel I’m finishing is definitely a case in point. After airbrushing with satin green the locomotive looked flat and uninteresting. Dry brushing with a lighter green helped but with a light dusting of dirt it comes alive.
Weathering is easy with an airbrush. Mix a weak rust/dark brown paint up and spray it lightly all over the body. Go over the lower areas a bit more to deapen the effect. Dry with a hair dryer and take a look to see if a bit more muck is in order. One happy, repeat with a dark grey/brown mix.
I experimented with holding the spray further away from the model than recommended. This allows the paint droplets to dry slightly before impact and imparts a fine texture – just like real dirt has – to the paint.
A little dry-brushing in selected areas and the body will be finished. Now I just need to do the same with the chassis.
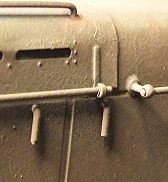
Weathering is easy with an airbrush. Mix a weak rust/dark brown paint up and spray it lightly all over the body. Go over the lower areas a bit more to deapen the effect. Dry with a hair dryer and take a look to see if a bit more muck is in order. One happy, repeat with a dark grey/brown mix.
I experimented with holding the spray further away from the model than recommended. This allows the paint droplets to dry slightly before impact and imparts a fine texture – just like real dirt has – to the paint.
A little dry-brushing in selected areas and the body will be finished. Now I just need to do the same with the chassis.
Saturday, October 21, 2006
Little peg into a larger hole
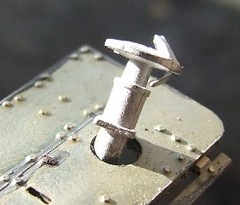
This is why kits have to be test built by idiots like me. As you can see the hole that the buffer is supposed to fit into is quite a bit larger than the shank. Actually it’s nearly larger than the buffer base (the square bit) that is supposed to sit on the buffer beam of this model locomotive.
Now as I’ve had a bit of practise at model making I managed, with only a little swearing, to fit the part with low-melt solder. The solder acts as both adhesive and filler in this instance and the result is not too bad.
Now I have to tell Trevor he needs to alter the etch. Still better to do this now than on the production batch.
Update: I think I know how this happened. If you look at the front and rear views on the plan there are circles for the buffer heads. I suspect that the designer managed to etch these instead of the correct size versions. Easy done and easy fixed.
Thursday, October 19, 2006
Old Instructions
Although this blog might suggest otherwise, I’m not the most prodigious of modellers. Some of the models I build take years to come to fruition. Most railway locomotives go back in their box two or three times during the build as I lose interest or just fancy doing something else for a while. It is a hobby after all – so if you want to change tack, do it.
The current project has scared me. It is a High Level Models mineral locomotive. I bought the kit on the strength of the article on Hellingly Hospital appearing in British Railway Modelling. Most of the cheque was used to fund the kit, something I think is only fair. Since the layout earned the money I should spend it in the layout.
High Level kits are superb. The parts fit together nicely and the instructions are second to none. For such small models they are very complicated to assemble but the process has been thought through and as long as you do what you are told, all will be well.
To keep my place I have been jotting down dates and ticking off stages so I know where I am. This is at least the third time this model has been on the bench. I wasn’t prepared for the date found on the paper which indicated the last time I’d done any work – it’s over a year ago !
Well, progress has been made. The rear buffer beam and cab sheet have been attached. Perhaps I might get a working model before the box beckons again. My incentive is a show in a few weeks with the Hospital where I could run the loco. Maybe I can squeeze a bit of time out of this weekend…
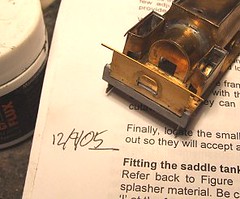
The current project has scared me. It is a High Level Models mineral locomotive. I bought the kit on the strength of the article on Hellingly Hospital appearing in British Railway Modelling. Most of the cheque was used to fund the kit, something I think is only fair. Since the layout earned the money I should spend it in the layout.
High Level kits are superb. The parts fit together nicely and the instructions are second to none. For such small models they are very complicated to assemble but the process has been thought through and as long as you do what you are told, all will be well.
To keep my place I have been jotting down dates and ticking off stages so I know where I am. This is at least the third time this model has been on the bench. I wasn’t prepared for the date found on the paper which indicated the last time I’d done any work – it’s over a year ago !
Well, progress has been made. The rear buffer beam and cab sheet have been attached. Perhaps I might get a working model before the box beckons again. My incentive is a show in a few weeks with the Hospital where I could run the loco. Maybe I can squeeze a bit of time out of this weekend…
Tuesday, October 17, 2006
Another one bites the dust
I forgot to mention another model railway project kicking around the workbench when I listed them a couple of days ago.
For months there has been a pair of On3 (I think; what we call O16.5) wagons built from kits awaiting couplings starring at me. I kept planning to get around to them but instead something got in the way. The wagons have had to be dusted a few times so they really would be better finished and in a box.
Last night I finally got on with it. The couplings fitted are Kadees which I was given by someone who fancied using them on his wartime layout and then decided they would be too much work. All I had to do was superglue them in the right spot under the buffer beam.
Kadees are notorious for being fiddly to fit. I think you are supposed to use gauges and stuff to get them right. I don’t have a gauge so I just checked they would couple with the loco (a Bachmann 0-4-2) and each other. Not sure if this will be good enough for curved track, but as they don’t have a layout nor any prospect of one in the near future, this isn’t going to worry me.
I was amazed at the engineering in such small and relatively cheap items. They are proper fully working knuckle couplings as fitted to American railways. Far more sophisticated than the traditional UK tension lock beast.
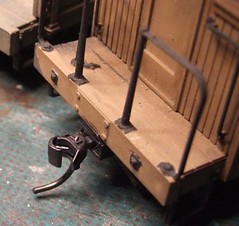
For months there has been a pair of On3 (I think; what we call O16.5) wagons built from kits awaiting couplings starring at me. I kept planning to get around to them but instead something got in the way. The wagons have had to be dusted a few times so they really would be better finished and in a box.
Last night I finally got on with it. The couplings fitted are Kadees which I was given by someone who fancied using them on his wartime layout and then decided they would be too much work. All I had to do was superglue them in the right spot under the buffer beam.
Kadees are notorious for being fiddly to fit. I think you are supposed to use gauges and stuff to get them right. I don’t have a gauge so I just checked they would couple with the loco (a Bachmann 0-4-2) and each other. Not sure if this will be good enough for curved track, but as they don’t have a layout nor any prospect of one in the near future, this isn’t going to worry me.
I was amazed at the engineering in such small and relatively cheap items. They are proper fully working knuckle couplings as fitted to American railways. Far more sophisticated than the traditional UK tension lock beast.
Monday, October 16, 2006
Fame at last !
I am the new Jeremy Clarkson. No, I’m not getting a perm and bucket load of right wing opinions. I have started writing about cars.
In the November 2006 issue of Volkswagen Camper & Commercial magazine, page 37 features my replacement of the thermostat in Ashley. Top quality pictures, well written prose. I can’t praise it highly enough.
Buy your copy today !

In the November 2006 issue of Volkswagen Camper & Commercial magazine, page 37 features my replacement of the thermostat in Ashley. Top quality pictures, well written prose. I can’t praise it highly enough.
Buy your copy today !
Sunday, October 15, 2006
An audience with greatness
Let me start by saying that this isn’t my model.
It is a beautiful example of the model engineers art. A part built Foden steam lorry on show at the Midlands Model Engineering Exhibition today. The chassis is superb. The woodwork for the body is absolutely amazing. It is cabinet making of the highest quality.
When I was a kid I always wondered why the model engineering section of the local festival was full of part built models that looked the same from one year to the next. There are only so many steam boilers you can look at before wanting to go back to the toy trains where things actually move. Why didn’t these guys get on with it and finish the models. It was explained to me that they took many years, often more years than I had been alive to complete, but it never sank in.
As a grown-up I can now appreciate the workmanship. To be honest the sight of a boiler without a machine around it still does nothing for me, but other objects are works of art. I have learned to appreciate workmanship for it’s own sake. Makes something properly and I can look in wonder.
The wood framing of the steam lorry amazes me. I don’t think I would ever be able to match the quality in my lifetime. But then I might also argue that as the frame will be covered when the model is complete, perhaps that fine finish isn’t really necessary ?
Of course the builder has gained enormous pleasure from the work and that alone justifies it. He probably looks at the doweled joints and smooth finish with that inner glow of satisfaction that you get from a job exceptionally well done. Doubtless the rest of the modelling will be carried out to the same high standard. I just hope I get to see the finished item. Sometimes bodgers like me need to come into contact with perfection to be inspired. Maybe next time I make something I’ll manage to raise my standards just a little.
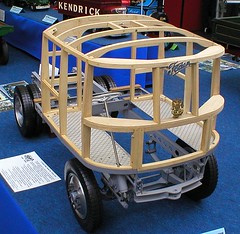
It is a beautiful example of the model engineers art. A part built Foden steam lorry on show at the Midlands Model Engineering Exhibition today. The chassis is superb. The woodwork for the body is absolutely amazing. It is cabinet making of the highest quality.
When I was a kid I always wondered why the model engineering section of the local festival was full of part built models that looked the same from one year to the next. There are only so many steam boilers you can look at before wanting to go back to the toy trains where things actually move. Why didn’t these guys get on with it and finish the models. It was explained to me that they took many years, often more years than I had been alive to complete, but it never sank in.
As a grown-up I can now appreciate the workmanship. To be honest the sight of a boiler without a machine around it still does nothing for me, but other objects are works of art. I have learned to appreciate workmanship for it’s own sake. Makes something properly and I can look in wonder.
The wood framing of the steam lorry amazes me. I don’t think I would ever be able to match the quality in my lifetime. But then I might also argue that as the frame will be covered when the model is complete, perhaps that fine finish isn’t really necessary ?
Of course the builder has gained enormous pleasure from the work and that alone justifies it. He probably looks at the doweled joints and smooth finish with that inner glow of satisfaction that you get from a job exceptionally well done. Doubtless the rest of the modelling will be carried out to the same high standard. I just hope I get to see the finished item. Sometimes bodgers like me need to come into contact with perfection to be inspired. Maybe next time I make something I’ll manage to raise my standards just a little.
Saturday, October 14, 2006
Wanted: Model boat captain
Today’s job is to try and move some projects on a bit. Ideally I want to finish one of them. With nothing special on, this doesn’t seem to be a hopeless cause.
The obvious choice was “Little Miss Minty”, my model launch. She was nearly complete with even the castings painted. A quick session with the superglue and all apart from the captain were fixed in place.
I then turned to the mechanical gubbins. This was a quick re-assembly of the parts I had taken out before spraying. I even fixed things down properly – OK, the receiver was velcroed into position !
With all this done the battery was charged and a trip to the lake arranged. It’s difficult not to be like a big kid in this situation and want to play with the new toy. The weather was nice and at this time of year that means an opportunity is to be grabbed.
On the water the boat worked fine. Engine noise was a problem, sometimes it was quiet, others there was a rattle. This was quickly traced to a wire from the speed controller touching the drive shaft, not everything is quite as fixed down as it needs to be.
The biggest problem was signal reception. Most of the time everything was fine but about three-quarters of the way through a u-turn everything went odd. The motor would stop and refuse to restart for a few seconds. Distance wasn’t an issue so it must be position. I moved the aerial wire from around the back edge of the hull but this didn’t help. Then I wrapped it around the centre bar leaving the end pointing up. This did the job so I know that I need to make this a bit more permanent than the current twisted wire and second hand masking tape arrangement.
Apart from this I’m happy. Just the captain to paint and fix in position to finish this one. I’ve even thrown away the leftover parts already !
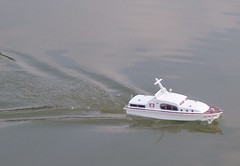
The obvious choice was “Little Miss Minty”, my model launch. She was nearly complete with even the castings painted. A quick session with the superglue and all apart from the captain were fixed in place.
I then turned to the mechanical gubbins. This was a quick re-assembly of the parts I had taken out before spraying. I even fixed things down properly – OK, the receiver was velcroed into position !
With all this done the battery was charged and a trip to the lake arranged. It’s difficult not to be like a big kid in this situation and want to play with the new toy. The weather was nice and at this time of year that means an opportunity is to be grabbed.
On the water the boat worked fine. Engine noise was a problem, sometimes it was quiet, others there was a rattle. This was quickly traced to a wire from the speed controller touching the drive shaft, not everything is quite as fixed down as it needs to be.
The biggest problem was signal reception. Most of the time everything was fine but about three-quarters of the way through a u-turn everything went odd. The motor would stop and refuse to restart for a few seconds. Distance wasn’t an issue so it must be position. I moved the aerial wire from around the back edge of the hull but this didn’t help. Then I wrapped it around the centre bar leaving the end pointing up. This did the job so I know that I need to make this a bit more permanent than the current twisted wire and second hand masking tape arrangement.
Apart from this I’m happy. Just the captain to paint and fix in position to finish this one. I’ve even thrown away the leftover parts already !
Drowning in projects
 Sorry for the lack of posts this week. Too much work. The last thing I want to do sometimes is stare at a screen in the evening. Besides, I haven’t really done any model making either.
This is a pity because I am knee deep in projects crying out for my attentions. Getting half built model railway locomotives ready for a demonstration hasn’t helped this !
On the bench at present there is:
“Little Miss Minty” model boat.
Y7, one of the half finished locos.
An O gauge Midland 0-4-4 also half finished. More on this in later posts.
0-16.5 Armstrong Whitworth – This now has castings and can be finished, or at least it will be when all the casting are in my hand.
A 4mm scale mineral tank engine for the Hospital layout. This is going to show next month so I’d like the tank to be ready at least for testing. I’ve said that before though.
Pigeon Pie is nearly finished, just a few castings and a bit of detail to add.
And then there is a GWR tender loco in EM in the queue which I’d really like to get stuck into.
I wonder if I could retire 30 years early to do all this stuff ?

Thursday, October 12, 2006
Wrong
Ignore part of that last post. If you stick the clear plastic into the window with plastic glue, once it dries it falls out again. User superglue like any sensible person trying to afix plastic to painted plastic and resin.
On a positive note, the clear plastic from the collars on Burton's shirts is wonderful glazing material and so much more ecological than throwing it away !
On a positive note, the clear plastic from the collars on Burton's shirts is wonderful glazing material and so much more ecological than throwing it away !
Tuesday, October 10, 2006
Glazing
 Model boats mean water and that means it’s not a clever idea to sail without some glazing in the windows. With windows the size of the ones in my new launch it’s a job I have to do. Now it’s painted I can’t put the job off.
When the windows went in I cut the holes big enough to allow me to stick the clear plastic to the back of the resin frames. It’s not that accurate but good enough for my dodgy workmanship. To get the size the material was placed over the whole and marked with new favourite tool, the CD marker pen.
A quick trim with a pair of scissors and I could stick it in place. Superglue seemed the best bet applied on the end of a small screwdriver but plastic glue worked as well.
Sunday, October 08, 2006
Workbench on tour
The workbench spent today at an exhibition. Literally this time, as I was demonstrating and had a to a work area with me !
The show was the Heathcote Modeller exhibition just off the M1 (the oppose way to Loughborough) at Shepshed. This is a really an O gauge model railway event, but others are catered for. On the Saturday there is a lot of trade. On Sunday some of these don’t come in and are replaced by demonstrators. I’d been invited to attend by Mercian Models and ended up next to Trevor’s stand.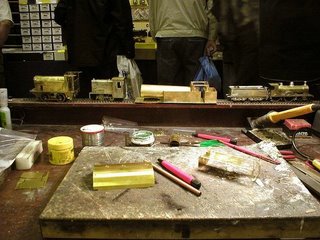
As it turns out this was very convenient. The first couple of jobs I did were building saddle tanks for locomotives in the range. A bit fiddly for me but quite worrying to the novice builder, hence they took the chance to get me to do the hard work. The first, a Peckett went pretty well and was assembled quickly. I managed to crease the metal in an ill advised attempt to put one of the bends in sharper than it needed but I was able to smooth this out enough not to show under paint. The owner was happy anyway.
The second tank was for a Barclay. These are a pig of a job as there are several fairly sharp bends and a tuck under at the bottom. The former that the tank top bends around has a fault as well – it’s about 1mm too long. I moved this and then gingerly tacked the metal in place. All looked OK except for the bottom. At the front and back it bulged. Normally I am confident I can bodge this away and cover the result with paint. It’s not quite so much fun doing this with people watching and knowing that you will hand it over in the brass. However there was no choice so I proceeded to fill with solder and file away while pretending that this is normal kitbuilding activity. I suppose it is really but don’t tell anyone.
The result was good and another happy punter. A bit nerve wracking as I didn’t really want to wreck someone else’s kit !
The show was the Heathcote Modeller exhibition just off the M1 (the oppose way to Loughborough) at Shepshed. This is a really an O gauge model railway event, but others are catered for. On the Saturday there is a lot of trade. On Sunday some of these don’t come in and are replaced by demonstrators. I’d been invited to attend by Mercian Models and ended up next to Trevor’s stand.
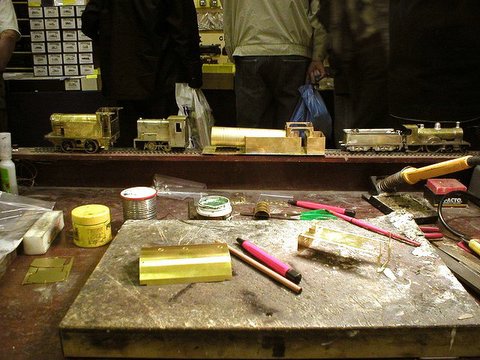
As it turns out this was very convenient. The first couple of jobs I did were building saddle tanks for locomotives in the range. A bit fiddly for me but quite worrying to the novice builder, hence they took the chance to get me to do the hard work. The first, a Peckett went pretty well and was assembled quickly. I managed to crease the metal in an ill advised attempt to put one of the bends in sharper than it needed but I was able to smooth this out enough not to show under paint. The owner was happy anyway.
The second tank was for a Barclay. These are a pig of a job as there are several fairly sharp bends and a tuck under at the bottom. The former that the tank top bends around has a fault as well – it’s about 1mm too long. I moved this and then gingerly tacked the metal in place. All looked OK except for the bottom. At the front and back it bulged. Normally I am confident I can bodge this away and cover the result with paint. It’s not quite so much fun doing this with people watching and knowing that you will hand it over in the brass. However there was no choice so I proceeded to fill with solder and file away while pretending that this is normal kitbuilding activity. I suppose it is really but don’t tell anyone.
The result was good and another happy punter. A bit nerve wracking as I didn’t really want to wreck someone else’s kit !
Thursday, October 05, 2006
Body beautiful
More soldering and I have a locomotive body. Thanks to tab and slot construction assembly is quick and reasonably easy. Even the boiler was a cinch as it’s pre-rolled. With the side tanks in place it sits on fold out ledges. All the parts are the right size and shape – not a given with many kits.
Purists will note that the front buffer beam is in the wrong place. It should overlap the footplate by the height of the valve covers. I fixed this after the picture was taken. Perhaps a little less haste would have been a good idea.
No singed fingers so far though.
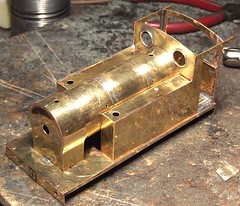
Purists will note that the front buffer beam is in the wrong place. It should overlap the footplate by the height of the valve covers. I fixed this after the picture was taken. Perhaps a little less haste would have been a good idea.
No singed fingers so far though.
Wednesday, October 04, 2006
Fast work
I need a half built model railway locomotive in a hurry.
The reason ? I’m demonstrating somewhere on Sunday and it helps the demo if you have a few part built kits on the modelling board. Of course I don’t actually have anything suitable kicking around, especially in 7mm scale so half a day last weekend was devoted to sticking some bits together.
Out of the maturing cupboard came an etched brass kit for an LNER Y7 from Conneseiur (Sorry, can’t spell it and the box is upstairs) Models. A nice simple locomotive that I bought years ago when I fancied building an O gauge layout. I’ve built 3 & 4mm scale versions, so why not get the set ?
The chassis is a simple fold up affair, which took very little time to reach the stage I photographed. The 50W soldering iron was a help here as there is a pretty large mass of metal to soak the heat away from the joins. Powerflow Flux was useful too. It’s nasty stuff that takes a lot of scrubbing to remove but it makes that solder flow. I even managed to get it around the axle bearings properly, not my usual blobby effect.
All soldering was carried out with the chassis upside down on a sheet of glass to keep things flat. It sort of worked but I still had to twist it a little with my fingers. That’s not a trick that you see in proper modelling instructions but it works. Just a gentle twist though, or you end up with a brass corkscrew.
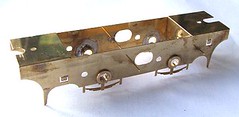
The reason ? I’m demonstrating somewhere on Sunday and it helps the demo if you have a few part built kits on the modelling board. Of course I don’t actually have anything suitable kicking around, especially in 7mm scale so half a day last weekend was devoted to sticking some bits together.
Out of the maturing cupboard came an etched brass kit for an LNER Y7 from Conneseiur (Sorry, can’t spell it and the box is upstairs) Models. A nice simple locomotive that I bought years ago when I fancied building an O gauge layout. I’ve built 3 & 4mm scale versions, so why not get the set ?
The chassis is a simple fold up affair, which took very little time to reach the stage I photographed. The 50W soldering iron was a help here as there is a pretty large mass of metal to soak the heat away from the joins. Powerflow Flux was useful too. It’s nasty stuff that takes a lot of scrubbing to remove but it makes that solder flow. I even managed to get it around the axle bearings properly, not my usual blobby effect.
All soldering was carried out with the chassis upside down on a sheet of glass to keep things flat. It sort of worked but I still had to twist it a little with my fingers. That’s not a trick that you see in proper modelling instructions but it works. Just a gentle twist though, or you end up with a brass corkscrew.
Monday, October 02, 2006
Name that boat
Every boat needs a name. I’ve used vinyl letters before but on this launch I fancied something with a scripty font. Even if I could get this in pre-cut letters, I wouldn’t fancy applying them to a hull as getting nice level text would be a nightmare. It’s one of those jobs that even if it’s slightly wrong, will stand out like a sore thumb.
Since I have used a system that allows production of waterslide transfers from a computer printer for adverts on model building walls, I thought this would be worth a whirl here.
Printing the sheet took a bit of work. The first go went all blotchy but my second attempt was good even if I did print the wrong side of the sheet first. Not sure how this happened as I’m sure I put it in the right way up. The text was laid out in a DTP package (PagePlus) and took only a few minutes.
The hull needed to be painted with gloss so the transfers would sit properly. There was going to be a lot of transfer film showing and this was my best bet of hiding it. Unfortunately even this didn’t really help as you can still see the edges. I think the ink ran a little as well and highlighted the edges.
The effect is pleasing with nothing untoward visible from normal viewing distances. If you can see any problem you have got wet feet !
A few coats of gloss varnish will hopefully keep everything in place. I don’t want them washing off the first time I sail !
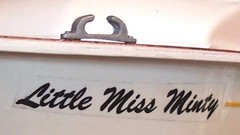
Since I have used a system that allows production of waterslide transfers from a computer printer for adverts on model building walls, I thought this would be worth a whirl here.
Printing the sheet took a bit of work. The first go went all blotchy but my second attempt was good even if I did print the wrong side of the sheet first. Not sure how this happened as I’m sure I put it in the right way up. The text was laid out in a DTP package (PagePlus) and took only a few minutes.
The hull needed to be painted with gloss so the transfers would sit properly. There was going to be a lot of transfer film showing and this was my best bet of hiding it. Unfortunately even this didn’t really help as you can still see the edges. I think the ink ran a little as well and highlighted the edges.
The effect is pleasing with nothing untoward visible from normal viewing distances. If you can see any problem you have got wet feet !
A few coats of gloss varnish will hopefully keep everything in place. I don’t want them washing off the first time I sail !
Sunday, October 01, 2006
Fixing Richard's bracket
The guy who sits next to me at work said, “You’ve got a welder haven’t you ? Could you fix a bracket on my bicycle lights ?”. I said I had (can’t hide it, I’d talked about the welding classes I took ages ago to the people in the office) and would be happy to look at the bit of bike to see what I could do. I pointed out that there were no promises, as I’d not actually used the machine yet.
What I got was a bent bracket with two cracks in the metal on the corner nearest you in the photograph. It looks like someone has tried to grab the light and twisted and split the metal. I fancied my chances so took the job on.
This morning I unearthed the welder from the depths of the garage and had a go.
My first mistake was setting the temperature too low. This resulted is hissing and spitting with lumpy weld left behind. It would probably do though so I cleaned the job up with a grinder. I wasn’t really happy with the result so I had another go. This was better but my lack of finesse with that most delicate of tools, the angle grinder had removed some good metal.
This time I upped the amperage a bit to the lowest medium setting and managed a much better result. Quite a good weld pool formed and the resulting lump was pretty smooth. I ground it down and then finished with hand tools to get the final result. Not perfect but definitely stronger than it was.
What I re-discovered was the joy of welding. I’d forgotten how much fun I had when I did my course. I also reminded myself how annoying welding masks are. Mine gradually lowers itself while you are getting ready to work and of course the window is so dark you can’t see where the torch is until you are welding. Them’s the breaks though – and if they are breaks in steel I can probably fix them !
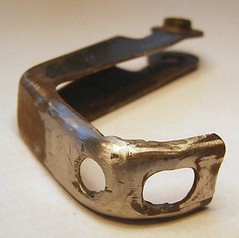
What I got was a bent bracket with two cracks in the metal on the corner nearest you in the photograph. It looks like someone has tried to grab the light and twisted and split the metal. I fancied my chances so took the job on.
This morning I unearthed the welder from the depths of the garage and had a go.
My first mistake was setting the temperature too low. This resulted is hissing and spitting with lumpy weld left behind. It would probably do though so I cleaned the job up with a grinder. I wasn’t really happy with the result so I had another go. This was better but my lack of finesse with that most delicate of tools, the angle grinder had removed some good metal.
This time I upped the amperage a bit to the lowest medium setting and managed a much better result. Quite a good weld pool formed and the resulting lump was pretty smooth. I ground it down and then finished with hand tools to get the final result. Not perfect but definitely stronger than it was.
What I re-discovered was the joy of welding. I’d forgotten how much fun I had when I did my course. I also reminded myself how annoying welding masks are. Mine gradually lowers itself while you are getting ready to work and of course the window is so dark you can’t see where the torch is until you are welding. Them’s the breaks though – and if they are breaks in steel I can probably fix them !
Reflections
How glossy is my boat desk ?
Several coats of varnish sprayed on the wooden deck really brings it alive. Someone has obviously been swabbing this properly !
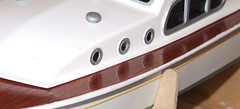
Several coats of varnish sprayed on the wooden deck really brings it alive. Someone has obviously been swabbing this properly !
Saturday, September 30, 2006
Pain free varnish (nearly)
Just for a change I have managed to spray something without a tale of woe.
By learning from my mistakes, the launch is gloss varnished with no runs and a pretty good finish. All I did was air brush paint on and then go in with a hair drier set to half speed. Thin coat. Hair drier. Thin coat. Hair drier. Repeat until the tinlet of varnish is empty.
Then put it out on the garden table to harden and fail to notice the rain.
No damage done but next time I’ll remember to but the ‘brolly up !
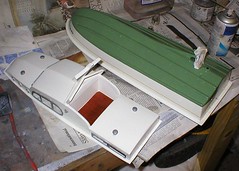
By learning from my mistakes, the launch is gloss varnished with no runs and a pretty good finish. All I did was air brush paint on and then go in with a hair drier set to half speed. Thin coat. Hair drier. Thin coat. Hair drier. Repeat until the tinlet of varnish is empty.
Then put it out on the garden table to harden and fail to notice the rain.
No damage done but next time I’ll remember to but the ‘brolly up !
Thursday, September 28, 2006
Who put that there ?
There is a railway modelling truism that when you are fitting point motors to a baseboard, the cross supports underneath will always be in the way of at least one motor. Don’t worry about planning to avoid this, the track plan will magically adjust itself to make your life difficult.
This isn’t supposed to happen with model boats. OK, the fish in the pond will get in the way and can even divert a small fast boat from its path, but generally they are mobile enough to move.
Get inside a boat though and the same problems start. On my launch I had to cut holes in the side for the windows. With that done I want to tidy up the inside a bit where it can be seen. There is a raised area inside to hold the superstructure in place and keep water out – there is probably a technical name for this but I don’t know what it is. This gets in the way of a clear view in.
My plan was to lower it where the windows are. To this end I drew around the inside of each window with my CD marker pen so I knew where to cut. Then I discovered that the crosspiece would have to be cut away as well. Who put that there ?!
So I’ve painted the bits next to the window black. No-one will notice them really…
This isn’t supposed to happen with model boats. OK, the fish in the pond will get in the way and can even divert a small fast boat from its path, but generally they are mobile enough to move.
Get inside a boat though and the same problems start. On my launch I had to cut holes in the side for the windows. With that done I want to tidy up the inside a bit where it can be seen. There is a raised area inside to hold the superstructure in place and keep water out – there is probably a technical name for this but I don’t know what it is. This gets in the way of a clear view in.
My plan was to lower it where the windows are. To this end I drew around the inside of each window with my CD marker pen so I knew where to cut. Then I discovered that the crosspiece would have to be cut away as well. Who put that there ?!
So I’ve painted the bits next to the window black. No-one will notice them really…
Tuesday, September 26, 2006
Decking
My boat is white and green and silver. Nicely painted colours but they don’t really grab you. What I need is to paint it red.
This would look stupid however so what I have done is incorporated some redish wood in the construction which is nearly as eye catching, but looks like a proper boat would.
The deck is covered with 1mm thick plywood bought some time ago, probably from a model aircraft shop (they use a lot of that sort of thing) on spec. I made a paper template first as it’s a pretty weird shape and I doubted my chances of getting it right first time. Using the template a deck was cut out of the ply in a single piece.
Plywood doesn’t look much like planks though. Even though most of the model boats fraternity seems to think that drawing some lines on it will make things better, I like to think (stand back, my ego is growing) that I can do things better.
My solutions, developed after several attempts on a bit of scrap wood, involved scribing the plank lines with the back of a scalpel. Then the same blade was dragged sideways down the grove to open it out.
A bit of light sanding made the wood ready for coloured (mahogany) varnish. The first coat looked a bit rubbish so I re-scribed and used a sharp pencil down each line to highlight the line. Another gentle sand in line with the grain and another coat of varnish did the job. You have to be careful that there isn’t dust or air bubbles in the varnish but I managed this by using modelling brush (size 4) to paint the varnish on instead of the proper decorating brush from the first attempt.
This would look stupid however so what I have done is incorporated some redish wood in the construction which is nearly as eye catching, but looks like a proper boat would.
The deck is covered with 1mm thick plywood bought some time ago, probably from a model aircraft shop (they use a lot of that sort of thing) on spec. I made a paper template first as it’s a pretty weird shape and I doubted my chances of getting it right first time. Using the template a deck was cut out of the ply in a single piece.
Plywood doesn’t look much like planks though. Even though most of the model boats fraternity seems to think that drawing some lines on it will make things better, I like to think (stand back, my ego is growing) that I can do things better.
My solutions, developed after several attempts on a bit of scrap wood, involved scribing the plank lines with the back of a scalpel. Then the same blade was dragged sideways down the grove to open it out.
A bit of light sanding made the wood ready for coloured (mahogany) varnish. The first coat looked a bit rubbish so I re-scribed and used a sharp pencil down each line to highlight the line. Another gentle sand in line with the grain and another coat of varnish did the job. You have to be careful that there isn’t dust or air bubbles in the varnish but I managed this by using modelling brush (size 4) to paint the varnish on instead of the proper decorating brush from the first attempt.
Sunday, September 24, 2006
Why is my boat upside down ?
It’s the last round of the Tomkat challenge. My model boat is ready and working. Batteries are charged. I can’t win, but at least I can have a race.
At the lake I do a single lap just to practise. Only one though as I don’t want to run the battery down – need to save all those amps for the race itself.
Heat 1: After a bit of messing around with the wind blowing boats about on the start line, we are off !
The Tomkat surges forward. Half way through the first lap I’m in the lead and running really well. At the end of the lap I’m ahead of everyone else and it looks like nothing can catch me.
Heading for the second corner I clip one of the other boats which is struggling and at right angles to the flow of traffic. This flips my boat over and the view is the one in the photo.
A quick-ish rescue with the rake and I return to the bench. The good news is the driver is still attached and not swimming with the fishes at the bottom of the pond. I play around with the controls, pour as much water out of the hull as I can and with a change of battery we seem to be working again. Not quick enough to get back in the race but I should be OK for the second heat.
The numbers are called for heat 2 so I check the boat again. Everything is fine. So I wander over to the water and launch gently. Then I try the controls. Nothing. Zitch. Zip. Dead as a Dodo that has been hit by a very large lorry and then run over by a steamroller.
So that is the story of my attempt at the Knightcote Model Boat club Tomkat challenge. About 70 quid spent, 15-20 hours painting and working on the boat. Several sessions fixing drive shafts and motors. All this for one-and-a-bit laps.
Somehow I don’t think I’m cut out for racing.
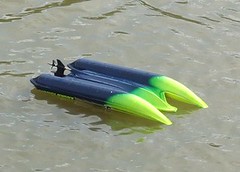
At the lake I do a single lap just to practise. Only one though as I don’t want to run the battery down – need to save all those amps for the race itself.
Heat 1: After a bit of messing around with the wind blowing boats about on the start line, we are off !
The Tomkat surges forward. Half way through the first lap I’m in the lead and running really well. At the end of the lap I’m ahead of everyone else and it looks like nothing can catch me.
Heading for the second corner I clip one of the other boats which is struggling and at right angles to the flow of traffic. This flips my boat over and the view is the one in the photo.
A quick-ish rescue with the rake and I return to the bench. The good news is the driver is still attached and not swimming with the fishes at the bottom of the pond. I play around with the controls, pour as much water out of the hull as I can and with a change of battery we seem to be working again. Not quick enough to get back in the race but I should be OK for the second heat.
The numbers are called for heat 2 so I check the boat again. Everything is fine. So I wander over to the water and launch gently. Then I try the controls. Nothing. Zitch. Zip. Dead as a Dodo that has been hit by a very large lorry and then run over by a steamroller.
So that is the story of my attempt at the Knightcote Model Boat club Tomkat challenge. About 70 quid spent, 15-20 hours painting and working on the boat. Several sessions fixing drive shafts and motors. All this for one-and-a-bit laps.
Somehow I don’t think I’m cut out for racing.
Saturday, September 23, 2006
Spray away
So here is the plan. Instead of using stickers to put the name on the boat, I will print some waterslide transfers using a transfer making kit. This means I can have a fancy scripty font and possibly some clever graphics as well. Obviously I will have to gloss varnish the hull but this isn’t a problem.
Transfers sit best on gloss paint as it’s smoother than matt. So I need to paint the hull with gloss white. This needs to be sprayed to get the quality of finish.
So today and yesterday evening I have mostly been hating trying to get a good finish with the airbrush. I have learned several things:
Sometimes I wonder why I do this.
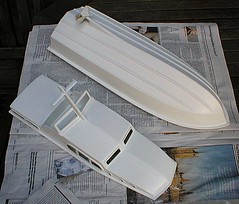
Transfers sit best on gloss paint as it’s smoother than matt. So I need to paint the hull with gloss white. This needs to be sprayed to get the quality of finish.
So today and yesterday evening I have mostly been hating trying to get a good finish with the airbrush. I have learned several things:
- Do not use old paint. Even stirring it doesn’t get rid of the skin. This then finds its way into the innards of the airbrush and blocks it up. The stuff is a pig to remove as well.
- Dry the paint as soon as it is on the model. Otherwise you get runs. I have learned this before but keep forgetting.
- Tidying up runs is a nightmare. Lots of sanding and hoping.
- I do not have enough patience to paint with gloss. It takes far too long to dry. Stupid paint.
Sometimes I wonder why I do this.
Friday, September 22, 2006
We are sailing
At last – a proper sail !
Yes my new model boat has been on the water and moved around under its own steam (OK, electricity) for more than 10 feet without breaking down. It sailed away from the launch area, circled a few buoys and then came back.
Of course things weren’t perfect. If you going to go for a sail it’s a good idea to charge the battery in the boat properly first instead of relying on the charge that has been in it for a couple of months and made a couple of abortive trips around the boating lake. The speed control spots the lack of charge and stops everything. It restarts a few seconds later to give the eager boater the change to get it within sight of the shore but of course I ignored several warnings like this. Still managed to sail back with no assistance from the various retrieval poles stacked against the clubhouse though.
The thing that really pleased me was how the model looked on the water. Previous sailing’s have taken place with just the basic superstructure. Now I’ve knocked holes in the sides for windows it’s looking pretty good. For a kit I was assembling quickly to give an easy-to-carry model, I think I’m now going to own a very handsome boat.
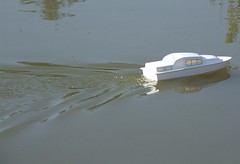
Yes my new model boat has been on the water and moved around under its own steam (OK, electricity) for more than 10 feet without breaking down. It sailed away from the launch area, circled a few buoys and then came back.
Of course things weren’t perfect. If you going to go for a sail it’s a good idea to charge the battery in the boat properly first instead of relying on the charge that has been in it for a couple of months and made a couple of abortive trips around the boating lake. The speed control spots the lack of charge and stops everything. It restarts a few seconds later to give the eager boater the change to get it within sight of the shore but of course I ignored several warnings like this. Still managed to sail back with no assistance from the various retrieval poles stacked against the clubhouse though.
The thing that really pleased me was how the model looked on the water. Previous sailing’s have taken place with just the basic superstructure. Now I’ve knocked holes in the sides for windows it’s looking pretty good. For a kit I was assembling quickly to give an easy-to-carry model, I think I’m now going to own a very handsome boat.
Subscribe to:
Posts (Atom)