Sunday, January 31, 2010

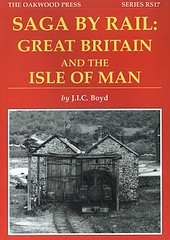
Book Review: Saga by rail: Great Britian and the Isle of Man by JIC Boyd

Saga by railEarlier this year I promised book reviews and here's the first one. Not just because I've not done much model making recently either !

During my lunch times at work I've been working my way through "Saga by Rail". Originally bought because of the magic words "Isle of Man" on the cover, it consists of lots of short chapters describing the authors travels looking exploring railways. Most are only 2 or 3 pages long plus copious black and white photographs which are very well printed. It's just the thing for dipping in for a few minutes in the middle of the day.

Boyd is one of the best known railway authors and no Manx fan's library is complete without his three volume set on the subject. My shelves are home to the early single volume as well, it was later expanded to make the trilogy. The story behind this is included as one of the "sagas" - basically the IOM Steam Railway hierarchy didn't want to co-operate despite being told to by those in charge so the first edition was rather shorter than planed.

The other subjects covered are pretty wide ranging. Lots of Ffestiniog of course but some pretty obscure lines make an appearance - the first chapter covers Snailbeach for example. Mind you, it does make you wonder about the author. The visit took place during 1941 on his honeymoon. You wonder what the new Mrs Boyd really thought when it was suggested !

I particularly like the Woodhead Reservoirs Tramway which had a steeple cab electric engine that looks very much like that found on the Hellingly line. All these electric locos looked very similar but there does appear to be a family resemblance. A later chapter on the Whittingham Hospital Railway makes me even happier !

The time period covered is late 30's to the end of the war. Much mention is made of petrol rationing limiting the authors travels along with complex and unrepeatable nowadays train journeys. The lines visited have mostly disappeared into history but Boyd writes about them as thought he only visited yesterday which makes for interesting and frustrating reading - how I'd love a time machine to go back and take a look.

Buy this book from Amazon

Saturday, January 30, 2010

Airfix club

The Parker household has had an obsession with collecting Airfix annuals for a while. Like most, it starts with a desire to obtain them from second hand bookshops and charity shops and like most (see also, James Bond books) it failed miserably. Since this is the 21st Century, despite the lack of flying cars or anything remotely Gerry Anderson, we do have eBay and of course it can deliver.

So, this week has seen the postman trotting up the drive with packages of books and very nice they are too. Mostly aimed at military modellers, there is still interest for others as the techniques for altering figures and road vehicles are very usable. There are pieces for railway fans but most are Michael Andress making bizarre modifications to the L&Y Pug kit to produce ever more unlikely locomotives, a theme he carried on for many articles in many different magazines.

Younger readers might be surprised that Airfix ever produced an annual and wonder why. They are probably confused by the photo at the top of this entry, so perhaps some background is in order.

The photo is Dick Emery, a comedian from the old days. I remember watching his shows as a kid but more importantly he was the president of the Airfix Modellers Club. Every week in my copy of Buster comic there was a page for the club and at the top was a smiling picture of Emery with some short piece encouraging us to get ourselves into a hobby with smelly glues and paint. This wasn't a random celebrity being bought in to add glamour to a hobby that was seen as nerdish either, Emery really was a modeller and believed in what he was doing. The series in the comic ran from May 1974 to March 1981. By the end I wonder how many kids saw the page as an anachronism in a world of ZX81's and Vic 20's ?

Anyway, Airfix published a magazine for model makers of all ages but predominately the older ones. It covered the who range of the hobby so you'd have articles on warships next to railways next to war gaming. The last issue appeared in 1993, quite an achievement as general modelling mags don't seem to have a happy history in the UK. Model Maker for example ran for about 10 issues in the late 1970's and that had the background of a more glittering run 20 years earlier.


The annuals which began in 1970 were a spin off from the mag and were basically more of the same between hard covers. Some attempts were made to produce specials - one of those packages this week was an annual for military modellers - but generally they had something for everyone or not enough for anyone, depending on your point of view.

The Airfix club still exists but it looks much more like a marketing tool nowadays in the same way that the Bachmann Collectors club and Hornby Collectors Club are. Of course it still has to deal with making things rather than just buying them and stashing the results (mind you there are loads of people who collect unbuilt plastic kits and hoard them) so there is advice on offer. I bet they don't have a page in comics though.

Friday, January 29, 2010

Wadborough LMS Platelayers hut

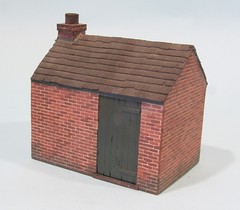
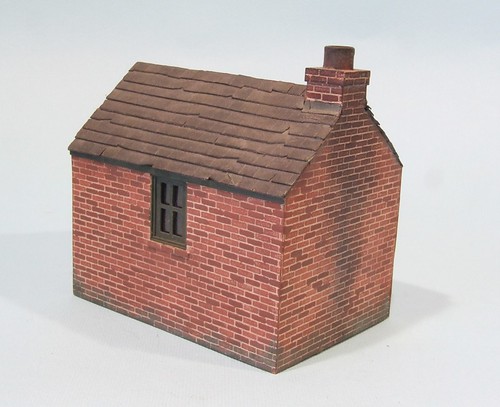
Wadborough LMS Hut frontI like this hut. I like it so much I've built it in 3 different scales over the years - 3,7 and 16mm to the foot. You are looking at the middle of of these. The original drawing is from the Ericplans book published by Peco back in 1971. Years ago I borrowed a copy from the model railway club library and photocopied everything interesting in case it would come in useful one day. Eventually I obtained my own copy but as it's long out of print (I think), it's not going anywhere near the workbench.

I built the model years ago with no particular use in mind for it. It lives in a box now and comes out for appearances on demo stands when I talk about card building construction. The only snag is that part of it is a mystery to me.

The basics are simple enough - the carcase is built from Daler board. It's covered in Howard Scenics embossed card which I carefully cut so it could wrap around the corners. The results are nice although I've not been converted from plasticard wall surfaces. The roof tiles are writing paper cut into strips. Even the lead flashing is paper. The window and door are more cardboard.

The big mystery is the painting - those bricks have come up very well and feature lovely clean mortar. My guess is that I dry-brushed the colours using Humbrol and then picked out individual bricks but I really can't remember. How I kept the gaps between bricks as paint free as they are is amazing, normally I'm hopeless with this and have to try and run thin paint into them but that's not an option with card which will soak the liquid up too quickly. Besides, that looks like unpainted card colour to me.

Perhaps this is why the blog is a good idea - I can just look back and remind myself. Everyone with a failing memory should have one !

Wadborough LMS Hut back

Thursday, January 28, 2010

Truro box

Truro boxSteve asked me for a favour. Would it be OK if he arranged for his model "City of Truro" from the NRM to be delivered to me. Then he'll send me the money and I'll post it on to him in Australia. Apparently the web site doesn't accept orders from outside the UK and that makes ordering a bit difficult.

Happy to oblige a fellow DOGA member I agreed and a couple of days ago, a box arrived at home.

Quite a box !

It's 30 by 33 by 46 cm

I had thought he was ordering a model. From the size of the packaging, I can only assume he in fact ticked the box to buy the real thing !

Wednesday, January 27, 2010

Cheese head screws - literally !

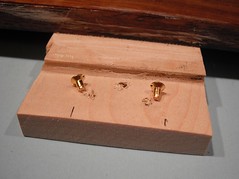
Broken screwsWhy do I do it ? From past experience I know that the screws that come in the packets with hinges and any other fixing are made of cheese. As soon as you try to screw them in, they break. Not straight away of course, no, you get then in up to the shank and then they break off.

Which is what happened when I tried to fit the hinges to my toolbox. And before you say it, yes I did make a pilot hole with a bradawl. The wood they are going in to is (I think) maple and therefore a bit harder than the normal pine the manufacturer probably expects his screws to be in.

Worse, I actually remembered this in the shop and brought proper screws. Brass ones admittedly but something less cheesy than these. They are still in the bag along with my brains when I started work it appears.

Something tells me that these aren't coming out so I'll have to move the hinge over, something there isn't a whole lot of space for. The holes left in the lid won't be pretty but at least they won't be too obvious either. Except to my tutor who will doubtless spot them.

Tuesday, January 26, 2010

Palette knife

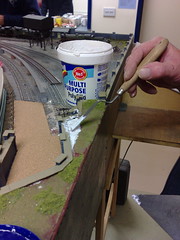
Palette knifeWho says railway modelling isn't art ?

Here we see a keen exponent of the hobby creating scenery using Polyfiller and a palette knife in a similar way to that employed by many artists for applying oil paints to canvas. Only the medium is different. And that we are making 3D and they were doing 2D.

For scenic work, the palette knife is a very handy tool. I used one to put the rock strata in the Flockburgh cliffs. For trowelling on plasters or other gloppy materials it really can be beaten.

You can buy these things from proper tool shops but far better to try the local art shop or even remaindered bookstore. The later often offer packs with several shapes for very little money. I think the one in the photo has been adapted by cutting it shorter than intended to give a flat point. At the price though this isn't a problem, just a few seconds with some big scissors or tin snips and it gets into the parts other palette knives cannot reach !

Monday, January 25, 2010

Peugeot mileometer repair

mileometer
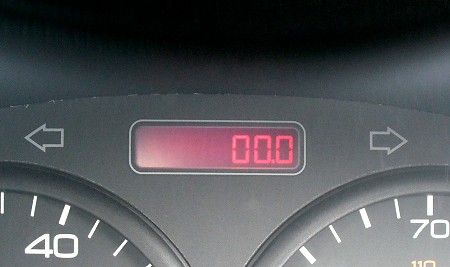
The mileometer (odometer for US readers) on my Peugeot stopped working, or at least that is how it appeared. Normally when the ignition is turned on, the thing lights up showing how many miles to go until the next service. Then the display changes to give you either total miles covered by the car or the trip mileage. In front of me the display was blank.

OK, you say, it's an old (10 years) car so you expect stuff to break. Live with it and shut up.

Well it's the youngest car I've ever owned and the MOT man expects to look at the total mileage later in the year, so it's not like this thing is a luxury. Besides, it's a fault and right in my face every time I drive. That makes me want to fix it.

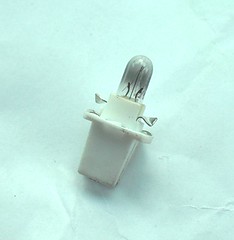
Time spent on Peugeot forums revealed that the LCD display doesn't work quite how I expected. The LCD bit acts like a mask and behind this is a bulb to show the display. If all is dark, shining a bright torch at an oblique angle reveals the numbers, just don't try this while driving !

So my guess (hope) wast that all I had was a duff bulb. A trip to Halfords later I had two internal bulbs which looked a bit big but according to the chart in the shop, would do. Back on the drive, I opened up Haynes and started work.

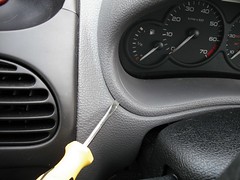
lever hereFirst job, prize off the plastic cover above the steering column. A flat bladed screwdriver inserted into the gap at the bottom left and right seems to work well. If you don't have a gap, push the plastic pod up a bit and you'll get enough space for the tool. A gentle tweak was enough to release it for me. If you struggle then something is wrong. I was surprised how easy it was to remove quite a big chunk of interior.

The book tells you to undo the negative side of the battery. I did and regretted it as the radio lost it's code and I'm now trying to work out what it is. A biro note in the manual isn't right so I'm searching the web for help on this. I think you will be OK because although you need to release the instruments for access, they can stay plugged in.

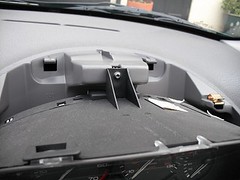
fixing boltAnyway, to get access to the back of the instruments, you unto the single star bolt at the top. T20 screwdriver I think for this. Then a little wiggle and it unclips.

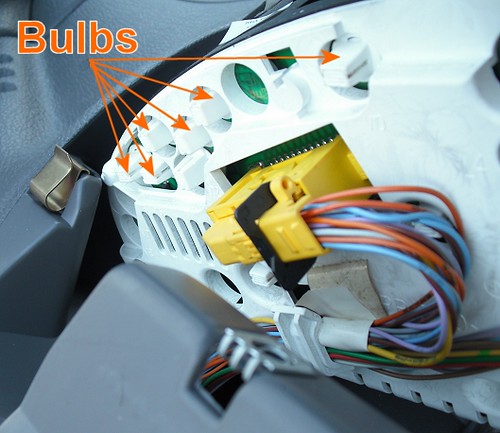
Crane your neck (a mirror is handy but not essential) around the back and the rear of the bulbs are revealed. Each can be removed by rotating 90 degrees with your fingers. The bulb and plastic casing will just fall out. At this point I discovered I had the wrong bulbs and had to put it all back together to go and get more.
bulbs
From the Halfords range, code number 509T will work. It's not perfect, the gap between the contacts on each side benefit from a tiny amount of squashing to close it up. This means the unit locks back positively onto the instruments. Without this they wobble - probably OK but it might flicker as you drive.

Reassembly is the reverse of the above. Clip the instruments in at the bottom and then the top. Do the bolt and test the car. Turn the ignition key to A and the mileometer should, if it's behaving like mine, light up. If that is OK, clip the pod back on and go and have a cup of tea. If not, twiddle the bulb in case you have a lose contact.

blownbulbGood luck.

Legal note: This is an accurate description of what I did. If you chose to follow these instructions and things don't work, it's not my fault. Sorry.

Sunday, January 24, 2010

LWMRS open day - with cake

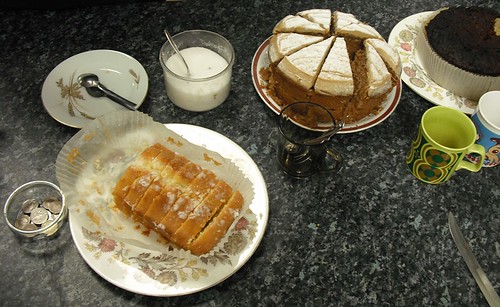
Cakes at the LWMRS open day
Yes cake. I know how popular pictures of food are on-line so here's a bit of bakery porn for you to salivate over. The cakes concerned were to be found on the tea bar of our model railway club yesterday.

Not for very long though - between 11 and 4 My colleague and I worked our way through 10 pints of milk and several gallons of tea satisfying the appetites of the 40 plus visitors other members were trying to persuade to join the club. Most people decided to sample the food too and very nice it was.

It's always fun to have these post show events. Since the club rooms are in the countryside, a few years ago the committee decided an event on the weekend was a better bet then the traditional Thursday evening. This is paying off as the numbers who turn up have been encouraging. However, turning a room full of people saying nice things about the premises and show into a room full of club members is still more of a challenge. People don't want or need to belong to clubs nowadays. Railway modelling has long been for many a solitary activity so the idea of meeting a group of other people is an alien one.

Personally I know joining a club was one of the best things I ever did for my model making. Simply spending time with other modellers on a regular basis helped me improve the quality of my work. We learned from each others mistakes and shared hints and tips. It's not like I've ever been big on helping out with club layouts either - I'm strictly a tea drinker and talker who makes use of the extensive club library facilities.

SatireBest of all though, club membership gave me the chance to get involved with the exhibition circuit. Initially this was helping operate other peoples layouts and then later, my own. You'll always find someone who needs extra manpower which means a door to the free weekends away standing in halls around the country making railway. Later I was roped in to help organise our show, something provided valuable experience that has helped me in proper paid jobs too.

Nowadays, teh interweb has persuaded people that they can have all the benefits of club membership for free just by hanging around on various forums. These have many advantages - you don't need to leave the comfort of your own home and meet real people. More importantly you don't actually have to do any modelling. Why waste time making things when you can just criticise others via your keyboard ? In a club if you don't occasionally come up with the goods people don't take you seriously. Hiding a behind a screen though, anyone can be the greatest model maker in the world...

So, if you live near a club, join it. Most do not try and press gang you into working on a layout as soon as you walk in the door. If they do then don't hang around long but do give them a chance. Railway modellers are often shy and it can take a few meetings before you get to know people. Just remember, this is the one place in the world where no-one will laugh at you for playing with "toy trains".

Saturday, January 23, 2010

Making the beam engine go

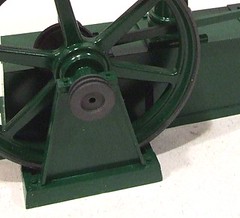
Beam engine close upAll the way from Denmark, Torben asks:

This Airfix beam engine kit, is it with electric powered. I think not ? I have this kit when I was a boy and that was with a batt. driven motor so it will work.

You are correct, my model isn't powered. When the kit was first released it was possible to buy the parts to make it work. Inside the base there are still mouldings that look like they should hold a battery but the instructions don't mention them.

To make the kit work would require some modelling skills but I don't think this ought to be that difficult. As you can see from the photo, the axle that runs though the flywheel has pulleys on the end. An elastic band around these and a similar (but much smaller) pulley on a motor, would drive the model very nicely.

The motor could be hidden in a plinth along with the battery and switch. The result would look lovely. Good luck if you decide to try it.

Friday, January 22, 2010

Working N gauge digger

Hat tip to Iain Robinson for this, an amazing piece of work by David K Smith. Iain actually picked up on a micro (in every sense) model railway, but I dug a bit deeper (all puns are intended) and found this - a working 1:160 scale digger.

What I really love is that I can see how this thing works. David's excellent and informative video shows you everything. In theory any of us could build something like this but in reality very few would have the skills required. You can't bodge in this scale, all the workmanship has to be of the highest order.

Oh, just watch the film. It's brill.

Thursday, January 21, 2010

Second sail

Second sailBack to the damper van - last time the model had received front and back extensions filled with polystyrene foam. I hoped this would provide enough buoyancy to keep it above the water.

Back in the test tank (basin) my hopes were dashed. While the van floated OK, the bow was just under water. Admittedly I had added a set of AA batteries but there is still a receiver and speed control to be fitted so this boat isn't going to get any lighter !

Water also found its way in through the grille. This isn't a big problem as I've not sealed this up yet, but you don't really want water anywhere inside a boat. On the plus side, it didn't sink, and the water ingress wasn't huge so the project is still worth pursuing.

So, the next move is to find some lighter batteries. Obviously 4 AA's are too heavy so a smaller pack will be required. There's a lot of choice here, I just need to find one. If all else fails a set of AAA's won't weigh as much. Power requirements won't be huge as this isn't a fast boat. I'm only after 6 volts as the electronic require a certain amount to work.

Wednesday, January 20, 2010

Drawer 'andles

andlesHow am I to open the drawers in my new wooden toolbox ?

The front flap fits against the drawer fronts precluding the use of a conventional handle. I looked long and hard for some flush fitting handles but it seems that these aren't available in small enough sizes to fit on the smallest drawer.

In desperation I purchased some D-shaped rings and split pins thinking I could recess the fronts and make handles out of these. I still have the hardware having decided that while the handle might work OK, it would look too spindly and insetting it into the front was a recipe for rubbish quality woodworking.

The magazine plan showed holes simply drilled in the front. I didn't fancy this for two reasons - the tools could fall out and poking a delicate pinky in to open the drawer would bring it into contact with all sorts of sharp things. Desperate times demand desperate measures though and I adapted the hole to make a single slot.

In theory the drawer contents are a little less likely to come out of a single opening. And the improved visibility will reduce the chances of hacking open fingers.

Best of all my cock-up with the wood cutting resulting in the small drawer being at the bottom is now exposed for the genius it really is. The lowest drawer doesn't need a handle as you can just pull the bottom. And since that's the most likely one to contain knives and other sharp items, the sticking plaster supply might stay at current levels for a while longer.

Tuesday, January 19, 2010

Flockburgh & Soldering in Hornby mag

Februarys Hornby Magazine sees the slightly delayed publication of the latest article on Flockburgh. The pictures are very nice and include shots of the scenic extension which haven't appeared in print before now. They also remind me that I haven't done much in the way of detailing in the year since they were taken !

Parker's Guide this month is a beginners guide to soldering. The intention is to persuade one or two newbies to have a go at a simple soldered joint. The intention is to move on from this to producing more items with hot metal construction, eventually ending up building a proper locomotive.

It's a difficult subject to know how to cover. I've erred on the simple side which perhaps leaves things a little light. Had I gone futher though with some more advanced techniques I suspect people would have been put off by thinking thay had to spend a lot of money to get started wheras 30 quid will get you burning your fingers and ruining perfectly good brass kits and to my mind, that is a lot more inclusive.

Monday, January 18, 2010

Leamington Show - Day 2

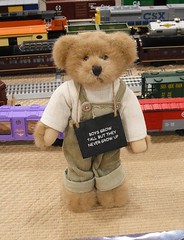
BearSunday dawned bright and a bit icy. Well there was a bit of ice on the windscreen that was quickly dealt with by the wipers, and the road from Coventry to Stoneleigh was slightly slippy in places to protect the good people of Leamington Spa from the barbarians in the north.

Arriving via the cashpoint at 8.30 we cleaned some wheels and track and then wandered around the show. While the layout owners weren't around this early, quite a few of the traders were. Most seemed happy to admit to a good Saturday's trading and congratulated us on the show. The general opinion was that while the numbers were down, the missing element were the general public rather than enthusiasts. That's not a big surprise - the public are fickle at the best of times and the chance to go to Tesco after 2 weeks locked in the house thanks to the second ice age would obviously be to great to miss.

Dave regaled us with the comments on RM Web - an unexpurgated list which generally were very positive. This might sound a bit sad but the new hall is a big step for the club and those of us involved in the organisation need too the feel good factor we can get. Teh interweb is a great thing for this - we get to see into the minds of those who have visited and pick up areas where things can be improved as well as basking in the glory when things go right.

Sunday followed the same pattern as Saturday. I went for the lasagna at lunch and chatted to guys from the boat club - who are allowed a couple of tables thanks to being near neighbours of the railway club on the farm we both meet at. Apparently they had quite a lot of interest and may have picked up a couple of new members. Great news this as it confirms a pet theory of mine, that people who like model making will appreciate all forms and not just their own brand. In fact many will indulge in more than one discipline - and yes I know how dodgy that sounds.

Anyway, the 4pm finish caught me out a bit as I'd expected have another half hour for a bit of last minute shopping and chatting.

For a big show, the hall emptied very quickly. Within an hour nearly all the stands had packed up and departed. Those that were left were the usual suspects (you know who you are) but this didn't matter as the club truck had to make two trips, one for club layouts and barriers and another for Overlord. By the time it returned for the second pick up, we were the last in the hall and being circled by the floor cleaning machine. Obviously there was much chat about how the event had gone, lessons to be learned and things we'd been proud of. Generally everything had gone very well. The numbers were not as great as hoped but then this wasn't unexpected - growing an event like this takes time. Next year will be bigger and better still...

More photos on Flickr

6.45pm Sunday

Sunday, January 17, 2010

Leamington Show - Day 1

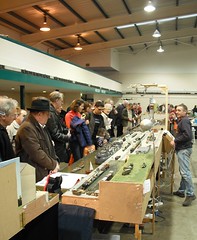
Overlord crowdI am writing this having just returned from the pub. A return that would have been sooner had the Scottish team from Blackstone Junction not arrived just as we were walking out of the door and insisted on one more. Apologies if some of this is gibberish.

Arrived at show around 7:30am. Checked layout was OK and then waited by the roller shutter door to help people in . Worried that the hall looked a bit empty. Worried a bit more that very few members had arrived to help out and I might have to do a lot of carrying. (Later found out there had been some confusion and most people decided to go with the suggestion that the hall would open at 8am, not the 7am I had thought). Rain coming down a bit but a steady stream of arrivals, most of whom don't need my help so I stay dry.

9am - close roller shutter door. Go back to layout and start setting up stock. Test and everything still seems OK. Put up notices and souvenirs. Lots of L&WMRS members in orange tabards by now so I think I can get away with this. Barriers are going up around layouts. Door stuff is being sorted. There is even talk of a queue forming.

10am - Public let in. Run the first train which seems to work OK. Next door, Bay Street is having a few issues which seem to be being resolved by judicious use of a hammer. Mike says I can't take his photo doing this. Apparently the hall has been cold overnight and then warmed up causing the track to move in a previously unexperienced fashion. I suggest he'd be better with all PCB track which seems to work just fine. And then realise he is holding hammer and retire to the layout.

Crowds build up OK. Not breathtaking but this is due (we think) to people heading for the supermarkets to stock up after 2 weeks of enforced starvation due to snow. That's what the guy sent out to get more tea and coffee supplies thinks anyway as it's so busy out there.

There are a lot of families in today. More than I've ever seen on the first day of a model railway show. One of the kids identifies my Class 22 as "Brewster". I have no idea what this is - the parents tell me he is a character from Chuggington. I've looked. He isn't.

Lunchtime - Excellent Beef burgeon on the restaurant, which as a member I have to pay for. They have been very busy. Hardly surprising as its lovely grub. No lull in the numbers in the hall though.

Afternoon - Donate quite a lot of money to a bookseller for two softback publications. Look aghast as I realise I missed out on reasonably priced NuCast GWR steam railcar kit on the second hand stall. Suspect that evil second stall man hides these things from me.

Chat to Anthony who is a bigwig at the NRM (sorry, can't remember the job title, something like "Head of oily things"). Hatch plan to fit Princess with underfloor lighting, big rims and a bithcin' sound system. Realise he probably has the power to do this and resolve not to mention it on blog in case anyone blames me. Marvel at 2 City or Truros double heading on Bay Street. Compose strong letter to a magazine editor complaining about the lack of prototype fidelity. Then realise he probably won't publish it as it's his train set.

Meet Garry who has some questions about compensation (see here) and test his newly built vans. They run beautifully through the crossover and into the front siding - the worst Flockburgh can throw at them. Better than my stock in fact which is annoying. Punish him by dragging him around to the back of the layout and make him operate for a bit as it's late in the day and the crowd is thin.

Shut up show - go to pub. Put world to rights and leave. Get as far as doorstep and get dragged back in by men in kilts.

There are some photos here. But not of the kilts.

Saturday, January 16, 2010

Blimey - That's a big hall !

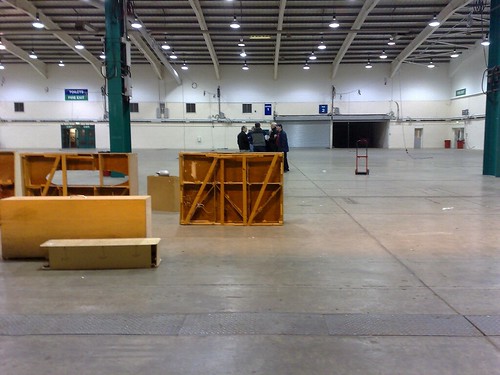
Hall 1

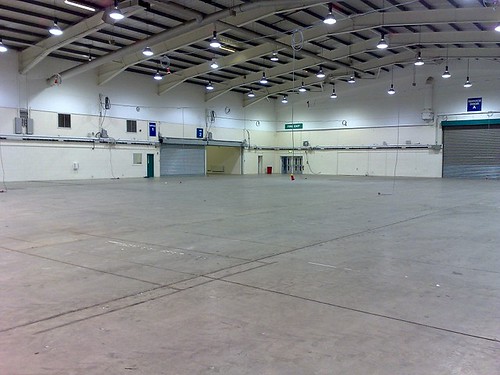
I have been in the hall we are holding the model railway show in, just not for a long while and certainly not when completely empty. Walking in on Friday therefore, was a bit of a shock. I mean, we have bandied the number of 30,000 square feet around to impress, but walking into the cavernous interior brought home just how big it really is.

Where to start ?

In one of the corner of a central isle seemed sensible. Thanks to the 20 metre long tape measure we established some lines from the walls and row of pillars. Then some corners. Finally using the big tape to show the long edges we divided them with a smaller one. Thanks to our precision workmanship, the stand sizes were about right. Well, near enough anyway.

Mind you, this is a big hall but not the biggest in the world. I wonder how the good people of the Warley club manage the NEC. I mean, we were operating at the edge of the technology available - or at least the length of tape measure available to us. Do they use GPS ? A theodolite ? Darts from a high vantage point ?

Anyway, after a couple of hours the floor was laid out with masking tape and chalk. We were issued with bright orange tabards with "Steward" on the back. Shortly after the first stands arrived and were moved into place. We'd brought Flockburgh in and put it up. Sadly for fans of angst, apart from a sticky point motor, it all worked first time. Result !

Next door, Chris needed a hand putting up Overlord. Here we hit a snag when one of the bolt holes wouldn't line up. It was a mystery until he spotted that had the wrong board. A bit like making up a jigsaw with 3 parts and getting two of them wrong ! It was pointed out that he might have spotted this a little earlier...

By 6pm, much of the show was in place and I slopped off home to leave the rest of the membership to deal with the final few hours. Not all the work goes on in the hall, there are e-mails to send and invites to the hastily organised Saturday social to cut out ready for the morning.

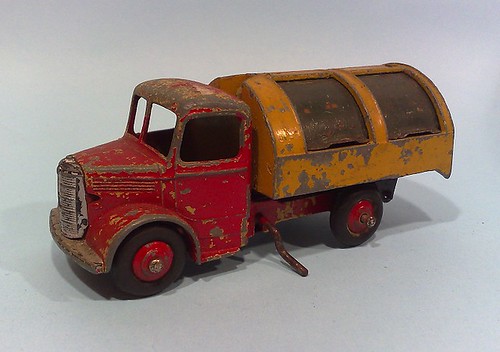
If there is one problem with the layout of the show it's that we are behind the usual huge second hand stall. I keep repeating the mantra, "I don't need any more project. I don't need any more projects..." so quite how I ended up with this:

Dinky Dustcart

I can't explain. I just looked at it and felt sorry for it, the paint is tatty, the lifting mechanism doesn't work and a headlight has broken off. One day though, I will make it better.

Friday, January 15, 2010

Leamington Show this weekend !

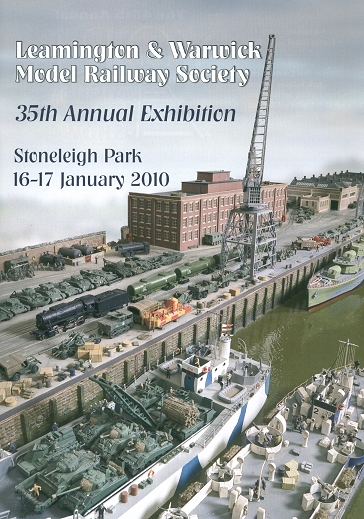
LWMRS Show Programme

This weekend - 16.17 January 2010 - sees the biggest model railway exhibition the Leamington & Warwick Model Railway Society has ever held. The weather is hopefully going to play ball and let everyone in OK - the roads are currently clear and the site itself has snow clearing and gritting equipment

We have thousands of programmes with the cover you see above. These will be given free to people attending the event. An A4 programme is another first for us and it's a good read. The photo is of Chris Mead's Overlord layout - 40 feet for World War 2 modeling with a few railways - which will be on show. Thanks to Hornby Magazine (another attendee) for the use of this image.

Hall 1 at the Stoneleigh Park Exhibition centre covers over 30,000 square feet. Today, my task is to mark out the floor so we can bring in around 70 stands and put them in place quickly and efficiently.

We're gonna need a bigger tape measure !

Anyway, read about the show on the club website.

Thursday, January 14, 2010

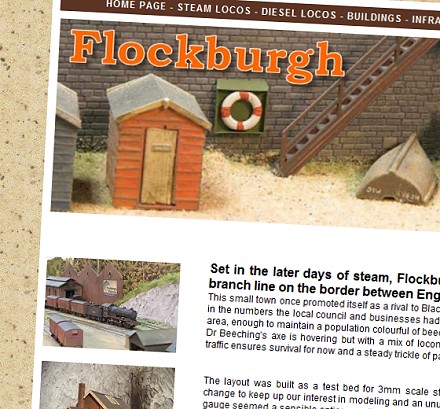
New Flockburgh Website

Flockburgh Website

With Flockburghs appearance in a magazine imminent, I have finally done the website properly. It's not got details of all the locos, the buildings and unusually, infrastructure. In other words, the fun stuff plus the bits that make it stand up.

You might argue that model railway layouts don't need websites and I think you might have a point. However a site gives owners the chance to show off bits of a layout that don't normally appear anywhere else. When you buy a magazine for example, you expect pretty pictures. Most people don't want to see the unpainted wooden bits or unsceniced fiddle yards.

Of course that is just what people like me do want to see. So in the spirit of openness etc, I've tried to include some of this information.

Anyway, head off to the Flockburgh Website and let me know what you think !

Wednesday, January 13, 2010

Walnut oak

OakThe carcase of my toolbox is made from oak. When I bought the wood it was dark but by the time I had planed and sanded, it was light. I preferred the dark.

So, come time for varnish, I ignored the original article where the wood was painted black (why ?) and picked out a tin of Ronseal Diamond Hard varnish in a fetching walnut colour.

Although I picked a gloss finish, to get anything resembling a shine, three coats have been needed with light sanding between each. One problem has been that it's been easy to end up with an unsightly build up of varnish on the edges. Maybe that's what comes of working in a freezing garage but I have a feeling the varnish is a bit on the thick side. Watering it down, literally as the stuff is water soluble, would probably be a good idea. I didn't have a spare tin to put the space colour in and would never countenance throwing some away to allow space for the water !

I'm not 100% sure about the results. The first coat looks a bit unnatural but I think after 3 I'm coming round to it.

Tuesday, January 12, 2010

More styrene

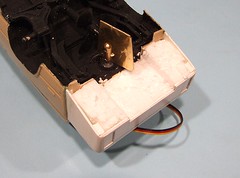
Poly infilI am determined to keep this thing afloat. Front and back the Damper van has hollow bottomed extensions and while I could just cover the bases with plasticard and hope this is OK, not having complete confidence in my own workmanship, they have been filled with expanded polystyrene before covering.

It's a smelly job as the plastic solvent eats polystyrene. That smell is bad news too as I'm pretty certain it's highly poisonous. Work in a well ventilated area and don't do too much at a time I think is the advice (actually, don't do it at all is probably the correct advice but then who reads instructions). With a bit of luck this "belt & braces" attitude will do the job. If the plastic box leaks, the amount of water that can be taken on board is limited by the polystyrene lump contained in it.

This is actually quite a contentious move. Within the model boat community, there are many who will argue vociferously that you shouldn't use any buoyancy devices as the hull should be properly watertight. That's true, but if any problems occur this will mitigate against them a bit. Just don't use it as an excuse to skimp on the hull.